So you've learned to cast on, and maybe you've even finished a scarf (go you!). But now you're ready to move past the basics and make stuff that looks actually good. You know, the kind of knitwear you see on your Pinterest board that makes you hit "save" immediately.
This isn't just another list of generic advice; it's your official glow-up guide to leveling up your craft. We're skipping the fluff and getting straight to the good stuff. Forget the wonky edges and dropped stitches that make you want to scream into your yarn stash.
From mastering tension to learning how to "read" your work, these insights are game-changers. Think of this as your personal cheat sheet for making projects you're genuinely proud to show off. Ready to stop just knitting and start slaying the fiber arts game?
1. Maintain Consistent Tension
Let's get real for a sec: tension is the secret sauce to knitting that looks super chic. It’s all about keeping the pressure on your yarn totally even as you knit. When your tension is consistent, every stitch is the same size, creating a smooth, pro-looking fabric.
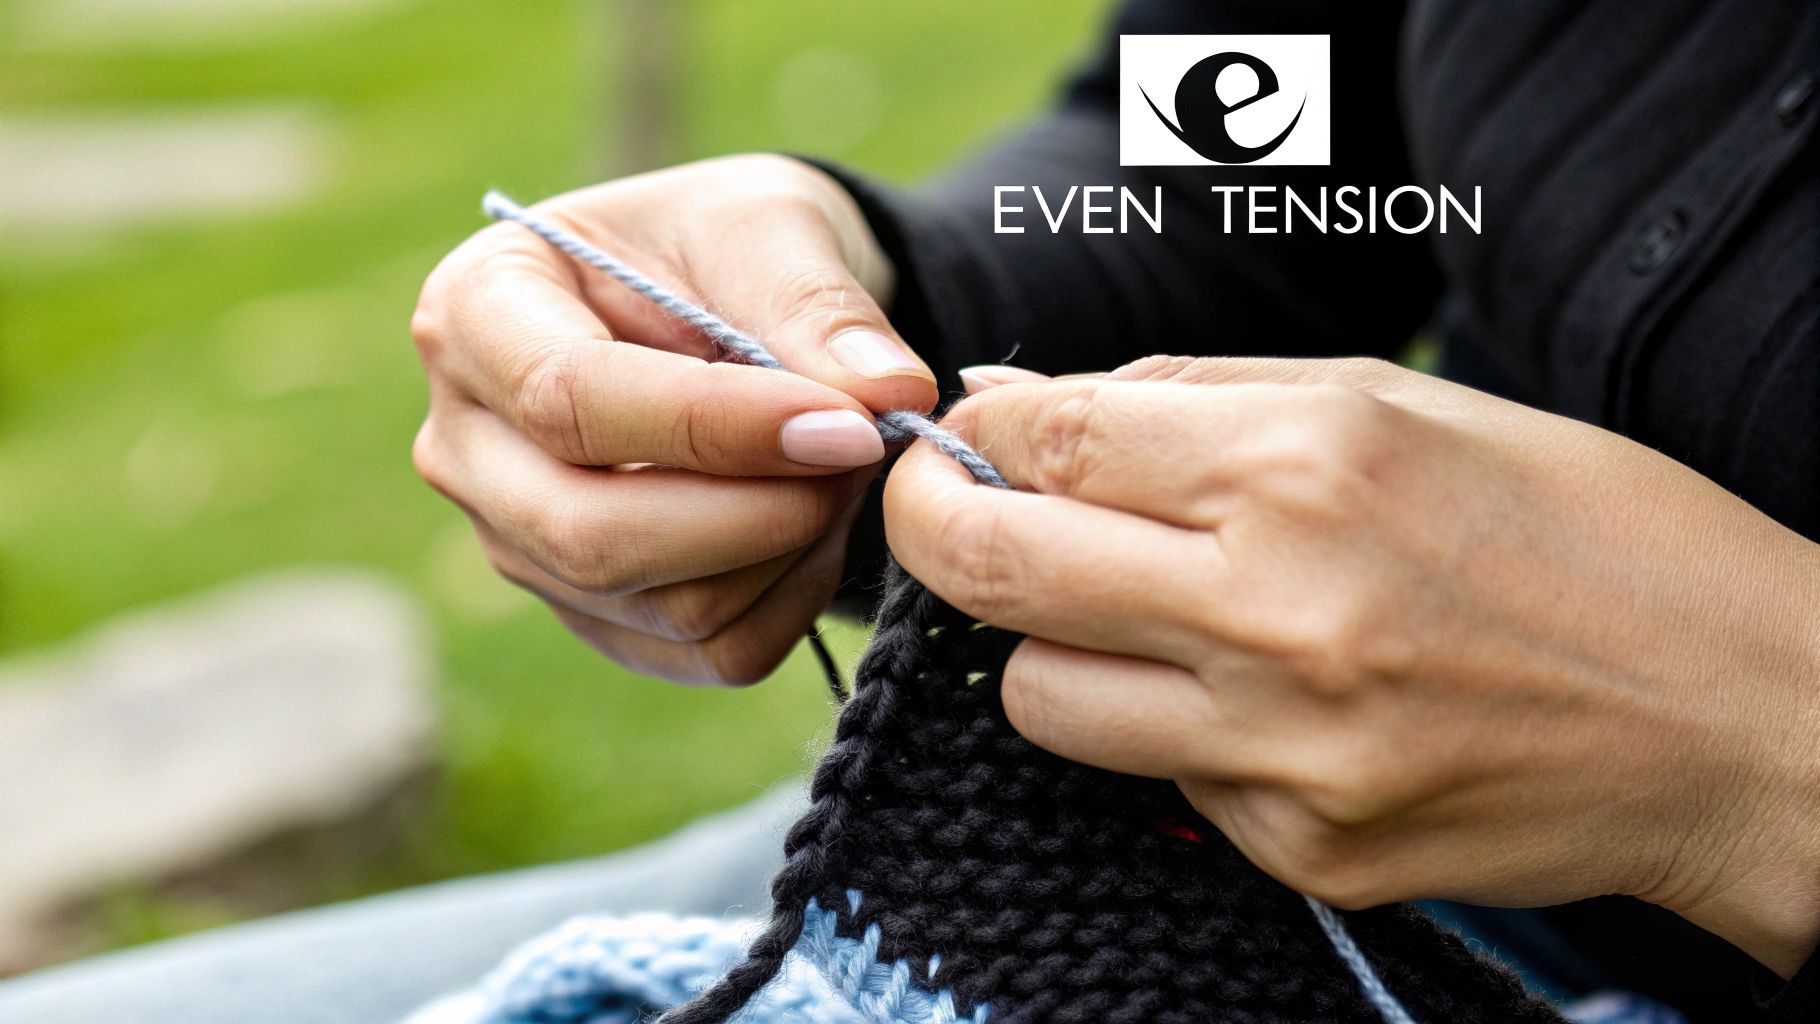
Think of it like this: inconsistent tension creates a fabric with some stitches being super tight and others being loosey-goosey. This can make your project look lumpy, uneven, and can even mess with the final size. A sweater with wonky tension might have one sleeve tighter than the other, and nobody wants that vibe.
Why It's a Game-Changer
Consistent tension is a fundamental knitting tip because it affects everything. It ensures your scarves don't unexpectedly get wider and your socks actually fit. Mastering this skill is a major level-up for any knitter.
Key Insight: Your muscle memory is your best friend here. The more you practice, the more your hands will naturally hold the yarn with the same pressure every single time.
How to Nail Your Tension
Getting your tension just right is all about practice and finding what feels good for you. There are tons of ways to hold your yarn, whether you weave it through your fingers or wrap it around your pinky. Experiment until you find a grip that feels comfy and gives you steady control.
Here are a few actionable tips to get you started:
- Find Your Grip: Settle on one way to hold the yarn and stick with it. Consistency is key to consistent stitches.
- Check Your Gauge: Before diving into a big project, always knit a small test square (a gauge swatch). This helps you check if your stitch size matches the pattern.
- Take Breaks: Your hands will get tired, especially when you're starting out. Take breaks to stretch and avoid the dreaded "death grip" that leads to tight stitches.
- Use Lifelines: For complex patterns, using a lifeline (scrap yarn threaded through your stitches) is a lifesaver. If you mess up, you can unravel back to the lifeline without losing all your progress.
2. Master the Magic Loop Technique
Tired of juggling a whole handful of double-pointed needles (DPNs) just to knit a sock or a hat? Say hello to the Magic Loop technique, the ultimate DPN-killer. It lets you knit small circles using just one long circular needle.
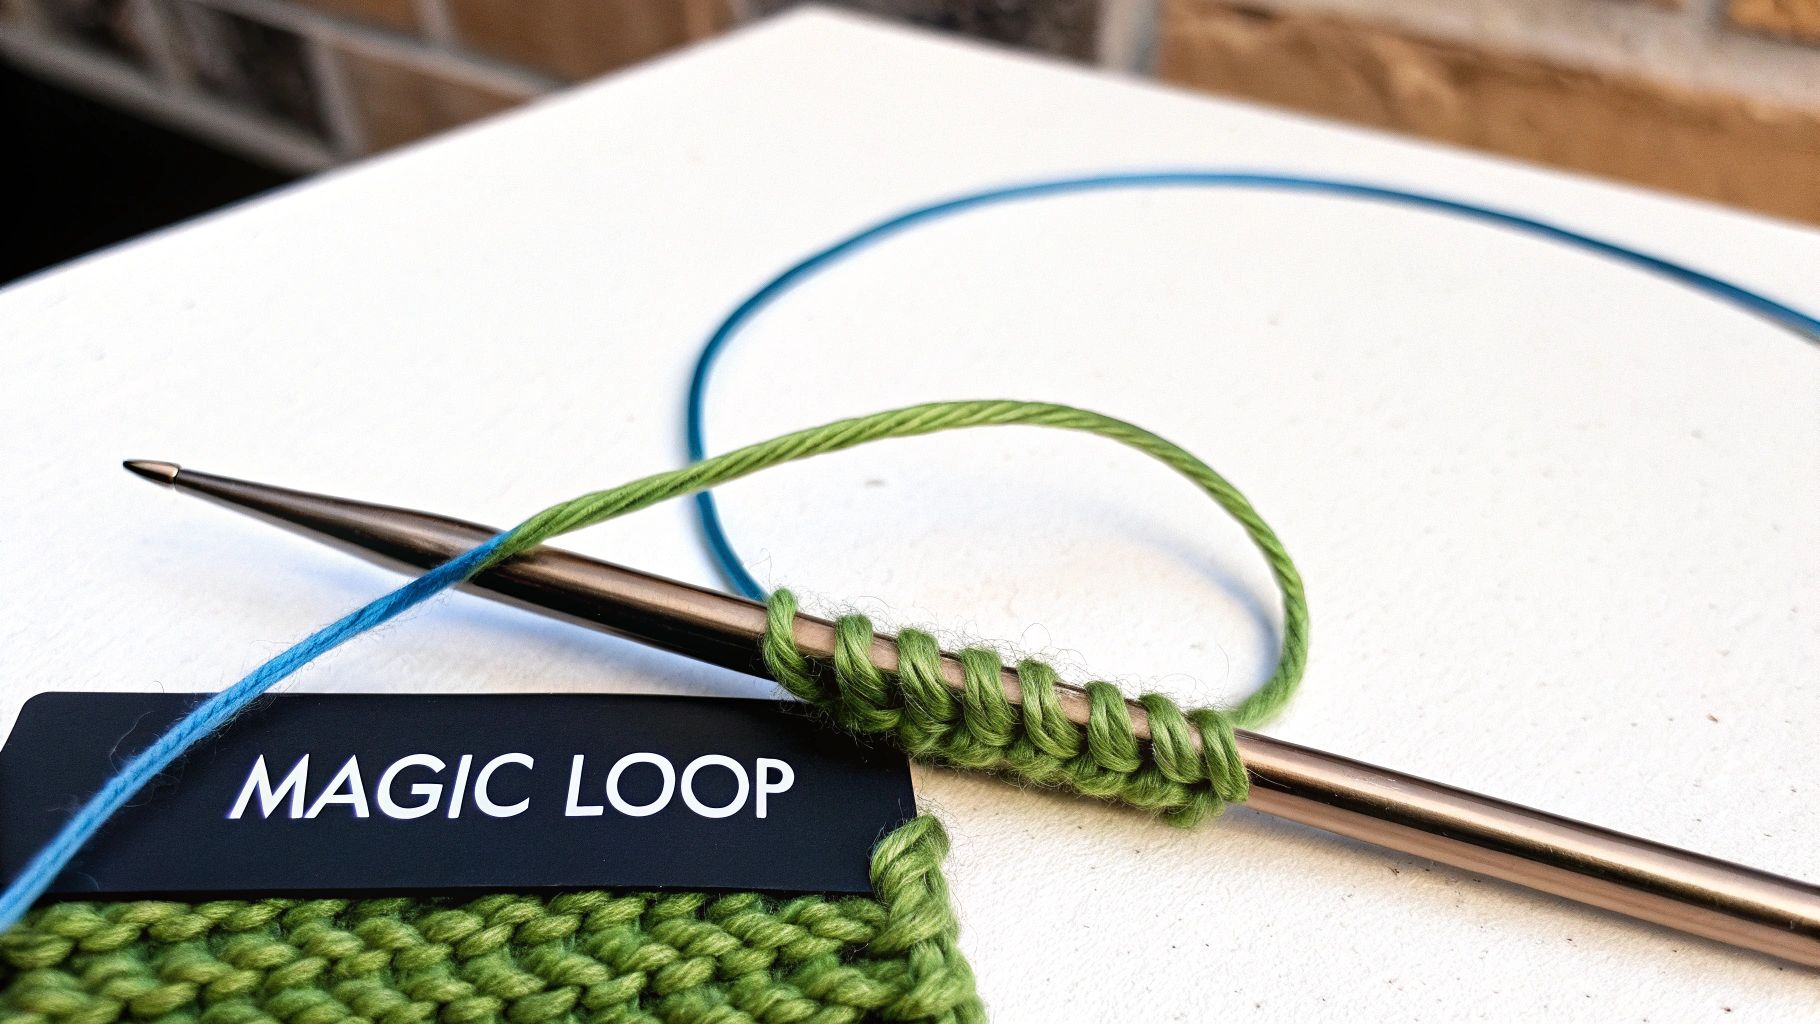
The idea is simple: you divide your stitches onto the two needle tips and use the long, flexible cable to create a "loop" on each side. This is one of those knitting tips that will make you feel like a fiber wizard. Once you get the hang of it, you'll wonder how you ever lived without it.
Why It's a Game-Changer
Magic Loop is revolutionary because it eliminates the risk of dropping stitches between DPNs, so no more annoying "ladders." It’s also super versatile; you can knit two socks at the same time on the same needle. This technique streamlines your workflow and makes knitting in the round feel effortless.
Key Insight: The magic isn't in the needle, it's in the cable. A long, flexible cable is your best friend for a smooth and frustration-free Magic Loop experience.
How to Nail the Magic Loop
Getting comfortable with the Magic Loop is all about mastering the initial setup. It might feel a bit awkward at first, but with a little practice, it’ll become second nature.
Here are a few actionable tips to get you started:
- Choose the Right Needle: Start with a circular needle that has a 32-inch or 40-inch cable. The extra length is crucial for creating the "loops."
- Give it a Good Tug: When starting a new round, give the first stitch a gentle tug to tighten it. This is the secret to preventing pesky ladders.
- Keep Stitches at the Tips: Don't let your stitches slide down onto the cable while you're working. Keeping them close to the needle tips gives you better control.
- Mark Your Rounds: Use a stitch marker to mark the beginning of your round. It’s an easy way to keep track of where you are.
3. Read Your Knitting
Think of "reading your knitting" as learning the language of your stitches. It's the skill that lets you look at your project and understand what’s happening. You can spot mistakes early and know where you are in a pattern without constantly checking.
Without this skill, you're totally dependent on your pattern, and fixing mistakes can feel impossible. But once you can identify a knit stitch versus a purl stitch just by looking, you gain massive confidence. It’s the difference between blindly following a recipe and understanding how ingredients work.
Why It's a Game-Changer
Reading your knitting is one of the most empowering knitting tips because it frees you from pattern anxiety. It allows you to troubleshoot on the fly, making you a more intuitive and fearless crafter. You’ll be able to see the logic behind a cable cross or recognize the rhythm of a lace repeat.
Key Insight: Every stitch tells a story. Learning to read your work means you can understand that story, correct the plot twists, and confidently create the ending you want.
How to Start Reading Your Stitches
Becoming fluent in your knitting takes a little practice, but it's easier than you think. The key is to be observant every time you pick up your needles. Start simple and build your visual library of stitches.
Here are a few actionable tips to get you started:
- Study Your Swatches: Before you start a project, really look at your gauge swatch. Notice how the "V" of a knit stitch looks different from the "bump" of a purl stitch.
- Identify the Basics: Learn to recognize the right side versus the wrong side of common fabrics like stockinette. This simple step can save you a lot of confusion.
- Practice with Purpose: Knit a small square of a simple pattern and make a conscious effort to identify the knit and purl sections.
- Trace the Yarn: When you spot a mistake, use your needle tip to follow the path of the yarn through the stitches. This helps you understand how the stitch was formed.
4. Use Lifelines in Complex Patterns
Picture this: you're deep into a gorgeous lace shawl when you spot a mistake ten rows back. The thought of ripping it all out is enough to make you want to cry. Enter the lifeline, your project's personal superhero and one of the most clutch knitting tips.
A lifeline is just a piece of scrap yarn you run through a row of live stitches. It acts as a safety net, creating a secure point you can rip back to without losing your mind. If you mess up, just pull your needles out, frog (rip-it, rip-it) back to the lifeline, and slip your stitches back on.
Why It's a Game-Changer
For complex patterns like lace or cables, a lifeline isn't just helpful; it's essential. These patterns are notoriously difficult to fix stitch by stitch. Using a lifeline gives you the confidence to tackle ambitious projects without fear.
Key Insight: Think of a lifeline as a save point in a video game. It lets you experiment and push your skills, knowing you can always go back to the last good spot.
How to Nail Your Lifelines
Adding a lifeline is super simple and takes just a minute. The key is to place them strategically so you have a recent, mistake-free row to return to. You'll thank yourself later for this small bit of prep.
Here are a few actionable tips to get you started:
- Choose the Right Material: Use a smooth, thin yarn in a contrasting color, or even unwaxed dental floss. You want something that won't snag and is easy to see.
- Install Strategically: Add a lifeline after completing a full pattern repeat or before a tricky section. Mark the lifeline rows on your pattern.
- Use Needle Holes: Many interchangeable needles have a tiny hole in the metal connector. Thread your lifeline through this hole and knit the row to pull it through automatically.
- Keep It Simple: Just thread your lifeline onto a tapestry needle and pass it through every stitch on your needle. It's that easy.
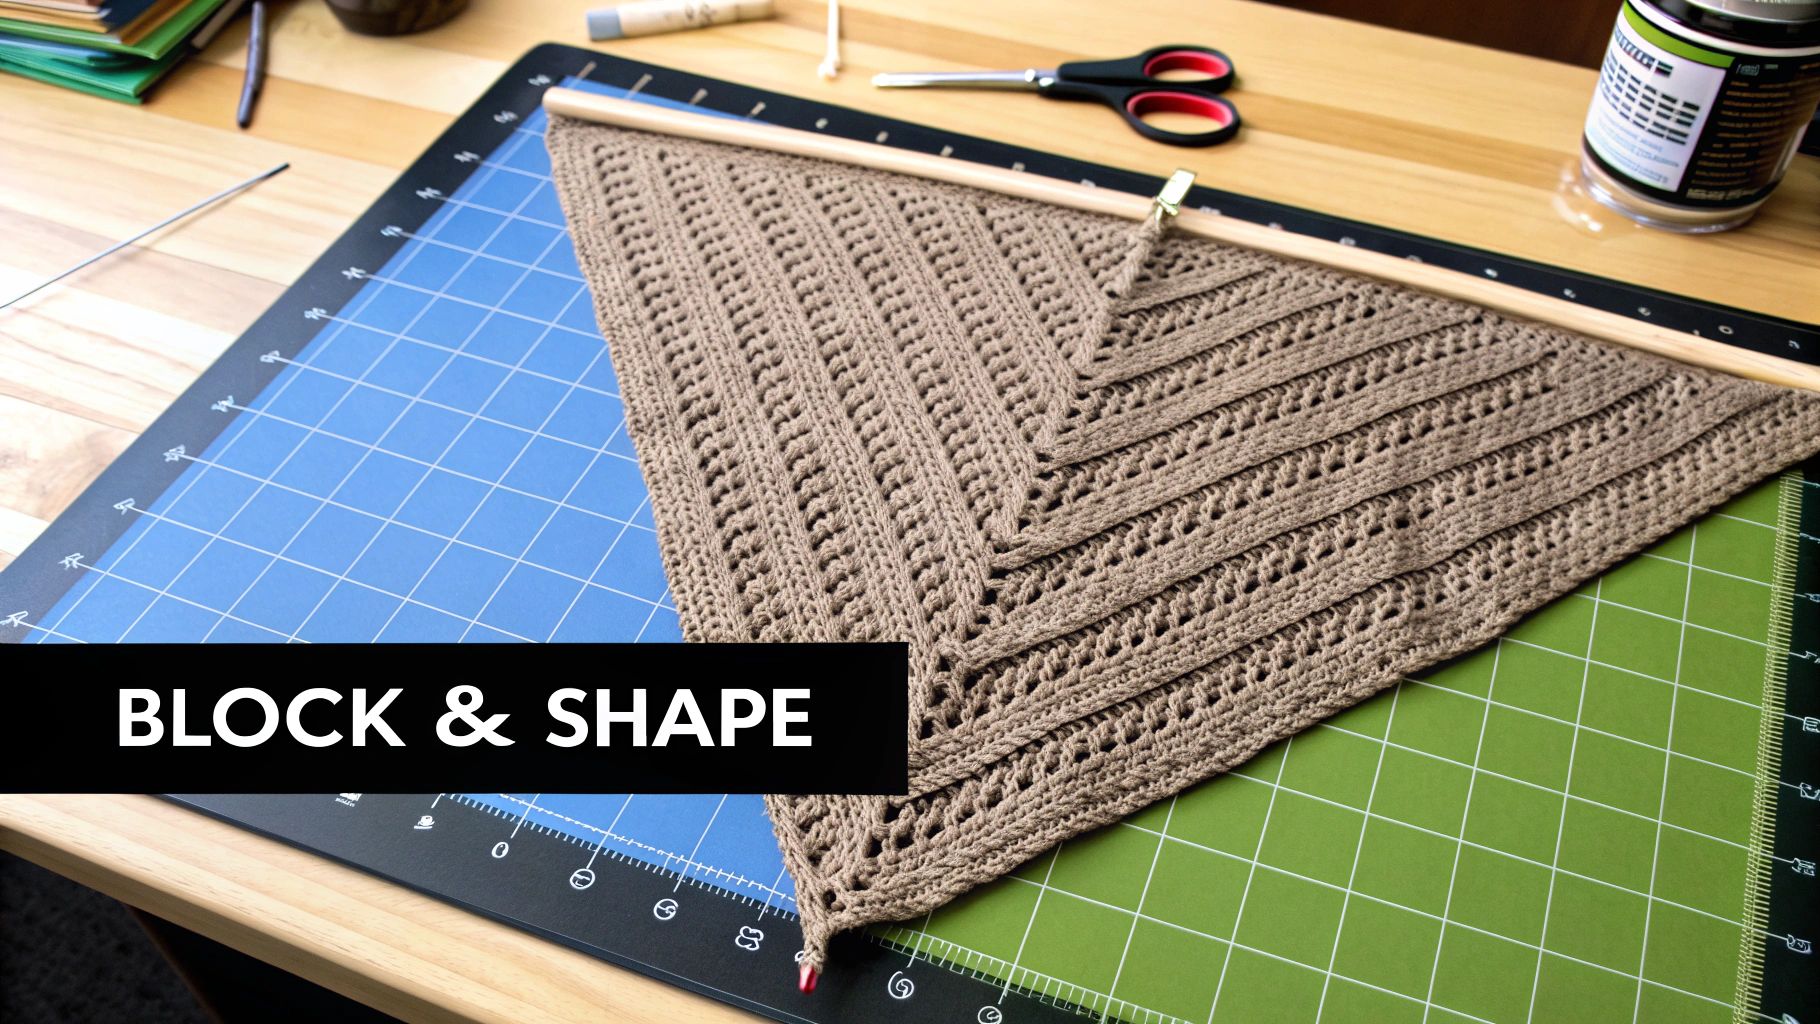
5. Block Your Finished Projects
Ever finish a project and think, “Why does this look kind of… homemade?” Blocking is the magic trick that takes your knitting from crumpled fabric to a professional-looking masterpiece. It’s a finishing process where you wet or steam your project and let it dry in the exact shape you want.
Think of it as setting your knitting. Without blocking, stitches can look uneven and edges might curl relentlessly. Blocking relaxes the fibers, evening out your stitches and allowing the fabric to drape beautifully.
Why It's a Game-Changer
Blocking is a crucial finishing step because it truly completes your work. It evens out tension, opens up intricate stitch patterns, and ensures your project meets the pattern’s dimensions. This is how you get a sweater that fits perfectly or a shawl with crisp, straight edges.
Key Insight: Blocking doesn't just make your knitting look better; it makes it behave better. The process sets the yarn's memory, ensuring your project holds its shape for good.
How to Nail Your Blocking
Blocking isn’t scary, and you don’t need a ton of fancy equipment. The method you choose—wet, steam, or spray—will depend on the fiber you used. Always check your yarn’s care label first!
Here are a few actionable tips for a flawless finish:
- Check the Fiber: Natural fibers like wool respond beautifully to wet blocking (soaking). Acrylics do better with steam, but don't touch the iron to the yarn or it will melt.
- Use the Right Tools: Invest in some rust-proof T-pins and foam blocking mats. They make pinning your project to the correct measurements a breeze.
- Measure Everything: While your project is damp, use a tape measure to ensure it matches the pattern's dimensions. Gently stretch or shape it as needed.
- Be Patient: Let your project dry completely before unpinning it. Rushing the process will undo all your hard work.
6. Learn to Fix Common Mistakes
Let's be honest, everyone makes mistakes when knitting. But what separates the pros from the newbies is knowing how to fix them without a meltdown. Learning to fix common errors is a superpower that will save you time, yarn, and frustration.
Think about it: that one little stitch that slipped off your needle doesn't have to be a catastrophe. Instead of frogging (ripping out) hours of work, you can perform a little "stitch surgery." This is one of the most practical knitting tips you'll ever learn.
Why It's a Game-Changer
Knowing how to correct mistakes builds confidence and makes you a fearless knitter. You'll be more willing to tackle complex patterns because you won't live in fear of one wrong move. Mastering these fixes means your projects will look cleaner and you'll actually finish them.
Key Insight: A small crochet hook is the most valuable tool you can have in your knitting bag. It's the perfect instrument for picking up dropped stitches and performing other quick fixes.
How to Become a Knitting Ninja
Fixing mistakes is a skill you build with practice, just like any other part of knitting. Start by intentionally dropping stitches on a practice swatch and then work on picking them back up. The more comfortable you get, the less you'll panic.
Here are a few actionable tips for damage control:
- Keep a Crochet Hook Handy: Seriously, this is non-negotiable. A crochet hook makes scooping up a dropped stitch and laddering it back up a breeze.
- Learn to "Tink": "Tink" is "knit" spelled backward, and it means to un-knit your stitches one by one. This is perfect for fixing a mistake you just made.
- Practice on Swatches: Don't wait for a real disaster. Use your gauge swatches to practice fixing dropped stitches and correcting twisted ones.
- Use Good Lighting: Trying to fix a tiny stitch in the dark is a recipe for disaster. Make sure you have bright light so you can see what you're doing.
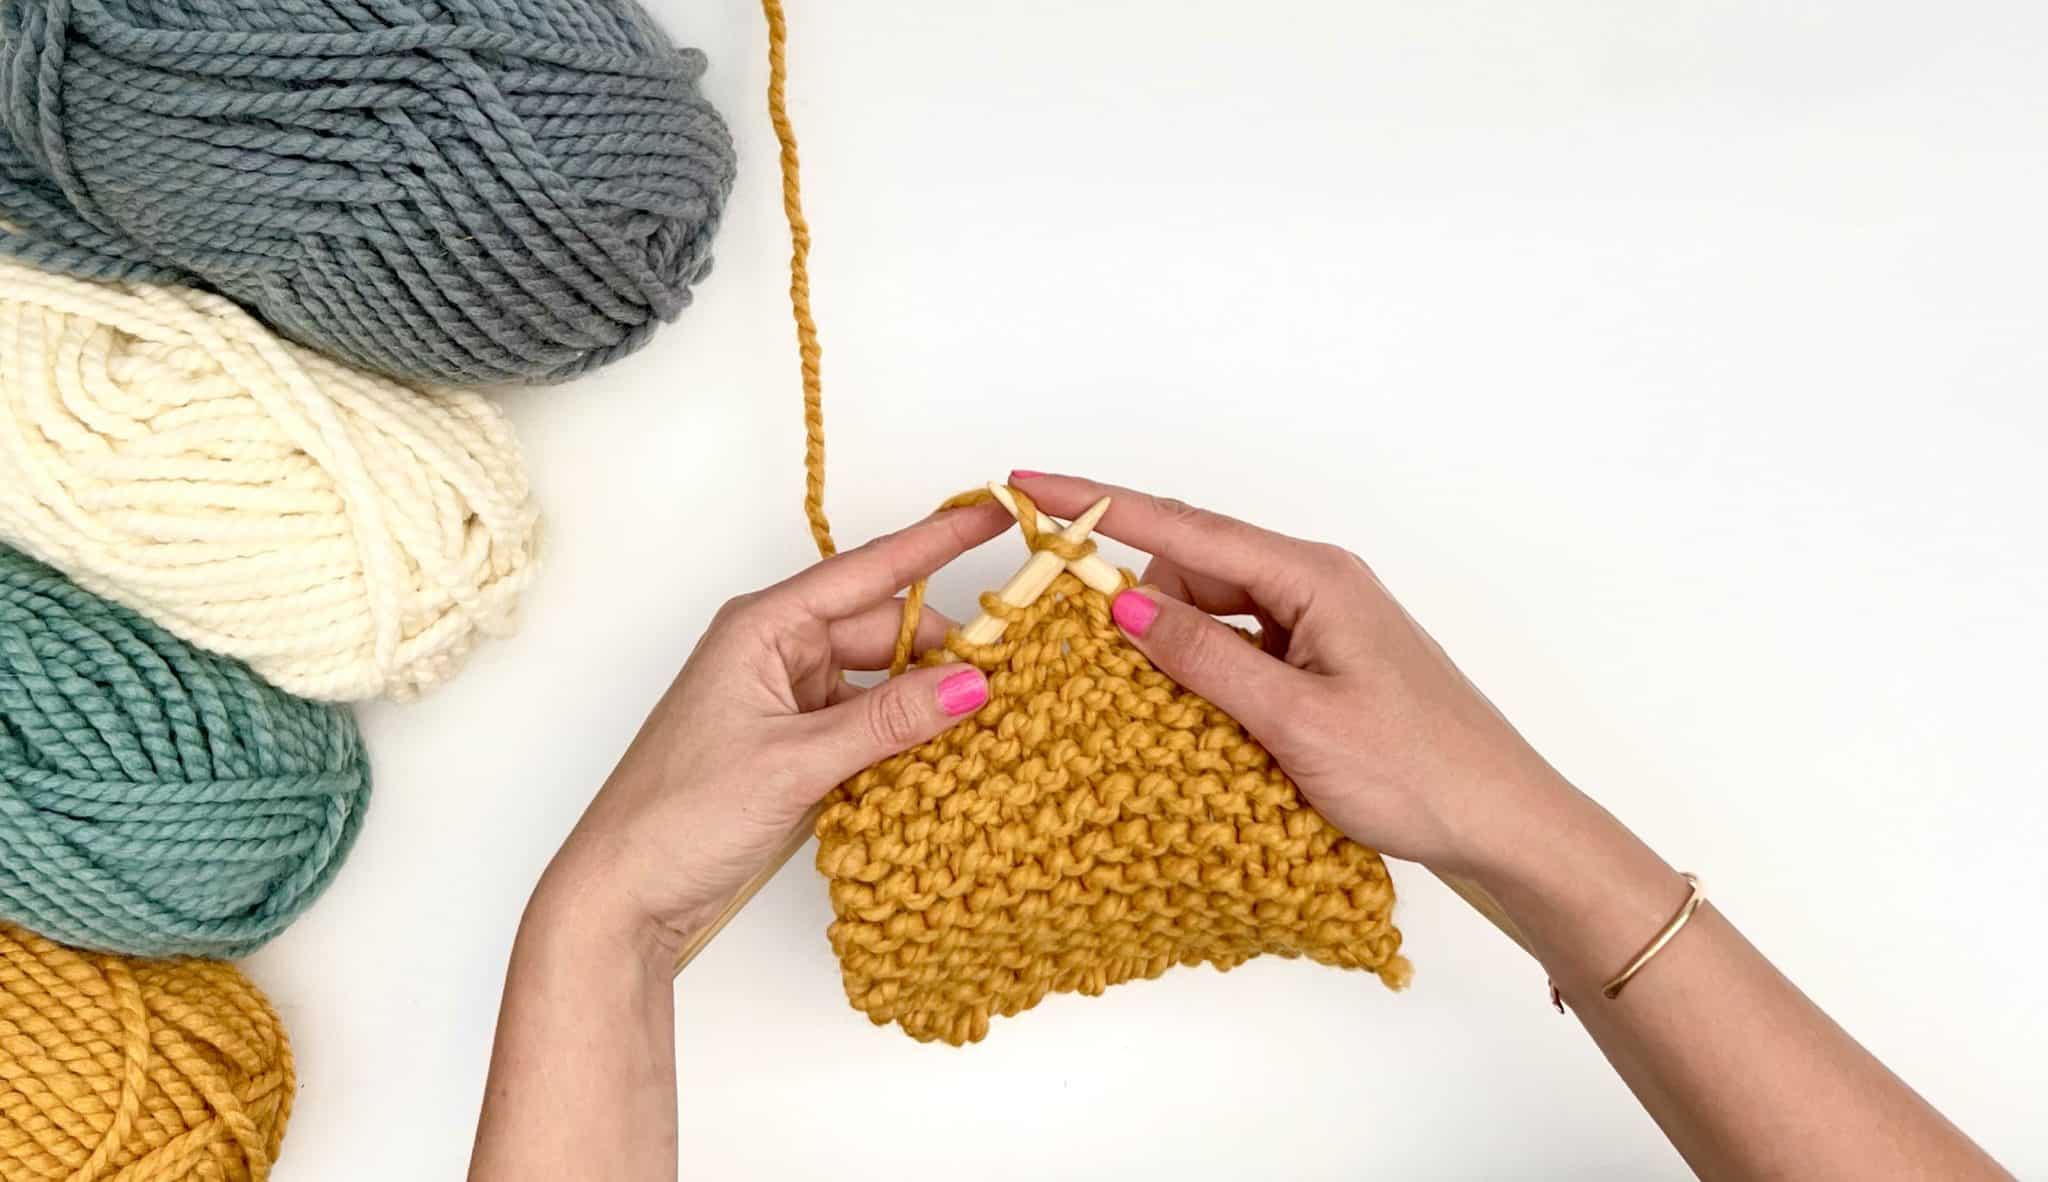
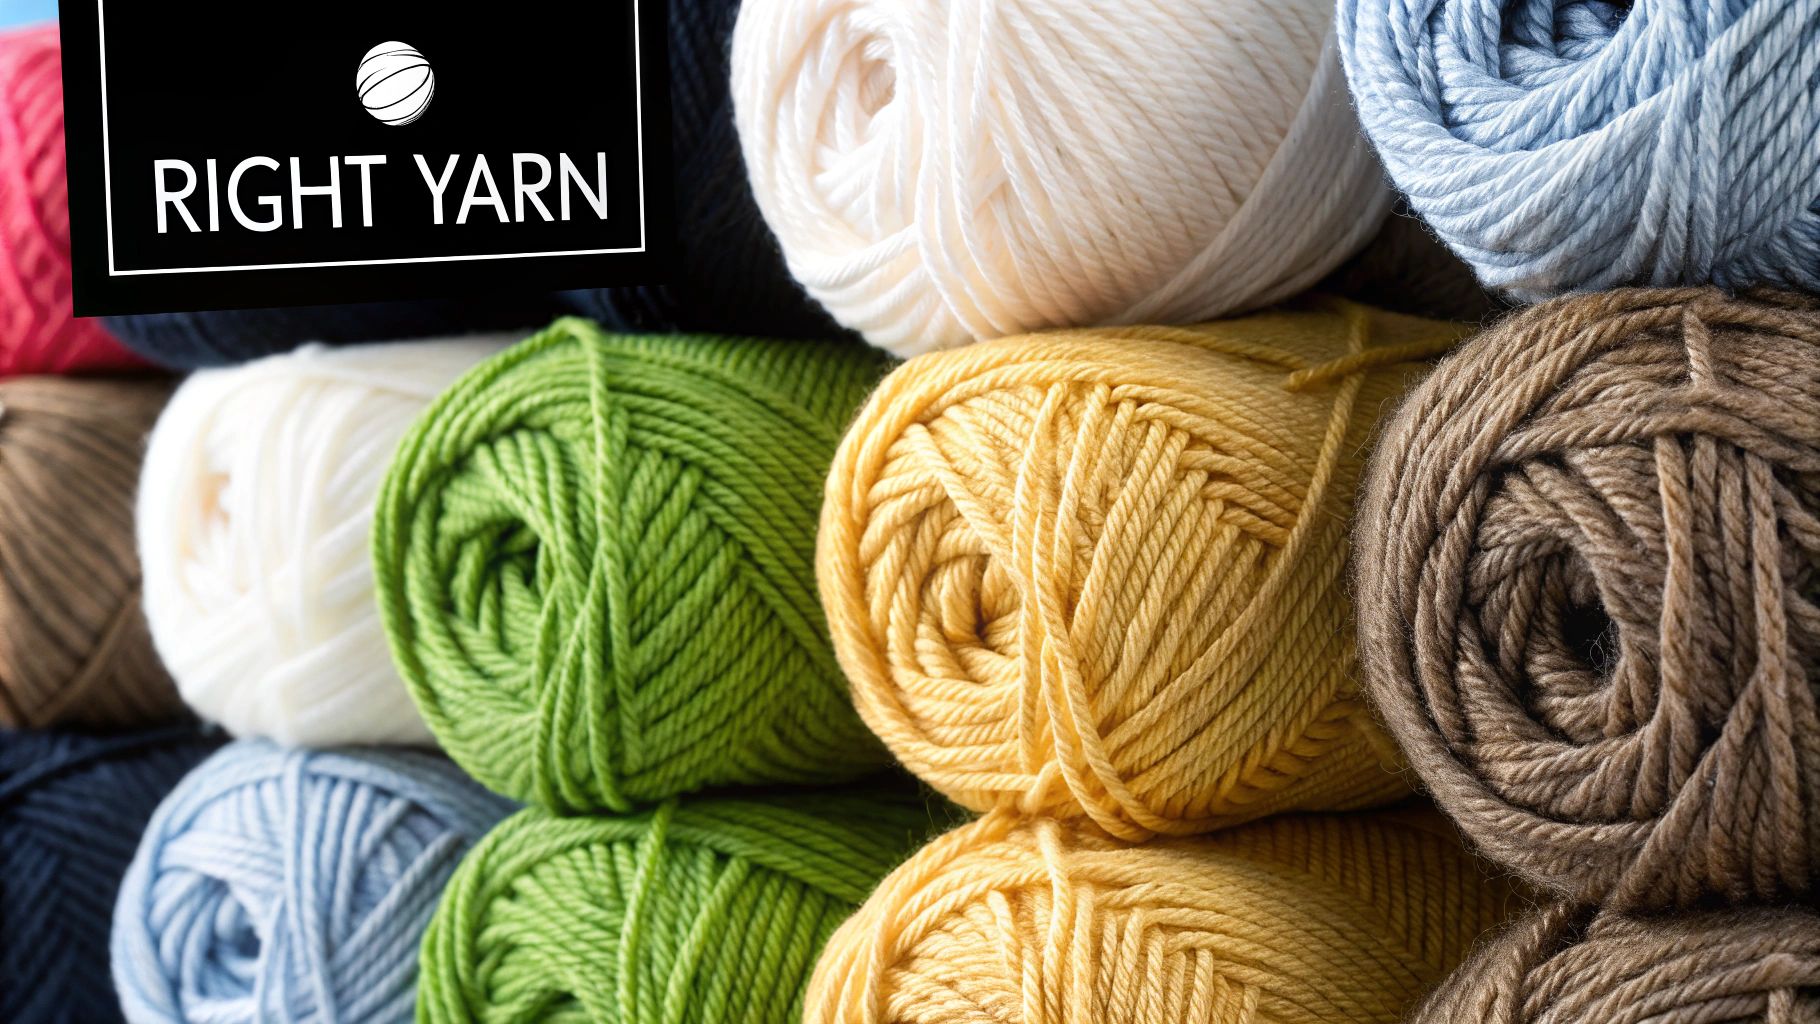
7. Choose the Right Yarn for Your Project
Walking into a yarn store can feel like stepping into a candy shop. But picking the right yarn is more than just grabbing the prettiest color. The fiber you choose is the literal foundation of your project, and getting it right is crucial.
Think about it: a scratchy wool might be tough enough for a rug, but you don’t want it in a baby blanket. A silky, drapey yarn is gorgeous for a shawl but would make a floppy stuffed animal. Choosing the right yarn ensures your hard work pays off.
Why It's a Game-Changer
This is one of those knitting tips that separates a good project from a great one. The right yarn guarantees your finished item will have the desired drape, structure, and softness. It also ensures it will hold up over time and be easy to care for.
Key Insight: The yarn label is your best friend. It contains all the critical info you need: fiber content, weight, yardage, and, most importantly, the washing instructions.
How to Nail Your Yarn Choice
Picking the perfect yarn is a skill you'll develop over time. It’s all about matching the yarn's properties to your project's needs. Don't be afraid to touch everything and ask for advice at your local yarn shop.
Here are a few actionable tips to get you started:
- Consider Its Use: Think about what you're making. For a dishcloth, you need something absorbent and durable like cotton.
- Match the Weight: Your pattern will recommend a specific yarn weight (like worsted or DK). Sticking to this is key to getting the right size.
- Check the Care Instructions: Be realistic. If you know you’ll never hand-wash anything, don’t buy a hand-wash-only yarn for a sweater you'll wear often.
- Feel the Fiber: If you can, always feel the yarn before you buy it. This helps you get a sense of its softness and texture.
8. Keep Detailed Project Notes
Think of every knitting project as a secret mission. Keeping detailed notes is like creating your own personal spy dossier. It's filled with crucial intel that will help you conquer future projects with total confidence.
This practice transforms each project from a one-off piece into a valuable learning experience. You’ll create a personal library of your successes, so you can easily replicate that sweater that fit perfectly. It’s one of the most underrated knitting tips for leveling up your skills.
Why It's a Game-Changer
Good record-keeping is your future self’s best friend. Ever finish a project and forget which needle size you used? Detailed notes solve that mystery, saving you from future guesswork.
Key Insight: Your knitting journal becomes a personalized pattern book. You can revisit old projects and know exactly how to adjust a size, substitute a yarn, or recreate a modification you loved.
How to Nail Your Project Notes
You don't need a fancy system; a simple notebook or a knitting app like Ravelry will do. The key is to be consistent and capture the details while they're still fresh. This habit will make you a more intentional and resourceful knitter.
Here are a few actionable tips for what to include:
- Log the Basics: Start with the pattern name, designer, yarn brand and colorway, needle size, and your final gauge.
- Track Modifications: Did you add length to a sweater or shorten the sleeves? Write down exactly what you changed and why.
- Include Photos: Snap a few pics of your work in progress and the finished object. A picture is worth a thousand words.
- Note Your Lessons: Write down any pattern errors you found, techniques that were tricky, or things you'd do differently next time.
8 Essential Knitting Tips Comparison
| Technique / Aspect | Implementation Complexity 🔄 | Resource Requirements ⚡ | Expected Outcomes 📊 | Ideal Use Cases 💡 | Key Advantages ⭐ |
|---|---|---|---|---|---|
| Maintain Consistent Tension | Medium – requires practice | Low – just yarn and needles | Even stitches, professional appearance, consistent gauge | Sweaters, scarves, socks with uniform stitches | Accurate sizing, reduced adjustments |
| Master the Magic Loop Technique | High – cable manipulation learning | Medium – long circular needle | Seamless small-circumference knitting, fewer needles | Socks, sleeves, baby hats | Eliminates ladders, fewer tools needed |
| Read Your Knitting | Medium to High – pattern recognition | Low – good lighting, magnifier | Spotting errors, adapting patterns, confident knitting | Complex stitch patterns, lace, cables | Increased confidence, error detection |
| Use Lifelines in Complex Patterns | Low to Medium – installing thread | Low – contrasting thread/yarn | Safety net for ripping back without losing progress | Lace, cables, colorwork projects | Saves time, reduces stress, enables experimentation |
| Block Your Finished Projects | Medium – requires time & space | Medium – blocking mats, pins | Professional finish, proper fit, enhanced stitch definition | Lace shawls, sweaters, afghans | Dramatically improves appearance and fit |
| Learn to Fix Common Mistakes | Medium – skill practice needed | Low to Medium – crochet hook etc | Saves project time, maintains momentum, error correction | Dropped stitches, twisted stitches, cables | Builds confidence, reduces project frustration |
| Choose the Right Yarn for Your Project | Medium – knowledge and decision making | Low to Medium – yarn cost varies | Suitable fabric performance, care, drape, durability | All types of knitting projects | Optimizes outcome, ensures longevity |
| Keep Detailed Project Notes | Low to Medium – habit building | Low – journal or digital tools | Better pattern replication, tracks preferences, documents | Any knitting project | Helps learning, future reference, avoids repeat mistakes |
You're Officially in Your Knitting Era
Look at you, officially a knitter! You've just powered through a massive toolkit of knitting tips that will take you from nervous beginner to confident creator. This isn't just a list of rules; it's your new creative playbook.
Think of these concepts as your foundation. Mastering tension control is your first major win. Learning to read your knitting and fix those inevitable mistakes will give you freedom to experiment.
From Tips to Tangible Skills
The real magic happens when these individual tips start working together. Imagine this: you pick the perfect, squishy merino yarn for a new sweater. You use Magic Loop to knit the sleeves two-at-a-time, guaranteeing they match. You calmly fix a dropped stitch thanks to a lifeline you smartly placed earlier.
When you're done, you block your project and watch the stitches relax into a beautiful fabric. All along, you’ve kept detailed notes on your needle size and any modifications. Keeping your notes and supplies in order is half the battle; check out these top organization tips for your craft area to keep your creative flow going.
Embrace the Journey, Not Just the Destination
These knitting tips are designed to build your confidence and empower you to tackle any project. Every scarf, hat, or blanket you create is a new opportunity to practice and play.
Remember that knitting is a journey, not a race. Celebrate the small victories, like a perfectly executed stitch or a row with flawless tension. You're equipped with the knowledge to create beautiful, handmade items, so go cast on something amazing!
Ready to put these skills to the test? Head over to Knitting.com for thousands of patterns, video tutorials, and a vibrant community of crafters. Find your next project and get all the support you need at Knitting.com.