How to Knit Stitch for Beginners
The very first stitch to learn as a beginner-knitter!
The very first stitch to learn as a beginner-knitter!
The knit stitch for beginners is a great place to start your knitting journey! The knit stitch is the very first technique to learn as a new knitter. Once you’ve practiced this stitch and got the hang of the motions, you’ll be able to make an endless number of stitches and so many knitting patterns.
In this tutorial, you’ll learn how to make a knit stitch, how to troubleshoot common knit stitch issues, and also understand how the knit and purl stitches work together!
Trying the knit stitch for beginners is the best place to start learning how to knit. It doesn’t get much easier! The first step is getting the hang of wrapping the yarn around your needles. Next, you’ll practice keeping your yarn tension consistent so that you’re making smooth, even stitches. Once you get basics of the knit stitch for beginners down you’ll be able to practice knitting faster over time. Eventually you might even be able to knit without looking at your needles, perfect for watching movies while you knit!
Every project starts with a cast on row. If you’re following a pattern, cast on the number of stitches noted in your project. If you’re simply knitting a swatch or test piece, go ahead and cast on enough stitches for a 4” fabric using the needles and yarn of your choice.
Note: This tutorial was written for right-handed knitters.
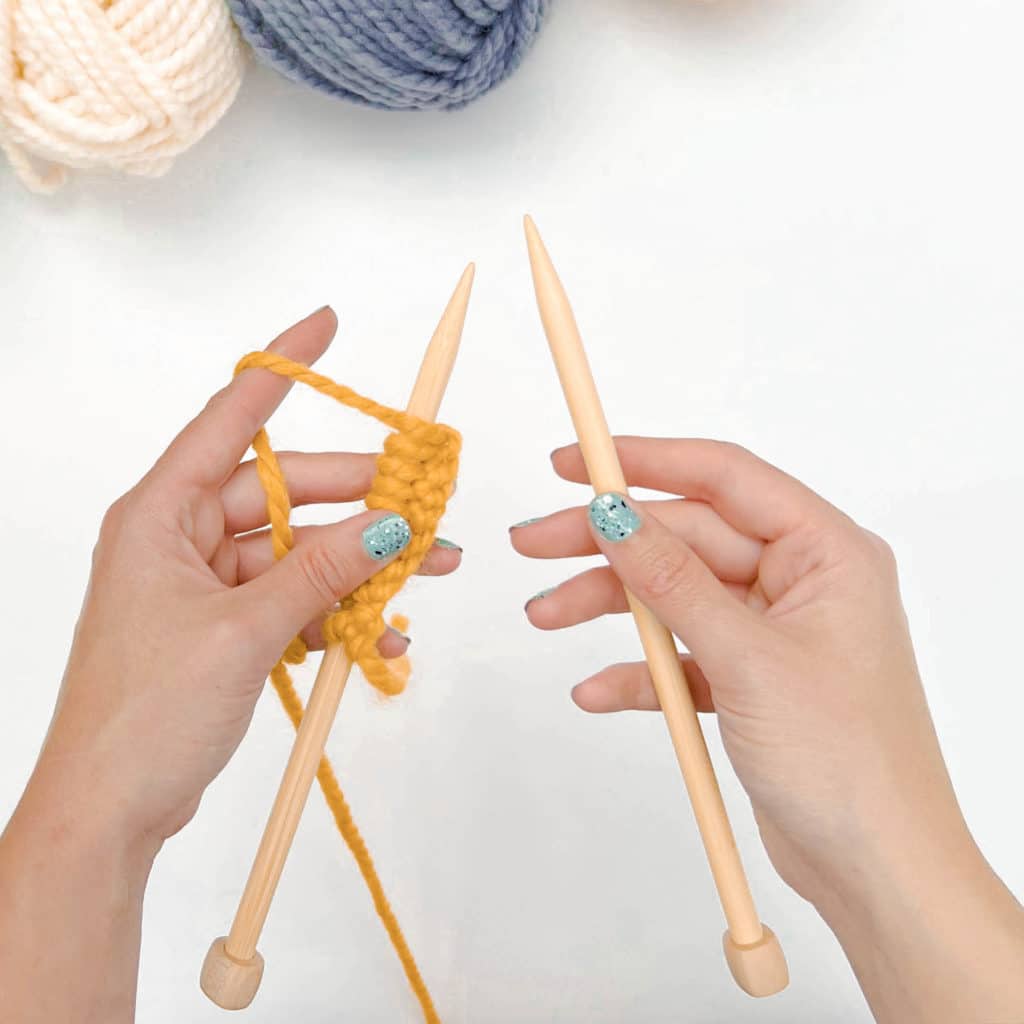
Step 1
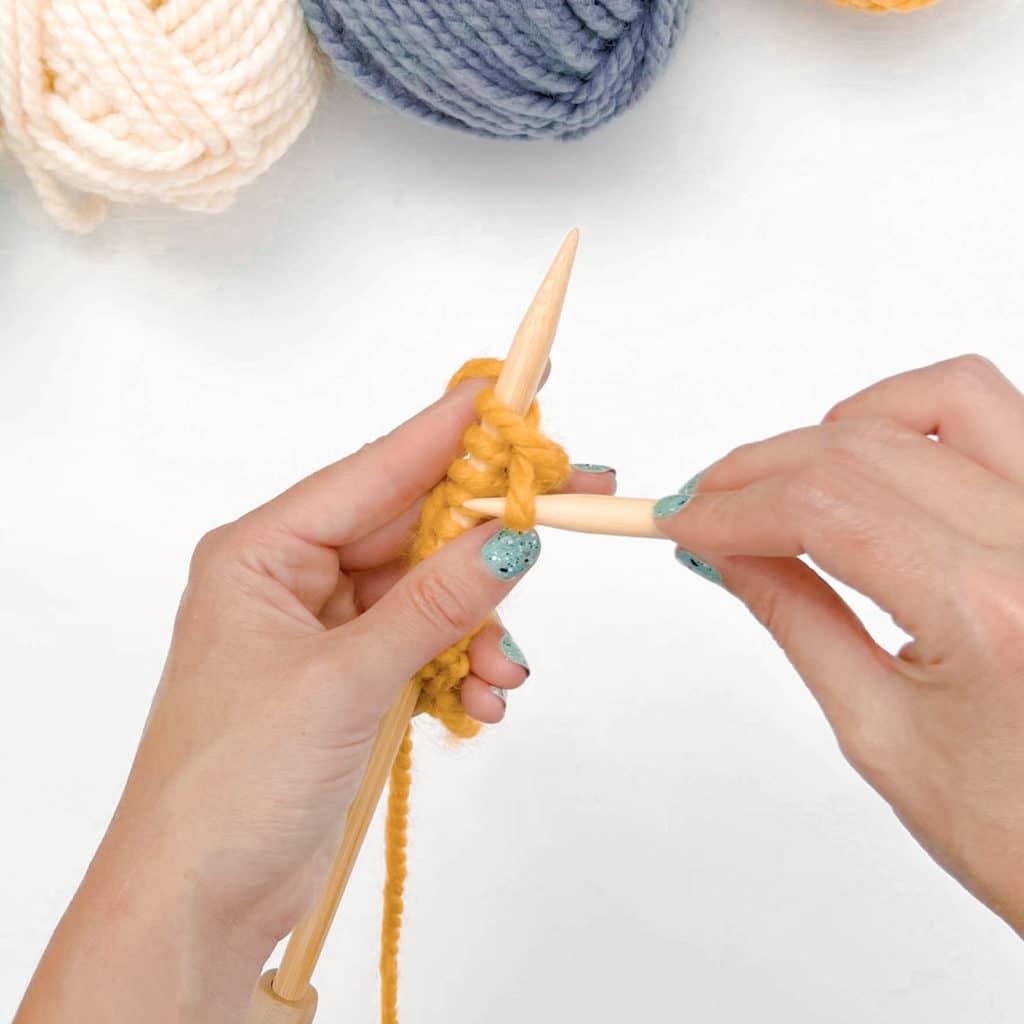
Holding the needle with the cast on stitches in your left hand, bring the yarn strand to the back.
Step 2
Insert the second needle through the first stitch upwards from right to left through the front loop.
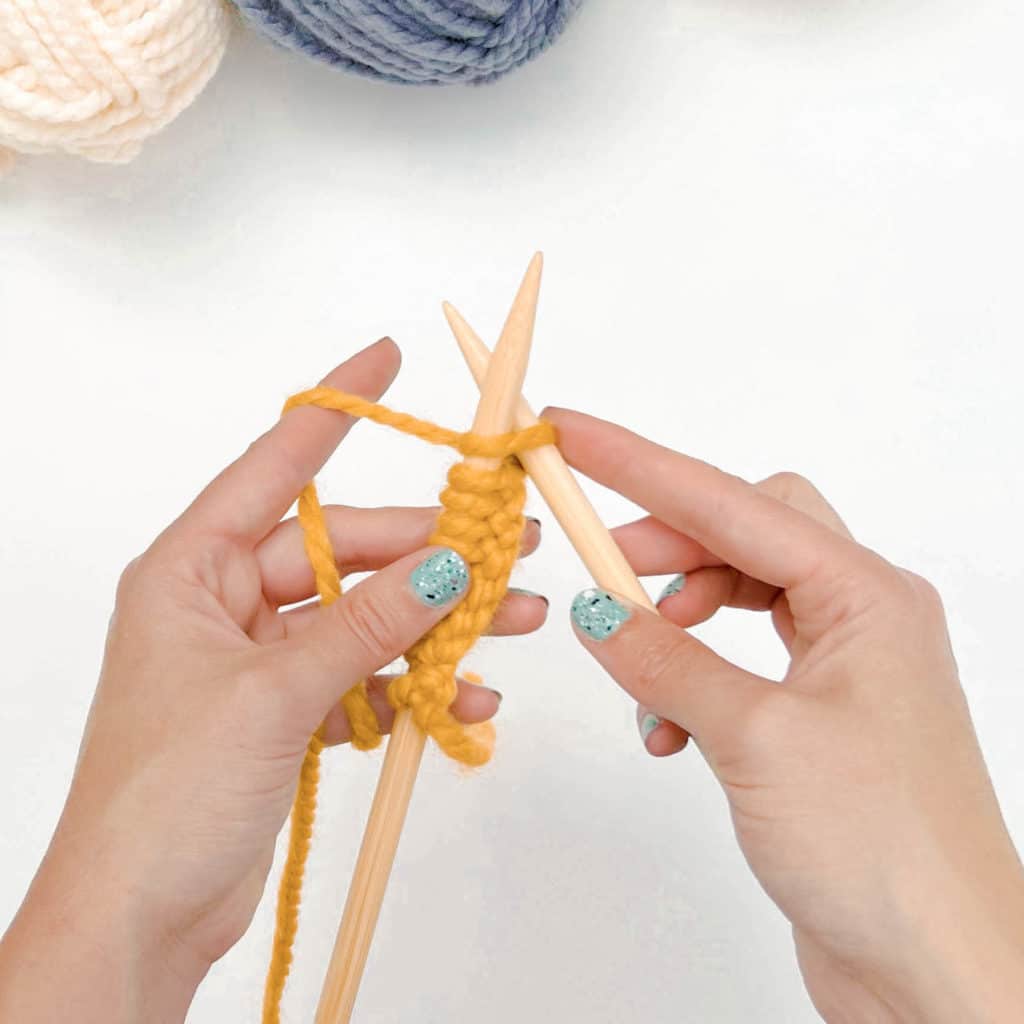
Step 3
Bring the yarn up and over the right needle (counterclockwise), coming up between the needles.
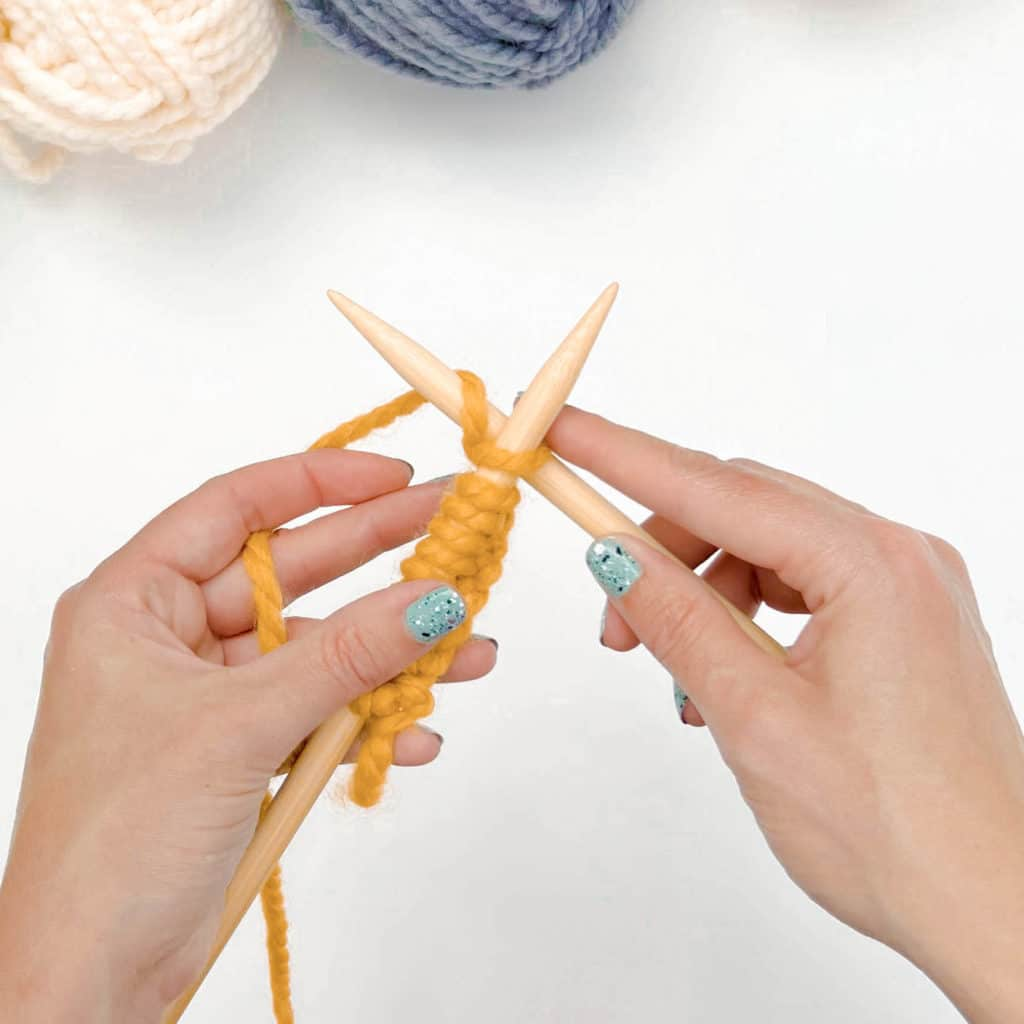
Step 4
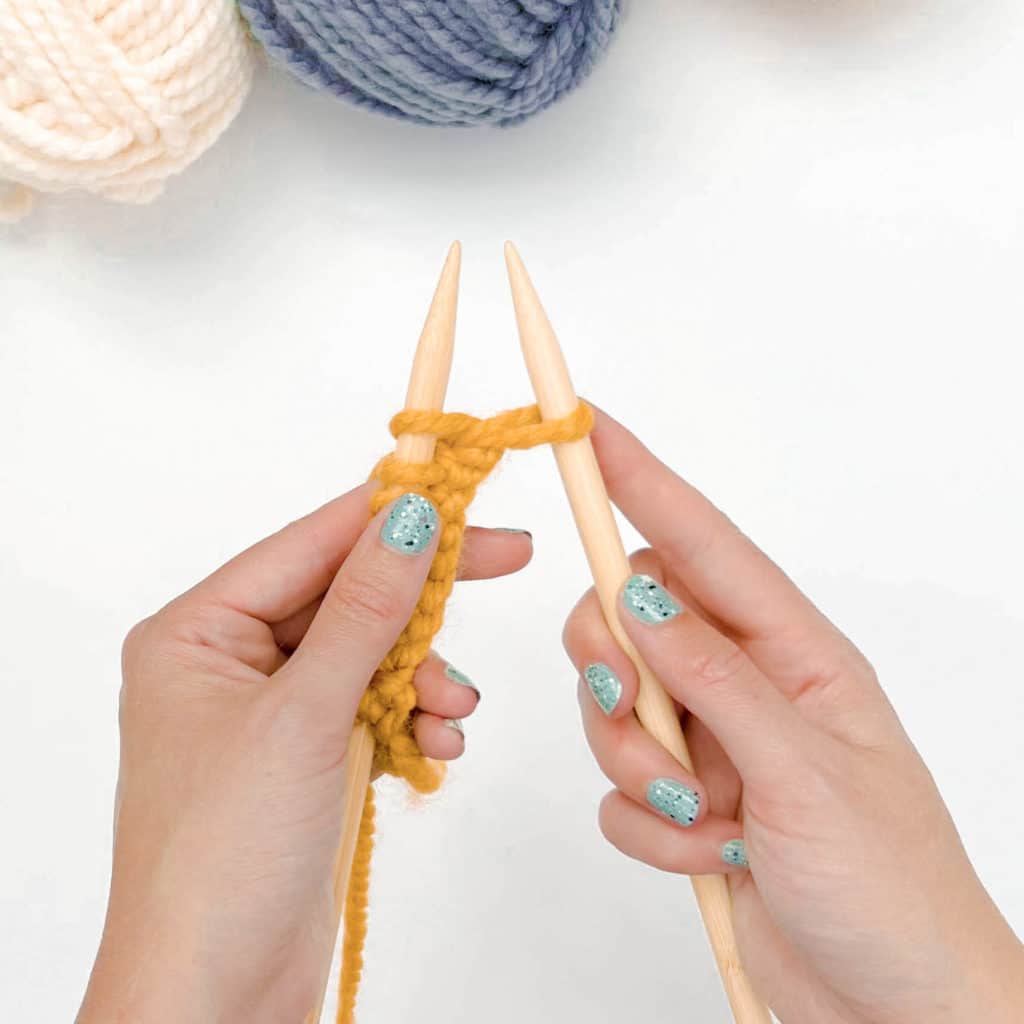
Pull the yarn loop through the stitch by pivoting your right needle downward, pinning the yarn between both needles and through the stitch.
Pro Tip:
Try using your pointer fingers to hold the loops in place as you move your needles!

Step 5
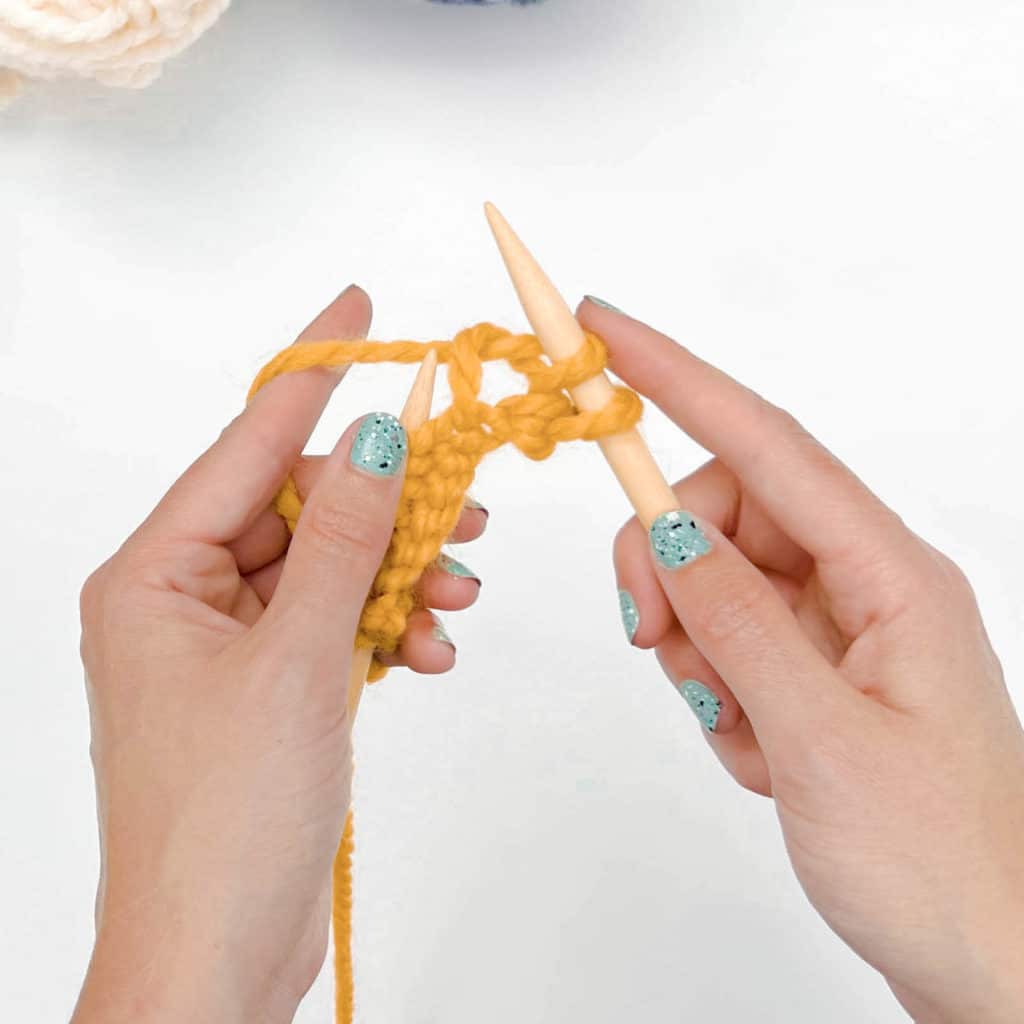
Drop the stitch off your left needle once the new knit stitch is resting fully on your right-hand needle.
REPEAT
Repeat steps 2-5!
We’ve condensed the instructions above into a text-only set of instructions to make it easy to practice the knit stitch for beginners! Use the steps below for a quick refresher on each step. Note: This tutorial was written for right-handed knitters.
Step 1: Holding the needle with the cast on stitches in your left hand, make sure the yarn strand is positioned at the back of the needle.
Step 2: Insert the right needle through the first stitch through the front, upward, and towards the right.
Step 3: Loop the yarn up and over the right needle (counterclockwise), coming up between the needles.
Step 4: Pull the yarn loop through the stitch by pivoting your right needle downward, pinning the yarn between both needles as you pull the strand through the stitch.
Step 5: Drop the old stitch off your left needle once the new knit stitch is resting fully on your right-hand needle.
Repeat steps 2-5 for each knit stitch.
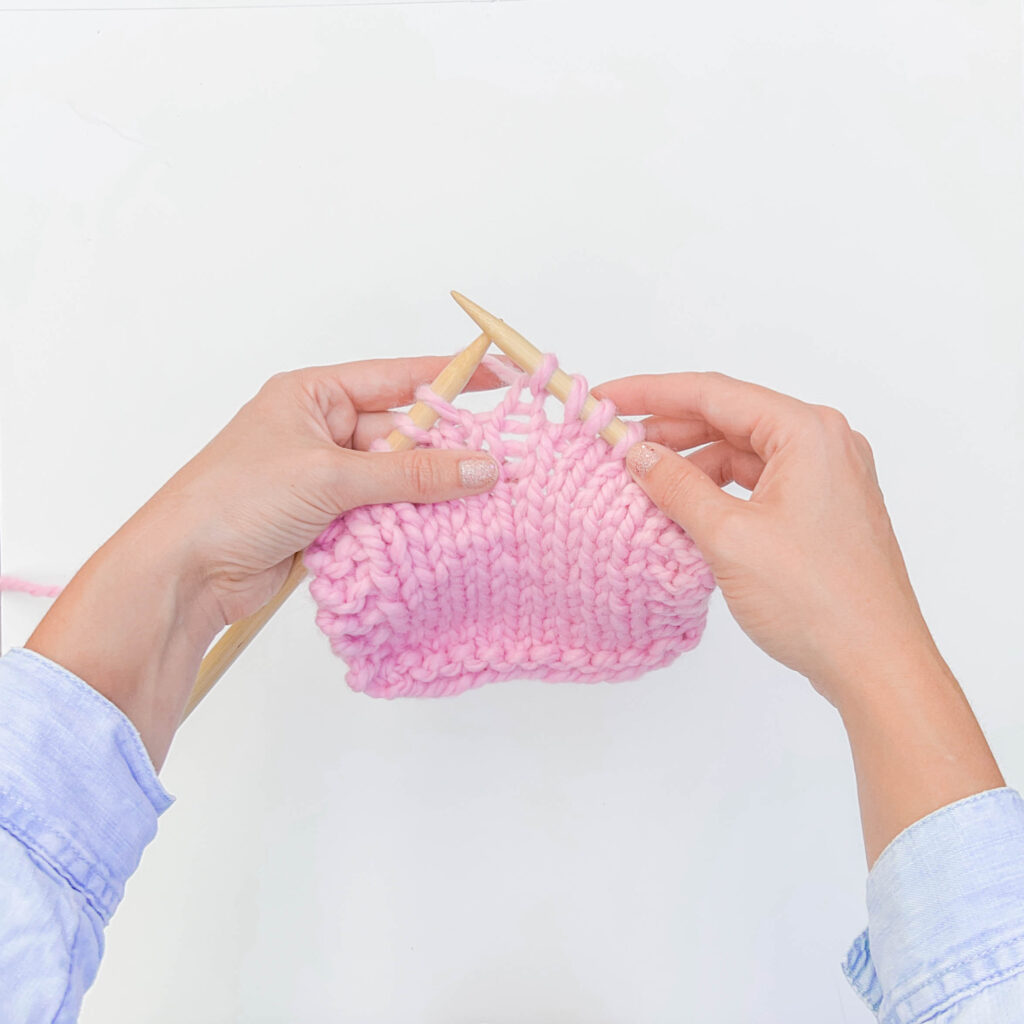
One of the biggest challenges for learning how to knit stitch for beginners is getting the hang of keeping your yarn tension even. Consistent tension means you’ll be able to knit even stitches, control your gauge, and be able to knit quickly and efficiently. To put tension on the yarn, knitters hold the working strand between various fingers. One of the ways you can adjust the yarn tension is by holding it in your hand differently. Some knitters wrap the yarn around their pinky and over their ring finger. Try wrapping the yarn around your fingers a few different ways until you find the way that works best for you!
When you wrap your yarn over the needle for each new stitch, make sure to leave the loop loose enough that the strand is touching the needle but not so tight that it’s pulled tight against the needle. To create looser stitches, gently pull the new stitch through the old by pivoting the needle tip closer toward yourself (Step 4) before dropping the old stitch off the left needle (Step 5). This creates a larger, looser stitch on your right needle without stretching or tightening the surrounding stitches.
Once you’ve worked a knit stitch and dropped it off of your left-hand needle (Step 5), gently tug on your yarn strand to tighten the stitch against the needle. The stitch should rest against the needle with no extra space between the fibers and your knitting needle.
Trying the knit stitch for beginners is just the start of the wide world of knitting stitches! Now that you know how to knit, you can make a basic stitch pattern like Garter stitch right away.
Later, once you learn the purl stitch, you can use both knitting and purling to make even stitch patterns. Soon you’ll be able to tackle our favorite beginner stitch patterns including Stockinette Stitch, Ribbing Stitch, Seed Stitch, and more!
While the knit stitch for beginners is the very first stitch to learn. The second stitch to learn is how to purl!
Surprise! The knit stitch is actually related to the purl stitch! All fabrics, including knitted projects, have a front and back side. This goes for each stitch too. Some stitches look the same on both sides, while others look very different.
Knit and purl stitches are actually the opposite sides of the same stitch. The reverse side of a knit stitch IS a purl stitch. This means that when you learn how to knit and purl, you’re unlocking a whole world of textures and stitches.
Understanding that knitting and purling are related will come in handy when you want to knit either stockinette stitch or garter stitch projects! Stockinette Stitch knitting is done by alternating rows of knit and purl stitches. Garter stitch knitting is done by either knitting every row or purling every row.
Being able to tell a knit stitch from a purl stitch can come in handy as you learn other stitches or need to fix a mistake. A knit stitch looks like flat “v” shapes, while a purl stitch looks like rounded bumps.
If you think you’ve made a mistake in your knitting, always take a moment to look at your fabric. If you see row after row of just knit ‘v’ stitches, you’re good to go!
Knitting can help to relax and de-stress, it helps to focus and calm the mind. Knitting can also be a social activity, providing an opportunity to connect with others who share the same interest. Today, there are many ways to connect with knitters. Try exploring Ravelry, a website with a wonderful online community and huge pattern database. Facebook groups and local yarn shops (LYS) are other great ways to find other knitters in your area and to hear about knit nights or crafternoons happening in your area!


