Knitting in the Round
Knitting in the Round There are tons of cool projects you ca
Knitting in the Round There are tons of cool projects you ca
There are tons of cool projects you can do when you know how to knit in the round. Beanies, sweaters, and scarves are just some of them. These projects are so much easier—and faster—to knit in the round. Plus, they’re loads of fun to do!
The biggest challenge while learning how to knit in the round is figuring out how to join in the round after the first row. Once you’ve figured out how to do it (and without twisting your row!), you’ll be flying through the rounds at lightning speed.
Before you begin, you’ll need to have already cast on some stitches. For practice, cast on enough stitches to go fully around the circumference of your knitting needles comfortably. Practice using the smallest length circular in your needle stash to keep things quick and easy.
If you’re working on a project that has a smaller circumference than your circular needles, try using the magic loop technique as a way to make your longer circular needles work for small projects.
A note about hand dominance: This tutorial was written for right-handed knitters. If you’re a left-handed knitter, you can follow the same instructions. However, you’ll need to replace “right needle/hand” with “left needle/hand” for all steps.

Step 1:
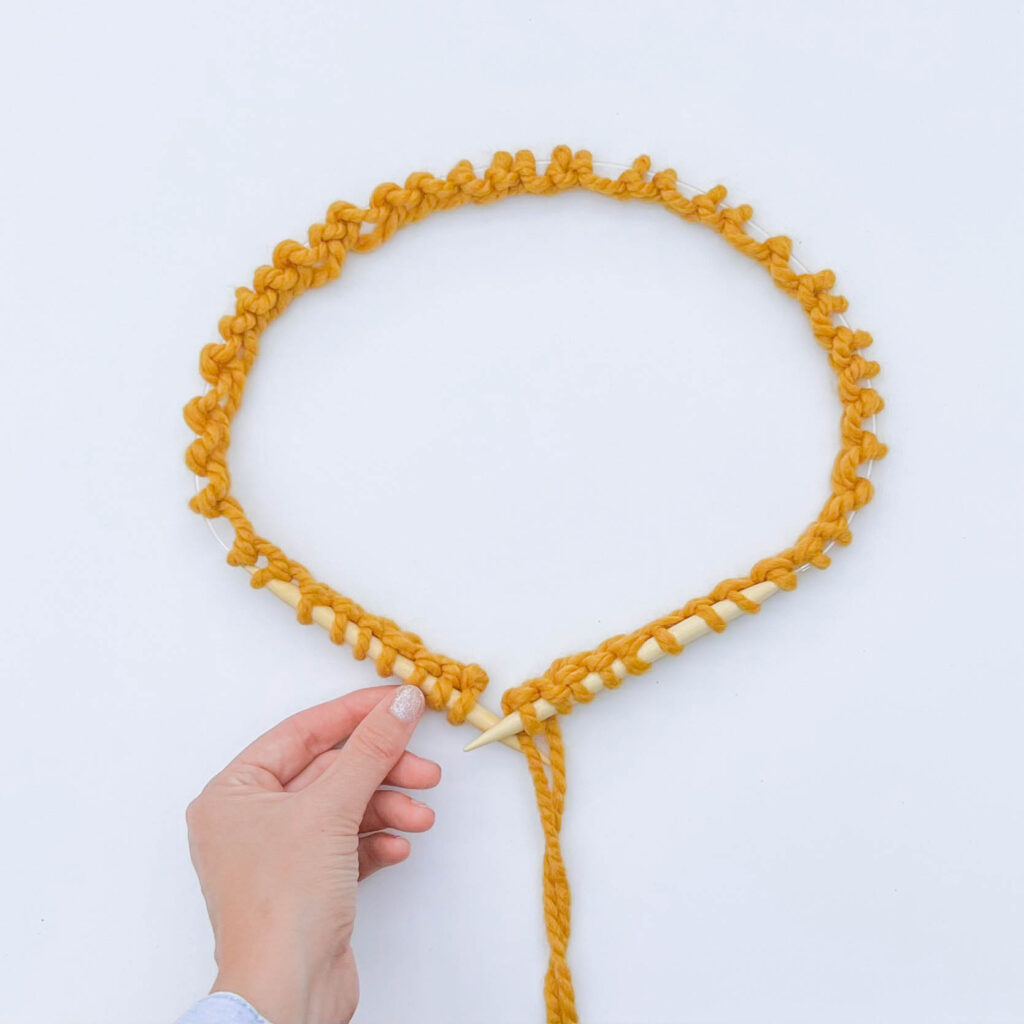
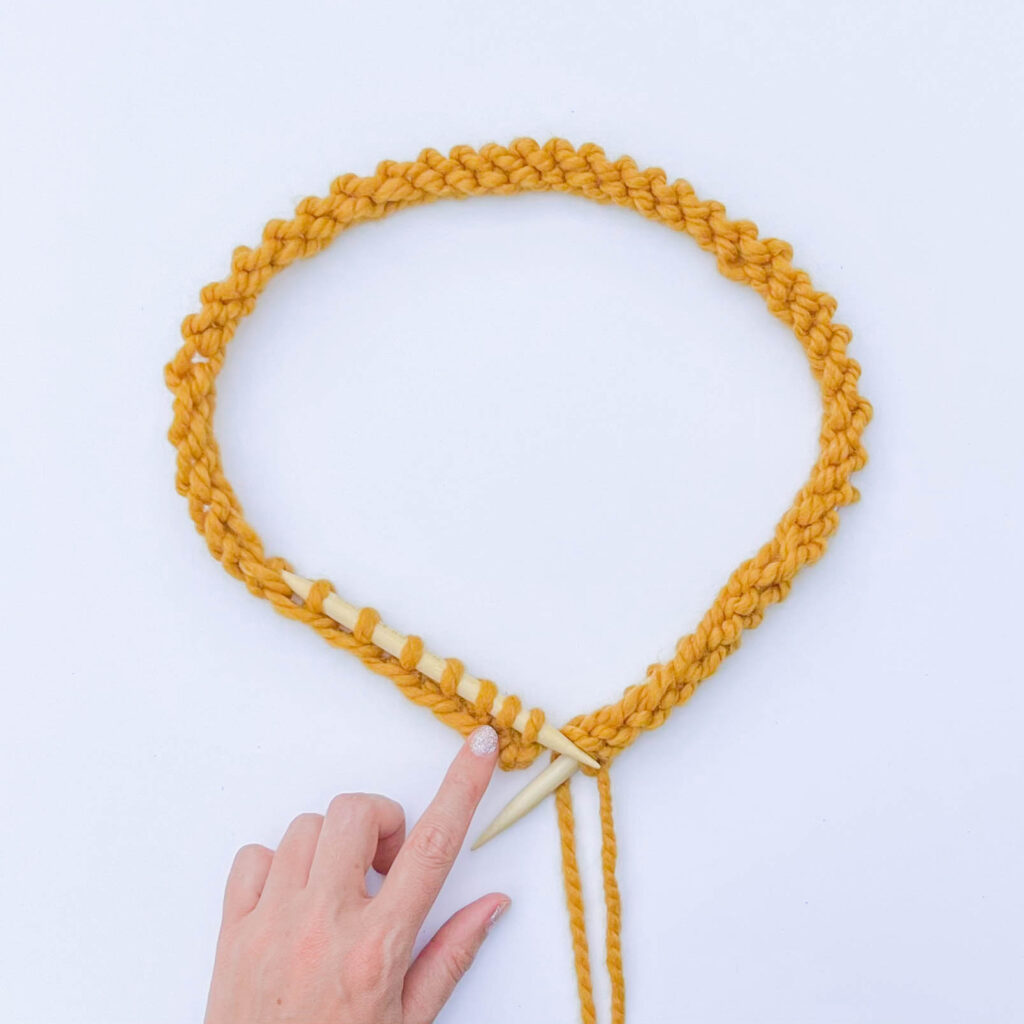
Check to make sure the cast on row isn’t twisted.
Lay your circular needles on a flat surface. The cast on edge should lie flat with the bottom edge facing inward.
A note about yarn tails: The photos in this tutorial show a sample that uses a longtail cast on and has the yarn tail on the same side as the working yarn before joining. If you use another type of cast on technique your yarn tail might be on the left side, or at the “end” of your cast on stitches. It doesn’t matter!
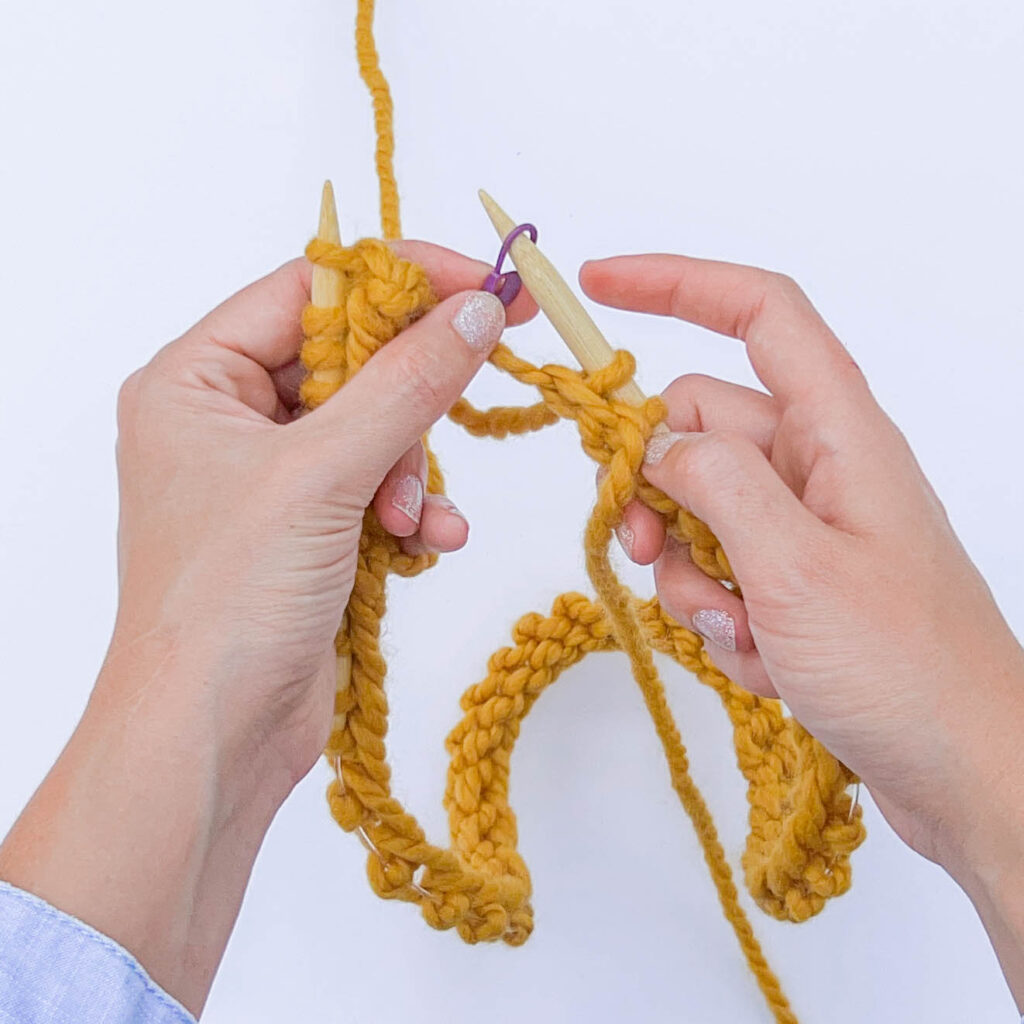
Step 2:
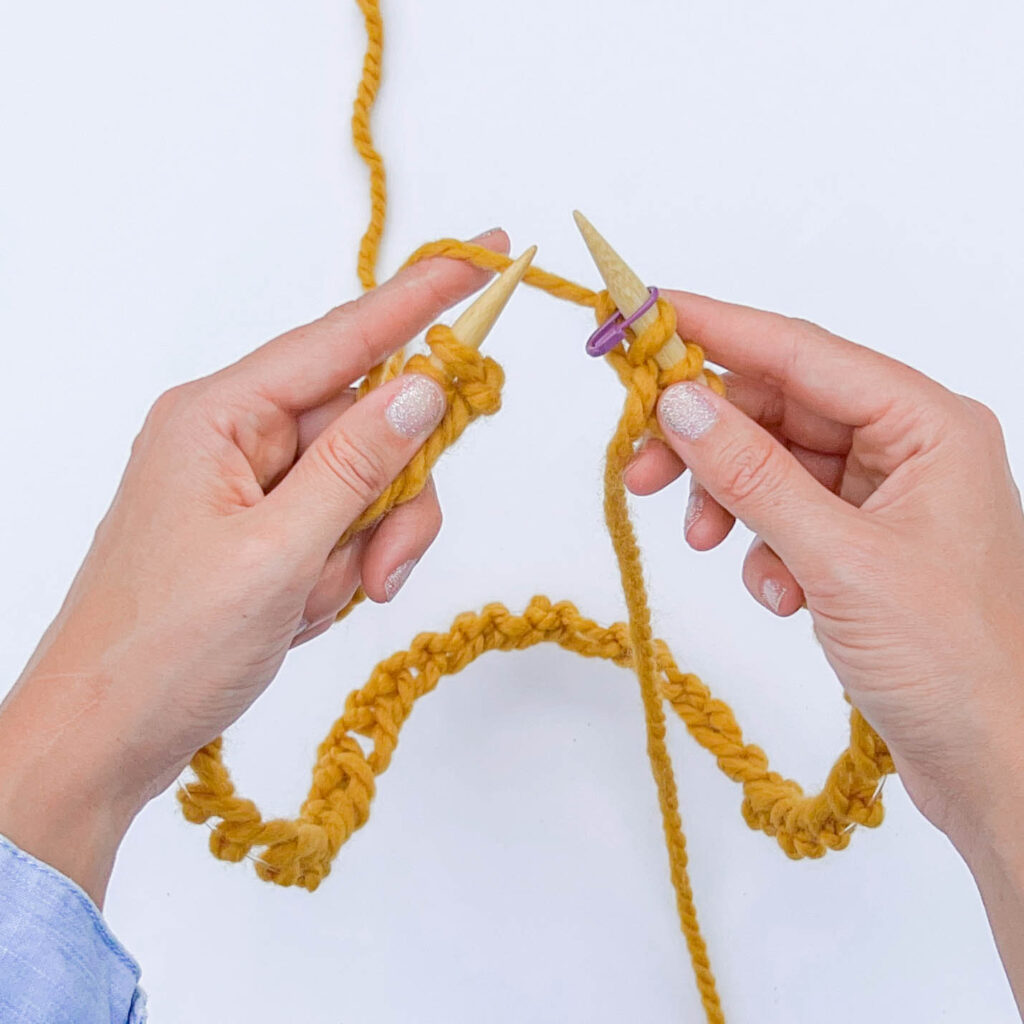
Slide a stitch marker onto the right needle.
Pick up both needles with the yarn strand attached to the right end of your cast on row.
Note: This tutorial shows how to join while knitting, so the working yarn is positioned to the back. To purl, bring the yarn in front.
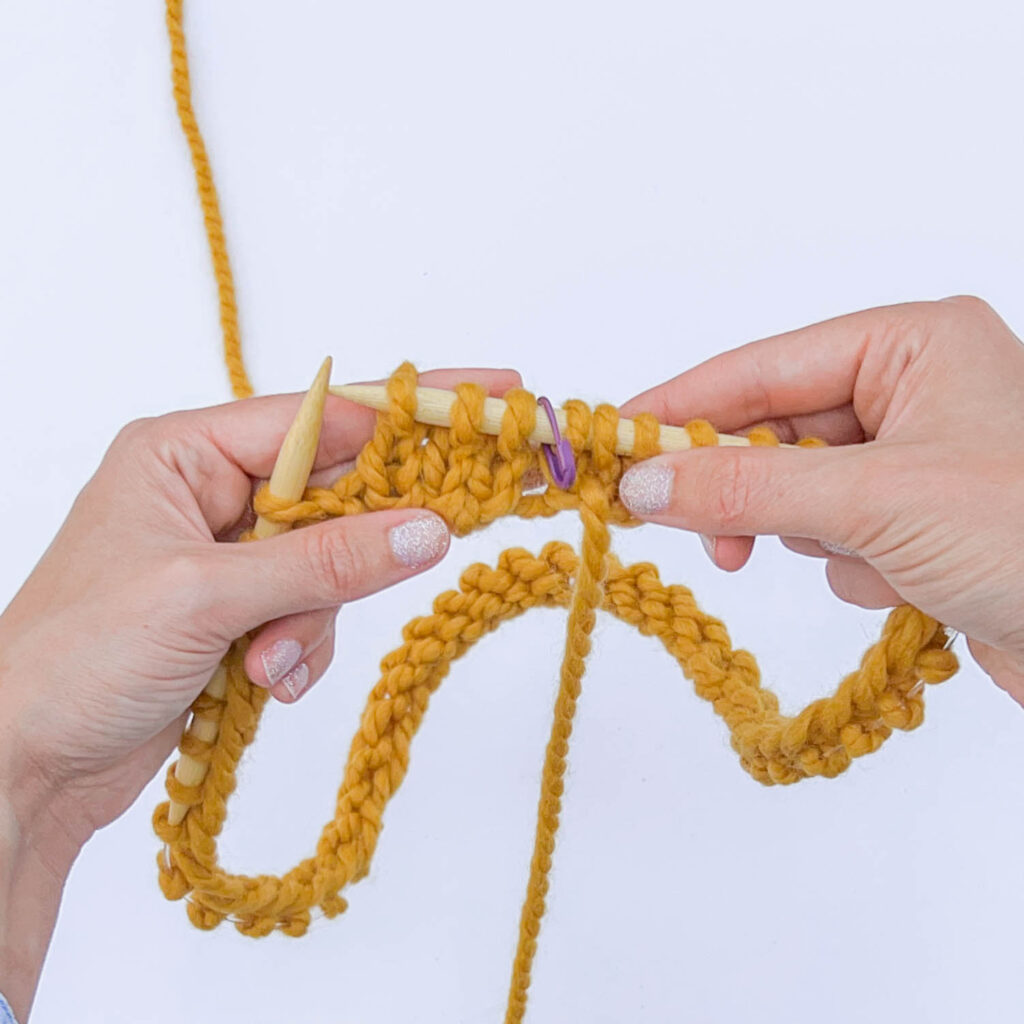
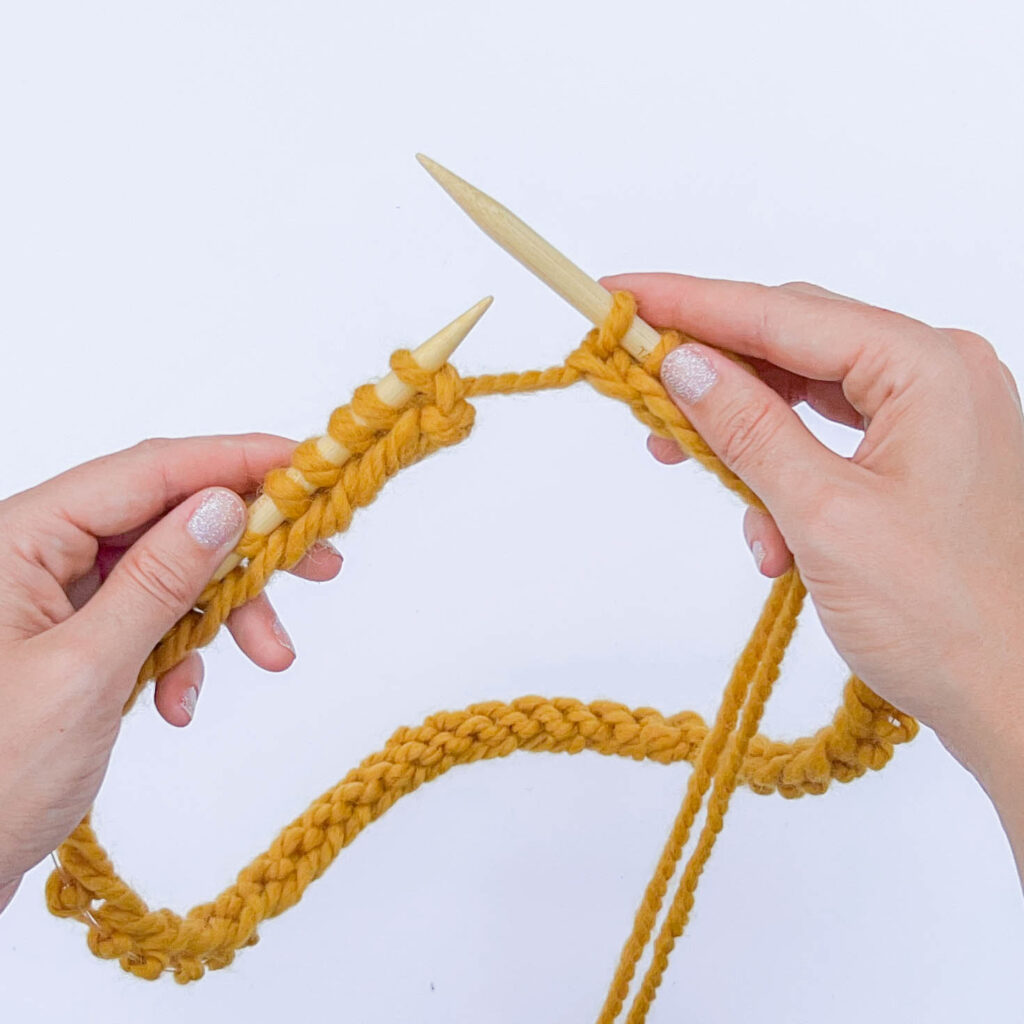
Step 3:
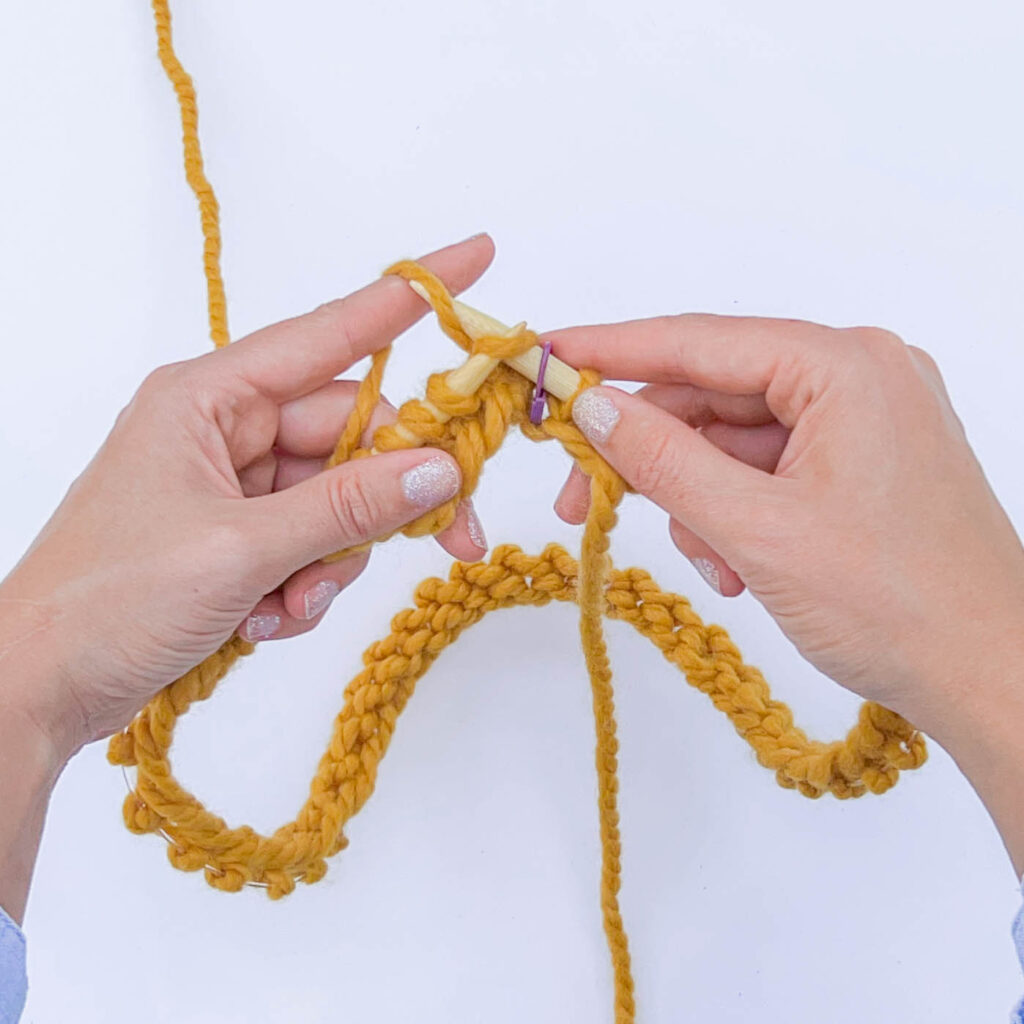
To work the first stitch, push the stitches on both needles up toward the tips.
Knit the first stitch on the left needle normally, slipping it to the right needle once complete.
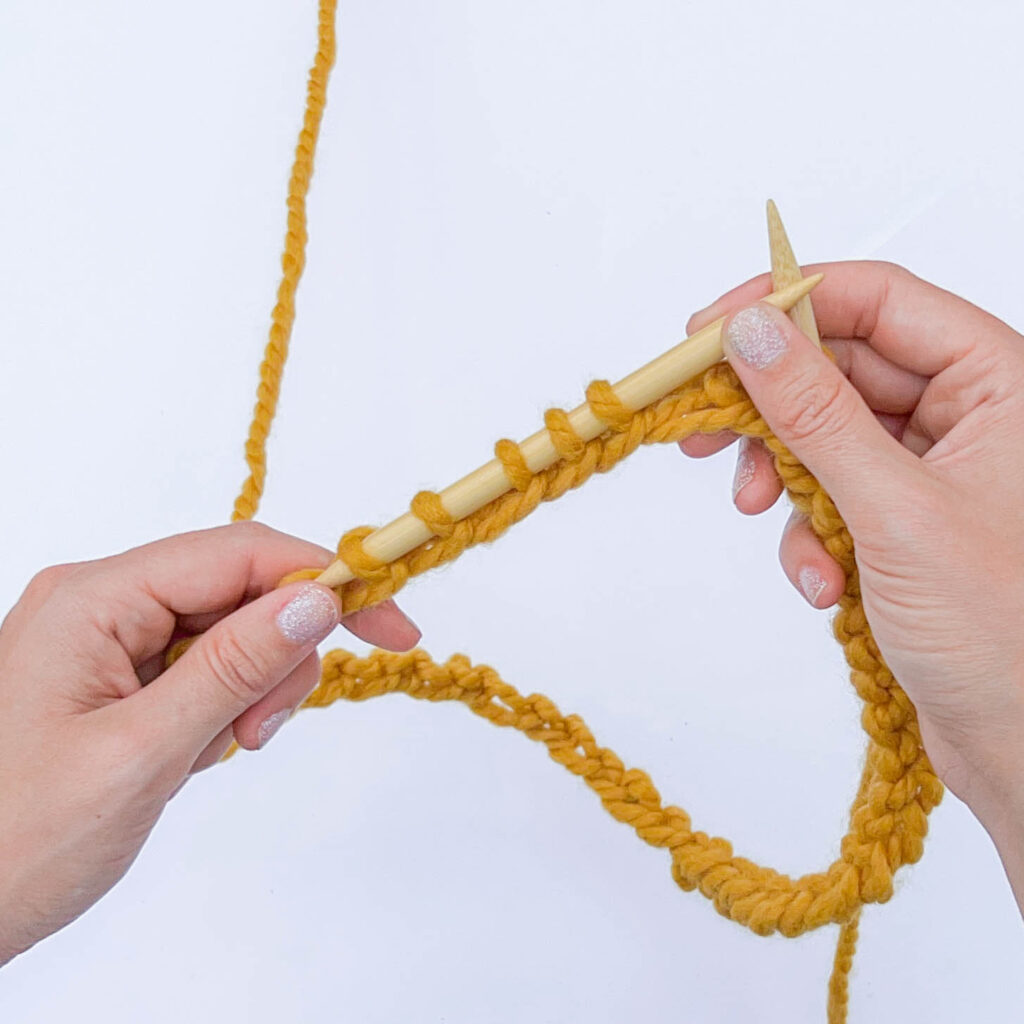
Step 4:
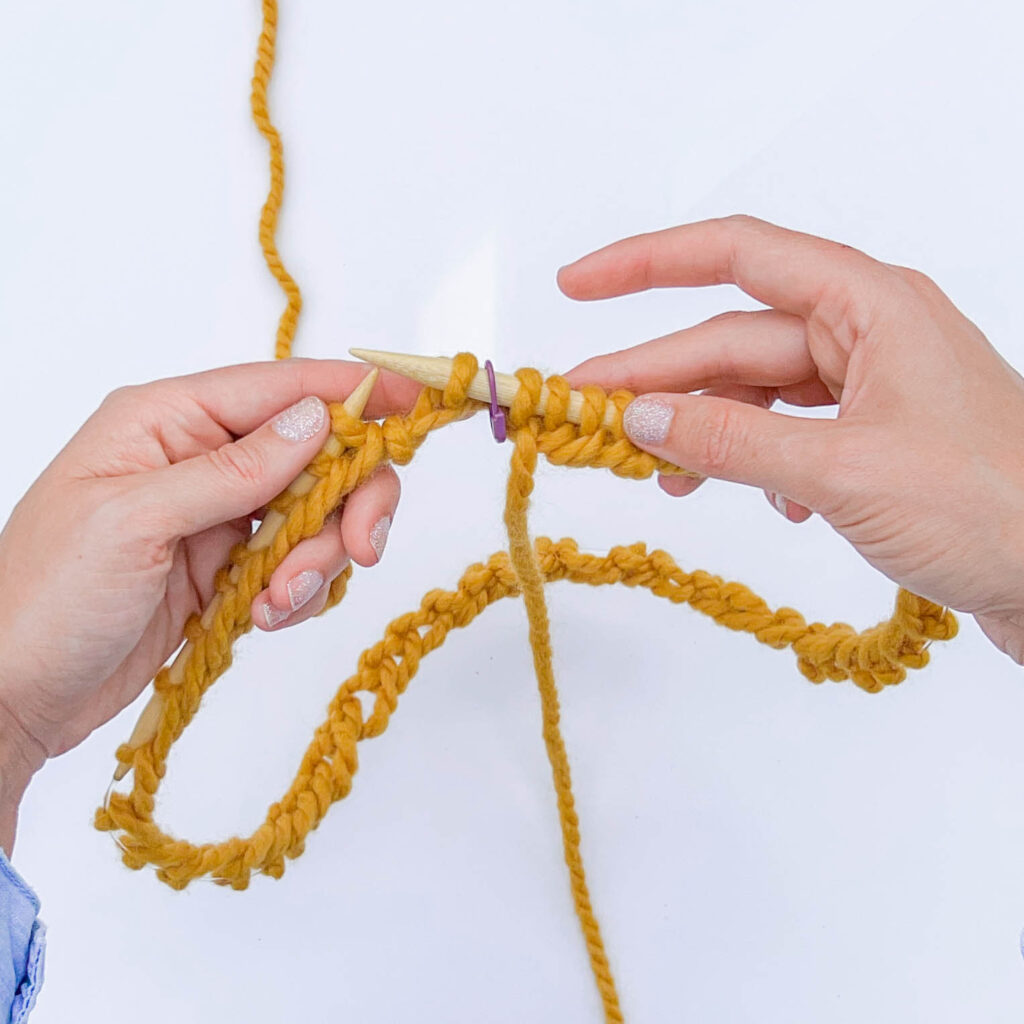
Yay! Your work is now joined, ready to knit in the round.
Pause to gently tighten that first stitch by pulling the working yarn to close any gaps at the join.
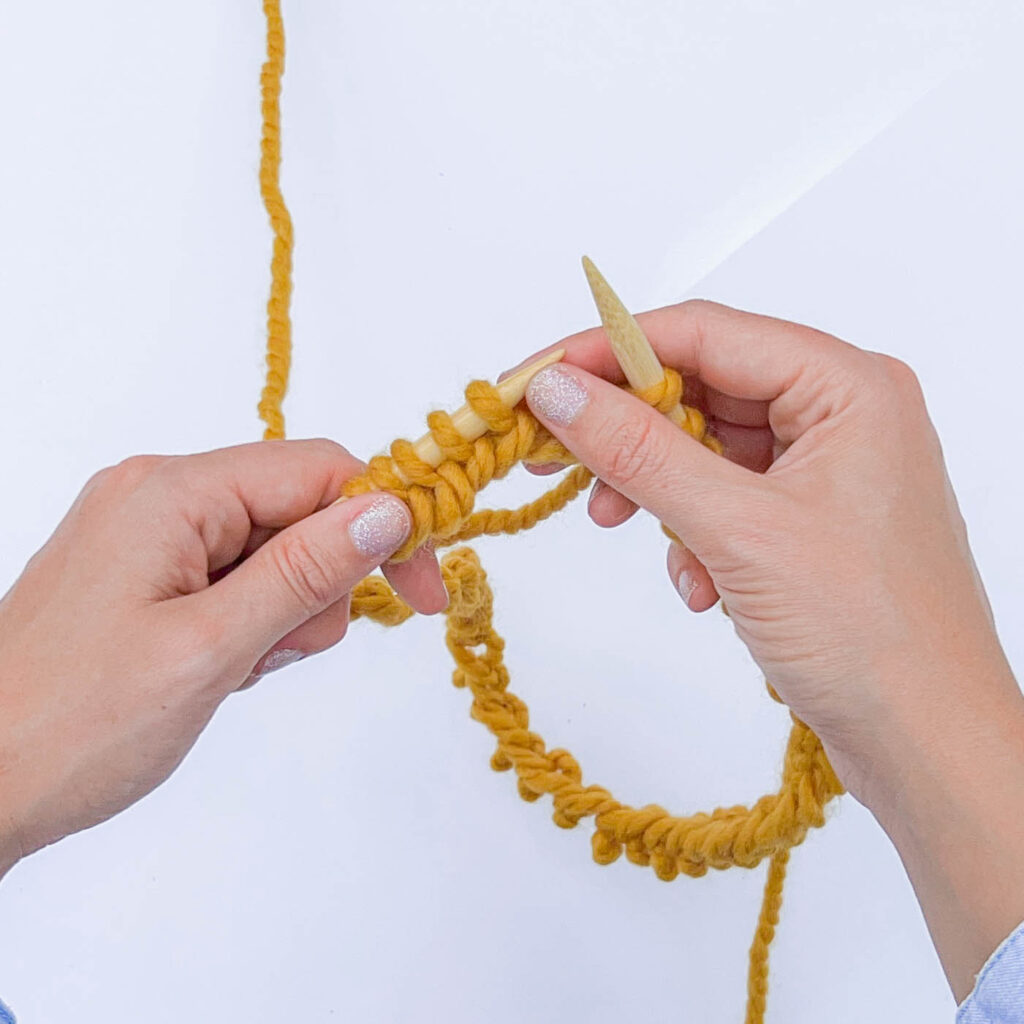
Step 5:
Continue knitting in the round until you’ve reached the stitch marker. Slip the marker from the left to the right needle.
You’ve now worked one row!
Repeat
Continue to work in the round by repeating step 5 until your project is the right length.
Knitting in the round is a little bit different than working back and forth. One of the things to keep in mind is that you’ll need to consistently help your stitches travel around the circumference of your knitting needles as you’re working.
After a few stitches, you’ll notice that the stitches will start to stretch and pull on the left needle while bunching up on the right. Practice shuffling your stitches around in a circle on your needles using the other fingers on your hand. Try gradually feeding new stitches up toward the tip of the left needle, and pushing them away from you on the right as you form each stitch.
Some types of yarn might slide easily, while others might take a little extra “encouragement”. It’s ok to pause and adjust your stitches in batches rather than as you go as well. Be mindful of how much the stitches stretch on the left needle, this might create an uneven finished fabric. If you’re having trouble keeping your gauge consistent, this might be the reason!
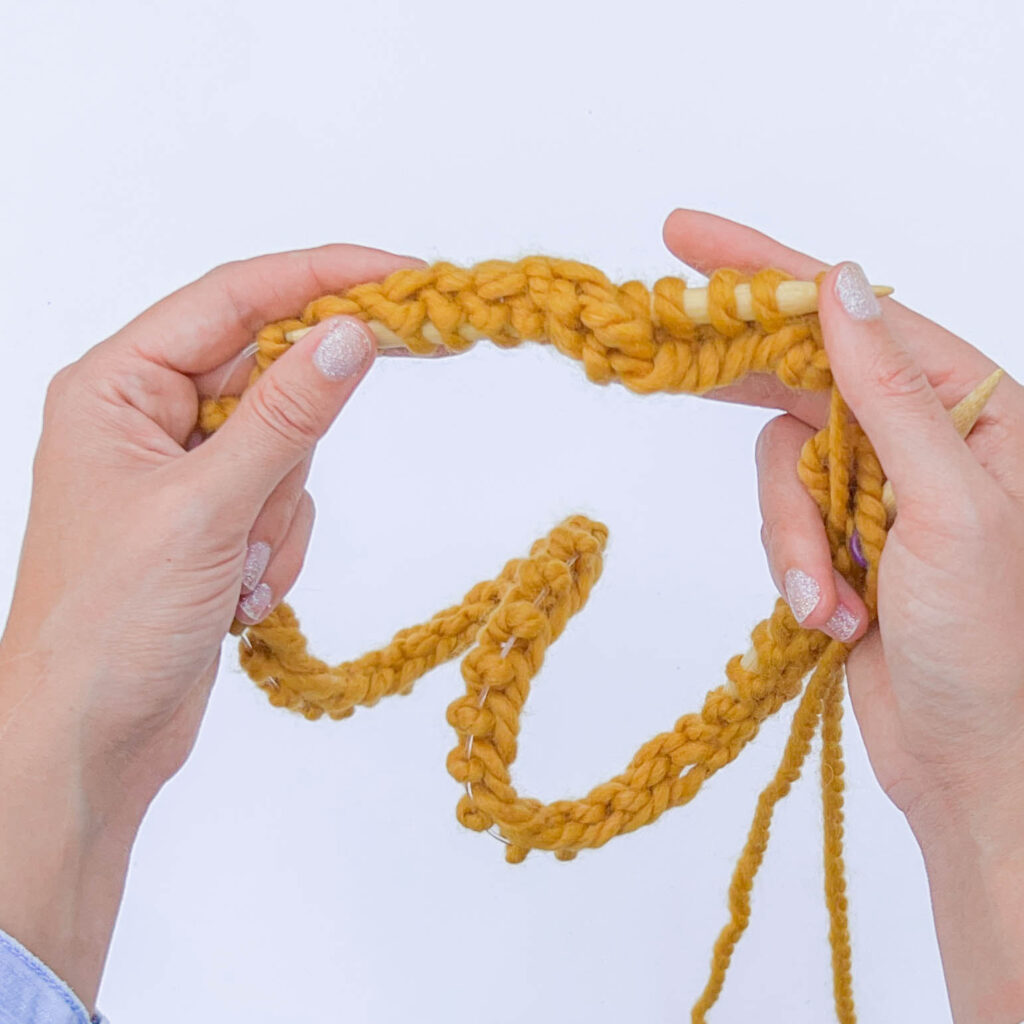
The best time to fix a twisted cast on row is before you join to knit in the round! Start by laying your needles and cast on stitches on a flat surface. Trace the bottom edge of your cast on stitches (the fabric hanging down off the needles) to make sure that the bottom edge is pointed toward the center of your needles.
If your fabric is much longer than your needles and is forming a rippled edge, work in sections to smooth your edge flat before moving on to the next section. By working in small sections to check that your stitches are lining up, you’ll eventually be able to work all the way around ensuring everything is aligned and ready to go.
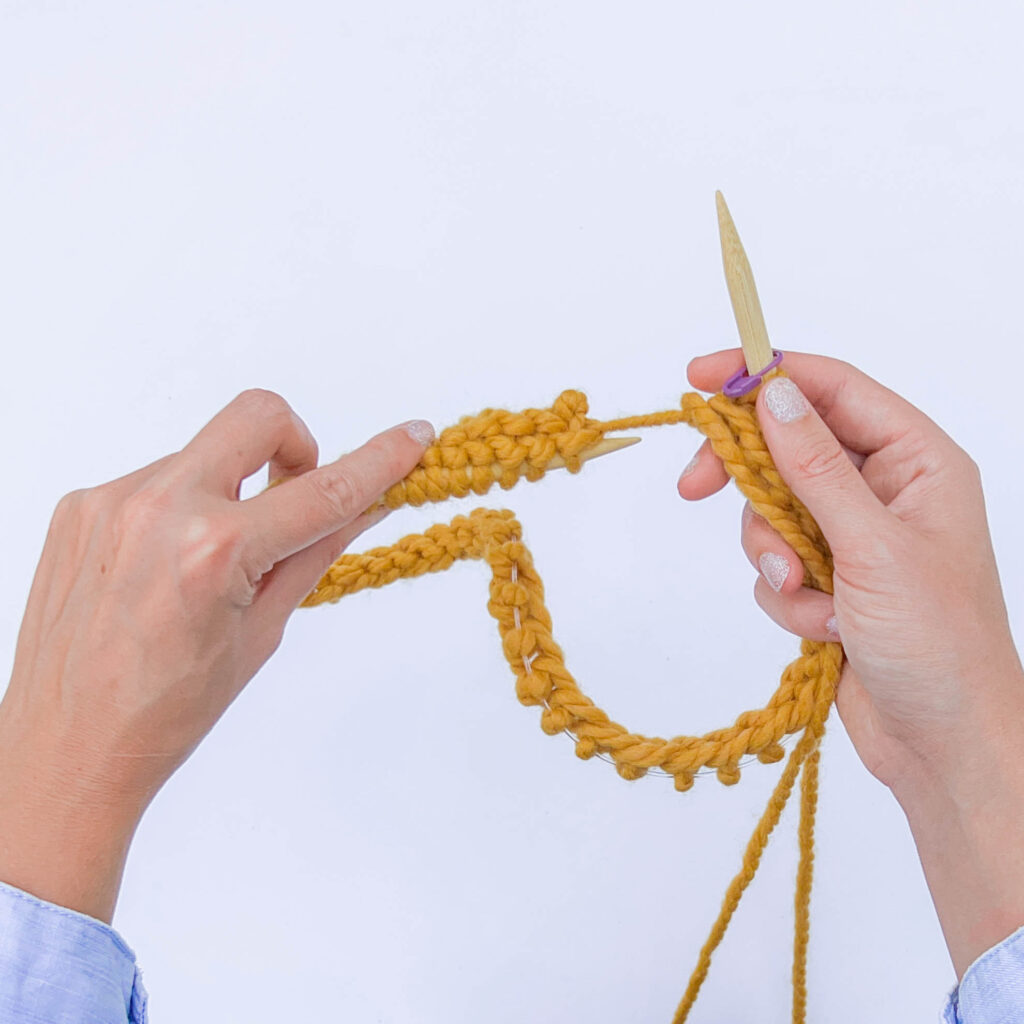
In the photograph above, you’ll see that the last few stitches are twisted and aren’t pointing toward the center of your needles. Fixing a twisted cast on before joining in the round is simple! Pick up the left needle and adjust the stitches so that they’re laying flat and match the same stitch positioning as the rest of the stitches on the needles before joining in the round.
Eeep! One of the most frustrating things is discovering that your stitches are twisted after you’ve already started working in the round. First, work all the way around your needles, adjusting the cast on edge so that the twist in your edge is pushed to the tip of the left needle.
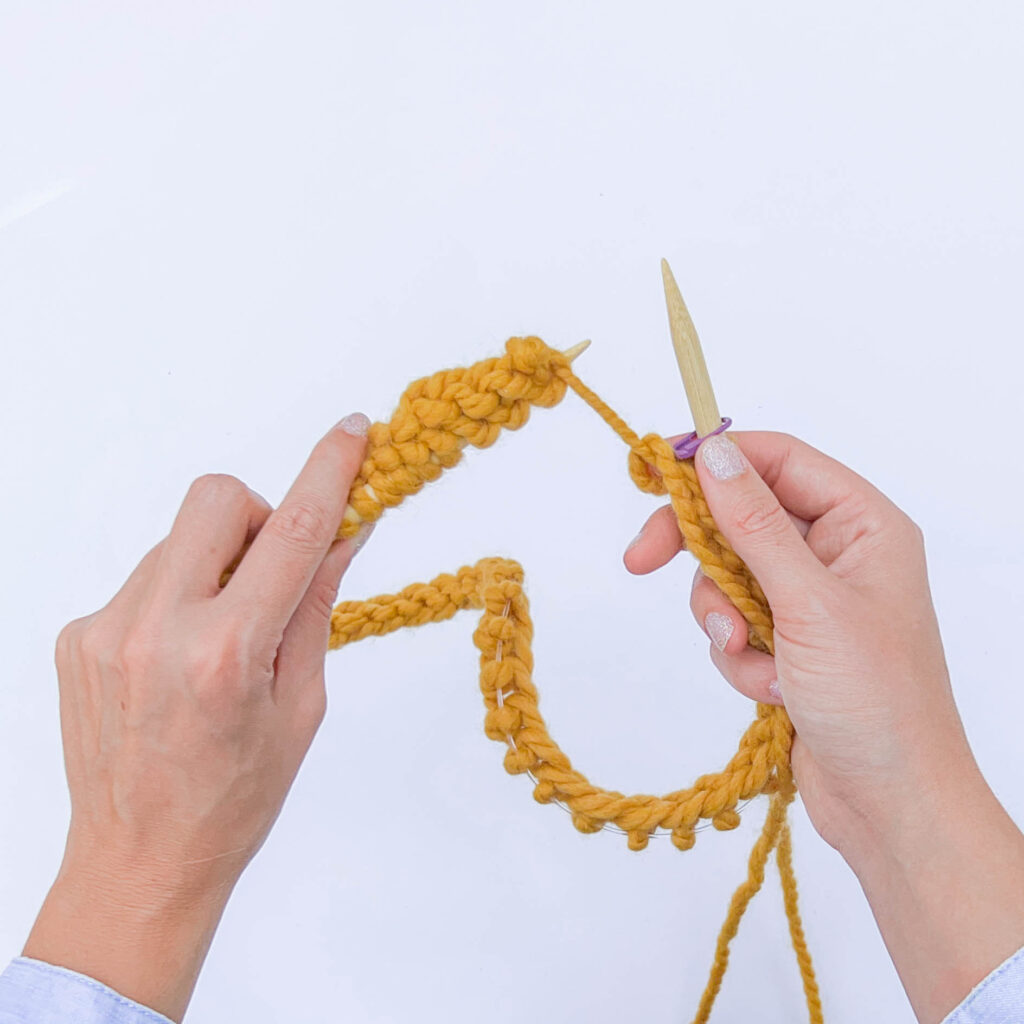
Rotate your left needle tip around the strand connecting the first and last stitch of the previous row in a circular motion. By moving your needle, you’re untwisting the stitches transferring the “twist” to that connecting yarn instead. Keep rotating until the fabric on the left side is flat (untwisted) and faces the same direction as the fabric on your right needle.
Typically after one or two rotations, all your stitches will lie flat around the needles naturally, and you can work your next row twist-free.


