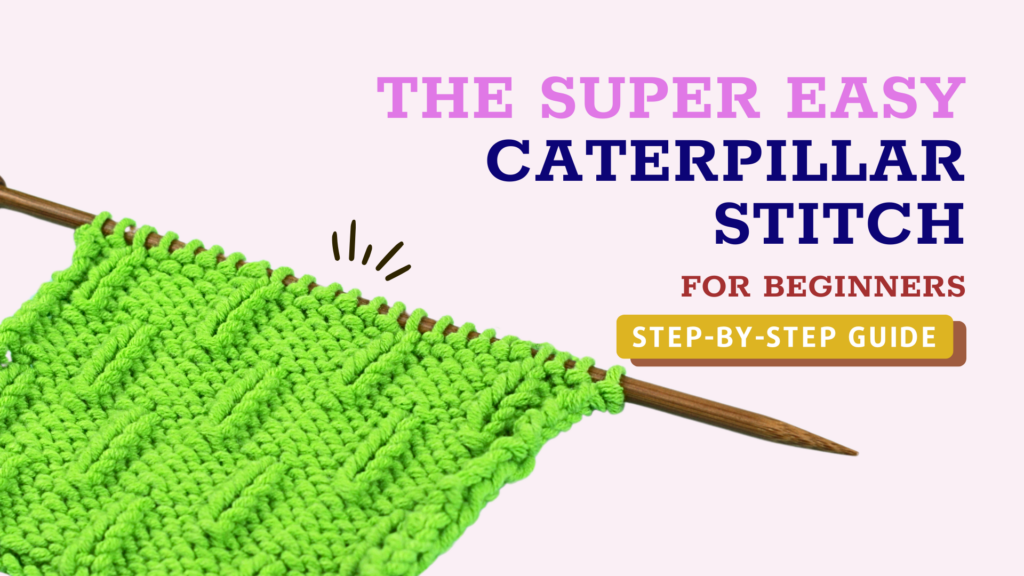
How to Knit the Caterpillar Knit Stitch: Easy 2-Pattern Repeat
The cutest knit stitch ever!
The cutest knit stitch ever!
Ready to learn your new favorite knitting stitch? The Caterpillar Knit Stitch (also known as “Vertical Dash“) is a cute, chunky, and really simple stitch to make. It’s made up with knits and purls in a fun, quirky combination.
Grab your knitting needles, yarn, and a couple of stitch markers. You’re going to love this tutorial!
The Caterpillar Knit Stitch is created by alternating 12 repetitive rows. I know this sounds like a lot, but it’s really just 4 rows separated into 2 stitch pattern batches.
Sound confusing? Here’s what the pattern looks written out:
We’re only alternating between rows 1 and 2 until we have 6 rows in total for the first batch.
Cast On: Cast on in multiples of 6. (I used the Basic Knit Cast On to make 24 stitches)
Row 1: *K1, P5*. Keep repeating this pattern until the end of the row. Pm (place your stitch marker.
Row 2: *K5, P1*. Repeat this pattern until the end of the row. Pm.
Row 3: *K1, P5*. Pm.
Row 4: *K5, P1*. Pm.
Row 5: *K1, P5*. Pm.
Row 6: *K5, P1*. Pm.
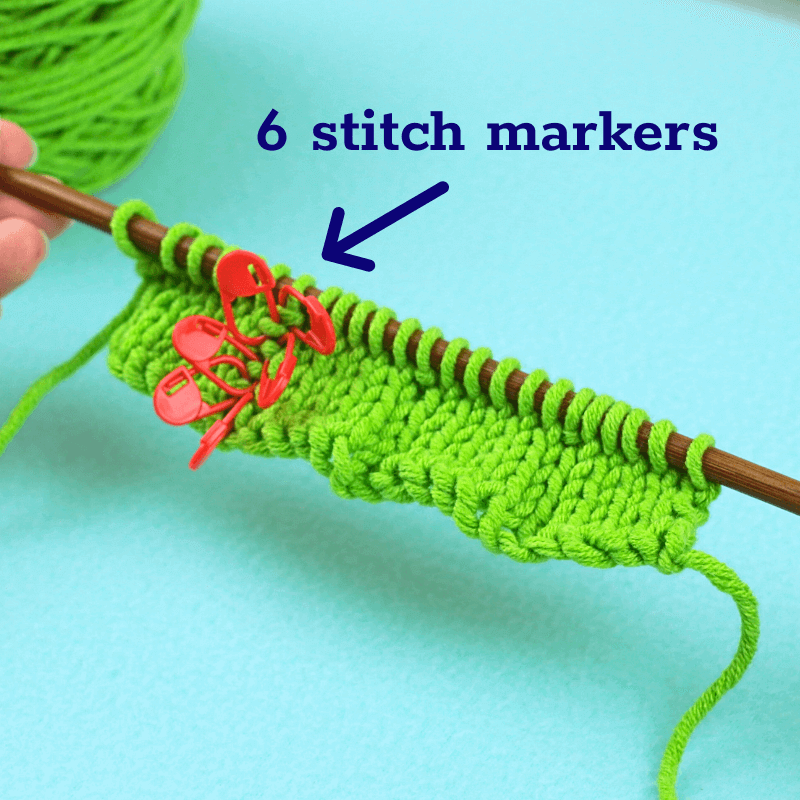
Put a stitch marker at the very end of each new row you make. When you have a total of 6 stitch markers lined up, it’s time to start Stitch Repeat Batch #2.
We’re only alternating between rows 7 and 8 until we have 6 rows in total for the second batch.
Row 7: *P3, K1, P2* Repeat this until you reach the end of the row. Pm.
Row 8: *K2, P1, K3*. Repeat the pattern until the end of the row. Pm.
Row 9: *P3, K1, P2*. Pm.
Row 10: *K2, P1, K3*. Pm.
Row 11: *P3, K1, P2*. Pm.
Row 12: *K2, P1, K3*. Pm.
Put a stitch marker at the very end of each new row you make. When you have a total of 6 stitch markers lined up, it’s time to start stitch repeat batch #1.
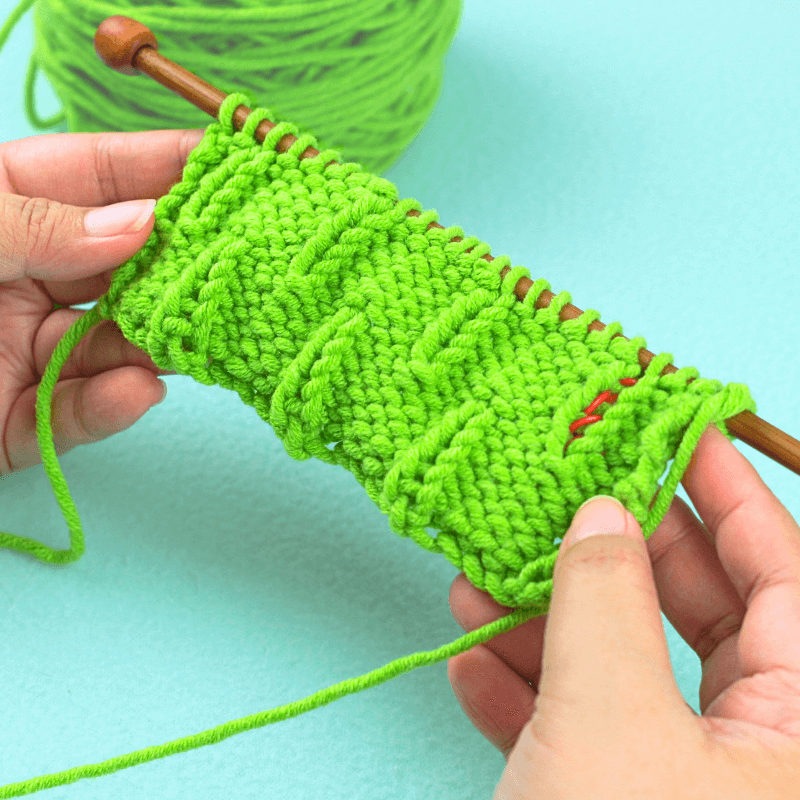
After knitting the second pattern batch, it’s time to go back to the first. So you basically alternate between these two batches until your project is the length you need!
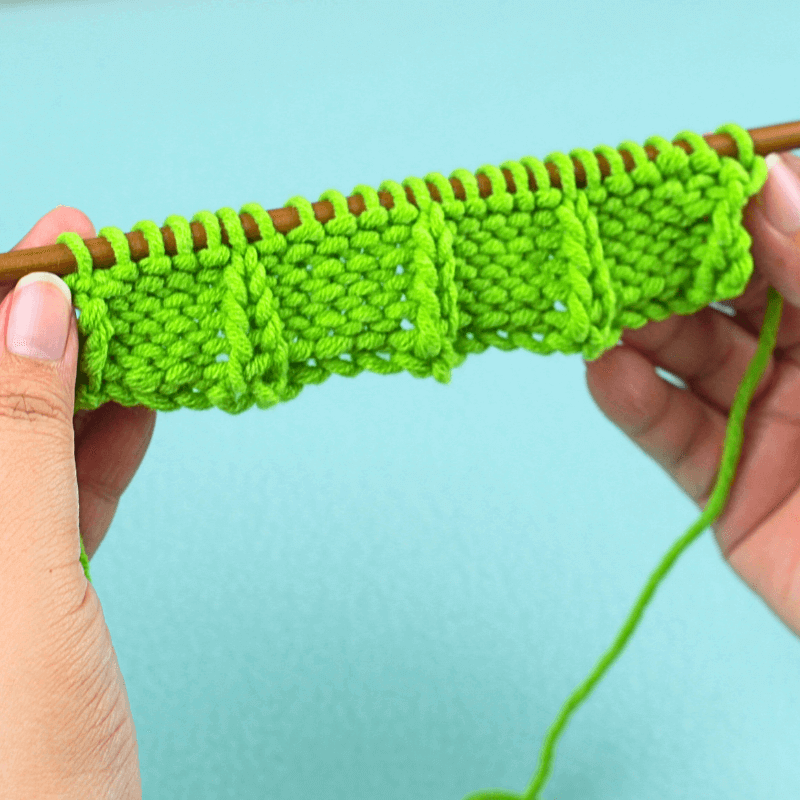
By the second row, you can clearly see the caterpillar stitch pattern coming out. The image below shows what the caterpillar knit stitch looks like after 4 repeats.

Notice that we’re basically repeating a total of 4 rows that are divided by two batches? That’s how simple and easy the caterpillar knit stitch is!
Feeling overwhelmed by the written pattern? Don’t worry, here’s an even easier video tutorial for this adorable textured stitch:
The knit stitches easily stand out among the flat purls and they look like cute chunky caterpillars crawling across your fabric. Stitch markers make it so much easier to keep track of your rows. So if you have a few on hand, make sure to use them.
How did your caterpillar stitch come out? Do you have other knitting stitches you want to learn about? Make sure to leave a comment or suggestion below!
Let’s add new knitting stitches to your growing skillset, shall we? Take a look at these amazing knitting tutorials:


