Knitted Cast On
Cast on quickly using the knit stitch!
Cast on quickly using the knit stitch!
The knitted cast on is a great beginner-friendly technique! This method is simple to memorize and creates a nice, sturdy edge for any knit project. The basic knit cast on uses the same skills and movements as the knit stitch. Whether you’re already familiar with the knit stitch or just getting started, this cast on is a great time to practice.
We’ve also included a quick troubleshooting guide in this tutorial if your edge is too tight. It’s a common problem for both new and experienced knitters. You’re not alone! Make sure to read to the end to learn more about what an ideal tension looks like for casting on.
The basic knitted cast on is especially good for simple projects like dishcloths, afghans, or scarves with edges that don’t need to flex or stretch to fit.
While we love this technique for learning the basics of casting on, the basic knit cast on is not as stretchy or elastic as other methods. Does your project have ribbing at the edge? That usually means the fabric is designed to stretch and will need a different, stretchier cast on like the Long Tail Cast On instead.
The knitted cast on is a great beginner-friendly method for most knit projects! While it’s helpful to be familiar with the knit stitch before trying this technique, this tutorial will give you enough instructions to work this cast on without knowing how to knit already.
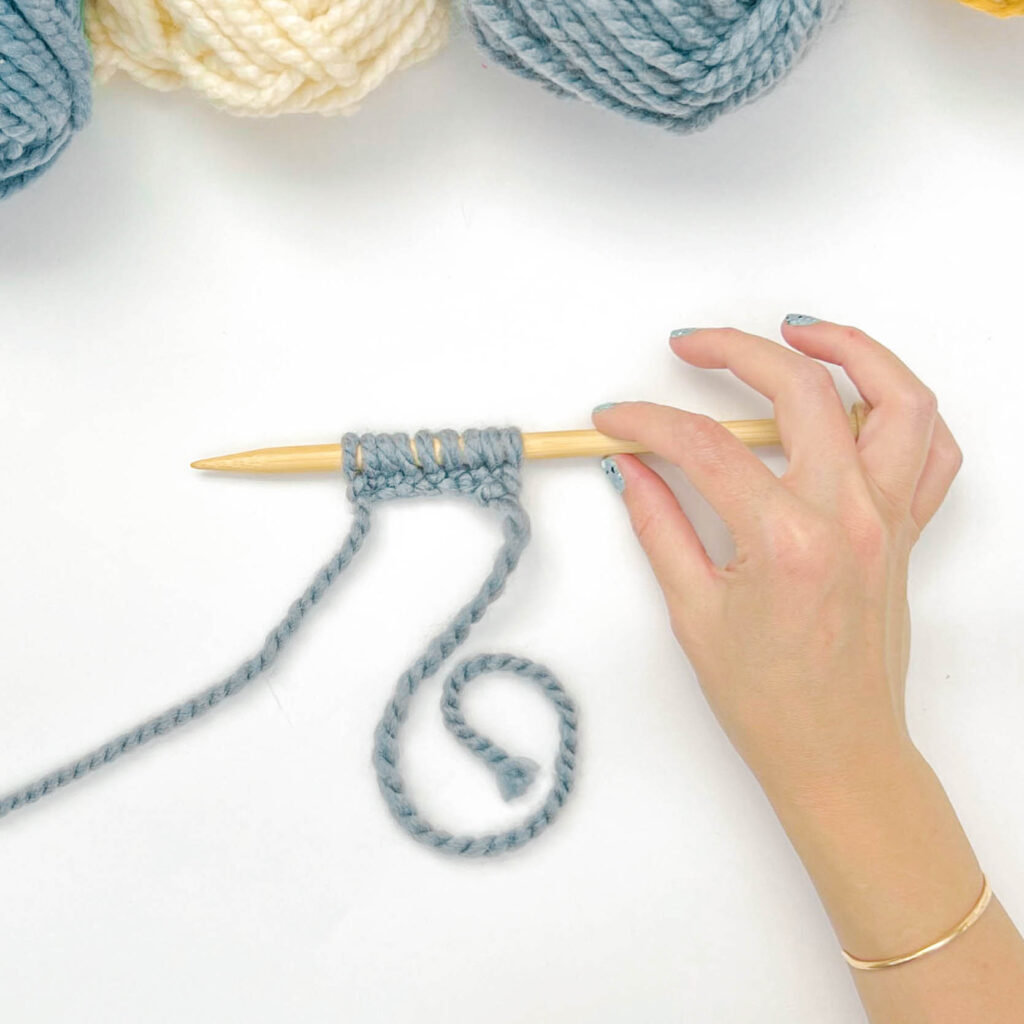
Before you work a knit cast on, you’ll need to put a slip knot on your left-hand needle. Remember, the slip knot also counts as your first stitch and should be included in the final number of cast on stitches before starting your project. For example, if a pattern asks you to “cast on five stitches” then you count the slip knot as stitch #1 of 5.
Learn how to make a slip knot here!
As a new knitter, you can use your index fingers to pin the stitches on either needle while you work your stitches. Don’t be afraid to hold the stitches onto the needles using your fingertip while wrapping the yarn, or pulling loops through existing stitches. It’s a handy trick that can ensure the stitches don’t accidentally slip off while you’re working!
Eventually, you may want to practice making new stitches without using your index fingers. Learning how to knit with the fewest movements and motions (including using your index fingers) will make you faster in the long run. However! Feel free to use your fingers to keep the stitches safely on your needles as you learn the basics.
Note: This tutorial was written for right-handed knitters. If you’re a left-handed knitter you can follow the same instructions, however, you’ll need to replace “right needle” with “left needle” for all steps.
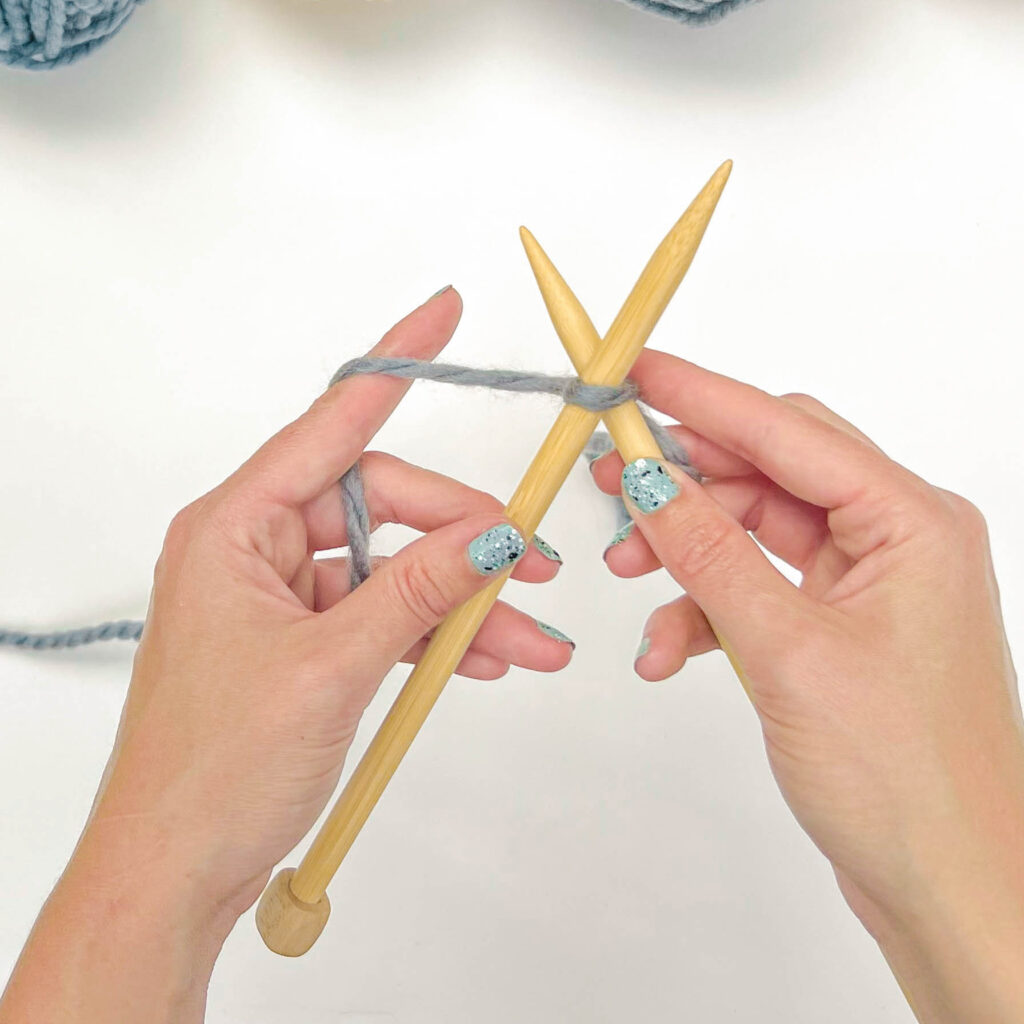
Step 1:
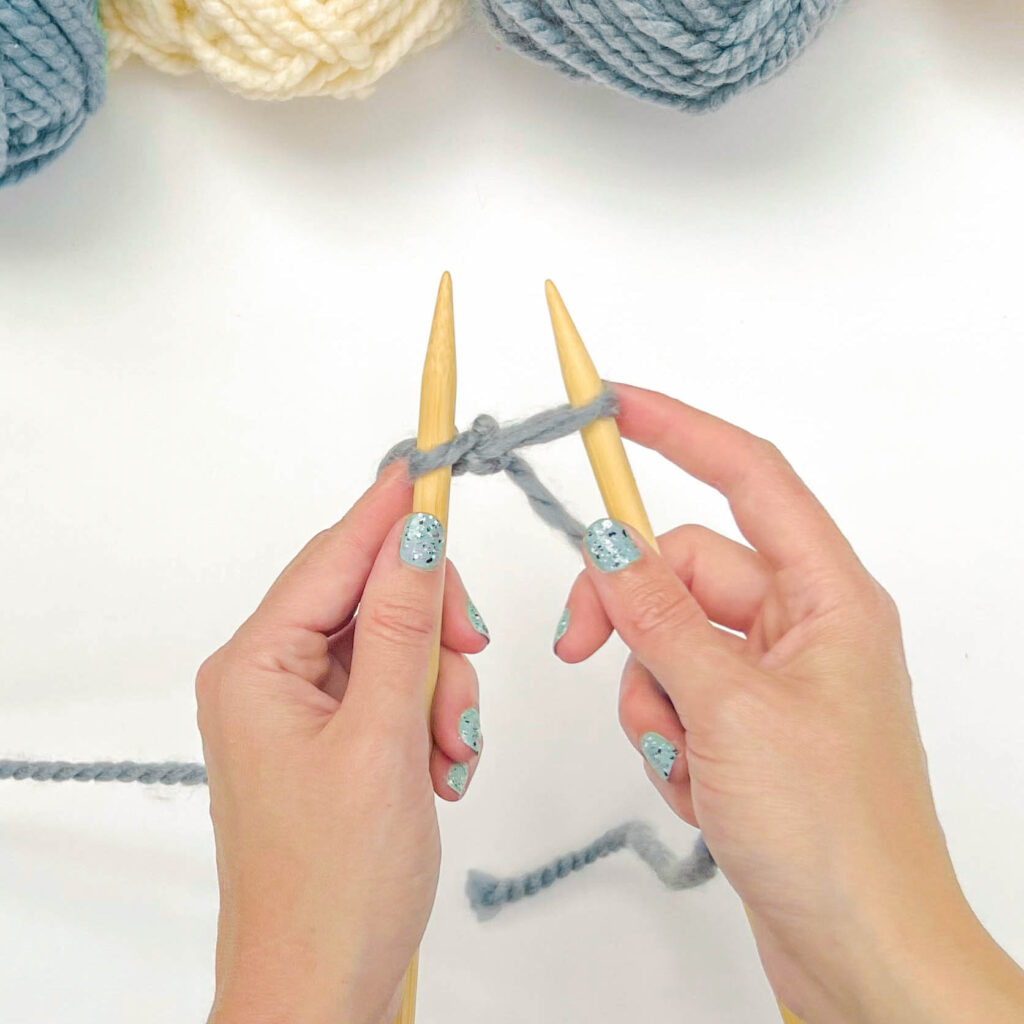
Insert your right needle into the stitch on your left-hand needle, upward through the front leg. This is the same motion used in the knit stitch. (You can find our full knit stitch tutorial here!)
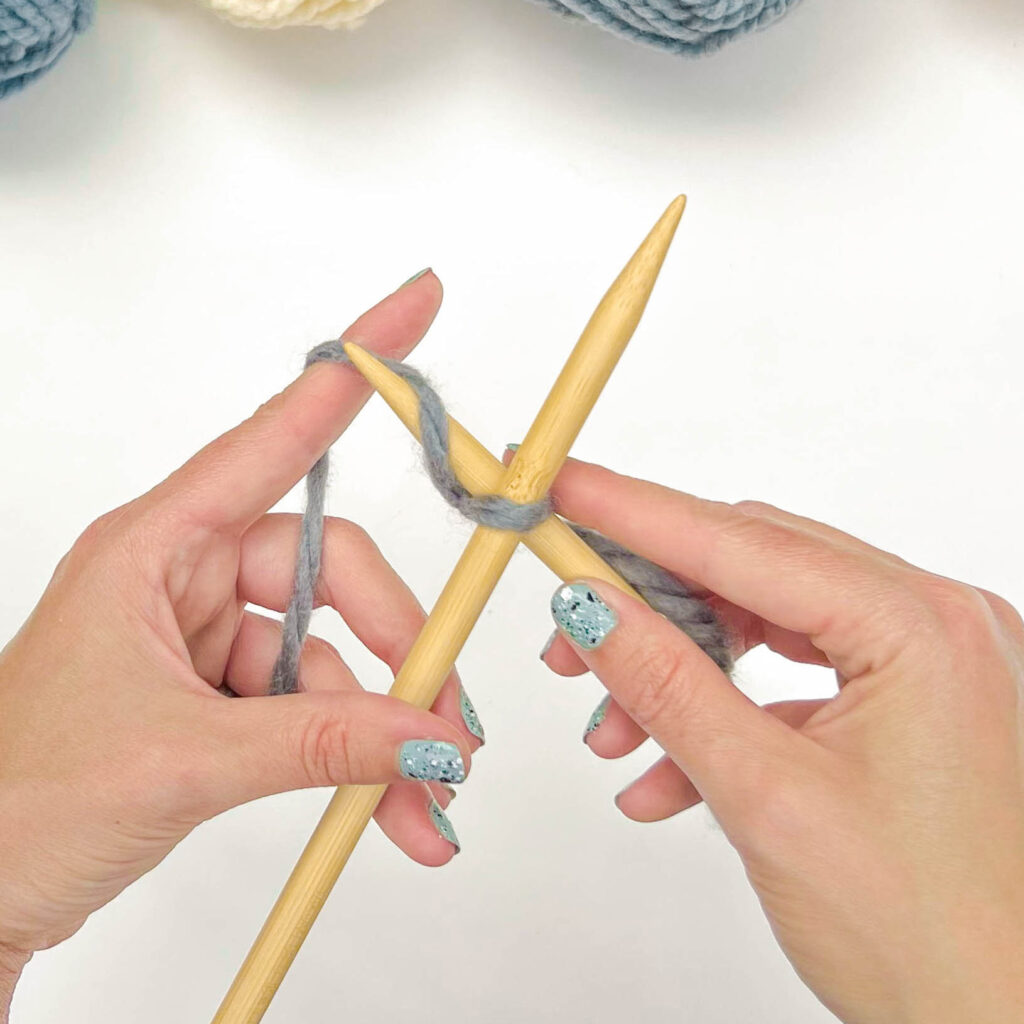
Step 2:
Loop the yarn around the right needle by wrapping the yarn up and over, counter-clockwise.
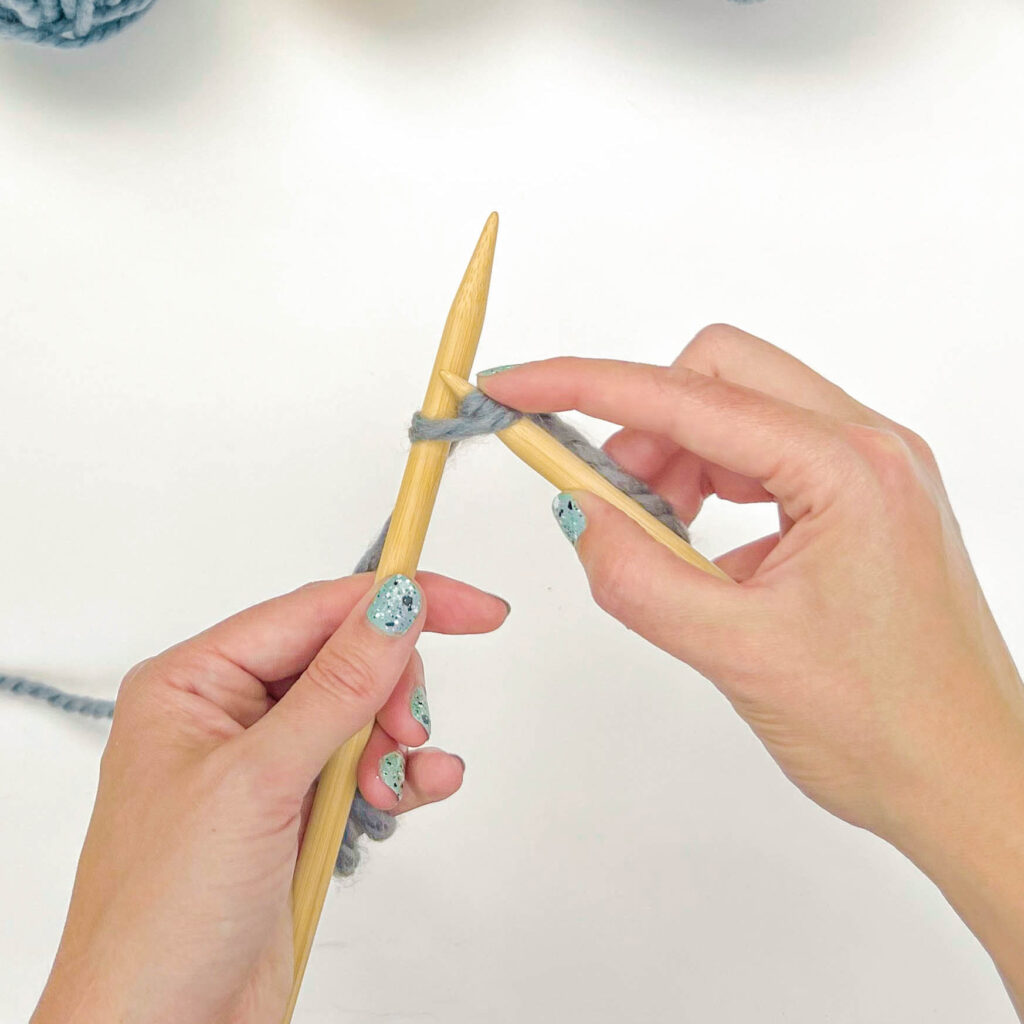
Step 3:
Gently pull the yarn through the stitch by pivoting your right-hand needle down through the loop.
Tip: Make sure to make the loop large enough to work the next step. It’s easier to make a larger loop and tighten it to rest on the needle properly than trying to loosen a loop of yarn that’s too tight to begin with!

Step 4:
Run the tip of your left needle up under the loop, along the barrel of the knitting needle…

… until the new loop is resting fully on the left-hand needle.
Step 5:
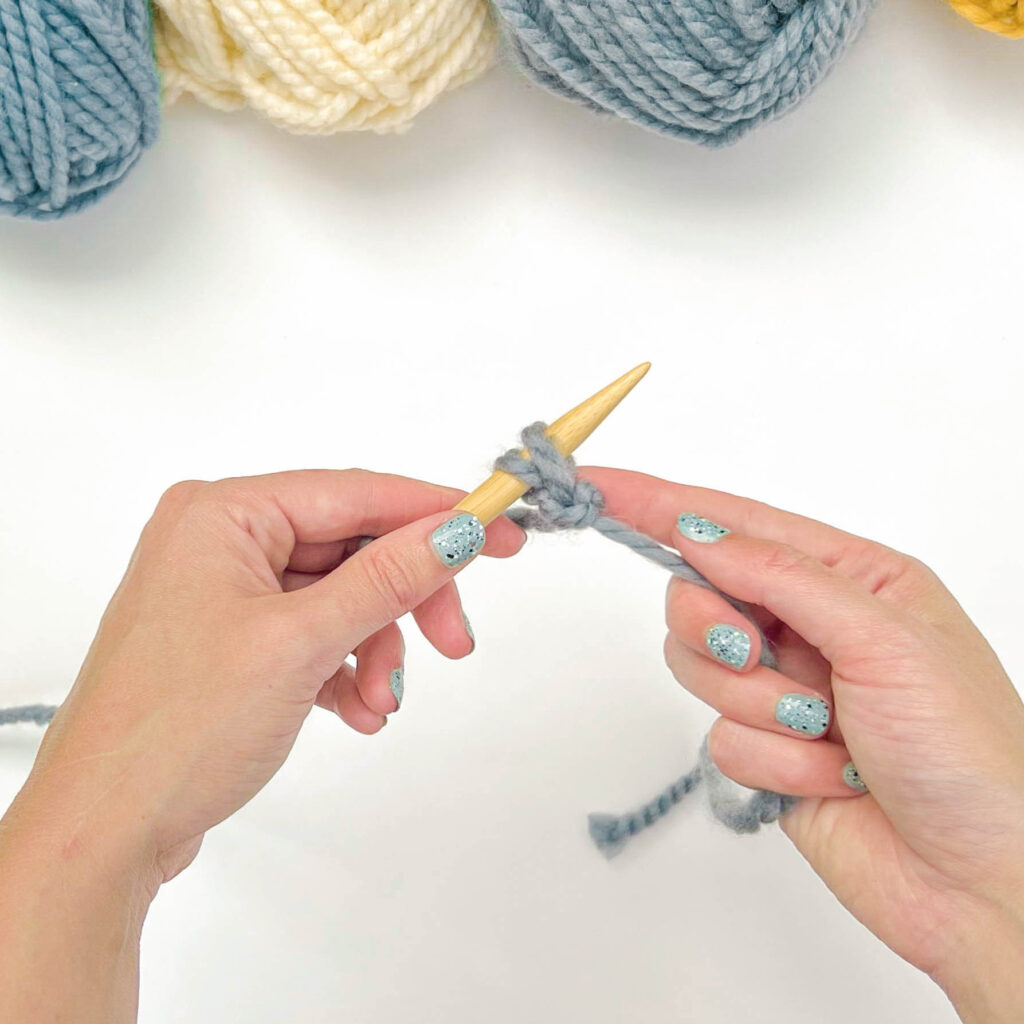
Slip the right needle out of your new stitch. If needed, tug the yarn strand to tighten the stitch so it’s gently resting against your needle.
You now have two stitches on the left needle.
Repeat steps 1 – 5
Repeat steps 1-5 until you have cast on the number of stitches you need.
The knitted cast on is the best way to add stitches in the middle or beginning of a row in an in-progress project. Most bottom-up sweater patterns will call for stitches to be added for the underarms in sleeves, or when you’re joining the two front shoulder pieces in a top-down sweater before knitting the rest of the body. You’ll see this in quite a few patterns which makes this tutorial a great one to know whether you’re working on beginner-level patterns or more advanced projects.
Practice makes perfect! While blocking your project can help even out any wobbly edges, casting on with consistency is key to creating a perfect edge. The tightness of your yarn strand is called “tension”, and is an important part of forming the perfect stitch.
Each cast on stitch should be tight enough that it’s touching the needle but not so tight that the fibers look stretched. A stitch that is too tight on the needle will be hard to work on the next row, and one that is too loose might not look smooth and even on your finished edge. It’s worth practicing until it looks just right!


