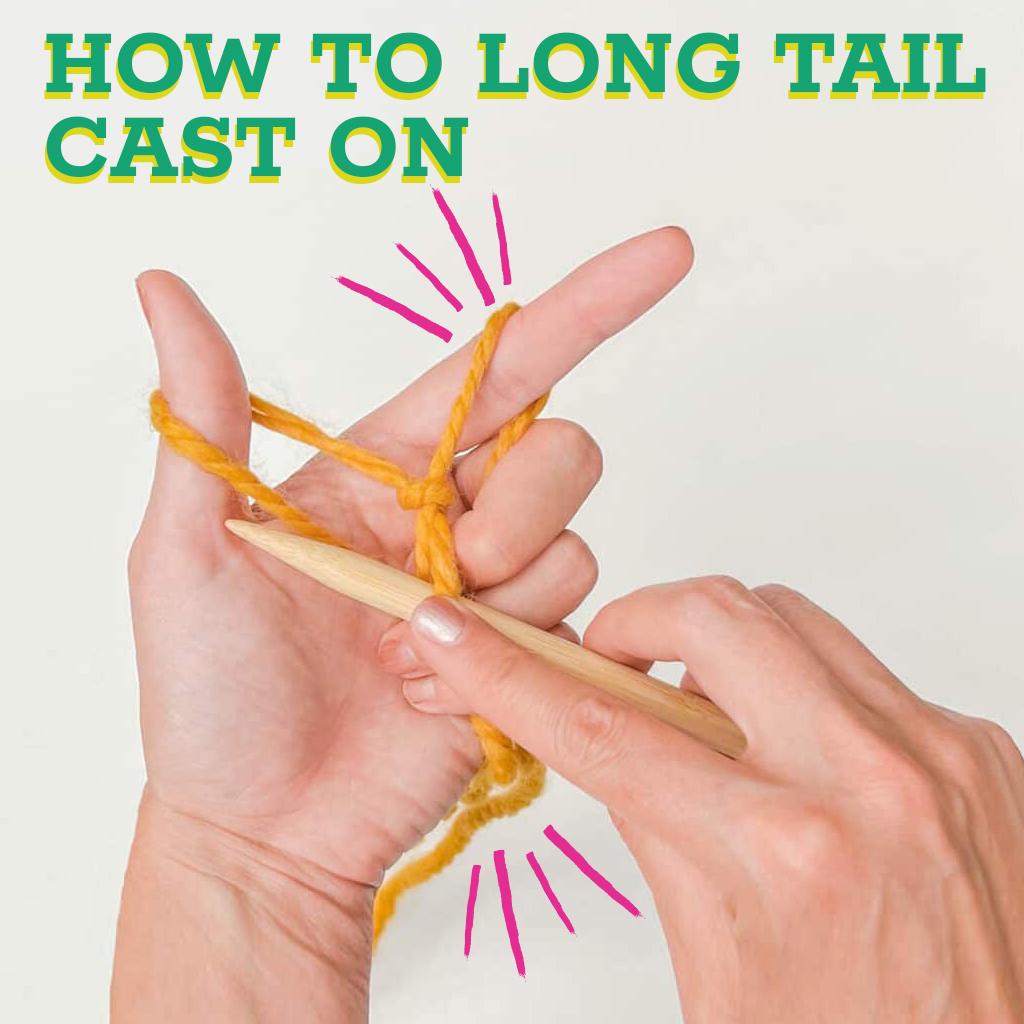
Long Tail Cast On
Many knitters swear by this strechy, sturdy cast on!
Many knitters swear by this strechy, sturdy cast on!
The long tail cast on knitting technique is one of the most useful ways to cast on stitches for a new project! Sometimes spelled “longtail cast on”, this knitting technique for getting your stitches onto your needles is well-known for being incredibly sturdy and elastic!
It is a great all-purpose cast on method. In fact, many knitters use this cast on as their “default” method because it is reliable and it creates a clean, beautiful edge when done correctly.
In this article, we’ll show you step-by-step instructions for casting on stitches. It may be tricky at first, but after practicing a few times, you’ll get the hang of it!
The long tail cast on is flexible and is one of the stretchier cast on techniques. That means this cast on is particularly useful for knits that need to stretch to fit like hat brims, sweater necks, and sock cuffs.
We prefer using a long tail cast on for projects that have a small to medium number of stitches. Because you have to measure out a yarn tail at the very beginning, if you’re casting on a large number of stitches (a large lace weight shawl, for example) it may be hard to guess the right amount of yarn needed and you may need to undo your cast on if you run out of yarn. Luckily, it’s easy peasy to redo a cast on row!
The long tail cast on is a great one to learn early on but is not the easiest method. In order to get comfortable with the new steps and motions try practicing just casting on for a while without starting a project.
We would call this a slightly advanced beginner technique simply because of the unfamiliar hand motions. It might take a few tries and extra practice to get right, but it’s well worth the effort.
If this tutorial feels a little bit too advanced, check out our beginner-friendly backward loop cast on tutorial.

Don’t you just hate when yarn slips off your knitting needles?
Introducing BeKnitting’s Set of 9 Straight Bamboo Knitting Needles! Sleek, sturdy, and slip-proof, these needles will give you the smoothest knitting experience ever.
Find them on Amazon!
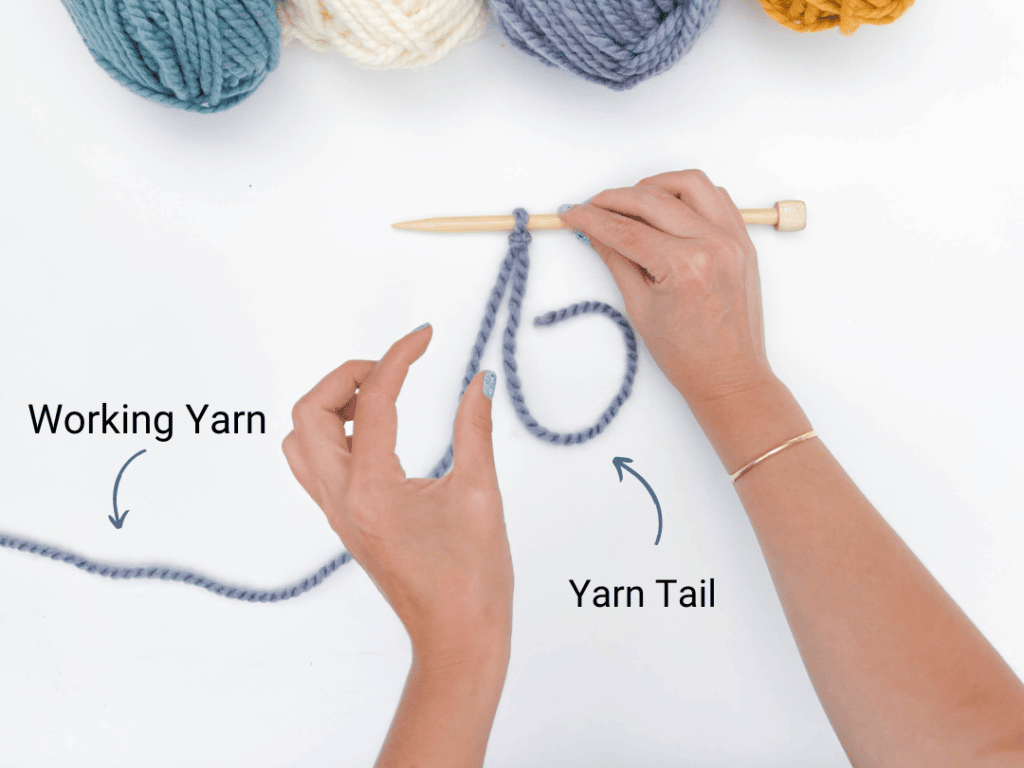
When you tie a slip knot to begin casting on, you’ll have two lengths of yarn coming out of the knot: a yarn tail and the working yarn strand.
The yarn tail is the cut end of your yarn. The working yarn is the piece that connects to your yarn ball.
As the name may imply, you will need to leave a “long tail” to work this cast on. Unlike other beginner methods, you will use both your working yarn and the long yarn tail to create stitches.
In this case, we recommend leaving a tail that is roughly three times the width of your finished cast on dimensions plus about 6” extra for weaving in at the end.
Example: A 6″ finished dishcloth needs 18” yarn pulled out plus 6” extra for a total of 24″ yarn tail length.
Before you work a long tail cast on, you’ll need to put a slip knot on your right-hand needle. Learn how to make a slip knot here!
Note: This tutorial was written for right-handed knitters. If you’re a left-handed knitter, you can follow the same instructions. However, you’ll need to replace “right needle/hand” with “left needle/hand” for all steps.
STEP 1
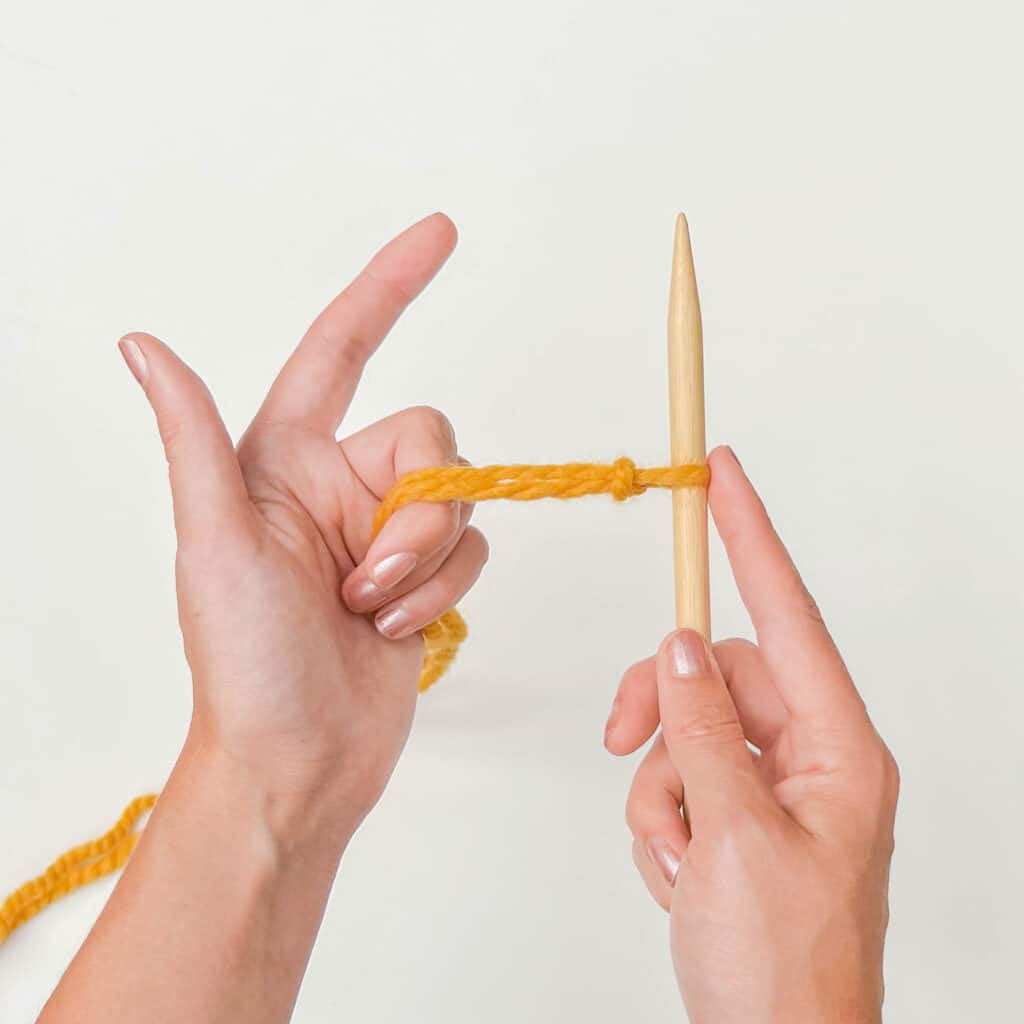
After you’ve measured your yarn tail and placed the slip knot on your needle, hold the yarn tail towards the front and the working yarn in the back. Grip both yarn strands in your left hand.
Tip: You can either grasp the yarn in your closed fist or wrap the strands around your pinky finger for extra tension.
STEP 2
Use your left index finger and thumb to spread the yarn strands apart.
The working yarn should be on your left index finger and angled towards the back of your needle, while the left thumb should be touching the yarn tail and angled towards the front of the needle.
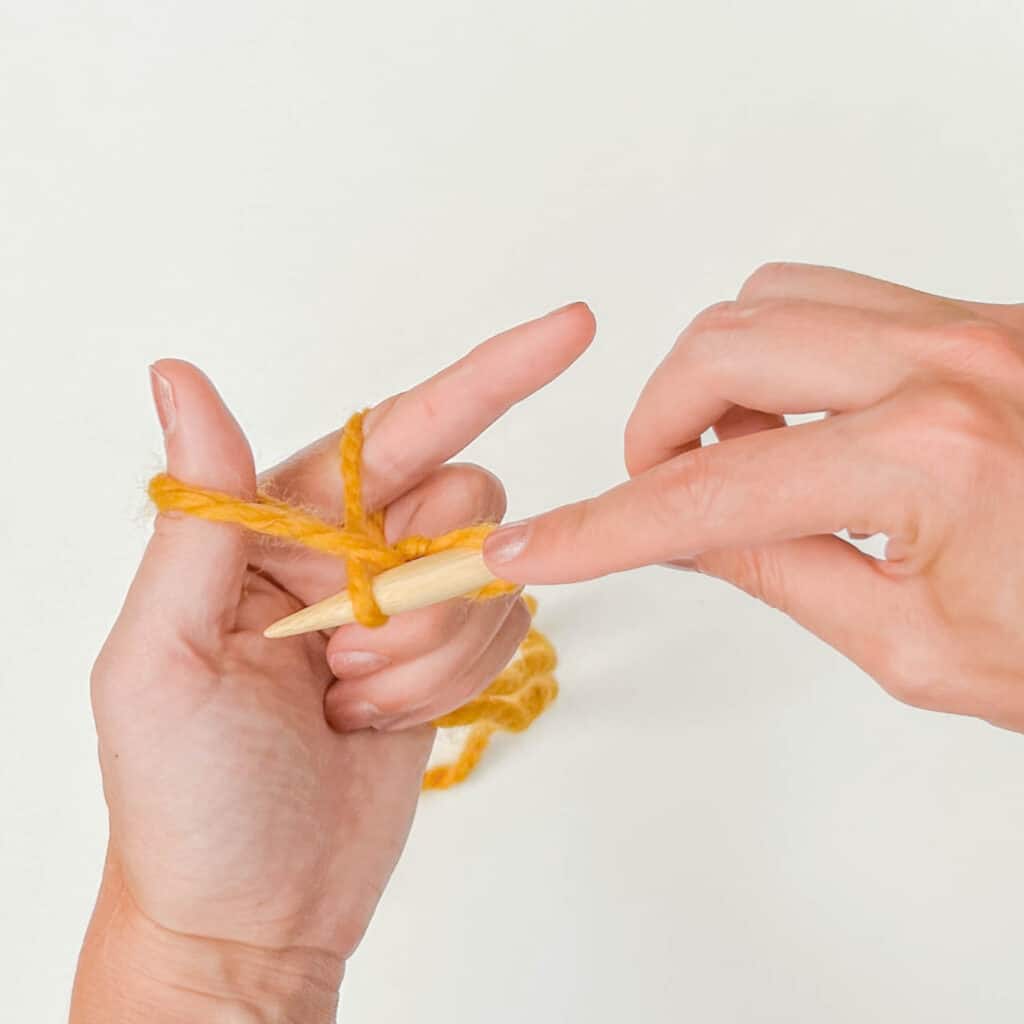
STEP 3
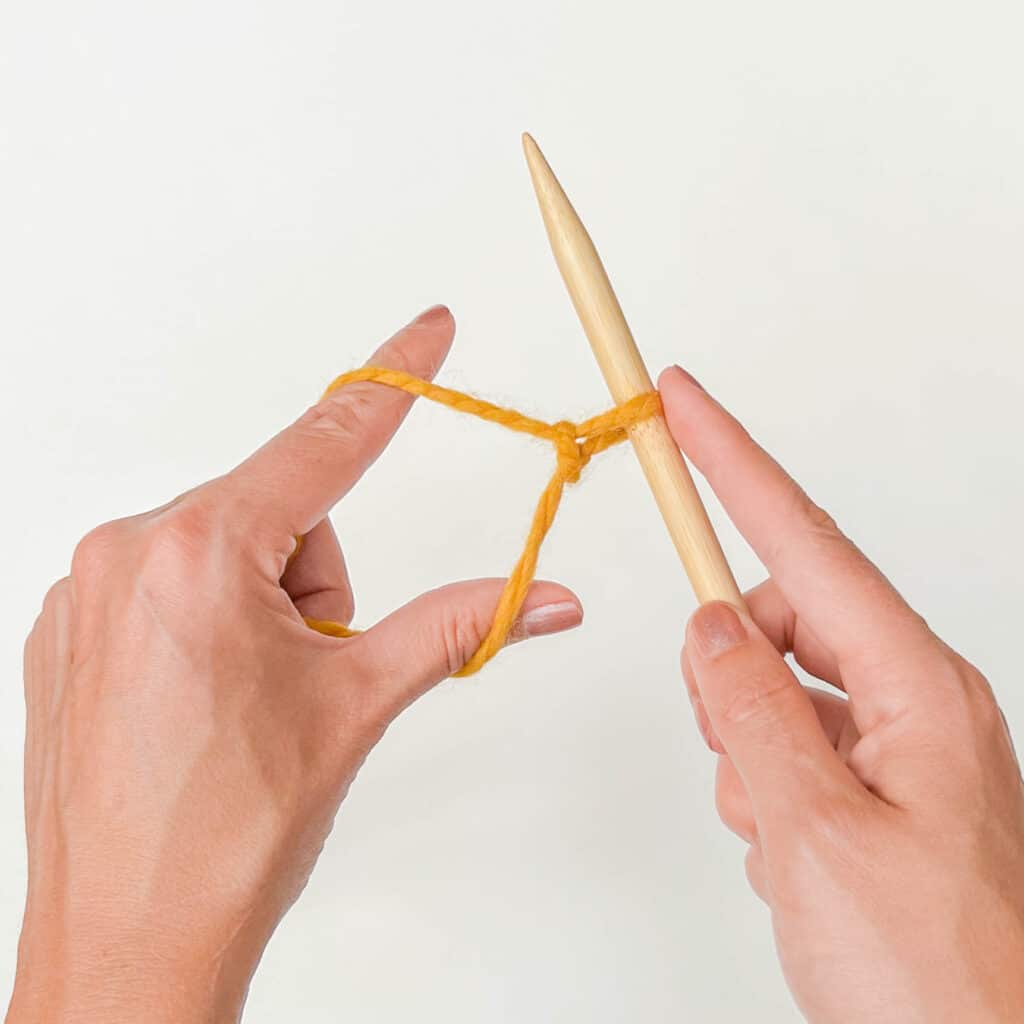
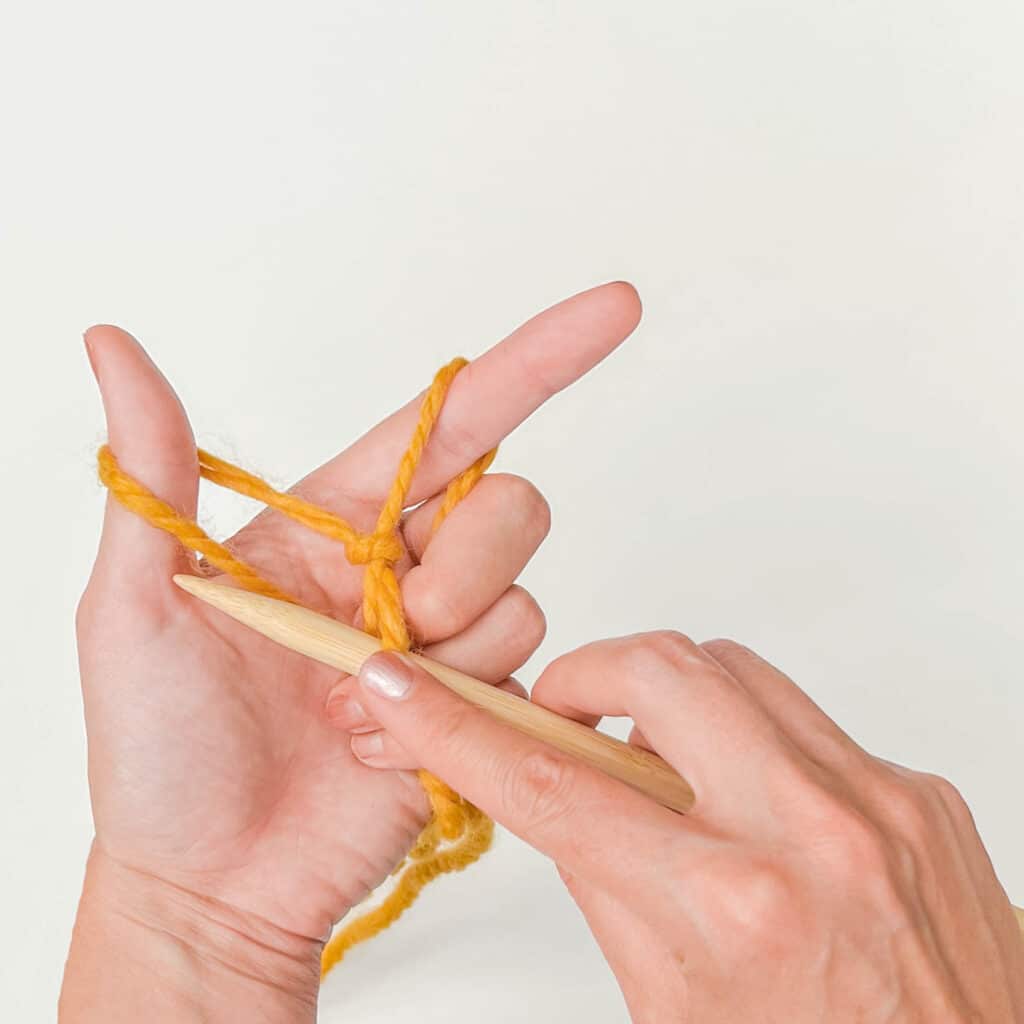
Turn your left hand towards you so that you can see your palm. Use your right hand to point the tip of your knitting needle down to the base of your left thumb.
STEP 4
Slide the needle up under the loop on your left thumb…
…until the tip of the needle touches the middle of your left hand’s index finger.
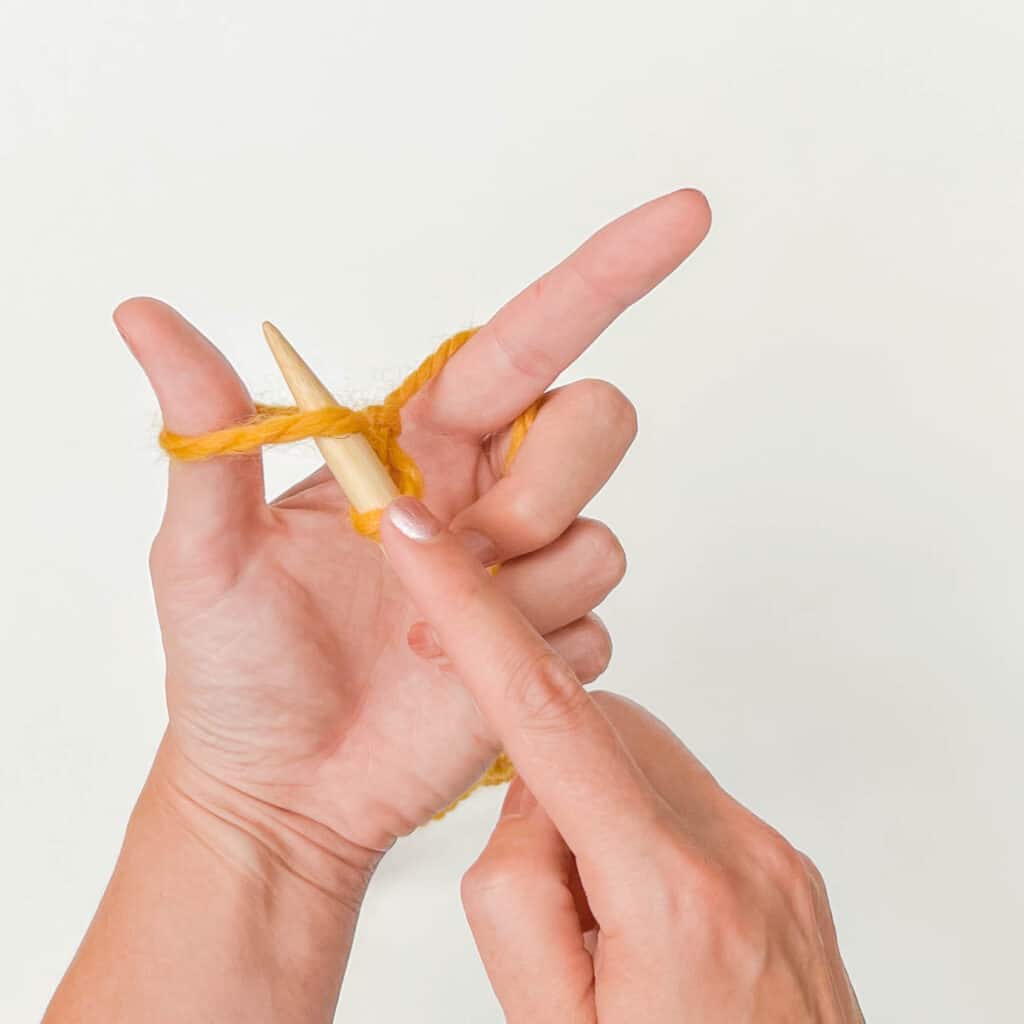
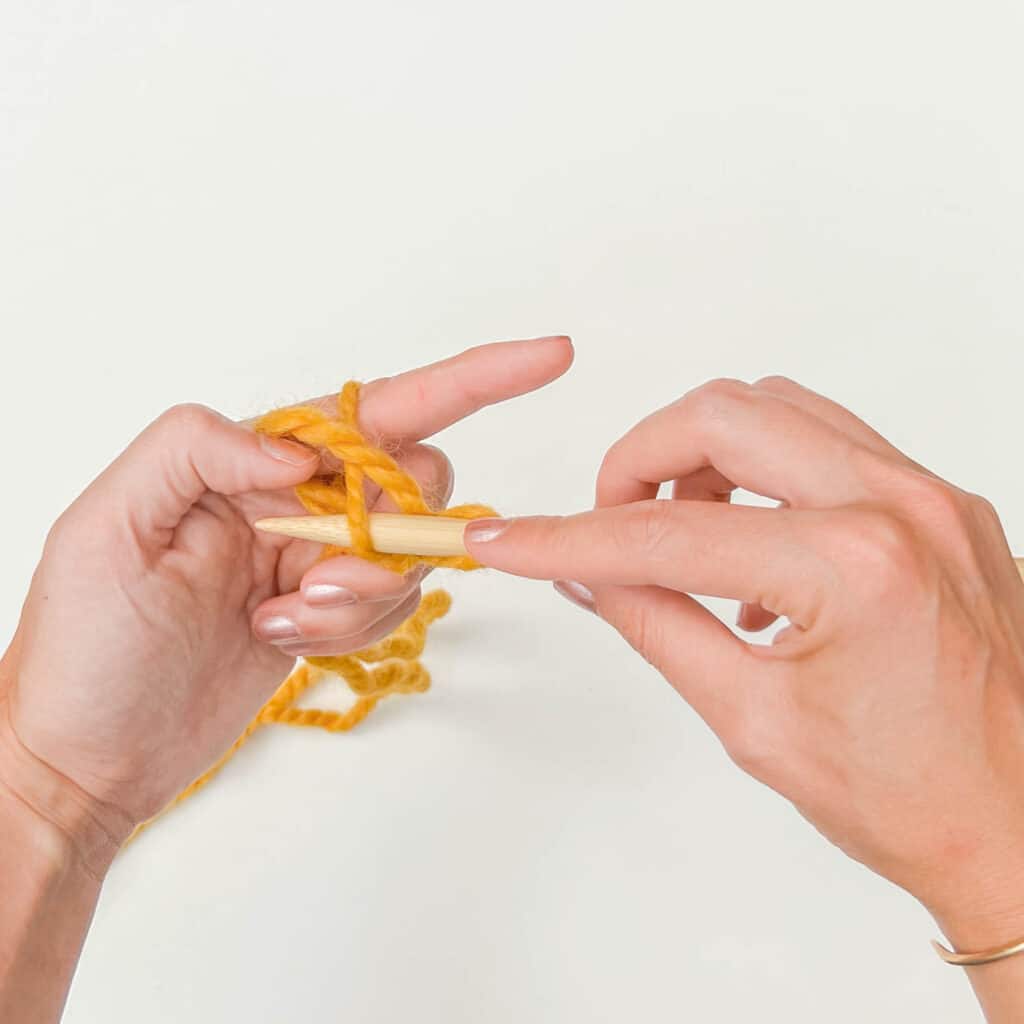
STEP 5
Slide the needle down, following the length of your index finger, behind the yarn strand anchored there.
Use the needle tip to hook the strand and pull it down under the loop that’s on your left thumb.
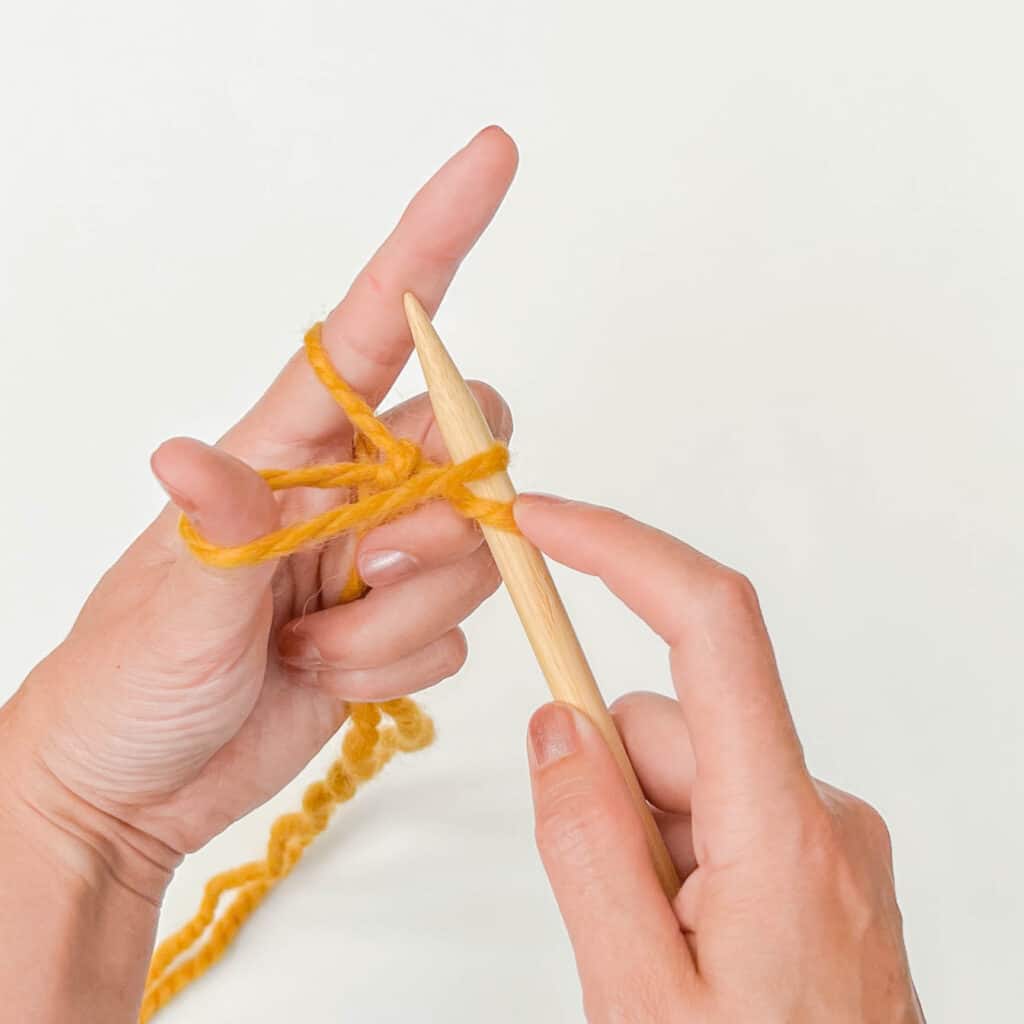
STEP 6
Slip that loop off the back of your left thumb. Gripping the rest of the yarn in your left hand still, pull the needle away with your right hand.
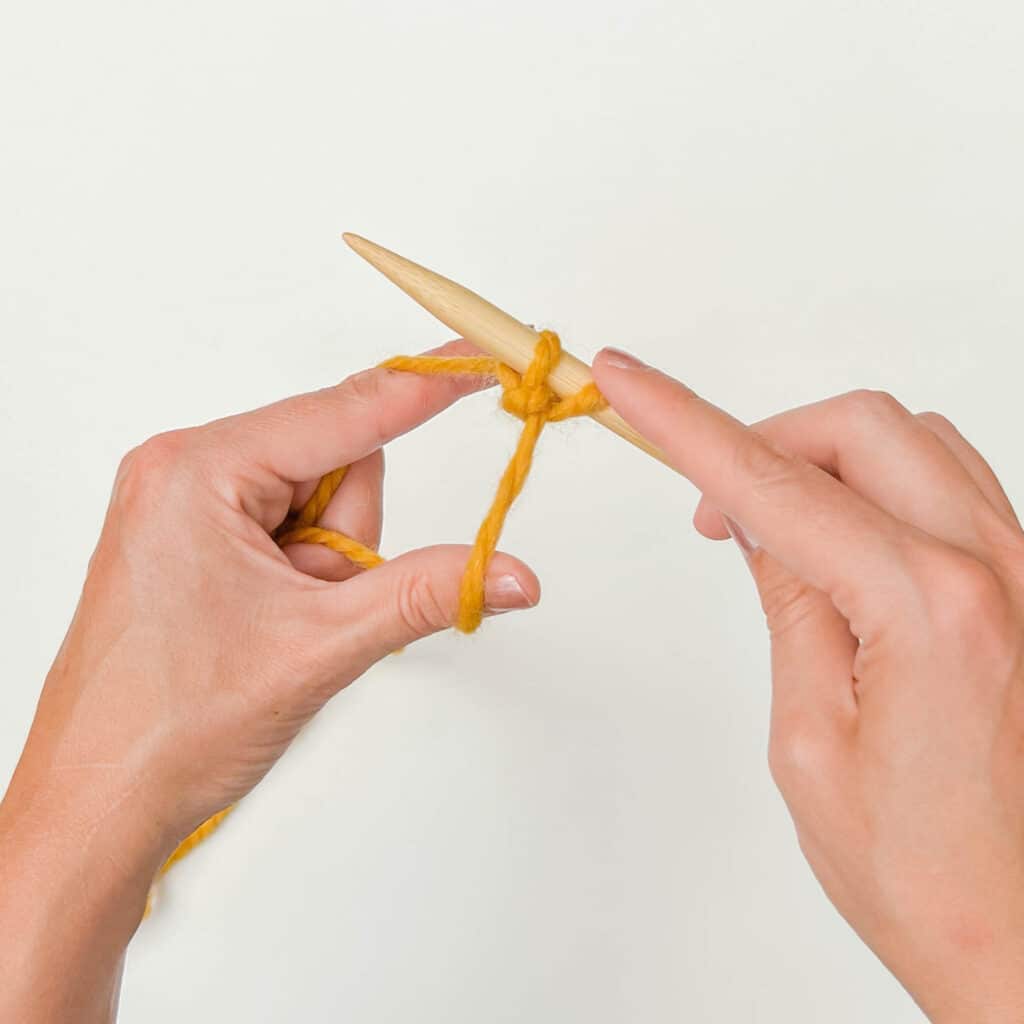
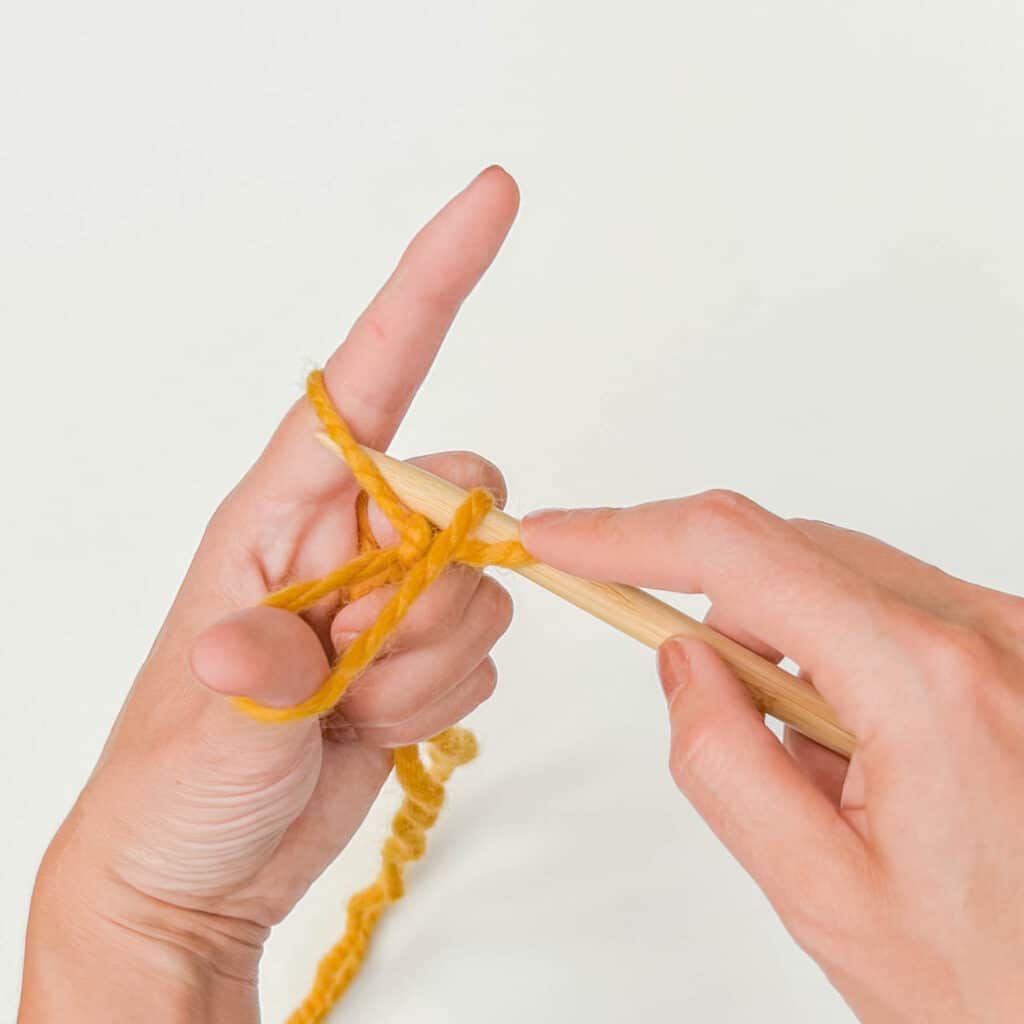
STEP 7
Re-insert your thumb between the working yarn and yarn tail to create the diamond-shaped from Step 1. At the same time, use the back of your thumb to gently pull the new cast on loop snug against the knitting needle.
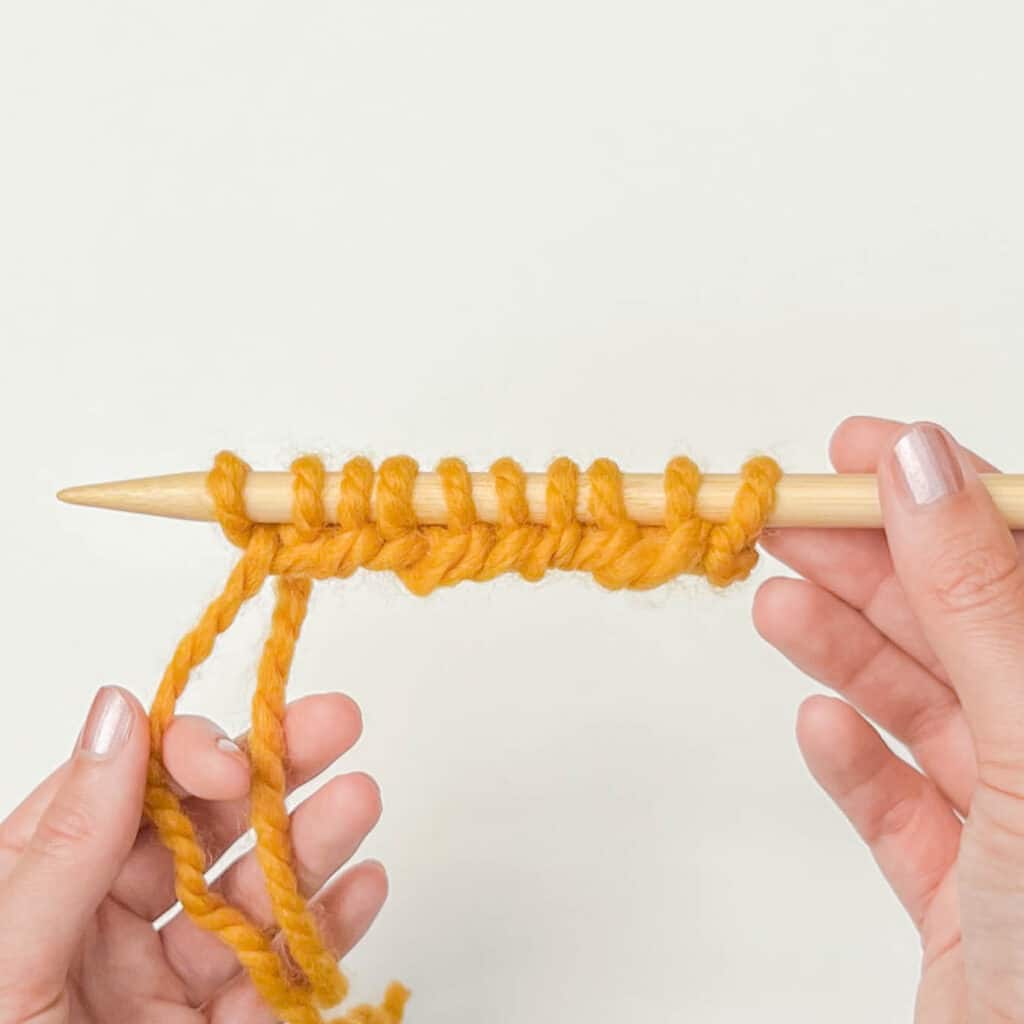
REPEAT
Repeat steps 4-6 for the desired number of stitches called for in your pattern.
Remember to count your slip knot as a stitch too!
We’ve condensed the steps above into a text-only set of instructions to make it easy to practice the long tail cast on! Use the steps below for a quick refresher on each step. Note: This tutorial was written for right-handed knitters.
Get Started: Measure out your yarn tail using the instructions above. Then attach your yarn to your knitting needle using a slip knot.
Step 1: Hold the slip knot steady on the needle with your right index finger. Grip the yarn strands in your left hand between your middle and third fingers or in your closed fist (whatever is comfortable). This adds tension by anchoring them so that they are taut.
Step 2: Insert your left-hand pointer finger and thumb between the working yarn and the yarn tail. Use them to create a diamond-shaped opening between the yarn strands — your index finger should be pushing against the working yarn toward the back of the needle, while the thumb should be pushing against the yarn tail end toward the front of the needle.
Step 3: Keep your right index finger pinning the slip knot on the knitting needle, and turn your left hand so that the palm is facing you.
Step 4: Point the tip of your knitting needle down to the base of your left palm, and bring it up, tracing your thumb, so the needle goes under and through the loop around your thumb.
Step 5: From there, bring the needle up towards the tip of your left index finger. Move the needle tip back down, between the yarn strands wrapped around the back of your index finger. Hook the front strand with your needle tip and bring the strand down through the thumb loop.
Step 6: Drop the loop off your left thumb, then “catch” the yarn tail strand with your thumb again (as in Step 2) and use it to gently pull the new cast on loop closed against the knitting needle.
Repeat steps 4-6 for the desired number of stitches called for in your pattern! As you cast on more stitches, make sure to keep the strands taught and even.
We’ve definitely had this happen to us too… many, many times. The rough estimate for how much yarn you need (see About Yarn Tails section above!) is just that: an estimate. Here are a few tips to avoid running out of yarn when doing the long tail cast on:
This is the time when practicing your long tail cast on technique before starting a full project pays off! Practicing is a great way to learn how much yarn you tend to use during the long tail cast on. We’re all a little different, and those differences can add up to either having enough yarn or not.
Each cast on stitch should be tight enough to touch the needle but not so tight that the fibers look stretched. A stitch that is too tight on the needle will be hard to work on the next row, and one that is too loose might not look smooth and even on your finished edge.
You will hear us say it a million times, but practice makes perfect! The tightness of your yarn strand is called “tension” and is an important part of forming the perfect stitch. Casting on with consistent tension is the key to creating a perfect edge.
For the long tail cast on technique, you can either grasp both strands in a closed fist in step 1 or wrap them around your pinky finger before closing the rest of your fingers around the strands for more control.


