Yarn Over
Yarn overs add stitches and create eyelets!
Yarn overs add stitches and create eyelets!

Yarning over creates a new stitch while leaving a hole or eyelet in the finished fabric. They’re quick to do and are most often used in lace patterns to create an open, airy texture. A yarn over can also happen by accident! Sometimes the yarn is looped over a needle creating surprise holes in your work and more stitches on your needles than you started with.
Today we’ll show you how to make a yarn over in knitting, how to spot an accidental one, and how to fix them when they happen.
Yarning over happens when you loop the yarn up and over your working needle between stitches. This creates an extra loop on your needles and a hole or eyelet in the fabric.
This technique is used in two ways: to increase the number of stitches on your needles while also leaving an open space in your fabric. These open spaces can be stacked in decorative patterns in lace or mesh stitch patterns. You’ll find them in all sorts of patterns, so it’s a great technique to learn as a beginner knitter.
Learning how to yarn over in knitting is easy! This technique is so easy, in fact, that it can happen accidentally. Skip to the second half of this tutorial to see how to fix your work when you’ve been yarning over when you didn’t mean to.
Note: This tutorial’s photos demonstrate this technique as a right-handed knitter. For left-handed knitters simple mirror the actions using the needle in your left hand as the “working needle”.
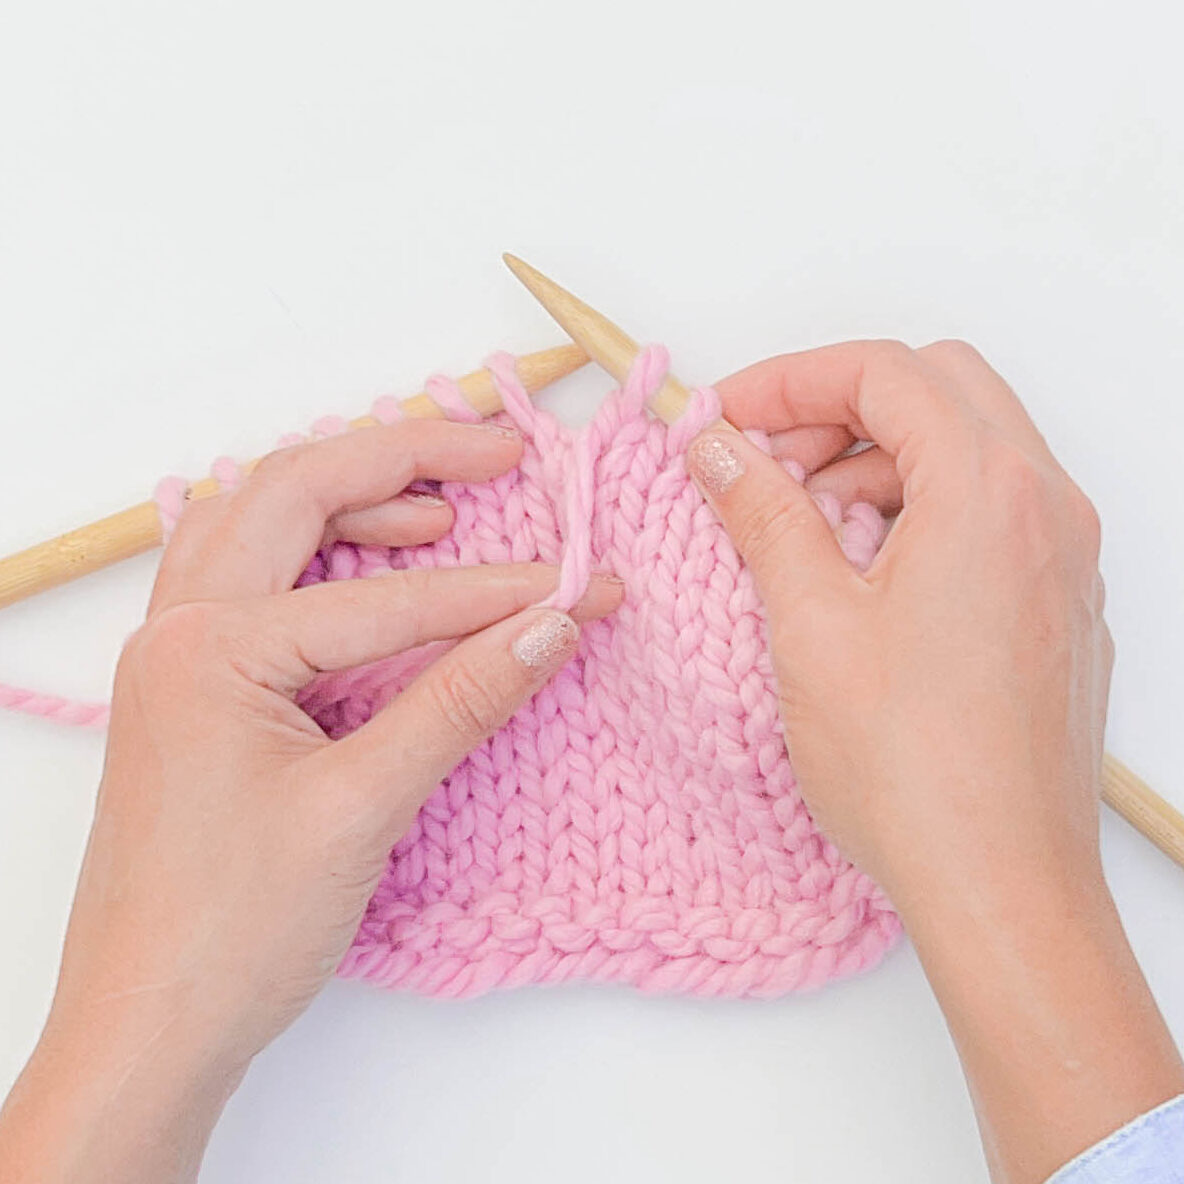
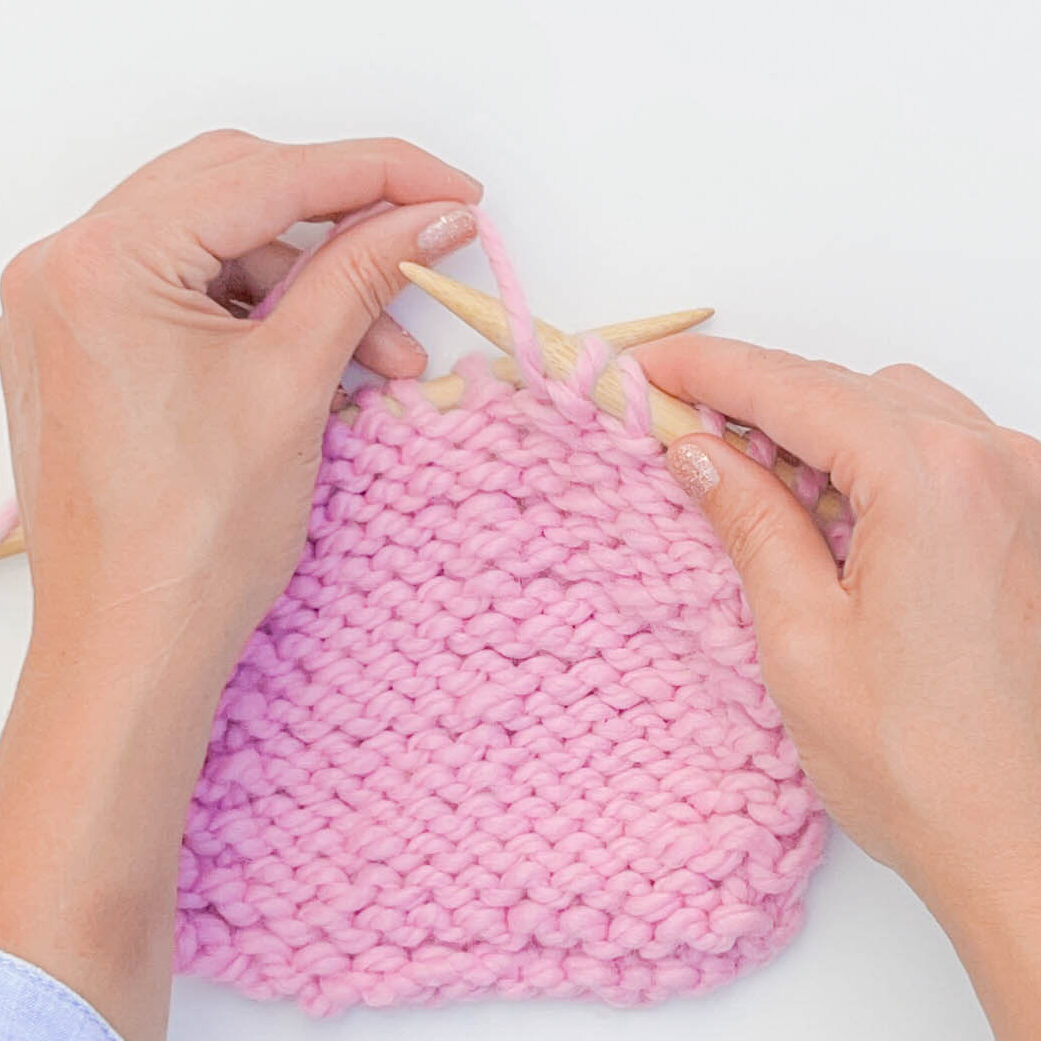
Step 1:
Bring the working yarn from the back of your work to the front by bringing it between your needles.
Step 2:
Wrap the yarn over the top of the right needle, bringing it to the back of your work.
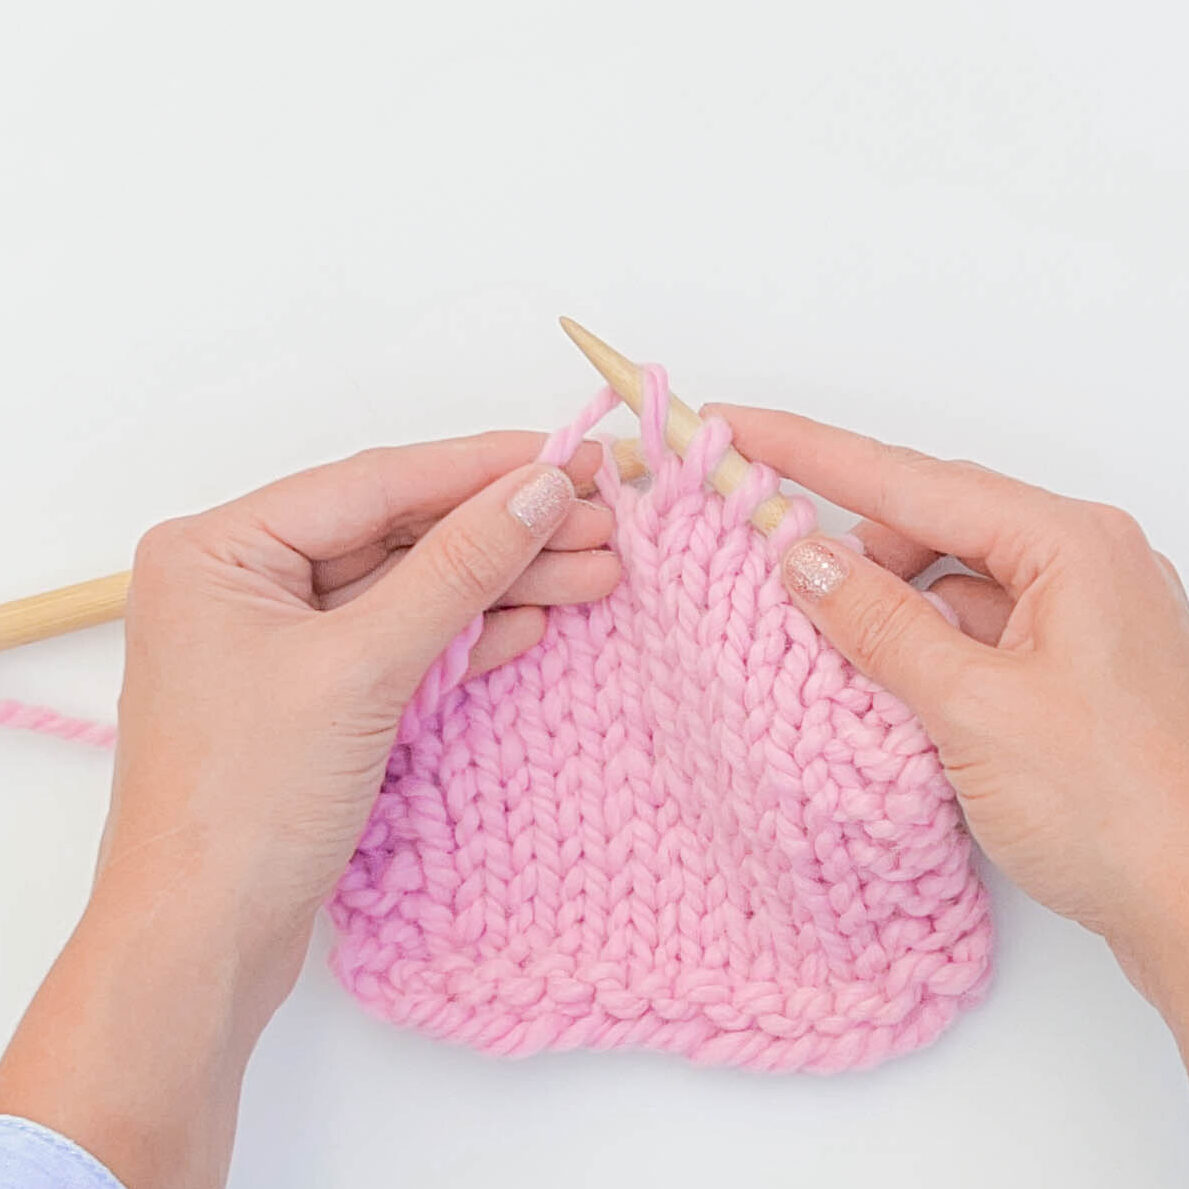
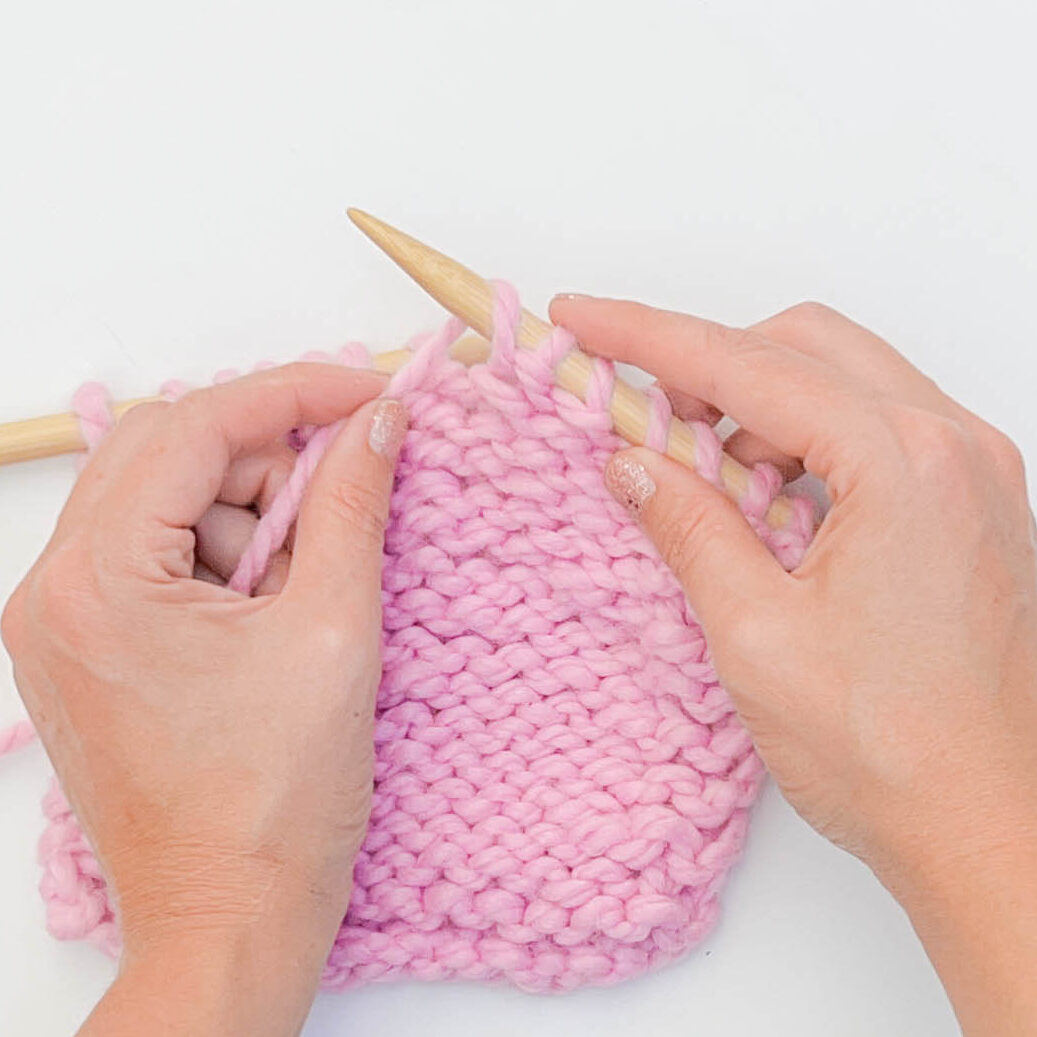
Step 3:
Knit the next stitch as usual.
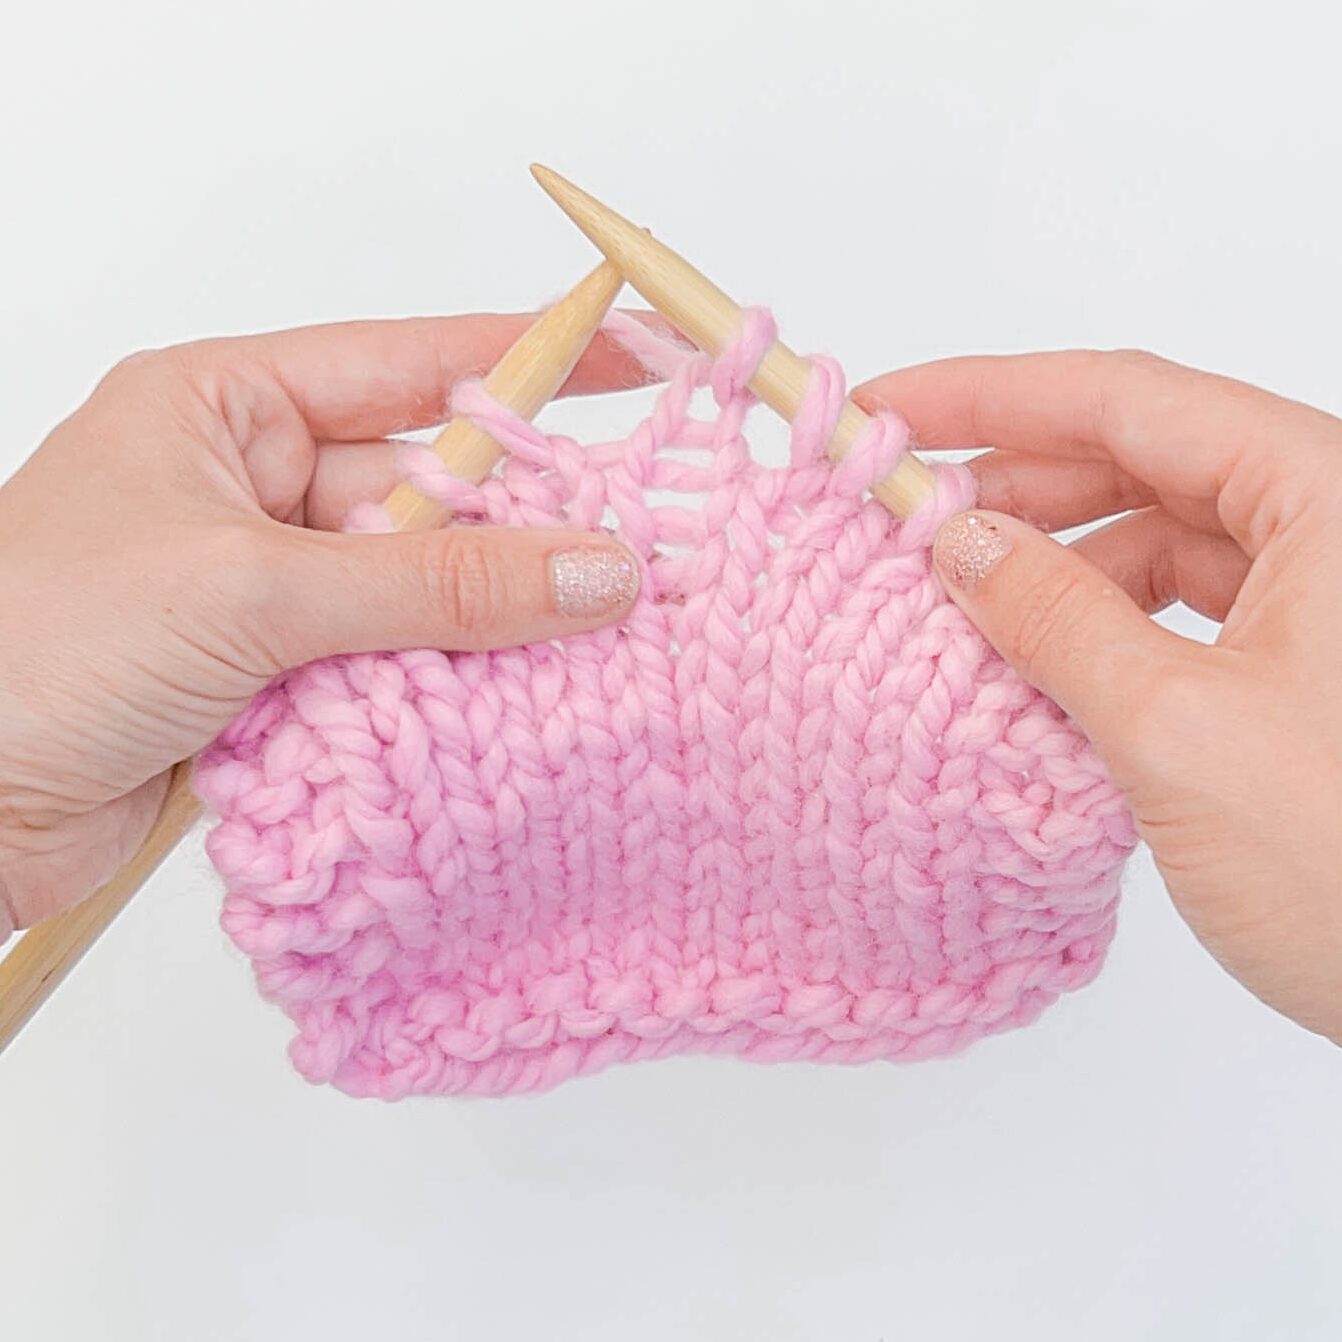
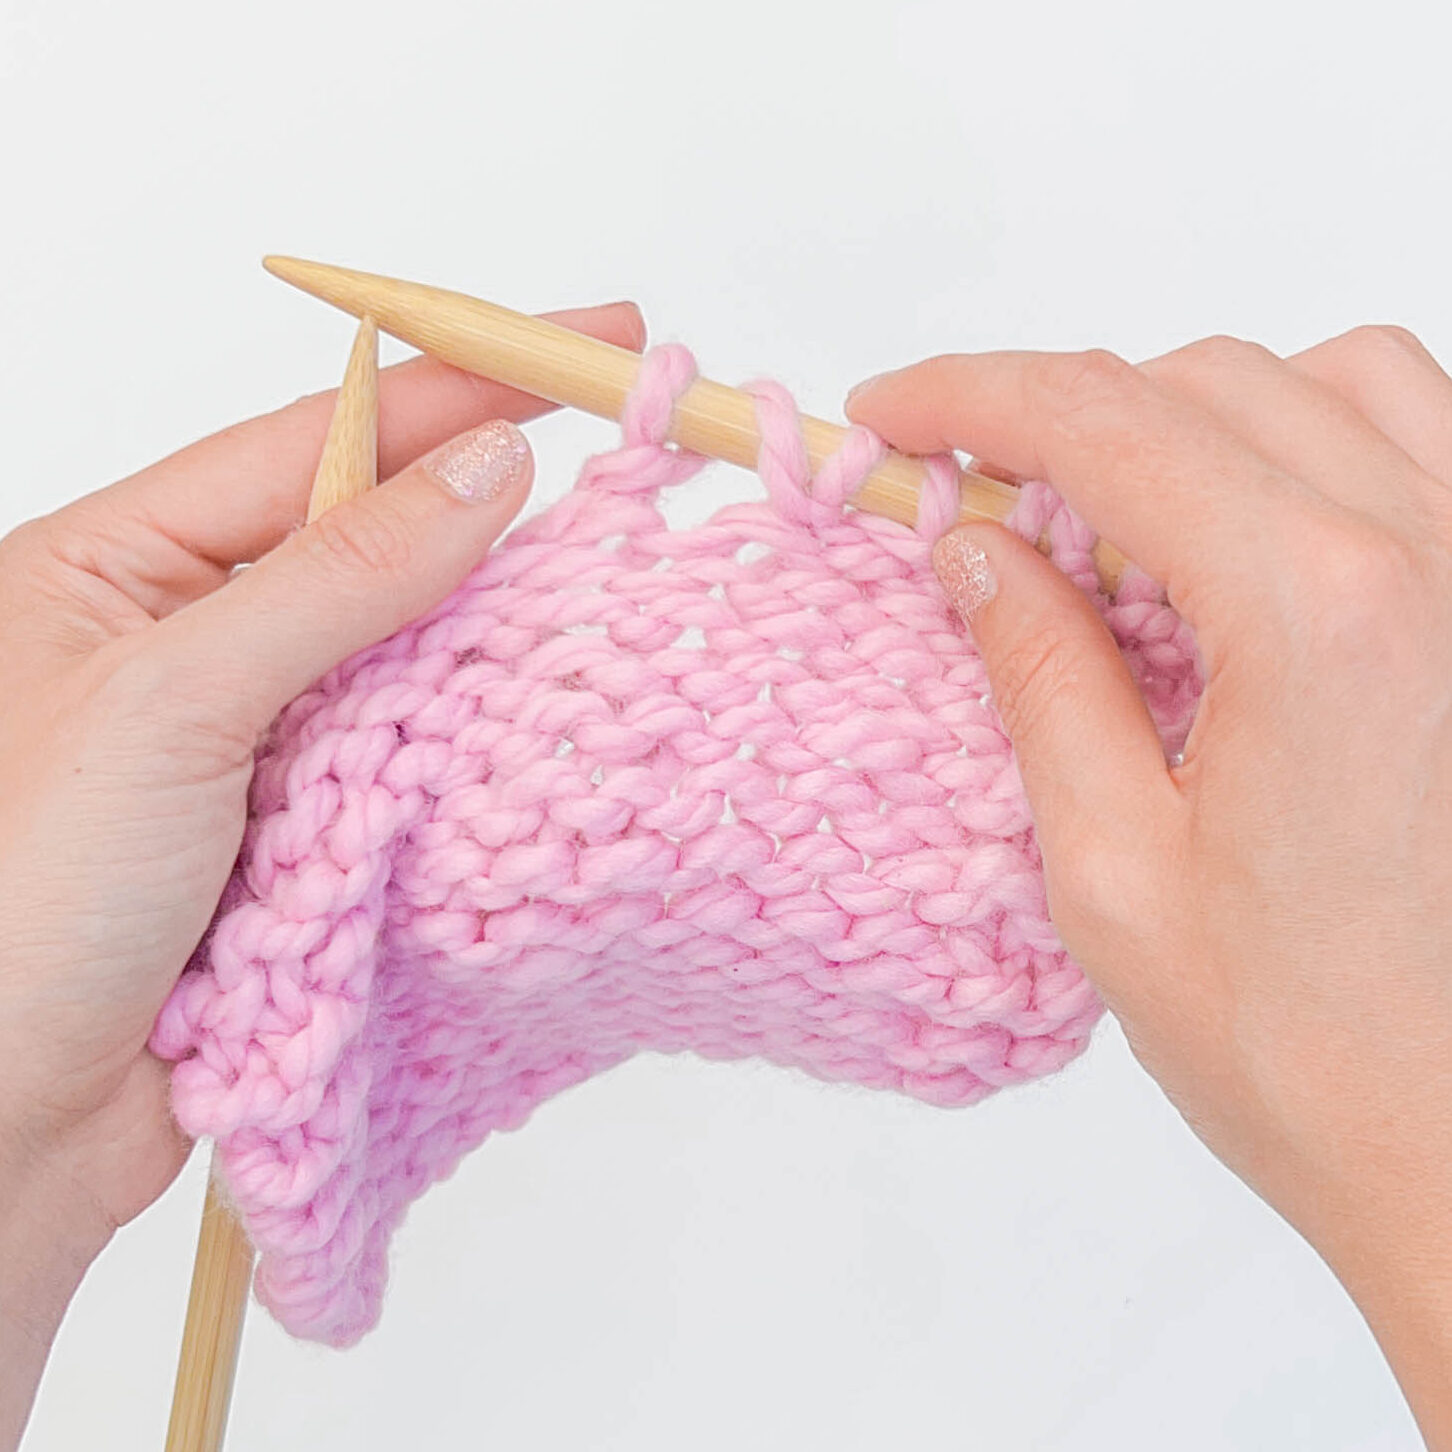
Step 4:
On the next row, work the yarn over loop as a normal stitch! Here you can see the eyelet/hole left in the fabric from the yarn over.
Step 1:
Bring the yarn up and over the working needle…
… wrapping it downward back to the front ready to purl the next stitch.
Step 2:
Purl the next stitch normally.
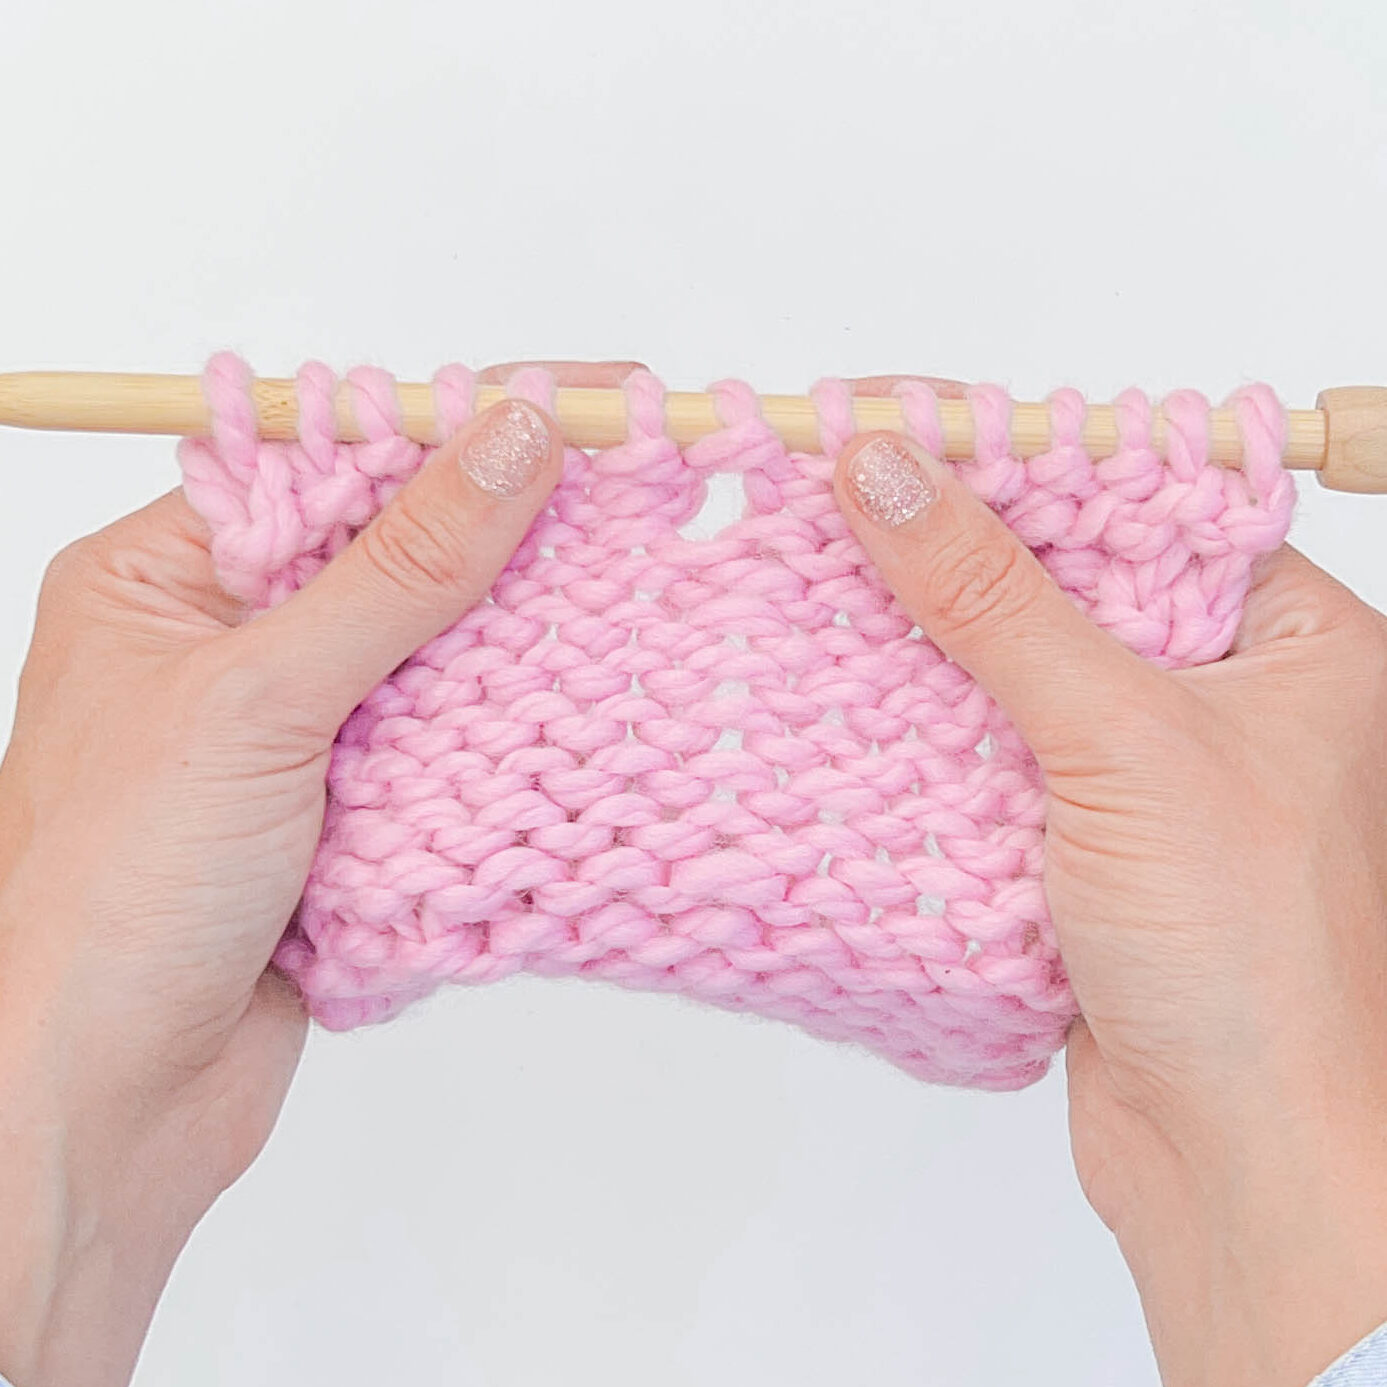
Step 3:
On the next row, work the yarn over loop as a normal stitch! Here you can see the eyelet/hole left in the fabric from the yarn over.
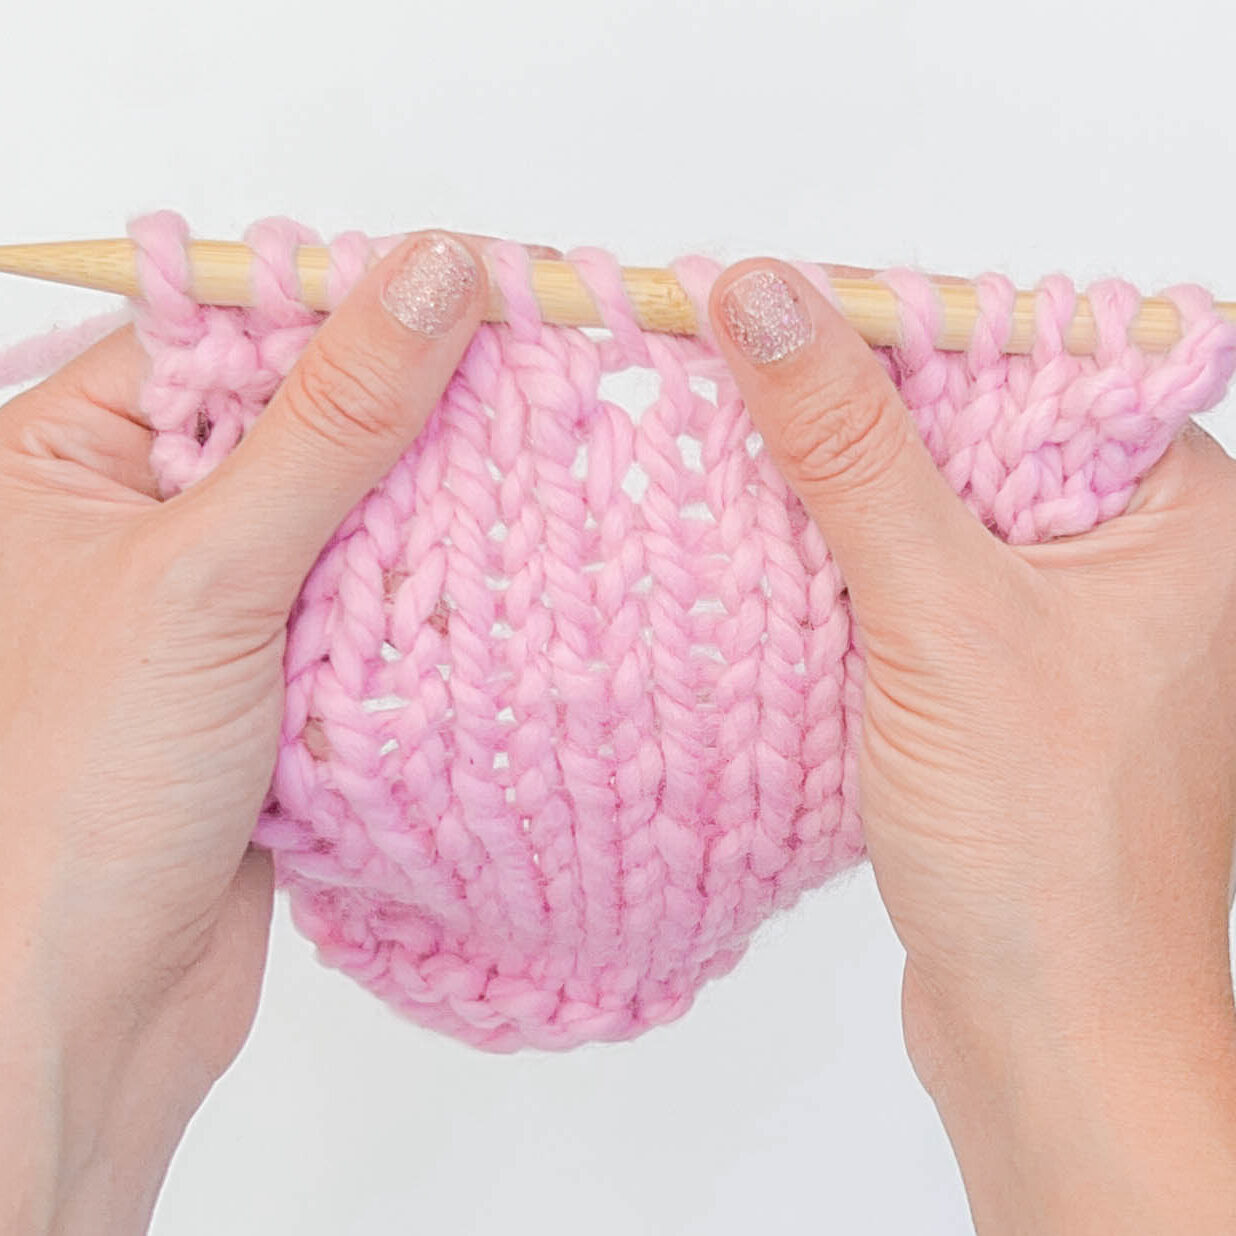
There are two ways you can work a yarn over stitch in the next row. You can insert your needle through the front loop to either knit or purl normally. This will leave a neat, round opening in the fabric below the stitch. Use this method for lace or openwork stitch patterns when you want to intentionally leave a decorative eyelet in your fabric.
Alternatively, you can also insert your needle through the back loop to either knit or purl. This second method will create both a twisted stitch and also make the hole/eyelet in the fabric much smaller. This is a great choice when you want to create a nearly invisible increase without leaving an opening in your fabric.
Whoops! You’ve accidentally made a hole in your fabric on accident by yarning over. This happens most often in patterns where you’re switching between a knit and purl stitch. You’ve brought your yarn up over your needles, leaving the strand wrapped over the needle rather than between the two needles.
If your hole is just one row down then it’s an easy fix! However, if you did this throughout your project or a bunch of rows down then the solution is a bit more complicated.
If you’re working and come to a yarn over on the next row, you’ll be able to spot it fairly easily because it will form a larger, floating strand that’s not connected to the fabric below. Don’t knit it! Simply slide the yarn over off your needle and let it drop down. A single accidental extra stitch should disappear into your fabric with blocking once you finish your project. Your stitches might be slightly looser in that area but it shouldn’t be noticeable. Want more help? Check out our handy tutorial video on how to fix one!
Unfortunately, if you’ve made a bunch of accidental yarn overs or made them too far back, it’s easiest to unravel your project until you’ve gone past the rows with errors. The key to unraveling your knits is to go slowly.
Step 1: Slip your stitches off the needles and lay it flat on a table.
Step 2: Use your hand to pin the body of your project down while you slowly pull on the yarn. Keep a careful eye on the row you want to unravel to while you undo your stitches.
Step 3: Once you get to the row you want to put back on your needles, unravel one stitch at a time, inserting your needle through each stitch to catch it as you go.
This technique is often abbreviated in written patterns as “YO”. Abbreviations are used as short hand in written knitting patterns to save space and keep the instructions short. When using a charted knitting pattern, this technique is typically shown as an “O” symbol.


