3 Needle Bind Off
A fast, sturdy way to join knits with a visible seam!
A fast, sturdy way to join knits with a visible seam!
This technique is a simple, yet effective way to join two pieces of knitted fabric together seamlessly! Not only does it provide a polished and professional finish, but it also saves you the hassle of sewing two pieces together. Plus, it’s a great way to add a touch of flair to your project with an optional decorative seam.
What kind of needle is used for the 3 Needle Bind Off?
You can use any type of needle for the 3 Needle Bind Off, but it’s recommended to use a needle that is the same size as the needles you used for your project.
Is the 3 Needle Bind Off difficult to do?
The 3 Needle Bind Off is a relatively simple technique and is suitable for beginners. However, it does require some coordination and practice to get the tension right.
Is the 3 Needle Knitting Bind Off stretchy?
The Three Needle Bind Off is not as stretchy as some other bind off methods, but it still has some give. If you need a more stretchy bind off, you may want to consider using a different technique, such as the sewn bind off or the Jeny’s Surprisingly Stretchy Bind Off.
When to use the 3 Needle Bind Off.
The 3 Needle Bind Off is often used to join shoulder seams on sweaters, the two halves of a scarf, or closing the bottom of a tote bag. The sturdy, raised edge is particularly durable and stretchy enough for most projects.
Before we get into the nitty gritty of actually working a 3 Needle Bind Off we need to decide which side of the project has the raised ridge created by this unique technique. You can either leave the raised ridge on the outside of your work as a design detail (especially cool if you bind off in a contrast color!), or turn your work inside out before binding off so the ridge is locked away on the backside, out of sight.
Let’s see what that looks like in some example images! Below you’ll see the Three Needle Bind Off knitting seam worked two ways using the same swatches.
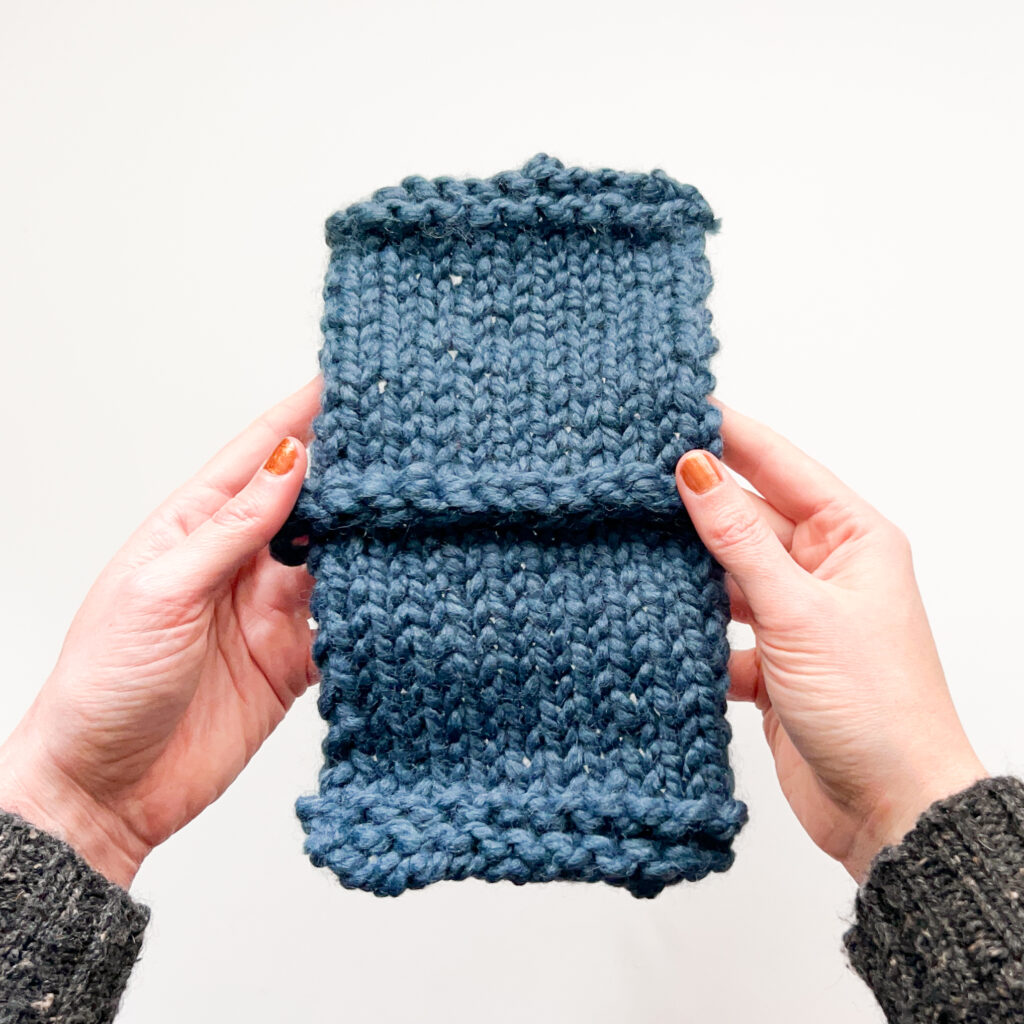
In the first pair of images, the knit side of the fabric was facing up/out as the stitches were bound off. This means the ridge is on the knit side of the fabric and the more invisible side of the seam is on the purl side.
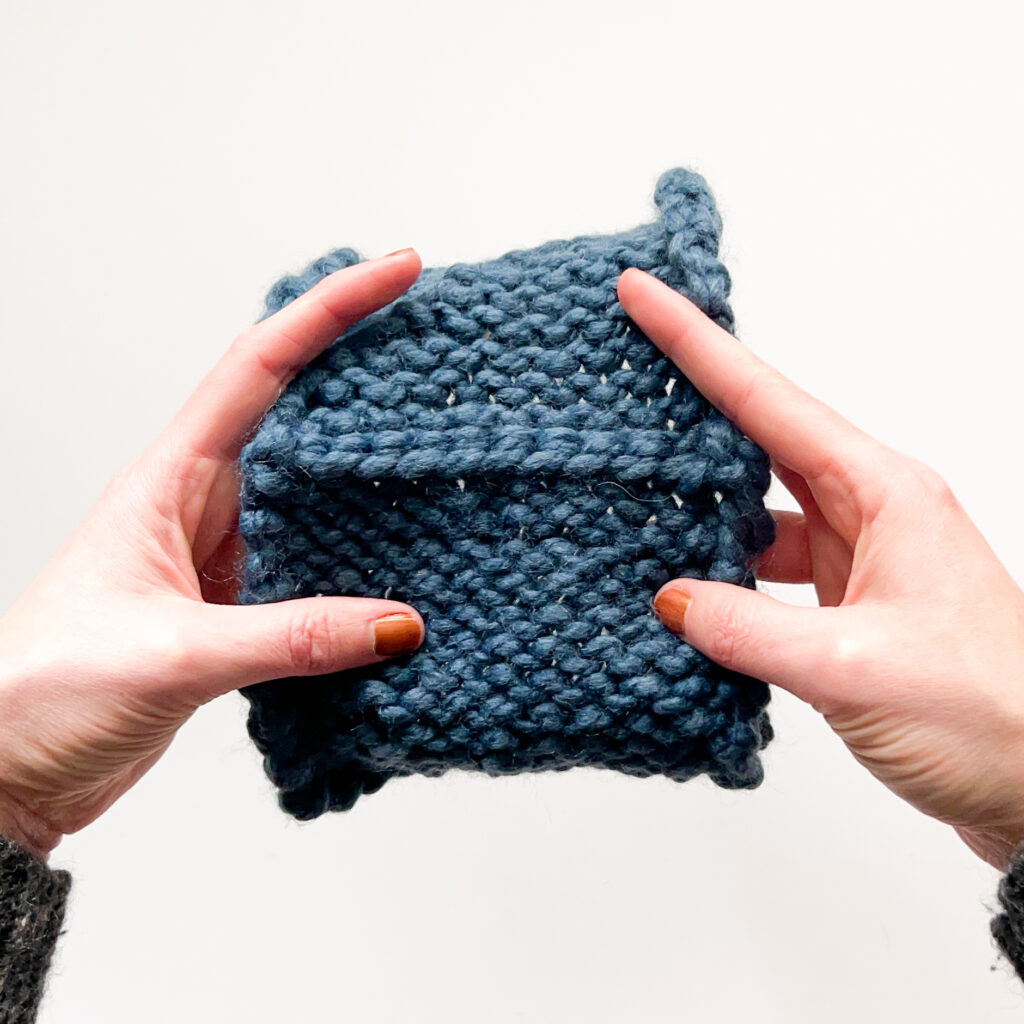
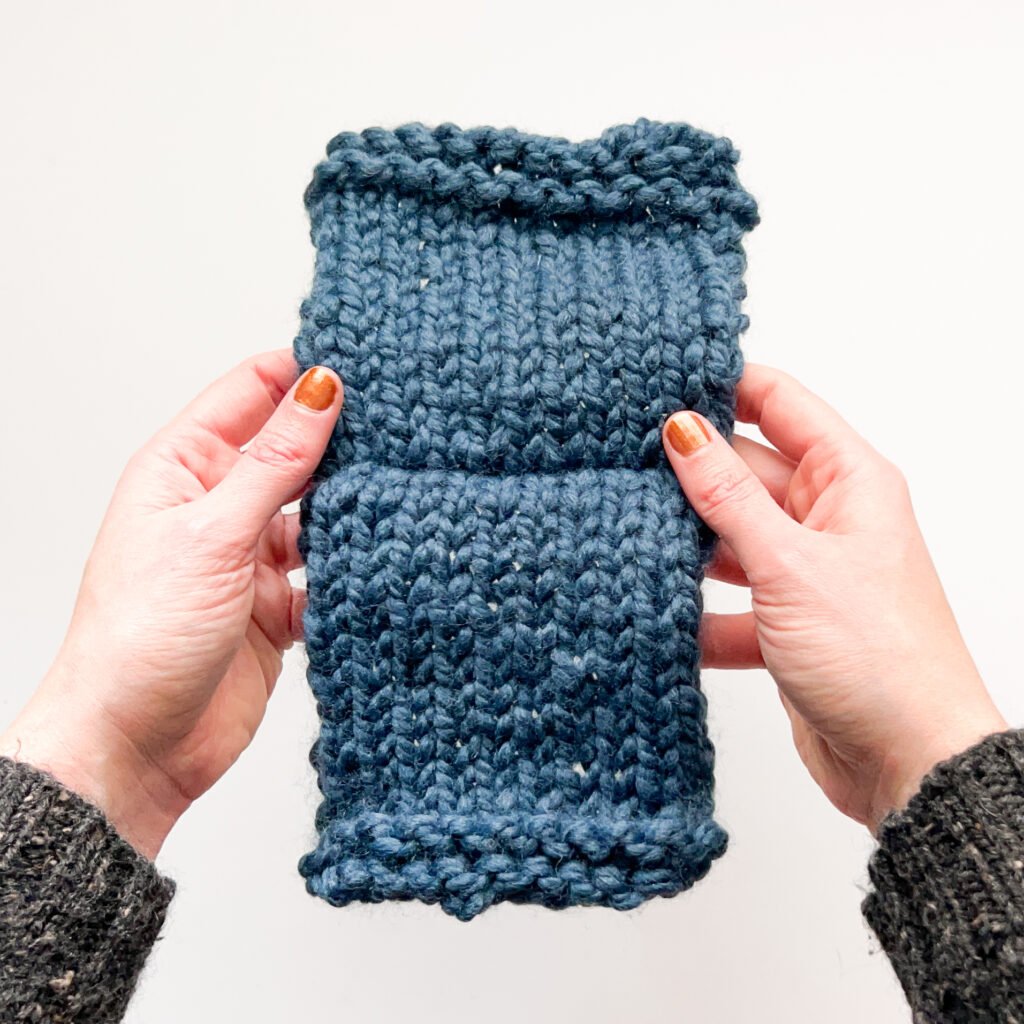
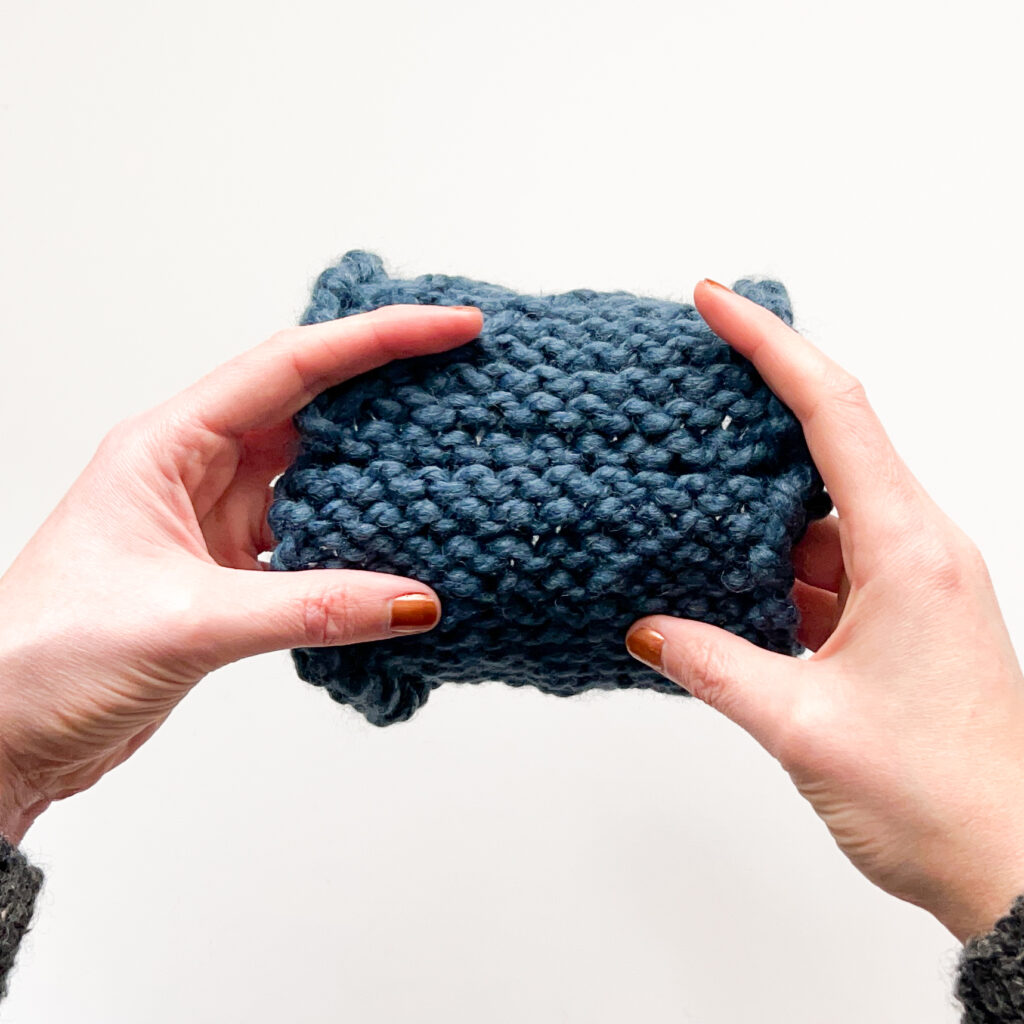
In the second pair of images, the purl side of the fabric was facing up/out during the 3 Needle Bind Off which resulted in the ridge on the purl side and the more invisible side of the seam on the knit side.
The great news is that the technique is the same either way! Just make sure to hold your two edges with the side you want the ridge on face toward you as you work the bind off!
There are two ways you can work a Three Needle Bind Off. You can use a knit stitch or a purl stitch. The knit stitch is the most common way to do the 3 Needle Bind Off on either the knit or purl side of a project.
However, some knitters find it easier to bind off across both needles using a purl stitch. and in some cases a purl stitch creates a tidier bind off, especially on the “wrong side” or purl side of stockinette stitch fabric.
We always recommend you try a new technique with a practice swatch and this one is no different! Try either the knit or purl stitch bind off to see which you like best and works better with your knitting style before using it on your final project!
NOTE: This tutorial was written for right-hand dominant knitting. If you’re a lefty, the same instructions apply however you’ll be working from left to right across the seam and the needle tips should be pointing toward your left.
This section will show you how to work a Three Needle Bind Off using a knit stitch on the knit side of a stockinette stitch fabric.
NOTE: both edges you want to seam need to have the same number of live stitches for this bind off to work and line up properly!
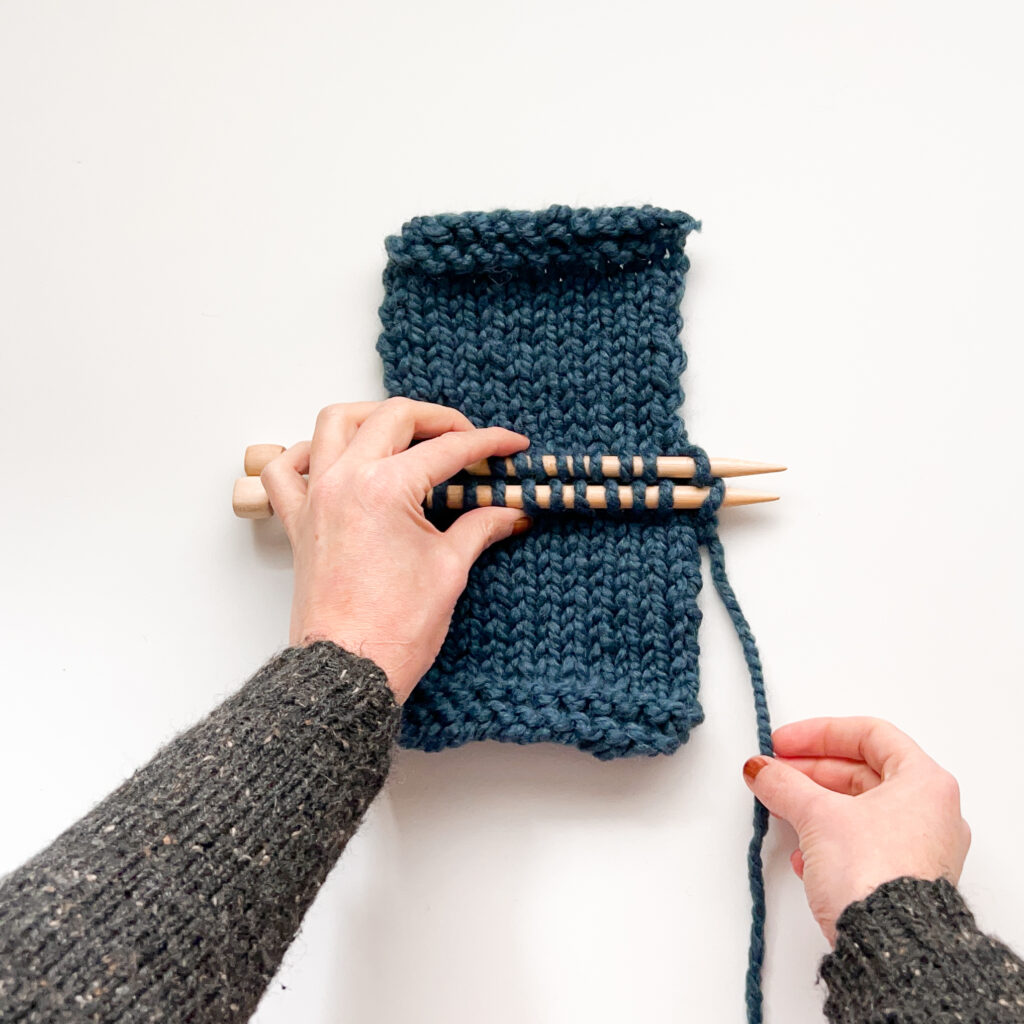

Getting Started
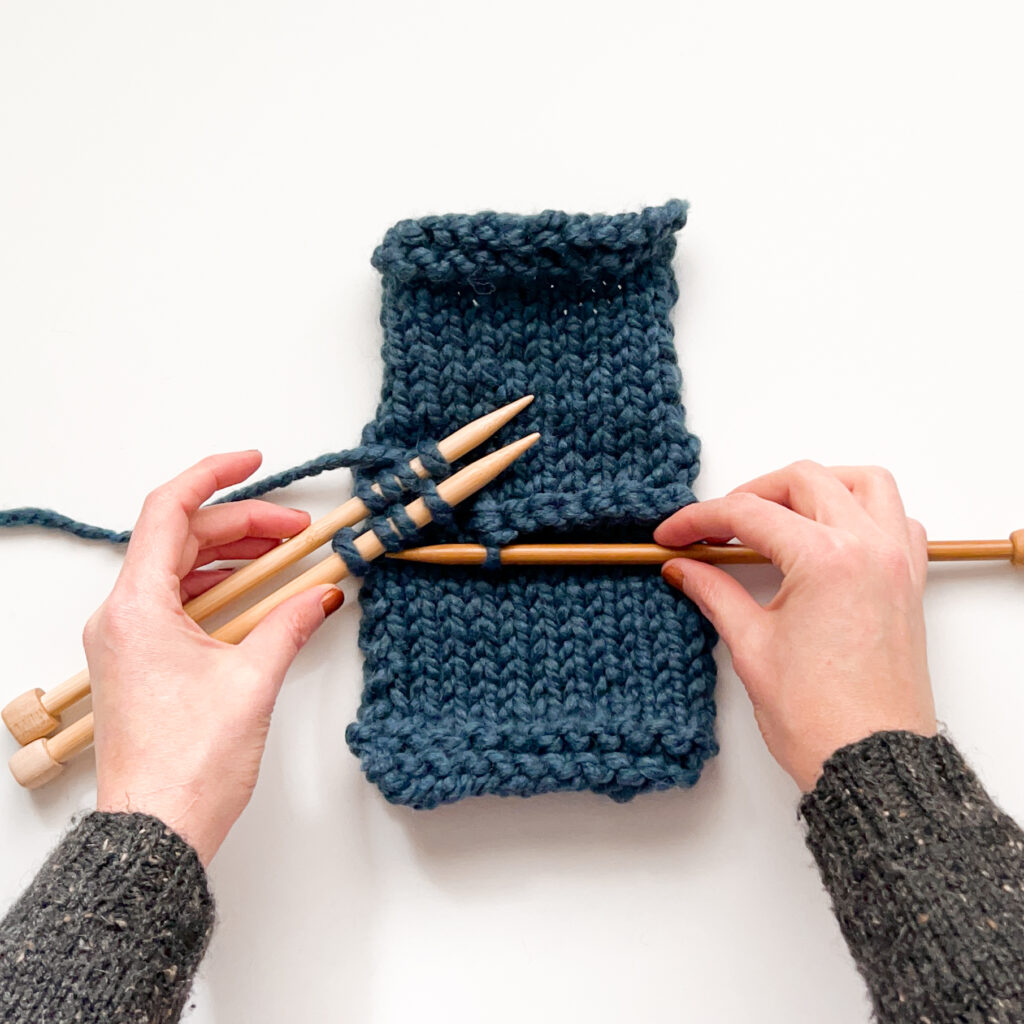
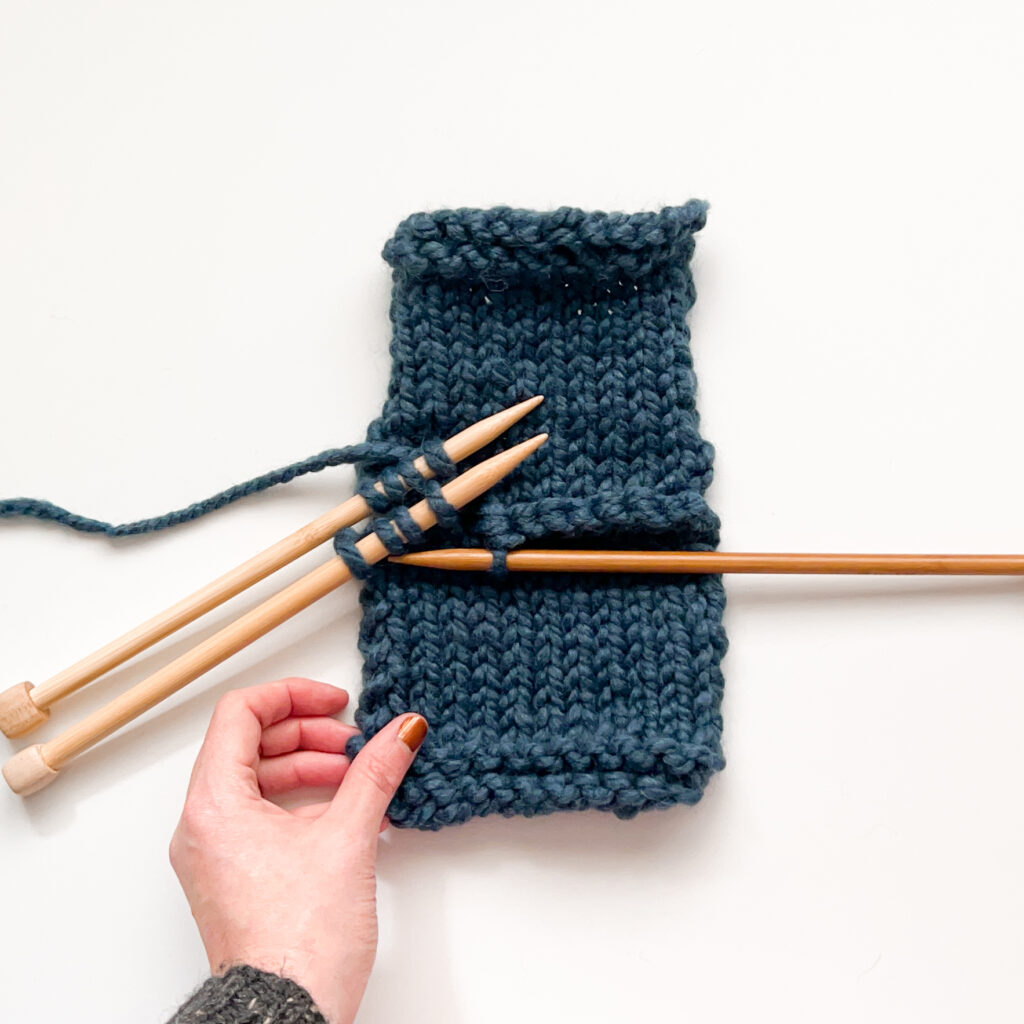
Place the two soon-to-be-seamed edges together parallel with both needle tips facing the same direction. Remember, the side facing up in this step will be the side with the raised ridge at the end!
Next, pick both swatches up together holding them by their needles.
Get ready to knit! The working yarn should be at the back of both needles in your left hand, an empty third needle will be in your right hand.
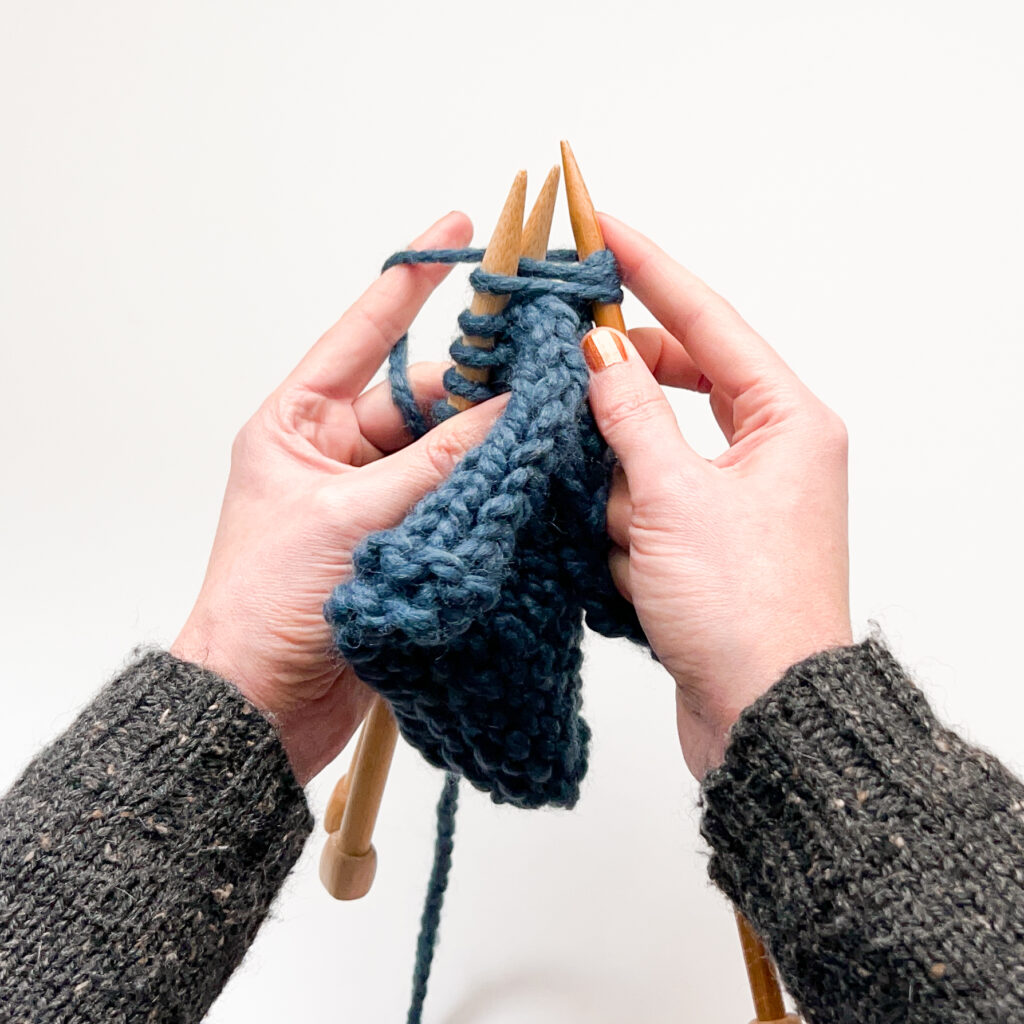
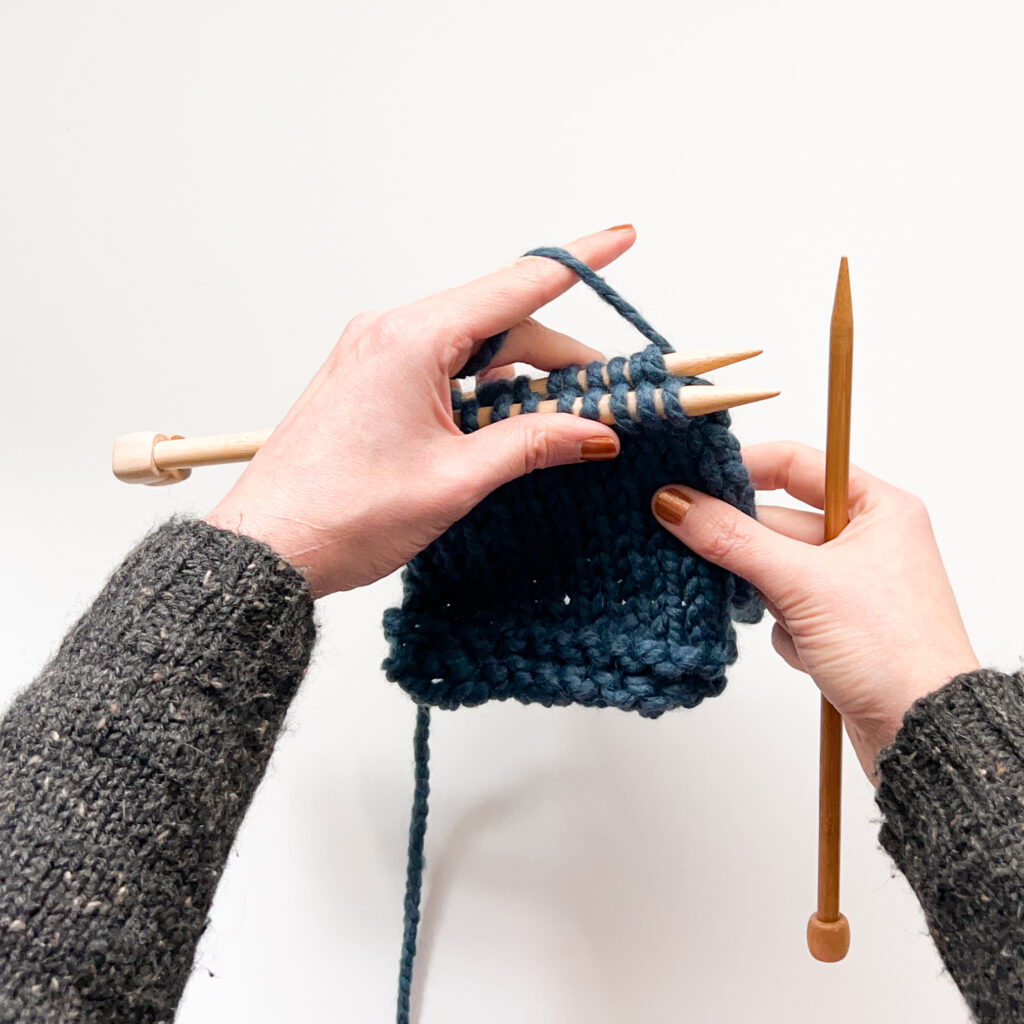
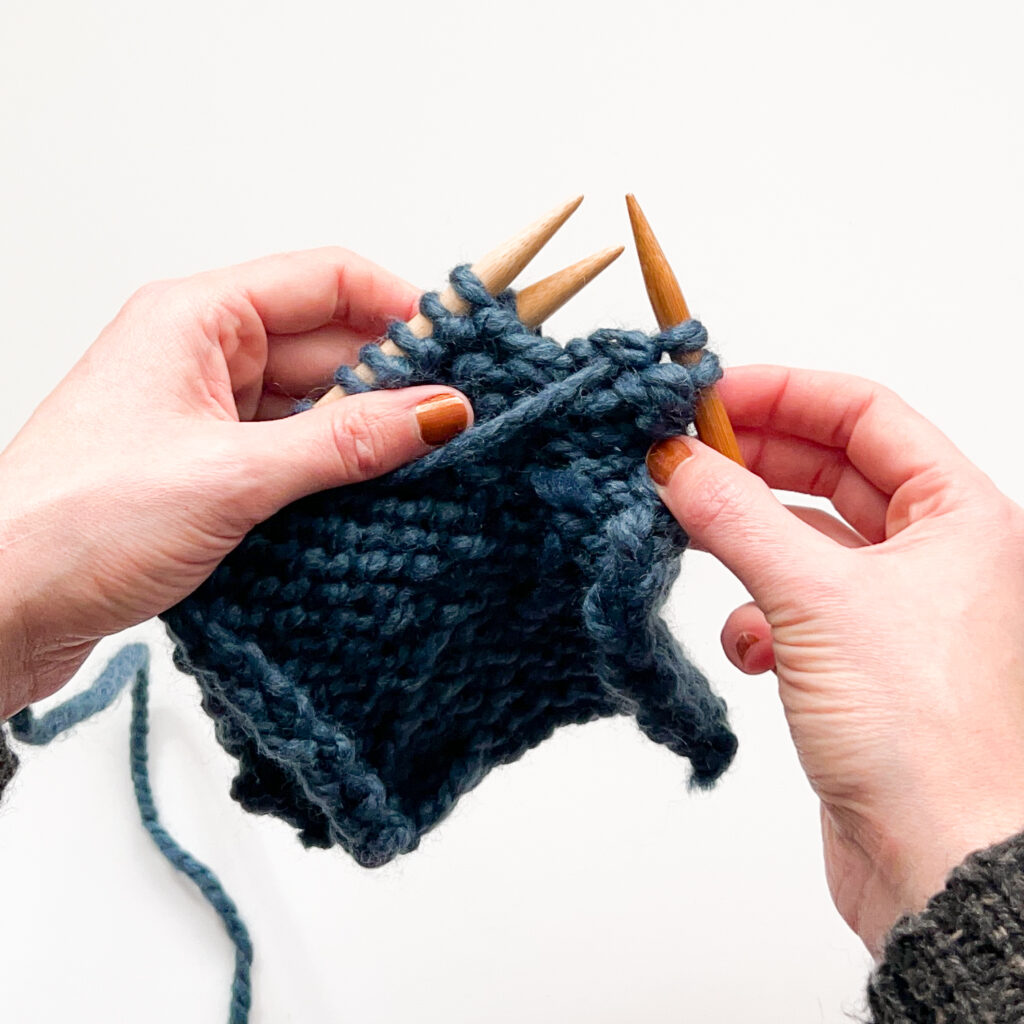
Step 1:
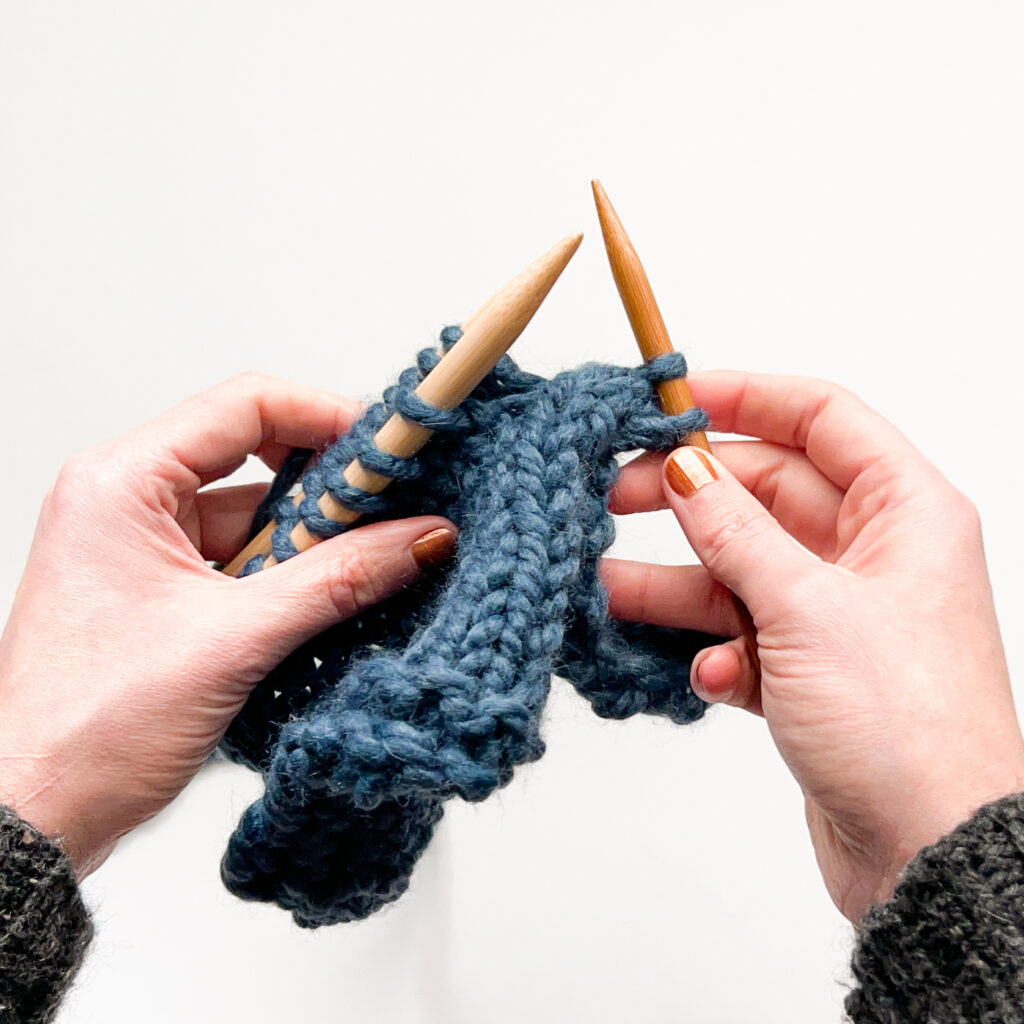
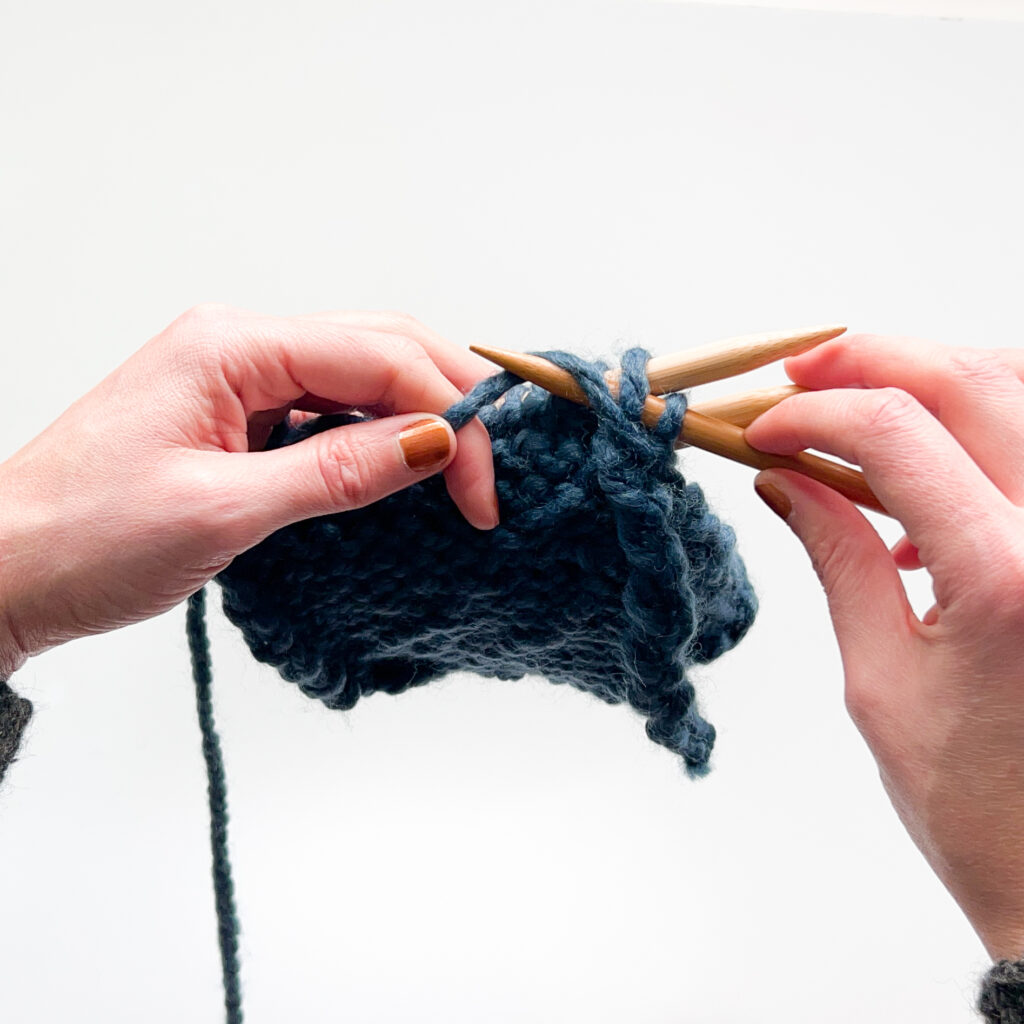
Knit the first stitches from both needles together.
To knit together, insert the right needle through the first stitch on the front needle as if to knit normally, continue through to the second needle, inserting the right needle from left to right through the back leg of the stitch on the back needle. Wrap the yarn around the right needle (counterclockwise) and pull it through both stitches, downward. Drop the stitches off of both needles at once.
You now have a single stitch on the right needle.
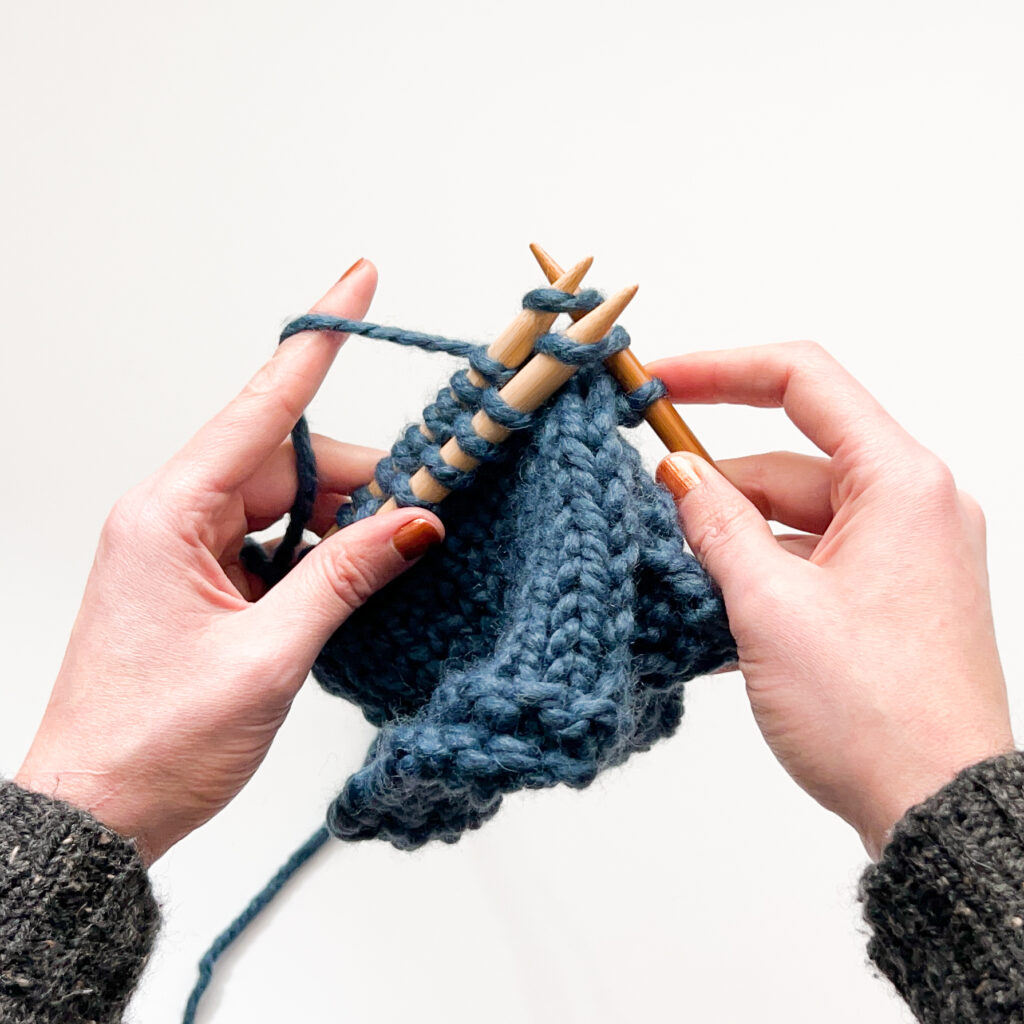
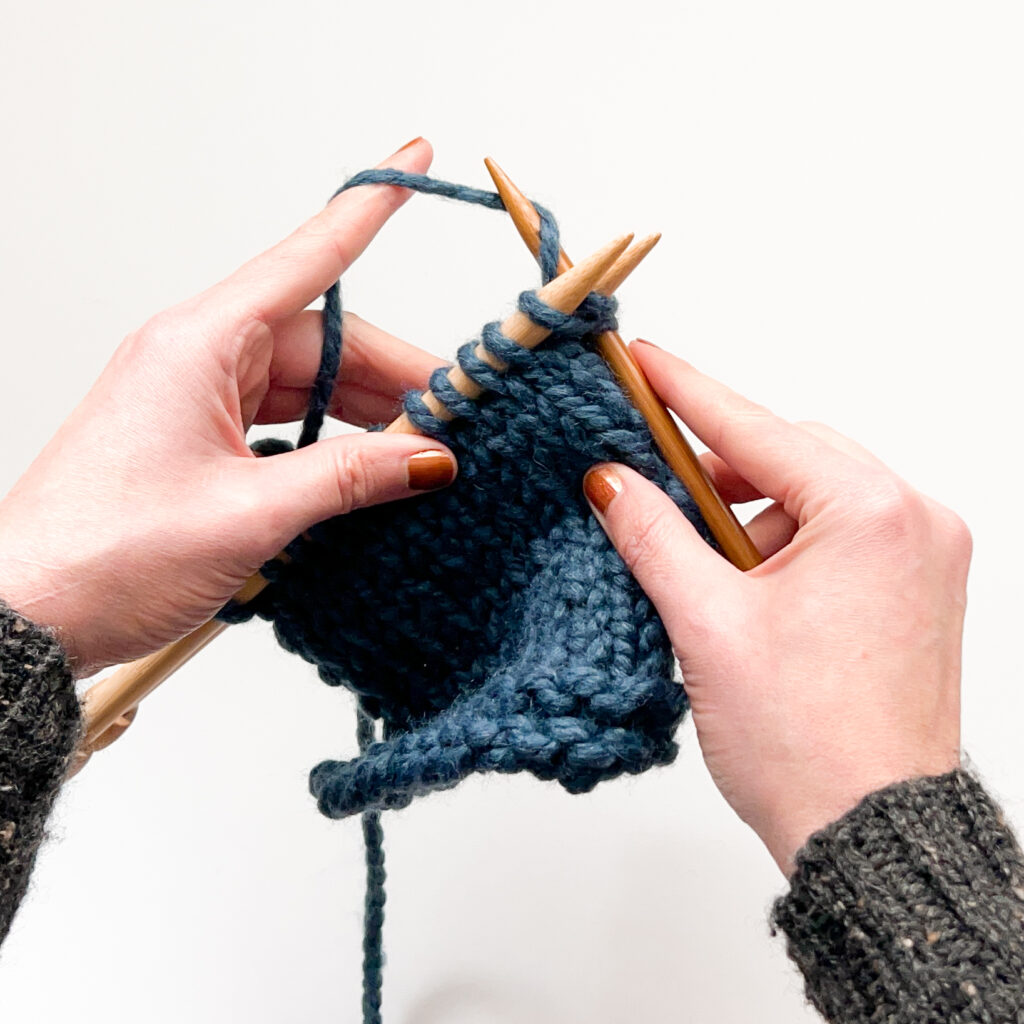
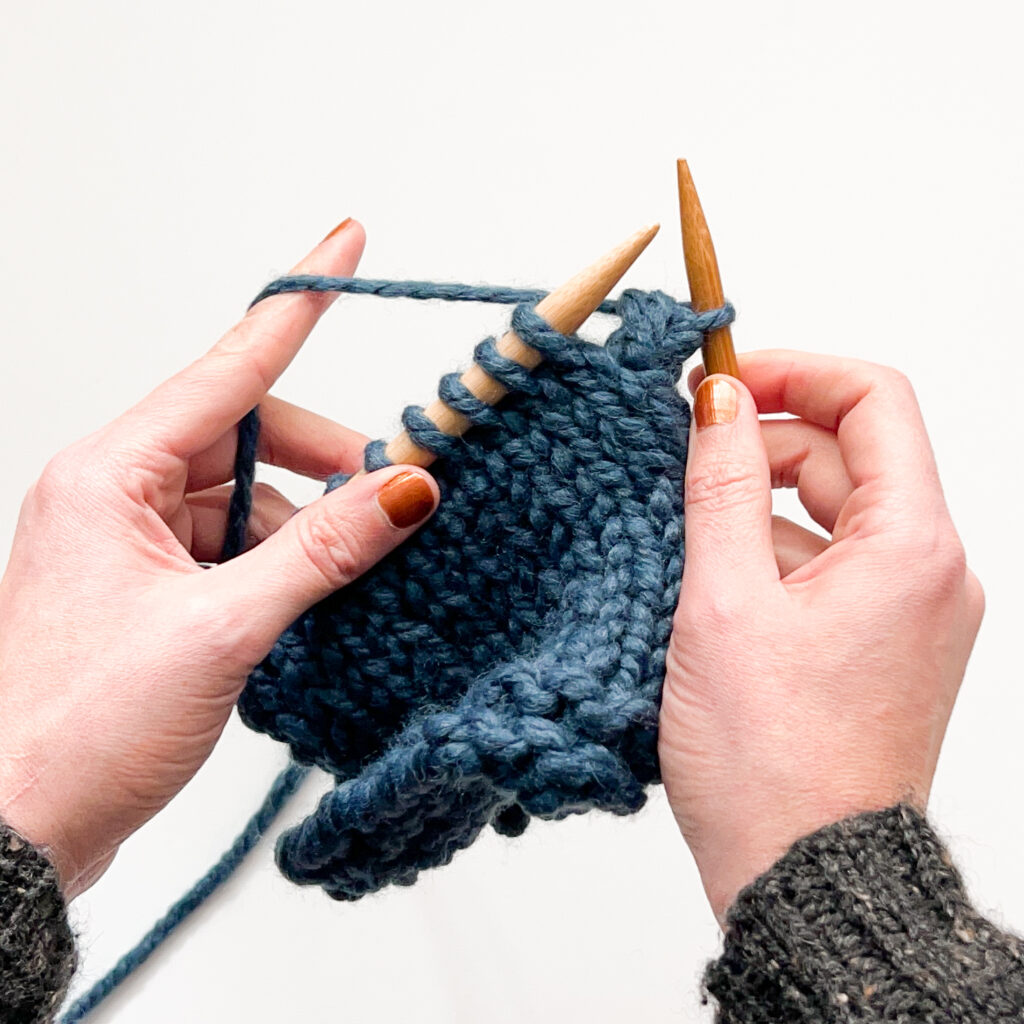
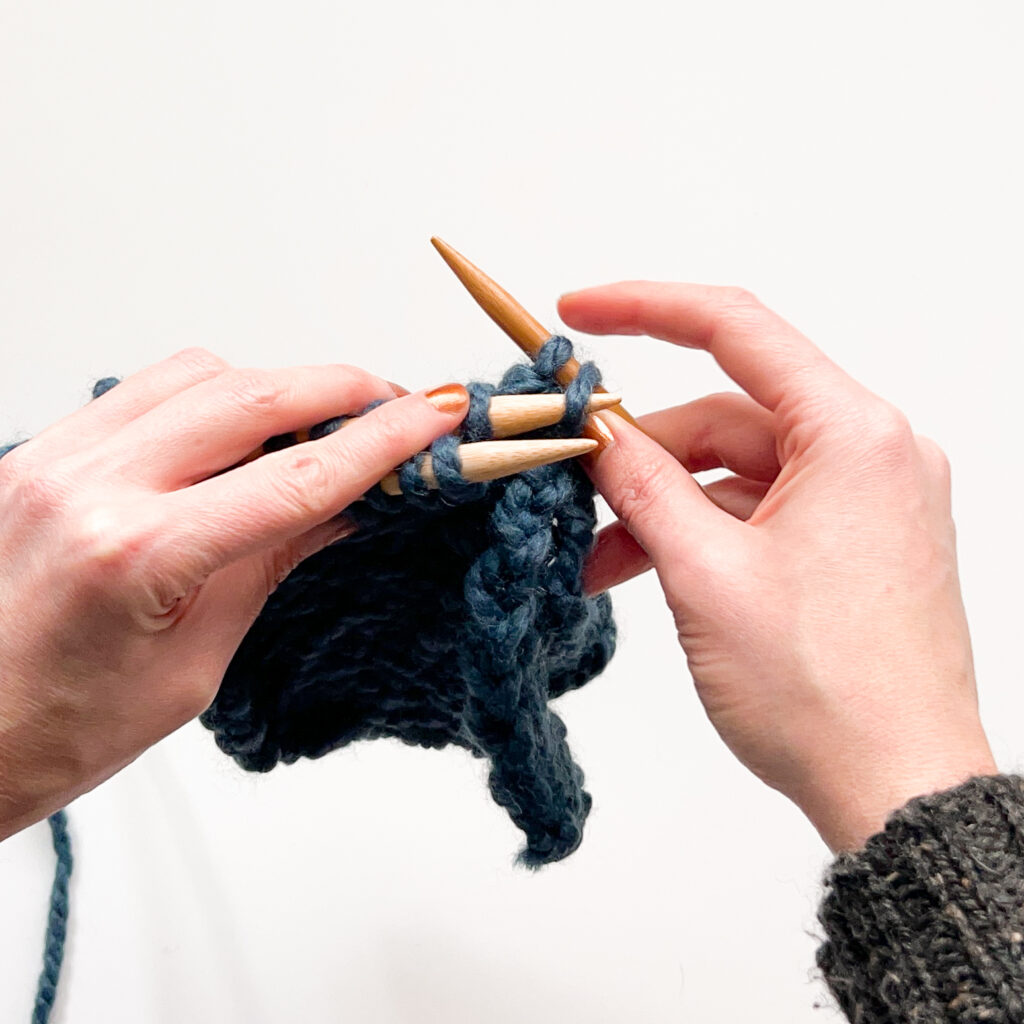
Step 2:
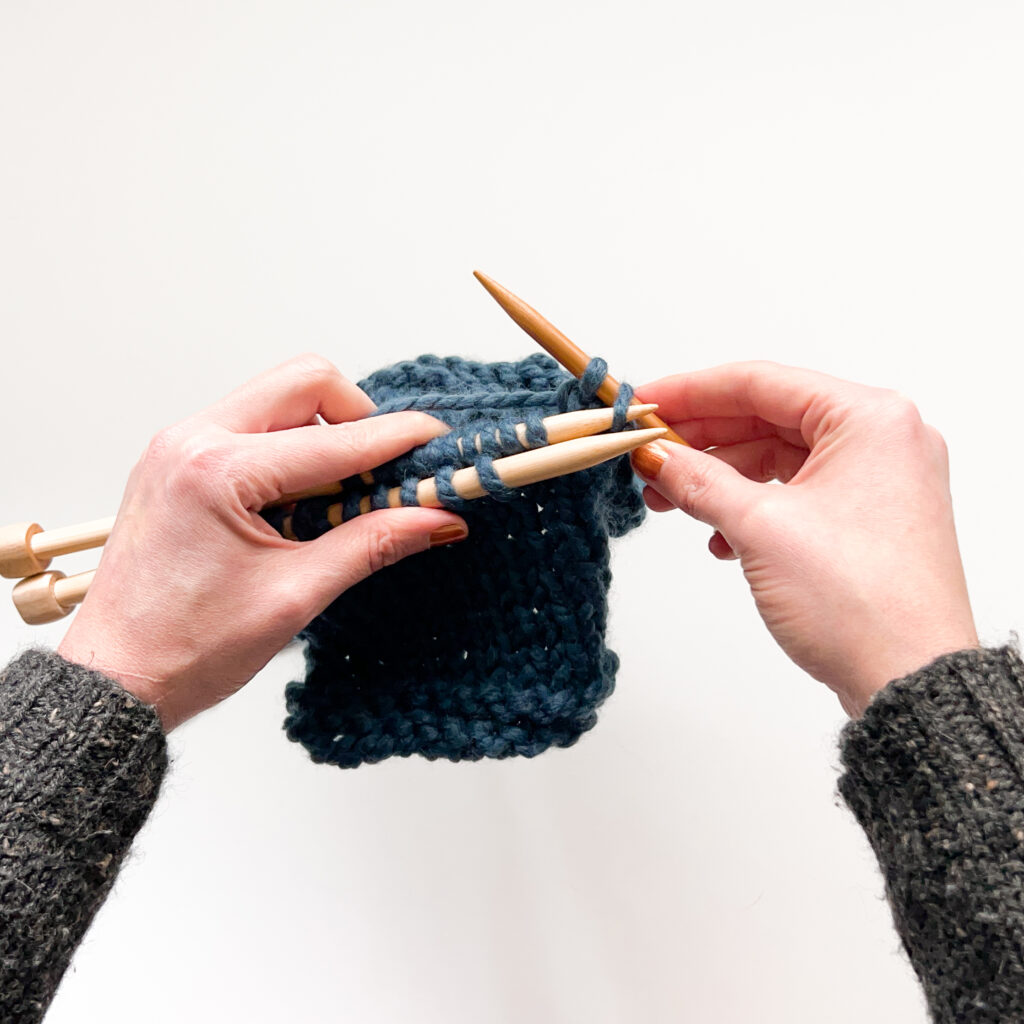
Knit the next stitches on both needles together as in the last step.
You now have two stitches on the right needle.
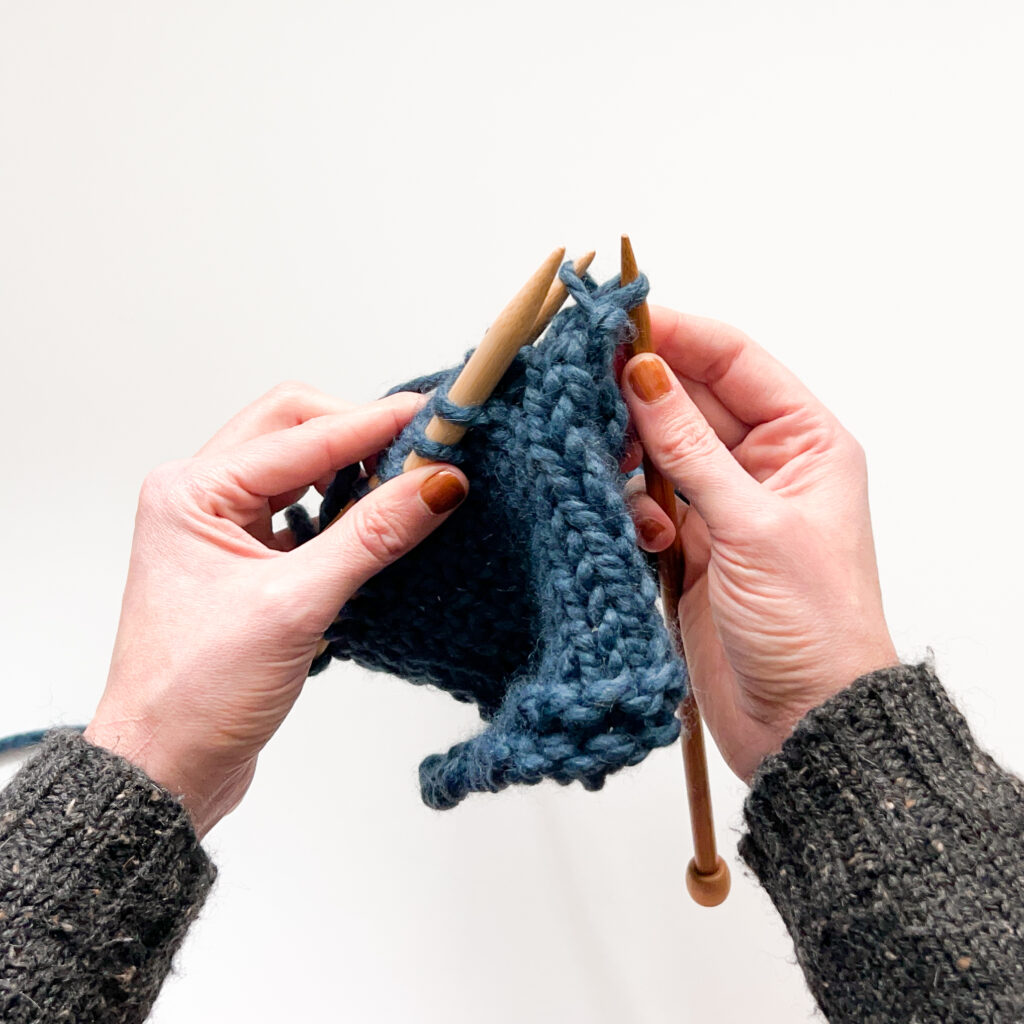
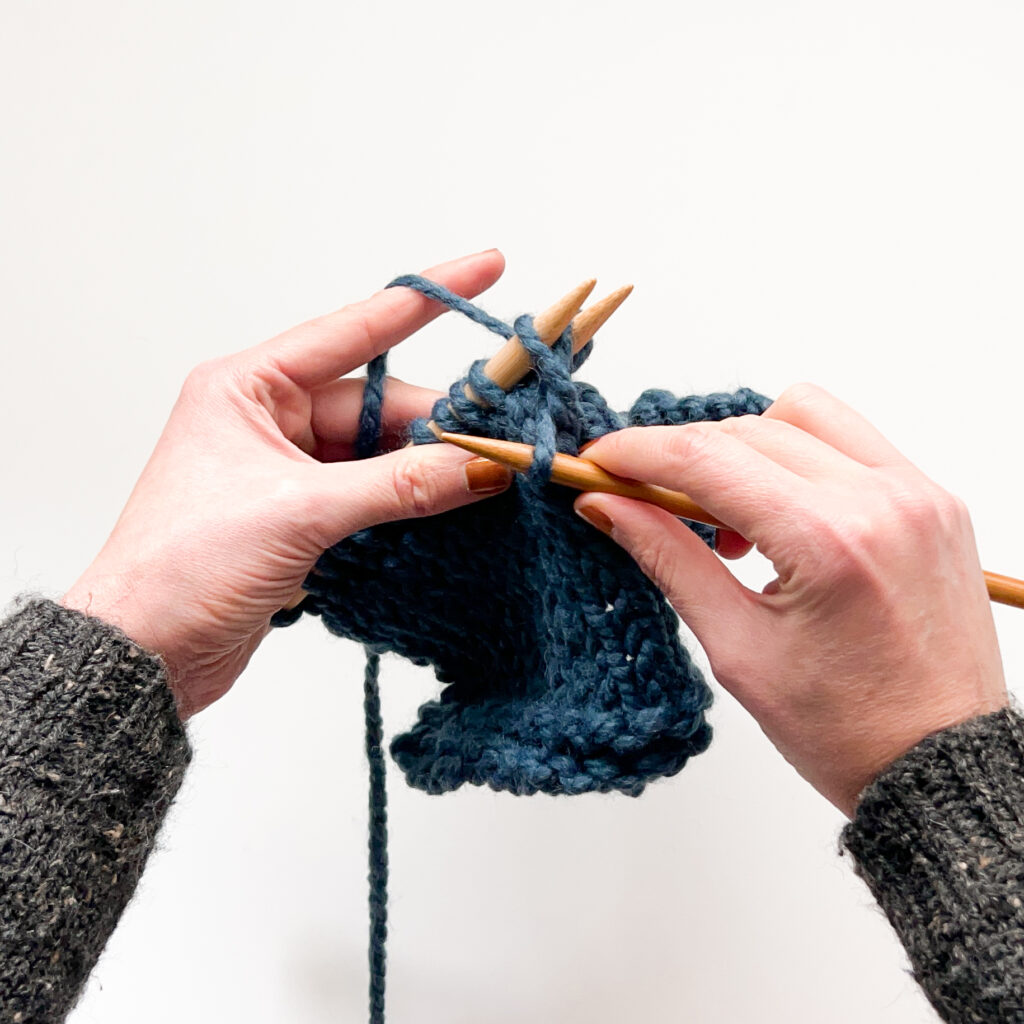
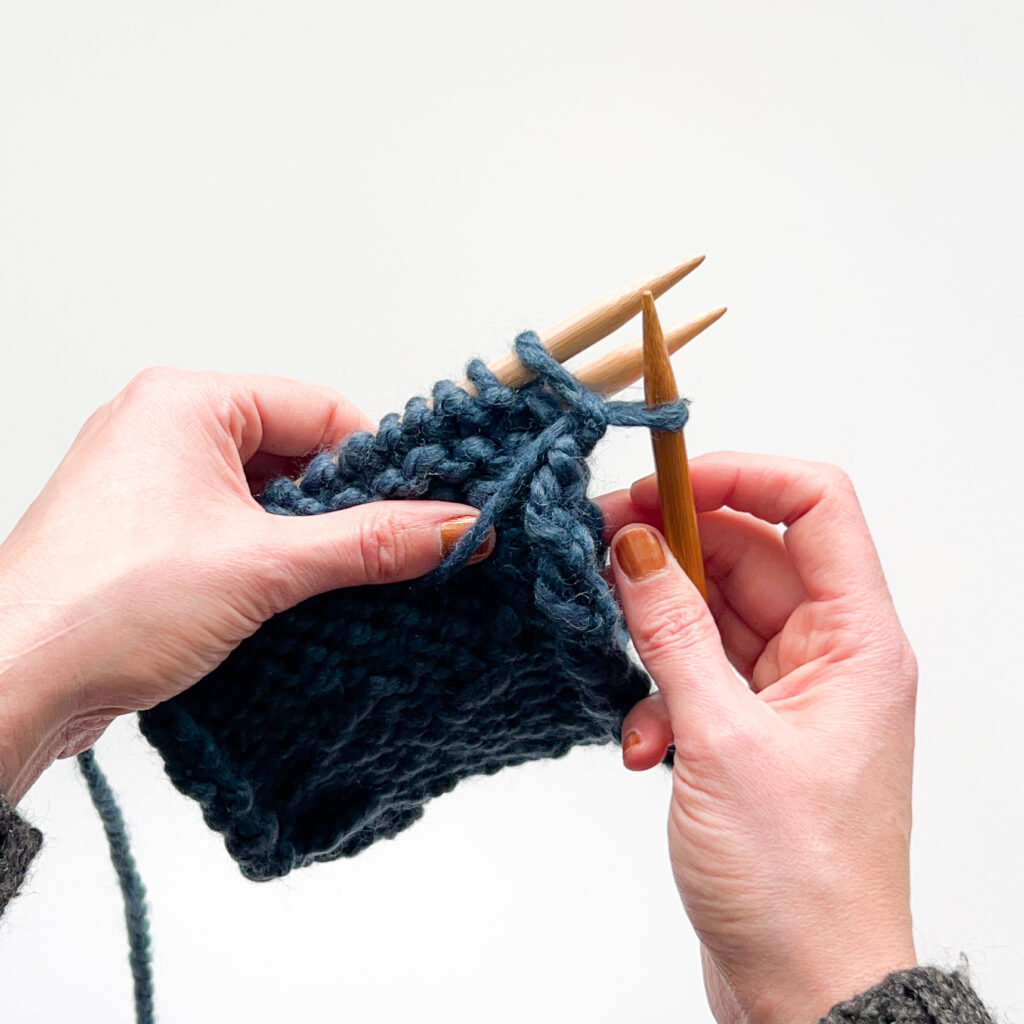
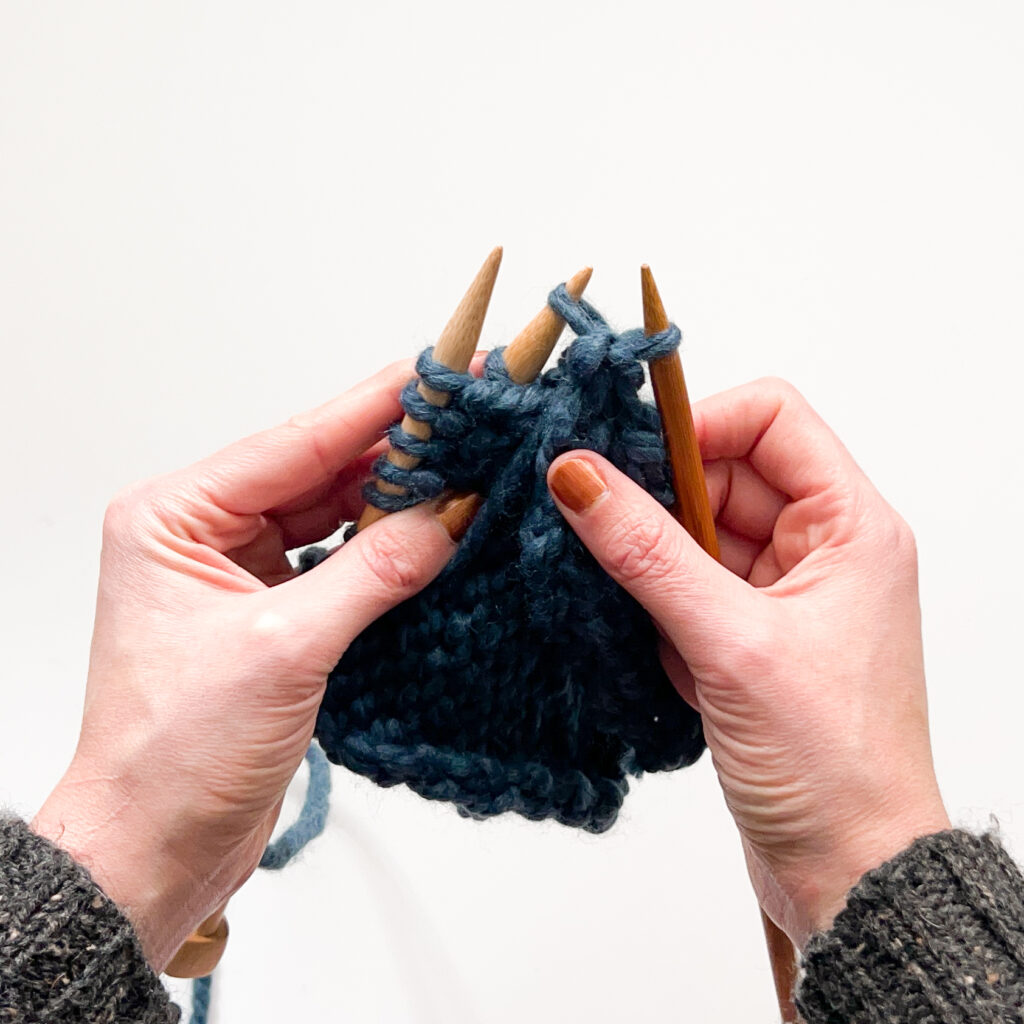
Step 3:
Use the back needle to pull the right stitch up-and-over the second stitch on the right needle. Drop the stitch off. You’ve now bound off one stitch and have a single stitch left on the right needle.
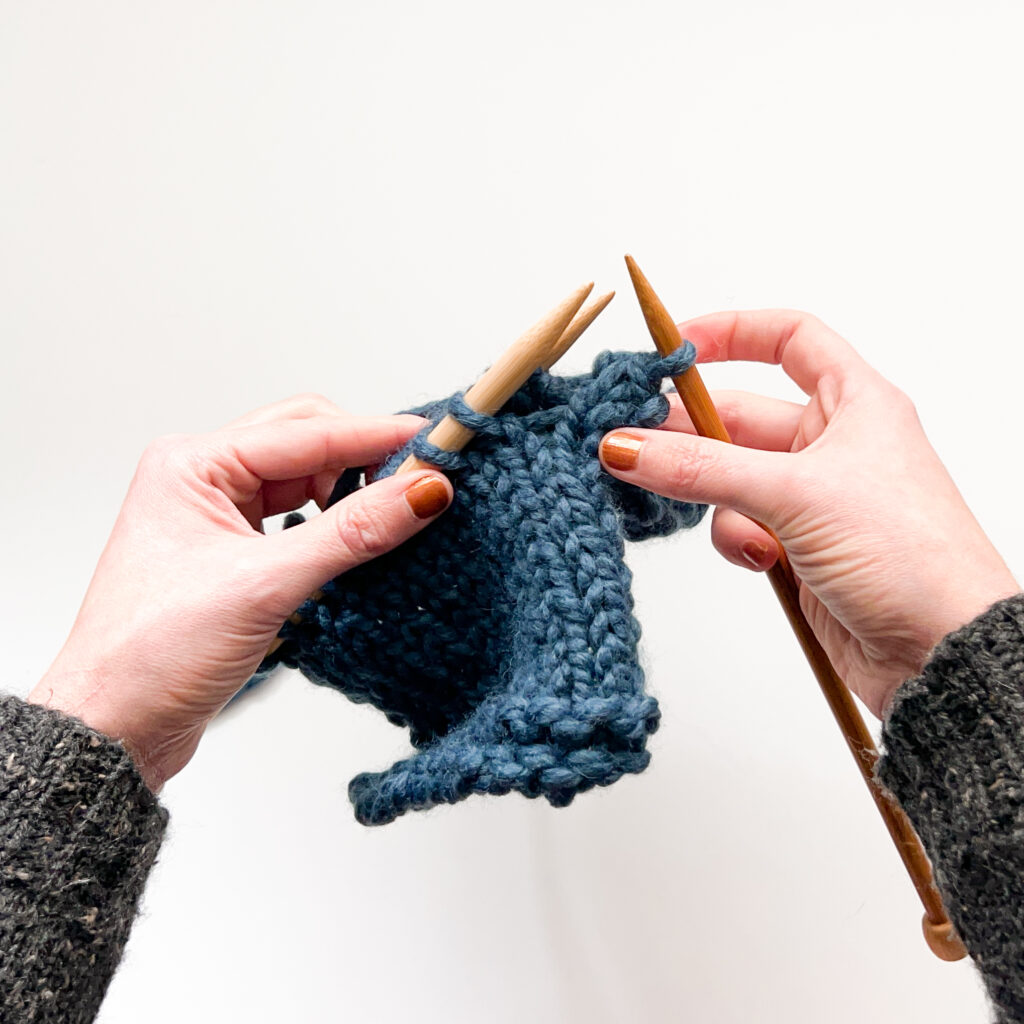
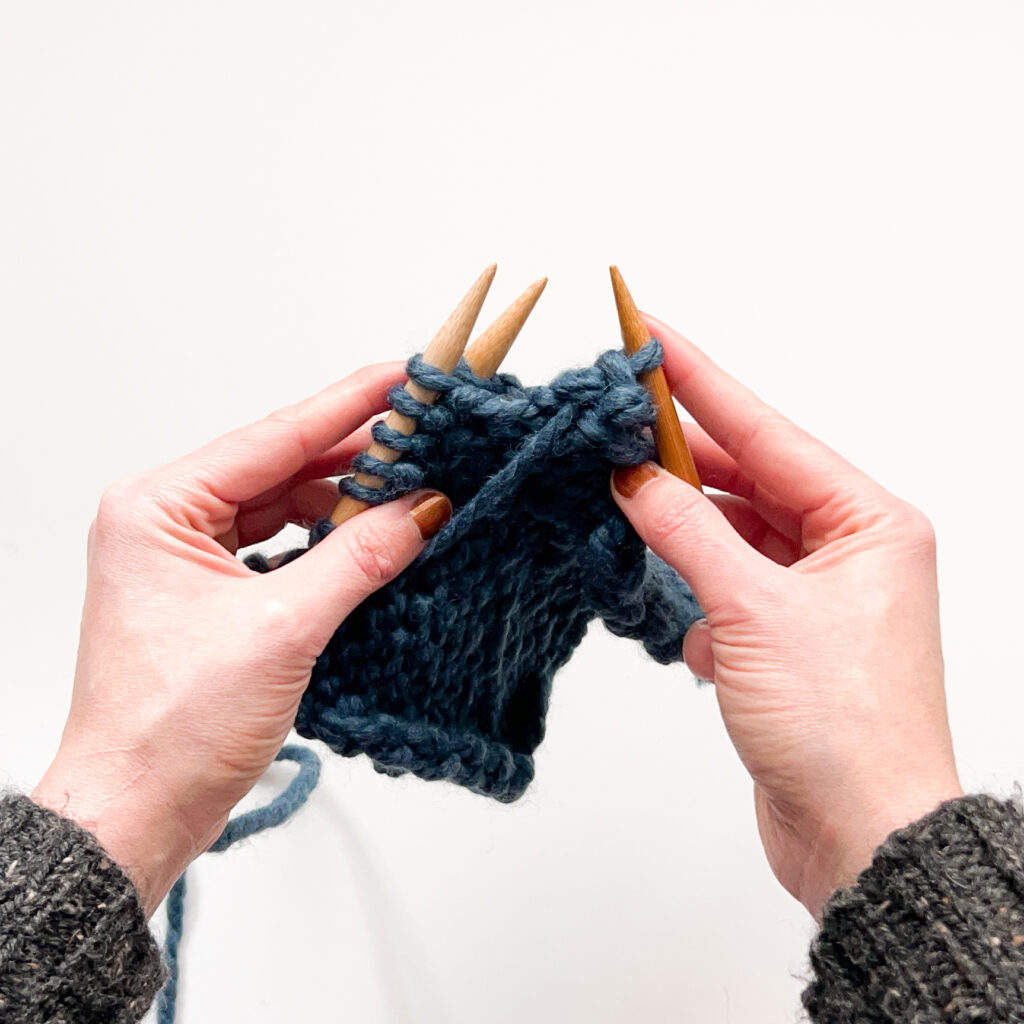
Repeat:
Work across the row repeating steps 1-3 until you have one stitch remaining on the right needle.
Cut the yarn and draw it through the last stitch, cinching it closed before weaving the ends in to finish the piece.
Finished 3 Needle Bind Off Seam On the Knit Side
Another way you can work a Three Needle Bind Off is to use the purl stitch. Some knitters find it easier to bind off across both needles using a purl stitch, and in some cases a purl stitch creates a tidier bind off, especially on the “wrong side” or purl side of stockinette stitch fabric.
NOTE: both edges you want to seam need to have the same number of live stitches for this bind off to work and line up properly!
Getting Started:
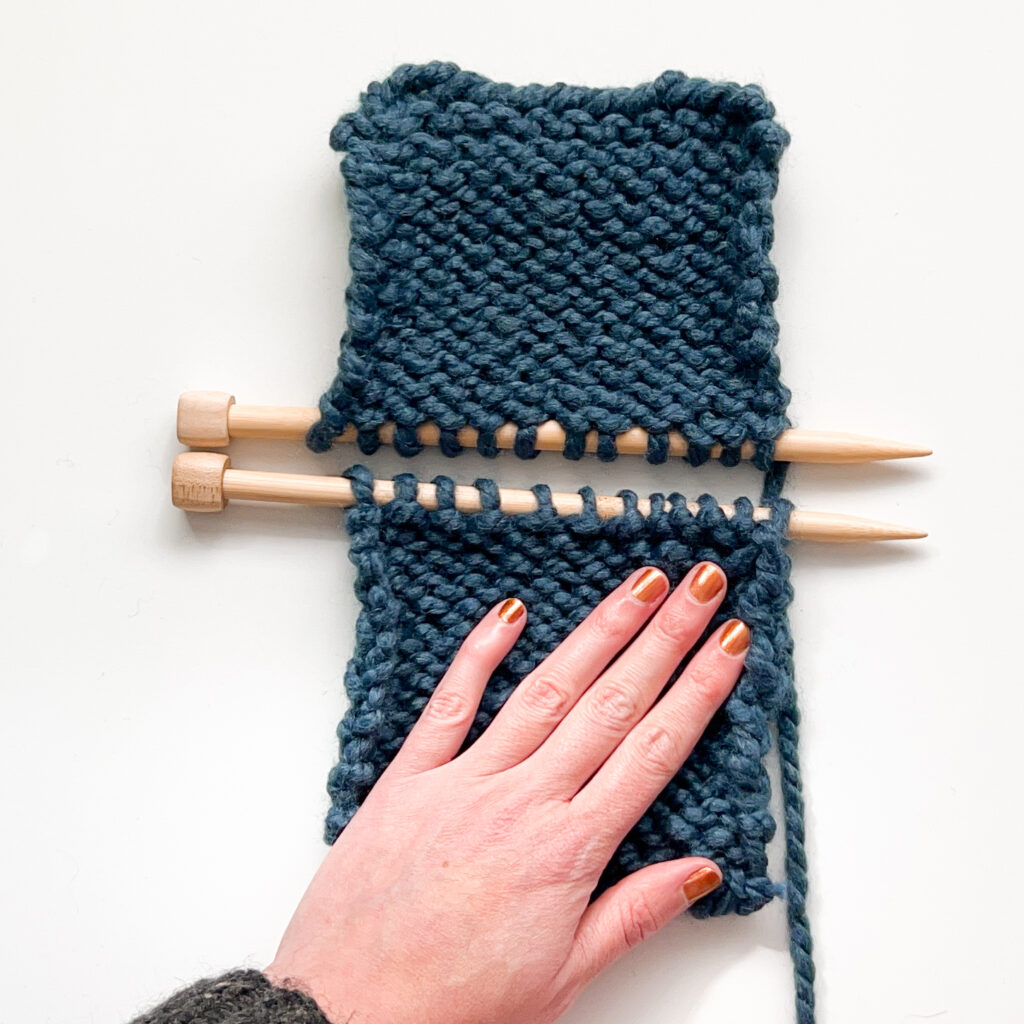
As in Step 1 of the Knit section above, start with the edges of your pieces lined up parallel with the needle tips pointing in the same direction.
In this case, we’ll be working with the purl side facing up/out.

Step 1:
Purl the first stitches from both needles together.
To purl together, insert the right needle through the first stitch on the back needle through the back leg, continue through to the front needle, inserting the right needle right-to-left through the front leg of the stitch on the front needle. Wrap the yarn around the right needle (counterclockwise) and pull it up through both stitches. Drop the stitches off of both needles at once.
You now have a single stitch on the right needle.

Step 2:
Purl the next stitches on both needles together as in the last step.
You now have two stitches on the right needle.
Step 3:
Use the back needle to pull the right stitch up-and-over the second stitch on the right needle. Drop the stitch off. You’ve now bound off one stitch and have a single stitch left on the right needle.
Repeat:
Work across the row repeating steps 1-3 until you have one stitch remaining on the right needle.
Cut the yarn and draw it through the last stitch, cinching it closed before weaving the ends in to finish the piece.
Finished 3 Needle Bind Off Seam On the Purl Side

This bind off is a quick and easy way to join two pieces of knit fabric together. The sturdy, raised seam adds structure to knits for a super sturdy finish. This cast off falls somewhere in the middle of the elasticity spectrum.
It’s also easy to undo if you change your mind! The stitches quickly zip apart when you pull on the yarn you used to knit both sides together.
Pro tip! Use a contrasting color! If you’re looking to add a pop of color or create a decorative detail, consider using a contrasting color for your third needle. This can create a fun and playful contrast to your project.


