How to Knit the Stockinette Stitch
Knit & purl rows = the best basic stitch pattern!
Knit & purl rows = the best basic stitch pattern!
Stockinette stitch is one of the best beginner stitches to learn! It’s a popular stitch and forms the foundation for a huge range of other more complex stitch patterns including cables, lace, brioche, and colorwork.
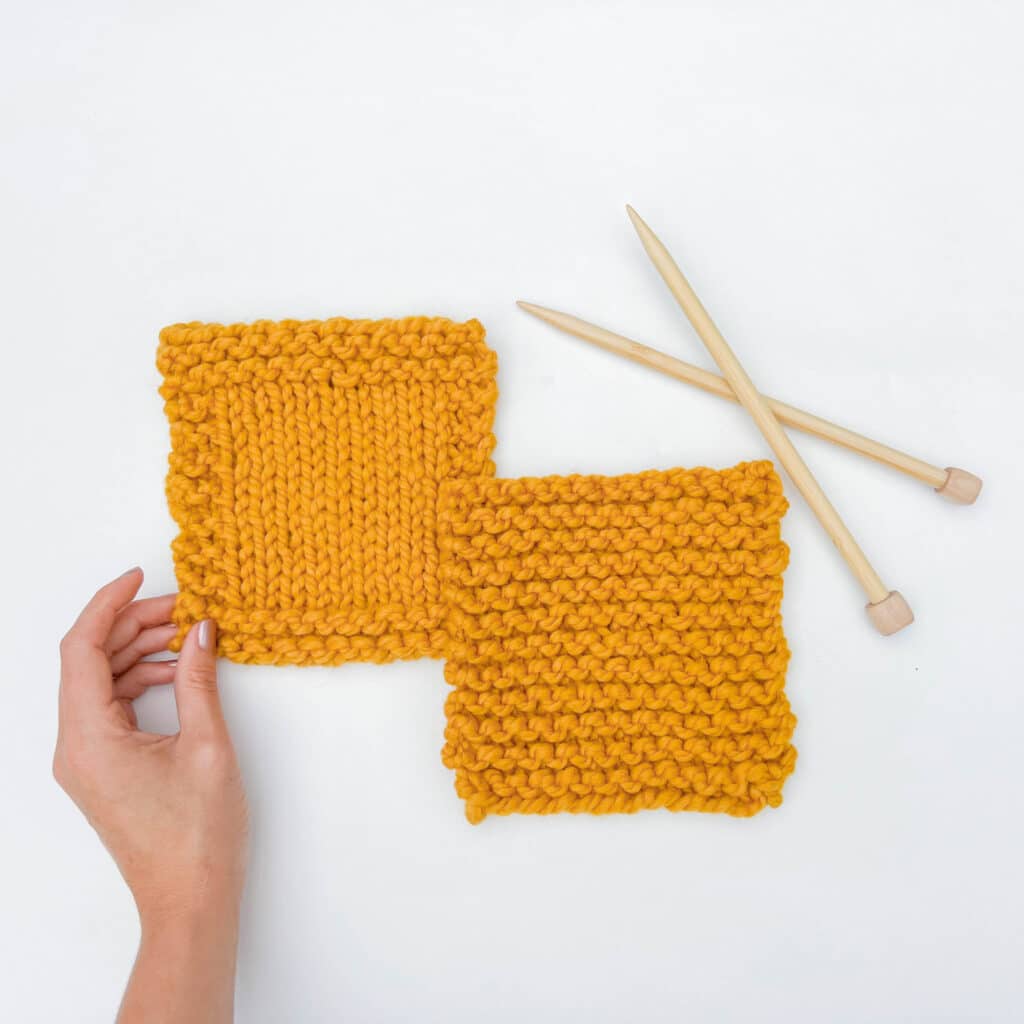
Stockinette stitch fabric is characterized by flat “v” shaped stitches on the right side and purl bumps on the wrong side. Today we’ll show you how to knit stockinette stitch flat (back and forth).
Stockinette stitch knitting is the second easiest beginner knitting stitch to learn (check out garter stitch for the easiest stitch)! This stitch is a great way to practice the basic knit and purl stitches.
Stockinette stitch is a versatile stitch that works well and is a wonderful go-to technique for a variety of projects. This stitch pattern is a great choice for garments like sweaters, shawls, and cardigans where you need a fabric that drapes and falls gracefully. We also love stockinette stitch for accessories like basic beanies, mittens, socks, because it stretches to fit curves, is sturdy, and creates a nice flat surface that’s easy to embellish.
There is a catch, though. Stockinette when knit flat does have a tendency to curl at the edges. There are a variety of ways to prevent curling. You can either incorporate a garter stitch border, add ribbing, or an i-cord edge in your project.
If you are not quite sure what needles or yarn to use, we have a beginner knitting kit to help you get started!
It has everything a new knitter needs for their first projects. So check it out!
Stockinette stitch worked flat is made by alternating knit and purl rows. This means you knit one row and, once you get to the end of your row, turn your work before purling the next row.
Knit one row. Turn your work. Purl one row. Repeat these two rows until the desired length of your piece has been reached!
Every project starts with a cast on row. If you’re following a pattern, cast on the number of stitches noted in your project. If you’re simply knitting a swatch or test piece, go ahead and cast on enough stitches for a 4” fabric using the needles and yarn of your choice.
All yarn ball labels should note how many stitches per inch you’re likely to get on certain needles. It’s likely you will need to cast on a few extra stitches than the yarn label recommends because garter stitch is such a stretchy, squishy fabric.
Note: This tutorial was written for right-handed knitters.
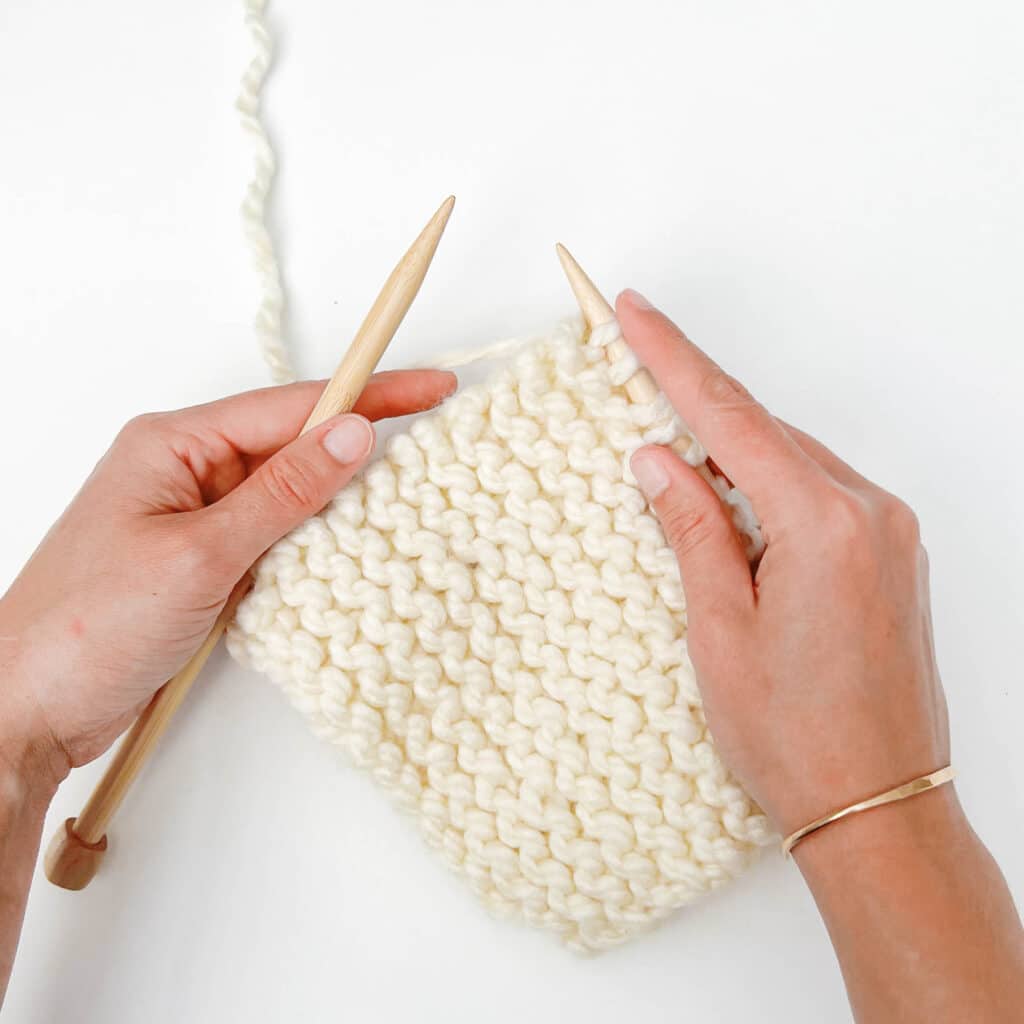
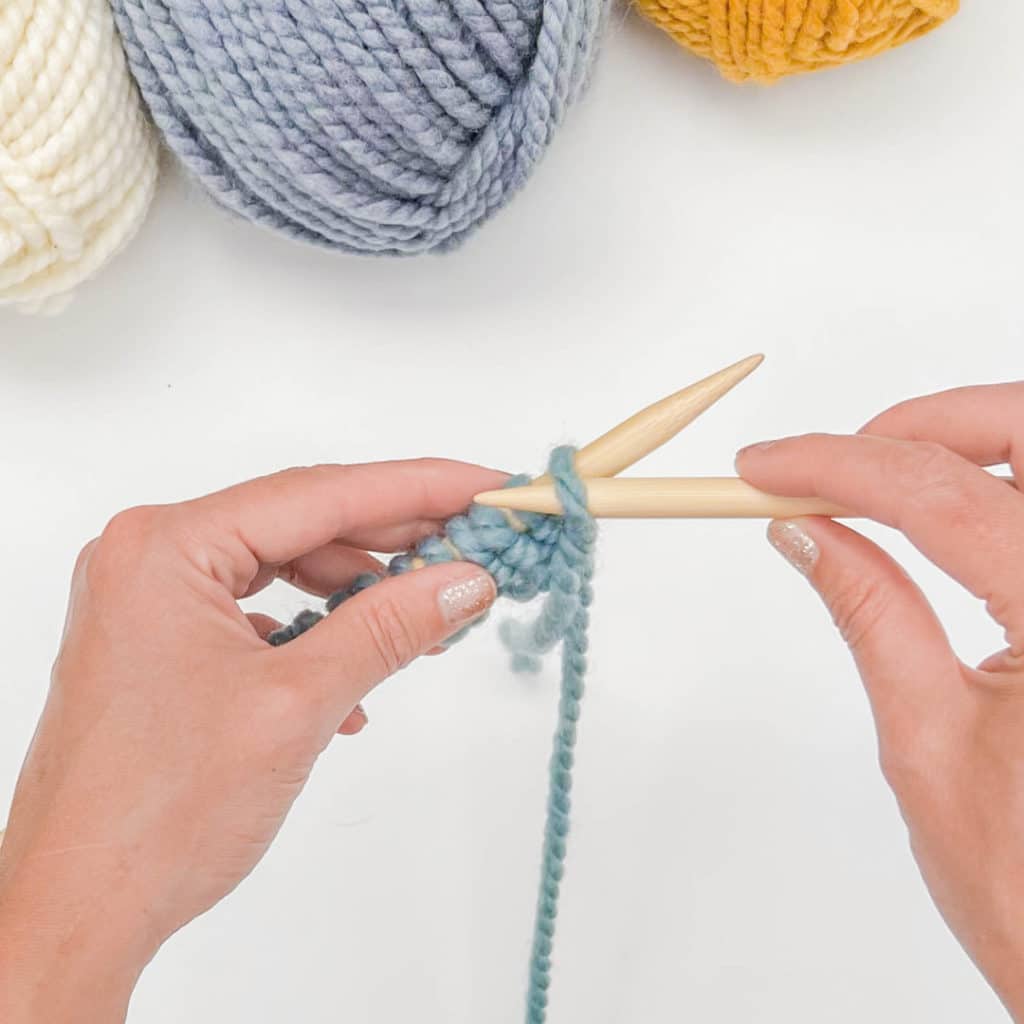
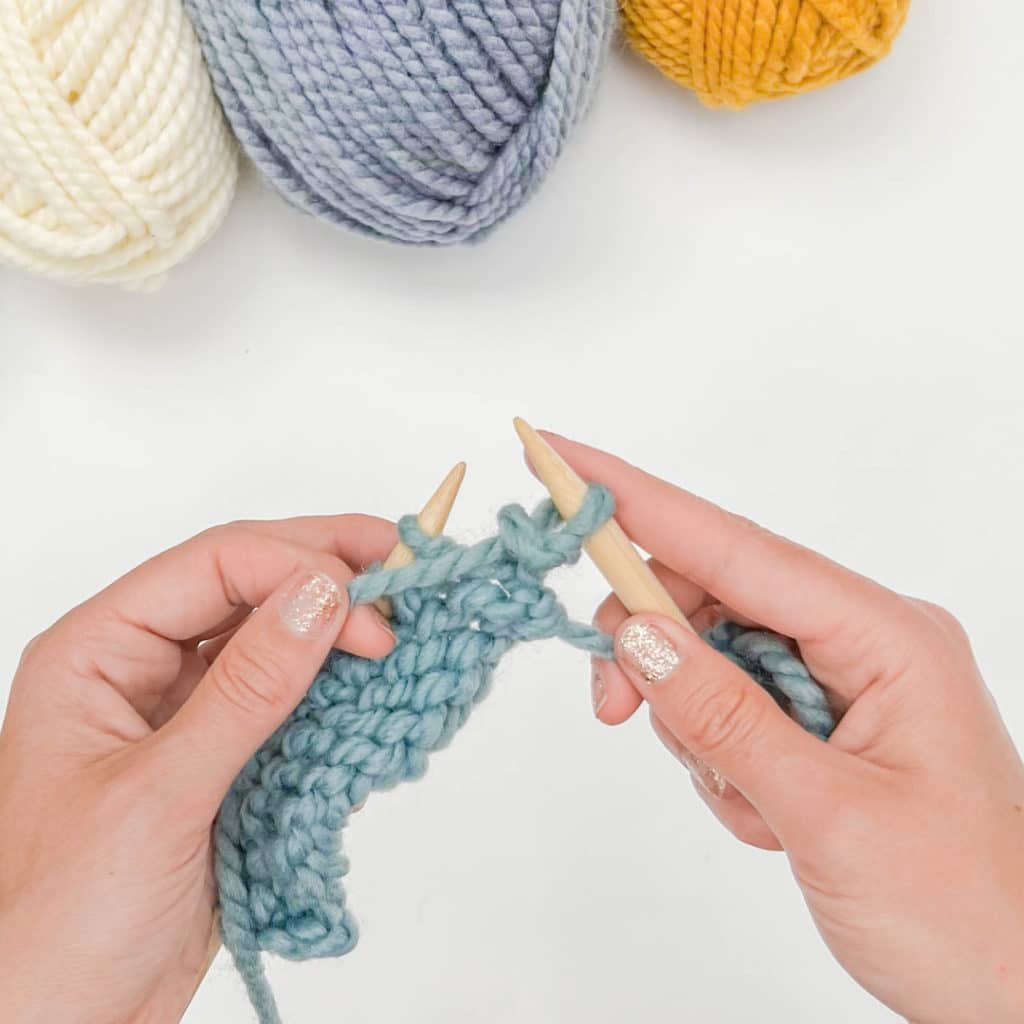
The first row is a knit row, these instructions will walk you through forming a knit stitch.
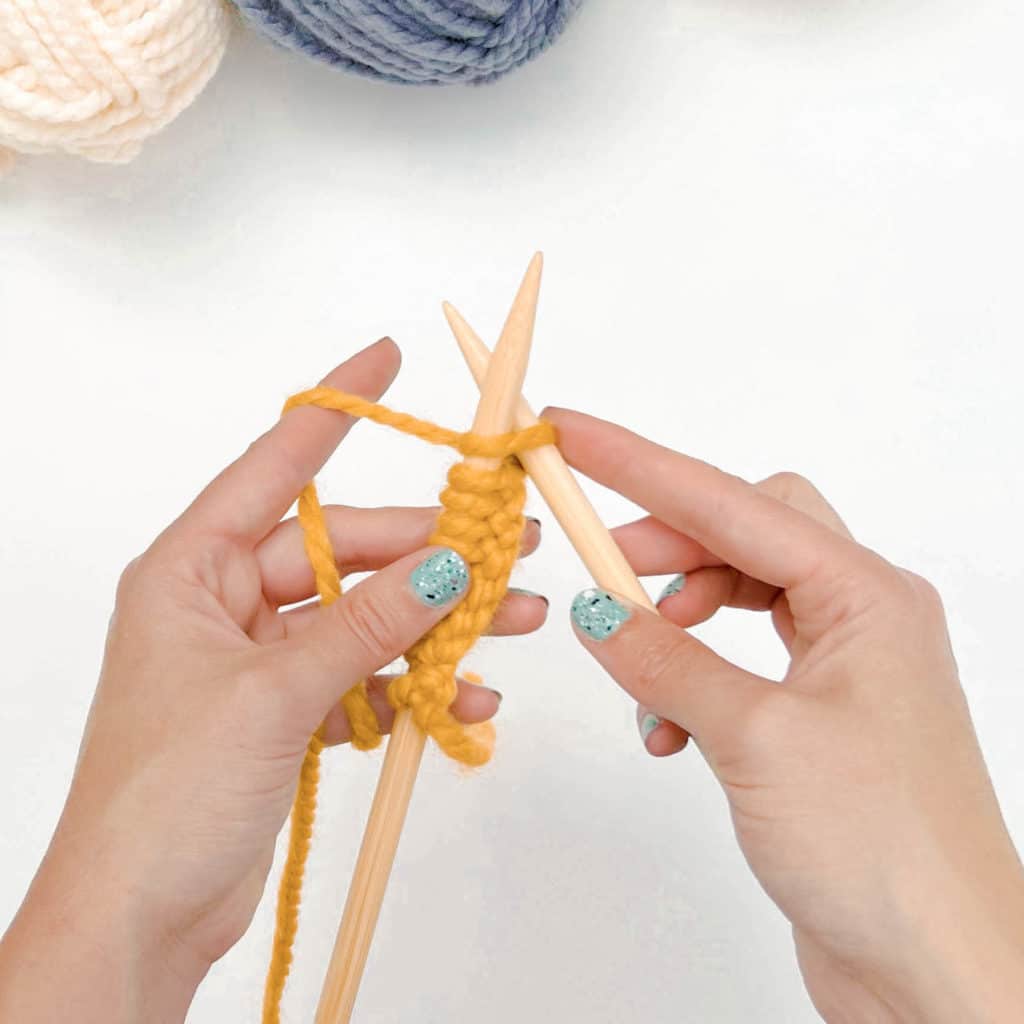
Step 1: Insert the right needle through the first stitch upwards from right to left through the front loop.
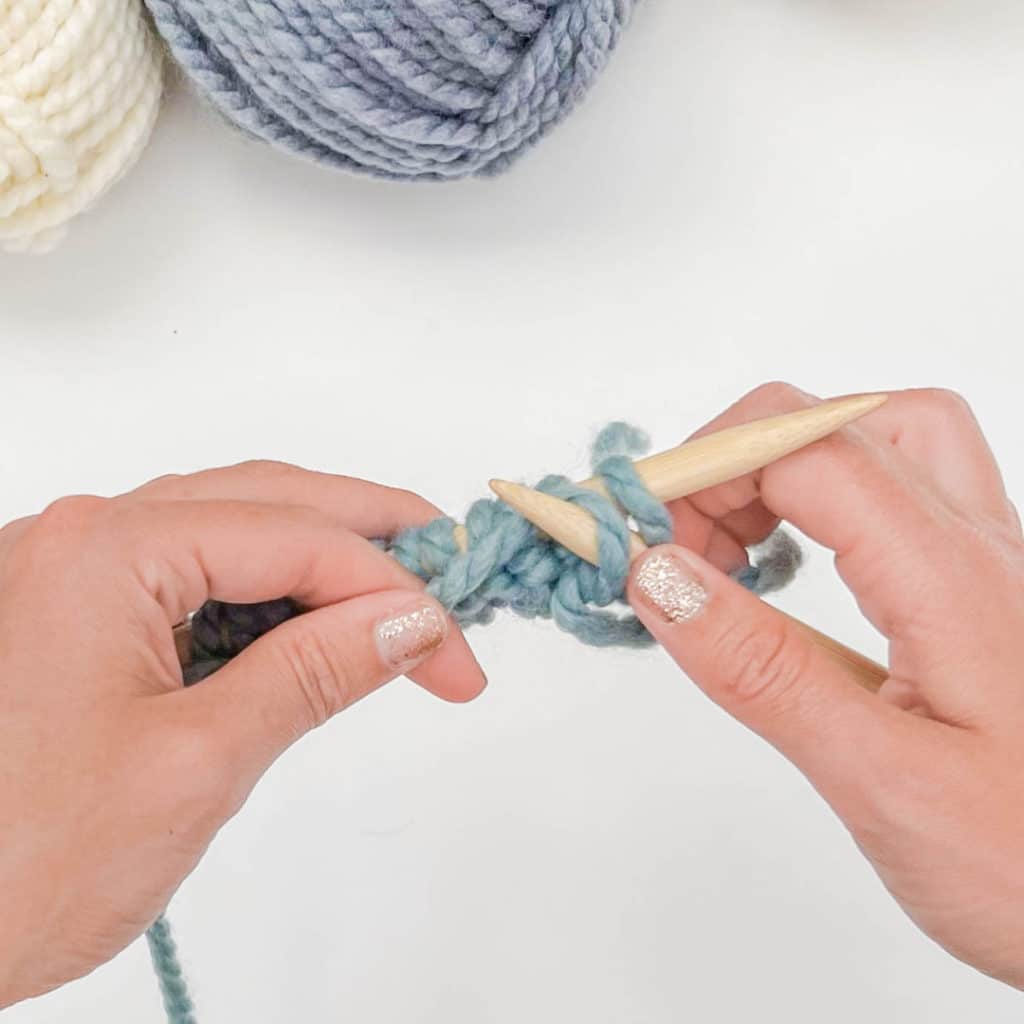
Step 2: Bring the yarn up between the two needles, looping it over the right needle.
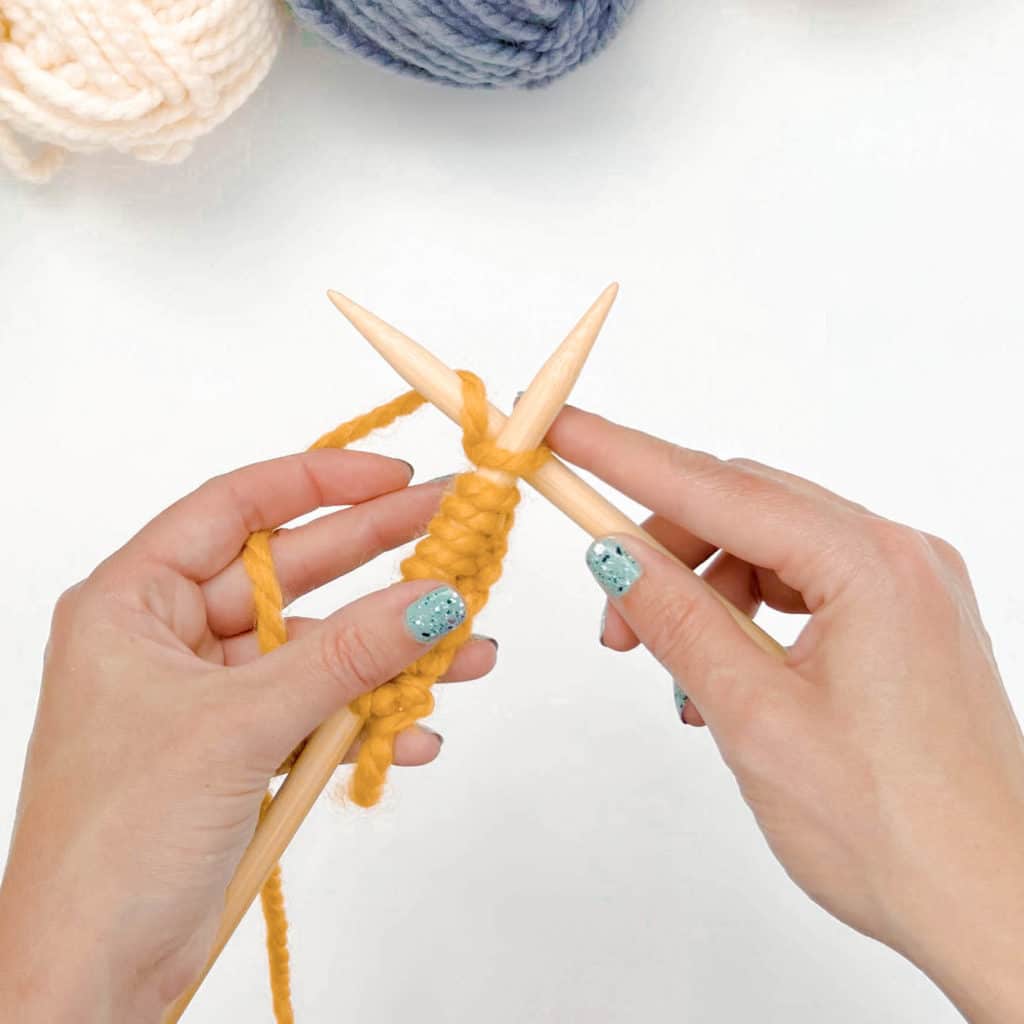
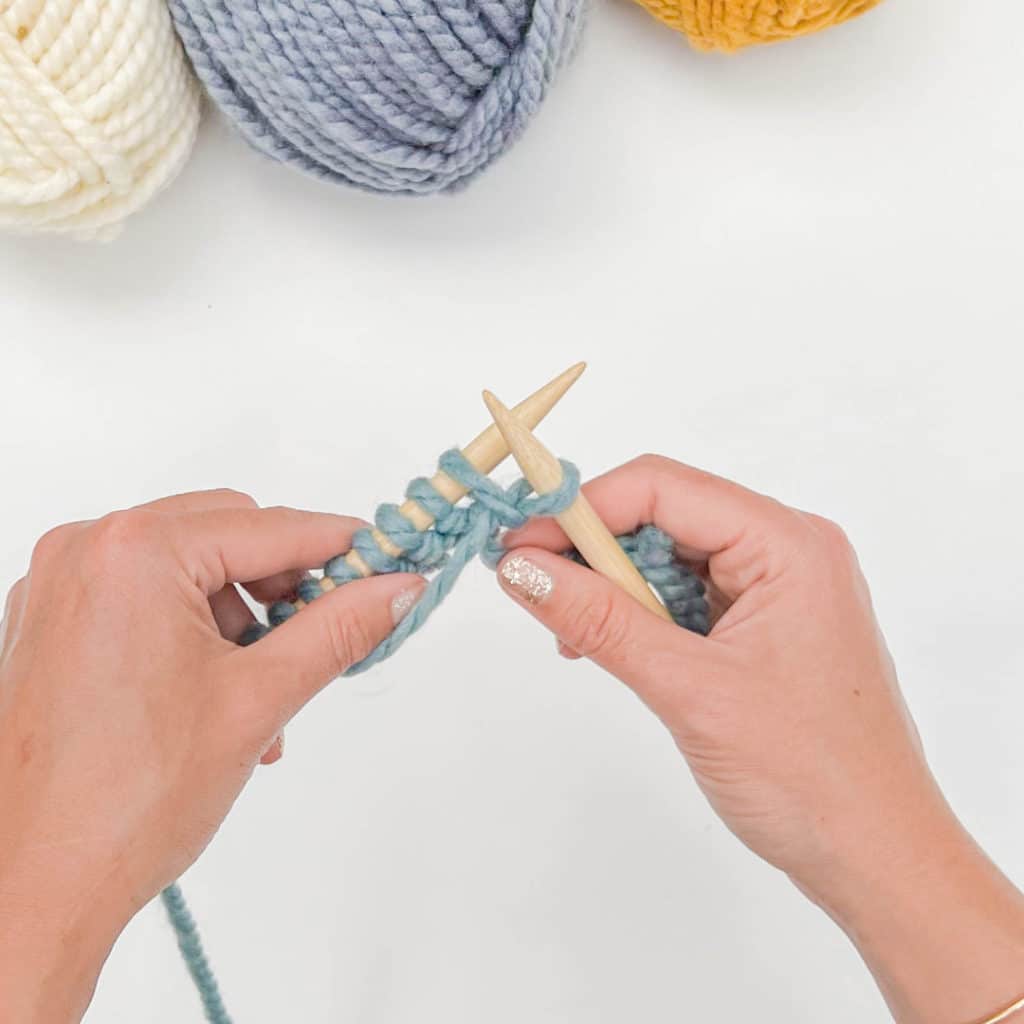
Step 3: Hook the yarn through the stitch by pivoting your right needle downward, pinning the yarn between the needles as you go.

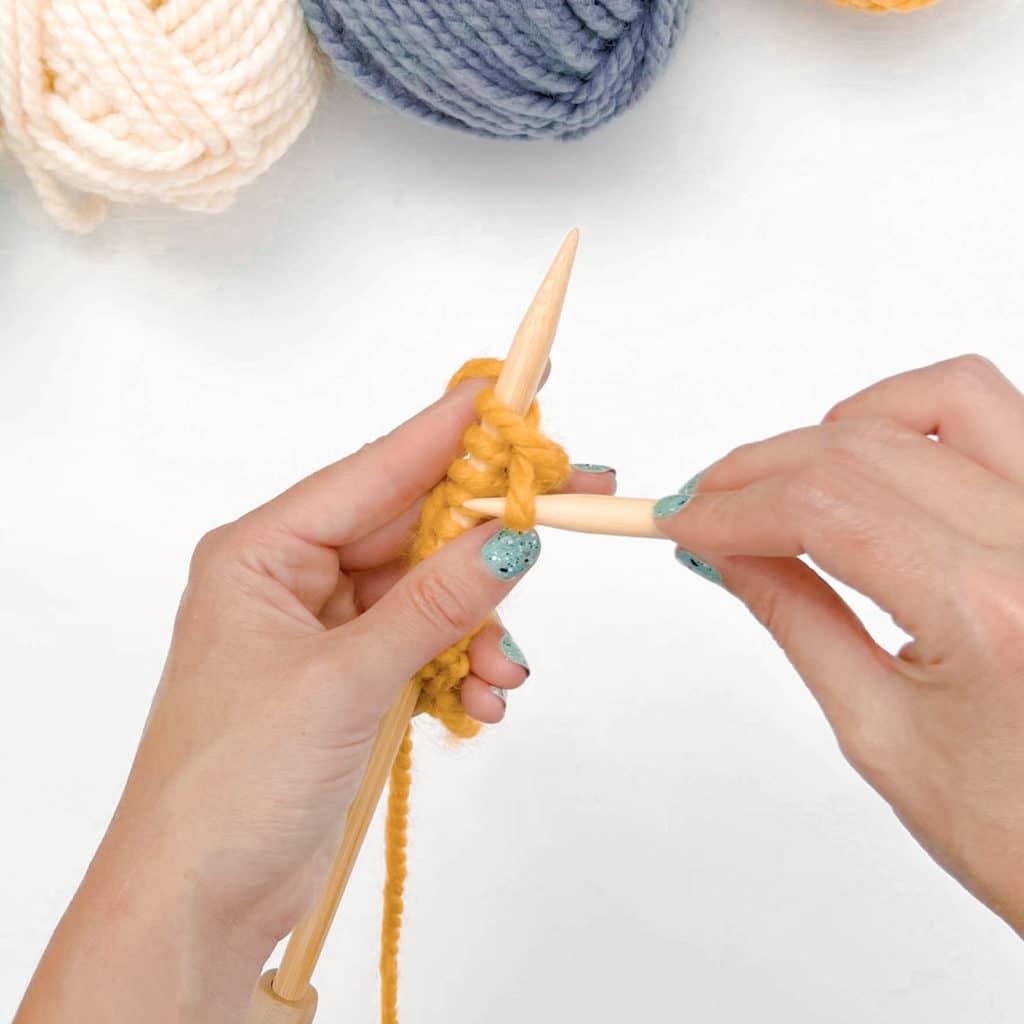
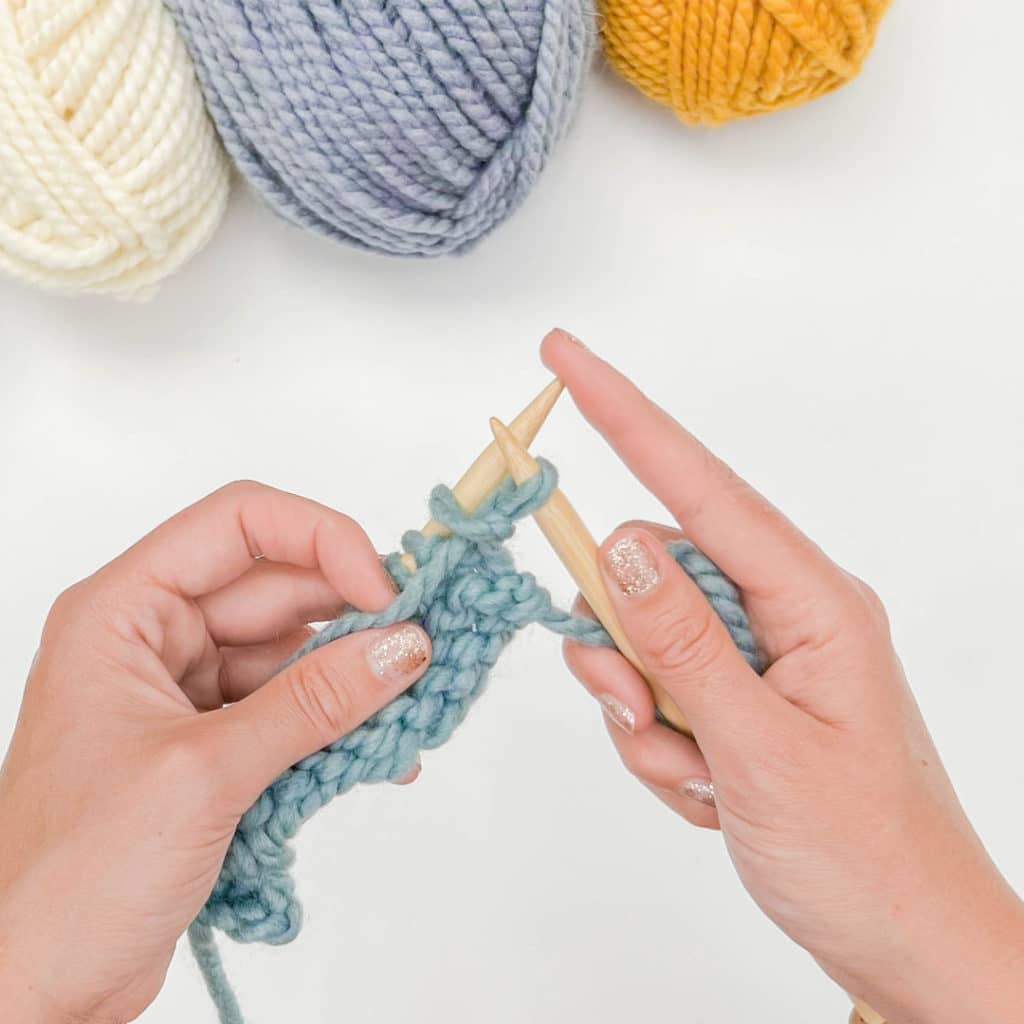
Step 4: Drop the stitch off your left needle once the new knit stitch is resting fully on your right-hand needle.
Repeat steps 1-4 until the end of the row.
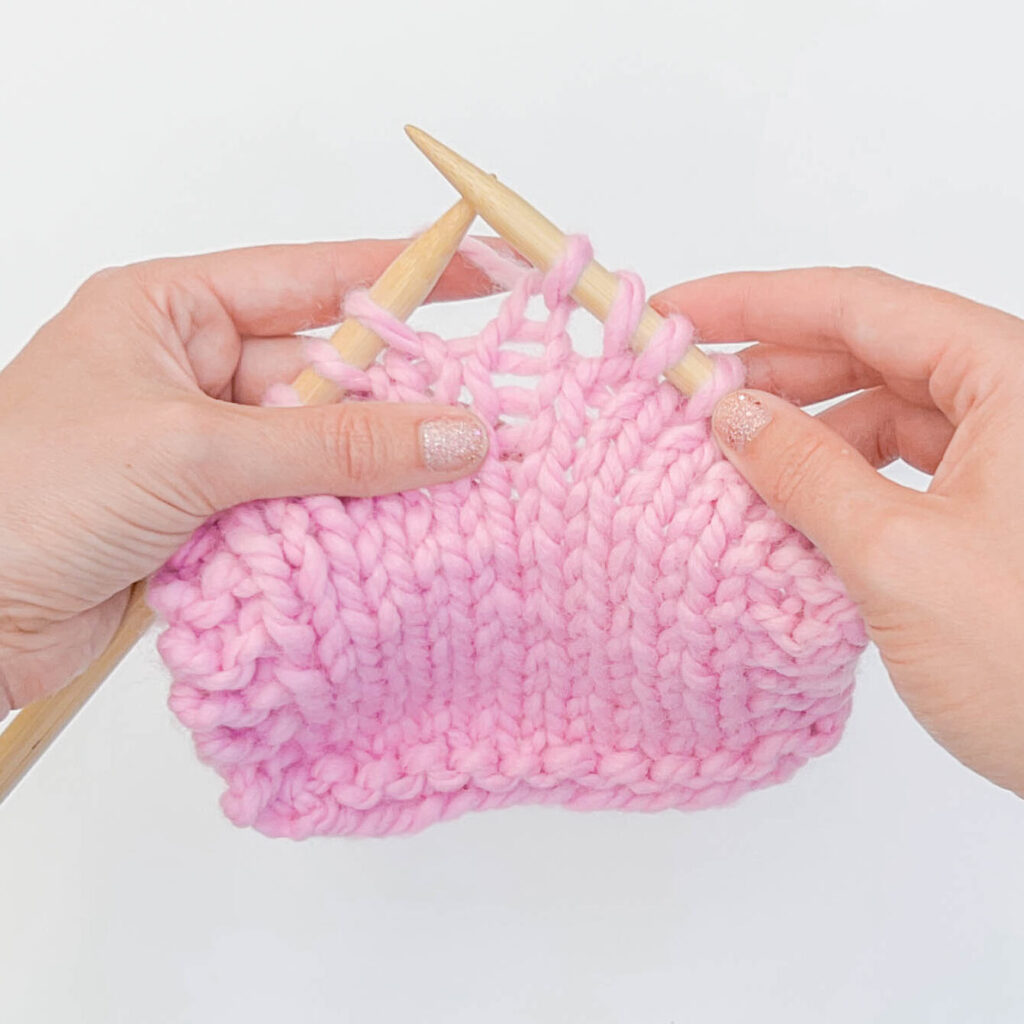
The second row is a purl row, these instructions will walk you through forming a purl stitch!
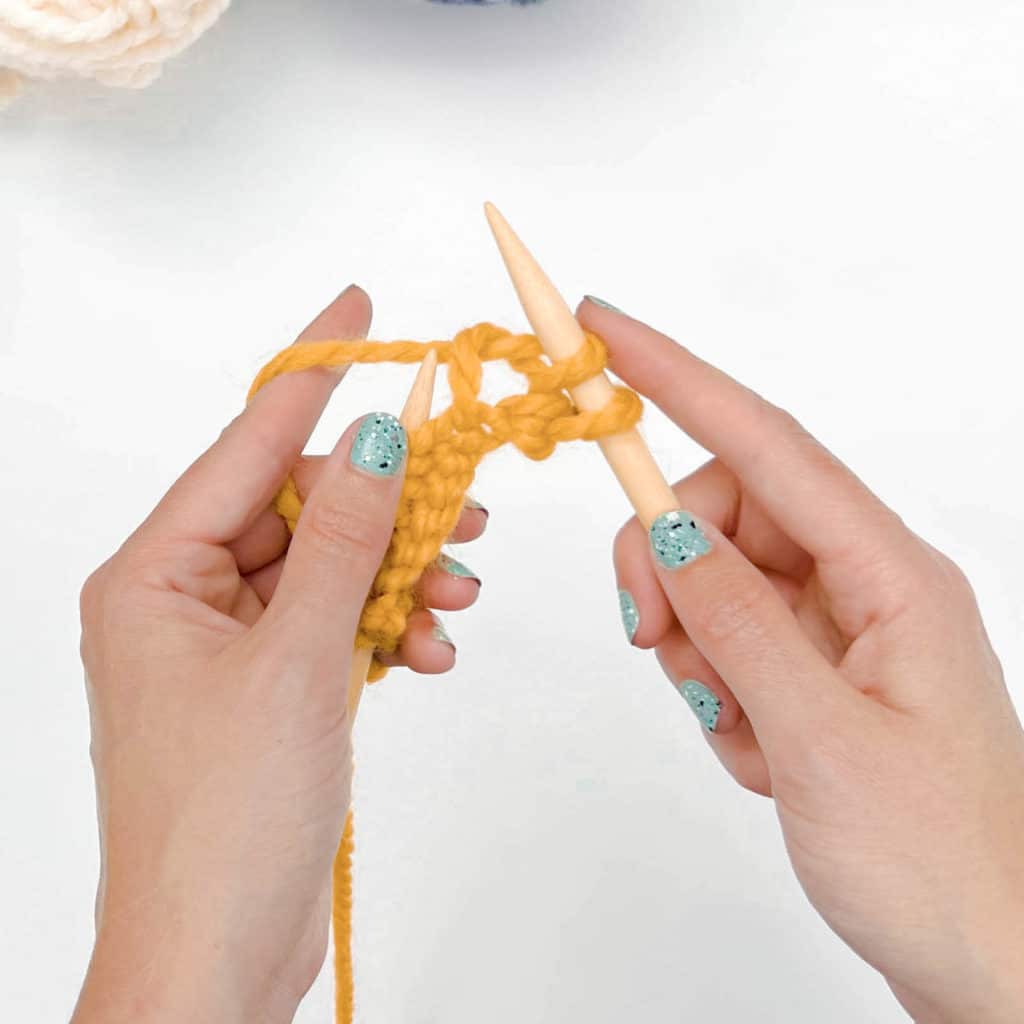
Step 1: Insert the right-hand needle through the first stitch from right to left through the front leg of the stitch.
Step 2: Wrap the yarn up and over your working needle from front to back, down between the two needles.
Step 3: Pull the loop through the stitch by pivoting your right needle tip upward to the right.
Step 4: Slide the old stitch off your left-hand needle.
Repeat steps 1-4 until you’ve purled all of your stitches!
Stockinette stitch is made differently depending upon whether it was knit in the round or flat. When knit flat (back and forth), stockinette stitch fabric is made using alternating rows of knitting and purling. When knit in the round, stockinette stitch knit is made by just knitting all stitches!
Because stockinette has two distinct sides of knit stitches on one side and purls on the other, it’s easy to spot mistakes in the middle of a row. This is a great stitch to use to practice learning how to “read” your fabric. After every row, take a moment to check your progress and scan for mistakes (and then fixing them right away!).
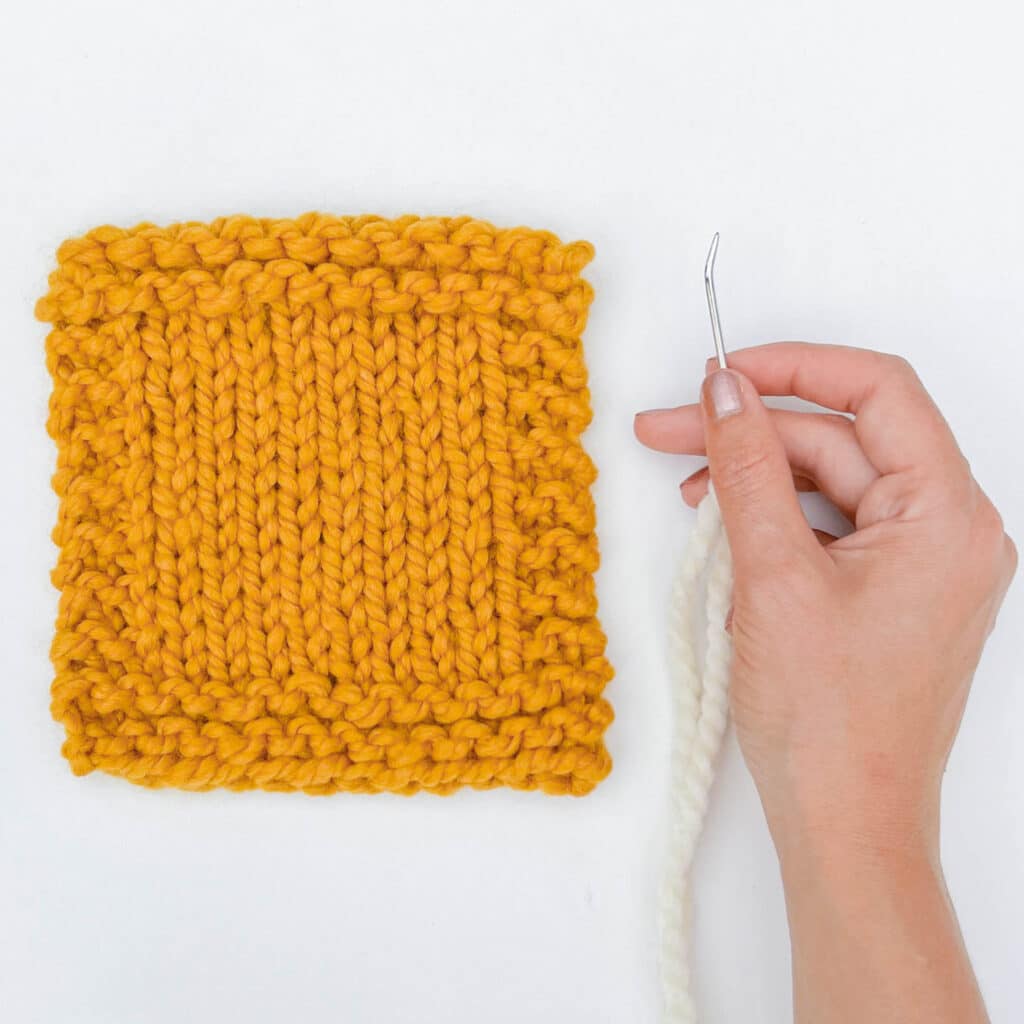
Once you’ve finished your stockinette stitch project or swatch, it’s time to weave your yarn tails in! We’ve got a handy step-by-step tutorial showing you the most popular ways to weave your ends in. READ MORE…