Provisional Cast On: Crochet Method
Easily knit from both sides of a cast on row!
Easily knit from both sides of a cast on row!
Tired of playing yarn chicken? Want to be able to knit a project on two sides at once? Or maybe you’re just not sure how long you want your finished project to be! Provisional cast on to the rescue!
This special cast on creates a temporary row that opens up endless possibilities for your knitting projects. The provisional cast ons make it possible to knit into both sides of your cast on stitches which means you can knit in two opposite directions at once! The best part? You can either do it right away or come back later.
In a “normal” knit cast on, you’ll have to either unravel your whole work or settle with a visible join/seam if want to knit using the cast on edge. However, the provisional cast on method leaves you with live stitches that you can knit into later on.
This makes it one of the best cast on methods in the knitting world!
“Why use a crochet hook to cast on for a knit project?”
There are several other ways to create the provisional cast on but the crochet hook method is one of the faster and easier ways to put those stitches on hold.
The crochet provisional cast on method gives you a more “stable” base to work on and can be less fidgety to create compared to other versions of this cast on method!
“Where can you use this cast on method?”
There are so many times when a provisional cast on can come in handy!
But how do you crochet this provisional cast on for knitting?
Read on to find out!
The provisional cast on knitting technique is a two-parter! The first section shows how to use a crochet hook to create cast on provisional stitches onto a single knitting needle using waste yarn.
The second section takes you through removing the waste yarn leaving live stitches behind. Pick up the live stitches on a second knitting needle before continuing to work!
For this section you need the waste yarn, one knitting needle, and one crochet hook.
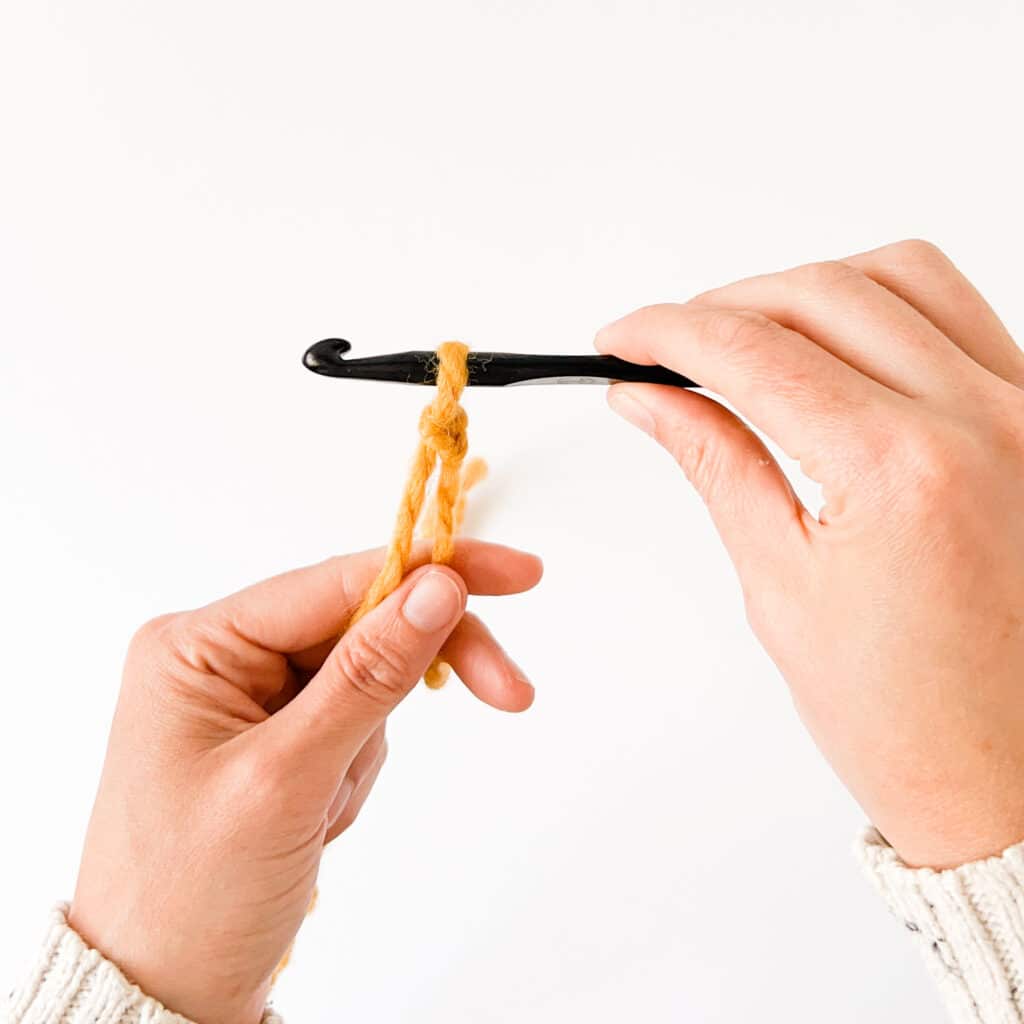
Step 1:
Tie a slip knot around the barrel of the crochet hook.
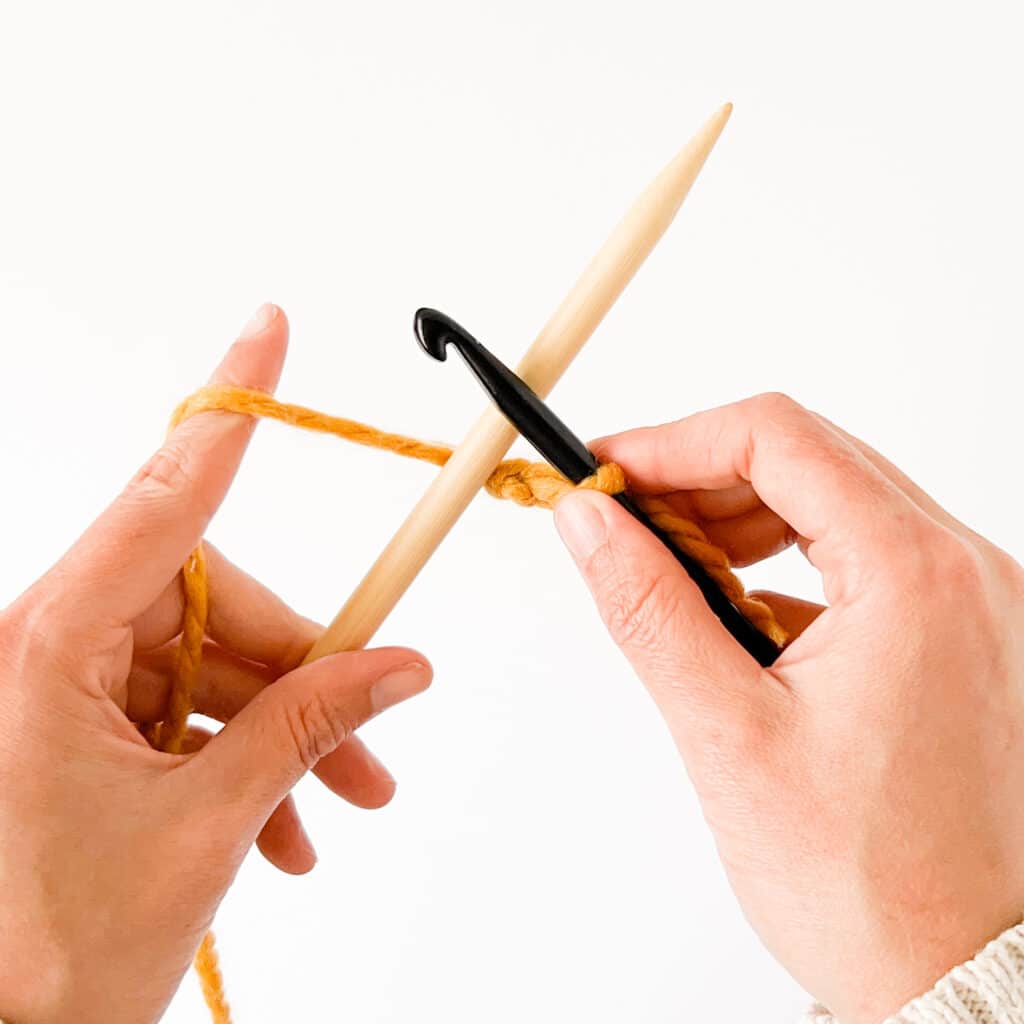
Step 2:
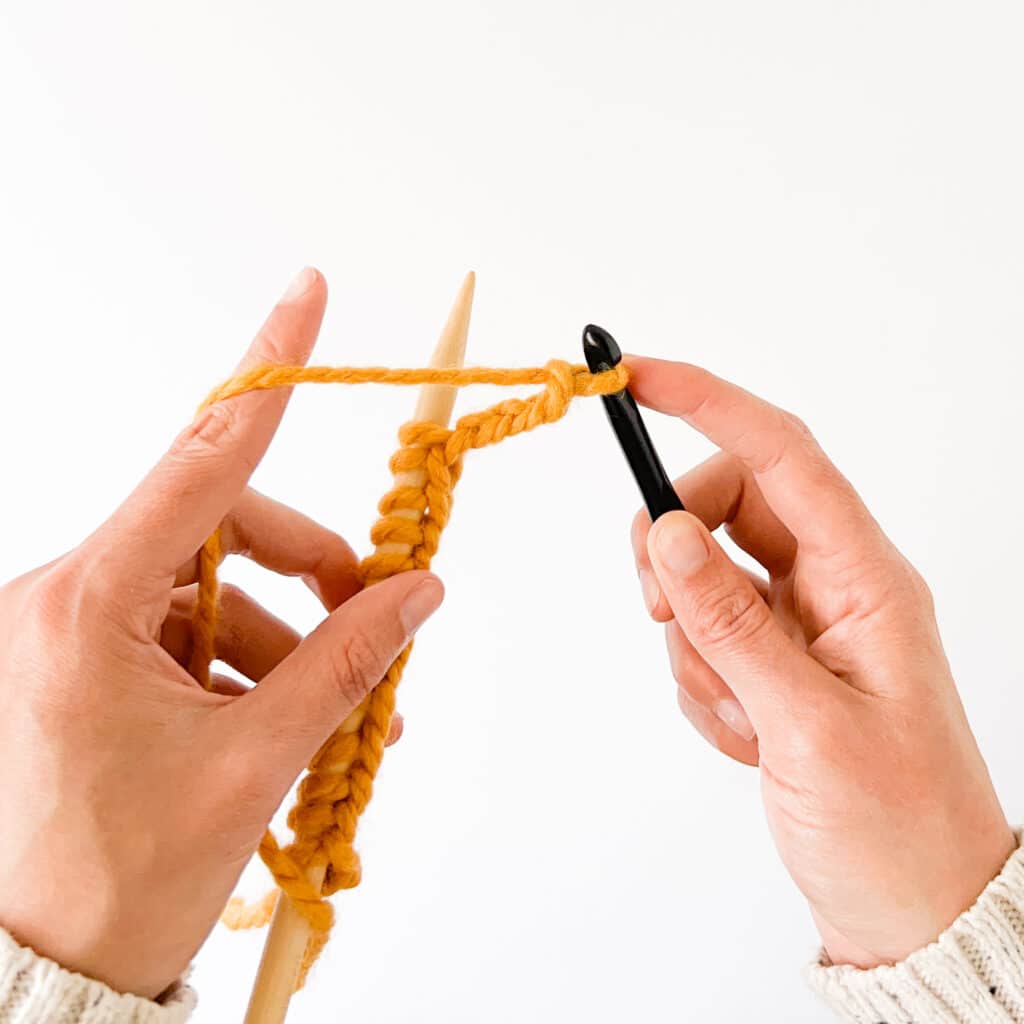
With the knitting needle in your left hand with the working yarn strand behind it and the crochet hook on top of it.
Hold the yarn tail out of the way in your hook hand.
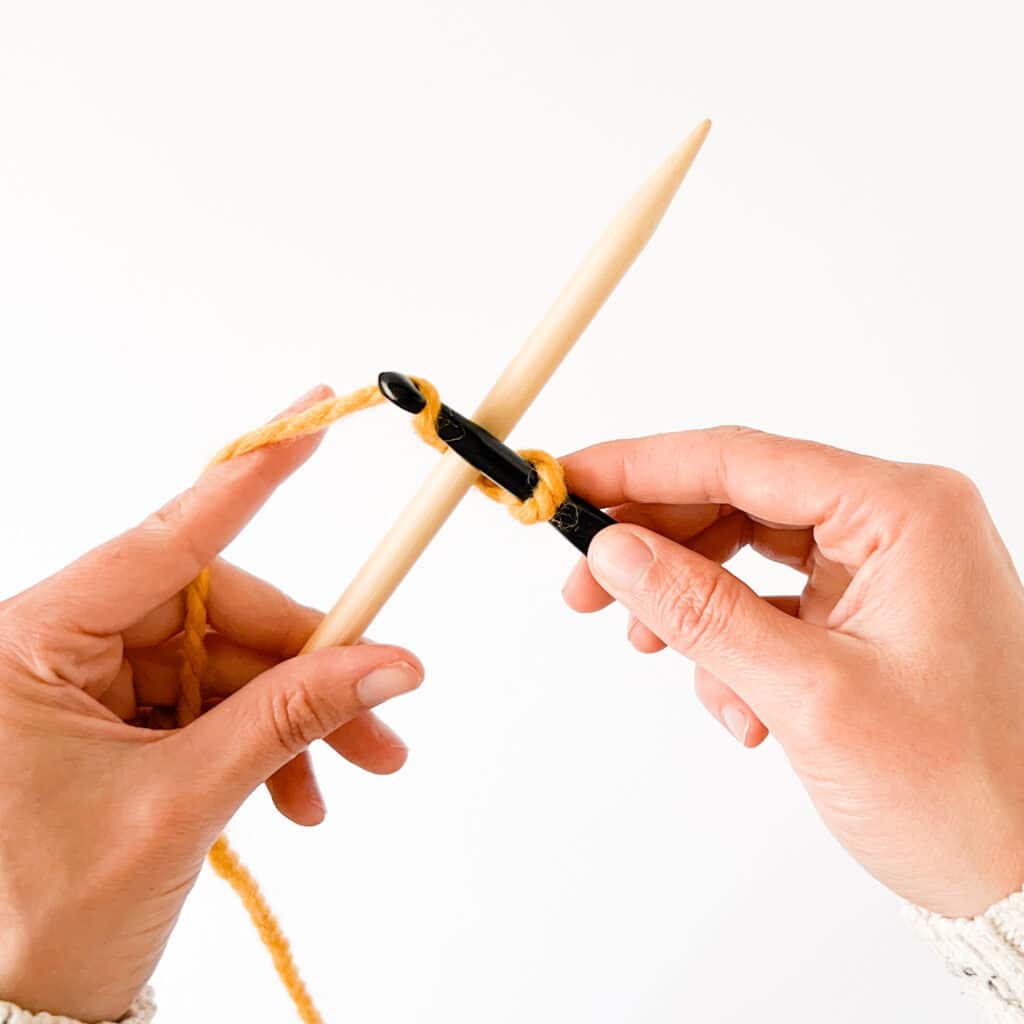
Step 3:
Hook the work yarn strand using the crochet hook.
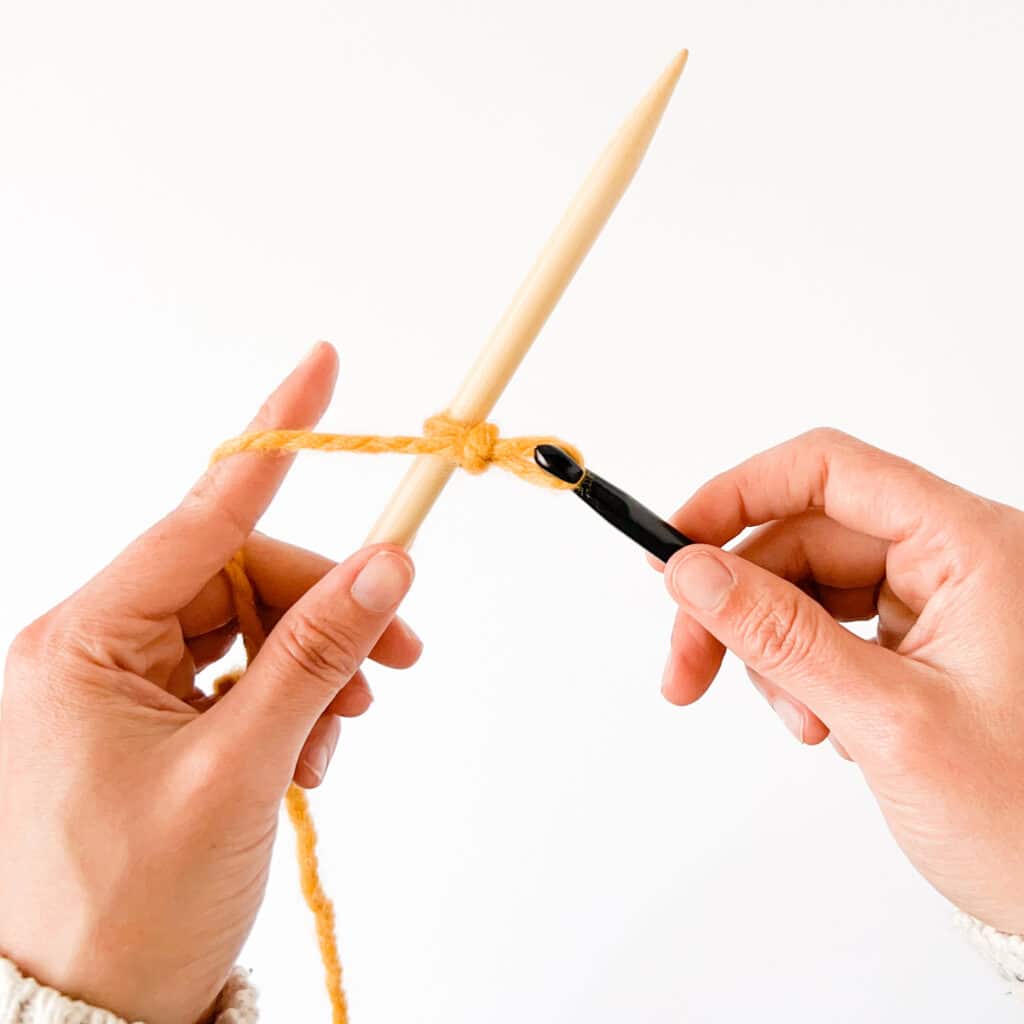
Step 4:
Pull the yarn through slip knot loop on the hook.
One stitch is now on the knitting needle.
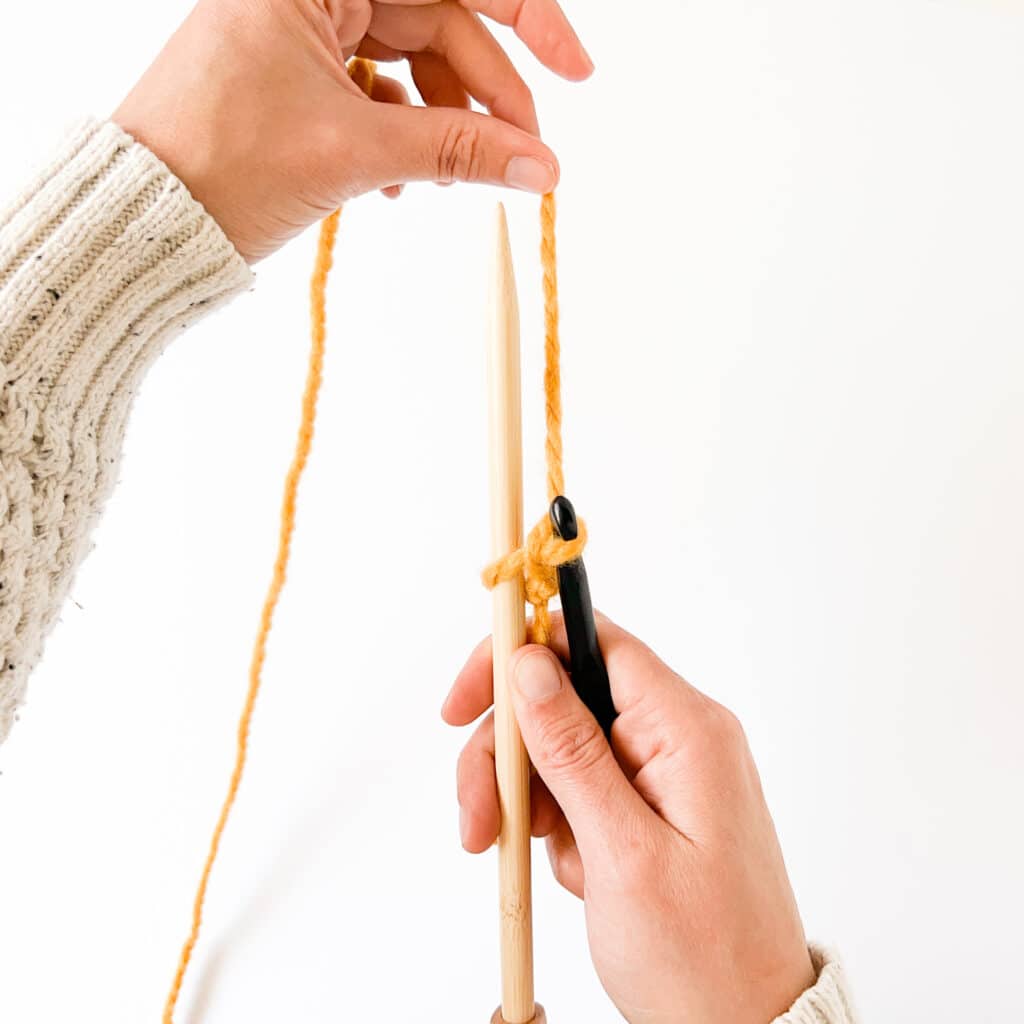
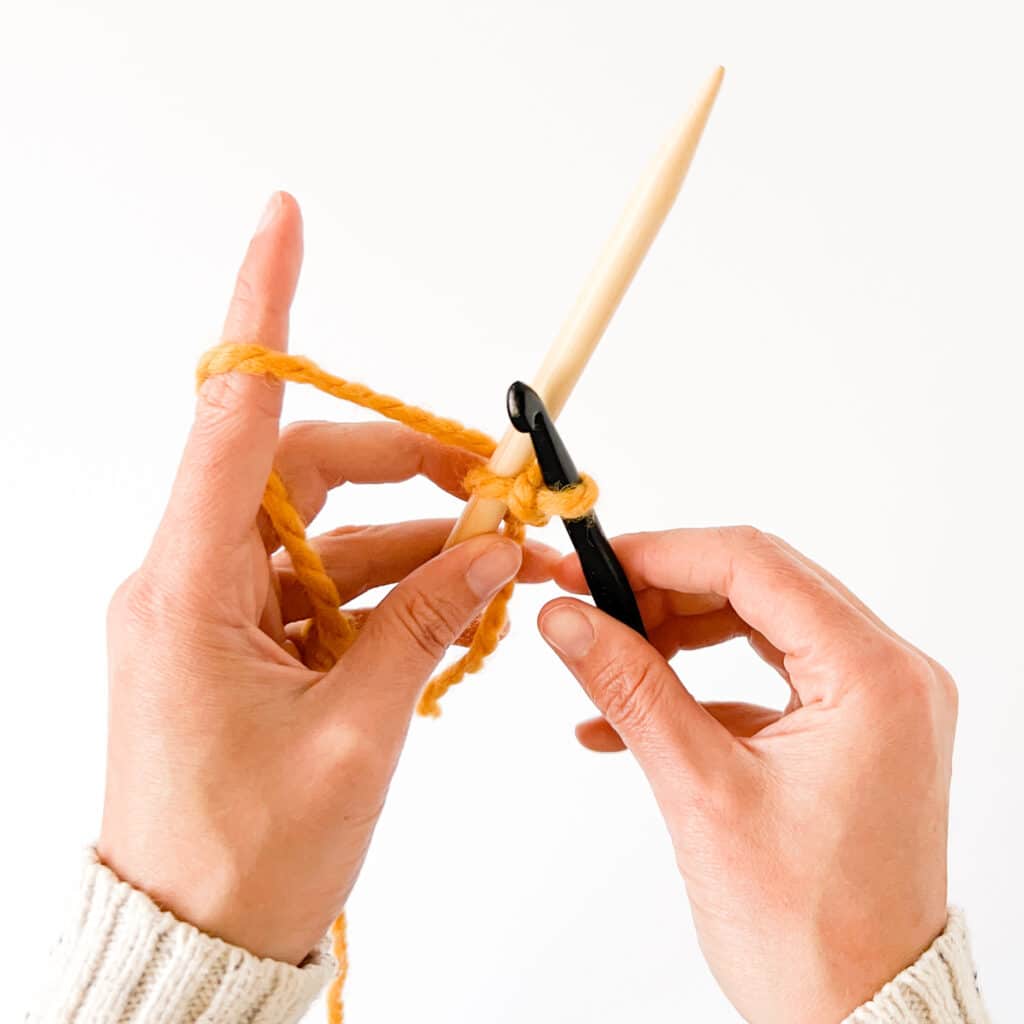
Step 5:
Bring the working yarn back behind the knitting needle and the crochet hook back in front of the needle.
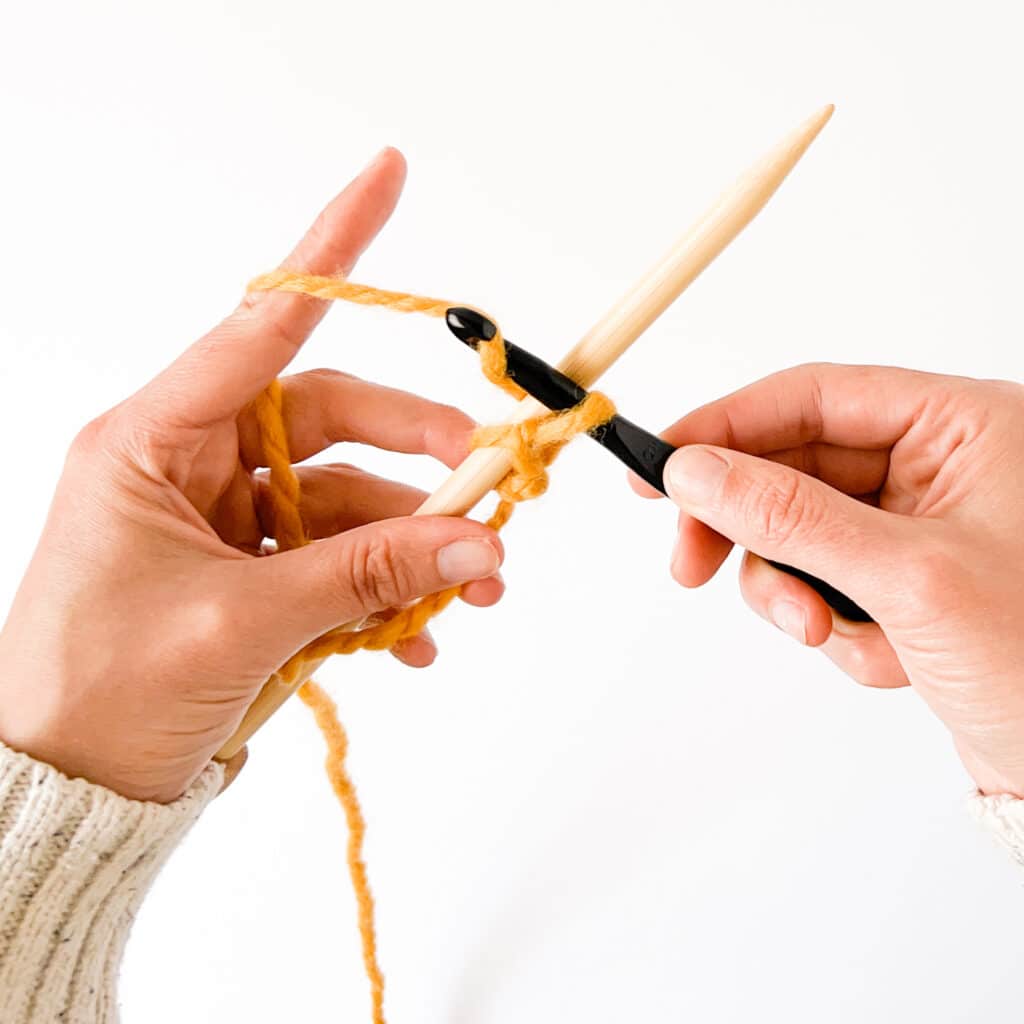
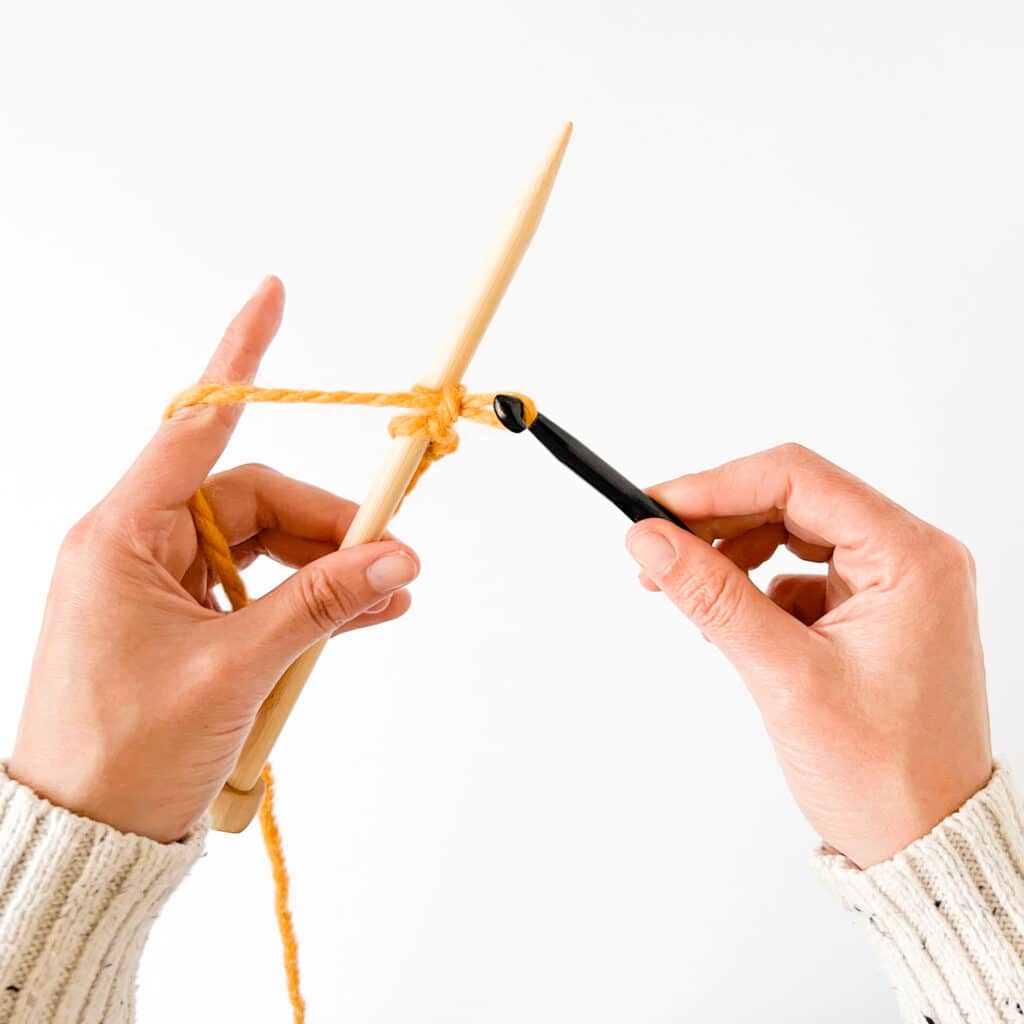
Step 6:
Use the hook to pull the yarn through loop on the crochet hook. A new stitch is now on the knitting needle.
Repeat steps 5 & 6:
Until you have cast on the right number of stitches on the knitting needle to begin your project!
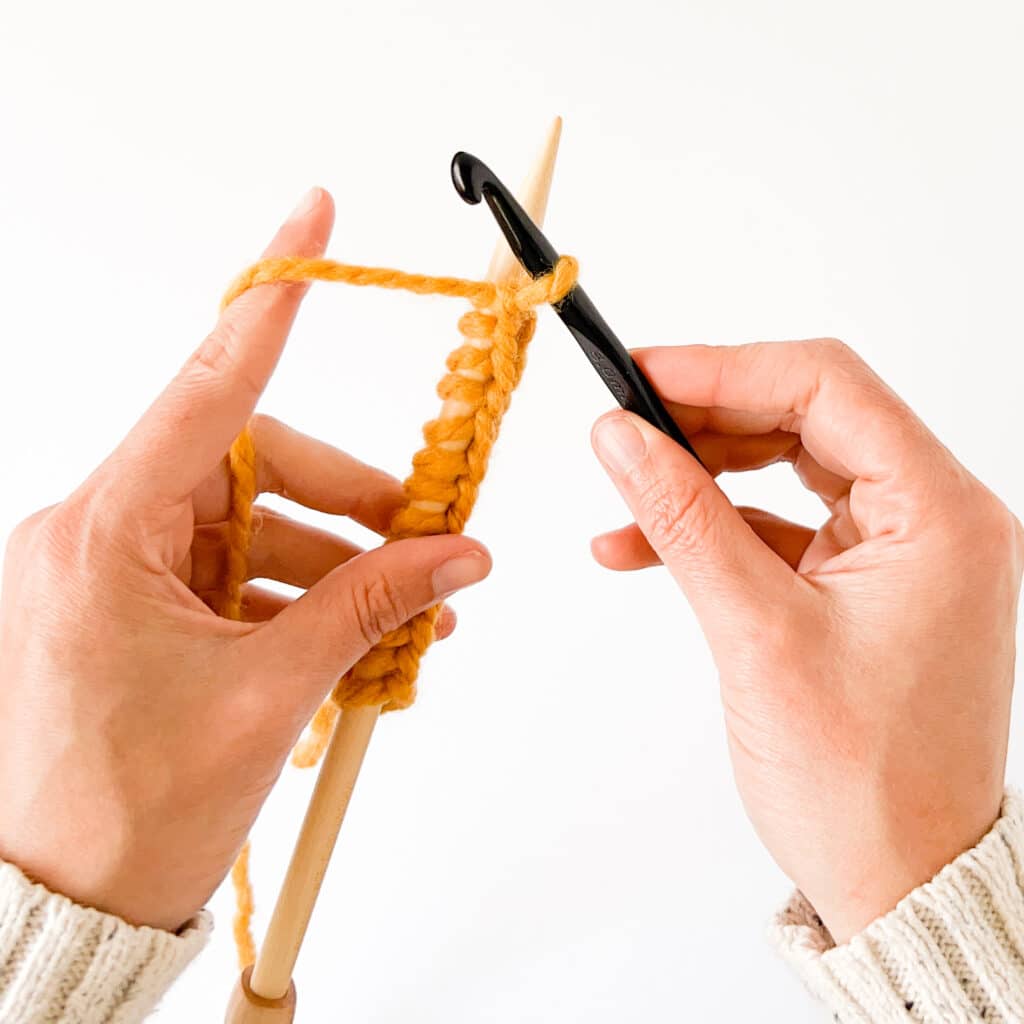
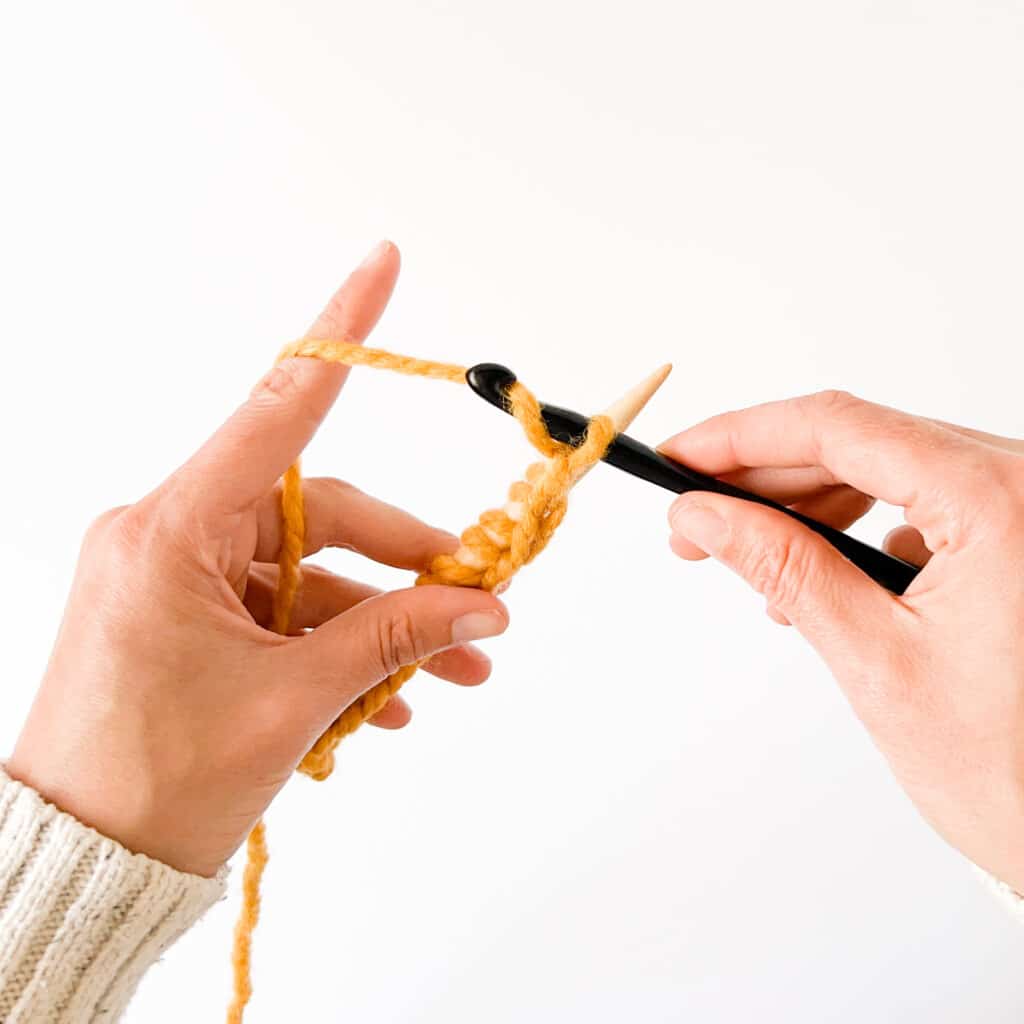
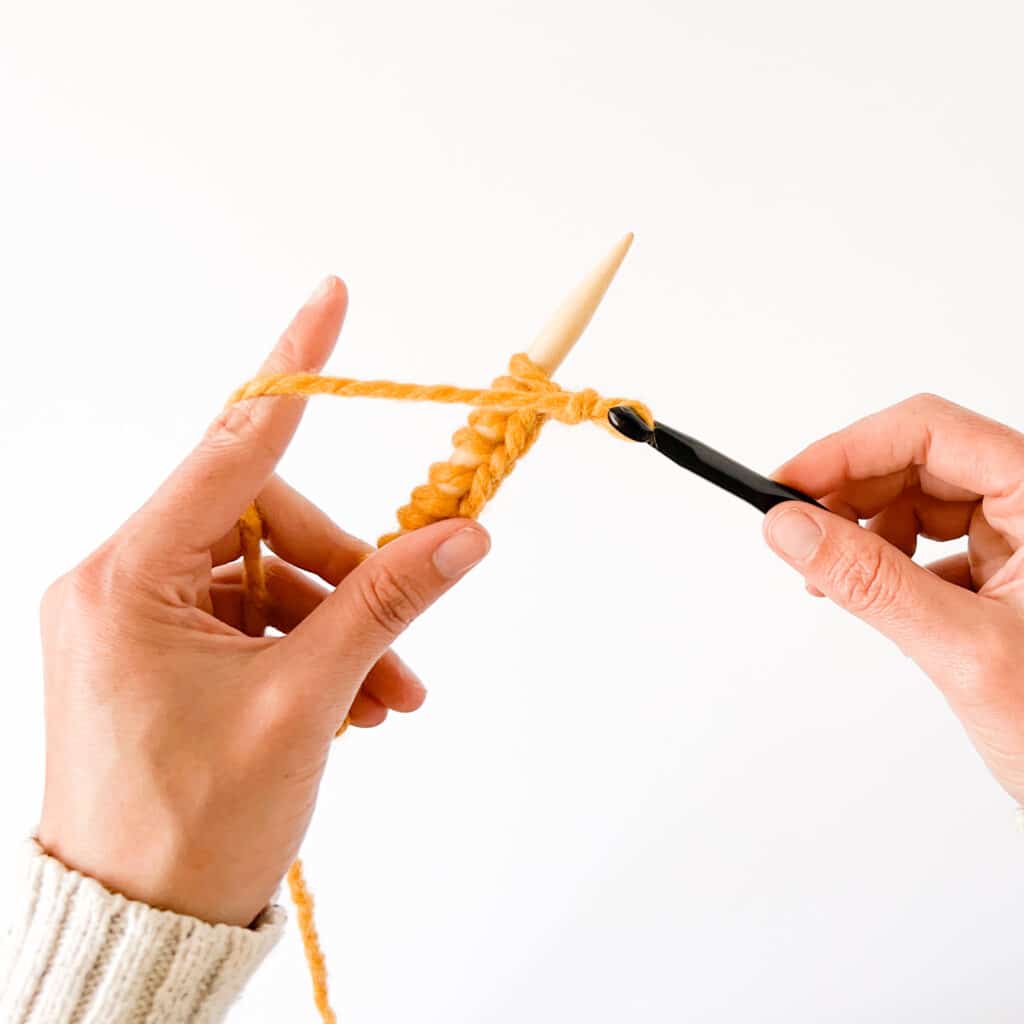
Step 7:
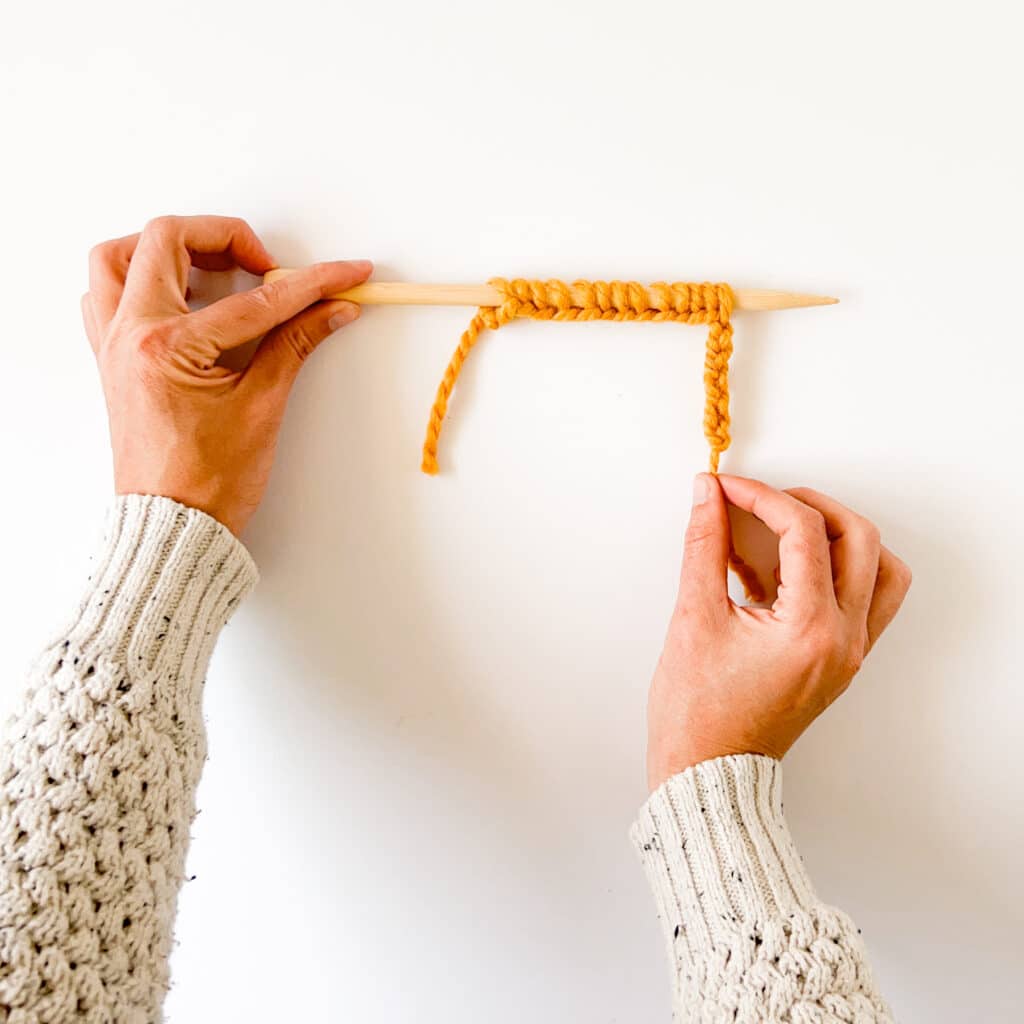
Leave the yarn and hook in front of the knitting needle at the end of step 6. Chain 3-4 stitches.
To chain a stitch, use the crochet hook to grab the working yarn and pull it down-and-through the loop on the hook. Each time you pull the yarn through counts as a single chain.
Step 8:
Cut the yarn leaving a short tail. Pull the yarn tail through the last chain stitch, cinching the loop closed and finishing the provisional cast on.
In this section you’ll need a second knitting needle and your project yarn.
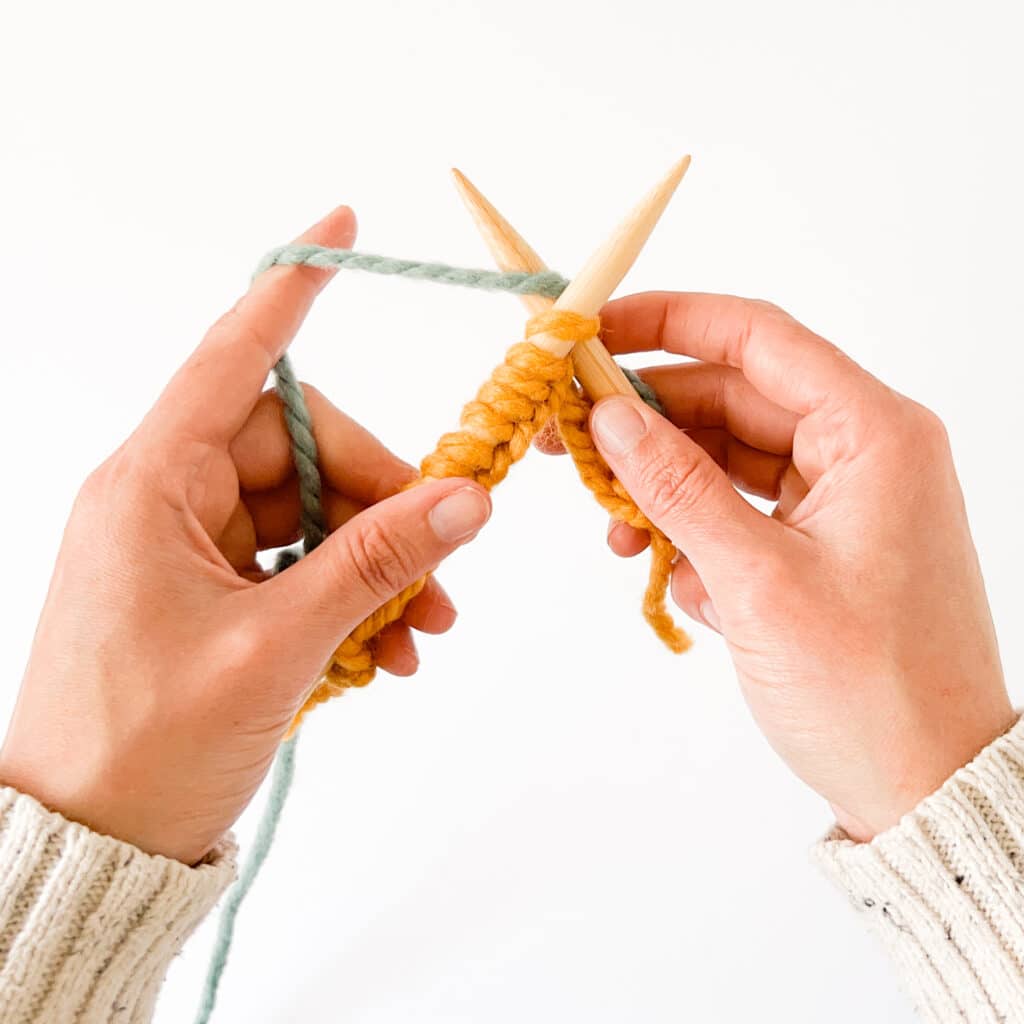
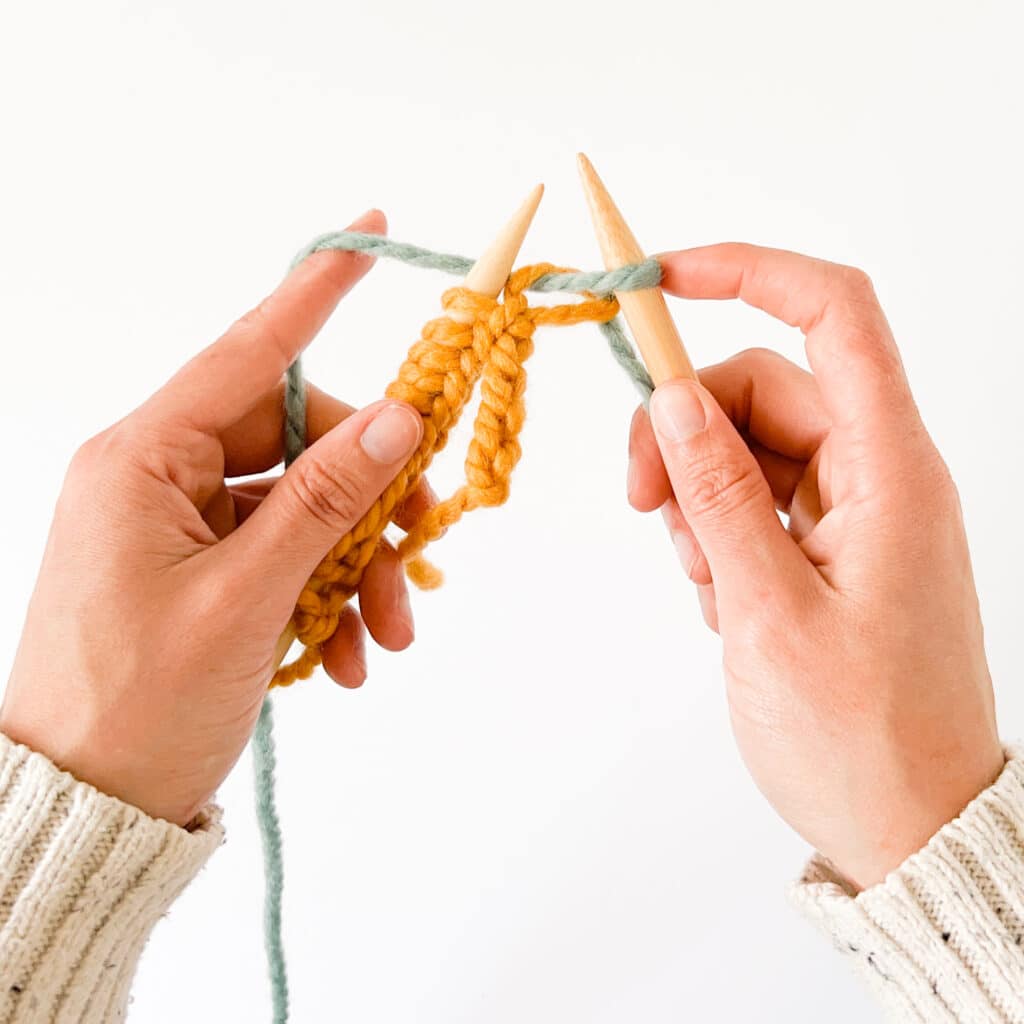
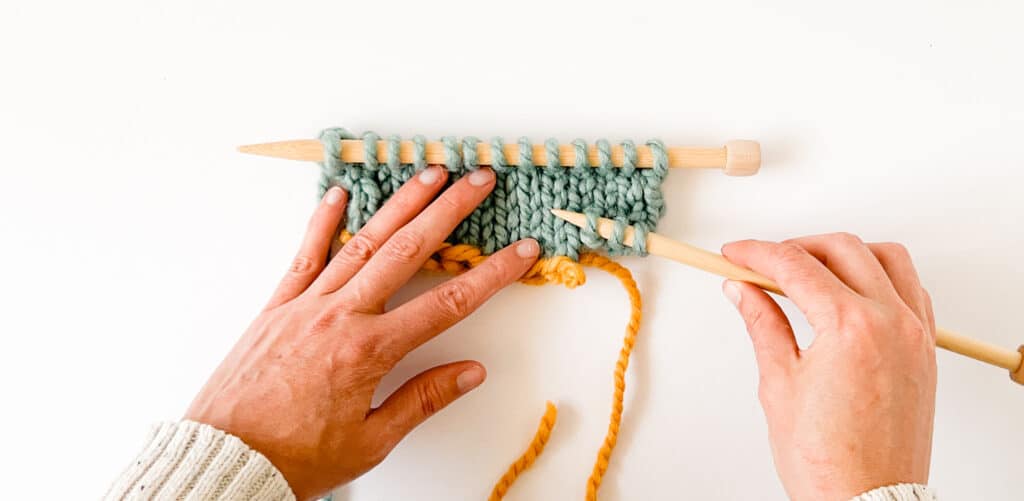
With a second knitting needle, work all of the cast on stitches on your left needle. In the photo above the stitches are knit but you can purl or work whatever stitch pattern you want into the provisional cast on stitches.
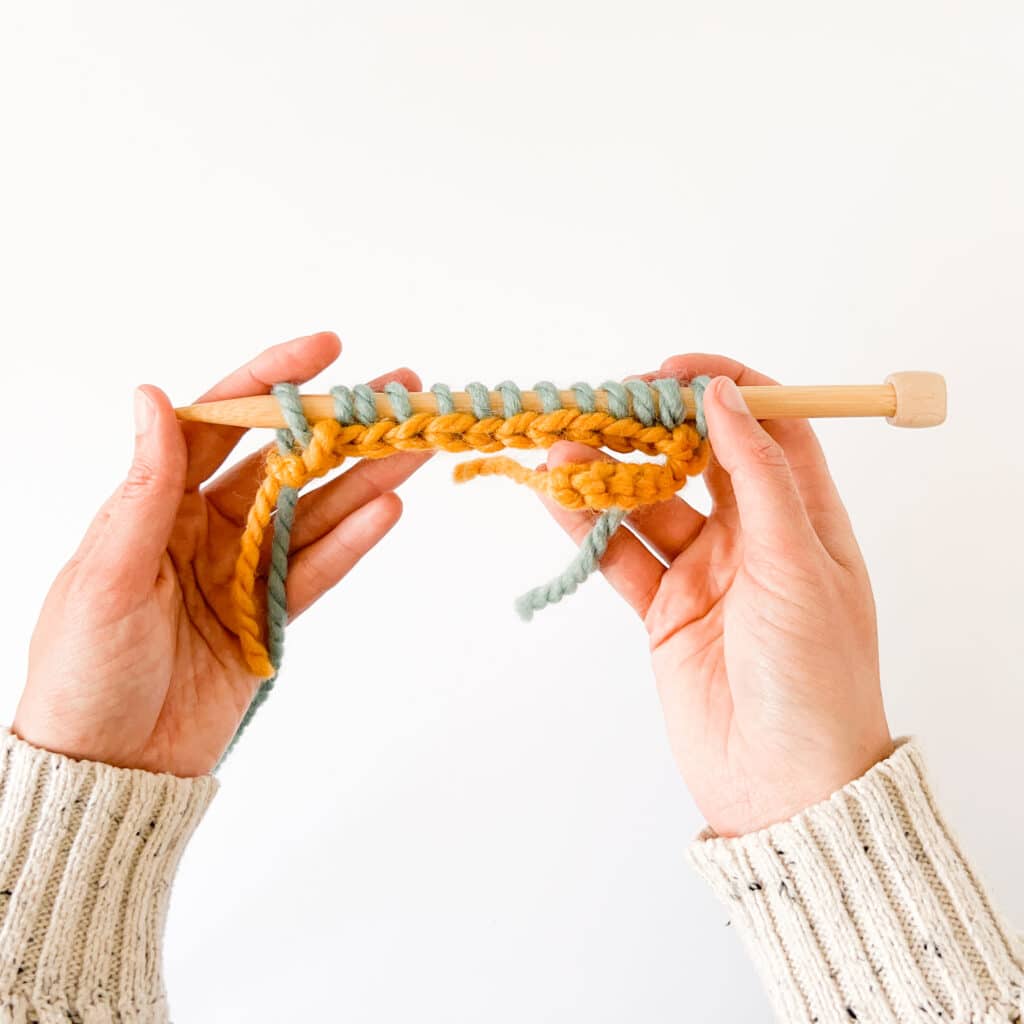
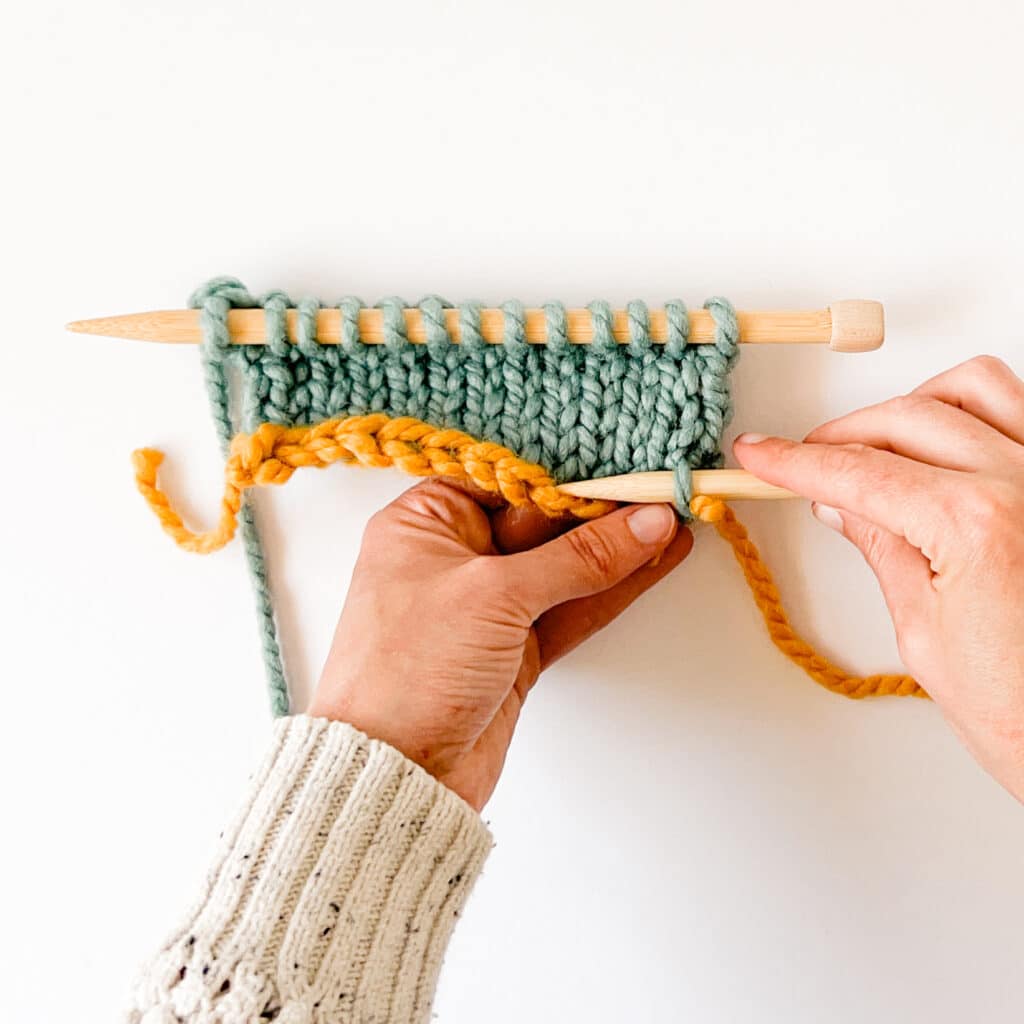
In this example, the yellow yarn is the provisional cast on and the blue/green yarn is the project yarn. Continue to work for as long as your pattern calls for or until you have at least two rows of stitches before undoing the provisional cast on stitches.
For this section you need the second knitting needle.
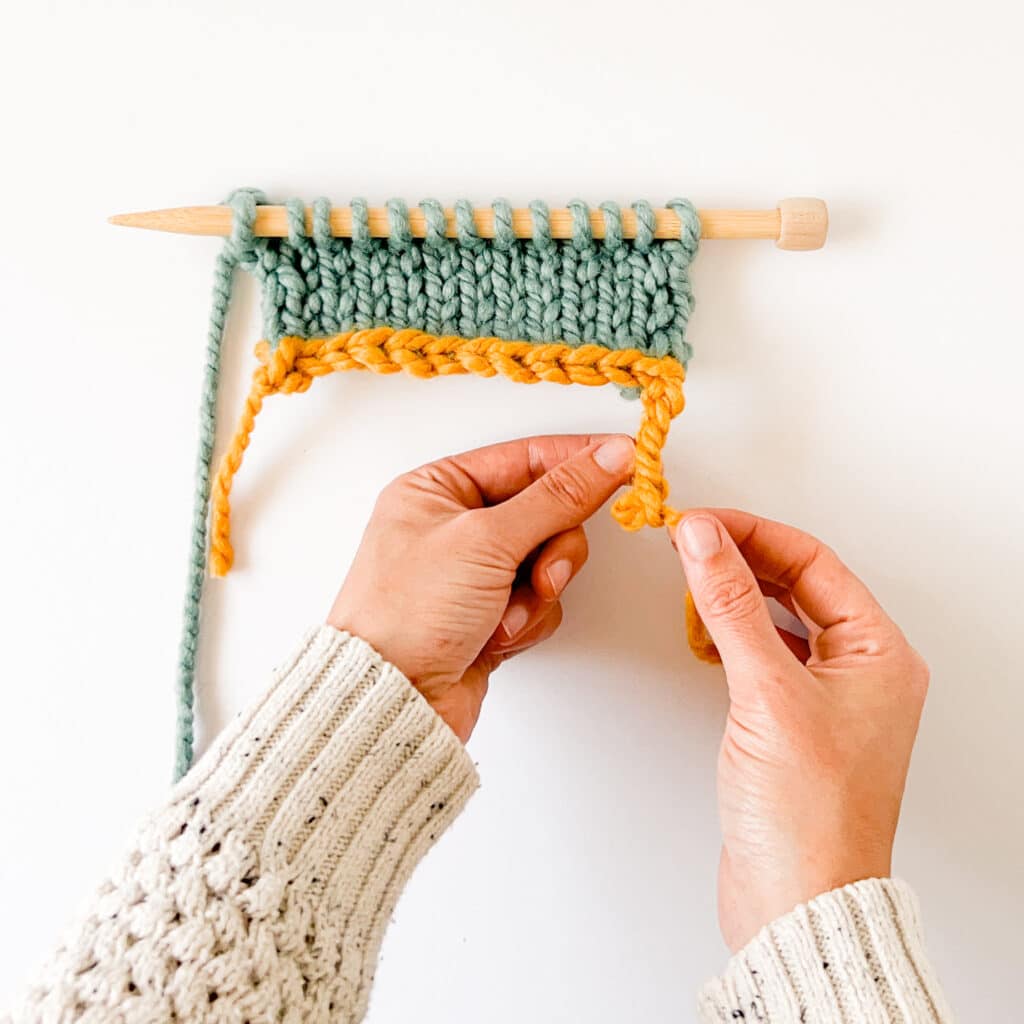
Step 1:
Find the length of chained stitches from step 7. Thread the yarn tail back through the last crochet chain stitch in step 8.
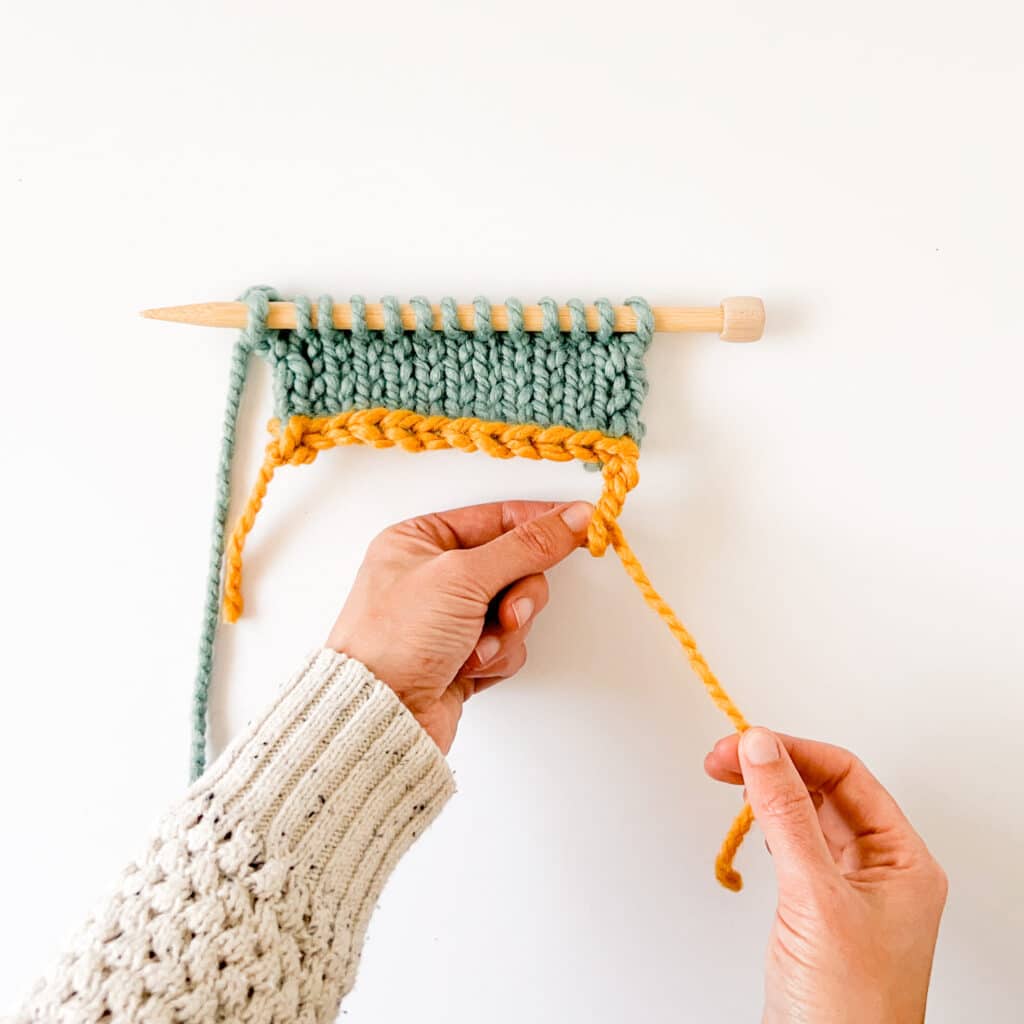
Step 2:
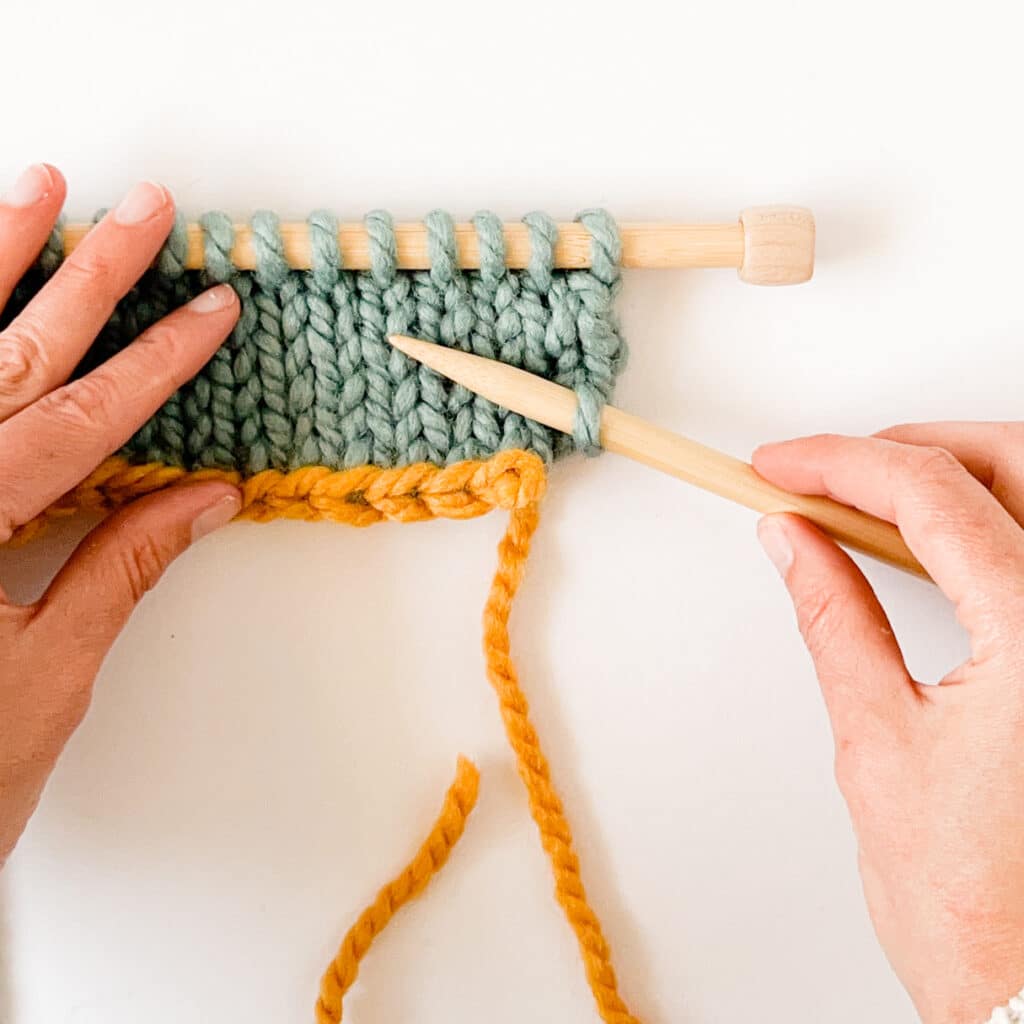
Gently pull on the yarn tail to undo the chain.
Pause once you get to the top of the chain before undoing the first provisional cast on stitch.
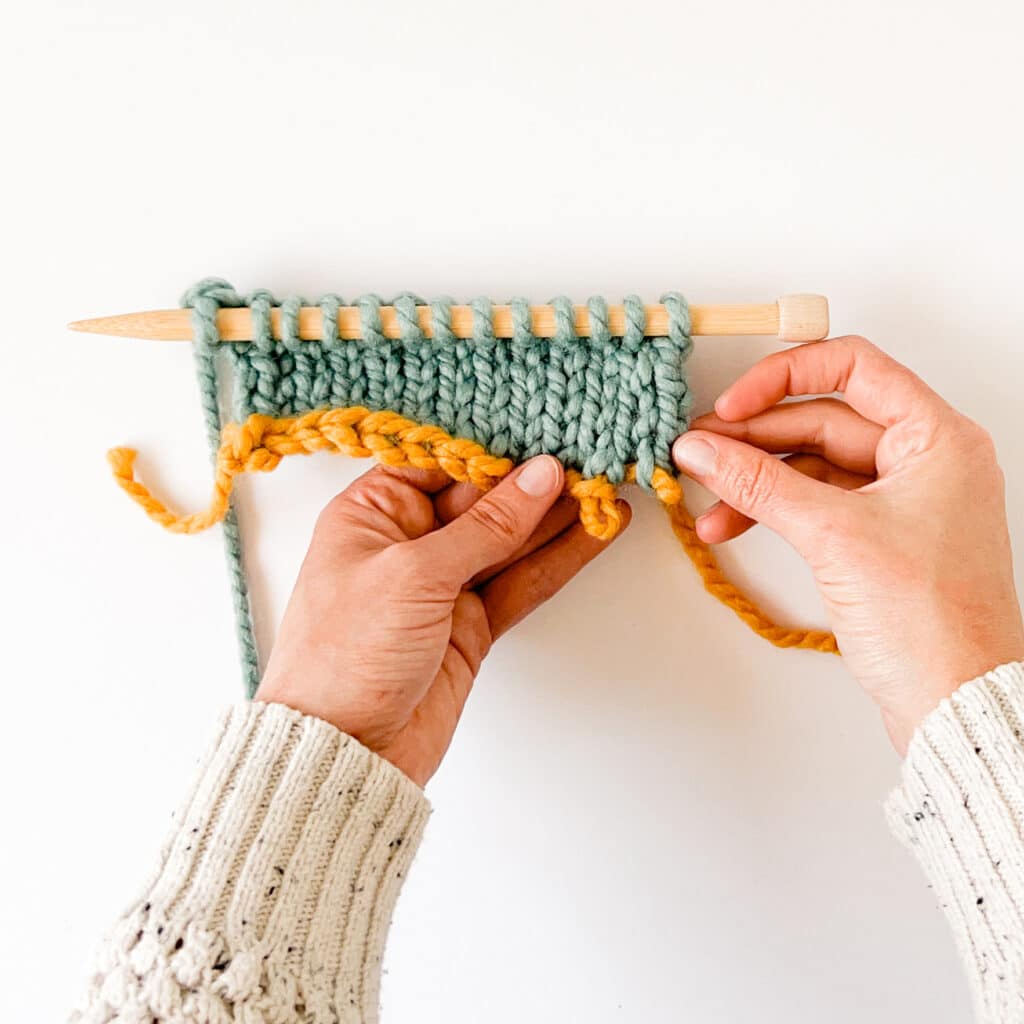
Pause once you get to the top of the chain before undoing the first provisional cast on stitch.
Step 3:
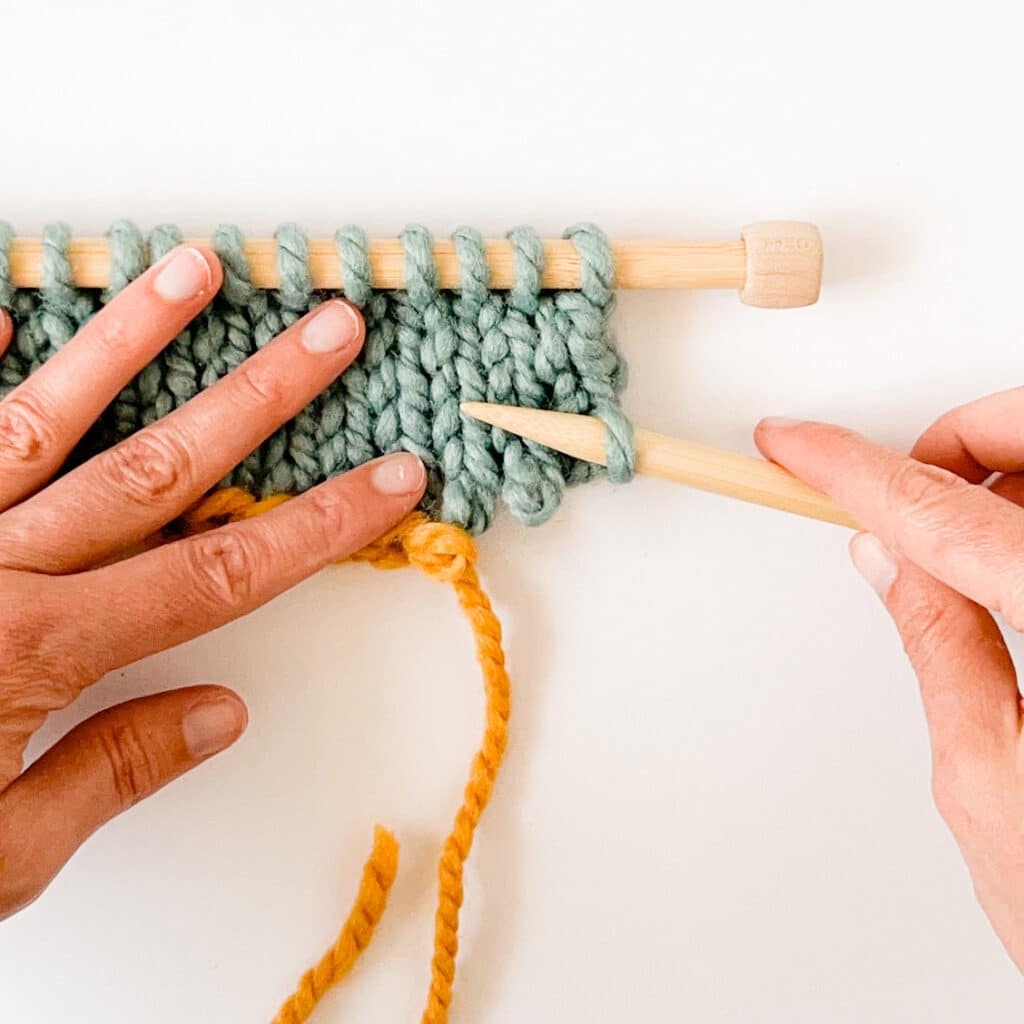
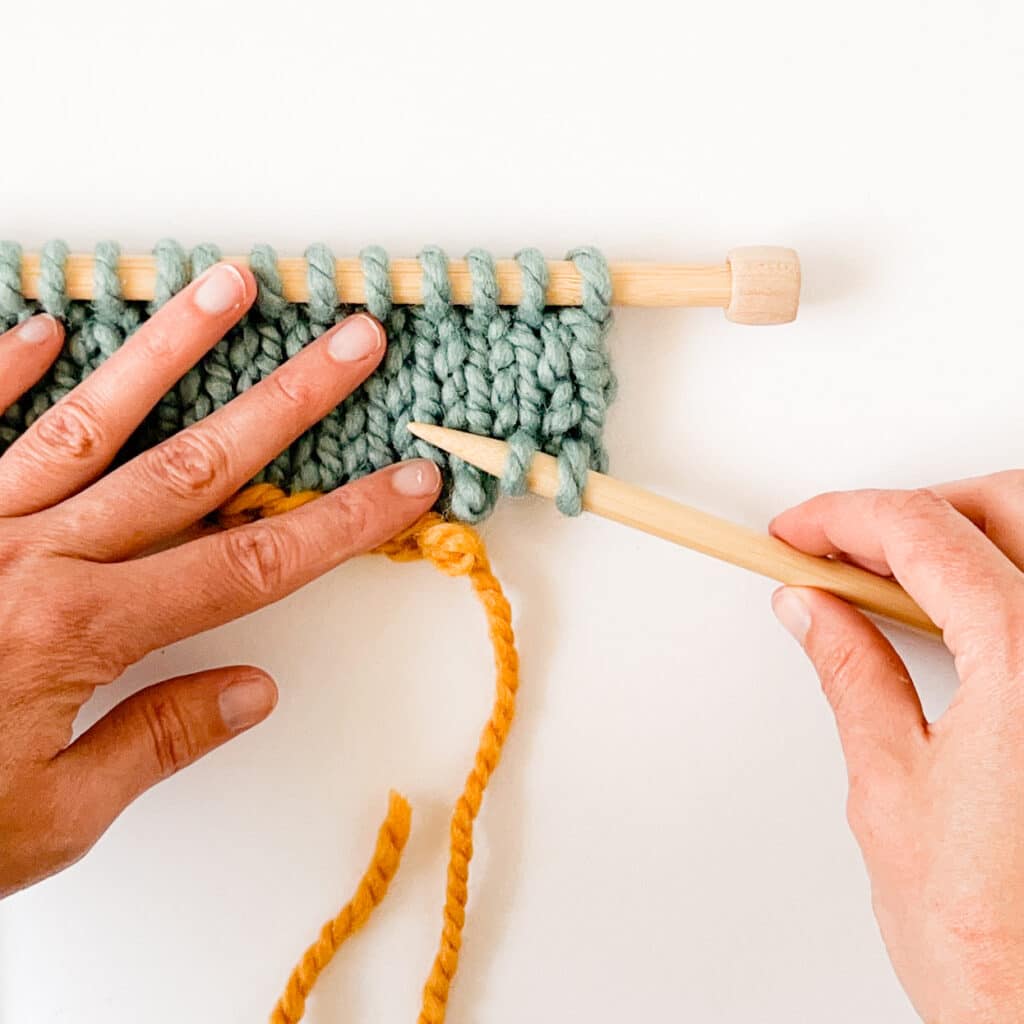
When you get to the first project stitch thread the knitting needle from right to left through the stitch before pulling the provisional yarn all the way out of the stitch.
Repeat:
Continue to pull on the yarn tail from the provisional cast on, unzipping the cast on to free one stitch at a time, threading them onto the right needle as you go until all the stitches are back on the knitting needle.
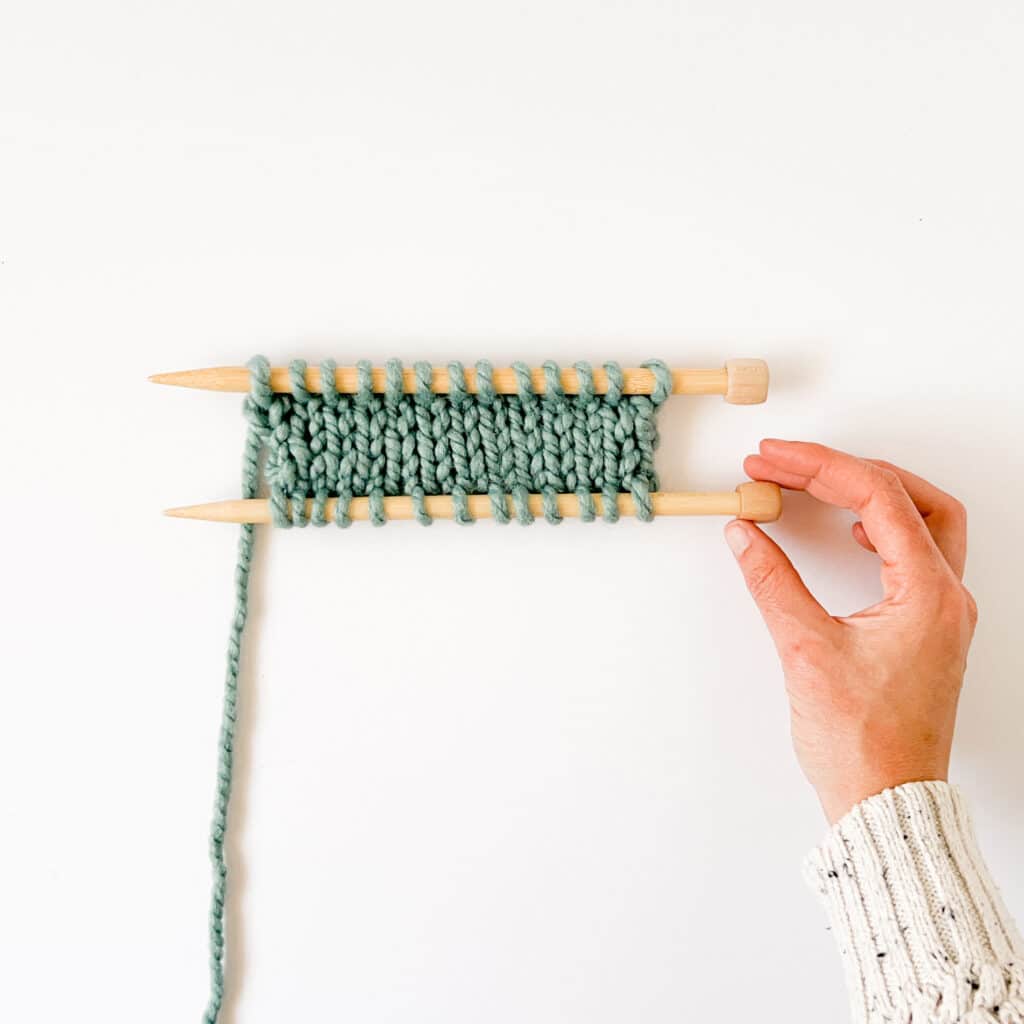
— And voila!
Now you can add stitches to the other end of your knit project without frogging or sewing thick seams!
The crochet provisional cast on looks so tricky to make that many beginner knitters feel intimidated to try it out. But with some practice, you will be able to stitch up this cast on method in no time!
Don’t feel like your first few tries have to be perfect. Even pro knitters have failed attempts every now and then. Take your time in familiarizing yourself with the stitches and such.
Ready to try out other cast on techniques? Check out our Tubular Cast On and German Twisted Cast On tutorials!


