German Twisted Cast On
Get to know the stretchiest cast on in knitting!
Get to know the stretchiest cast on in knitting!
One of the trickiest things in knitting is choosing the right cast on for your project. If you’re looking for a super stretchy edge, the german twisted cast on might be the right technique for you! Very similar to the popular long tail cast on, this technique uses the same motions for an even stretchier start to your project.
If you’re a new knitter, this might take a few tries but once you get the hang of it you’ll be able to cast on stitches quickly and easily. Taking the time to practice is always a good idea and I recommend you grab some knitting needles and yarn and follow along as I show you each step.
If you’re ready… let’s get started!
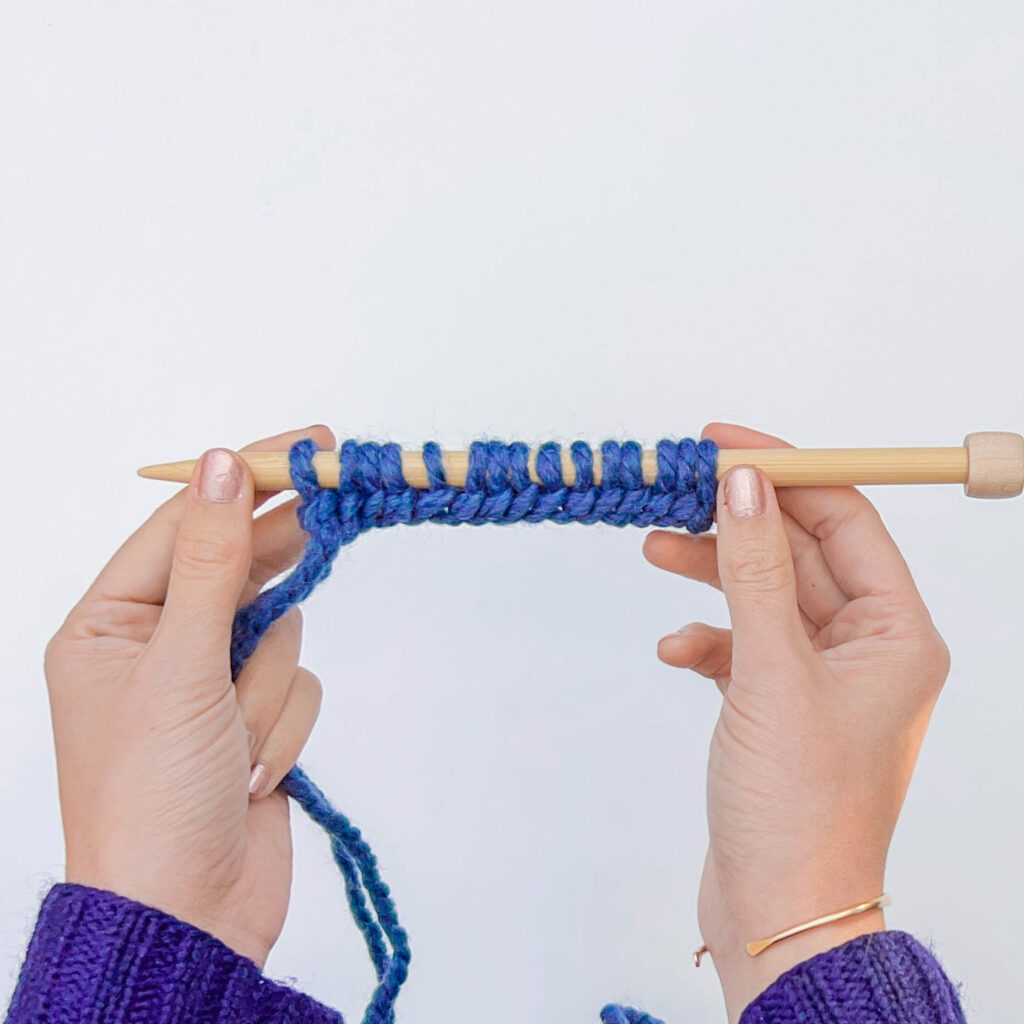
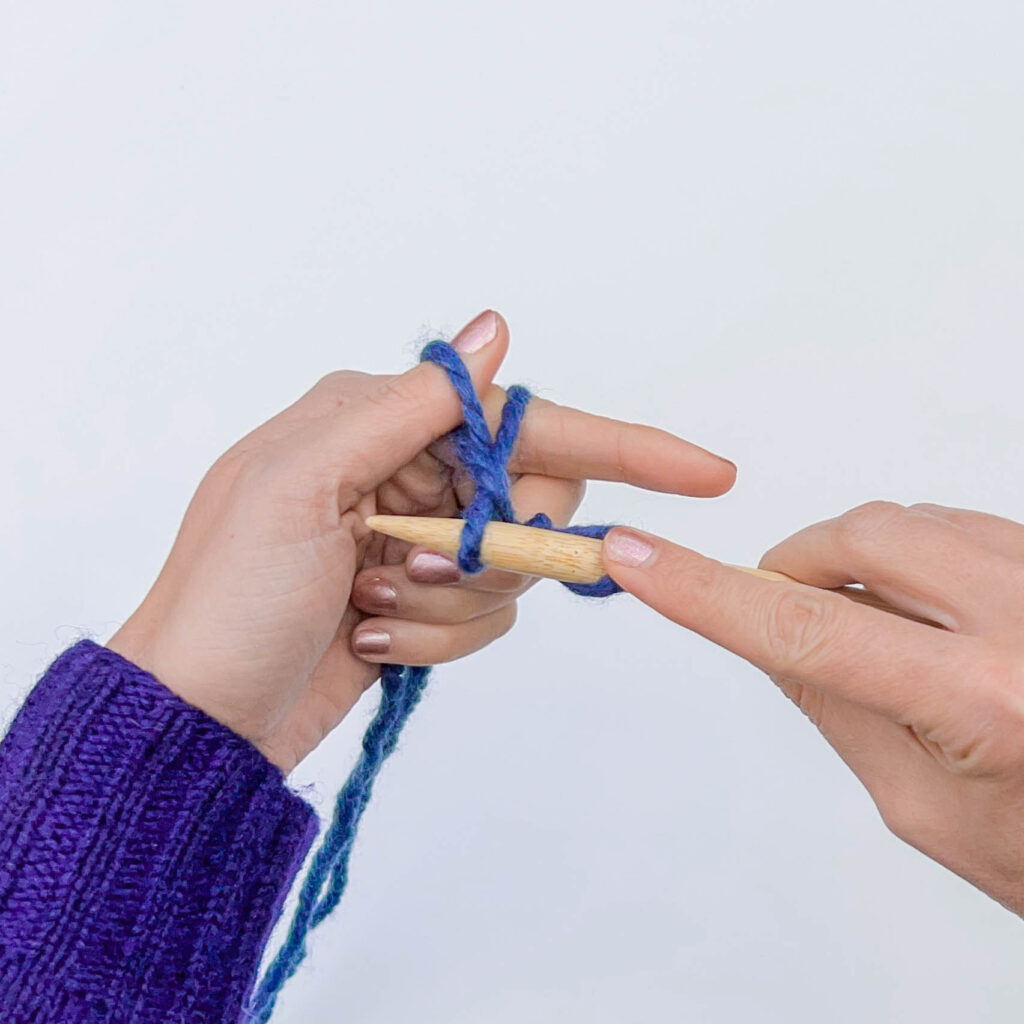
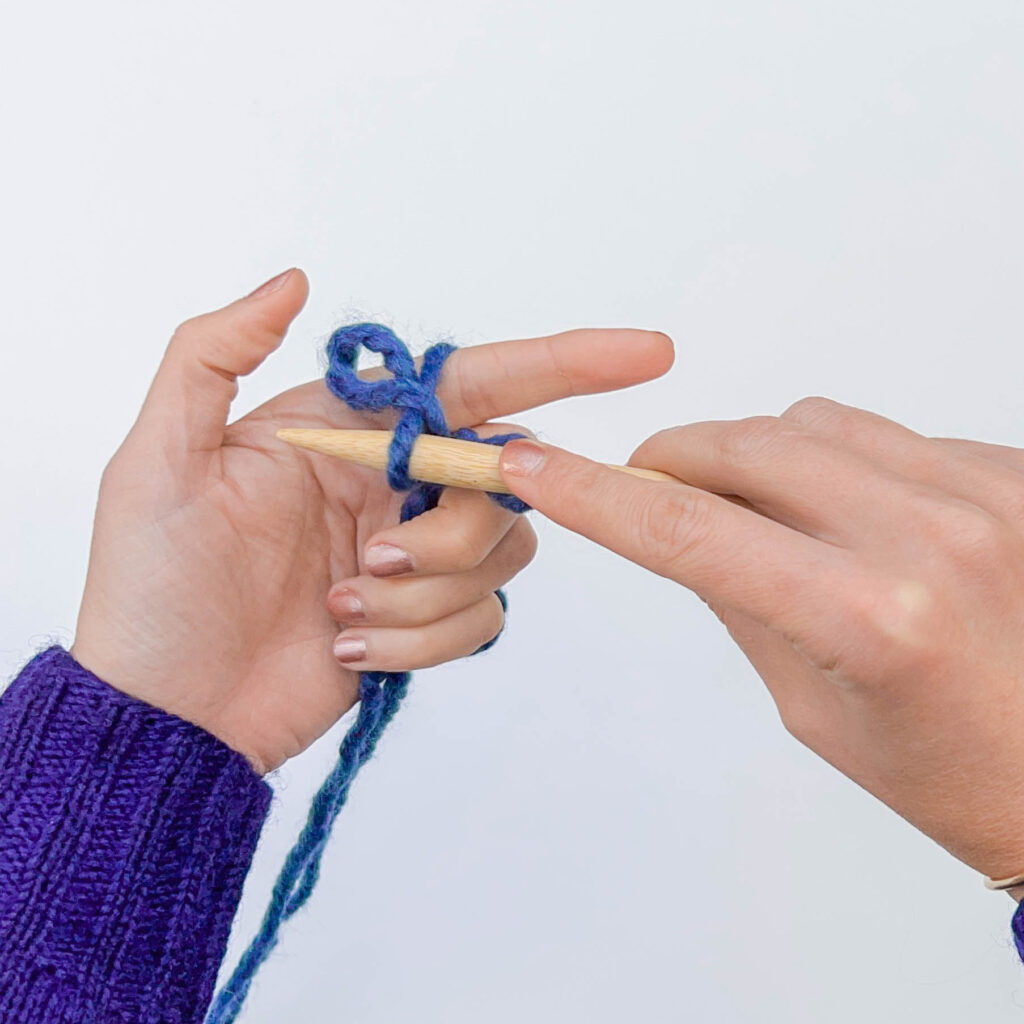
To start, you’ll need to put a slip knot on your right-hand needle.
This technique, like the long tail cast on, uses both your working yarn and a long yarn tail to cast on stitches. In this case, we recommend leaving a tail that is roughly three times the width of your finished cast on dimensions plus about 6” extra for weaving in at the end.
For Example: A 6″ finished dishcloth needs 18” yarn pulled out plus 6” extra for a total of 24″ yarn tail length.
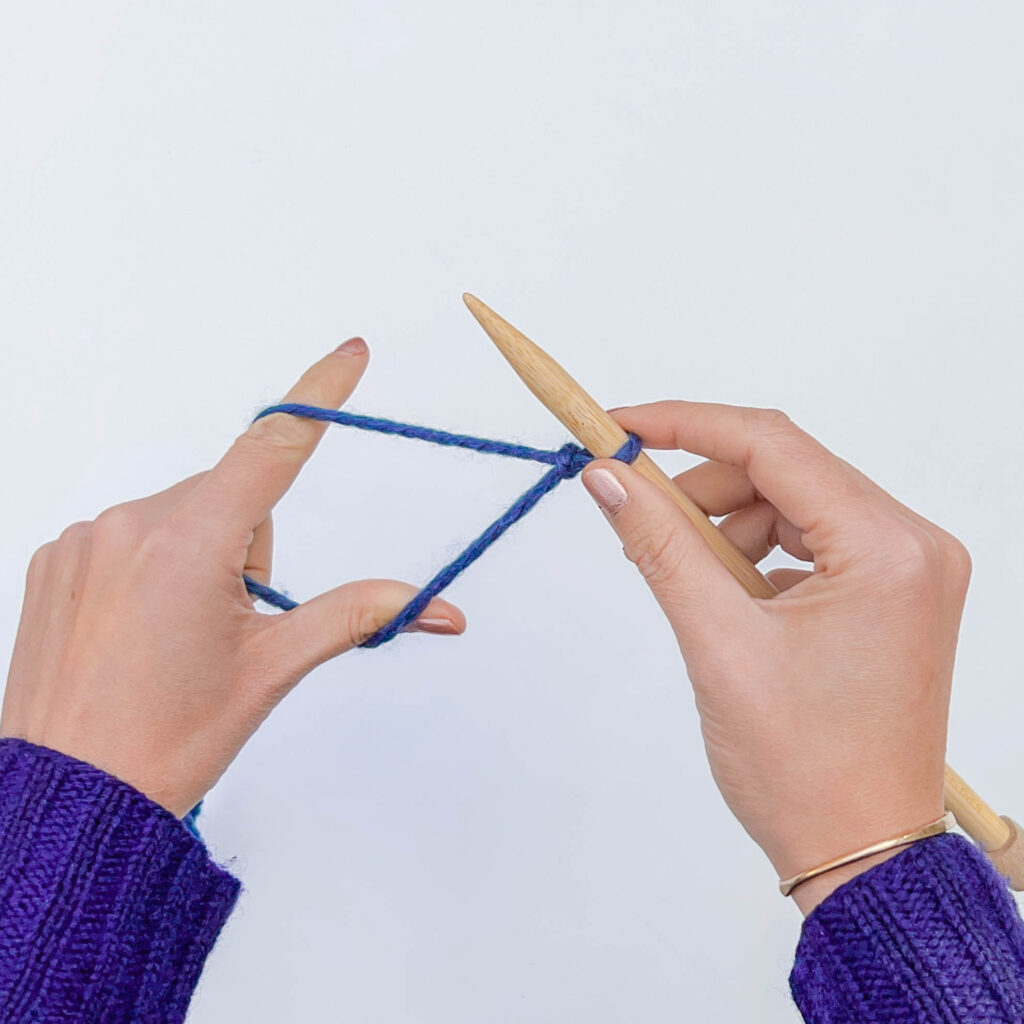
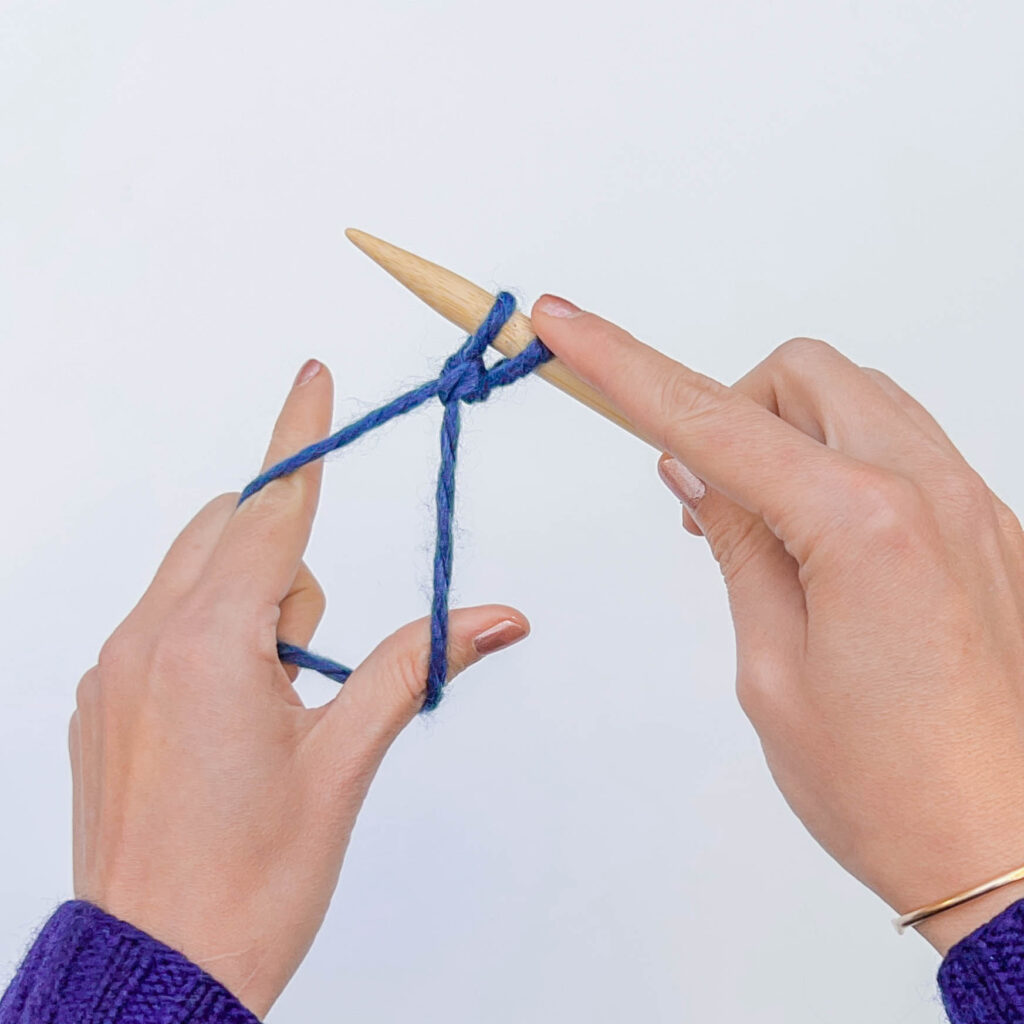
Step 1:
Grasp both yarn strands in your left hand.
Use your left index finger and thumb to spread the yarn strands apart creating a diamond-shaped opening.
Tip: You can either grasp the yarn in your closed fist or wrap the strands around your pinky finger for extra tension.
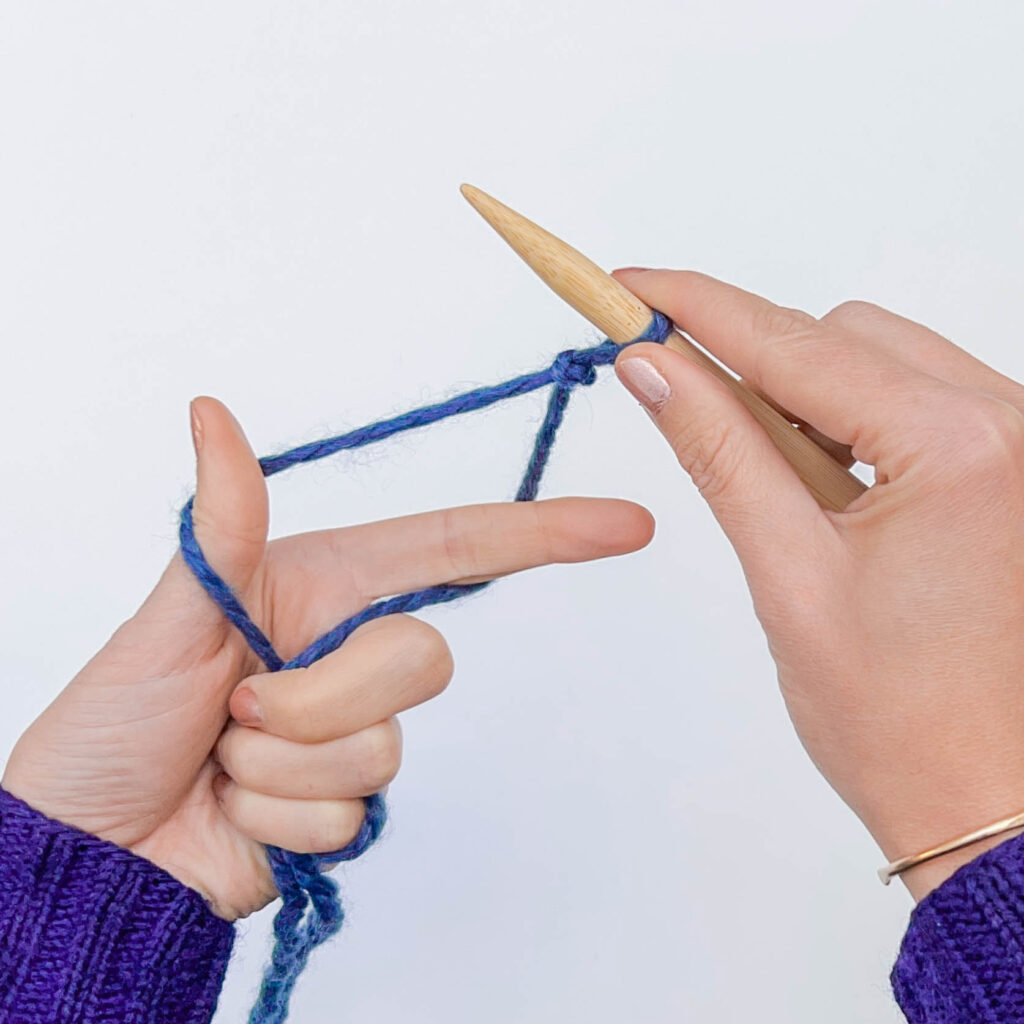
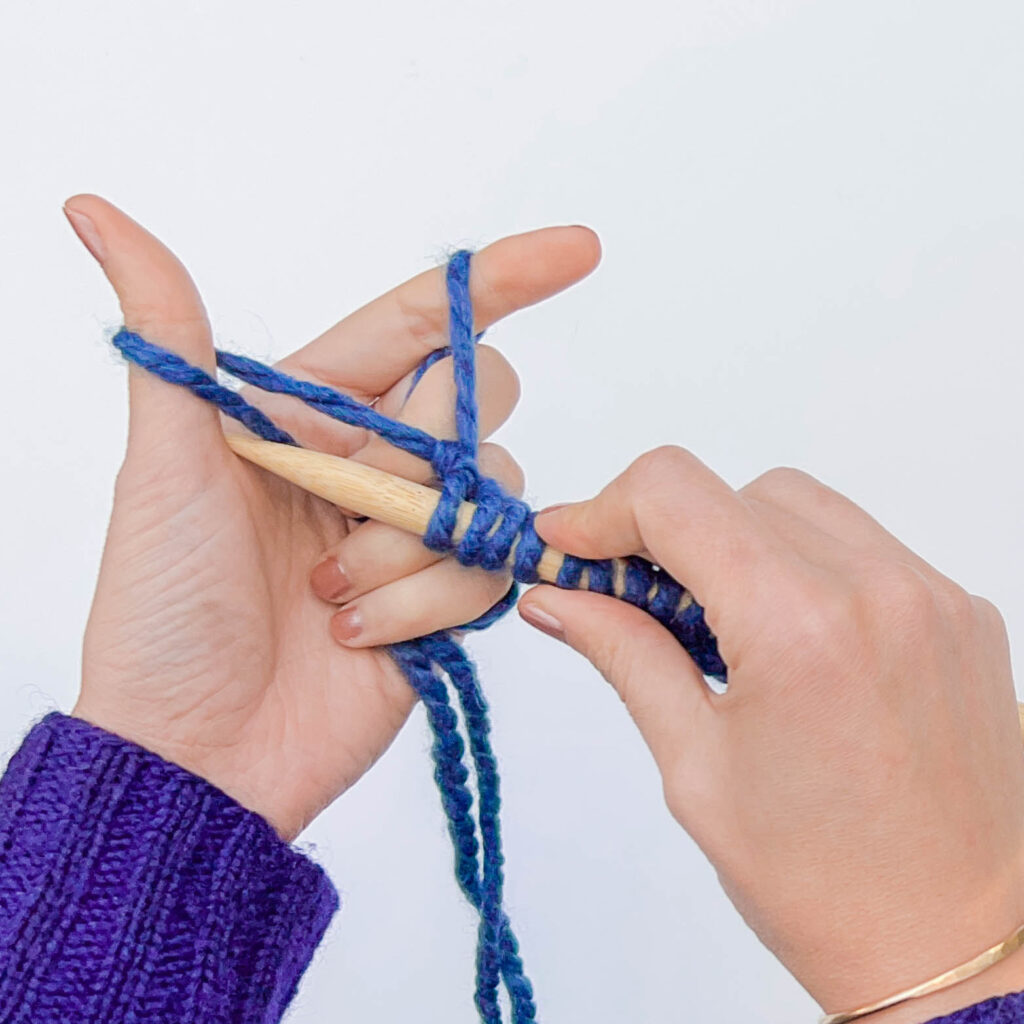
Step 2:
Turn your palm so that it faces you.
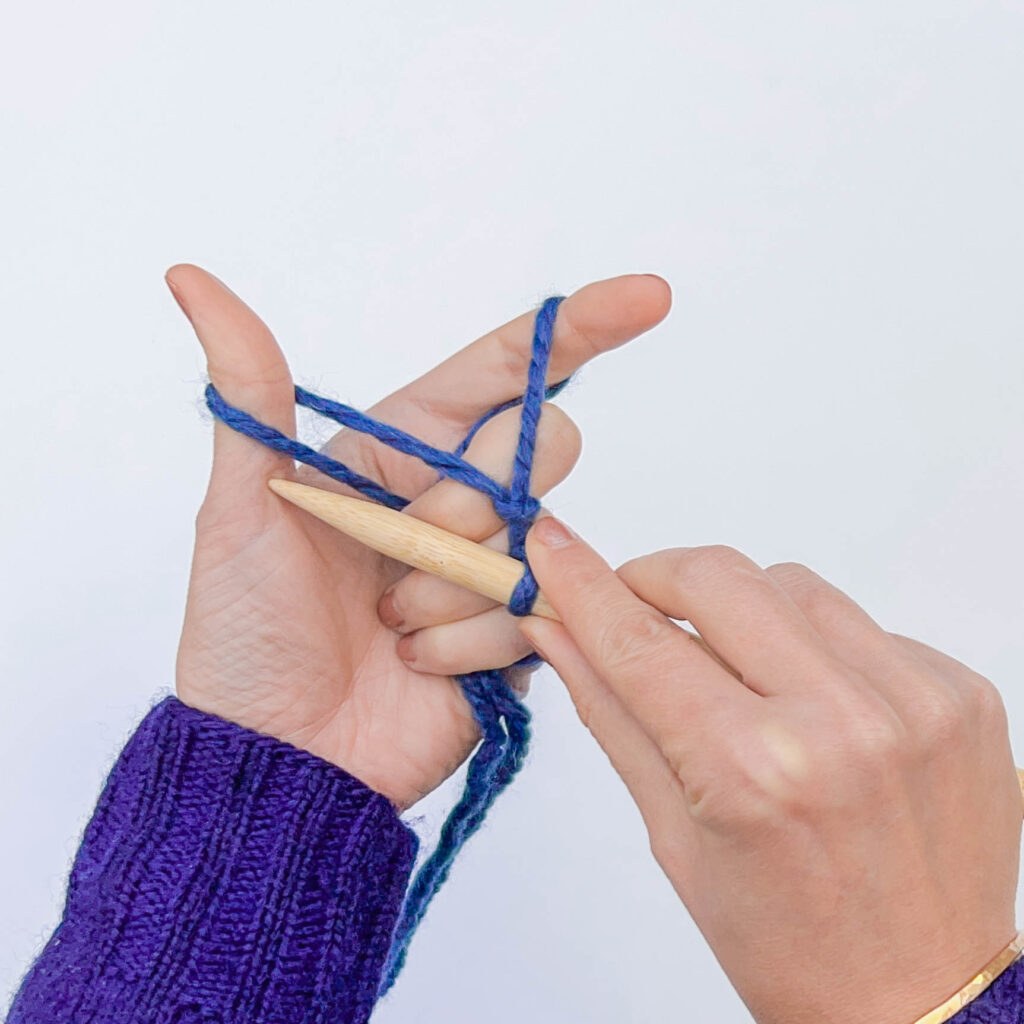
Step 3:
Bring the right needle up over both thumb yarn strands…
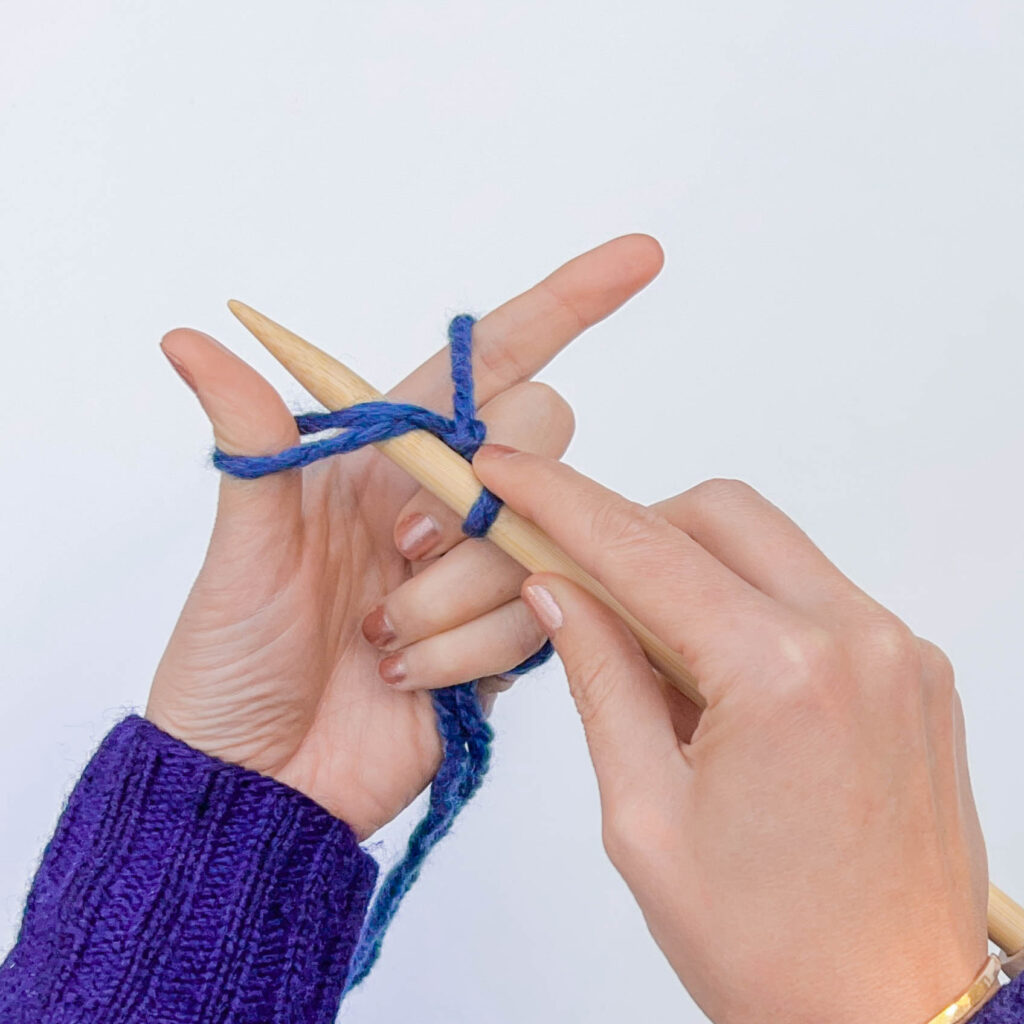
Step 4:
Scooping up under both strands until the needle tip is between the thumb and index finger.
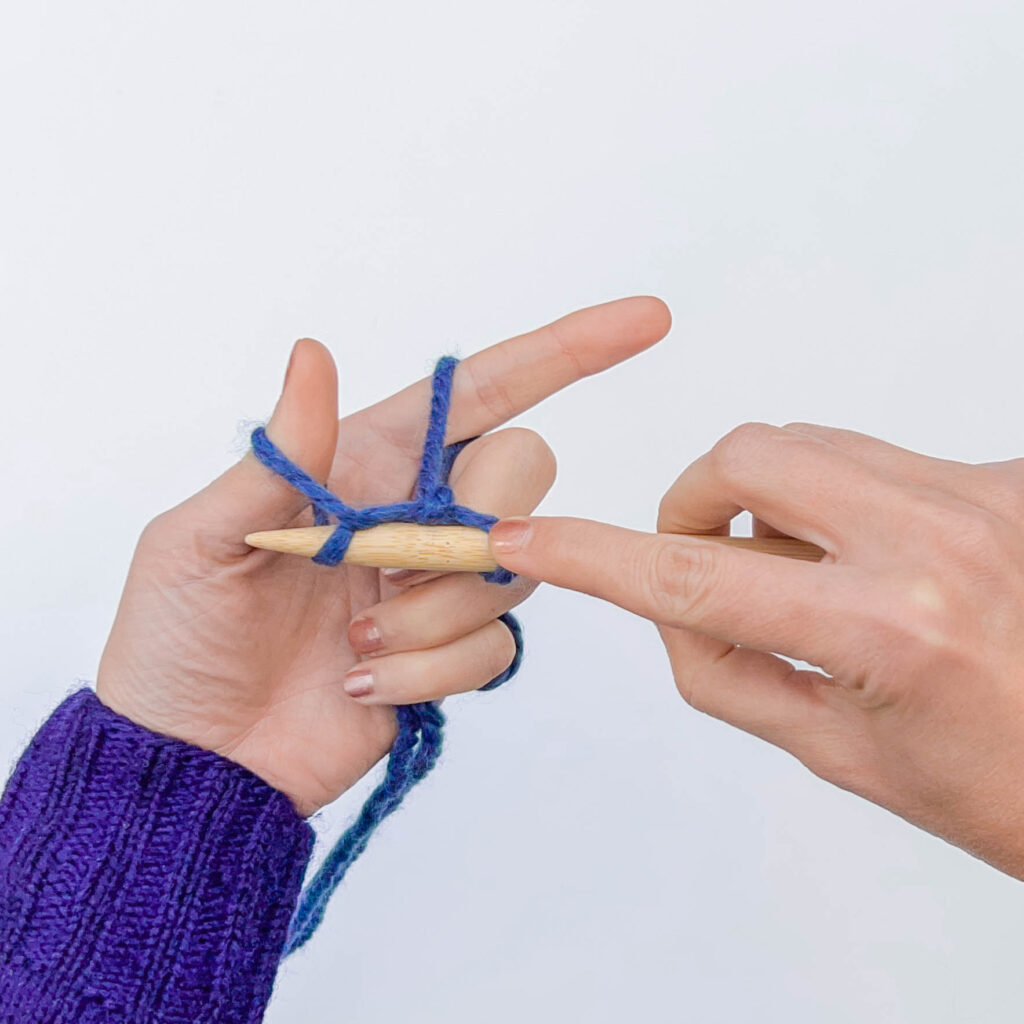
Step 5:
Hook the needle over the inner thumb strand, down toward the wrist.
Step 6:
Pull the needle upward moving in front of the outer thumb strand until the needle tip touches the middle joint of your index finger.
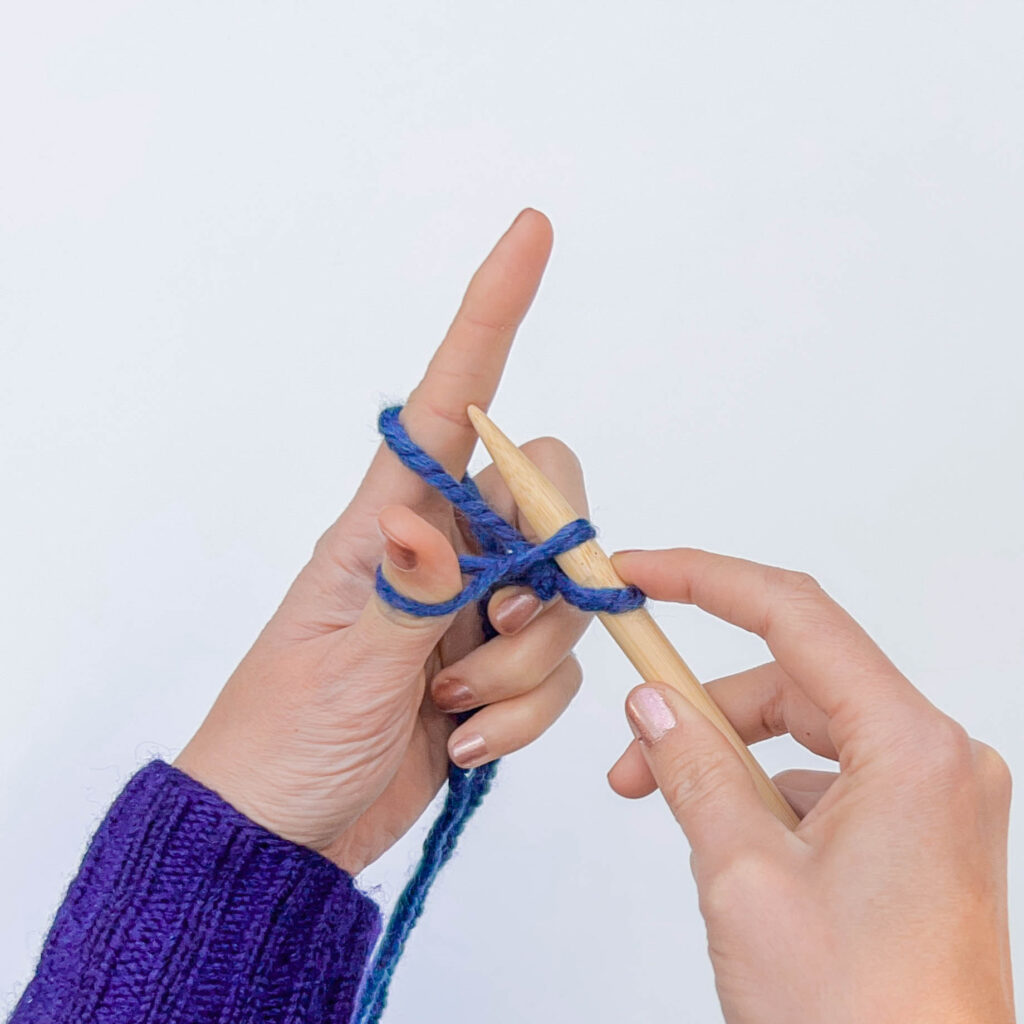
Step 7:
Hook the needle behind the index finger strand.
Step 8:
Close the thumb into your palm to slightly untwist the thumb strands while pulling the index finger strand down between the two thumb strands.
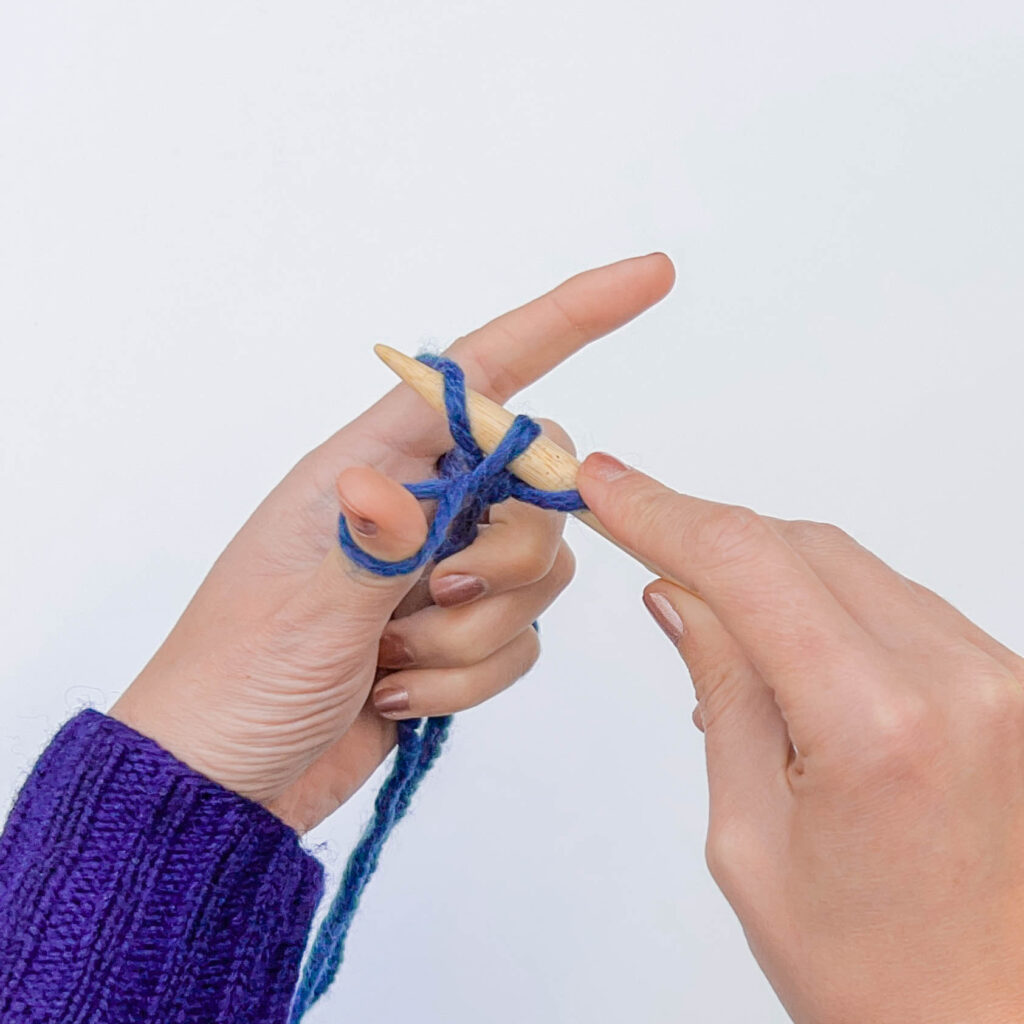
Step 9:
Let the yarn strand drop off the back of your thumb.
Step 10:
Insert your thumb back between the index and thumb strands, recreating the “diamond” shape ready to work steps 3-10 again!
Continuing working steps 3-10 until you’ve cast on the correct number of stitches using the twisted german cast on. Remember! Always count your slip knot as the first stitch in your cast on row.
Need some extra help? Check out our video for a step-by-step tutorial for the German Twisted Cast On!
A surprising part of knitting is that many techniques are similar yet, slight variations can make a huge difference! In this case, about half the steps are the same between the longtail cast on and the twisted german cast on. These small differences add up to a slightly stretchier cast on.
The twisted german cast on is a great choice for projects that need a maximum amount of stretch. Sock cuffs, hat brims, and sweater neckbands are all perfect opportunities to use this technique.


How much of a tail should I leave if I am casting on 102 stitches using #6 yarn on a #13 needle?
Hello! One of the methods I love using is wrapping the yarn tail on my knitting needle about 15 times. 15 wraps = 10 stitches (I add some allowance for changes in my tension). Pinch the end of the tail you just measured and fold the full length against the working yarn tail.
Measure the full length about 10 more times. This will hopefully give you enough of a tail to finish your cast on row with a bit left for weaving into your work. I hope this helps!
Thank you so much for this step-by-step tutorial. No matter how many videos I watched, I struggled learning this cast on because the teacher’s movements were always too fast and I did not already know the long tail cast on (I cast on with the knitting on method). So this is exactly what I needed! Thanks again!