Tubular Cast On
A super stretchy cast on for ribbing!
A super stretchy cast on for ribbing!

The tubular cast on creates a super stretchy edge in just a few simple steps. Our step-by-step tutorial shows you how to work the most basic and versatile version of this cast on – the long tail tubular cast on. Like it’s cousin, the long tail cast on, this tubular version uses a long yarn tail and the working yarn to create a super stretchy cast on edge for knits.
The tubular cast on is a much more involved cast on than the typical beginner-friendly methods. It’s worked over the course of five rows which makes it a much more time consuming method than almost any other cast on. However! It’s worth learning, or at least book marking this tutorial for later, for those special projects when you really do need a super stretchy edge.
Learning how to work the long tail cast on is worth the extra time and effort for two reasons. First, this cast on is super stretchy, making it a great cast on for ribbed edges like socks, cuffs, and sweater necks. Second, it creates a very tidy edge for ribbed projects. This tutorial will show you how to work a tubular cast on for 1×1 ribbing.
The work a complete long tail tubular cast-on involves several rows. The first, is a simple set up row followed by four rows of double stockinette stitch. Most knitters prefer to work this cast on flat and then later join in the round if needed, however you can work this cast on in the round as well.
One thing to consider: we prefer this cast on for projects that have a medium to small number of cast on stitches. Because you have to measure out a yarn tail at the very beginning, if you’re casting on a large number of stitches (a large lace weight shawl, for example) it may be hard to estimate the right amount of yarn needed and you may need to undo your cast on if you run out of yarn. Luckily, it’s easy to redo a cast on row!
Note: this tutorial was written for right-handed knitters, lefties can swap “right hand/needle” with “left hand/needle” for the same results.
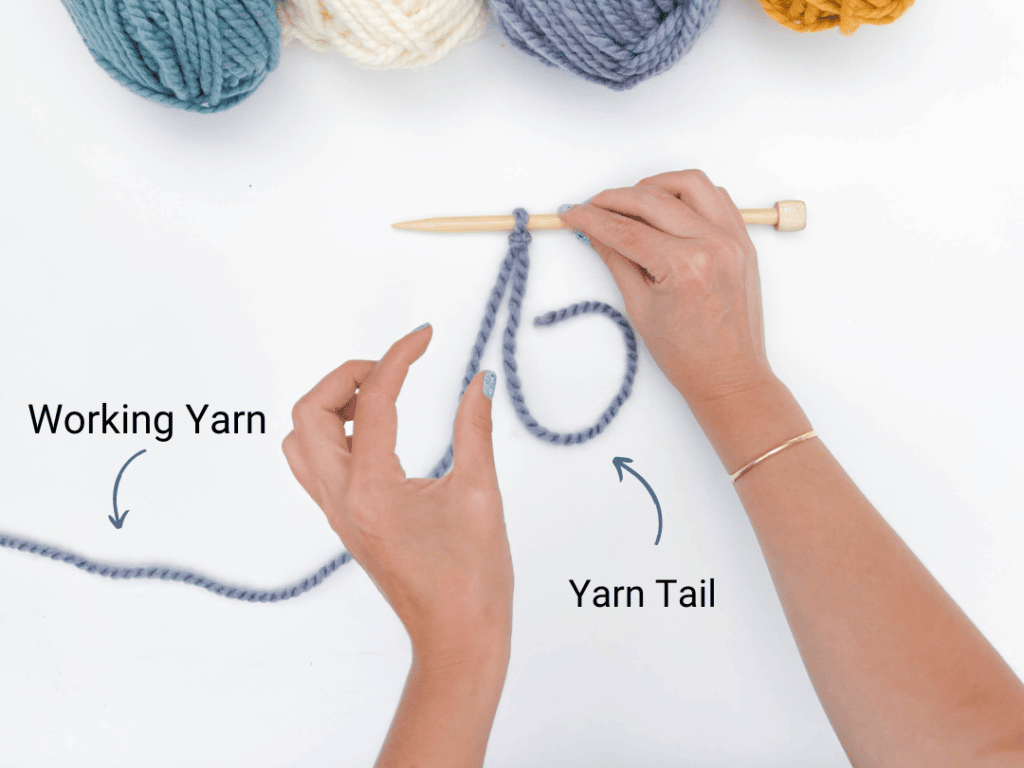
Leaving a “long tail”: You’ll need to leave a “long tail” that will accommodate the stitches you will be making. In this case, we recommend leaving a yarn tail that is roughly three times the width of your finished cast on dimensions plus about 6” extra for weaving in at the end. For example, if you’re making a dishcloth that measures 6” wide, you’ll want to leave an 18” yarn tail plus 6” extra to weave in.
About yarn tails: the yarn tail is the piece of yarn ending with the cut end and not the length of yarn leading back to the ball.

To work a Long Tail Tubular Cast On you’ll need to work one foundation row (a combination of knit and purl cast on stitches) followed by two set up rows. We’ll show you how to do all three rows here, if you’re ready, let’s get started!
Set up: This cast on starts with a slip knot on your right-hand needle! If you need a quick refresher, check out our full tutorial for tying a simple slip knot here.
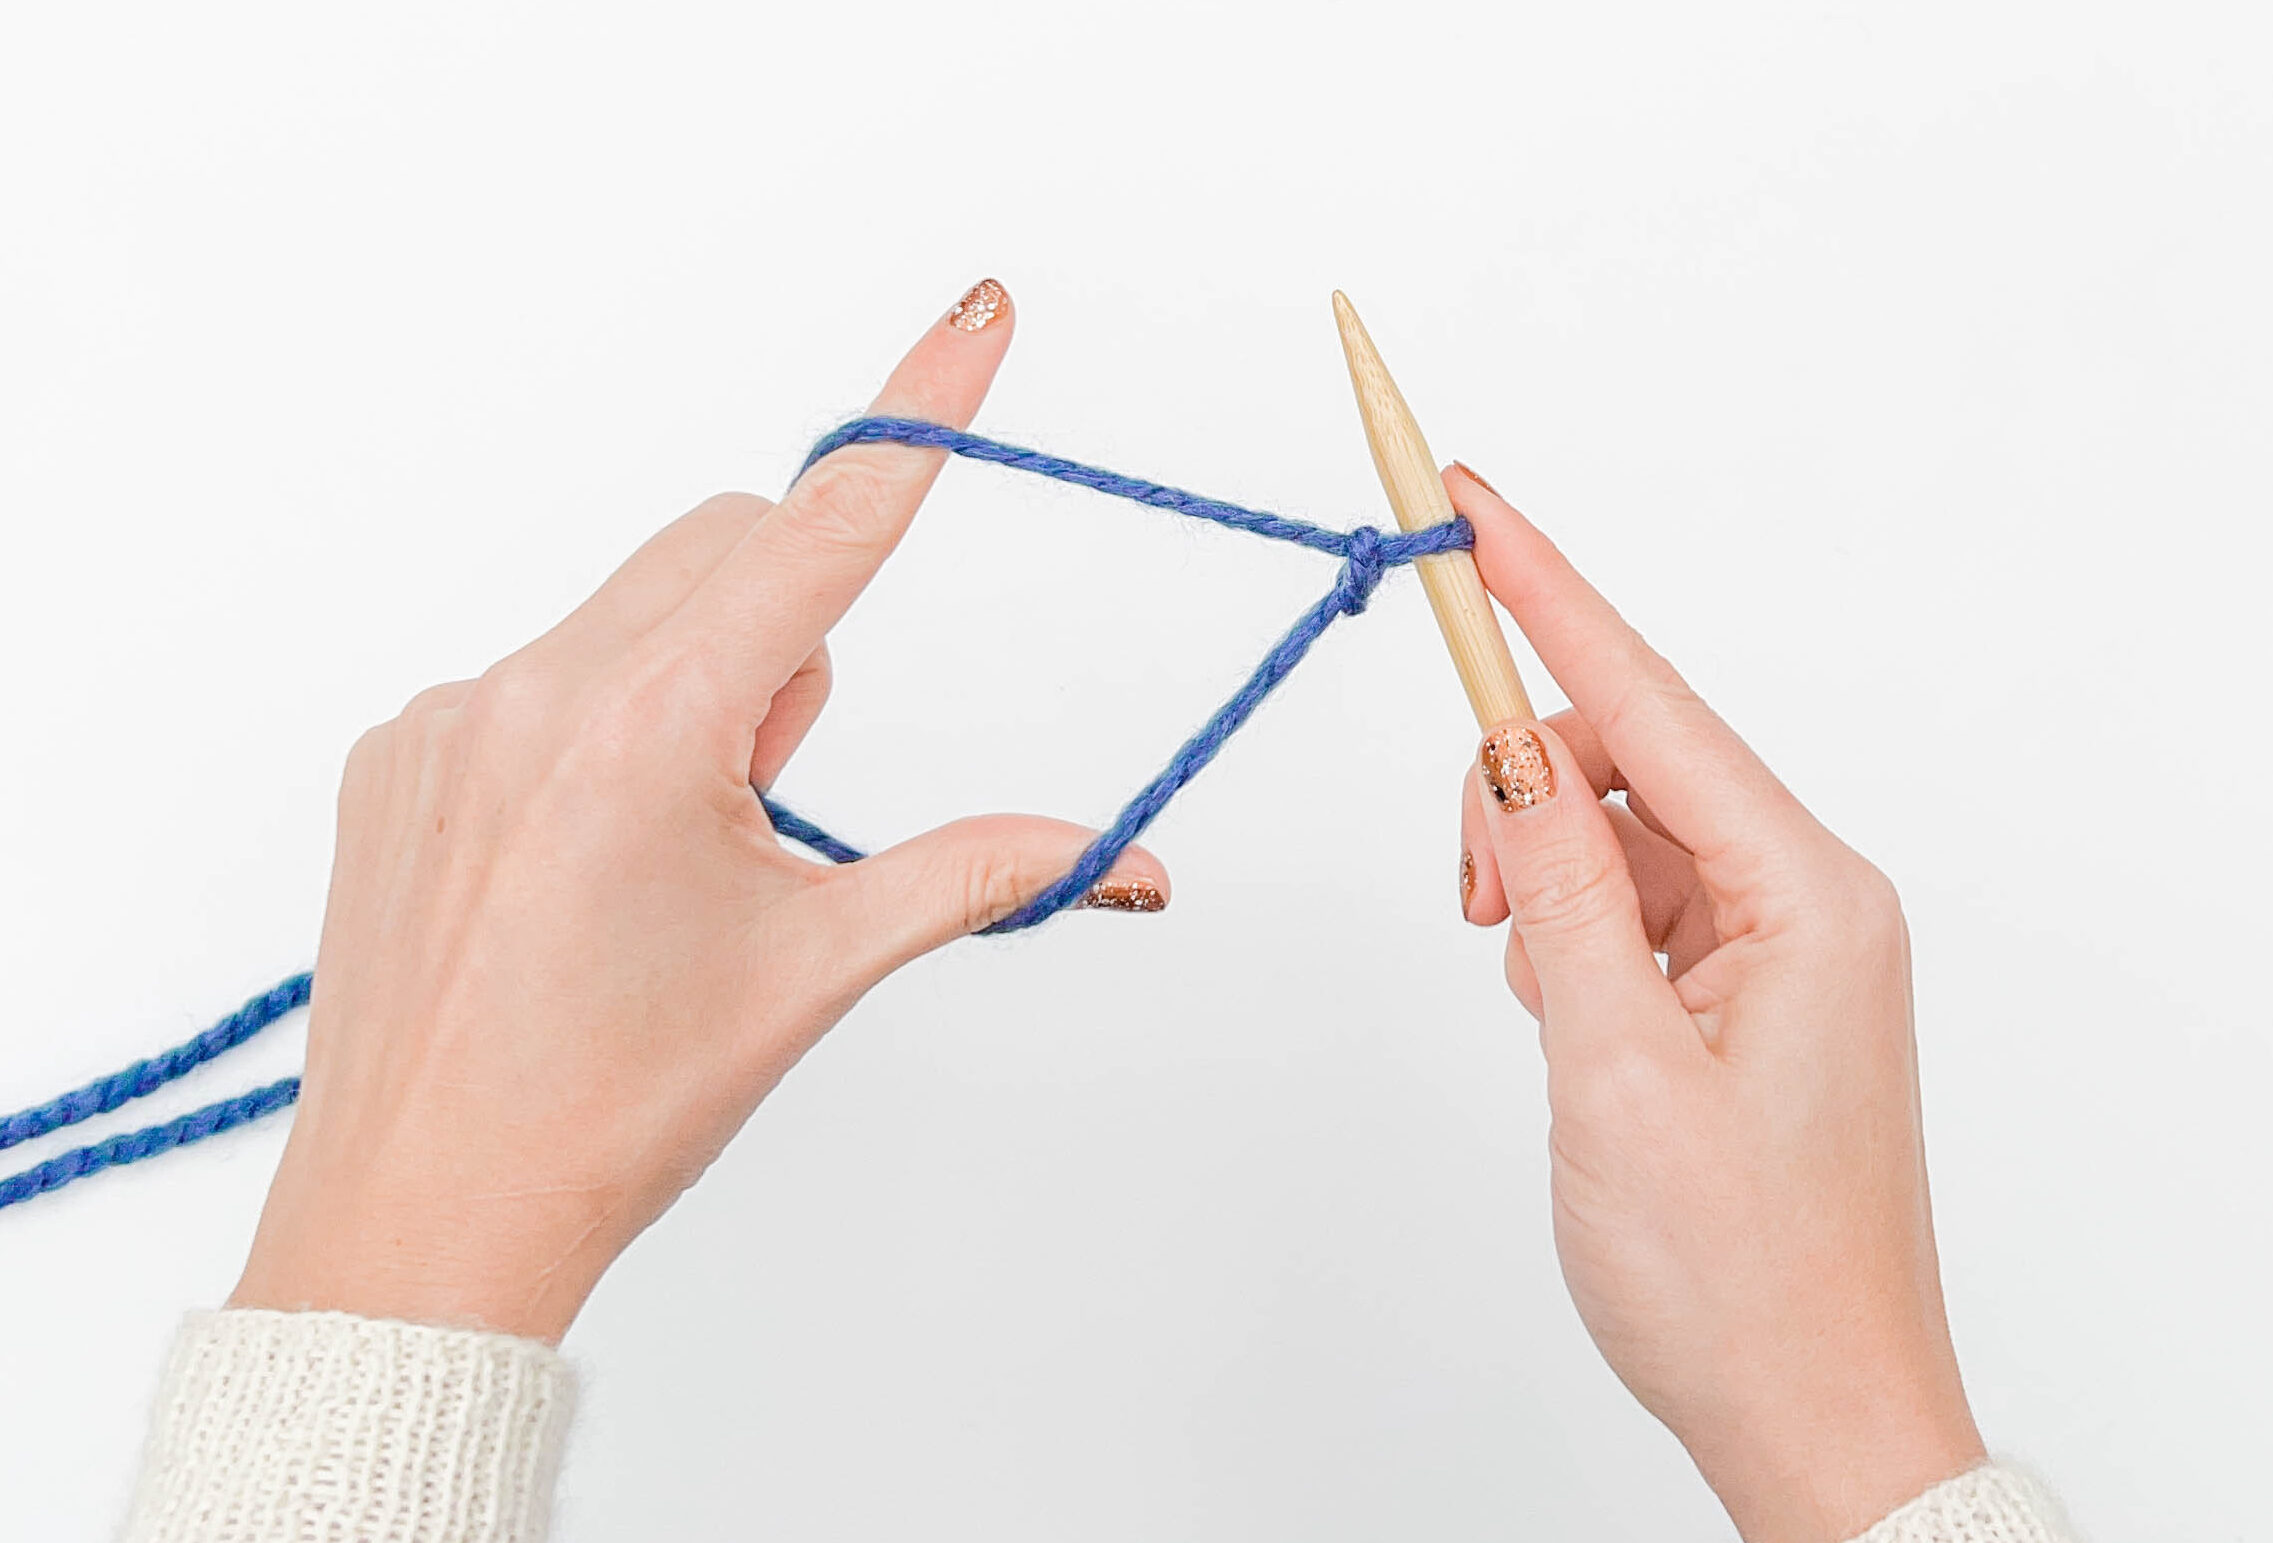
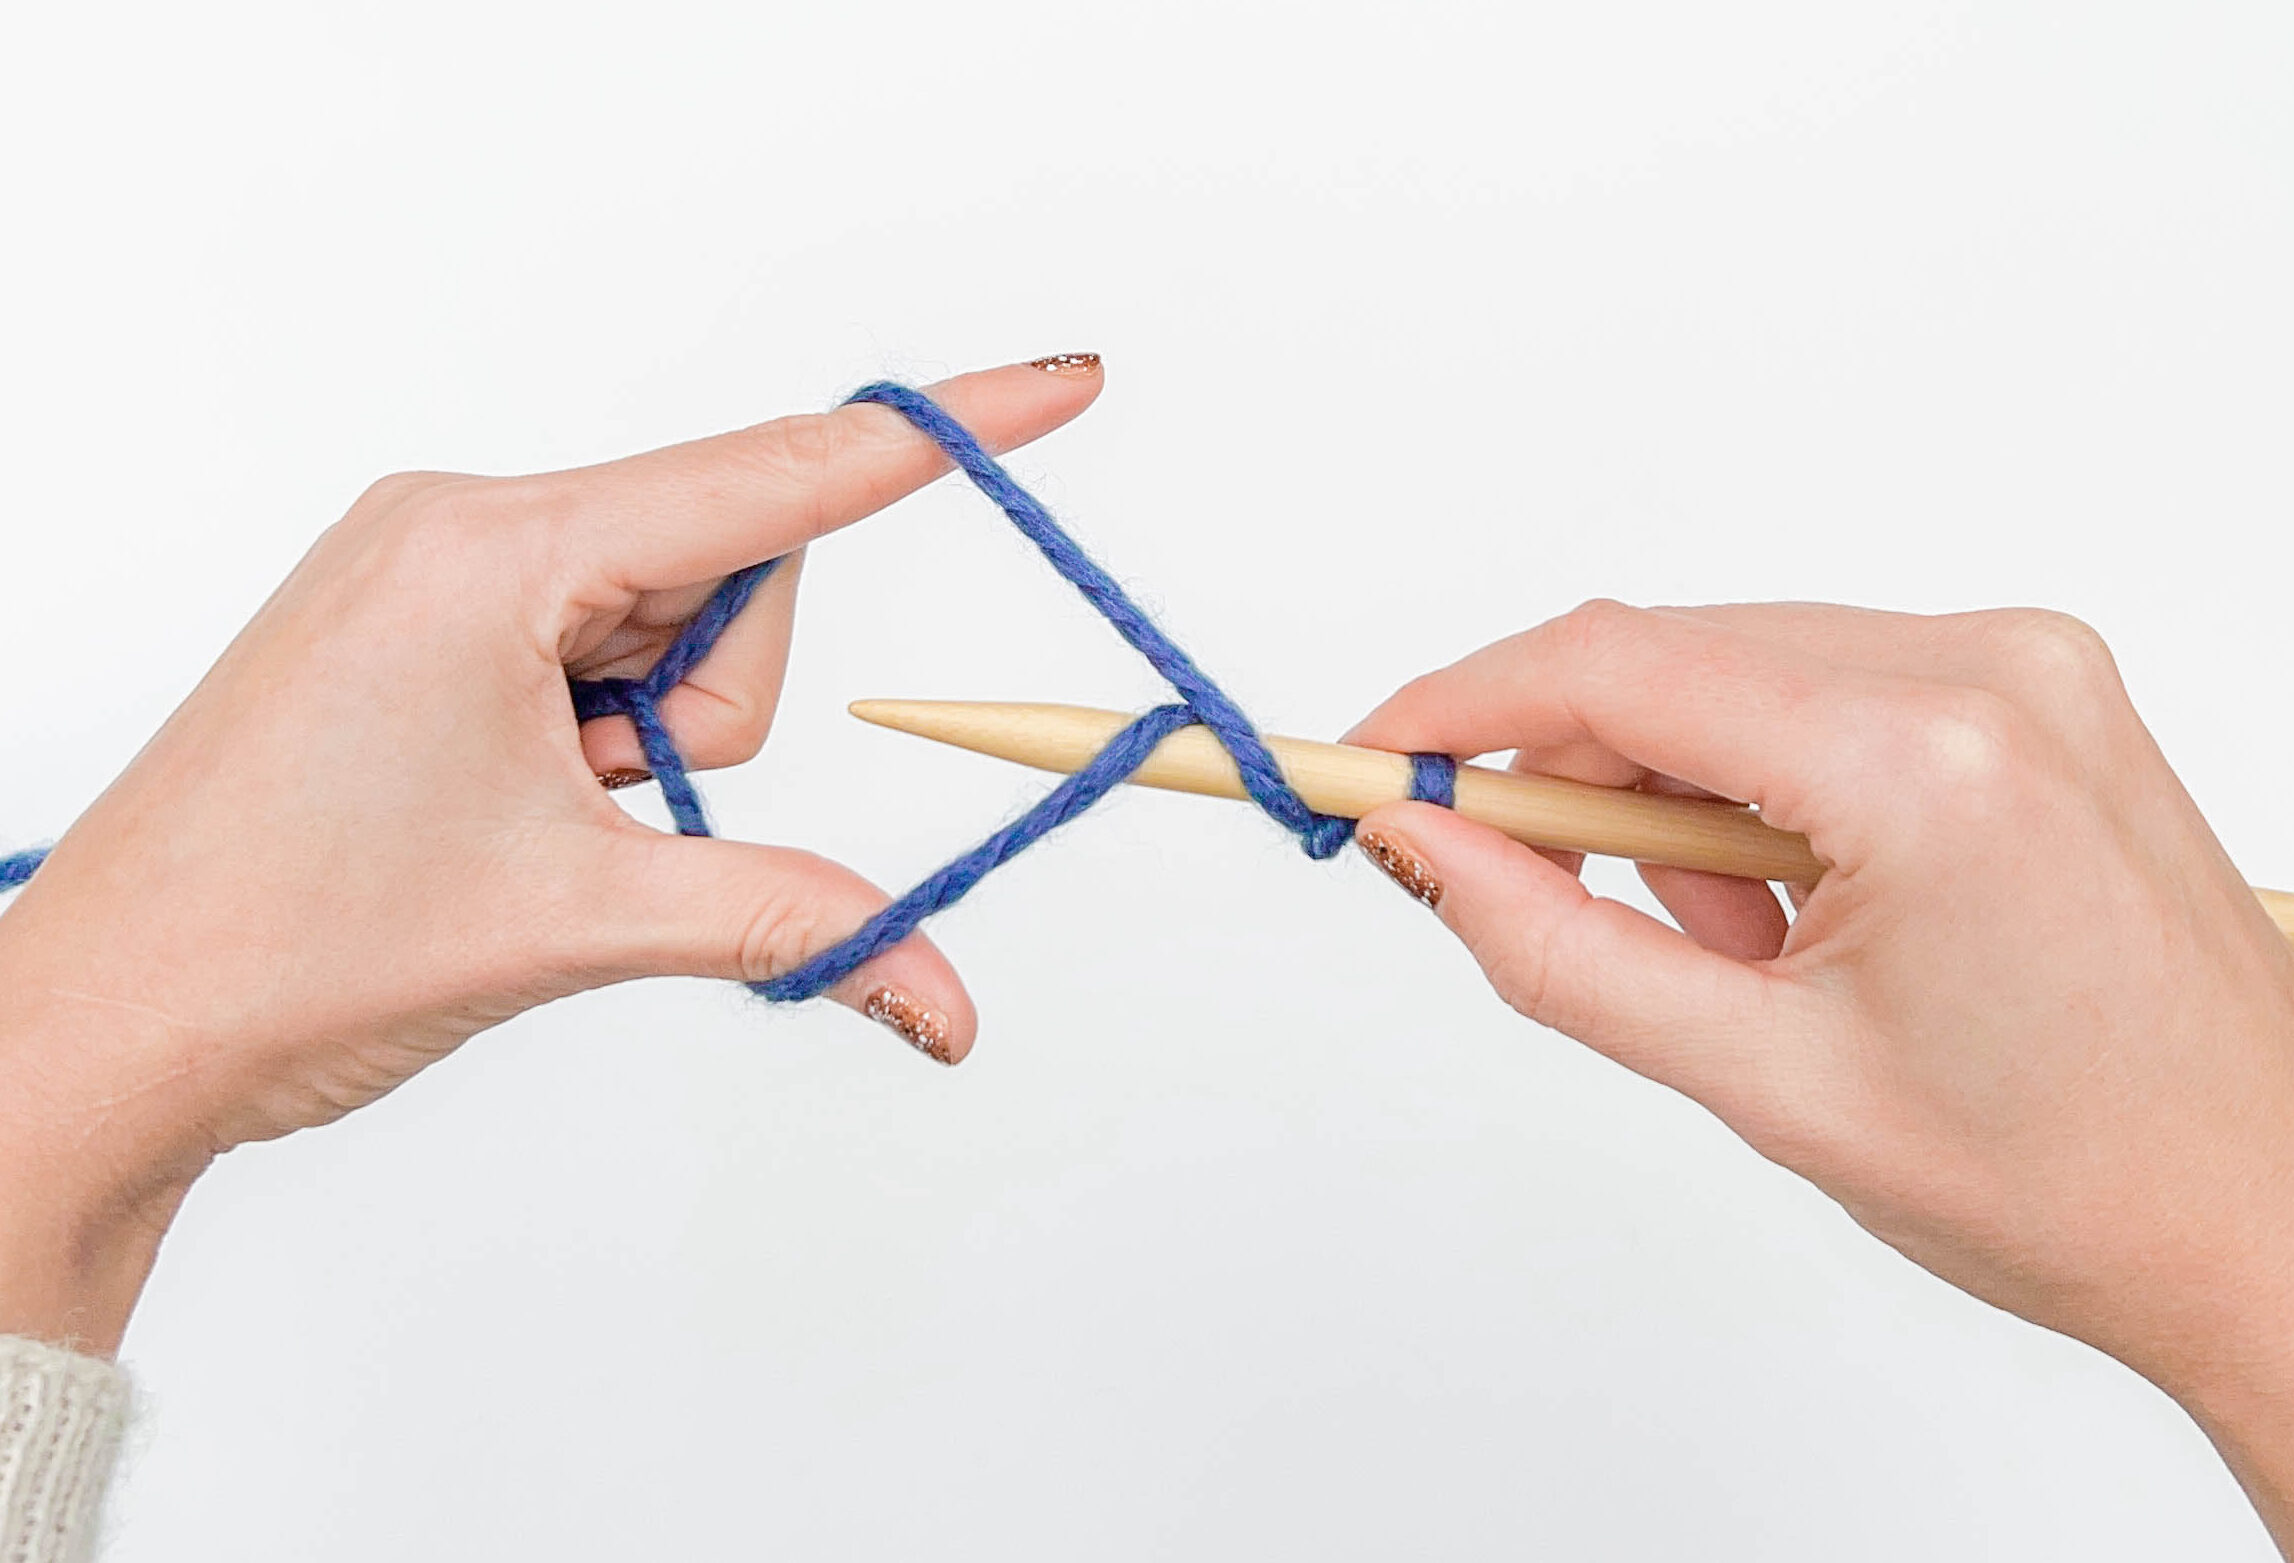
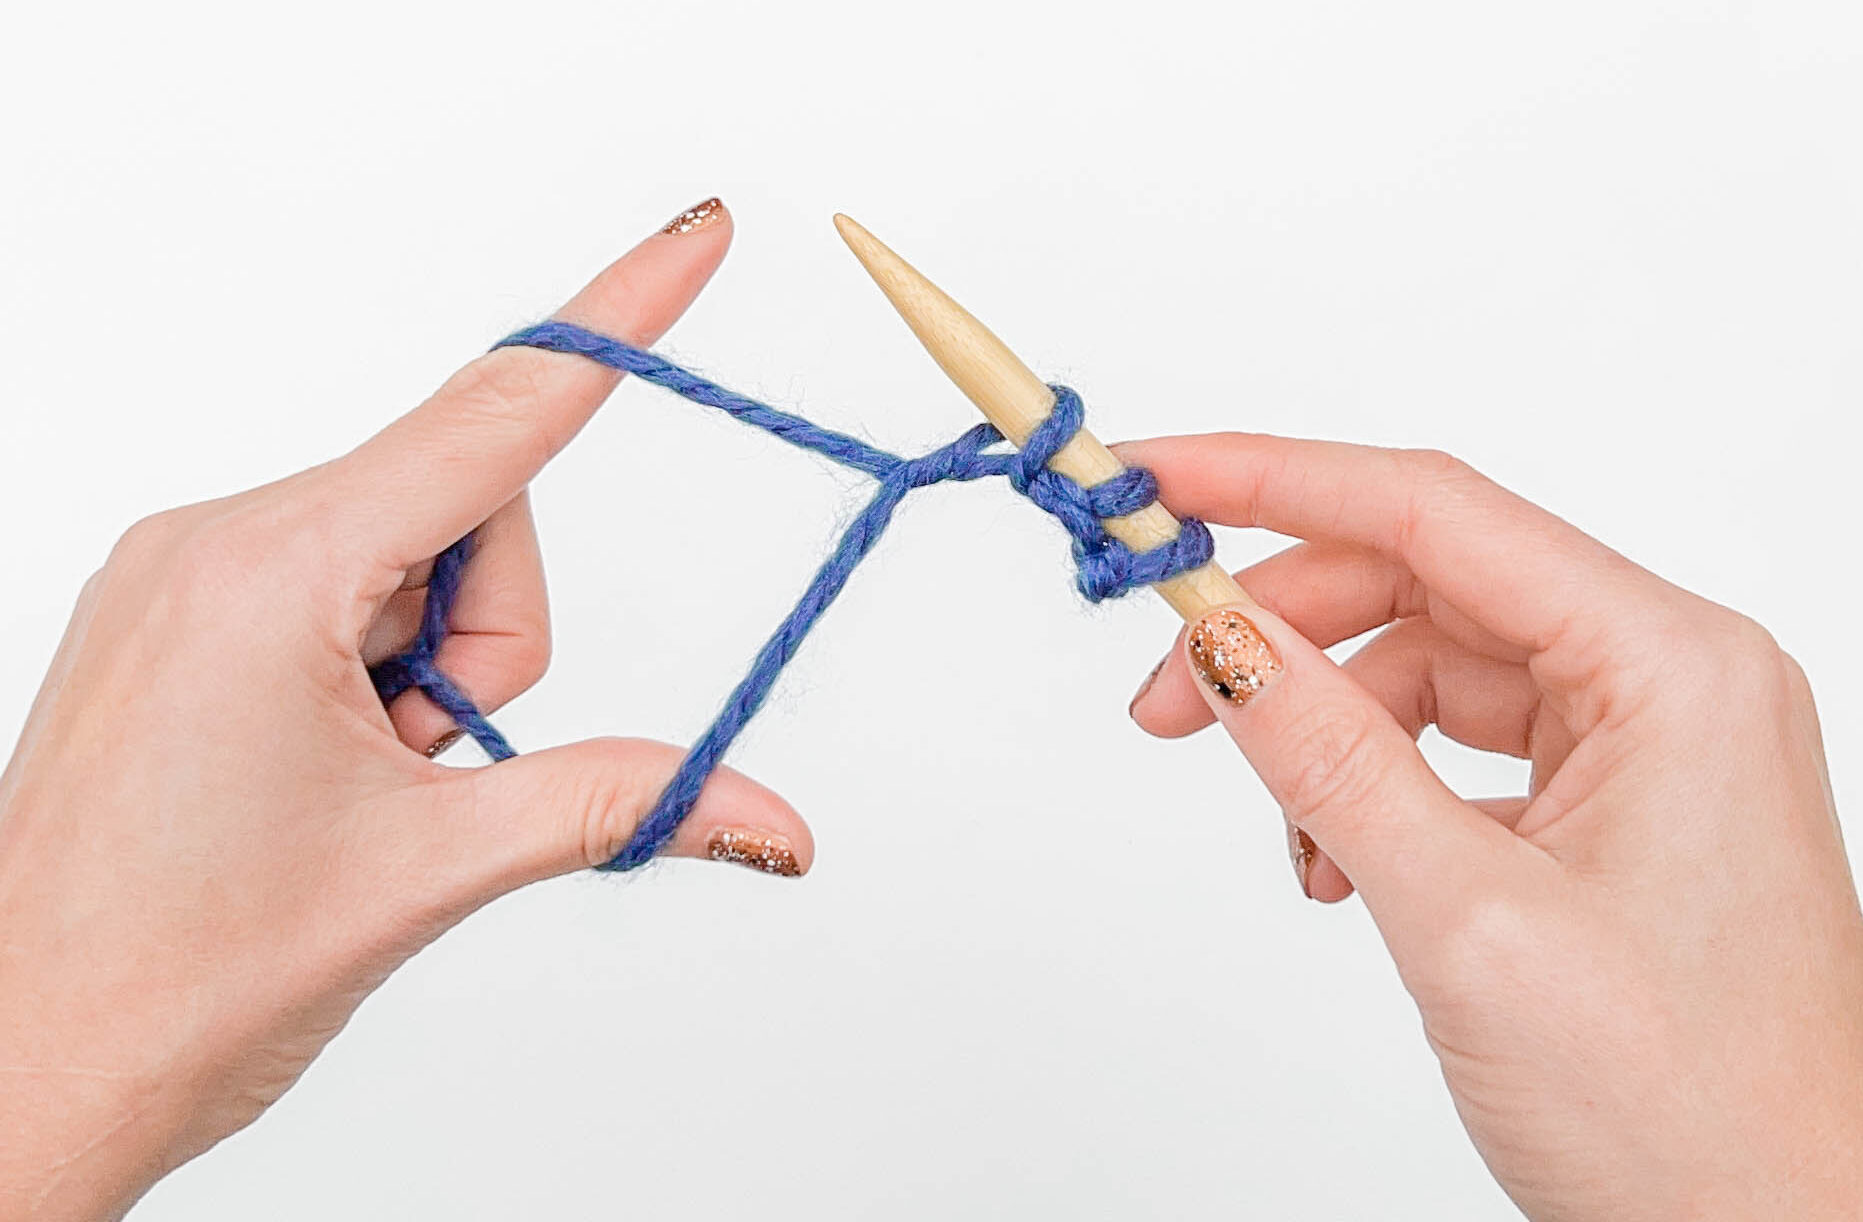
Step 1:
Grasp the tail and working yarn strand in your left hand. Inserting your index finger and thumb to create a diamond-shaped opening.
Pro tip: use your right index finger to hold the slip knot in place while you work.
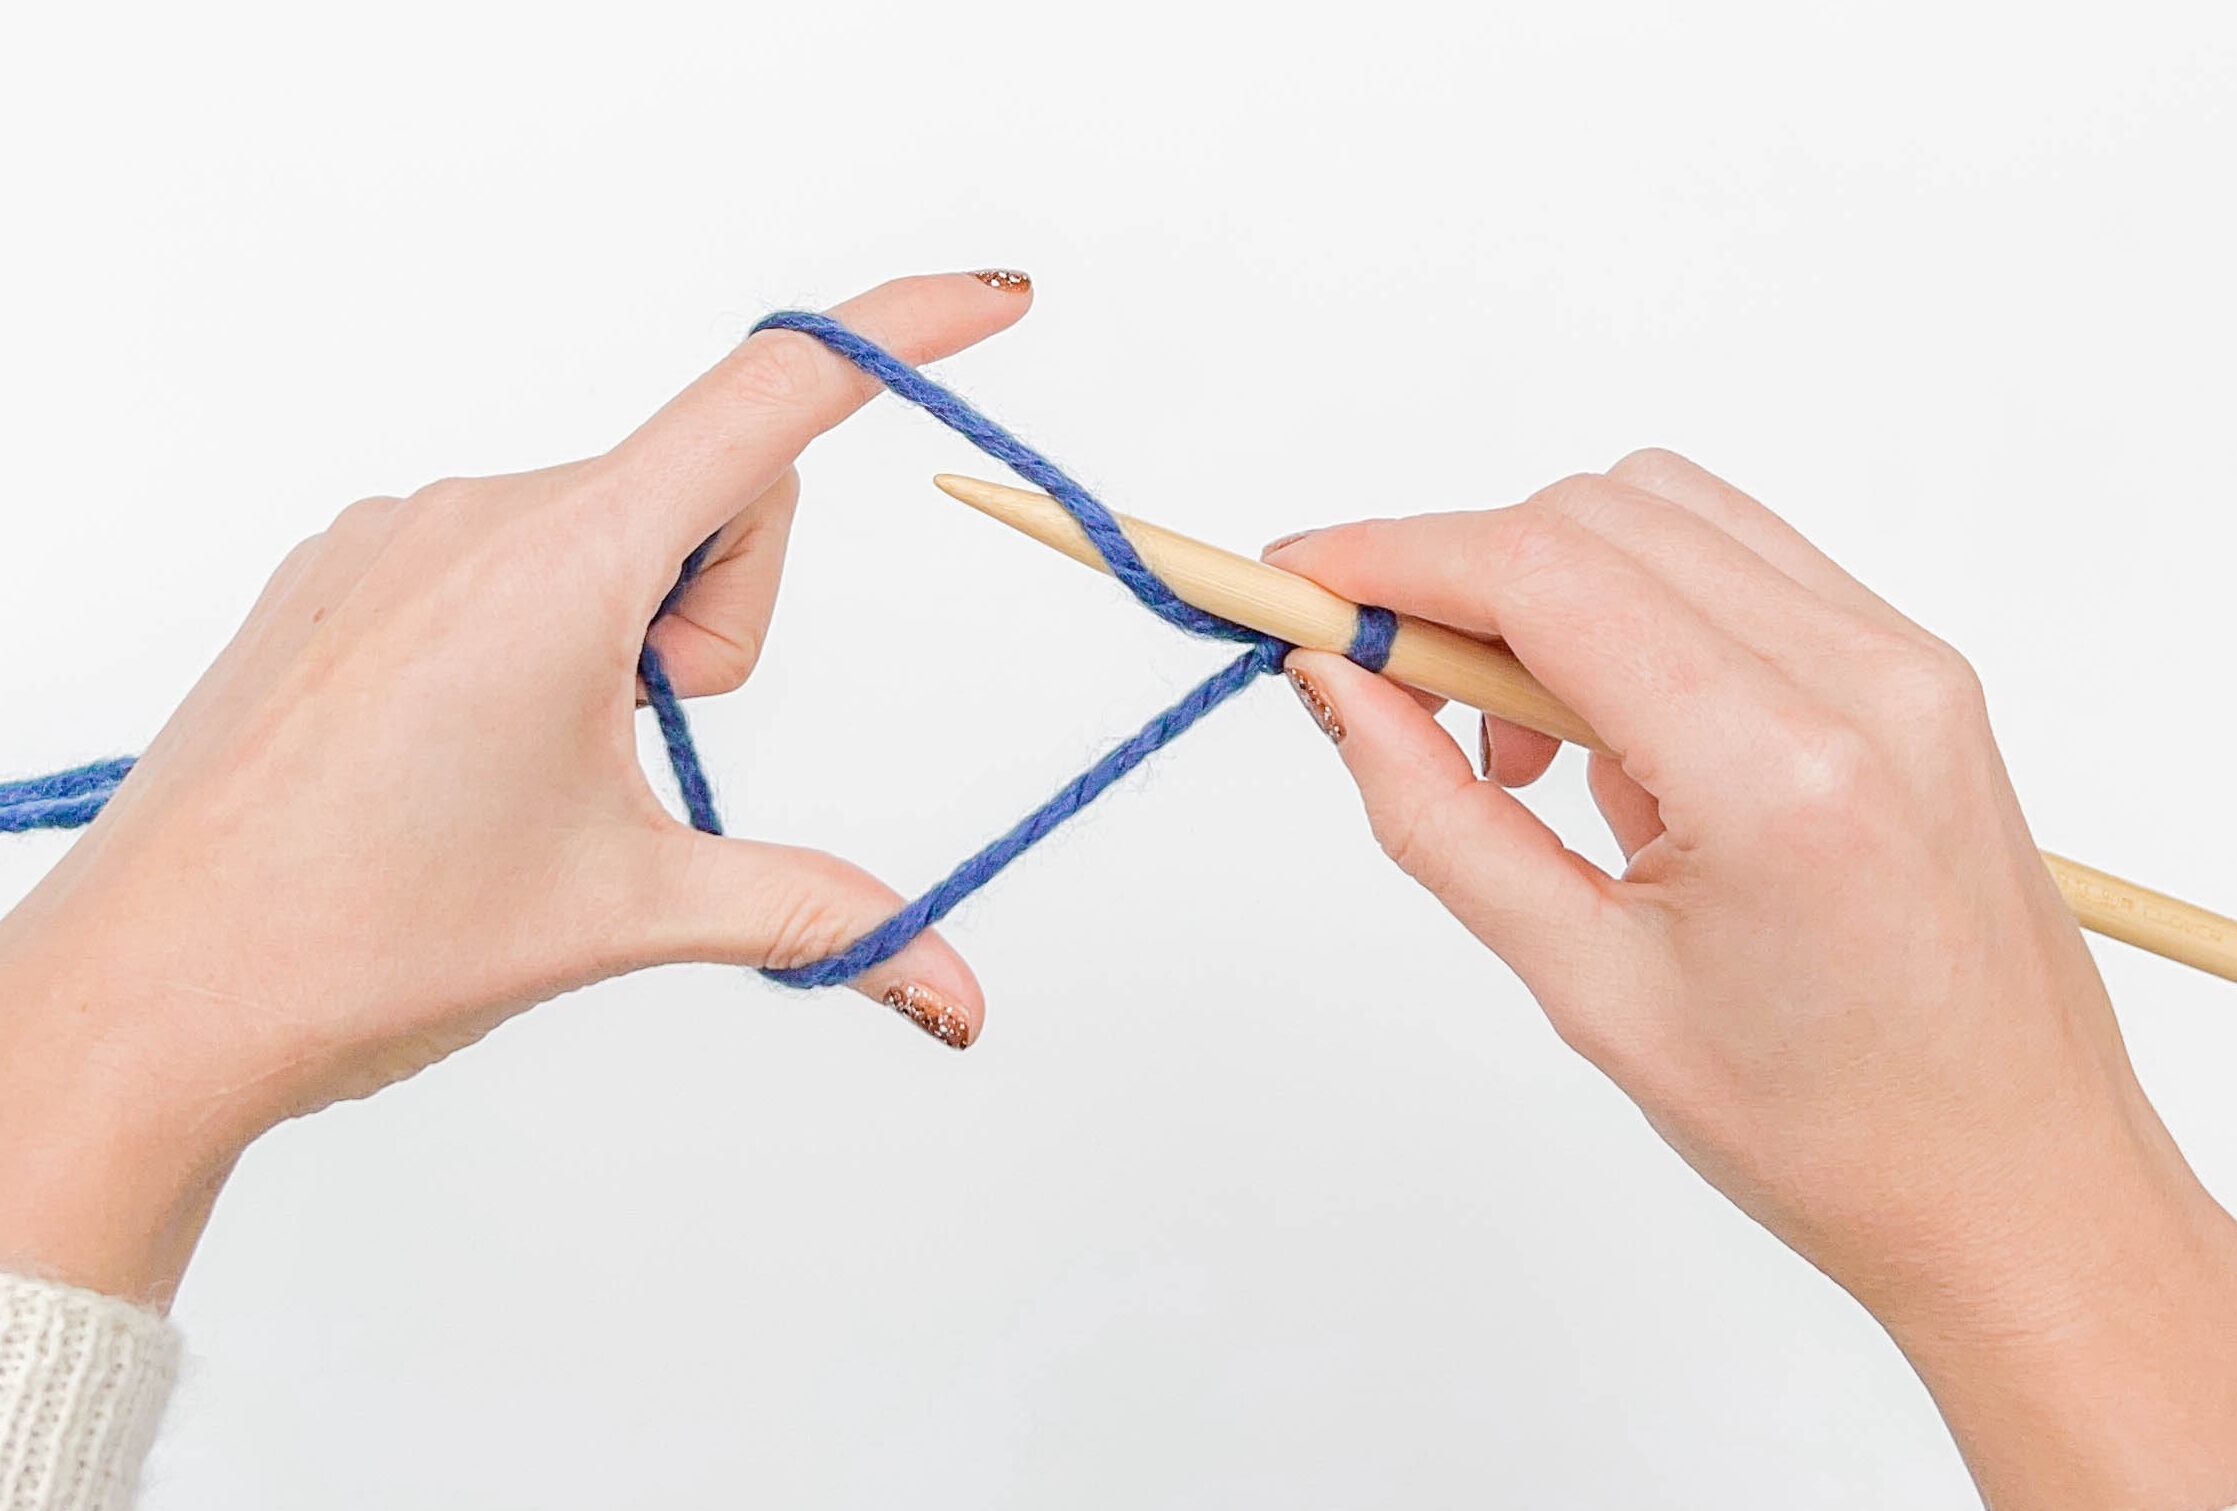
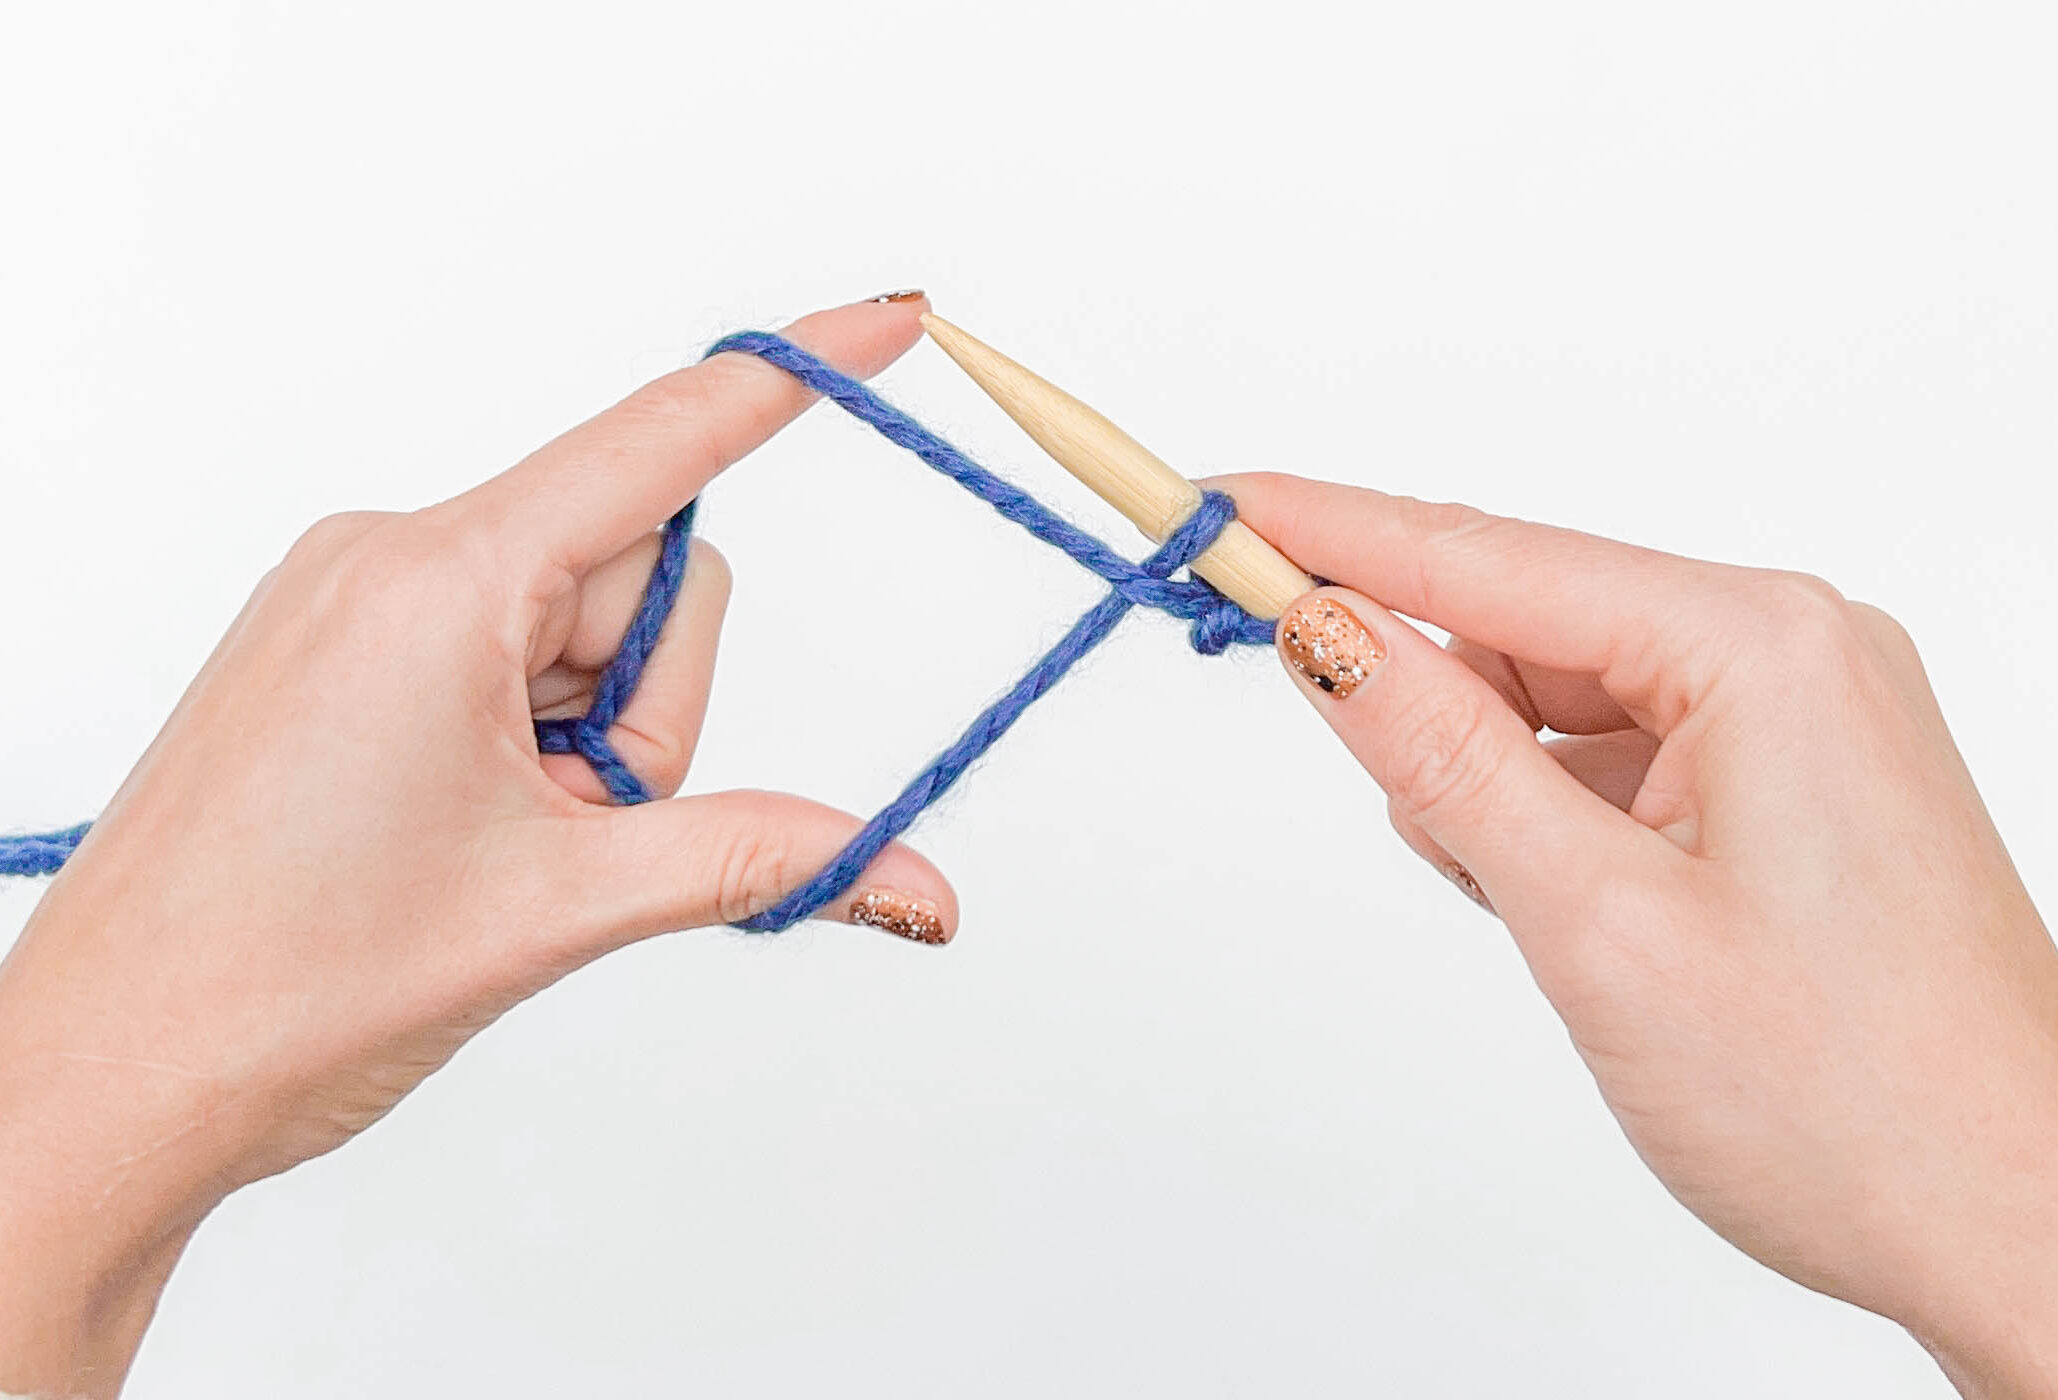
Step 2:
Hook the needle up over the index finger strand…
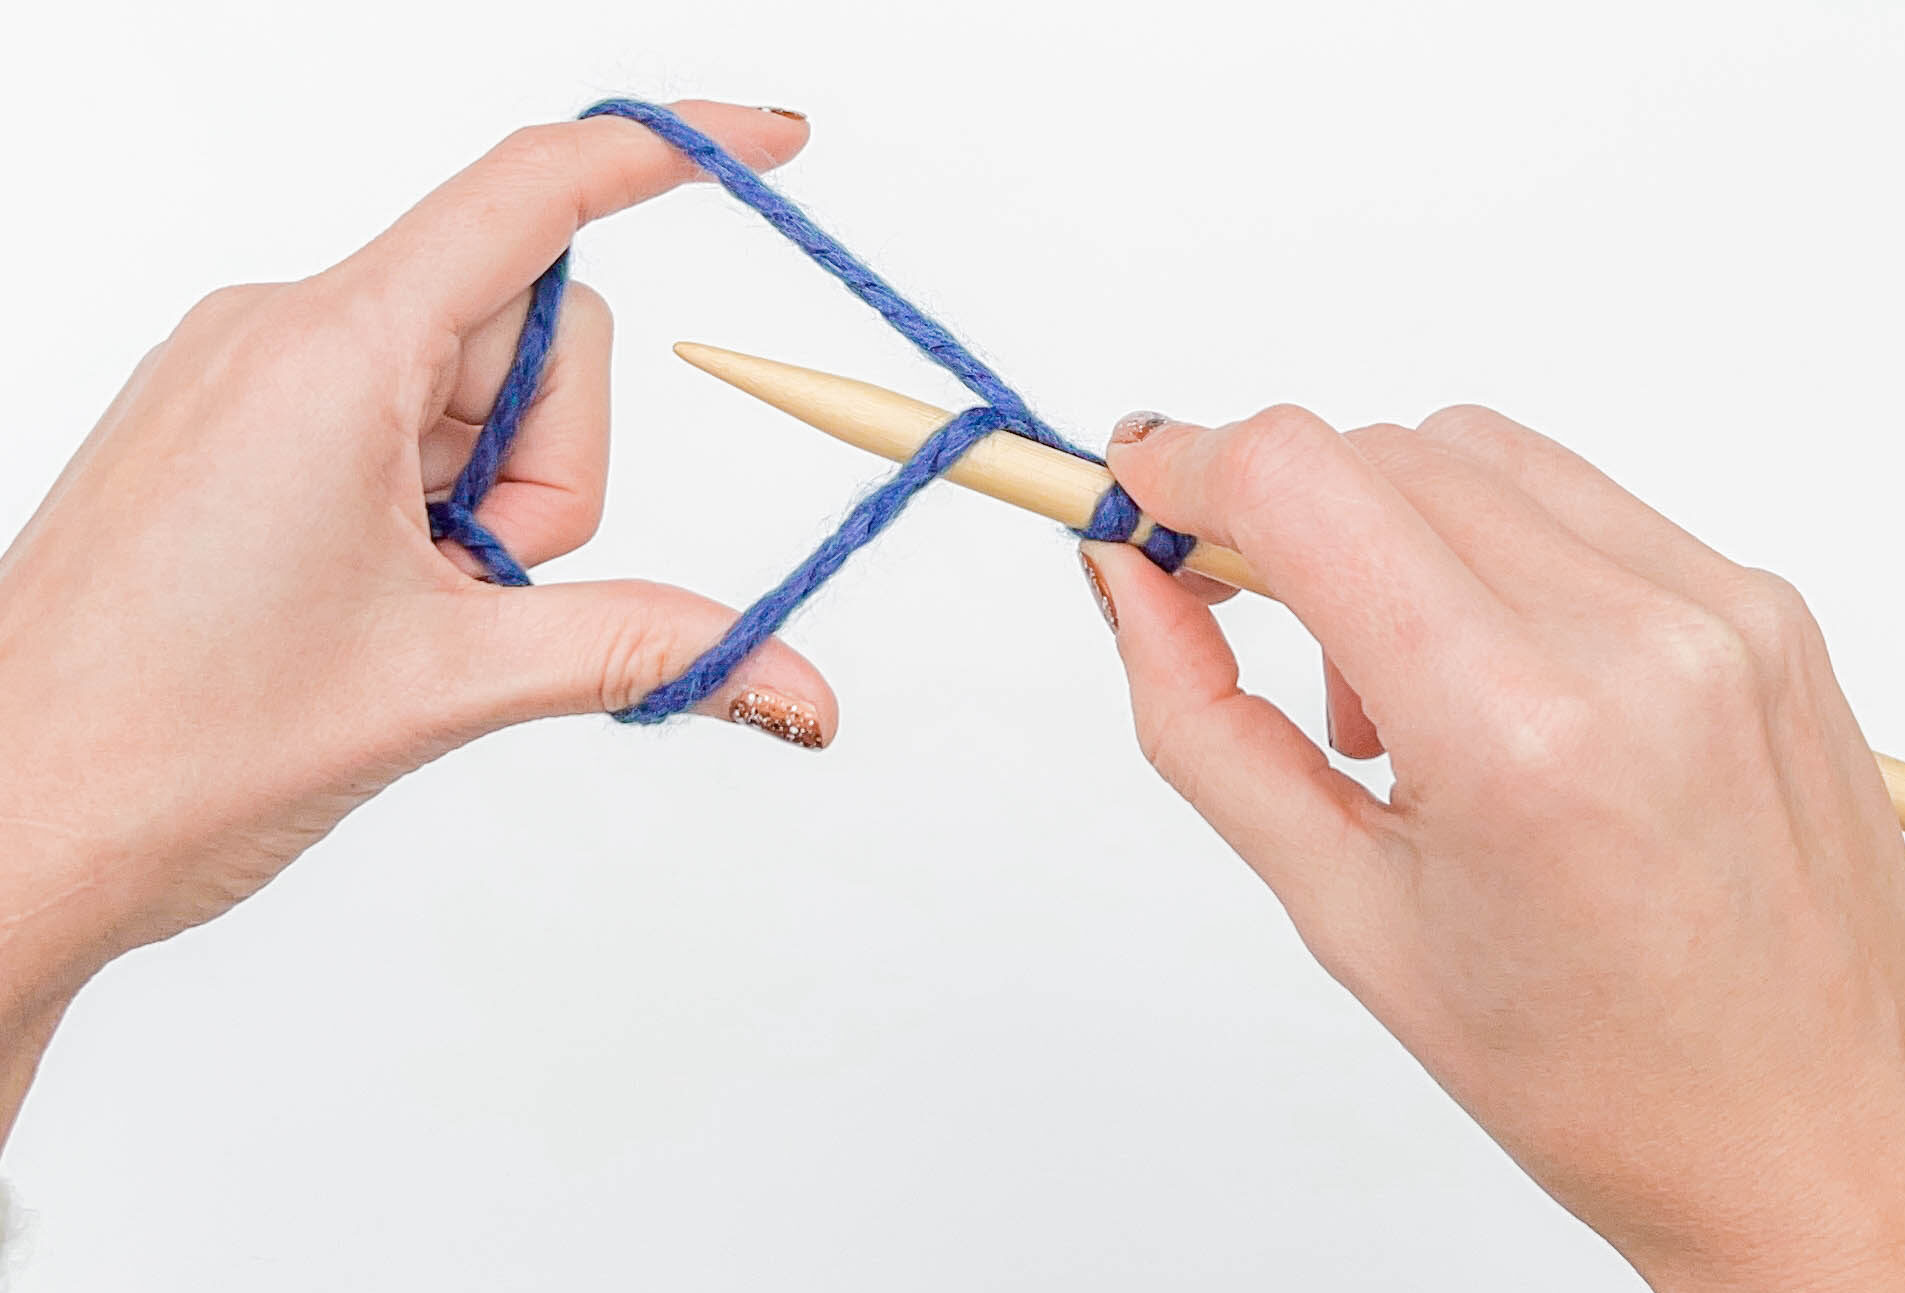
… and continue downward bringing the needle over the thumb strand.
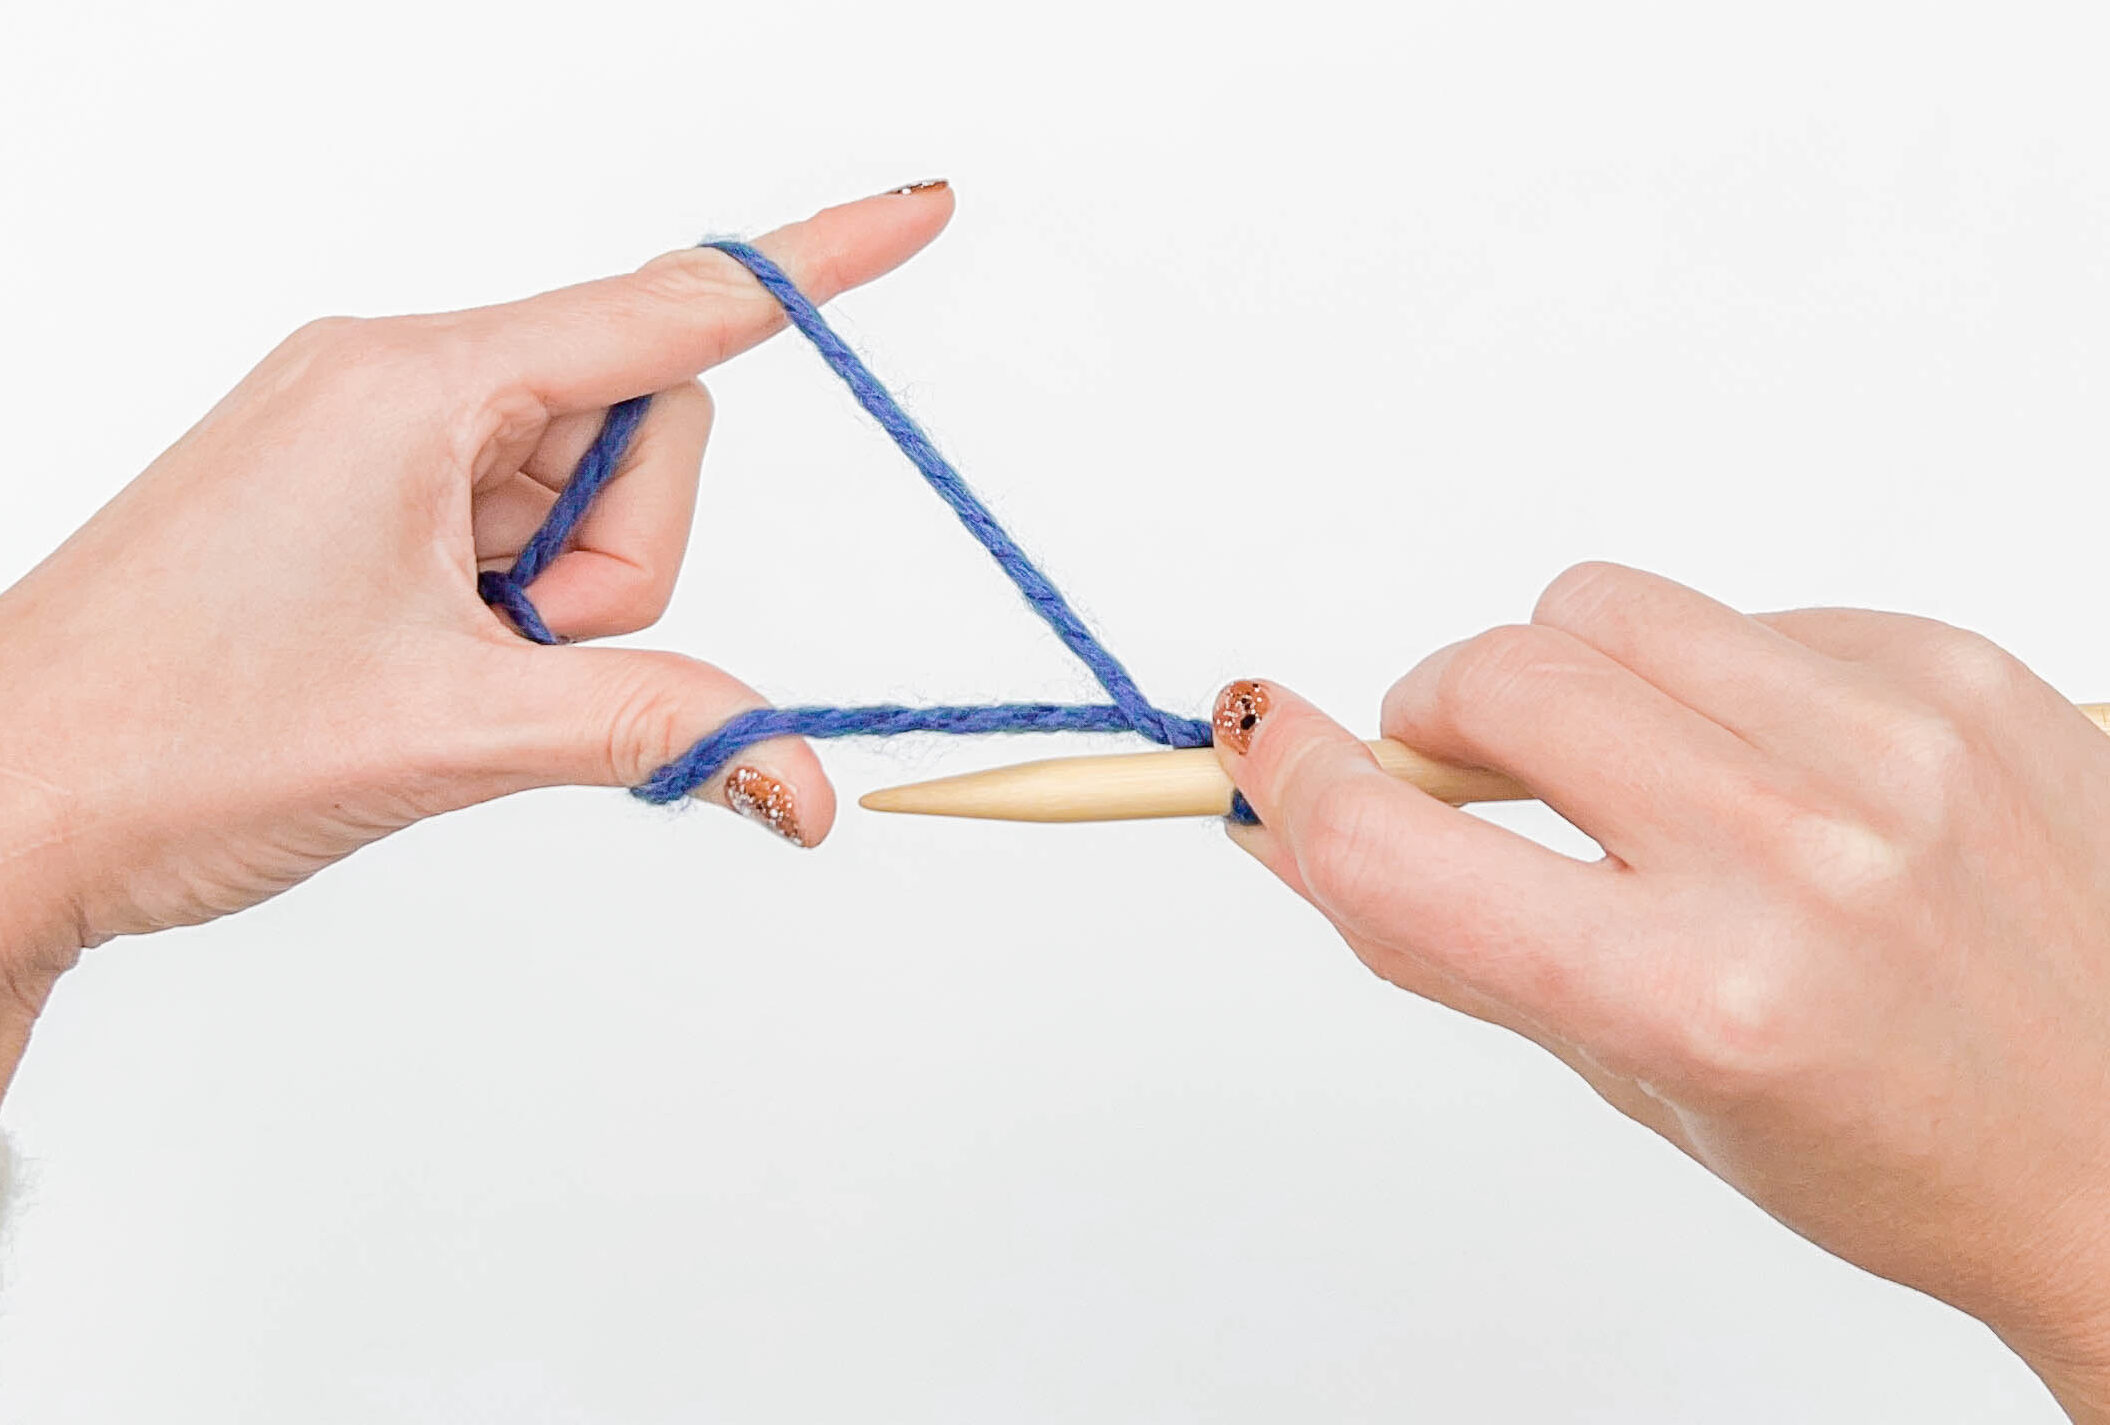
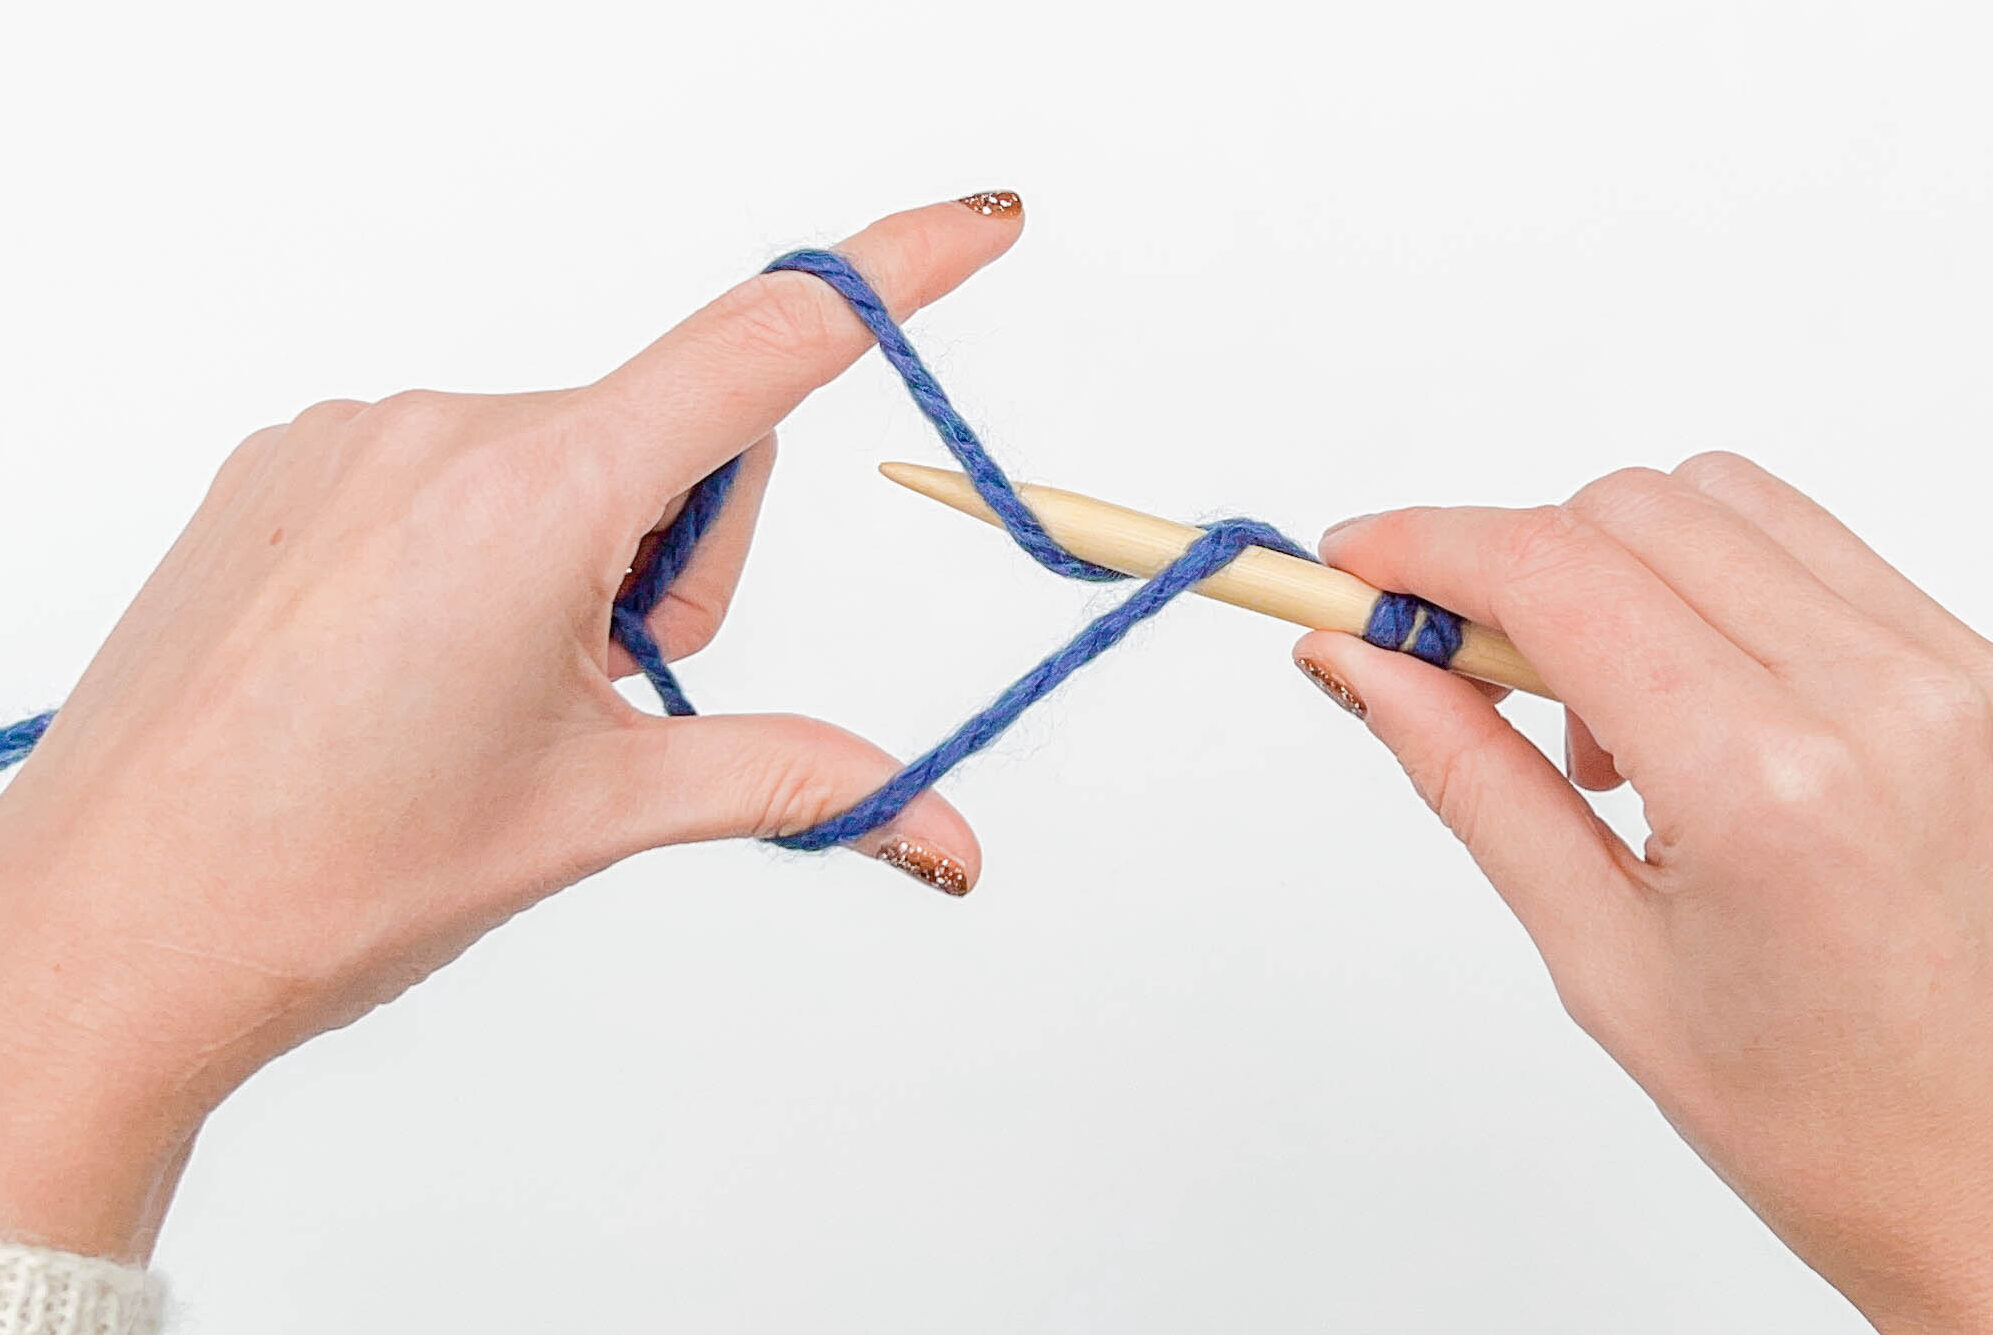
Step 3:
Scoop the needle under the thumb strand, moving away from you. Hook the thumb strand with the needle and bring it up behind the index finger strand.
Purl Stitch
You now have a purl stitch on the right needle! The index finger strand is positioned in front of the loop you just created.

Step 1:
Bring the right needle down, over the thumb strand.
Tip: use your right index finger to pin the previous stitch in place on the right needle while you work these steps.
Step 2:
Bring the needle under the thumb strand moving upward toward the index finger.
Step 3:
Hook the needle over the index finger strand, grabbing the yarn…

… pull the index finger strand downward, behind the thumb strand.
Step 4:
Bring the needle up, pulling the looped yarn under and in front of the index finger strand.
You now have a knit stitch on the right needle! The thumb finger strand is positioned at the back of your needle.
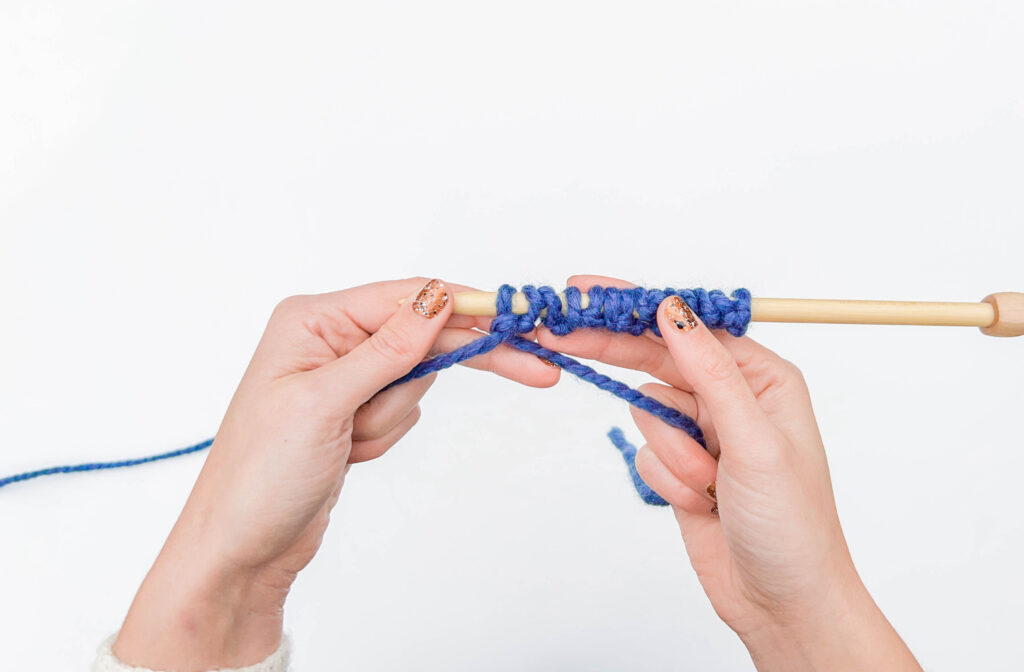
Continue to cast on stitches:
Continue following all the steps for foundation row purl and knit stitches until you’ve cast on the number of stitches you need! Remember to count your slip knot as the first stitch in your cast on row. End after completing a foundation row purl stitch.
Turn your needle so that it’s in your left hand, ready to work two set-up rows. Twist the yarn tail and working yarn once to “lock” the purl stitch in place so that it won’t unravel before you work the next steps.
Over the next two rows you’ll be slipping the purl stitches purlwise (with the yarn in front) and knitting the knit stitches normally. We’ll show you how to work the first set up row with photos.
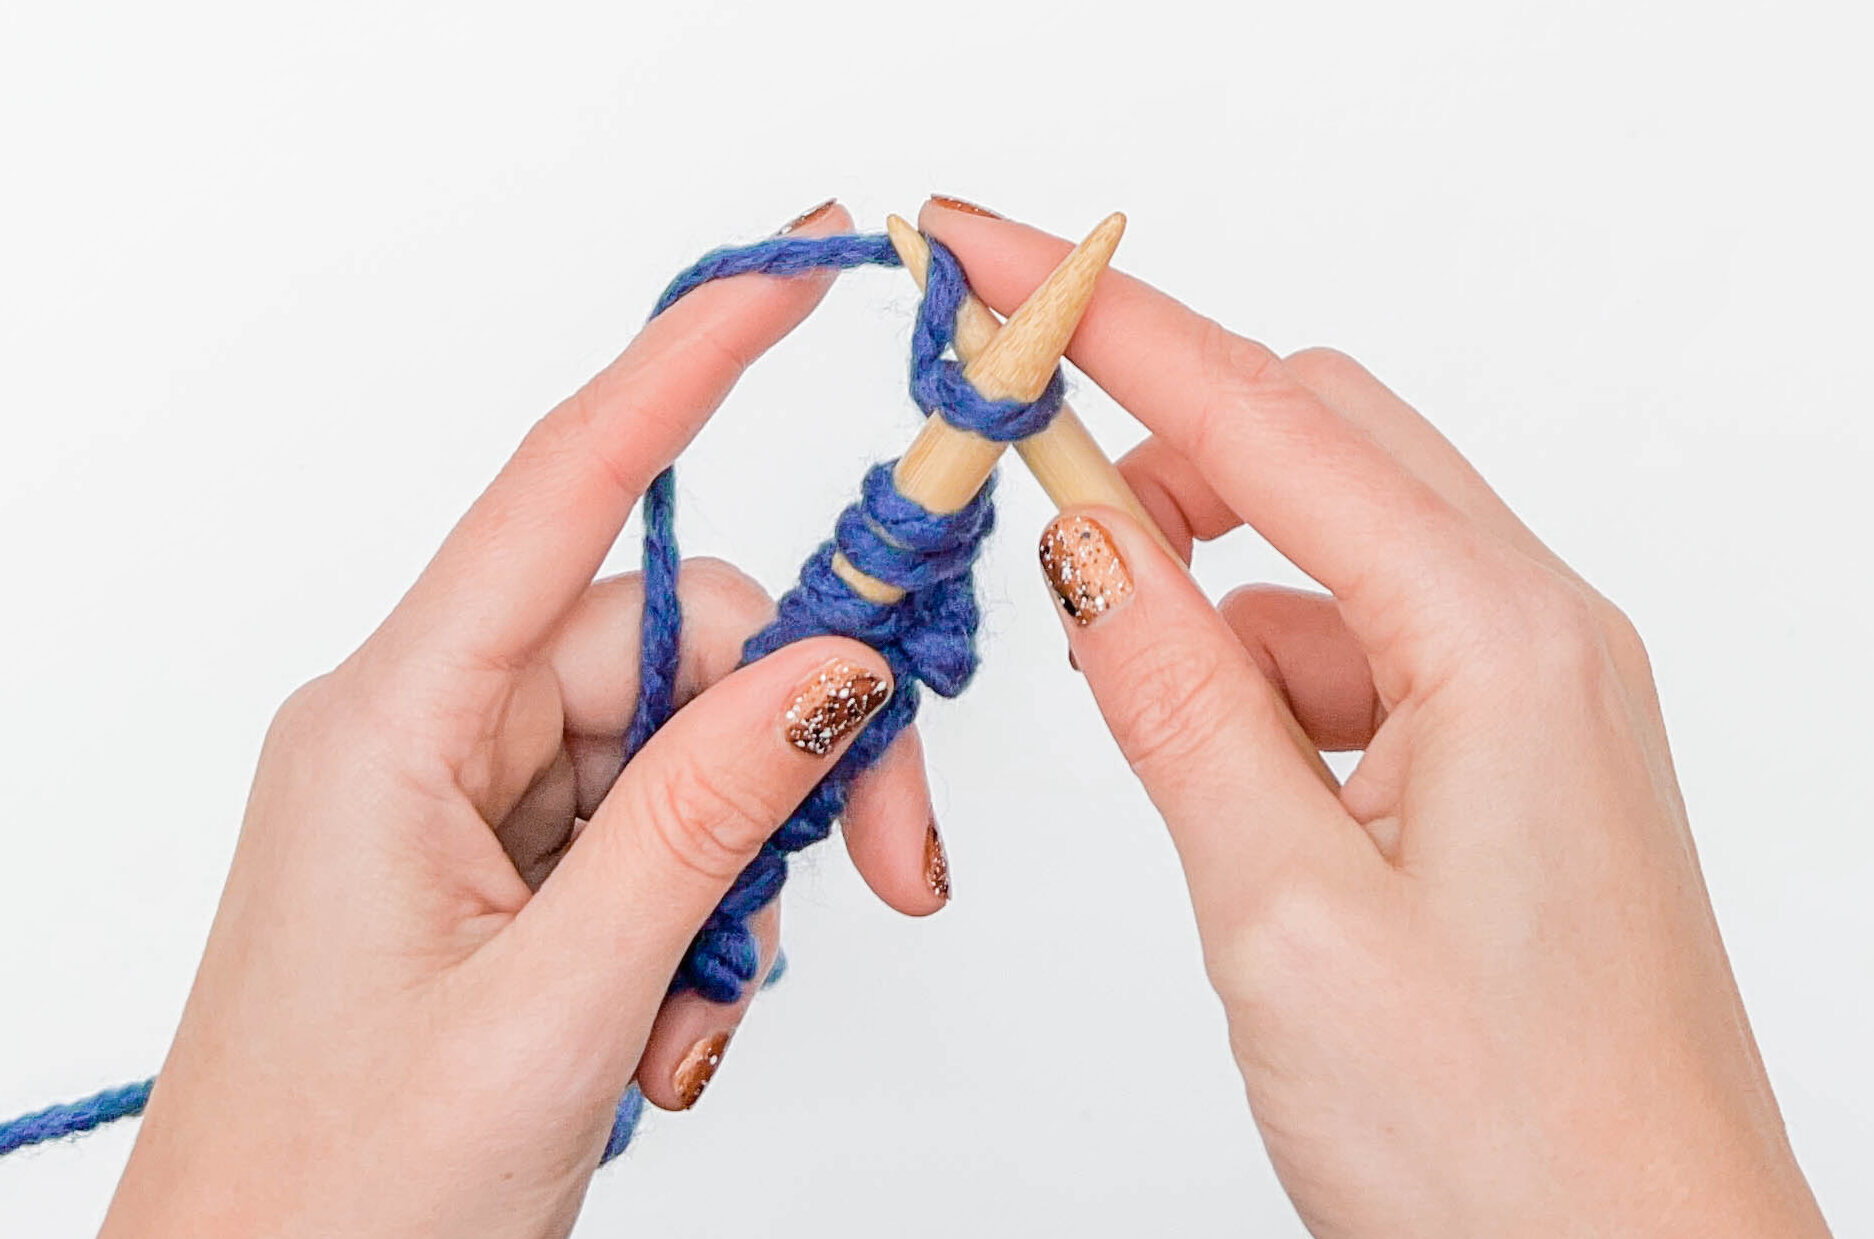
Step 1: Knit
With the yarn in back, knit the first stitch normally.
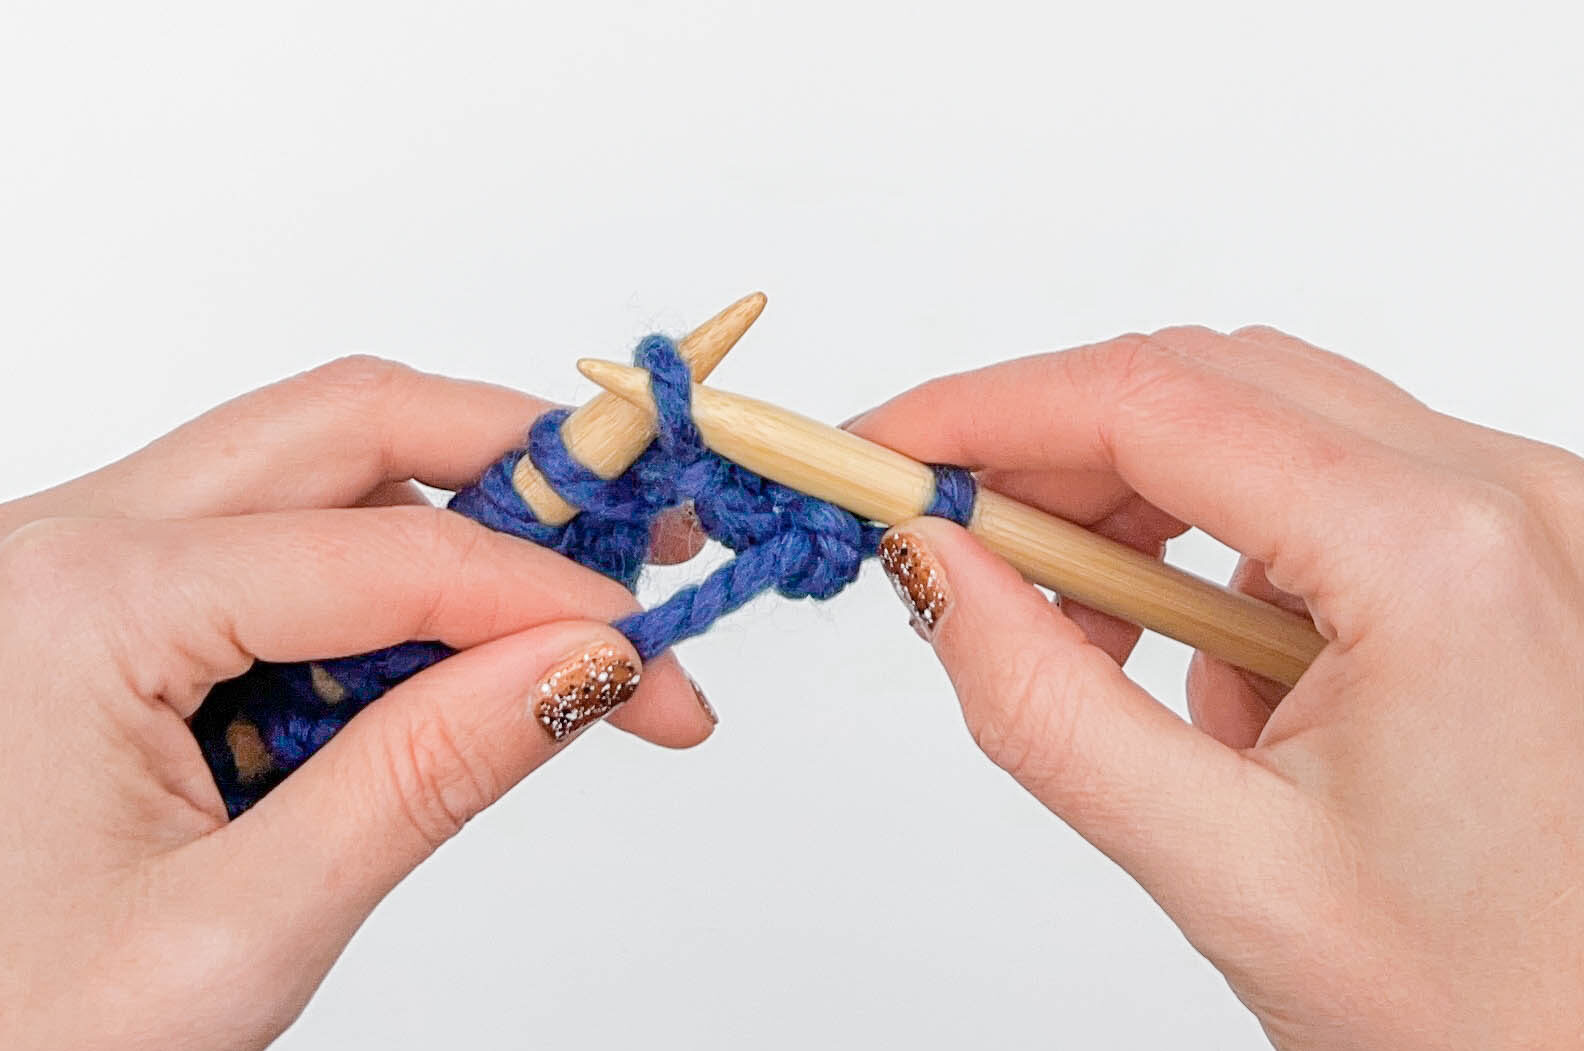
Step 2: Slip purlwise with the yarn in front.
Bring the yarn to the front, between the needles. Insert your needle through the purl stitch normally…
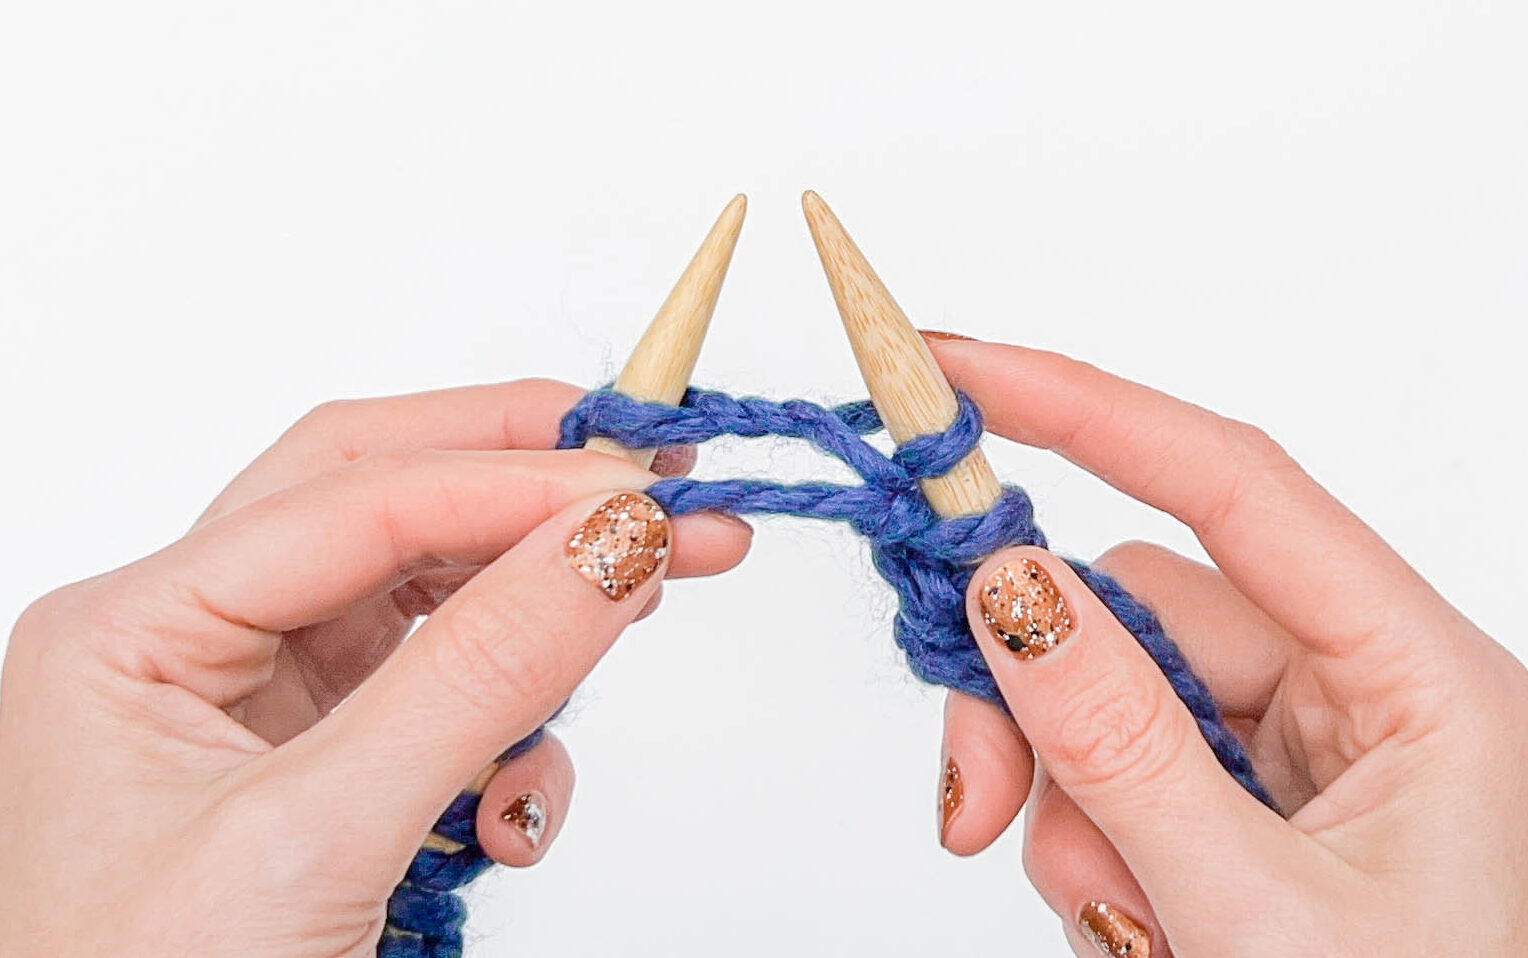
… before slipping the purl stitch to the right needle, unworked.
Bring the yarn between the needles to the back again ready to knit the next stitch.
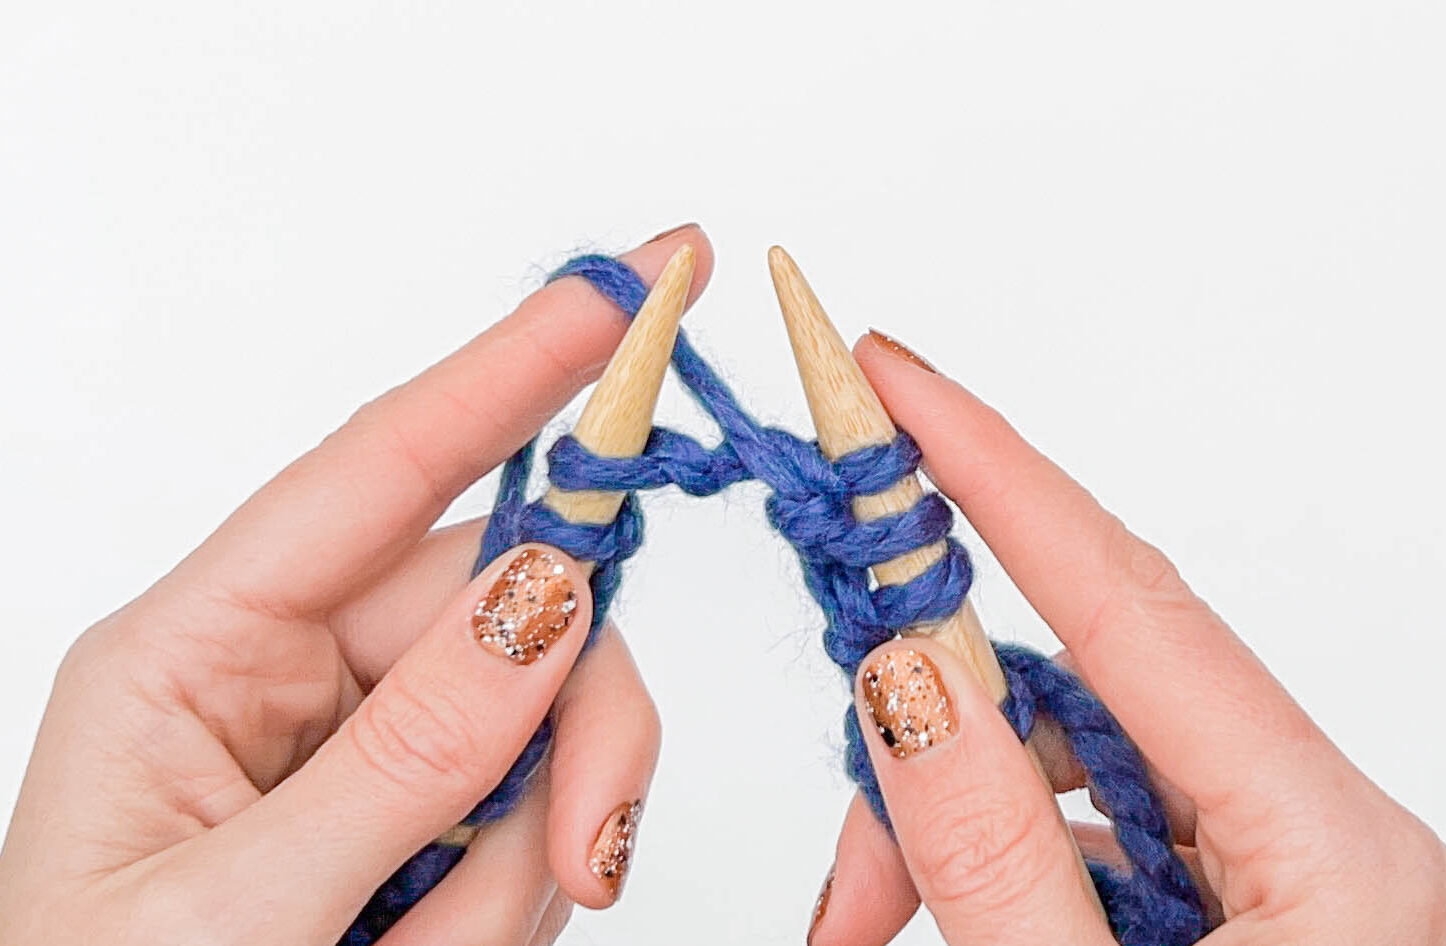
Repeat steps 1 and 2
Repeat Steps 1-2 ending with a slipped purl stitch before moving on to the second set up row.
Repeat steps 1-2 of the first set up row above until all the stitches have been worked, end with a slipped purl stitch. You now have one foundation row and two set up rows on the needles.
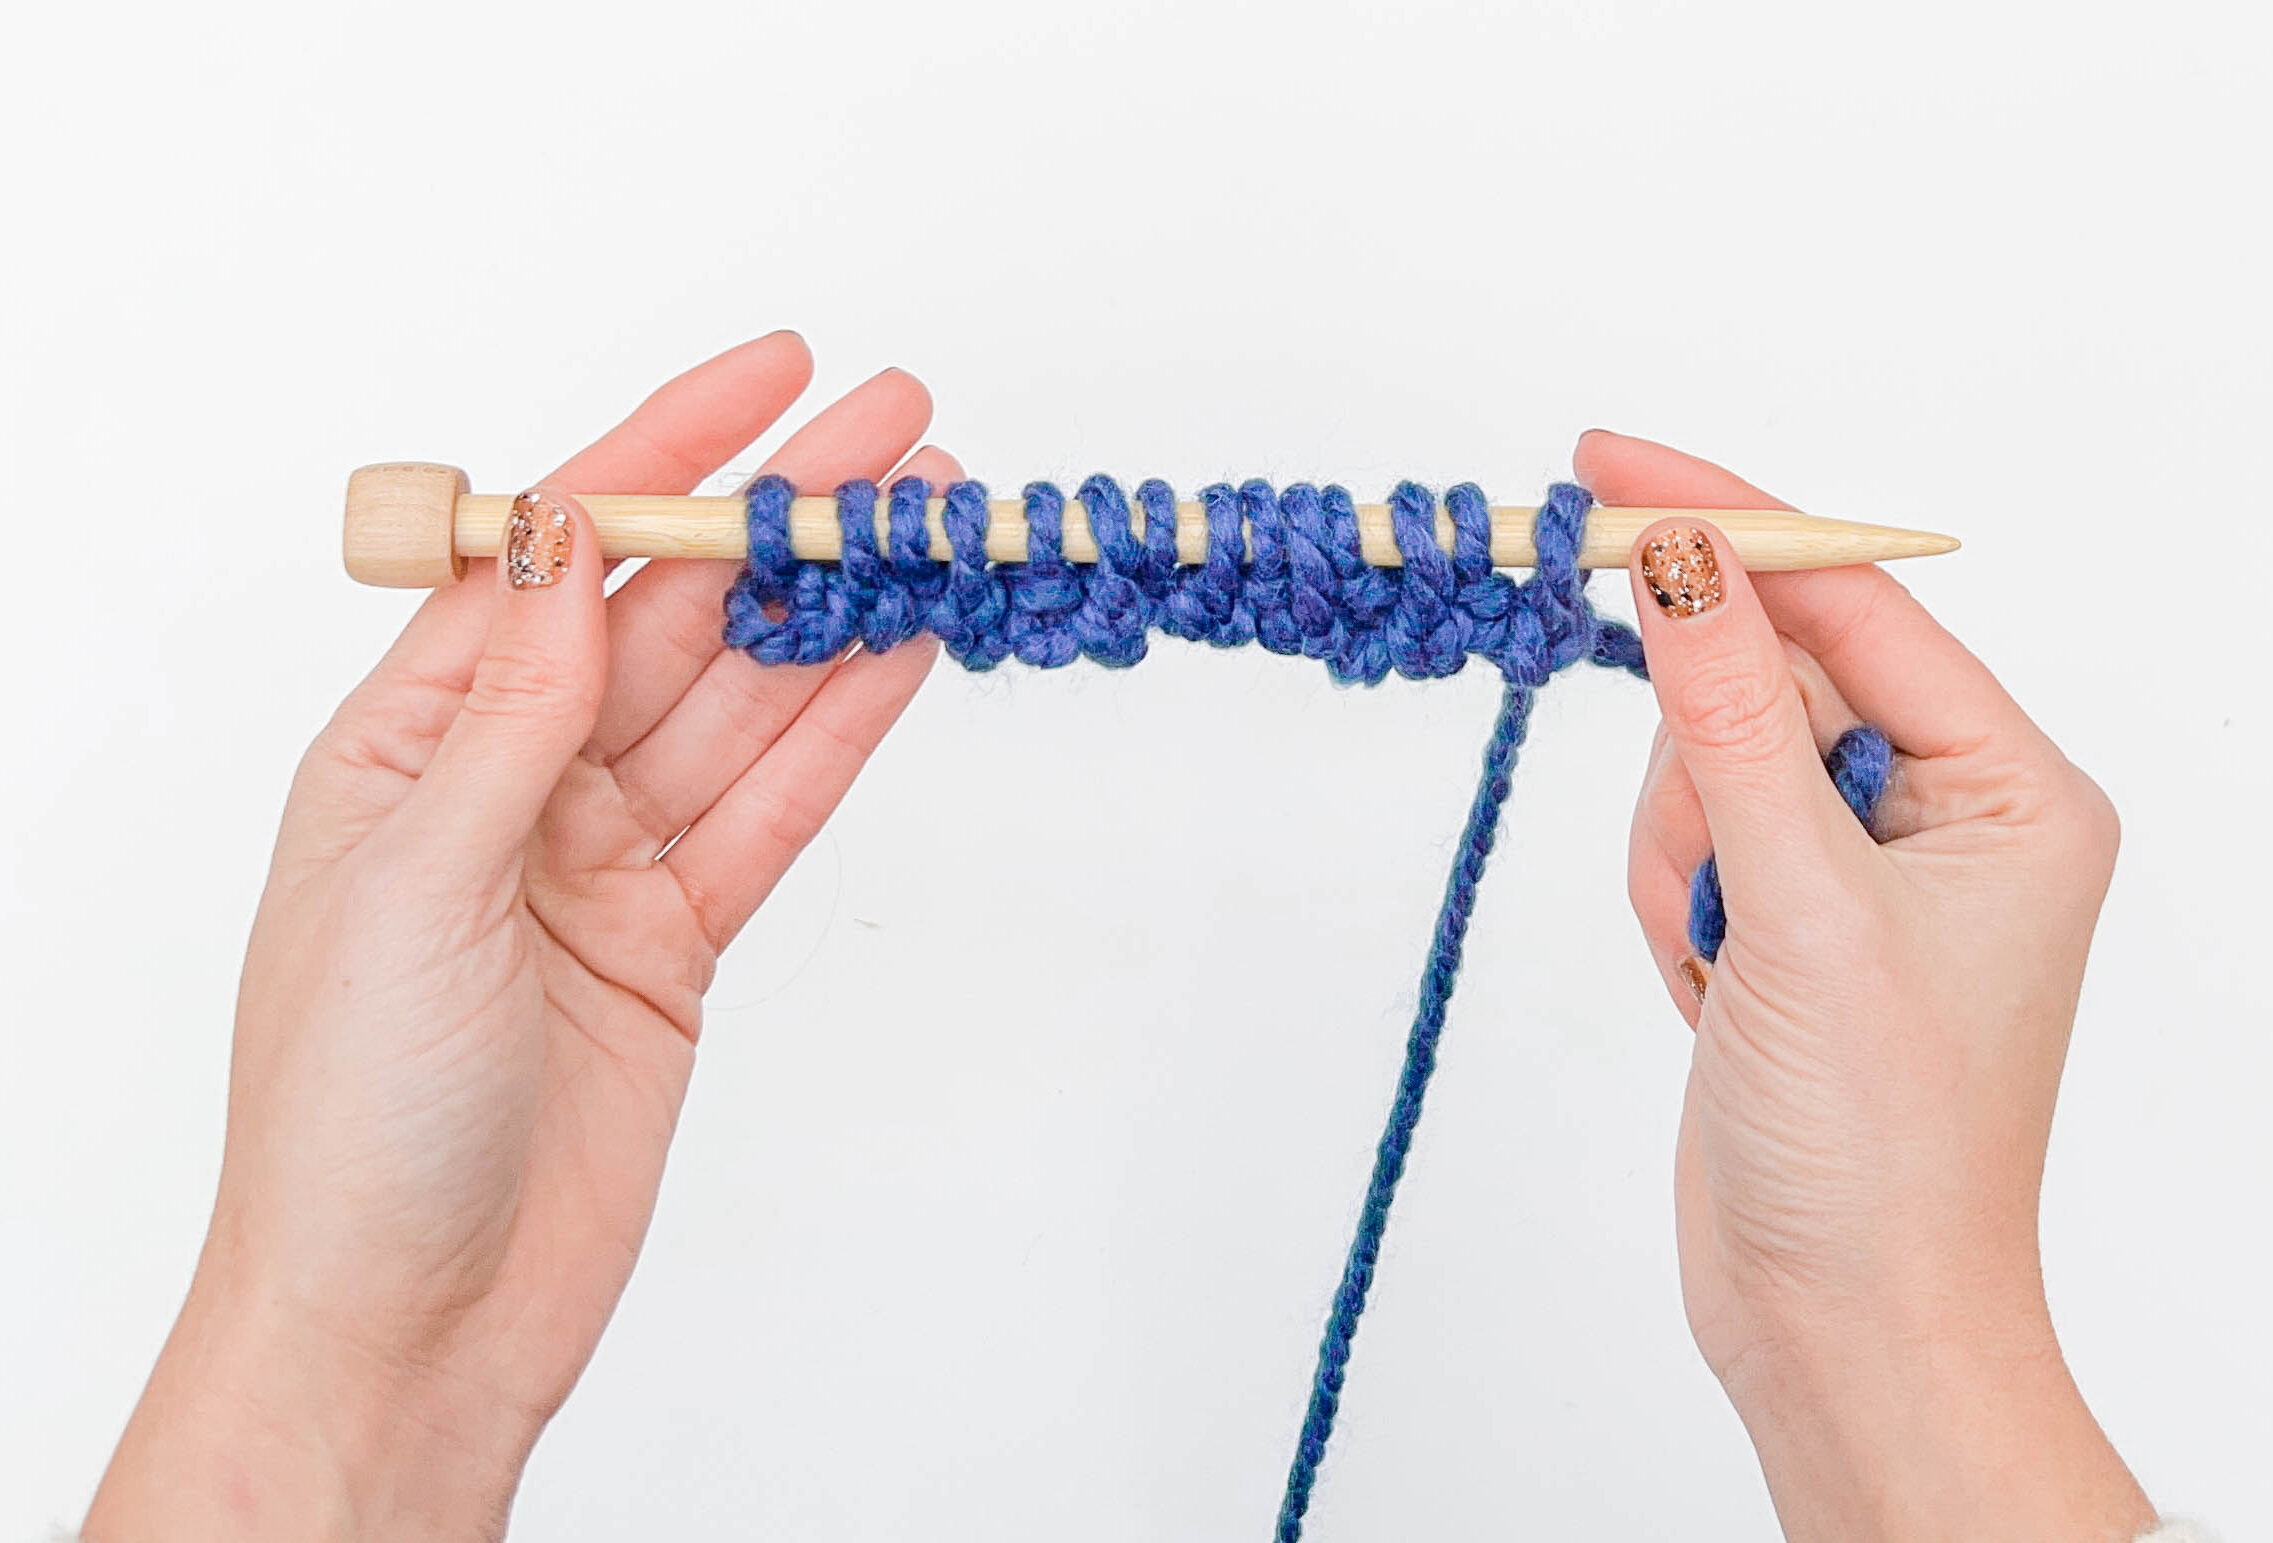
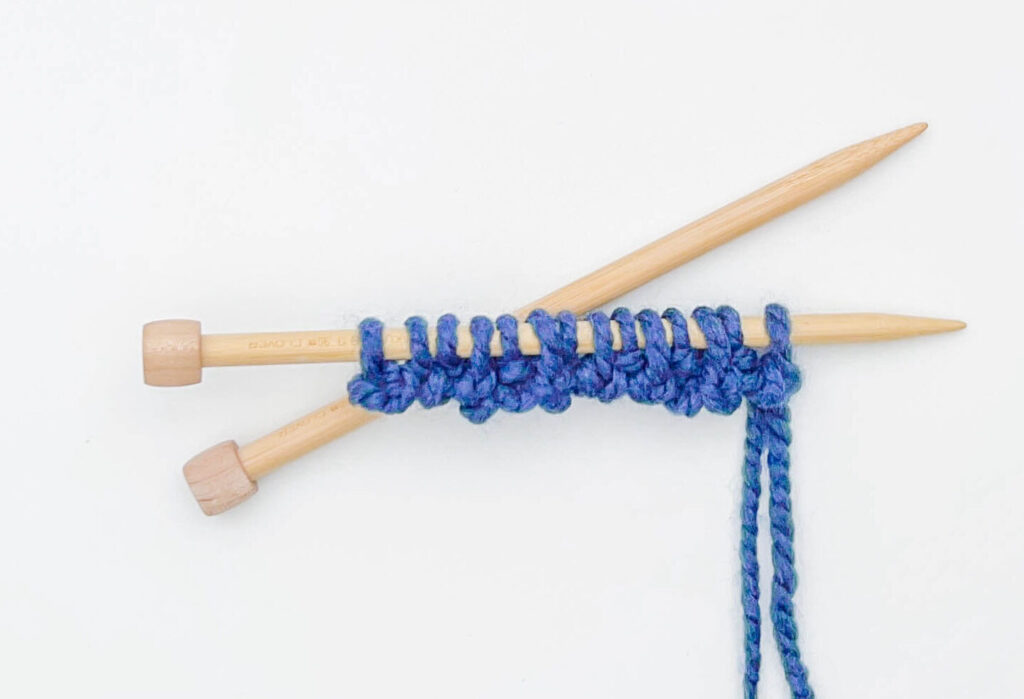
You’ve now completed the full Tubular Cast On!
Optional set up rows: You can also repeat the two set up rows once more (for a total of four set up rows) for a more rounded edge. However, you’ve worked enough rows that you’ll be good to go as-is without these additional rows.
As with so many fun, well-used knitting techniques this cast on goes by a few different names! The tubular cast on is also known as both the long tail tubular cast on and the Italian cast on. These are all the same technique, however you might find some subtle differences between tutorials. That’s ok! Find the one that clicks with how you craft.
The tutorial shows you how to work a tubular cast on designed to work best with 1×1 ribbing or brioche projects. But! There are a few different tubular cast on techniques designed for other kinds of projects.
Knitting is all about personal preference! Try all of these cast on methods to find the one that suits your project and knitting style best!


So far the clearest I have read and looked at enough to try. Do you explain how to go circular? Like for the hats
and fingerless mitts I will make for the Cancer center here. I am not happy with just a long-tail cast on.