How to Make Yarn Animals with the BeKnitting Pom Pom Kit
Learn to make the most perfect yarn pals ever!
Learn to make the most perfect yarn pals ever!
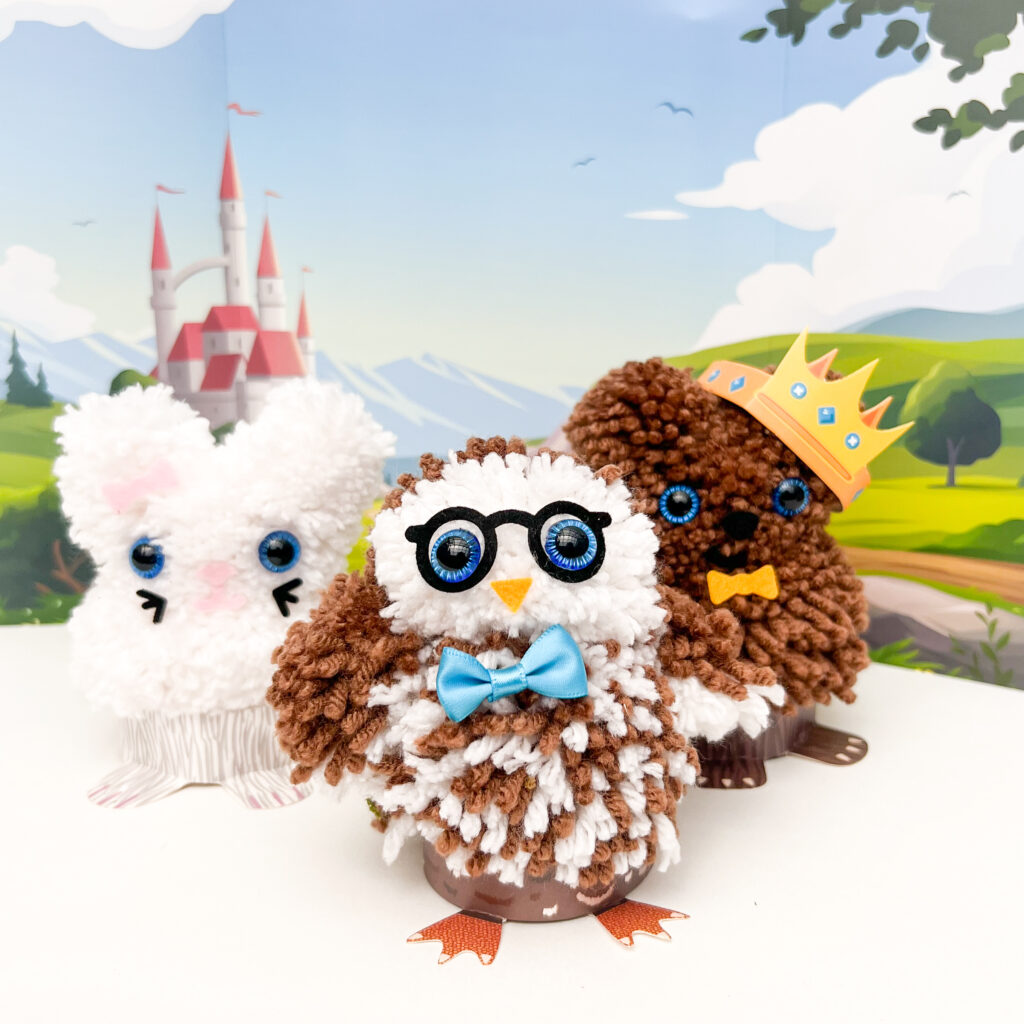
YAY! You’ve gotten the BeKnitting Pom Pom Forest Friend Kit and now you’re ready to make some cute yarn animals out of pom poms! The booklet that comes with the kit can only hold so many photos so we decided to give you extra information for your DIY pom poms in this series of tutorials.
First, we’ll show you how to make Honey Bear, then Binky Bunny, followed by Oscar the Owl. Each of the yarn animals has a slightly different set of instructions so make sure to read through all of them to get all the tips and tricks you need to make the more perfect pom poms.
Ready to get crafty? Let’s go!
Each of the DIY pom poms is made using a pom pom maker! While the instructions for wrapping the yarn will be different for each forest pal, the technique is the same.
Never made pom pom crafts before? We have a whole tutorial about making pom poms here if you need a step-by-step detailed refresher!
See the full How to Make a Pom Pom Tutorial here!
Continue on in this post to learn how to make each of the specific yarn animals from the kit through a series of step-by-step instructions for beginners.
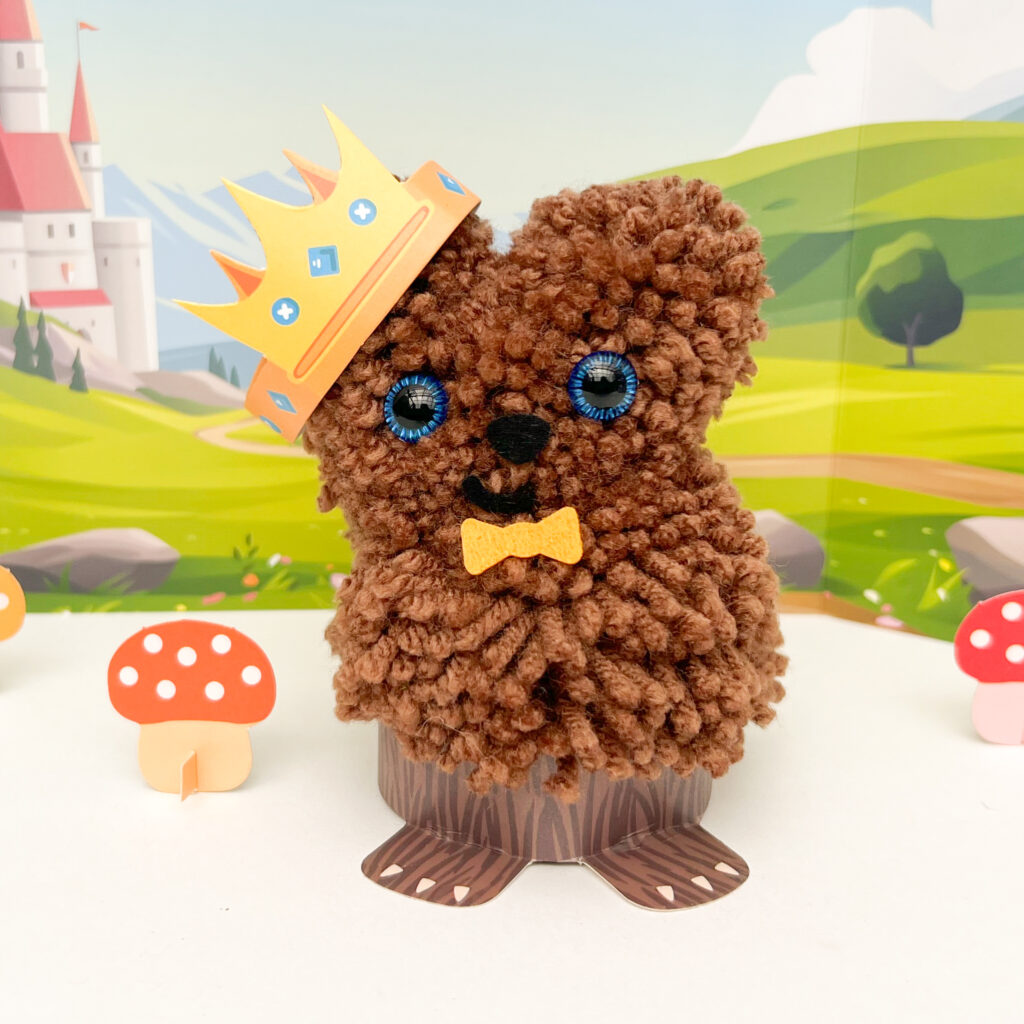
Always getting into a little bit of a pickle, Honey Bear stops at nothing to get a sweet snack all day every day. If you’ve ever had a cookie go missing, odds are good that Honey Bear had something to do with it.
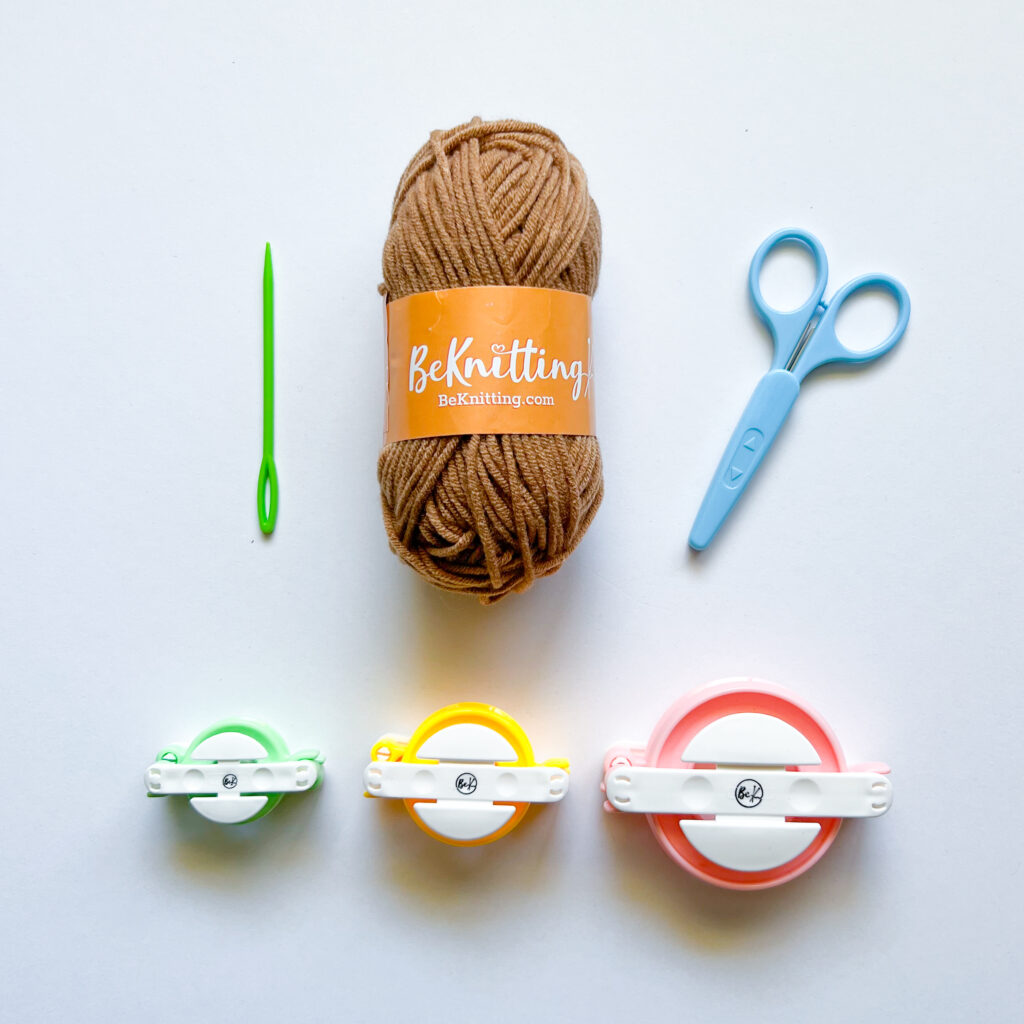
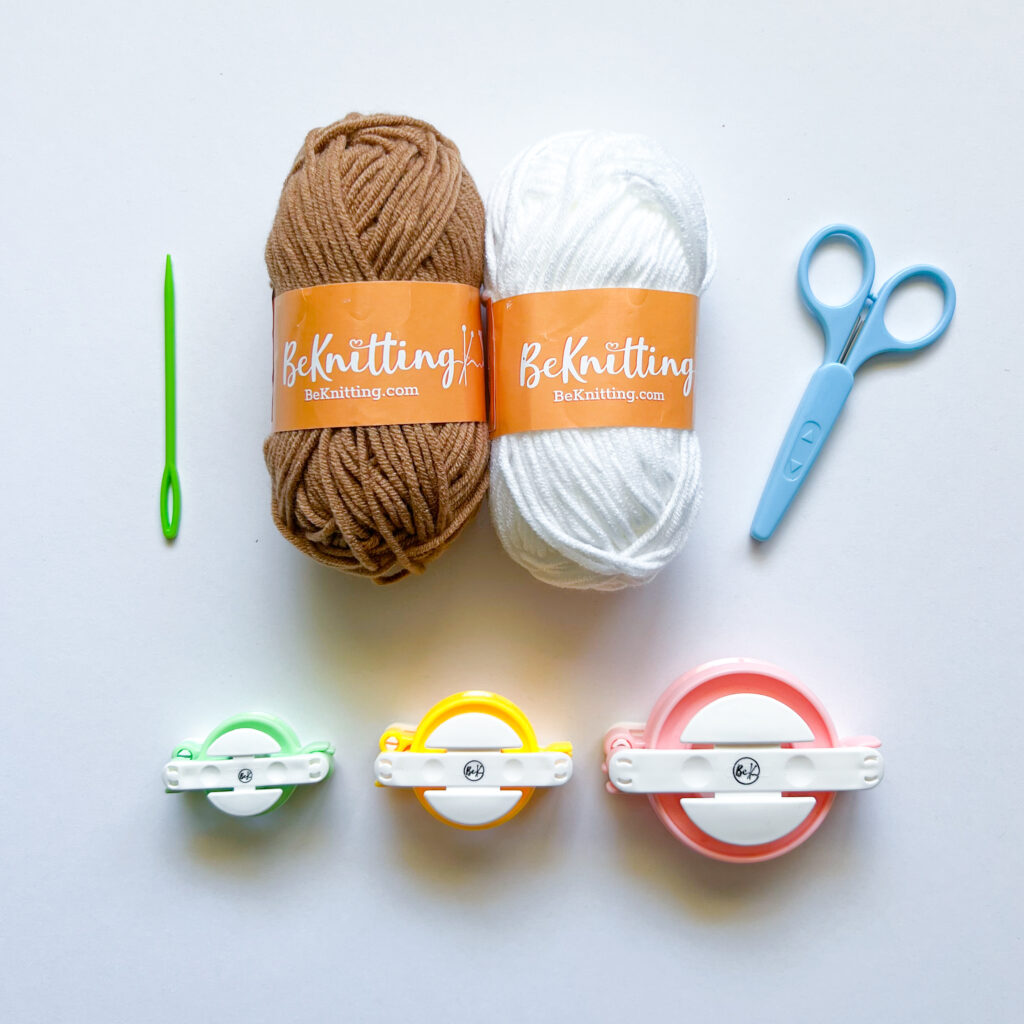
To make the Honey Bear you’ll need to gather the following materials: brown yarn, yarn needle, medium pom pom maker (pink), small pom pom maker (yellow), extra small pom pom maker (green), and a pair of scissors.
Since the bear is all one color it’s easy to make all of the pom poms you need! You’ll need one medium brown body pom pom, one small brown head pom pom, and two extra small brown pom pom ears!
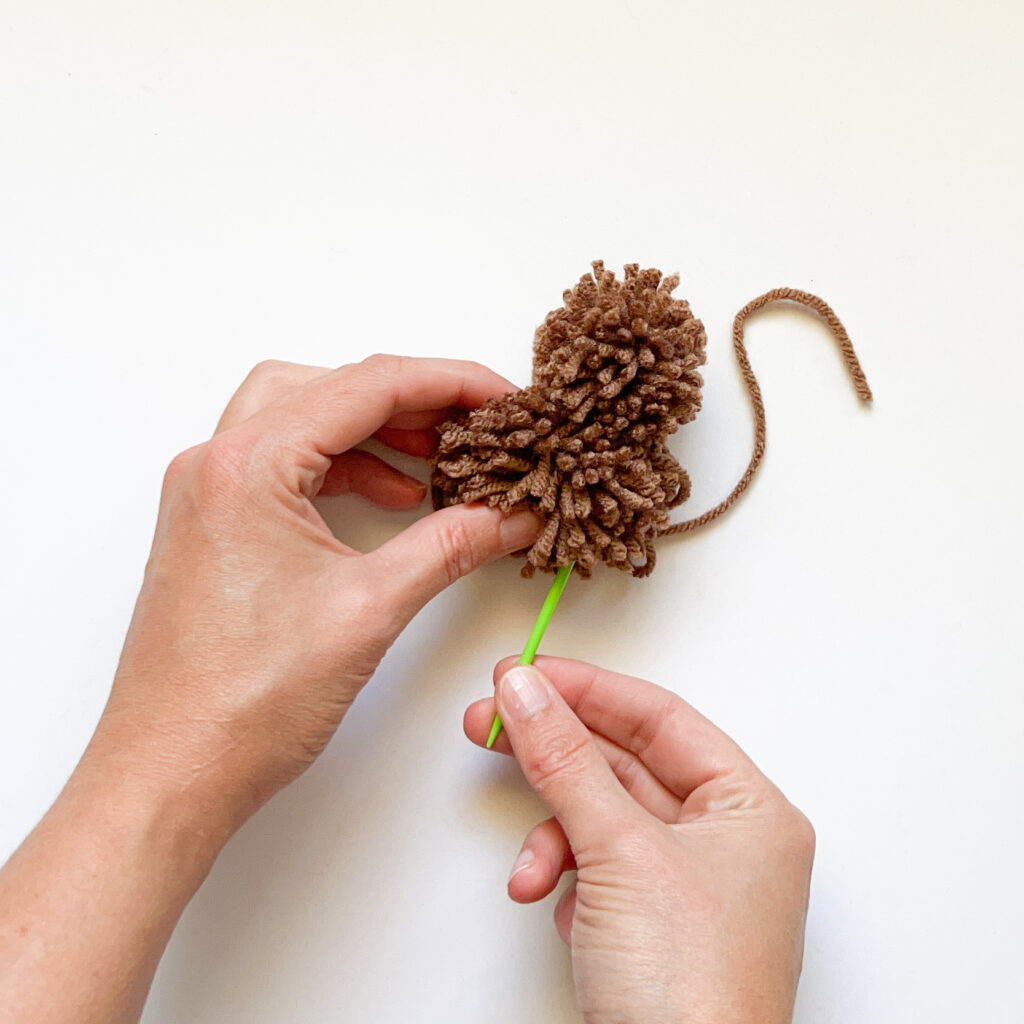
To make a pom pom, follow the general step-by-step instructions in this tutorial for using a pom pom maker to create yarn pom poms. All the pom poms in this kit are made the same way.
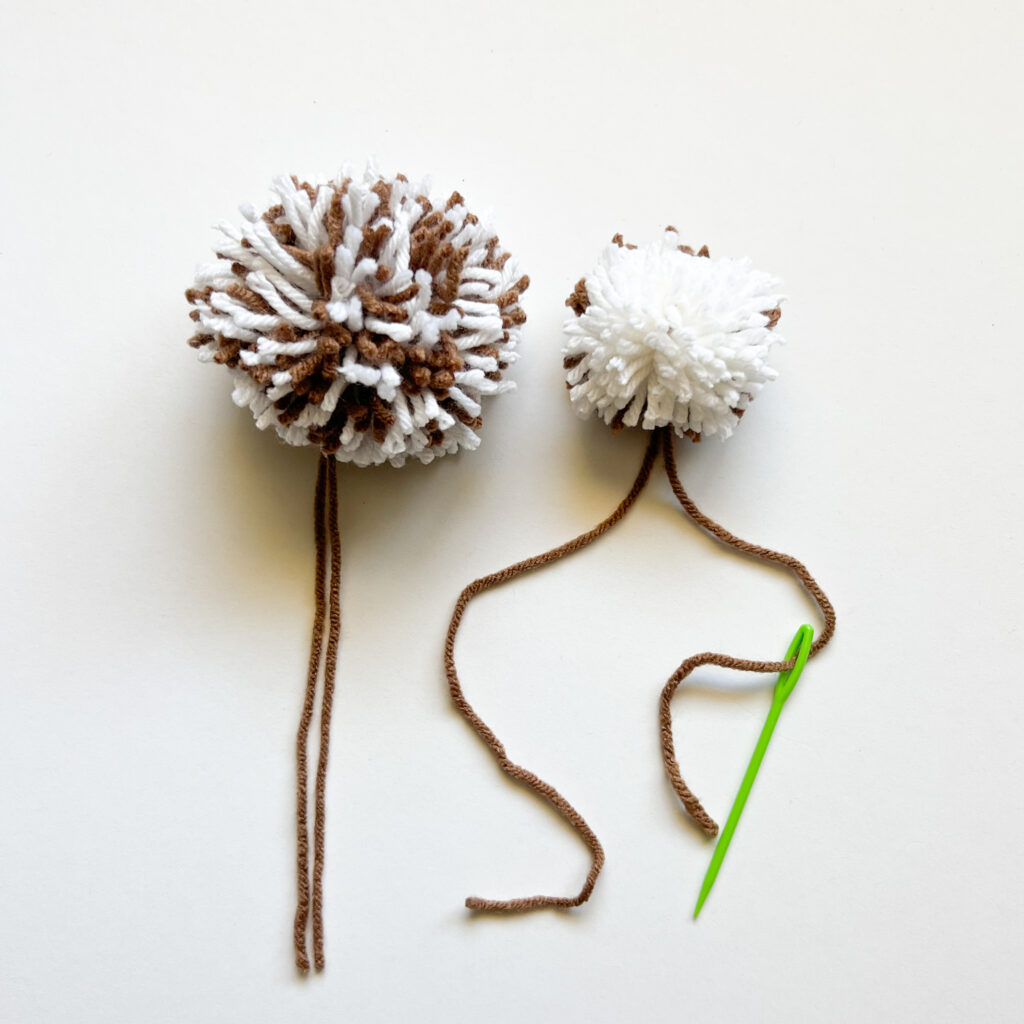
Trim any extra long yarn ends but be careful not to overly shape the pom poms before you assemble them in the next step! The extra yarn length with help blend the pieces together.
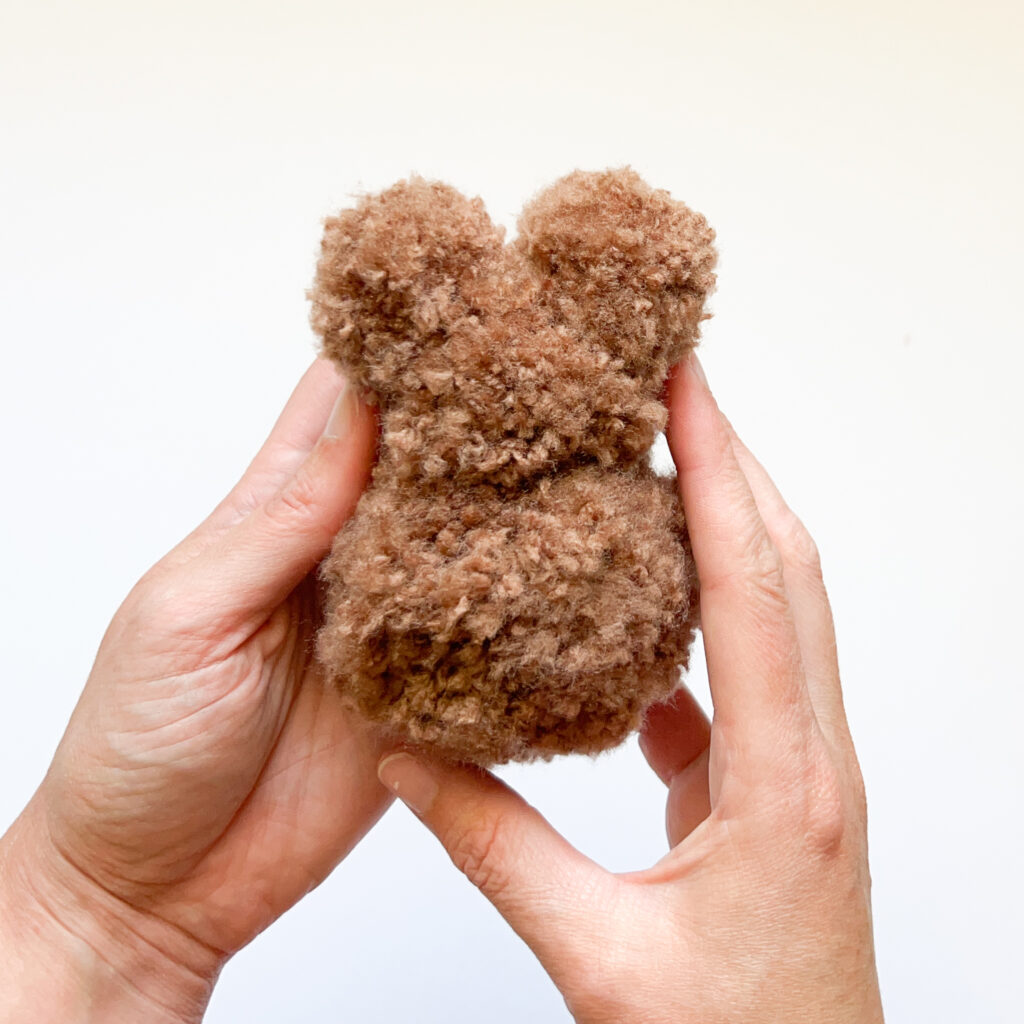
Use the tails from each pom pom to assemble the bear. First we’ll attach both ears to the head, and then the head to the body! Simple.
Step 1: One at a time, thread both of the yarn tails from one ear pom pom through the head from the top and out the bottom.
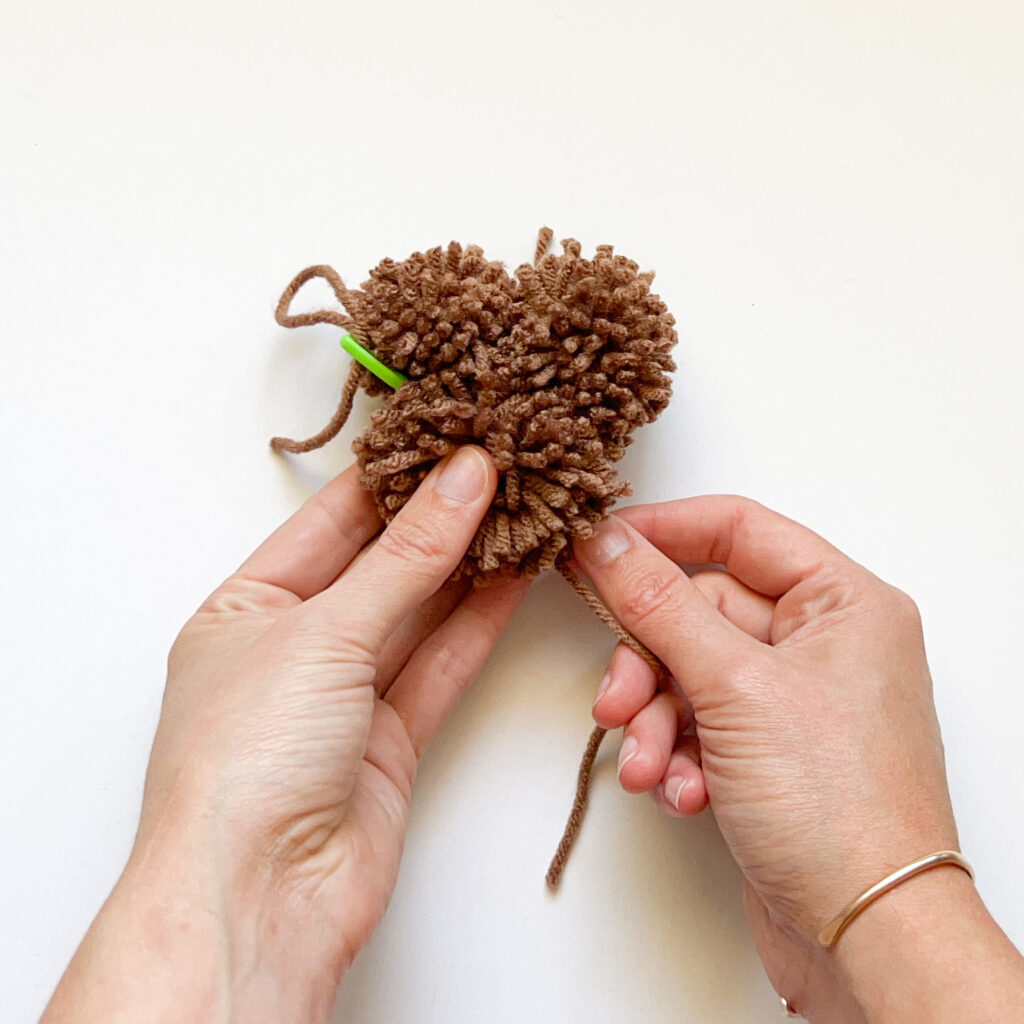
Step 2: Repeat step 1 with the second ear. Position the second ear right next to the first at the top of the head.
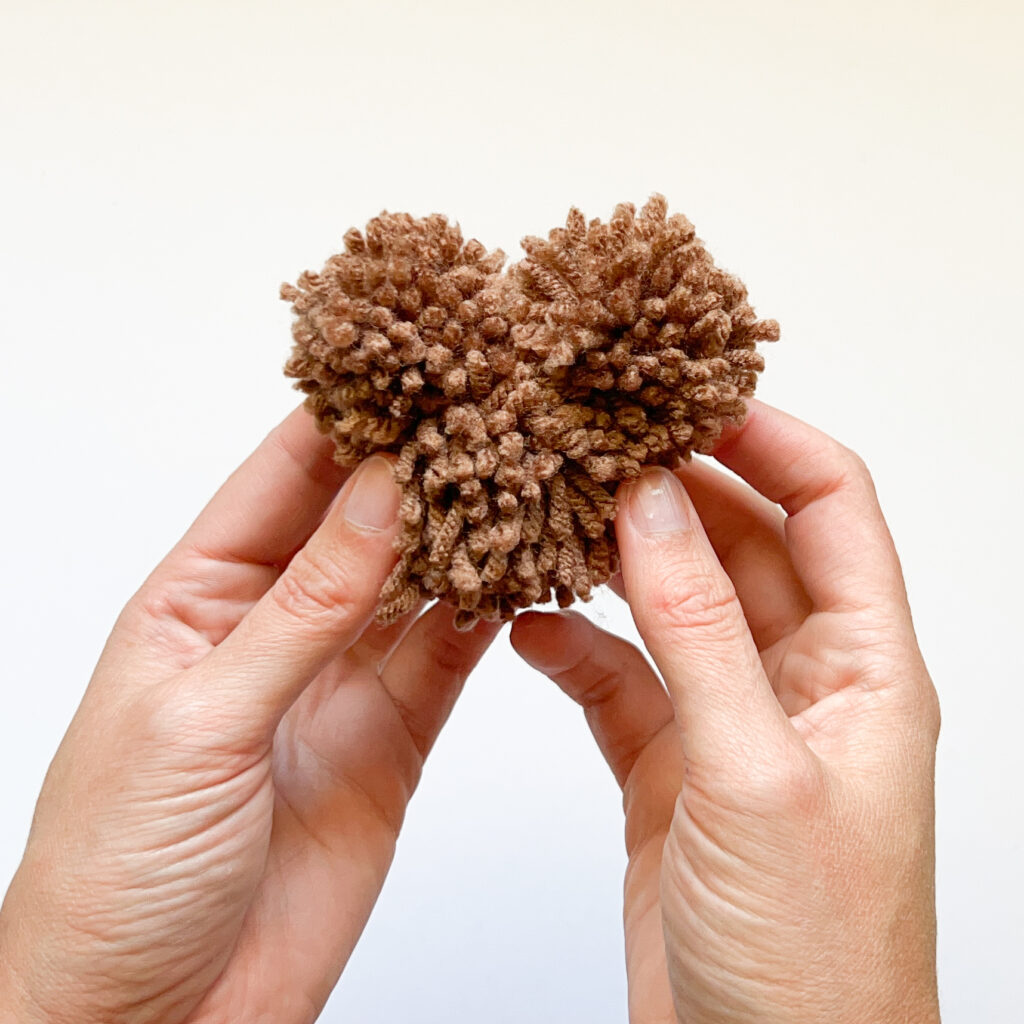
Step 3: Knot each pair of yarn tails from the ears twice. Make sure to pull the tails tight to keep the ears snug against the head. Trim the extra yarn even with the surface of the pom pom.
It’s time to thread the yarn tails from the body pom pom up through the top of the head and then the yarn tails from the head pom pom down through the body!
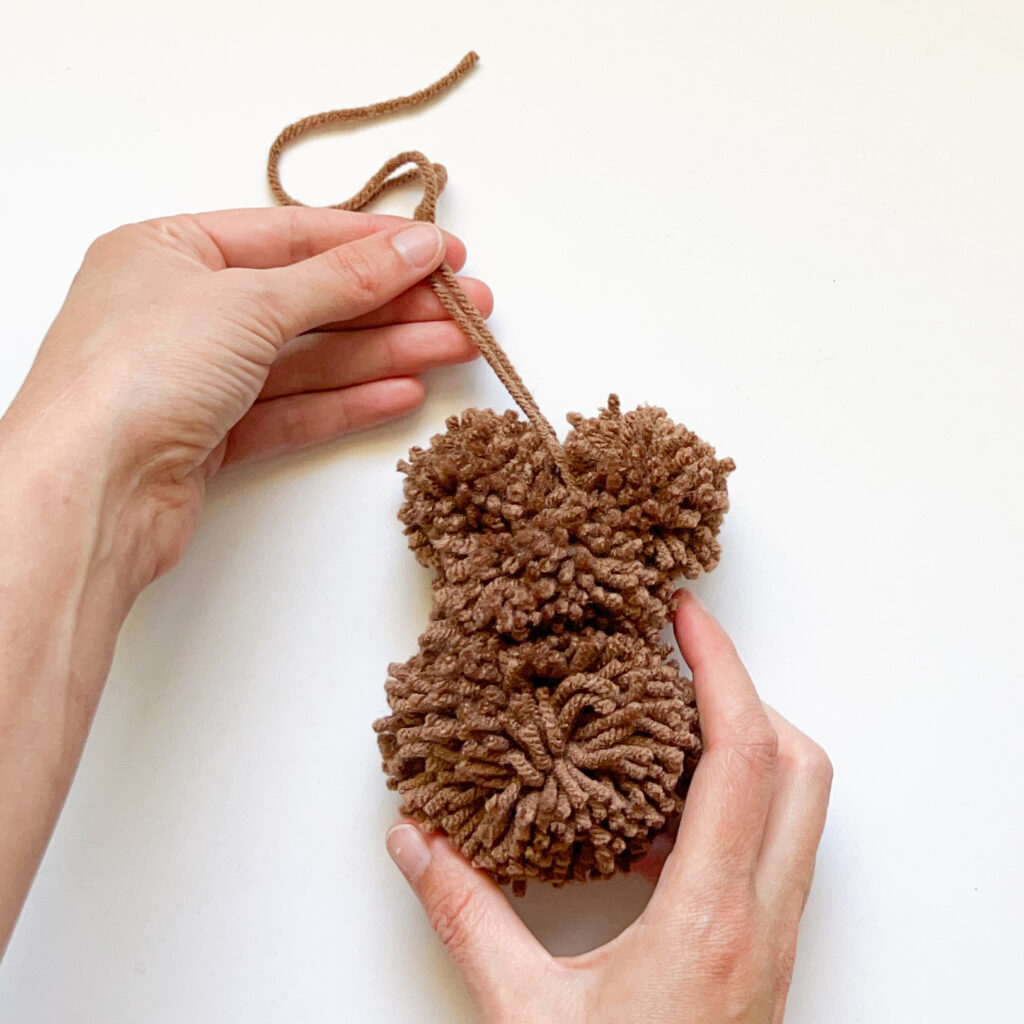
Step 1: One at a time, thread both of the yarn tails from the body pom pom up through the head so that they exit between the ears. Tie them in two overhand knots, pulling tight so the head is snug. Trim the extra yarn.
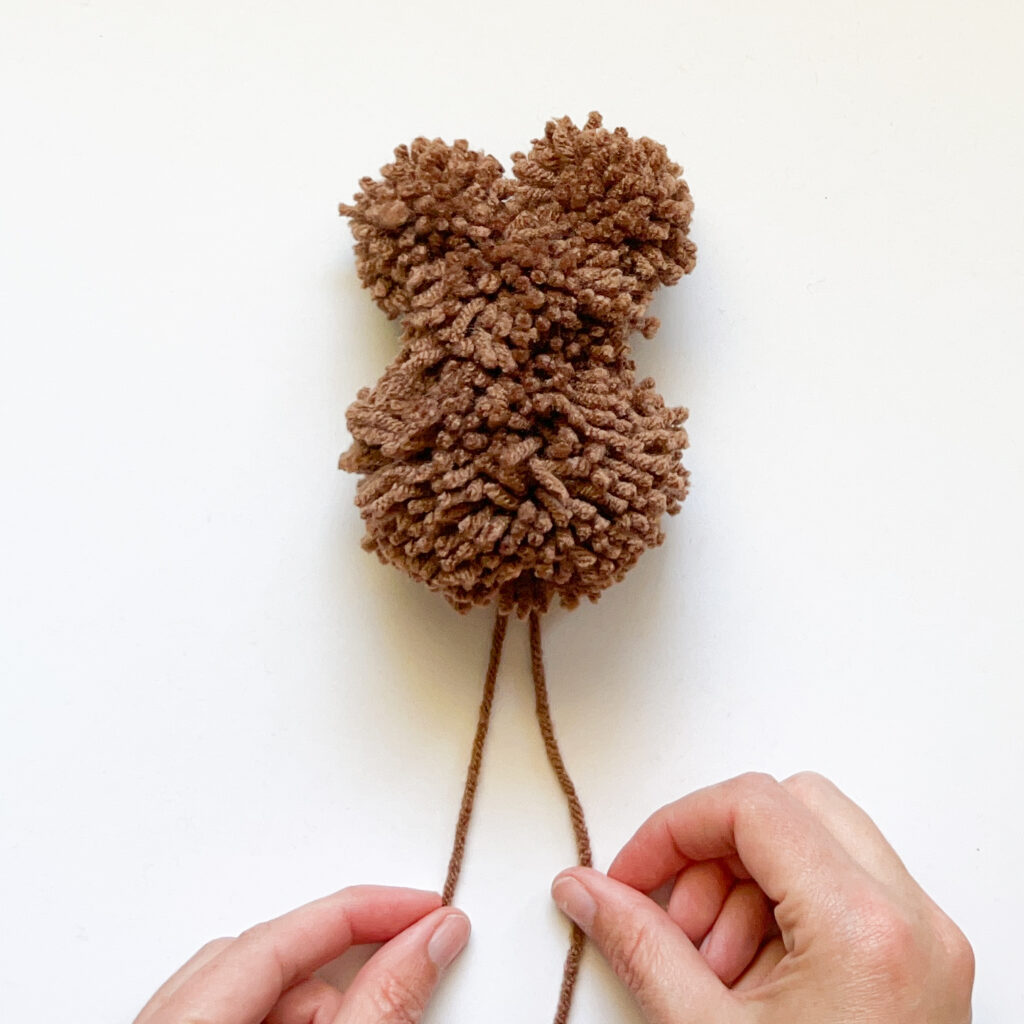
Step 2: Thread the head pom pom tails down through the body pom pom, tying them together twice in a knot for extra security. Trim the yarn close to the surface of the pom pom.
Use the scissors to trim and shape the bear to look… well… more like a bear!
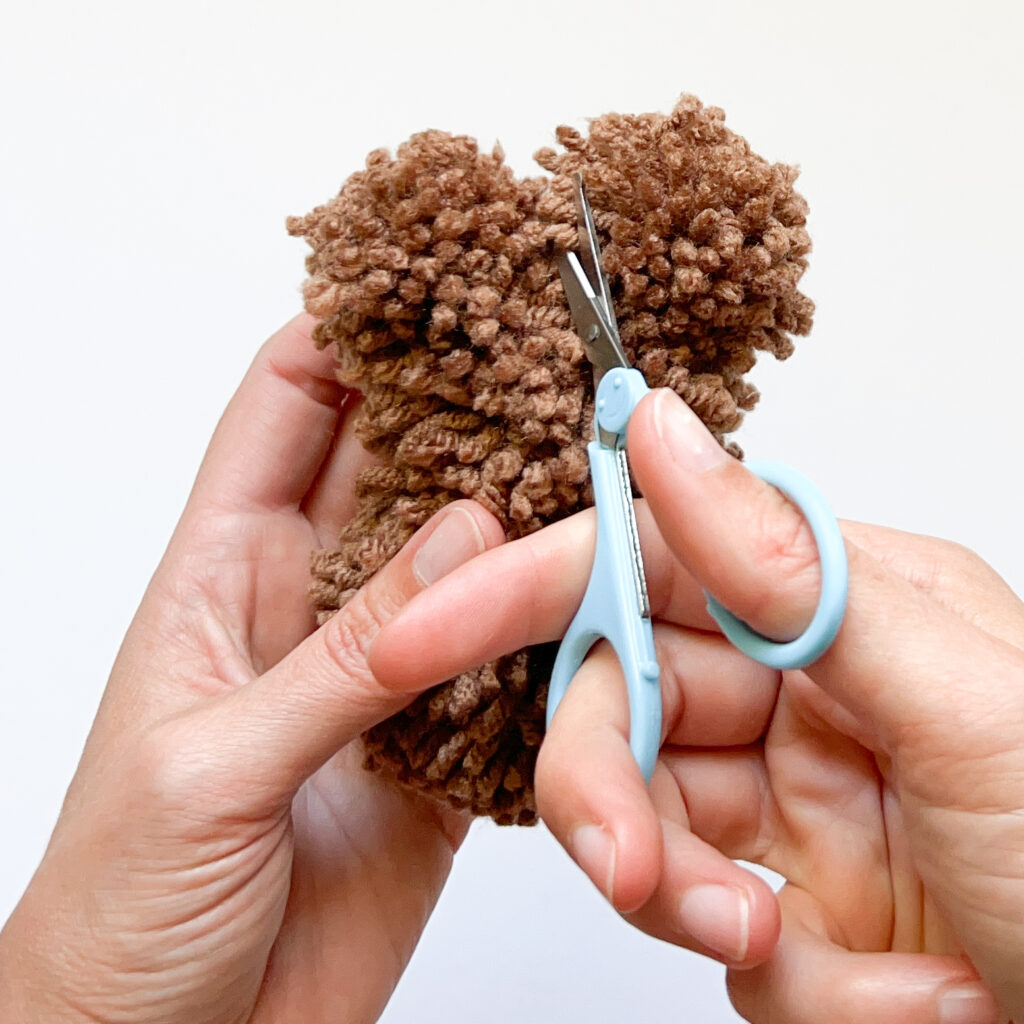
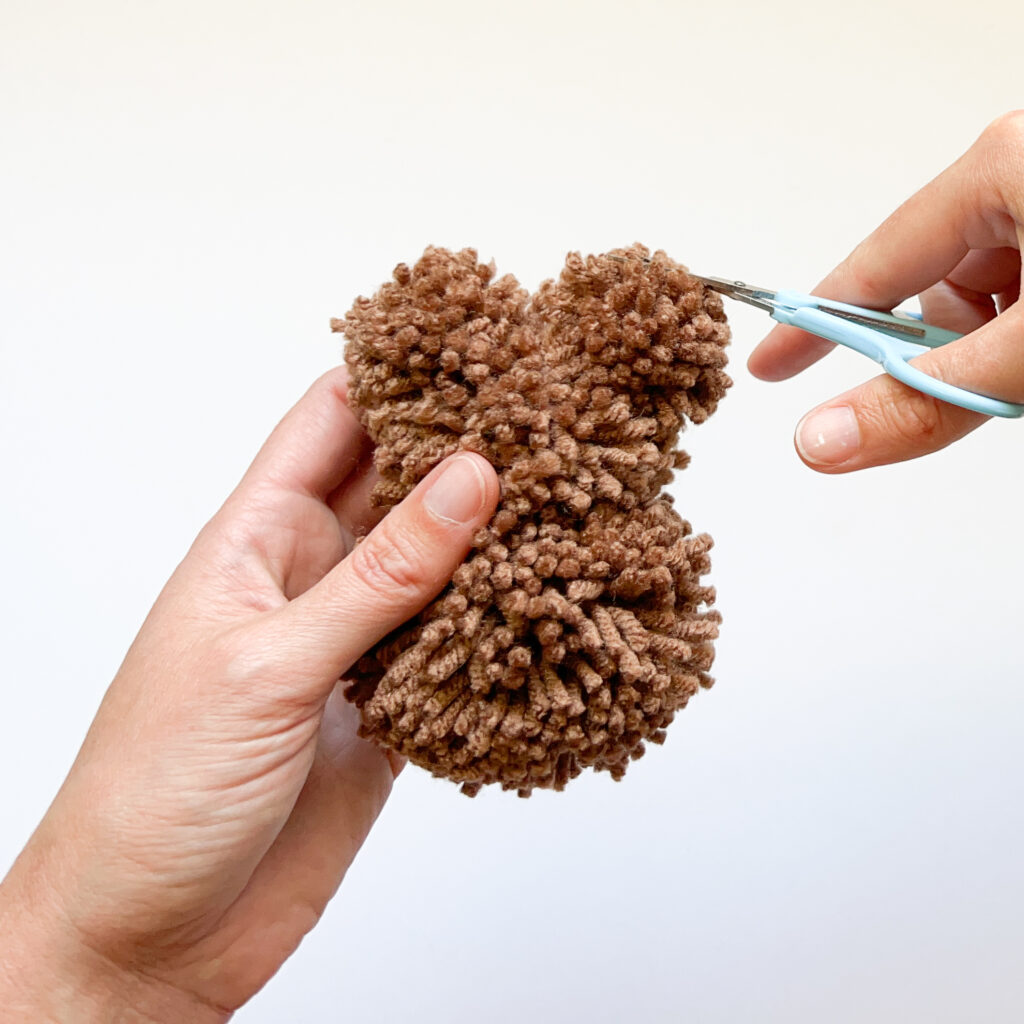
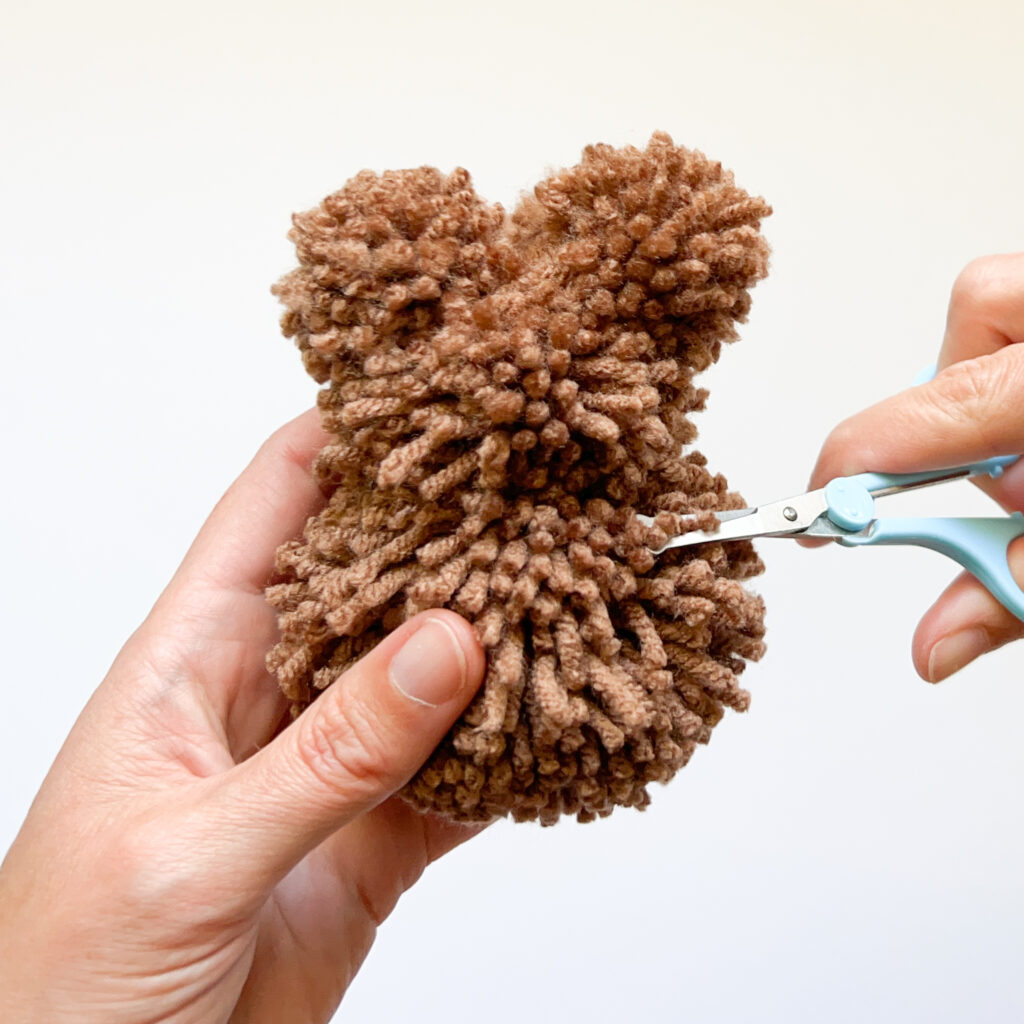
To start, your pom poms will be a little ragged. Start by adding some space between the ears. Next round the tops of the ears and trim them down a little bit so that they’re a little smaller over all. Last, curve the scissors around the neck to give some extra definition and space around the head and shoulders.
The last step is optional but definitely makes the pom pom pal look infinitely cuter! Take a hair brush, metal pet brush as in the photo, or even a comb and gently use it to fluff the yarn ends on your pom pom. Go slowly making sure not to pull any strands out of your pom pom!
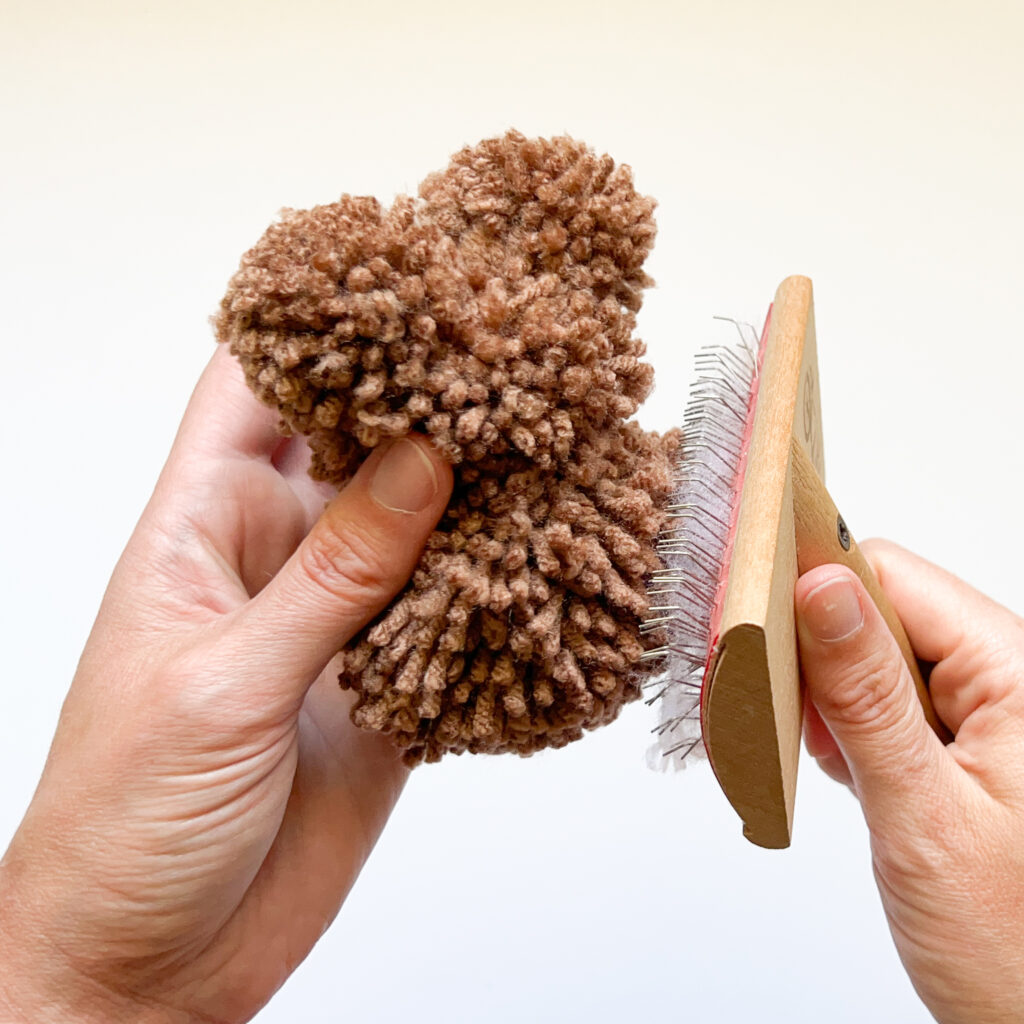
You might need to give your buddy one last little trim after fluffing. Ta dah! It’s done!
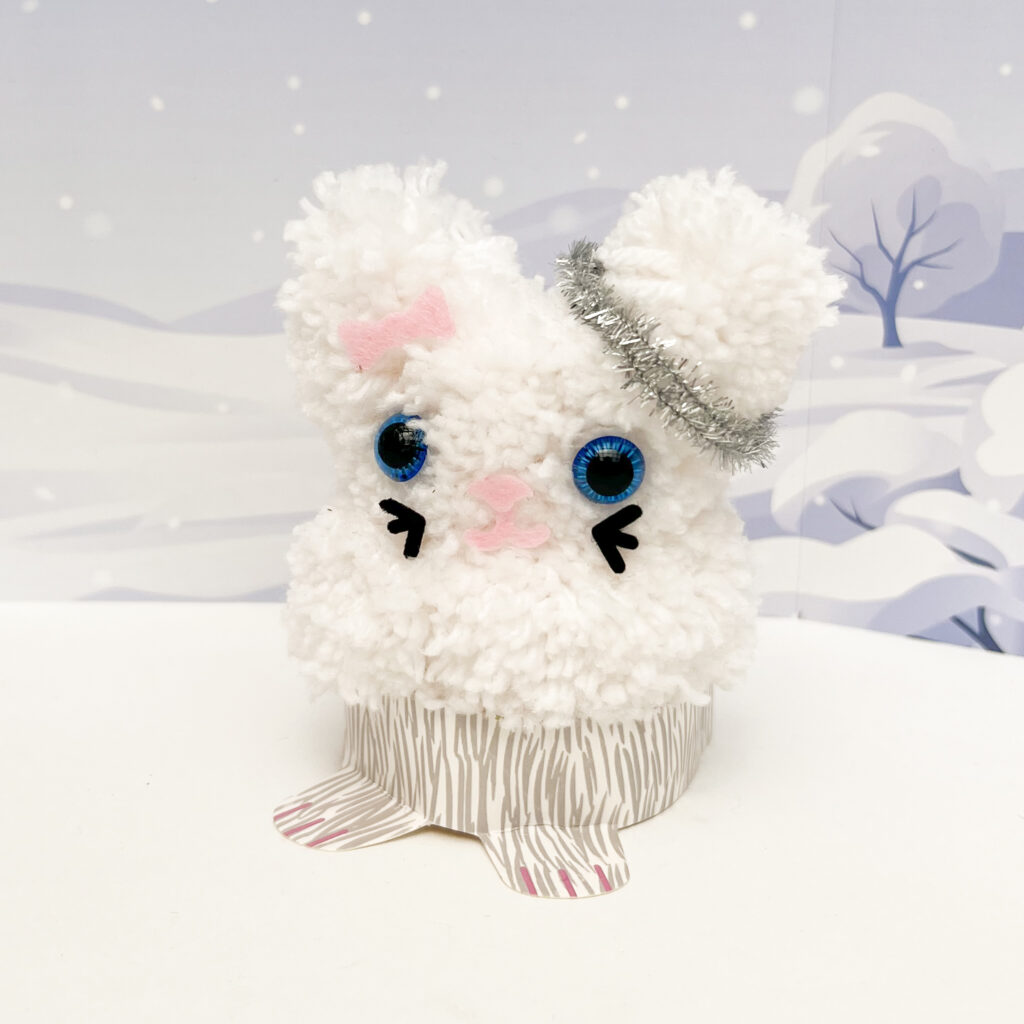
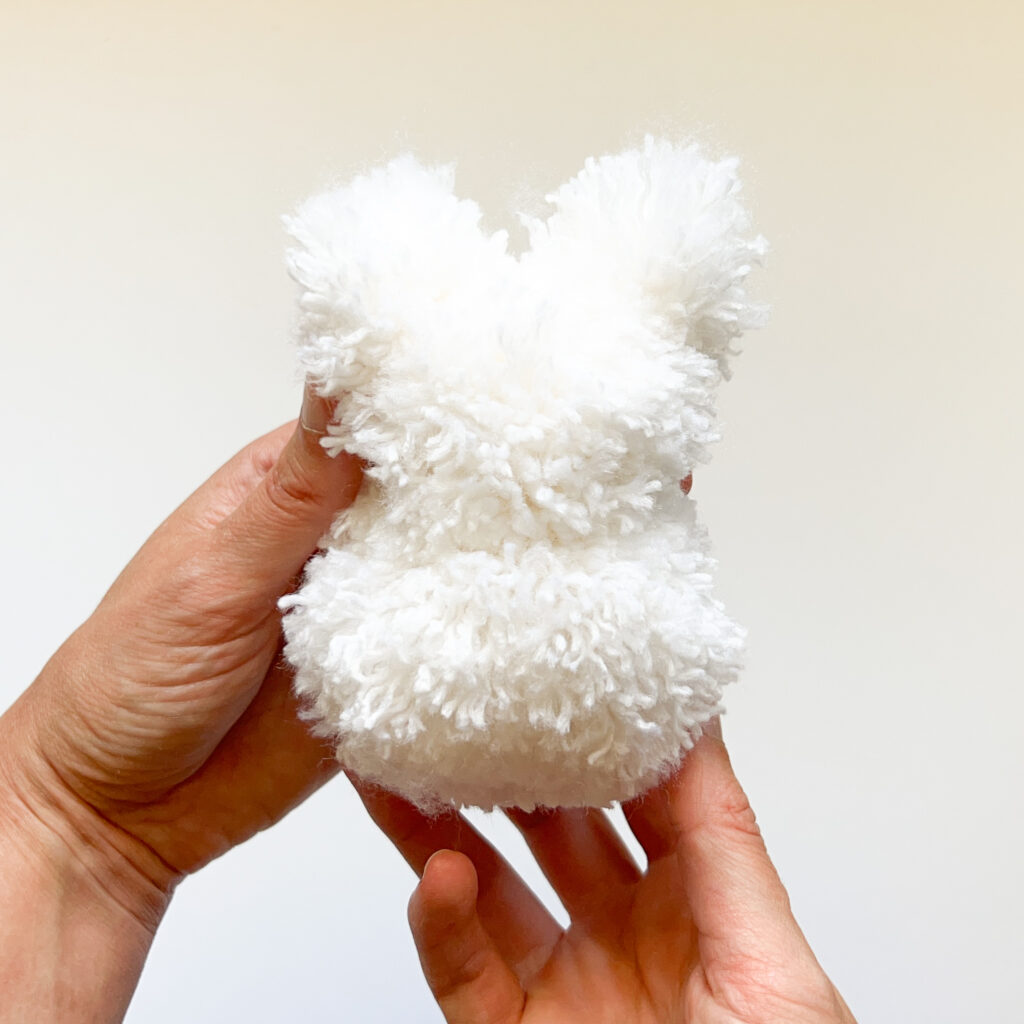
Binky is always on the move! This busy bunny knows all the best picnic spots, secret hide-aways, and opportunities for a little mischief in the forest.
To make the bunny you’ll need to gather the following materials: white yarn, yarn needle, medium pom pom maker (pink), small pom pom maker (yellow), extra small pom pom maker (green), and a pair of scissors.
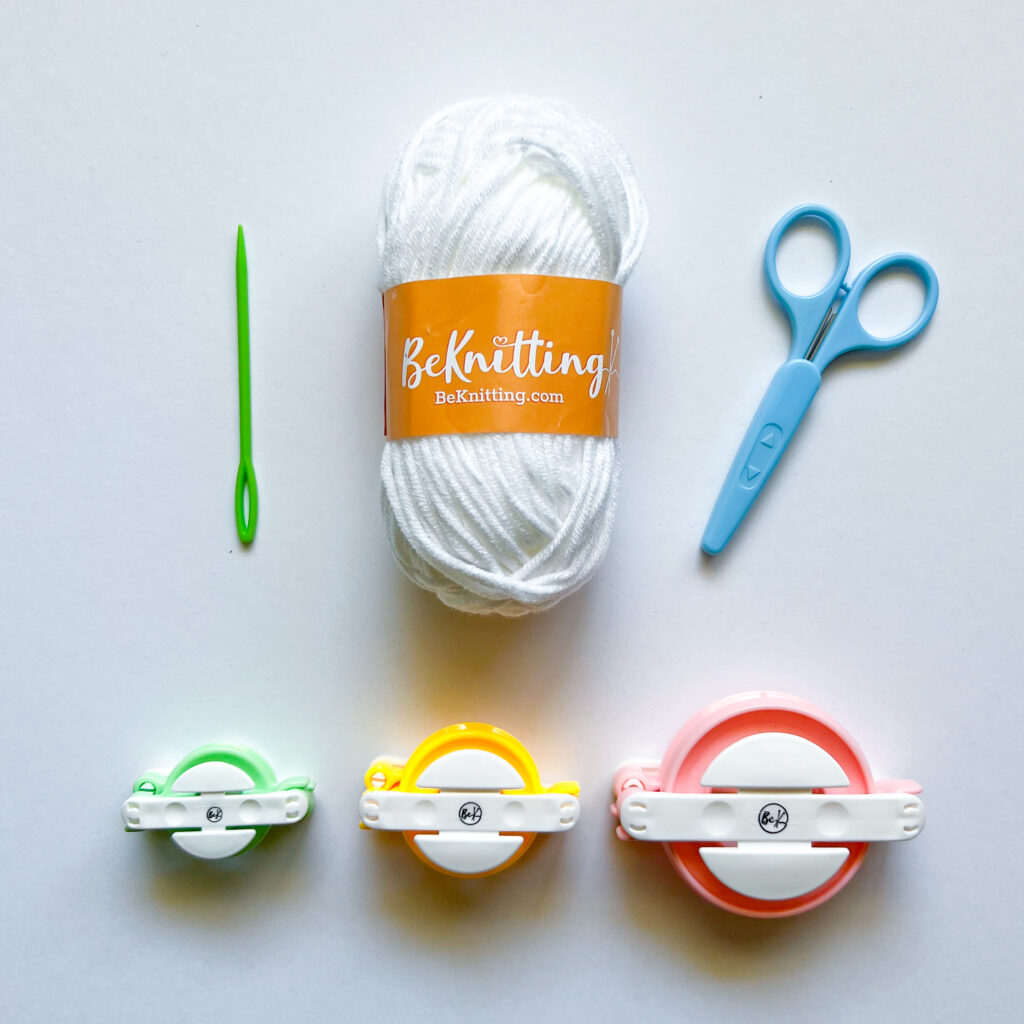
Since the bunny is all one color it’s easy to make all of the pom poms you need! You’ll need one medium white body pom pom, one small white head pom pom, and two extra small white pom pom ears!
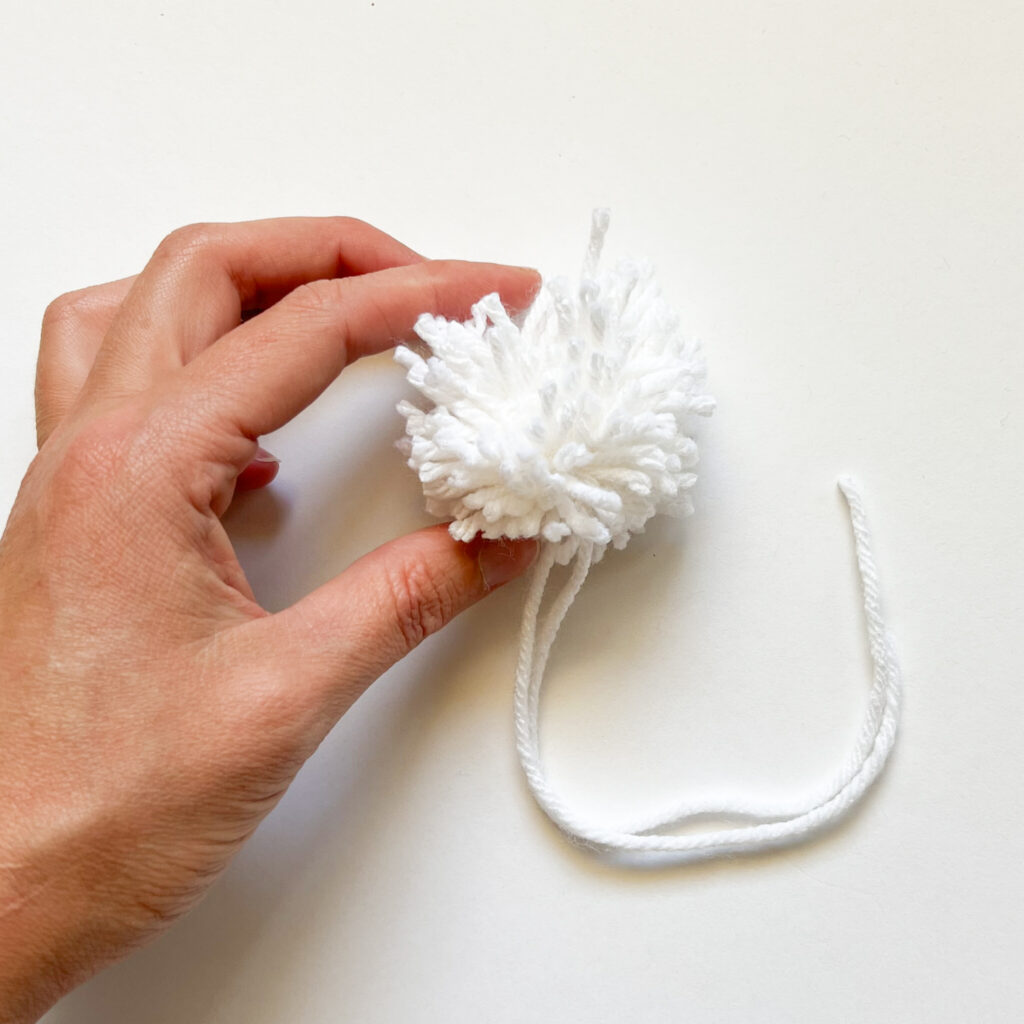
To make a pom pom, follow the general step-by-step instructions in this tutorial for using a pom pom maker to create yarn pom poms. All the pom poms in this kit are made the same way.
Trim any extra long yarn ends but be careful not to overly shape the pom poms before you assemble them in the next step! The extra yarn length with help blend the pieces together.
Next, we’ll show you how to use the tails from each pom pom to attach the ears to the head, and then the head to the body!
Step 1: The ear pom poms will come out of the maker with an oval shape, tug the yarn tails down so that they’re at one end of the oval.
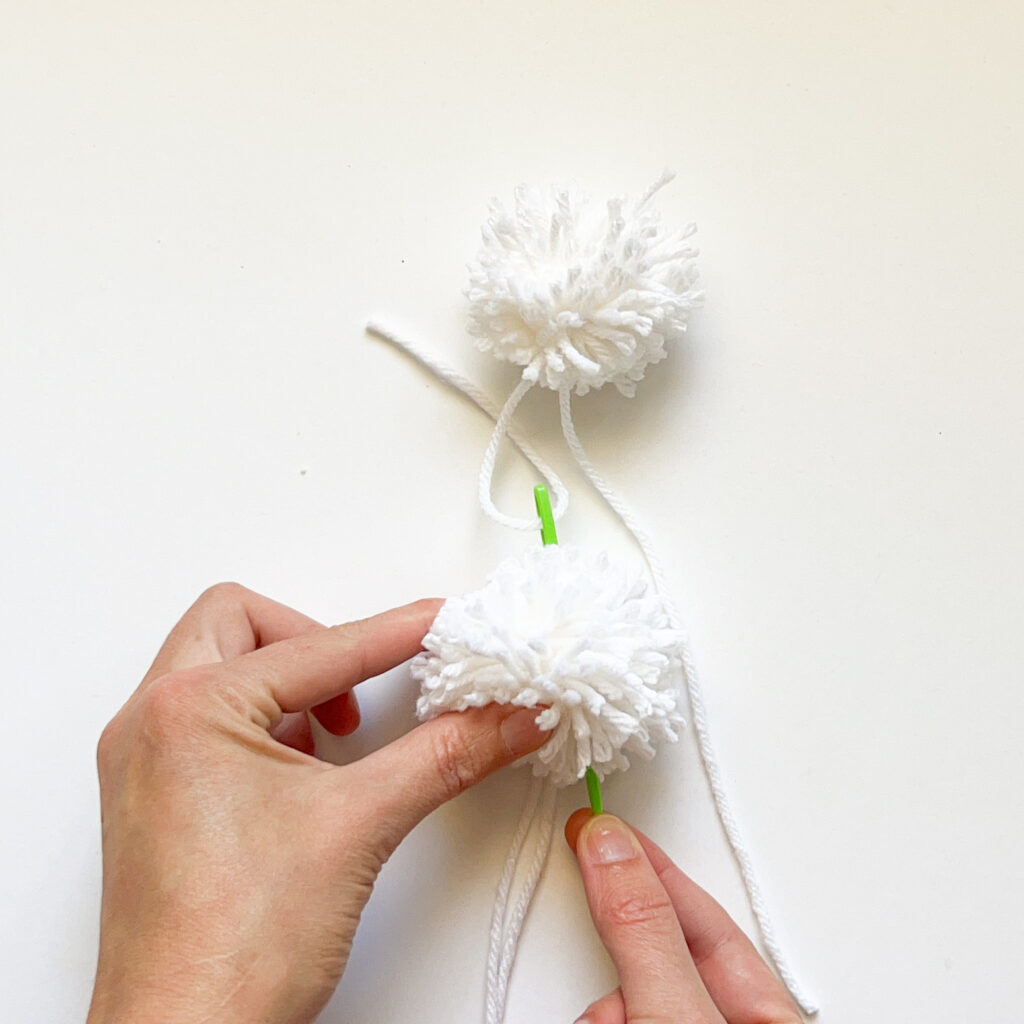
Step 2: Thread one of the yarn tails from the ear pom pom through the head, moving from the top and out the bottom.
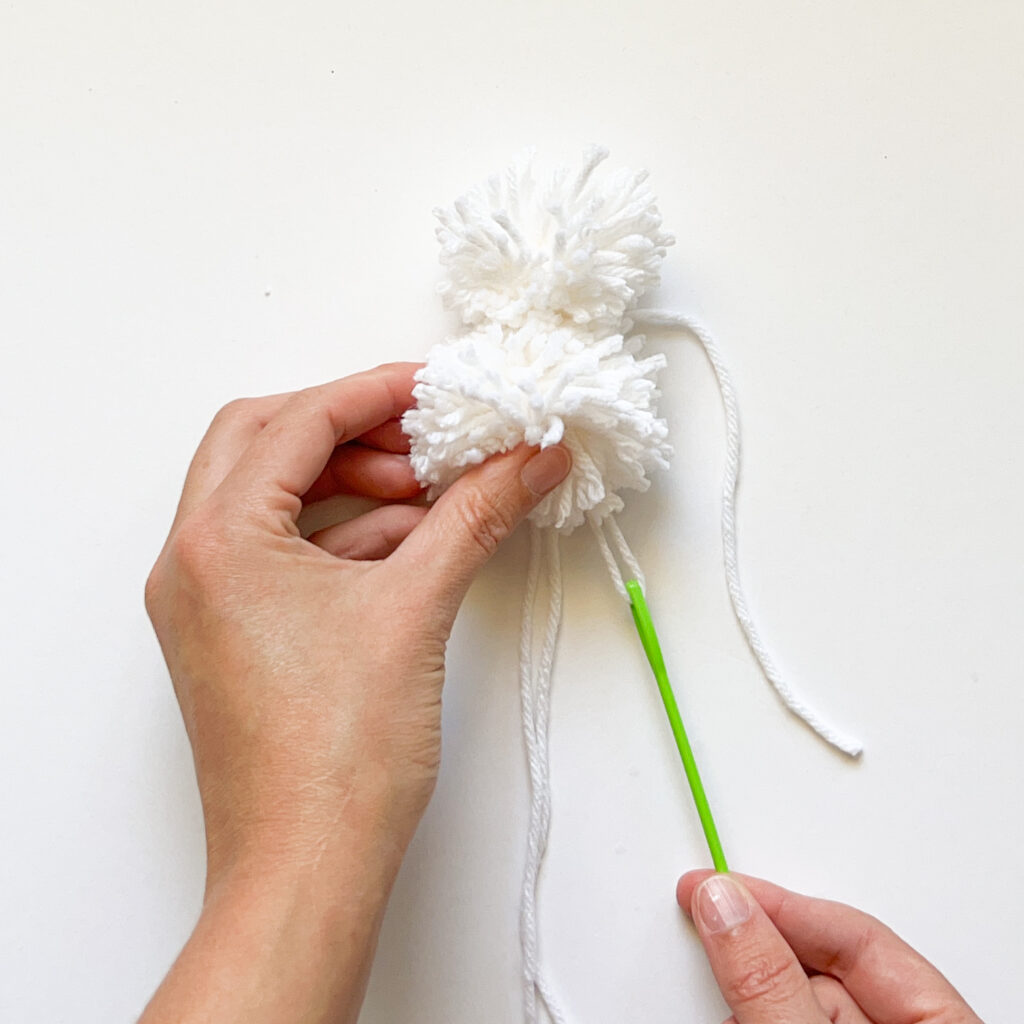
Step 3: Repeat with the second yarn tail, pulling them both tight so that the ear is snug to the head.
Tie the two pom pom yarn tails in an overhand knot, pulling it tight before tying a second knot for extra security. Trim the ends even with the pom pom.
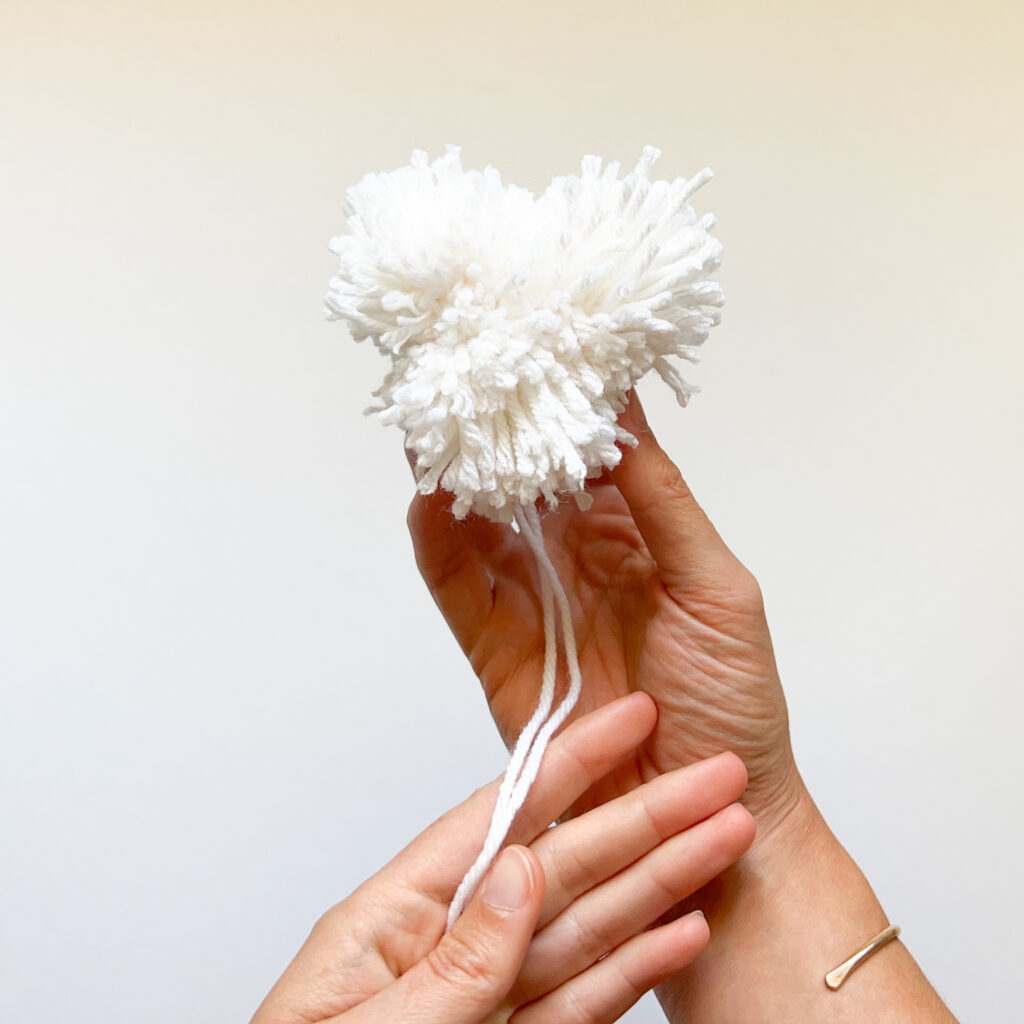
Step 4: Repeat step 3 with the second ear. Position the second ear right next to the first at the top of the head.
It’s time to attach the head to the body, the steps for the rabbit are the same as for the bear above! Follow each step for the bear again: thread the yarn tails from the body pom pom up through the top of the head and knot them together. Next, thread the yarn tails from the head down through the body!
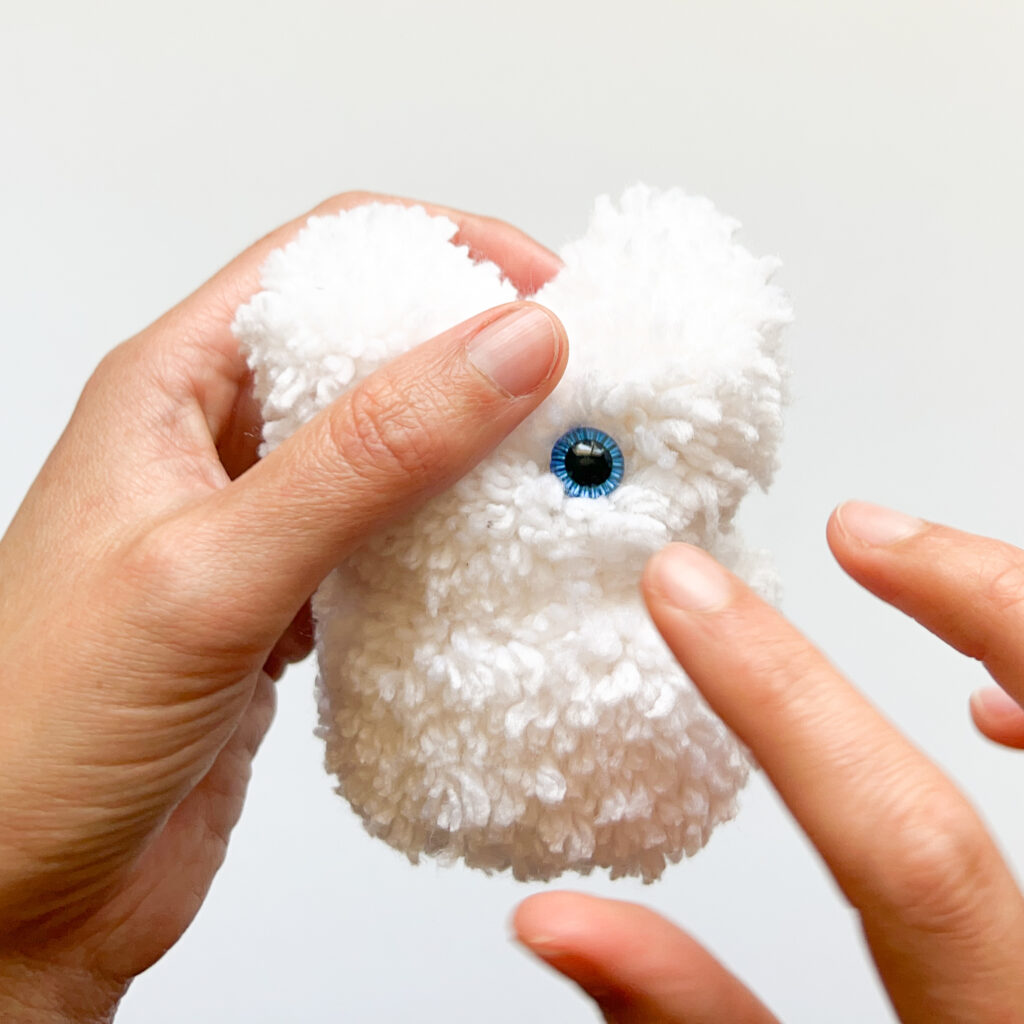
Before we begin, the rabbit’s ears need a lot of definition to make them tall and narrow.
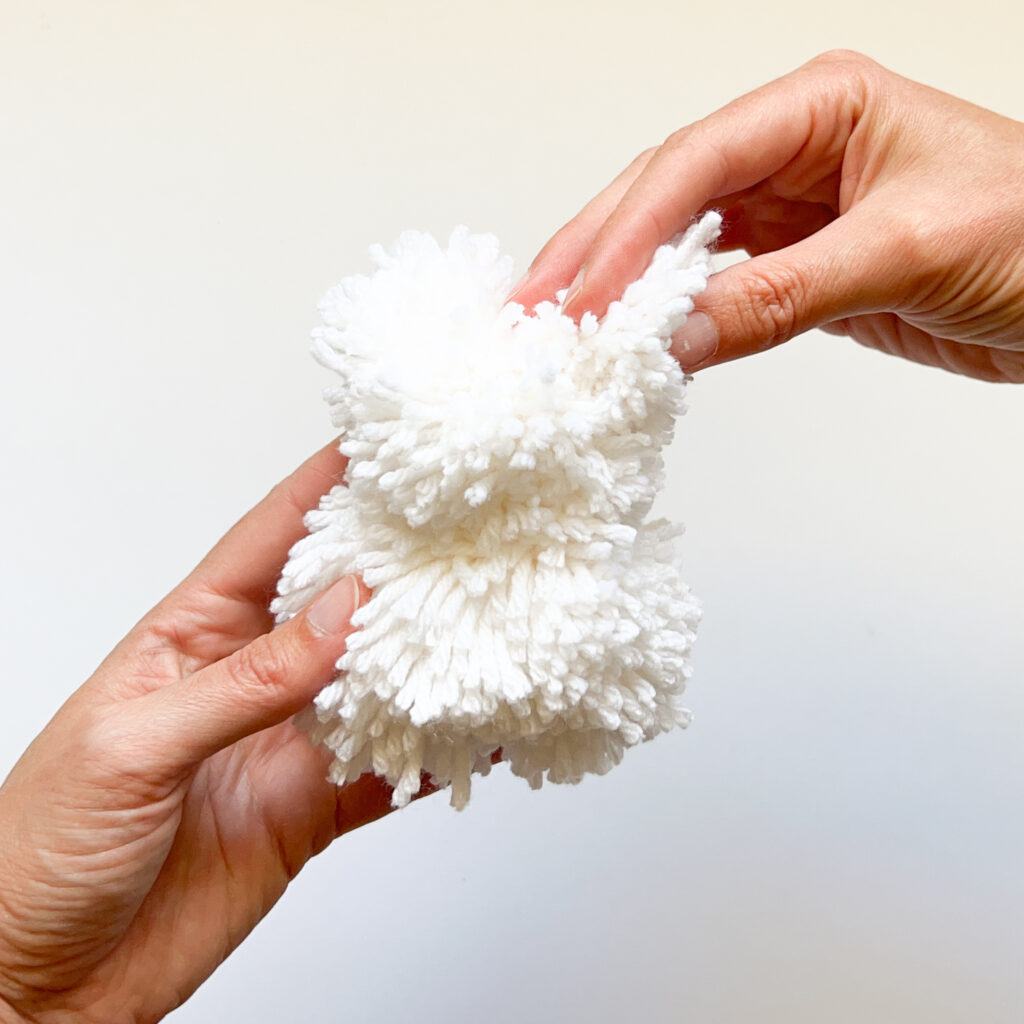
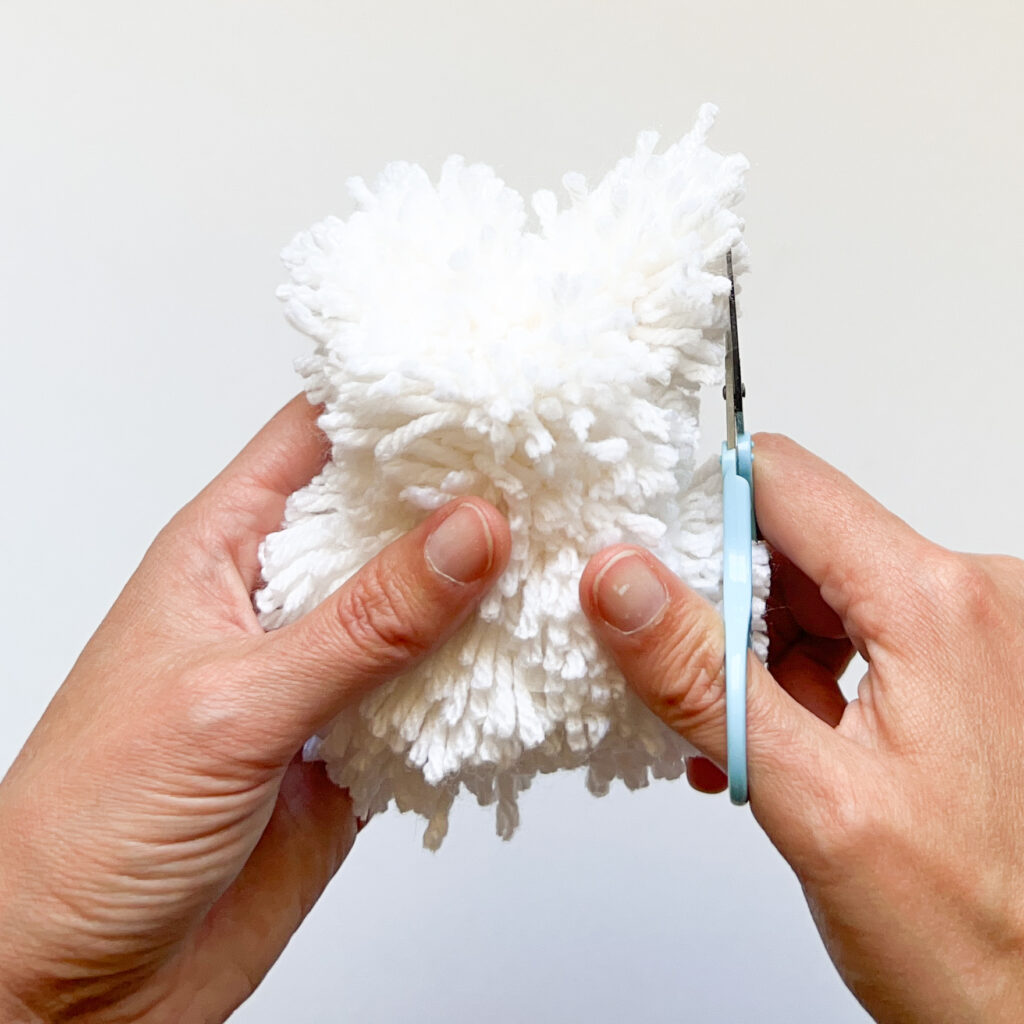

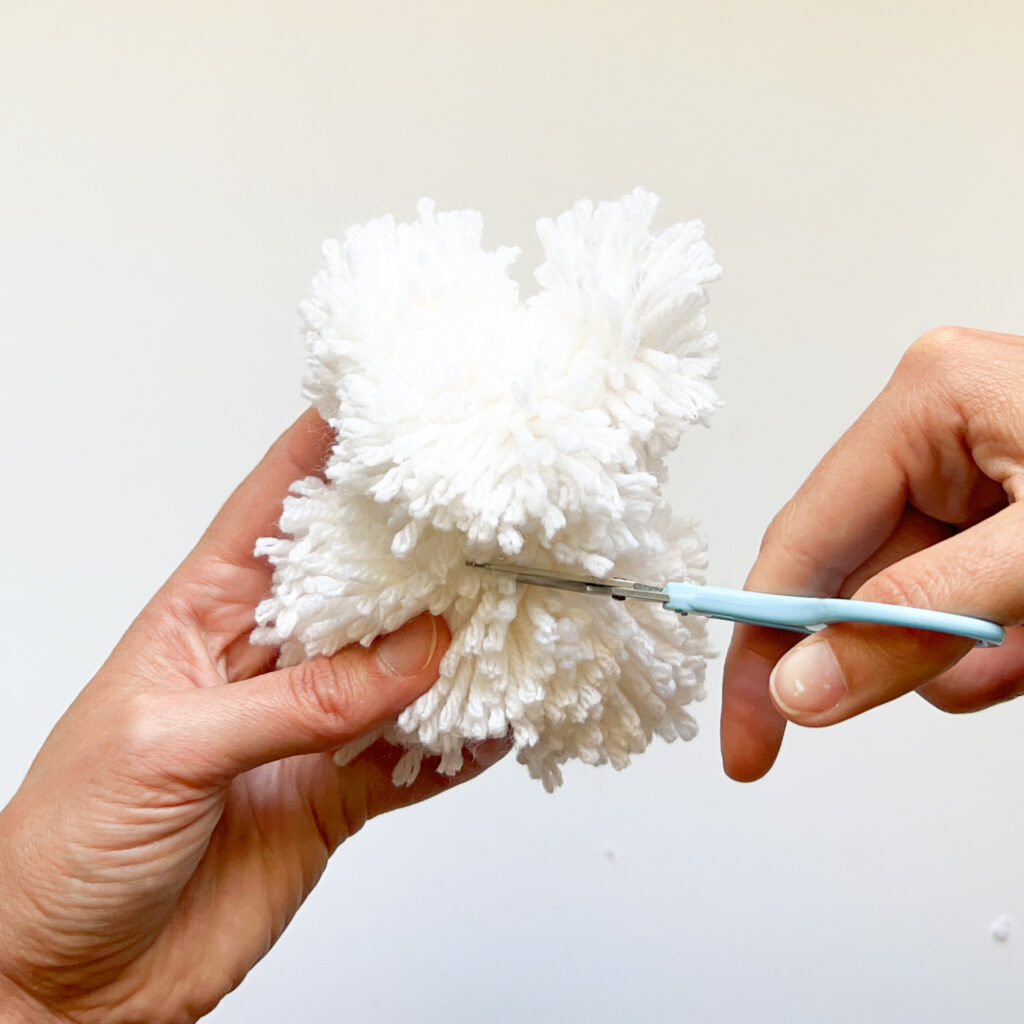
Stary by pinching the ear pom poms to give them a long shape. Next, trim up the side of the ear so that it’s flat and even with the side of the head. Create some space between the ears by trimming the top of the head pom pom down a little bit, and then trim inside of each ear for even more space.
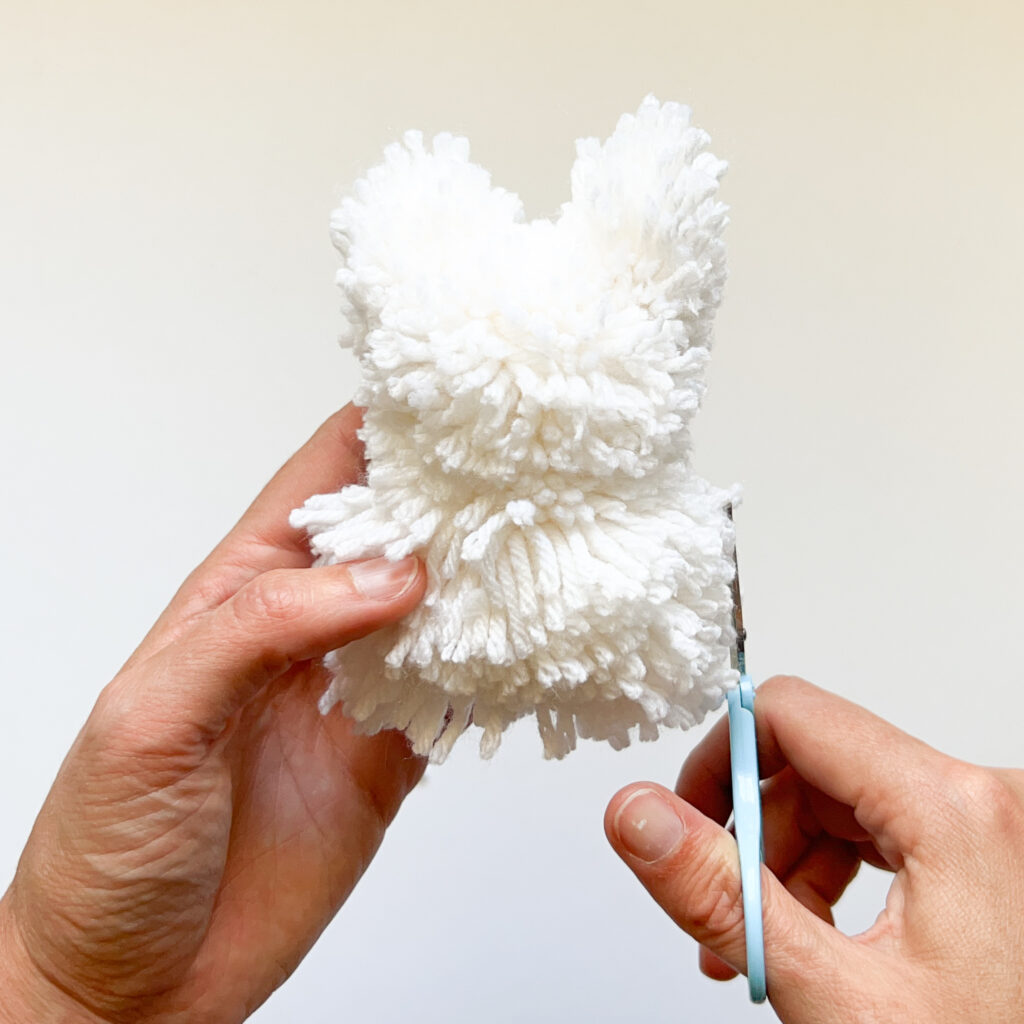
Last, trim the neck area in a curve around the base of the head to give the face some definition. Lightly trim around the body to even it out before moving on to the next step!
The last step is optional but definitely makes the pom pom pal look infinitely cuter! Take a hair brush, metal pet brush as in the photo, or even a comb and gently use it to fluff the yarn ends on your pom pom. Go slowly making sure not to pull any strands out of your pom pom!
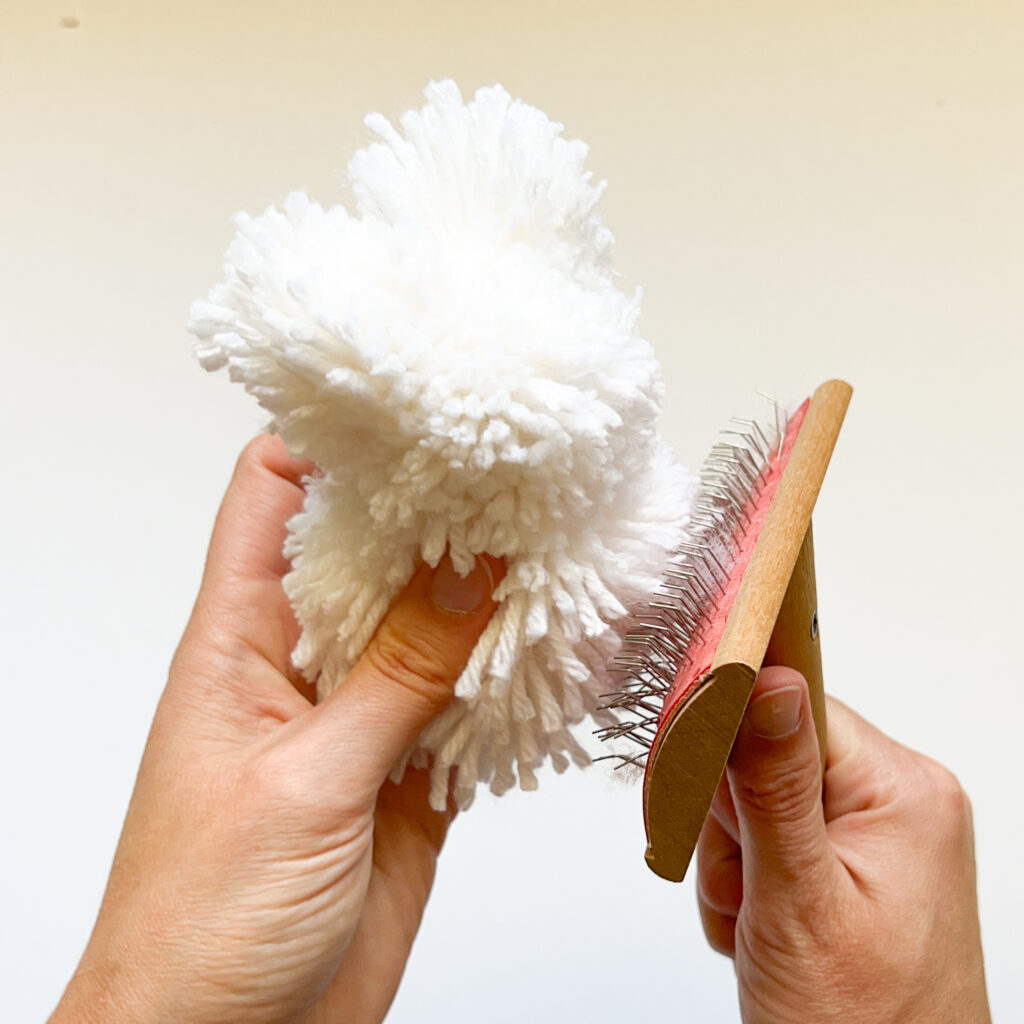
You might need to give your buddy one last little trim after fluffing. Ta dah! It’s done!
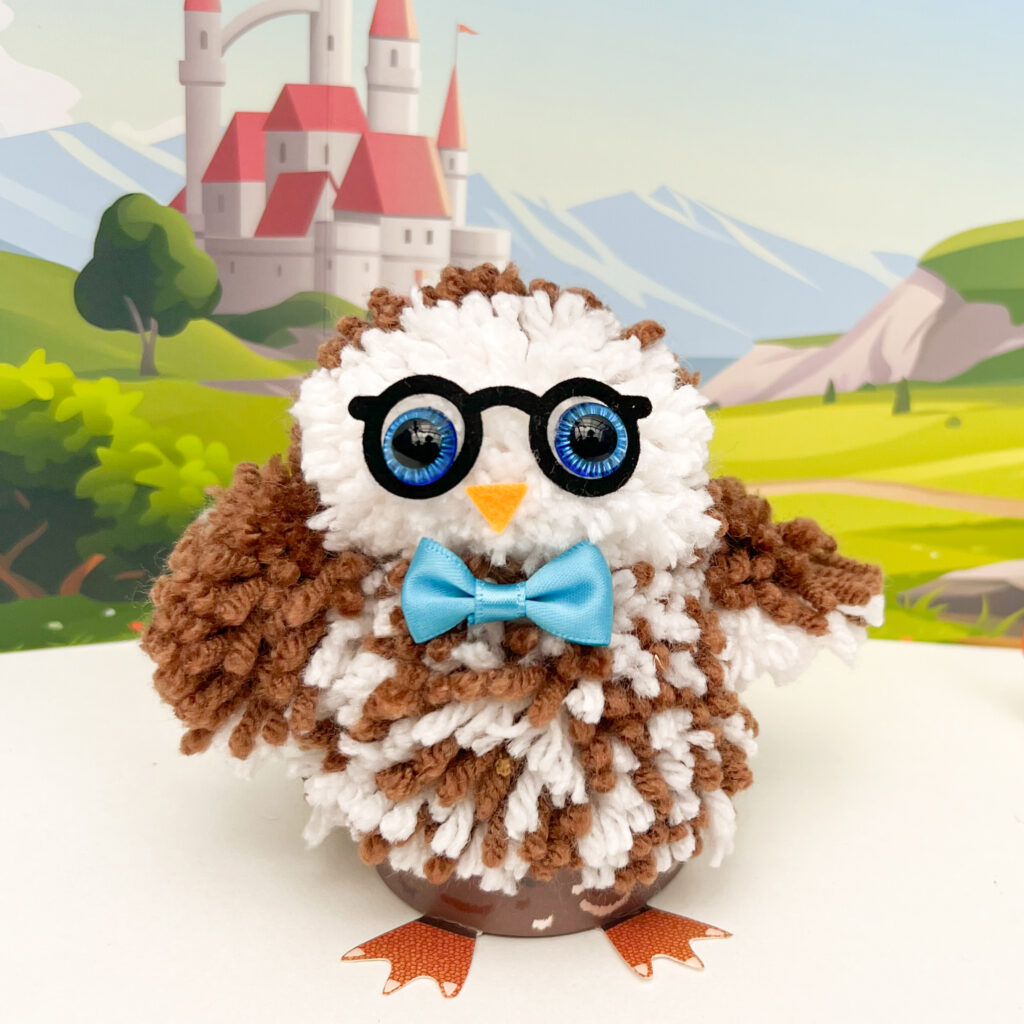
Oscar Owl is the curious explorer of our woodland trio. Always poking a beak in where it doesn’t belong, Oscar has solved several mysteries including “Whoooo ate the last cupcake?!” Spoiler: it was Honey Bear.
To make the owl you’ll need to gather the following materials: 1 ball brown yarn, 1 ball white yarn, yarn needle, medium pom pom maker (pink), small pom pom maker (yellow), extra small pom pom maker (green), and a pair of scissors.
Since the owl is two colors it’s worth reading all of the instructions before making it! To make a pom pom, follow the general step-by-step instructions in this tutorial for using a pom pom maker to create yarn pom poms. All the pom poms in this kit are made the same way.
Trim any extra long yarn ends but be careful not to overly shape the pom poms before you assemble them in the next step! The extra yarn length with help blend the pieces together.
We’ll show you exactly how to wrap the yarn for the body, head, and two wings!
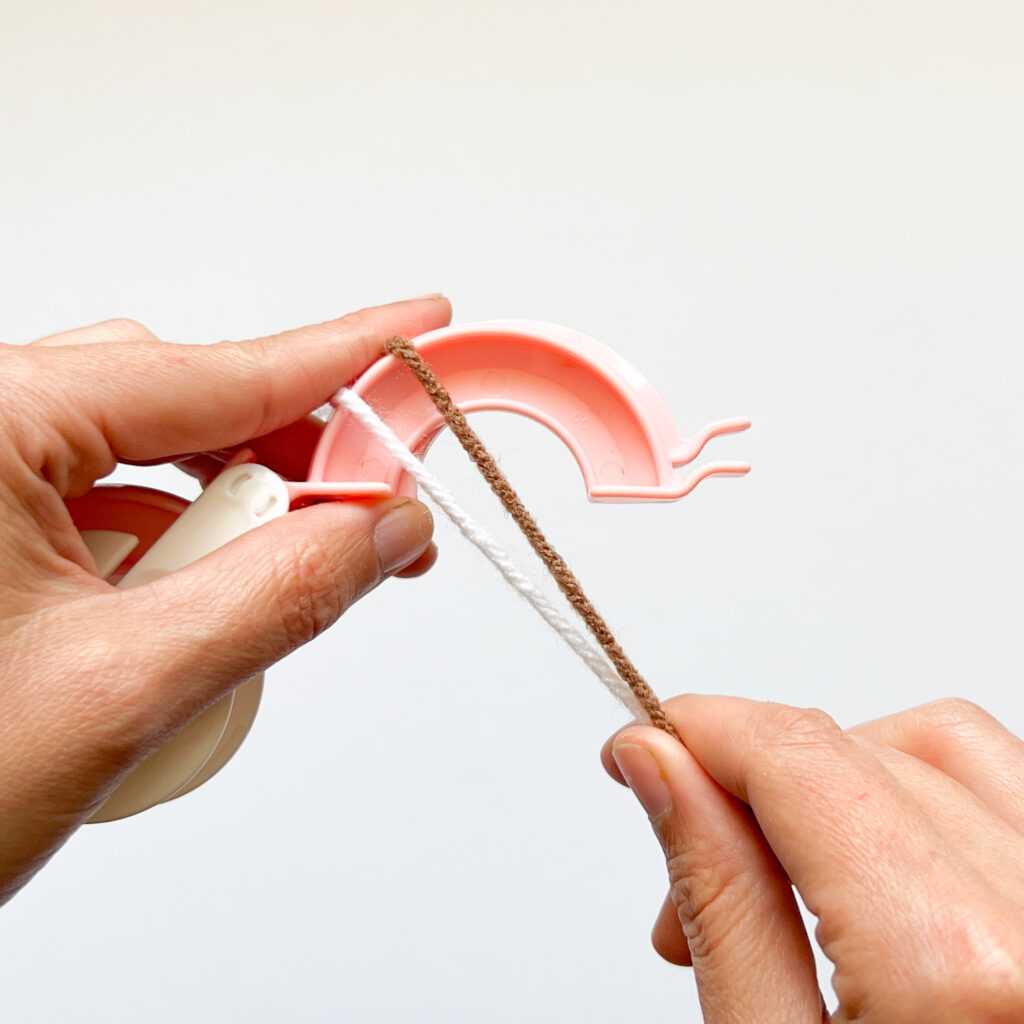
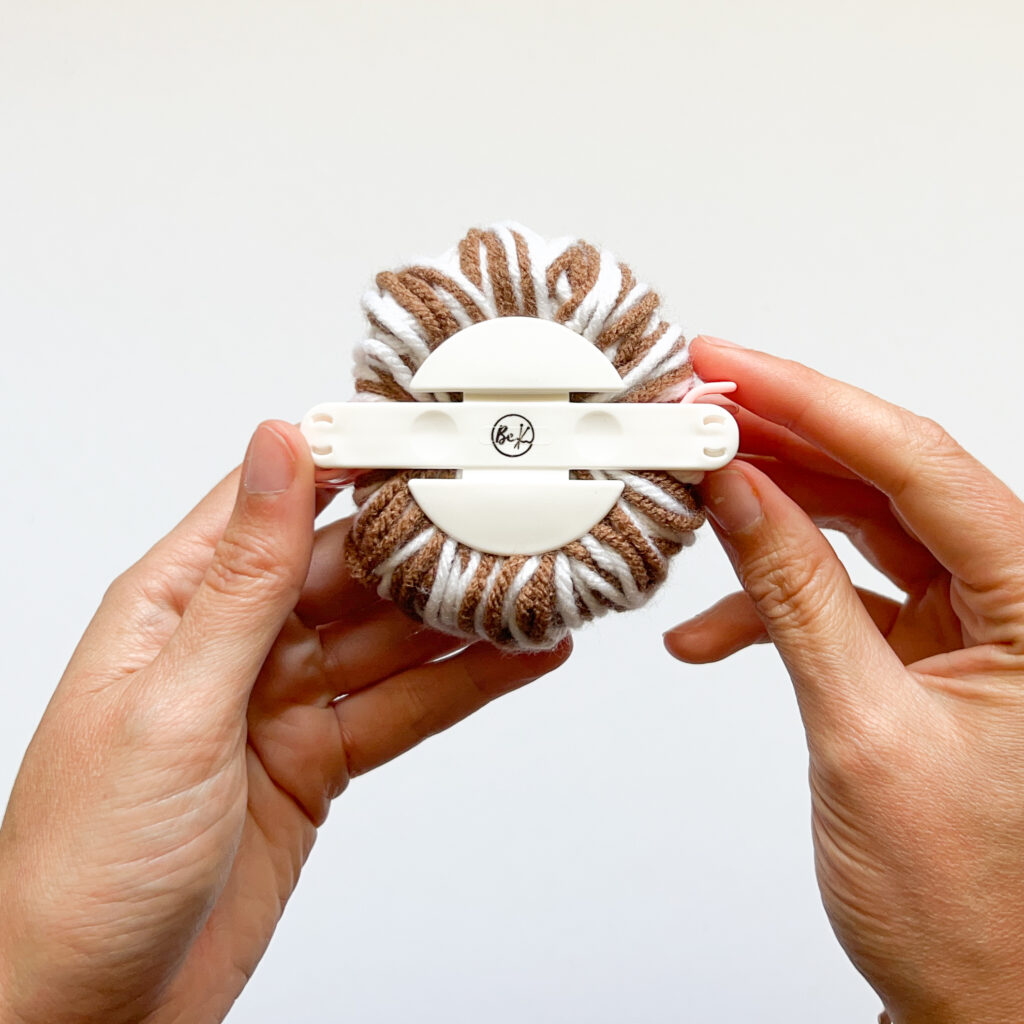
Make One Body Pom Pom: Use the medium (pink!) pom pom maker and a strand of white and brown yarn held together to wrap both sides of the maker.
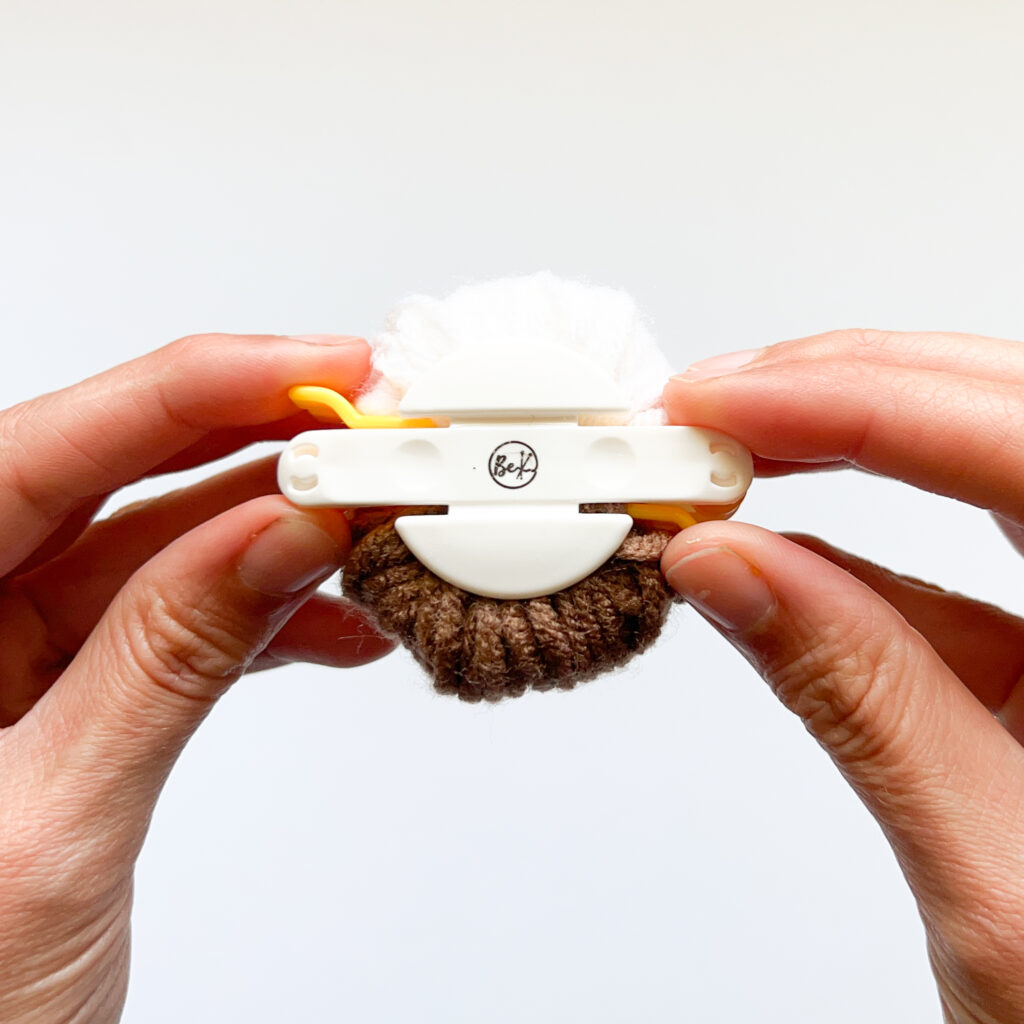
Make One Head Pom Pom: Use the small (yellow!) pom pom maker, fill one half with white yarn and the second half with brown yarn.
The brown side is the back of the head and the white side is the face!
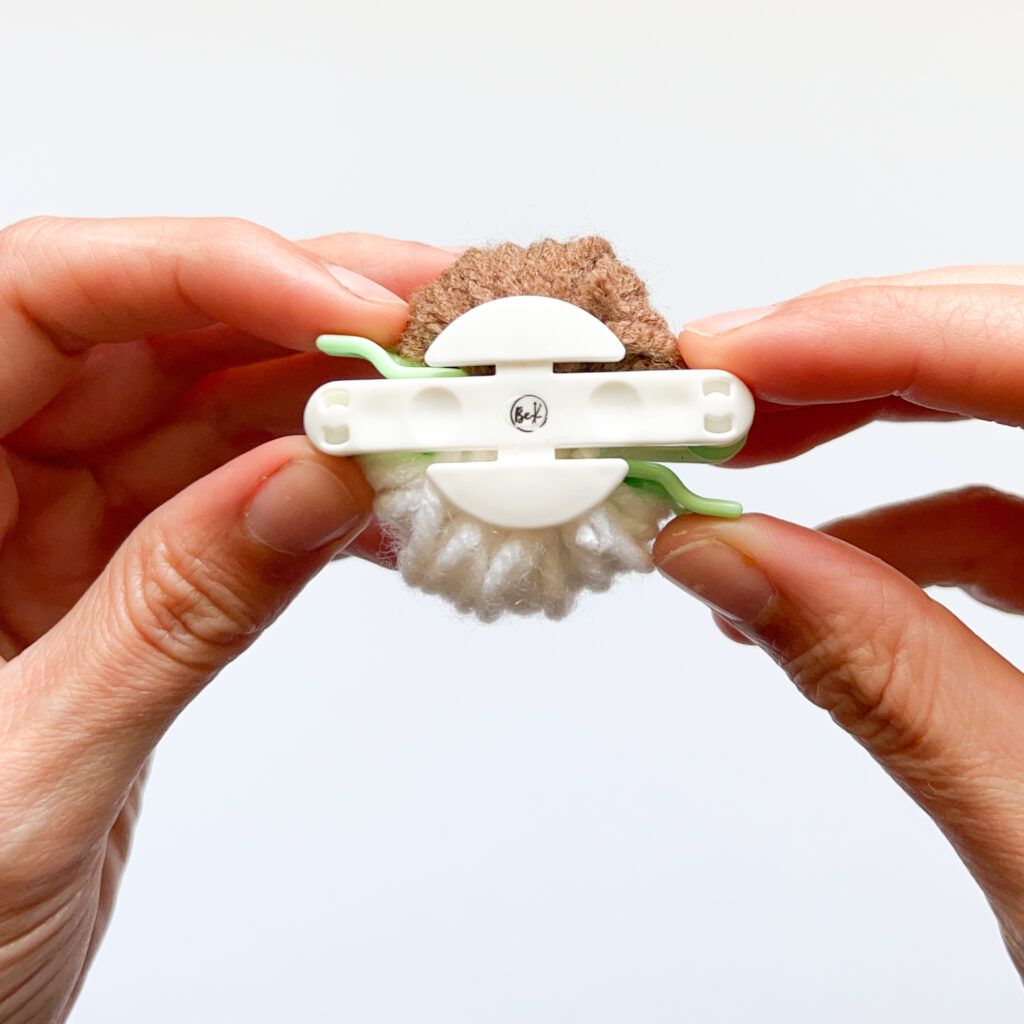
Make Two Wing Pom Poms: Use the extra small (green!) pom pom maker to make two wings by filling one half with white yarn and the second half with brown yarn.
The brown side is the top of the wing and the white side is the underside!
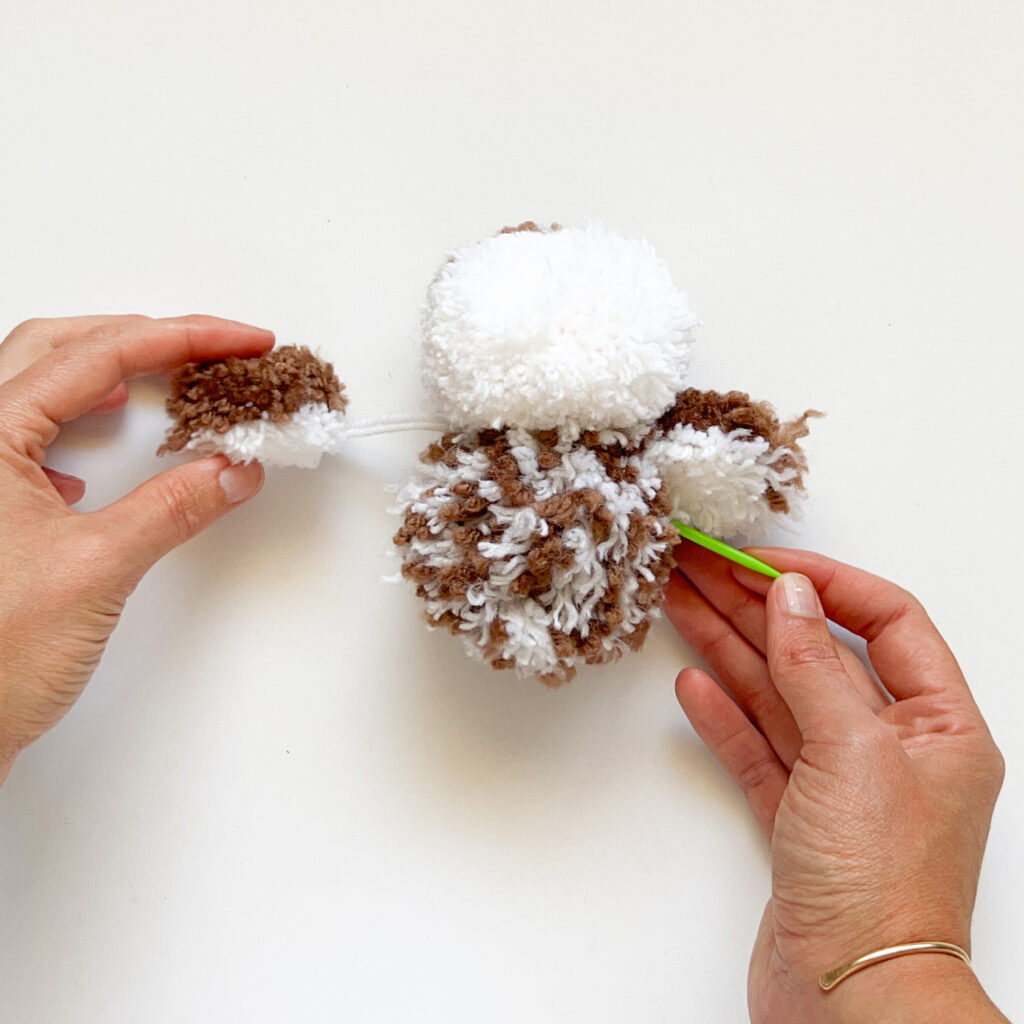
Next, we’ll show you how to use the tails from each pom pom to attach the head and wings to the body!
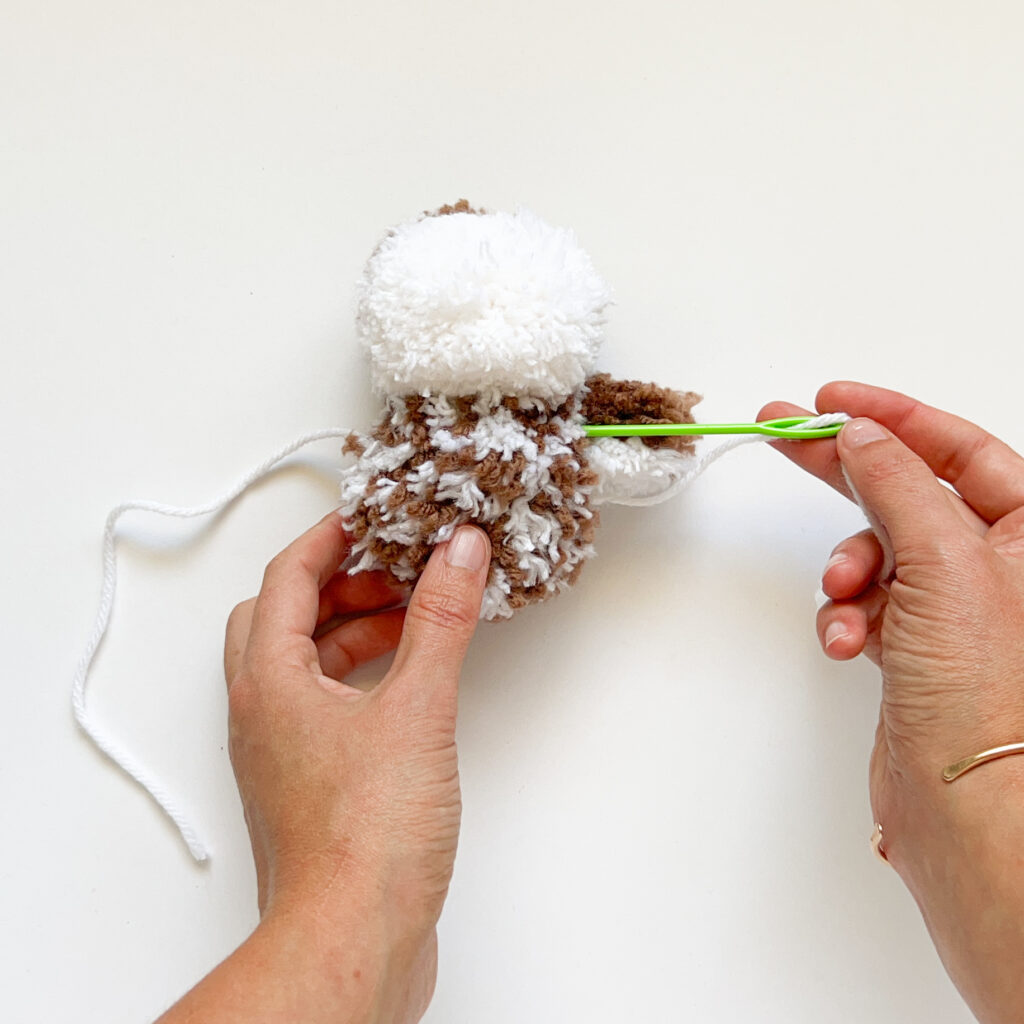
Step 1: Thread one of the yarn tails from the head pom pom onto your yarn needle.
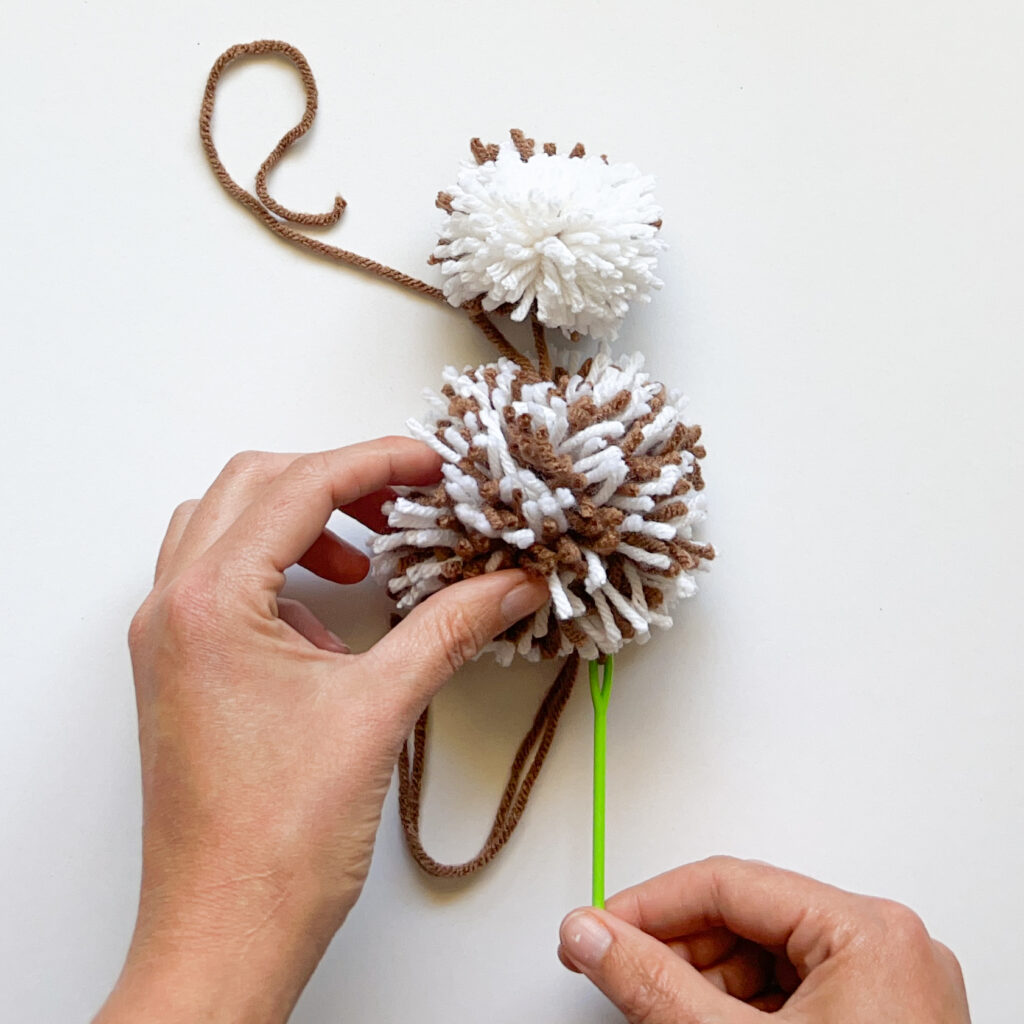
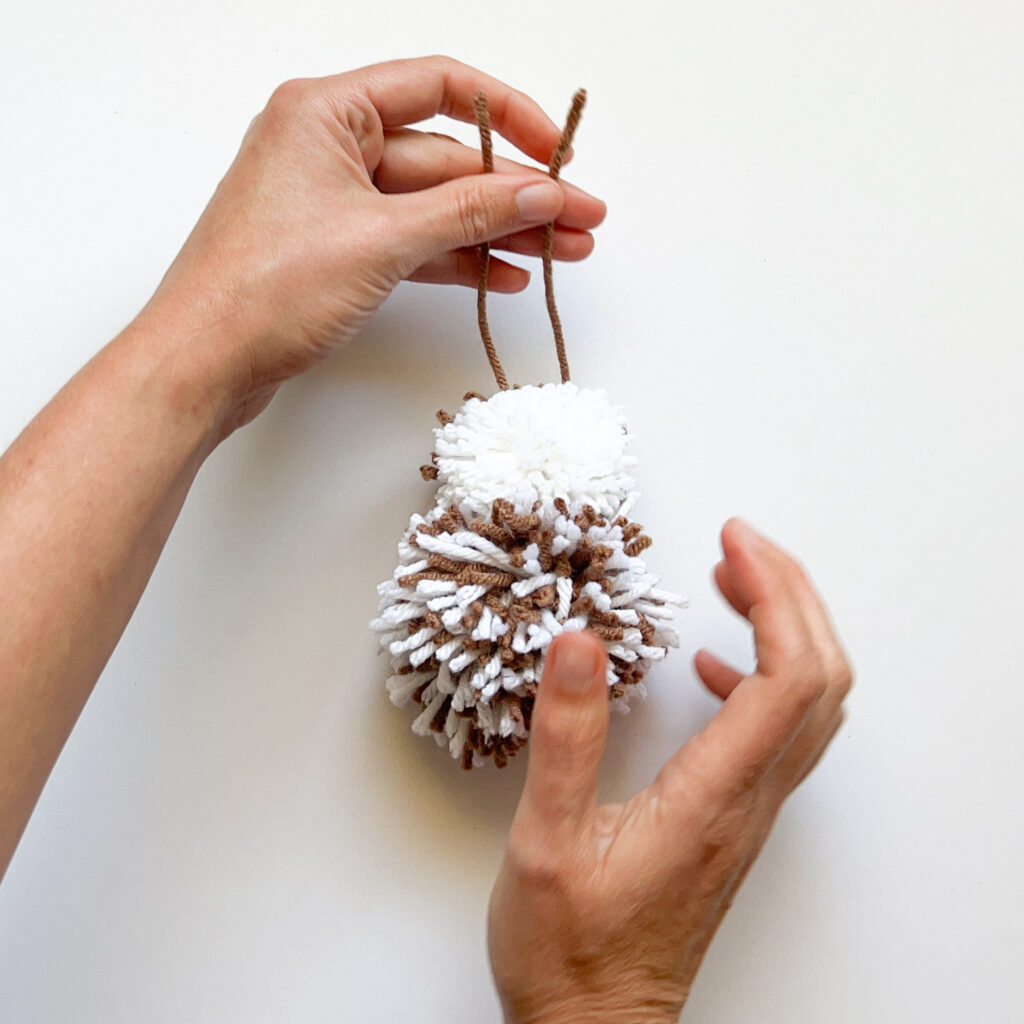
Step 2: With the front of the owl (white side of the head) facing you, insert the needle through the body pom pom from the top of the body to the base where the body yarn tails are.
Step 3: Repeat with the second yarn tail from the head. You now have four tails at the bottom of your owl!
Make sure to keep the head and body tails separate.
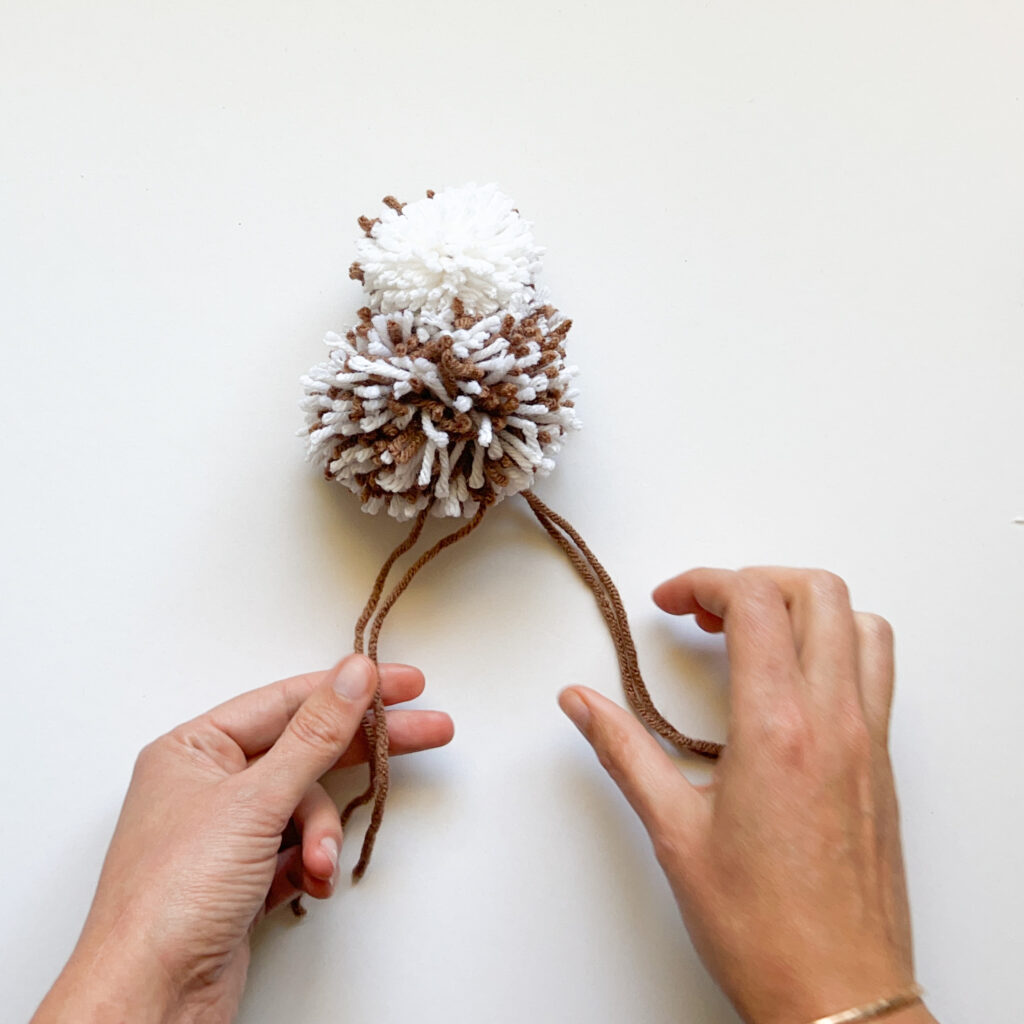
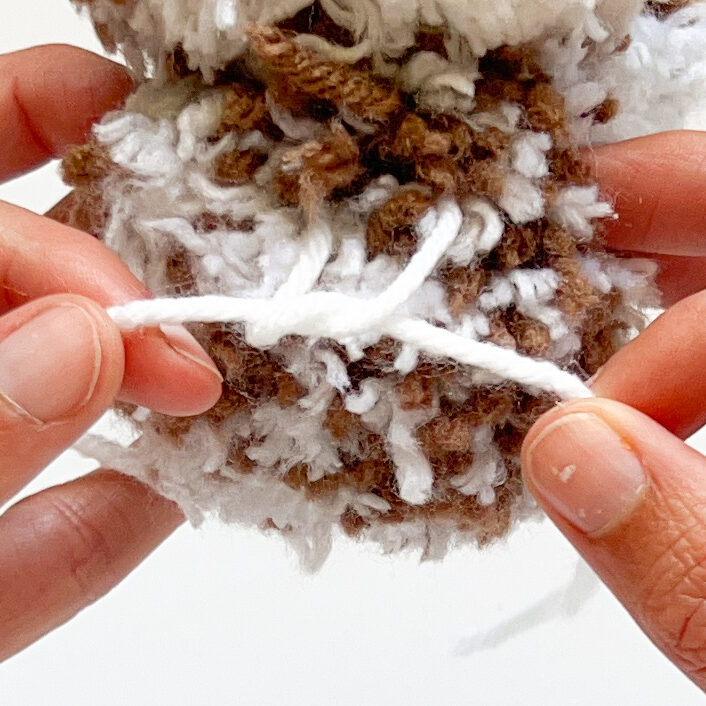
Step 4: Tie the yarn tails from the head pom pom in an overhand knot. Make sure to pull it tight so the head is snug against the body. Tie a second knot and then trim the tails close to the pom pom’s surface.
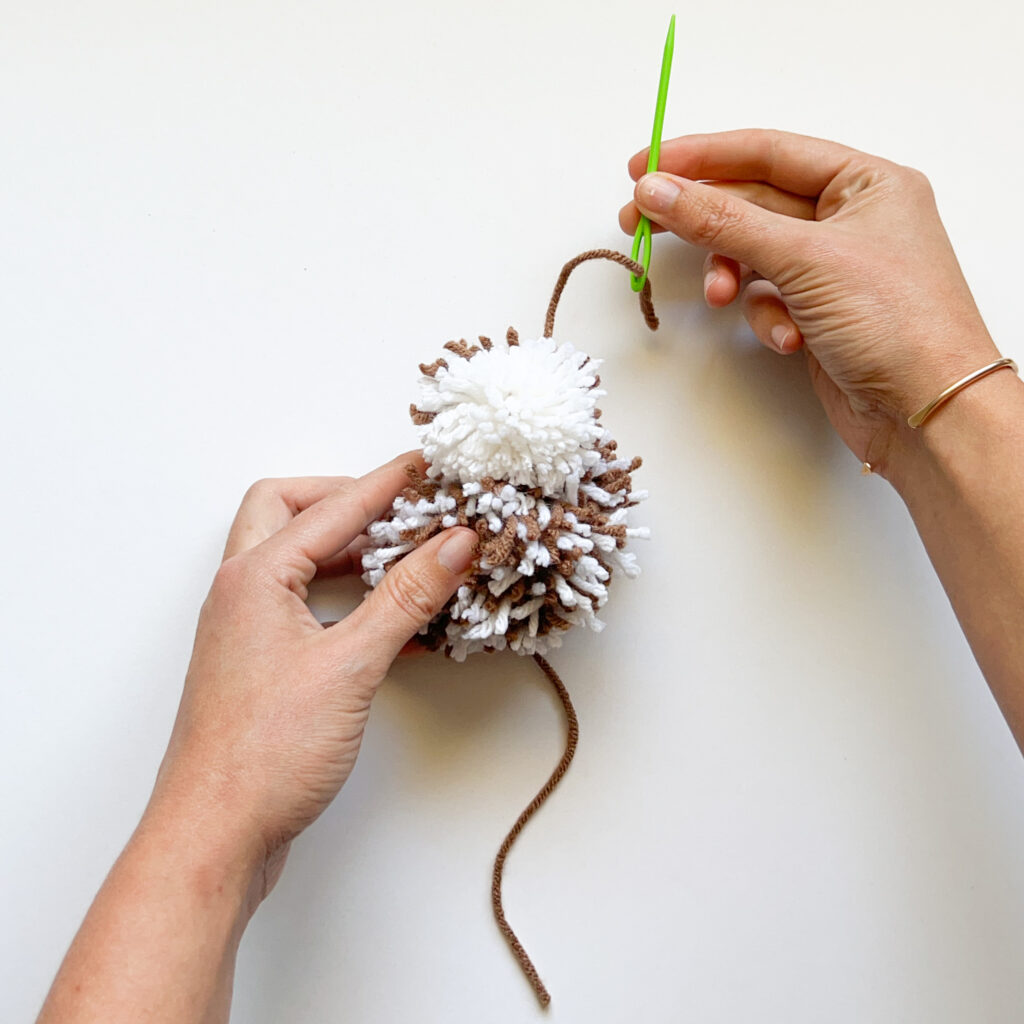
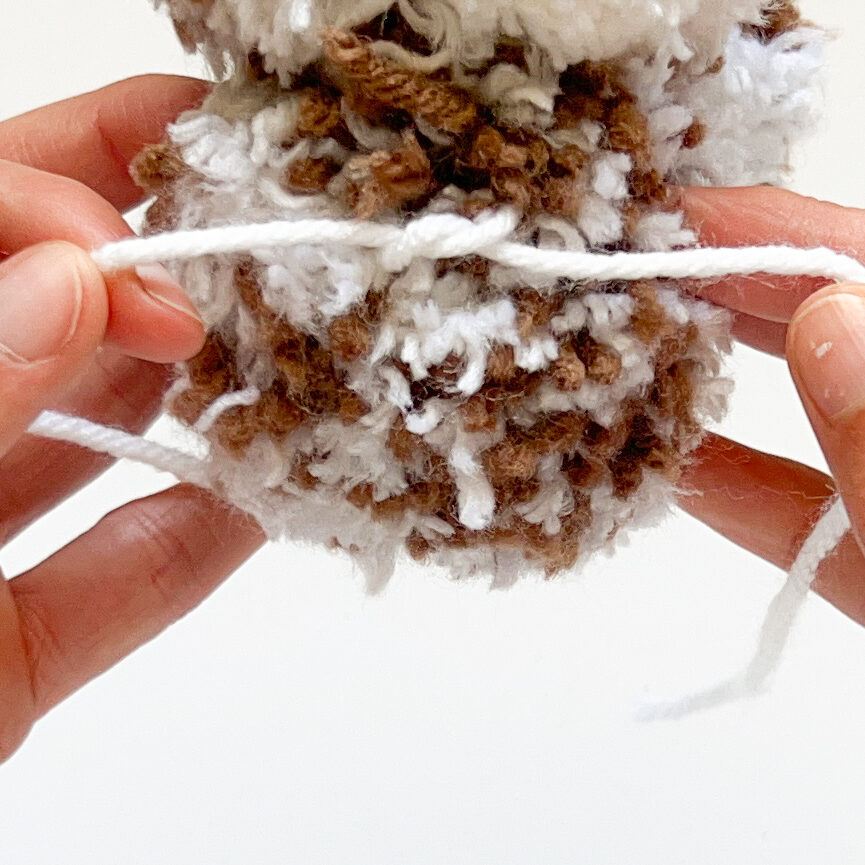
Step 5: Thread one yarn tail from the body pom pom back up through the body and out the top of the head.
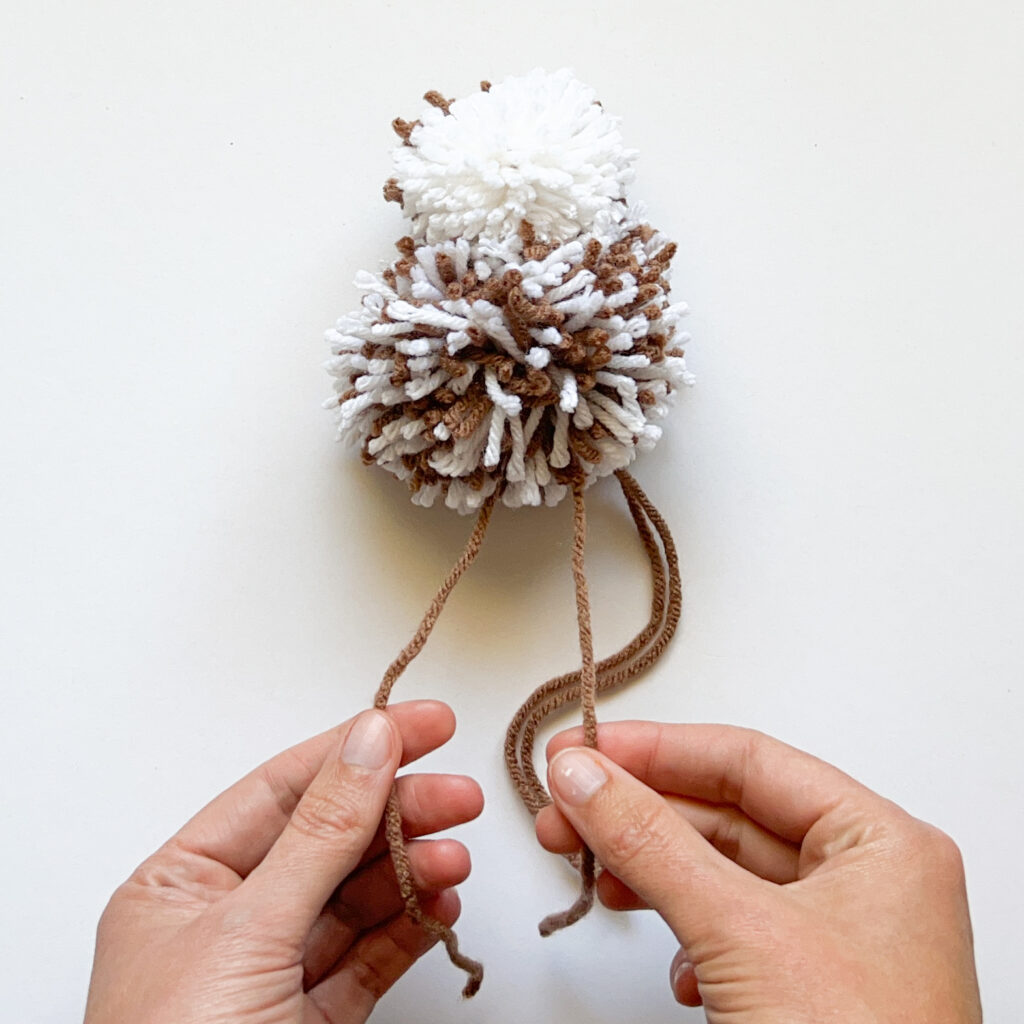
Step 5: Repeat with the second body tail. Both body tails are now coming out of the top of the head!
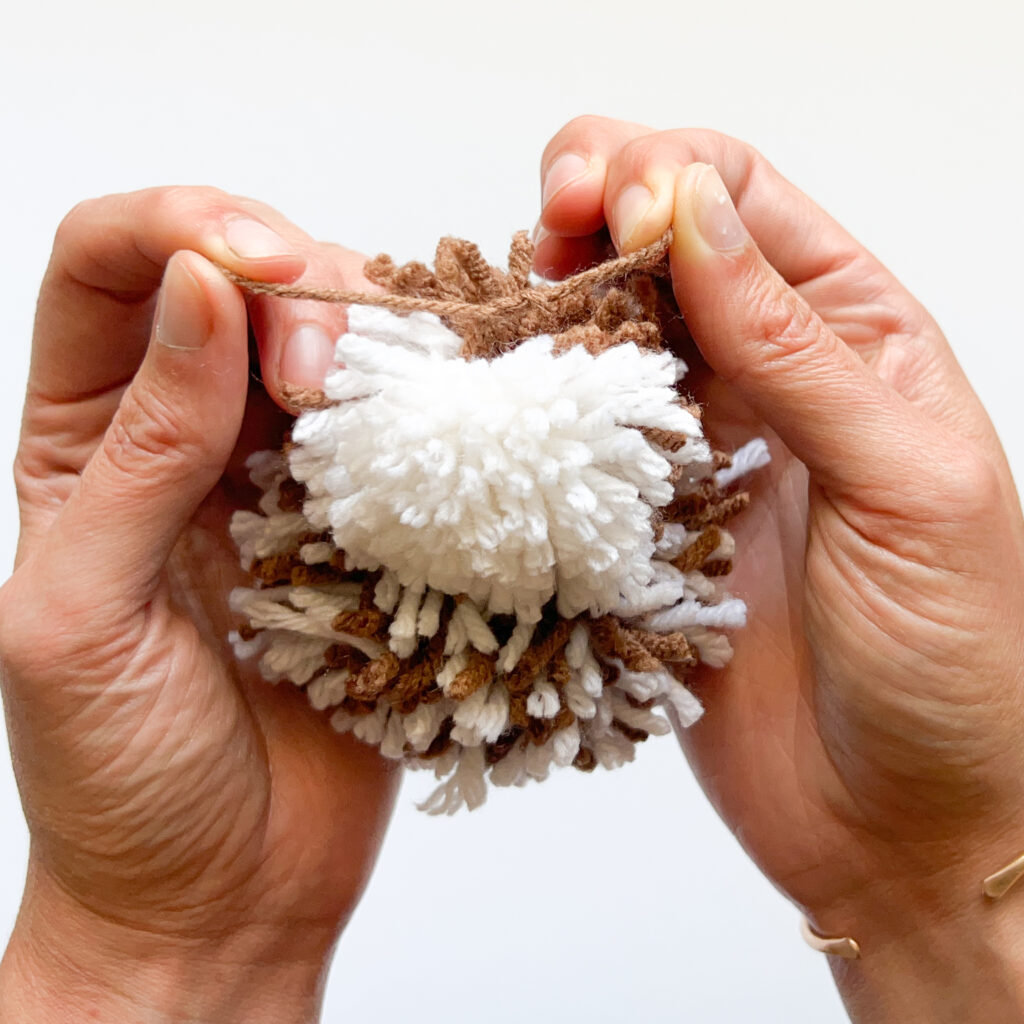
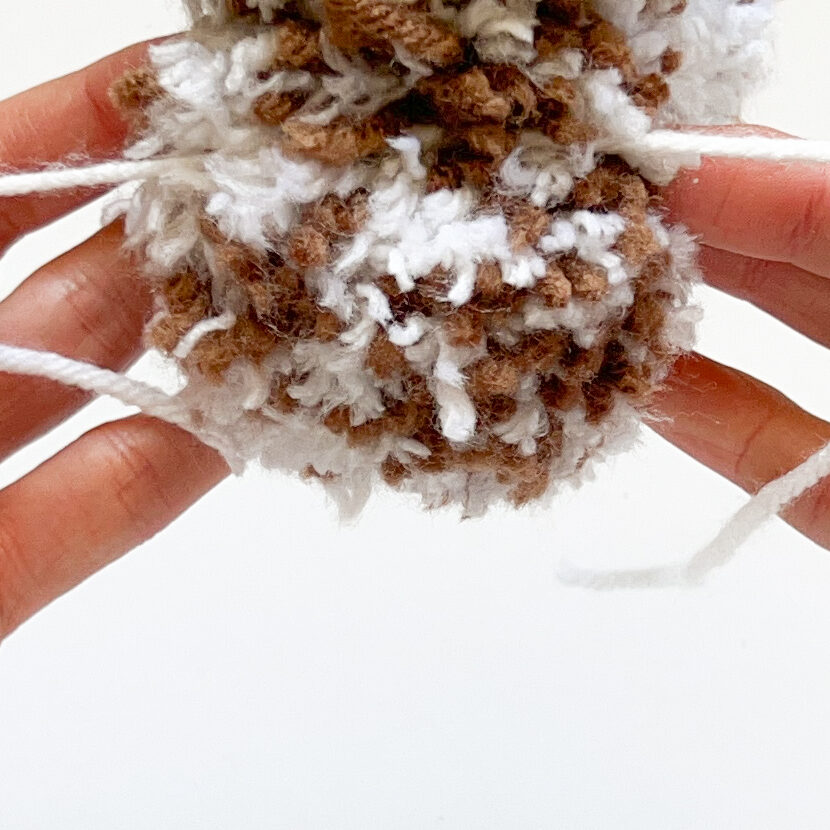
Step 6: Tie the body tails in an overhand knot, pulling it tight making sure not to catch any of the pom pom yarn strands in the knot. Tie a second knot and trim the extra yarn even with the pom pom’s surface.
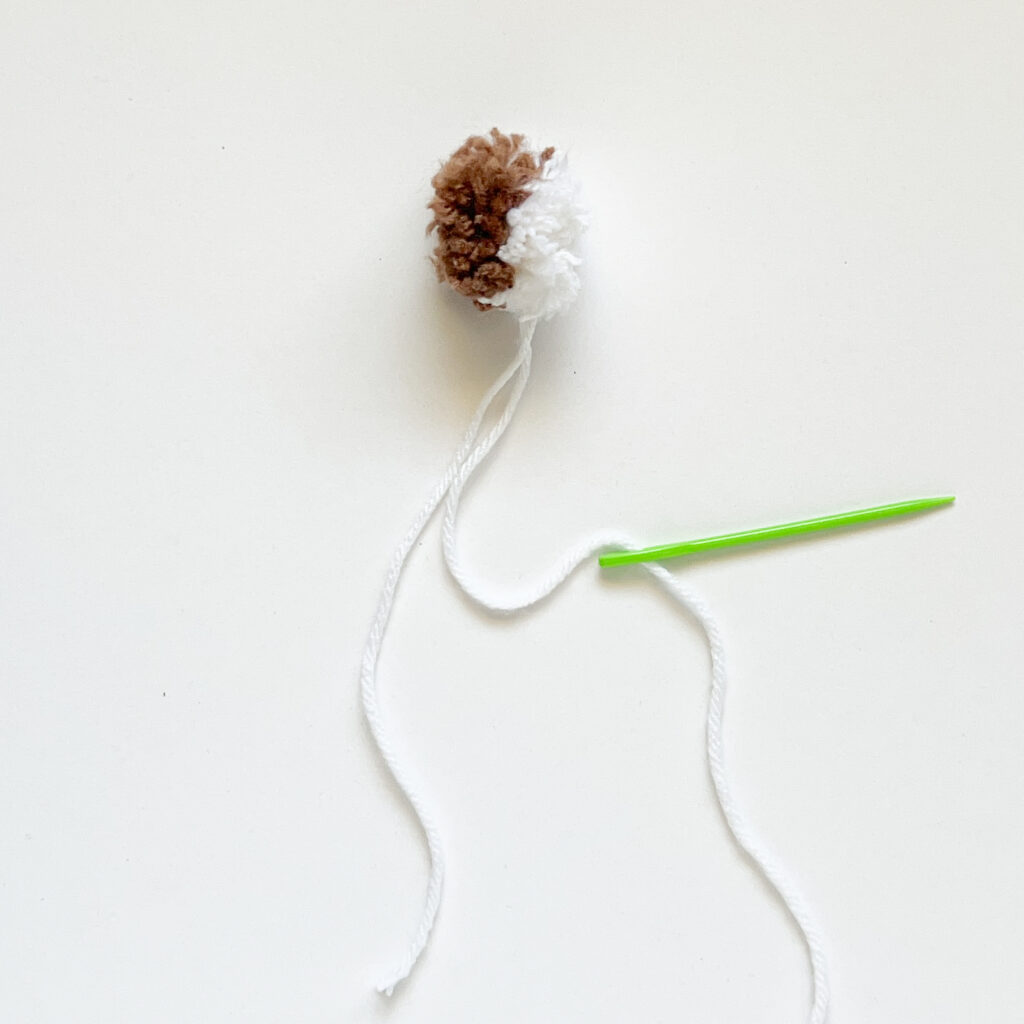
Step 1: Thread one of the yarn tails onto your yarn needle.

Step 2: Start with the front of the owl (white side of the head) facing you. Insert the needle through the body pompom just below the head on one side.
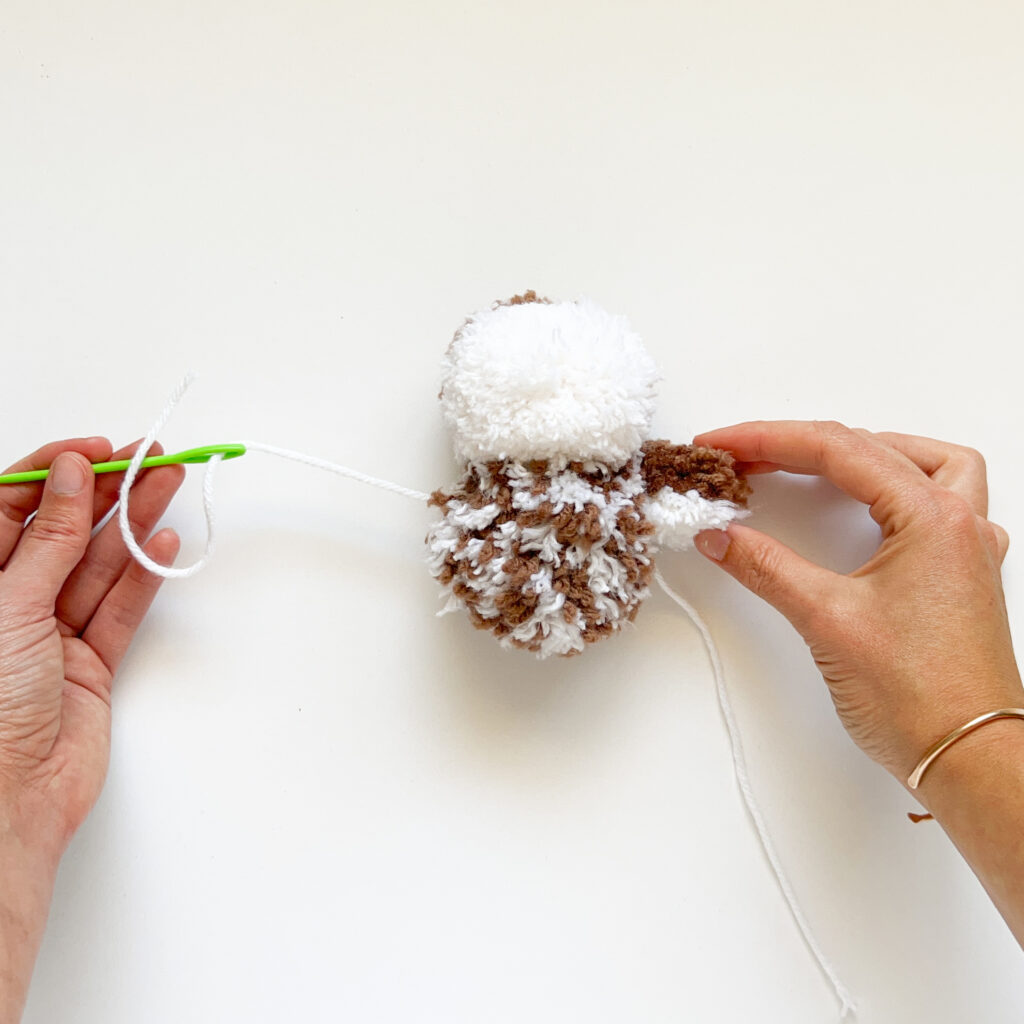
Step 3: Pull the yarn tail and needle all the way through so that the base of the wing is pulled against the body. Make sure that the brown half of the wing is facing up!
Step 4: Repeat with the second yarn tail from the same wing.
Step 5: Tie the two pom pom yarn tails into one overhand knot, pulling it tight before tying a second knot for extra security. Trim the ends even with the pom pom.
Repeat steps 1-4 with the second wing: Thread the yarn tails from the second wing through the body directly opposite from the first wing. Make sure the needle exits just under the first wing.
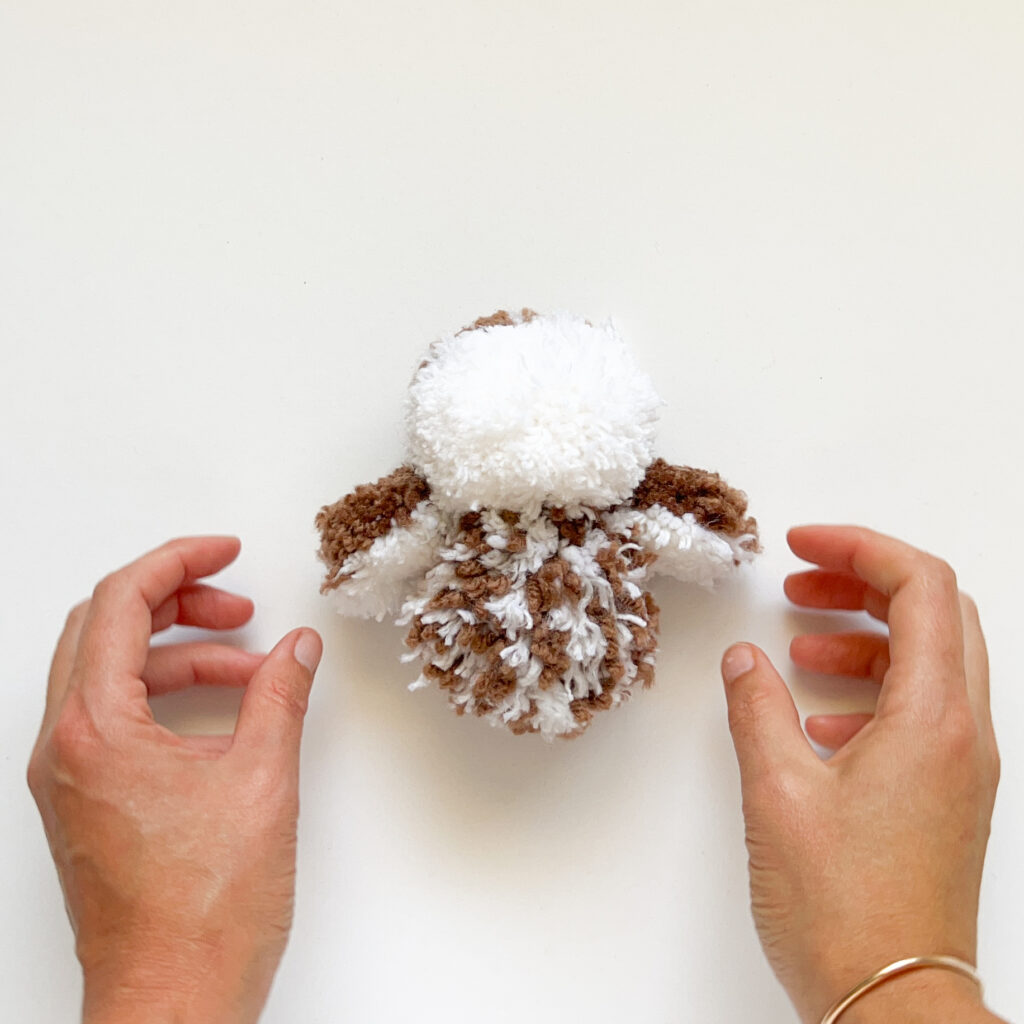
All Done! The face of the owl is the white half of the head pom pom, and both wings have a brown half facing up, and white on the underside of the wing.
It’s time to add some shape and definition to the wings and head. Trim the wings to emphasize a long, thin shape by trimming the top and underside flat (careful! Don’t snip the string that ties the pom pom together.) Trim around the neck to give some extra definition for the head too!
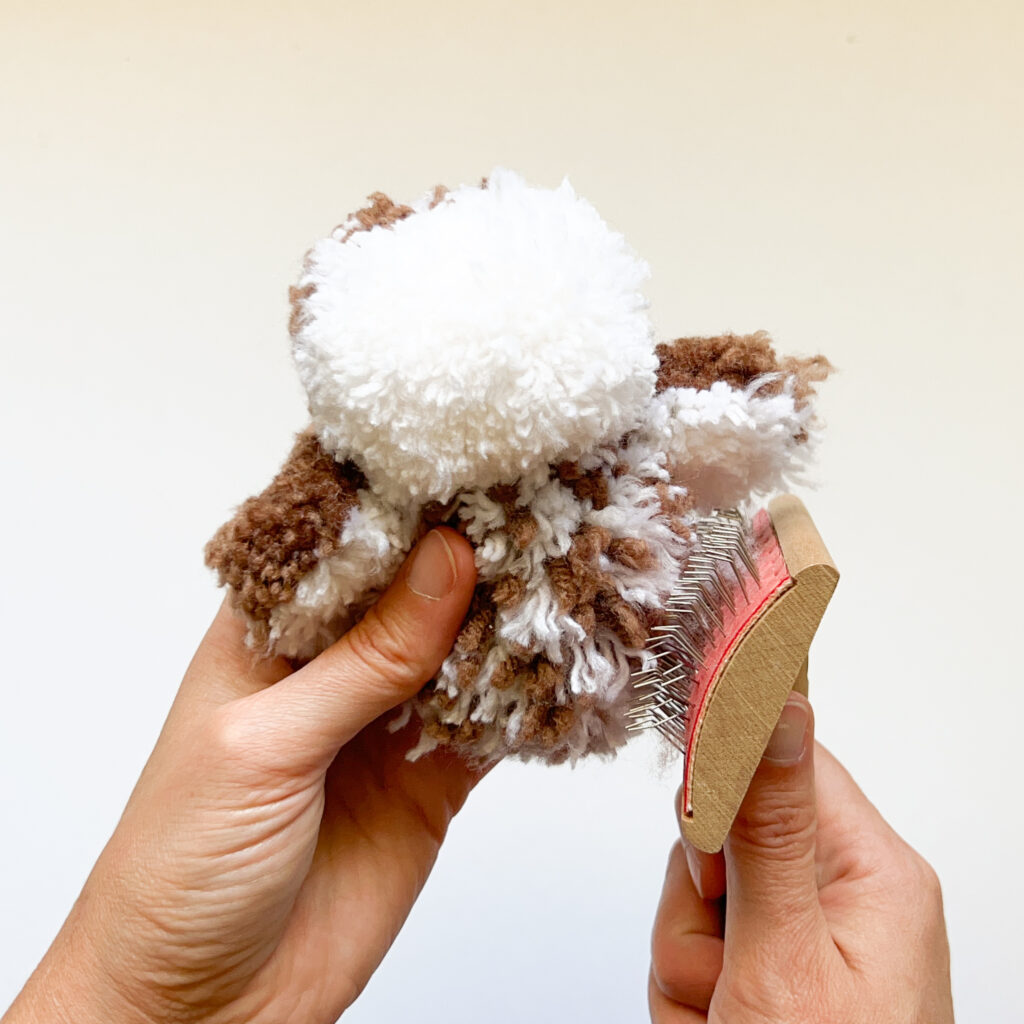
The last step is optional but definitely makes the pom pom pal look infinitely cuter! Take a hair brush, metal pet brush as in the photo, or even a comb and gently use it to fluff the yarn ends on your pom pom. Go slowly making sure not to pull any strands out of your pom pom!

You might need to give your buddy one last little trim after fluffing. Ta dah! It’s done!
The guide above and the instructions in the booklet are just the beginning! Make the pom poms anyway that feels fun. You can customize each pal with the accessories in the kit and also the way you wrap the yarn. Want a brown rabbit an a white bear? Go ahead!
Remember, there’s just enough yarn in the kit to make all three friends!

Want to see how to use the other accessories in your kit? We’ve got a post for that! Click through to read the full post with some suggestions for customizing your critters.


