Kitchener Stitch
Invisibly seam two pieces of knitting!
Invisibly seam two pieces of knitting!

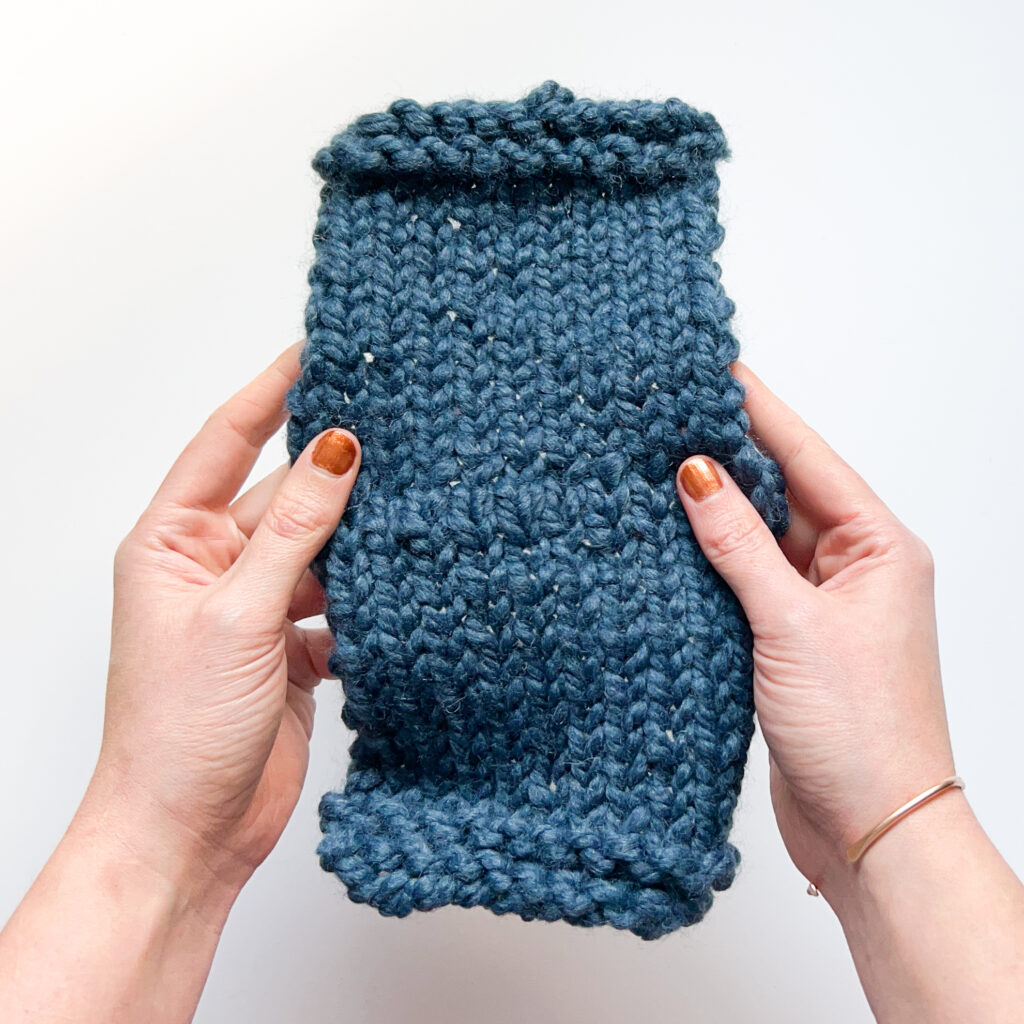
Welcome to the wonderful world of Kitchener stitch! This technique, also known as grafting, seamlessly joins two sets of live stitches together. It creates a beautifully smooth and almost invisible seam, perfect for finishing socks, sweaters, and any other knitwear project that requires a professional-looking, seamless join.
Use Kitchener Stitch any time you have live stitches you want to join in a straight seam. Two common examples: if you’ve just finished knitting the toes of a sock or you’ve got to join the front and back of a sweater are the shoulders you can easily close the opening without creating a bulky or visible seam.
Yes! Kitchener stitch is easy to learn and can be done with just a few basic tools: a yarn needle and a piece of yarn in the same weight and color as your project. With a little bit of practice, you’ll be able to master this technique and create seamless, professional-looking knitwear.
Ready to try it out? Grab your project and let’s get grafting!
Before we get started, here are some notes!
Getting Started:
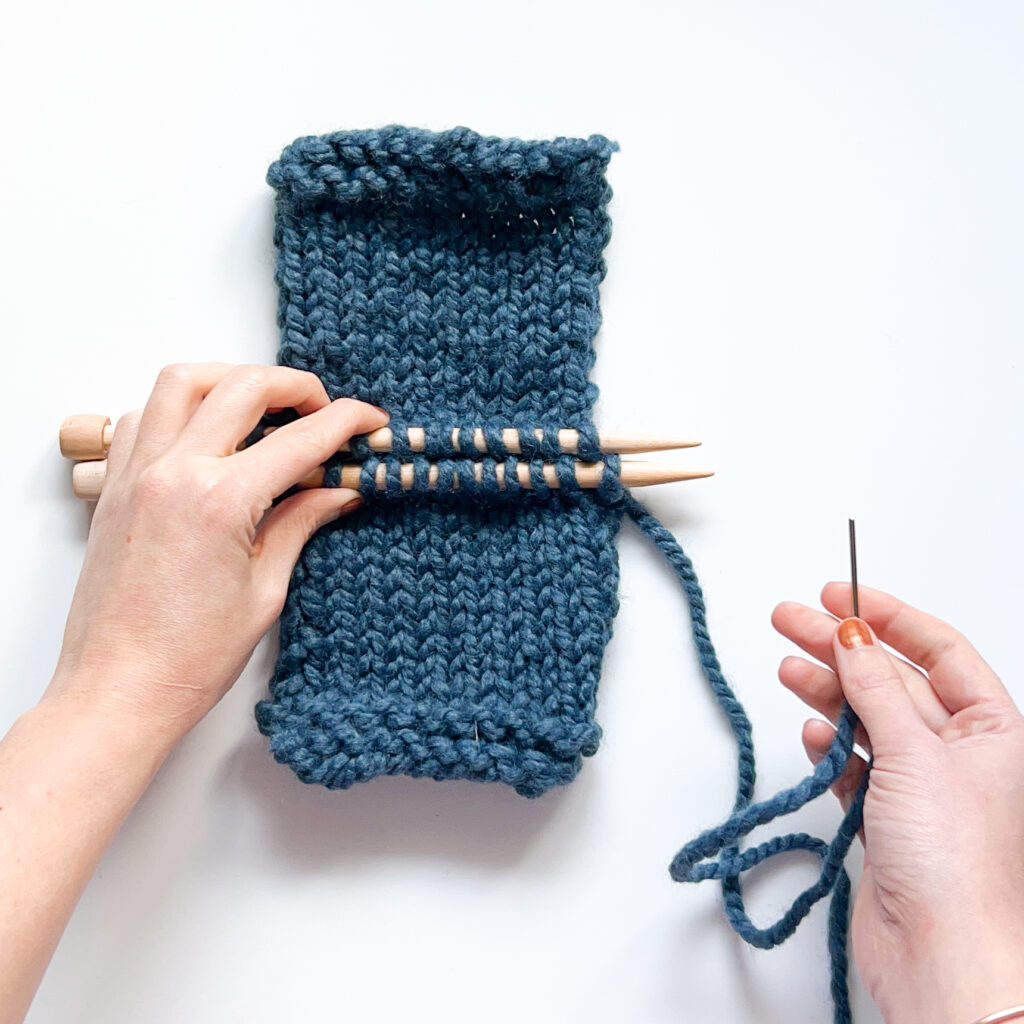
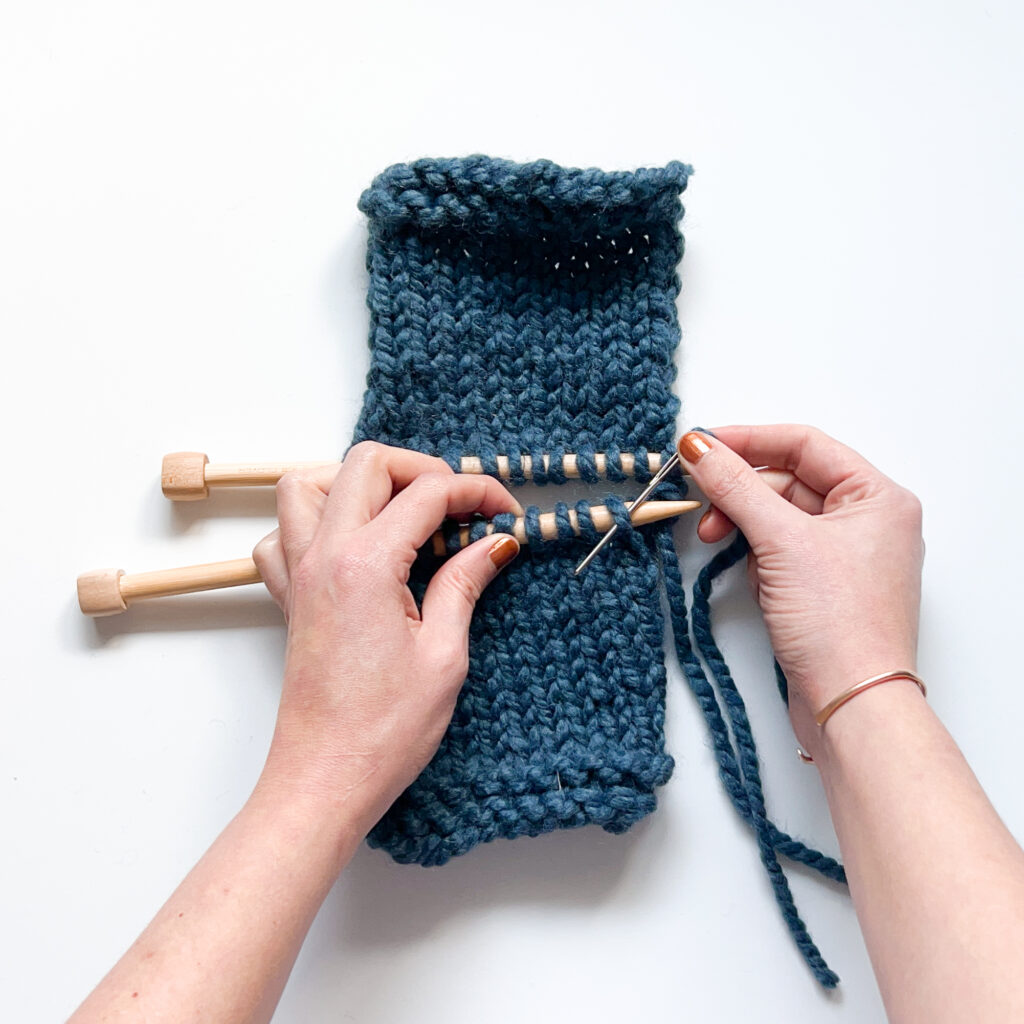
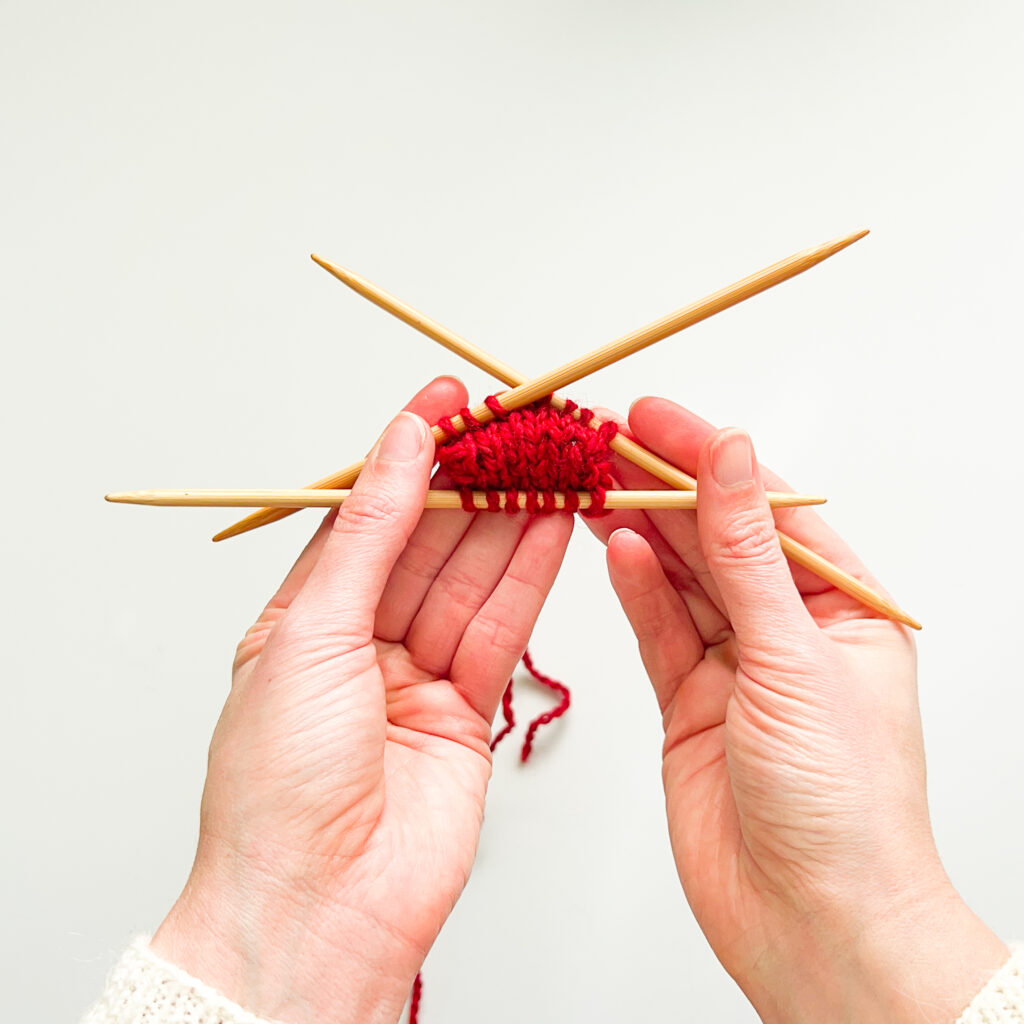
Start with both needles held parallel, the right side of the fabric facing up/out. Thread the yarn onto a yarn needle.
Step 1:
Insert the needle purlwise through the first stitch on the front needle.
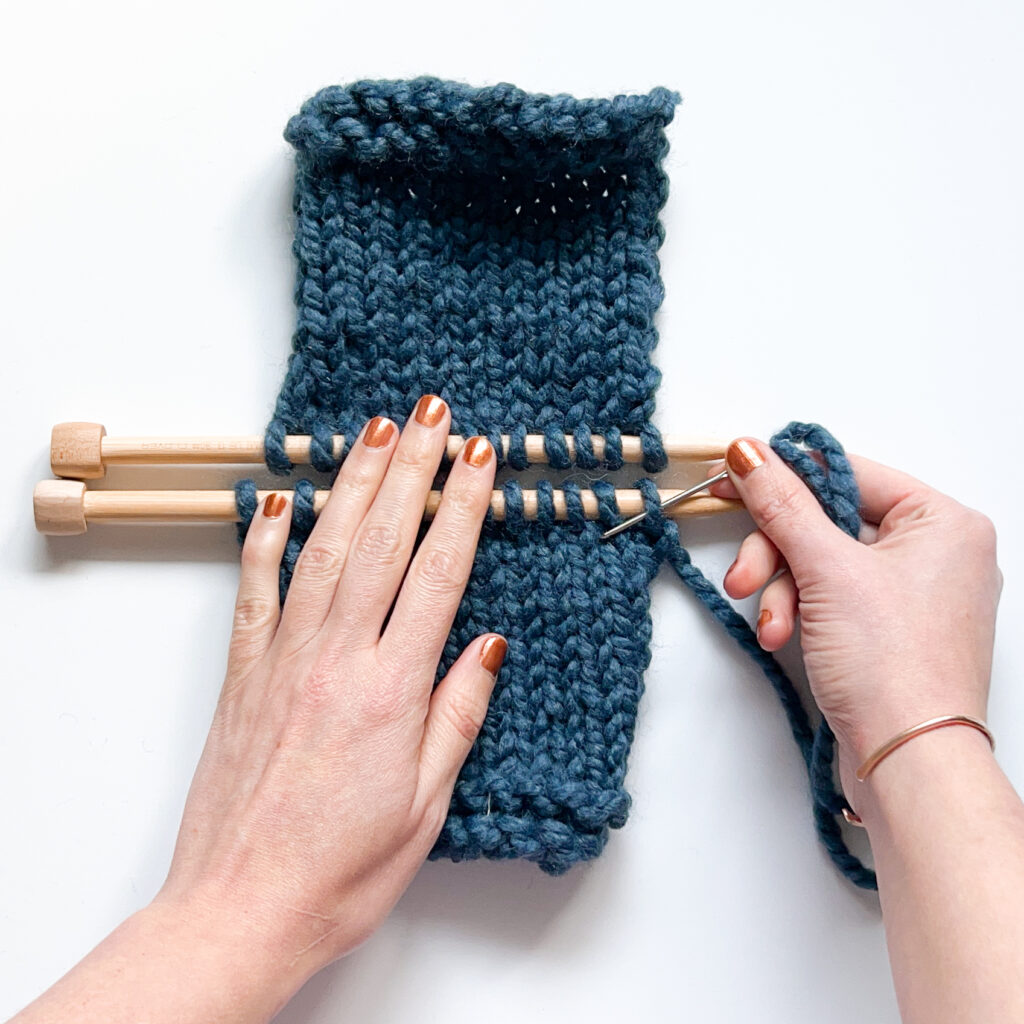
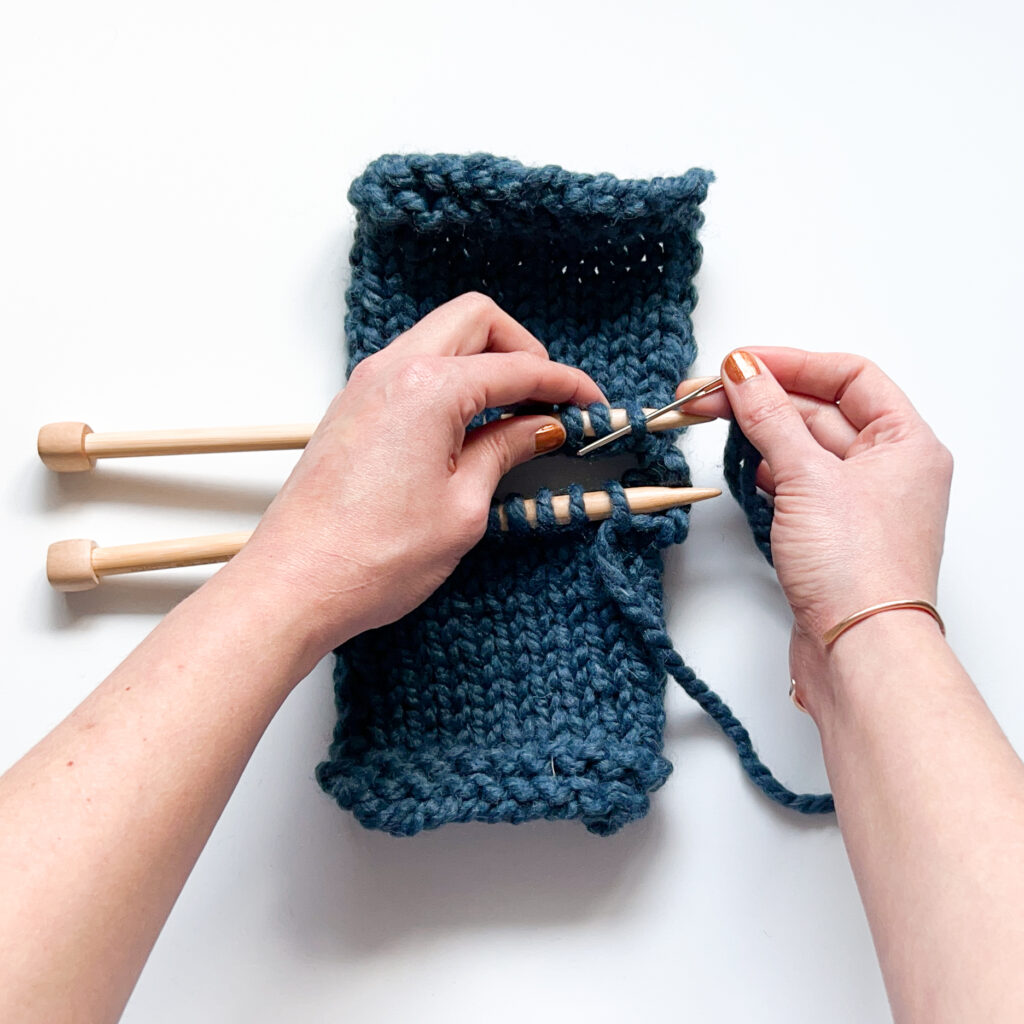
Step 2:
Insert the needle knitwise through the first stitch on the back needle.
The two sides of your seam are now joined together, ready to work the Kitchener Stitch repeat for the remaining stitches.

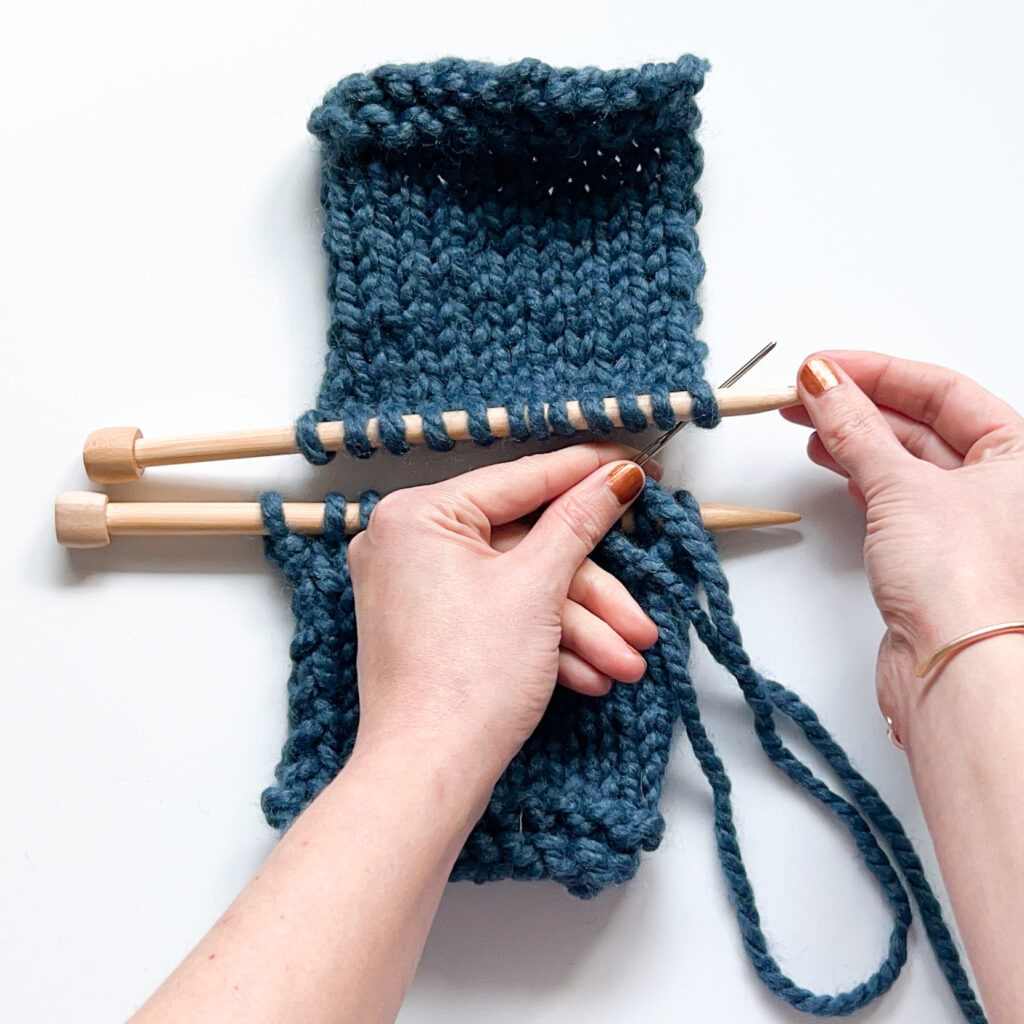
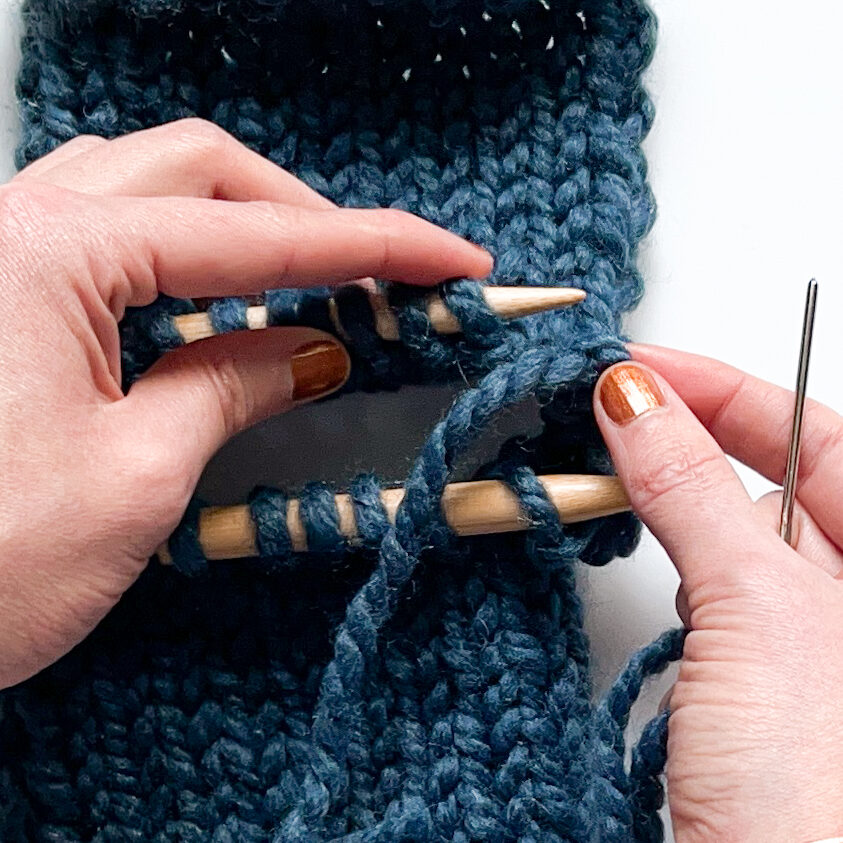
Step 1:
Insert the needle knitwise through the first stitch on the front needle.

Draw the yarn through.
Slip the stitch off the front needle.
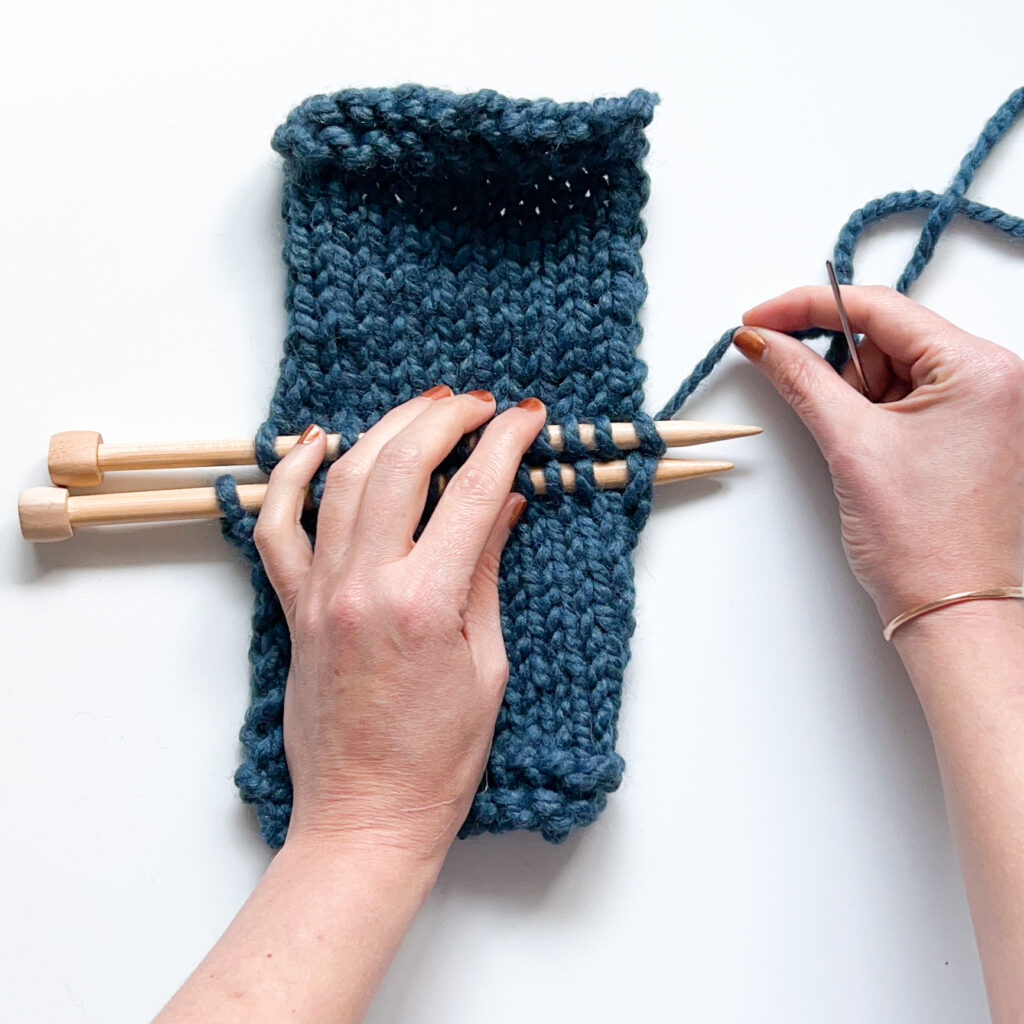
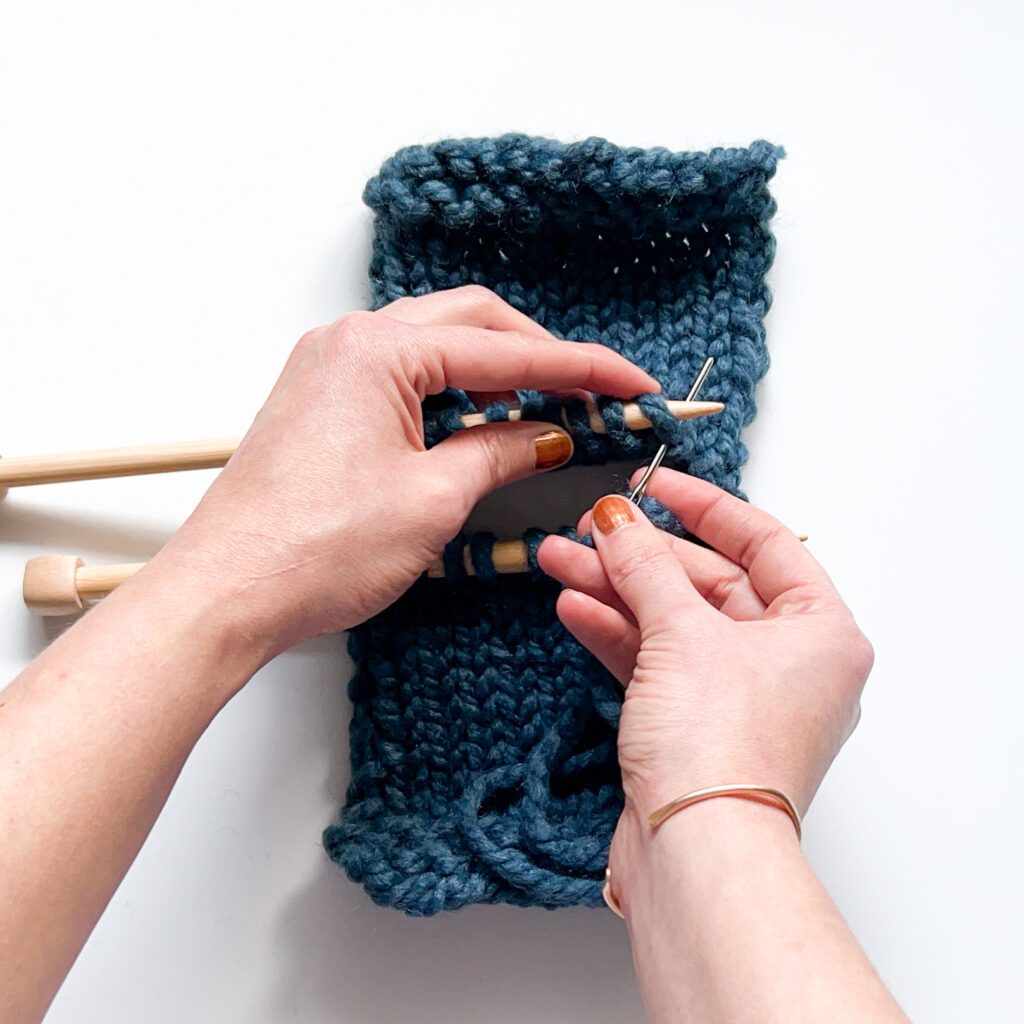
Step 2:
Insert the needle purlwise through the next stitch on the front needle.
Leave the stitch on the needle.
Step 3:
Insert the needle purlwise through the first stitch on the back needle.
Draw the yarn through.
Slip the stitch off the back needle.
Step 4:
Insert the needle knitwise through the next stitch on the back needle.
Leave the stitch on the needle.

Repeat steps 1-4 of the Kitchener Stitch repeat until you’ve worked all the stitches and both needles are empty.
For the last stitch on both needles you’ll end after Step 2 in the sequence.
This quick reference shows all the steps for the Kitchener Stitch in a condensed format. If you need just the steps for Kitchener Stitch we’ve got you covered.
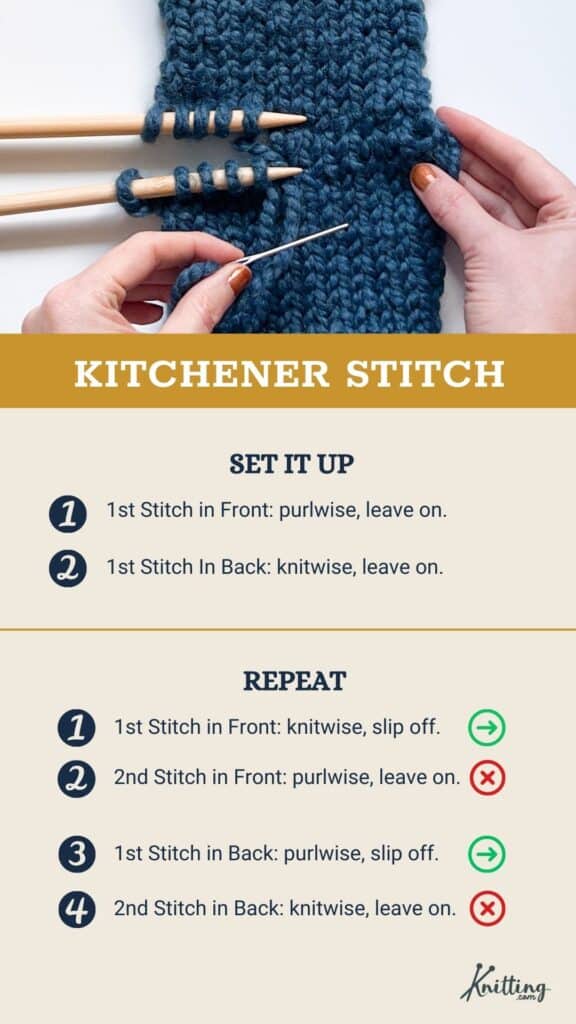
INSTRUCTIONS:
Remember to work the set up steps once, then just work steps 1-4 from the repeat section for the remainder of the seam. Lastly, you’ll end by working steps 1-2, dropping the last stitches off the needles.
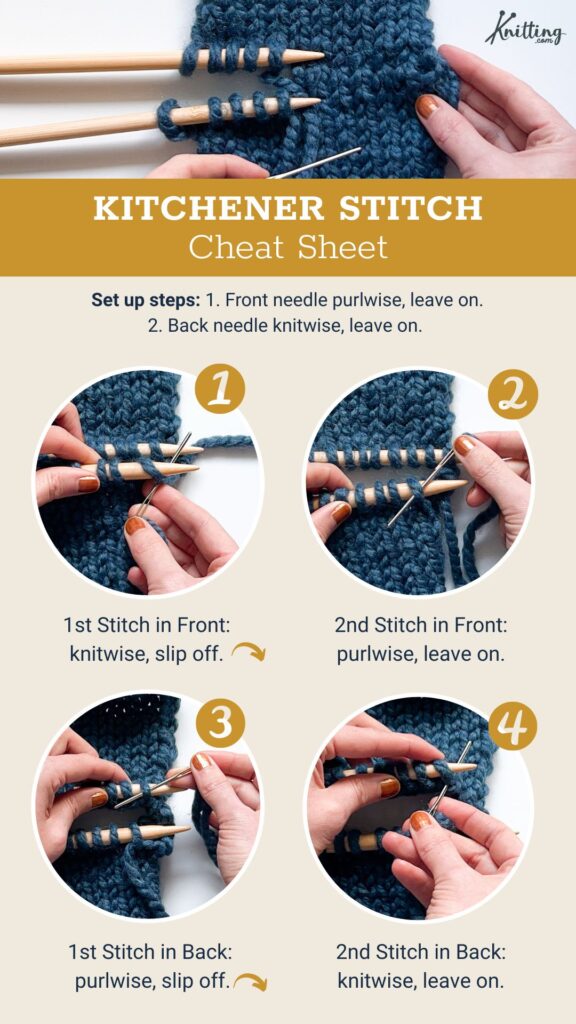
SET UP STEPS:
REPEAT STEPS:
STEP 1. 1st stitch in front: knitwise (slip off).
STEP 2. 2nd stitch in front: purlwise (keep on).
STEP 3. 1st stitch in back: purlwise (slip off).
STEP 4. 2nd stitch in back: knitwise (keep on).
Pro tip: save this image for a quick reference guide to working the kitchener stitch on your next project!
The kitchener stitch is a great way to finish a project and fits into a few finishing categories. The kitchener stitch is both a sewn seam an a bind off method, all in one technique! As you’re joining the two pieces of fabric you’re also taking the stitches off the needles in a way that creates a secure seam. Attaching two live edges of fabric seamlessly is also called “grafting”.
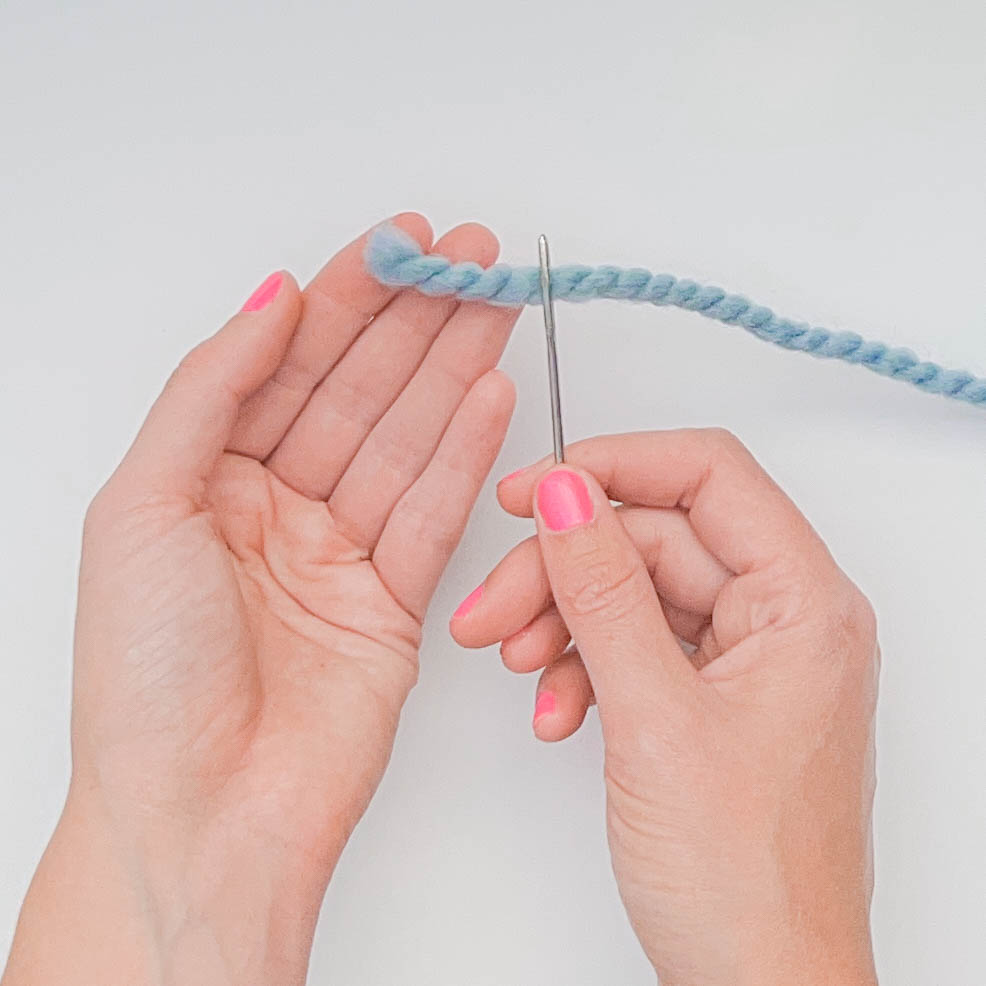
Check out our trick for threading a yarn needle using any yarn in a snap!
The Kitchener Stitch closes a project invisibly. To start a project in the round with an invisible seam, try Judy’s Magic Cast On!


