Knit Bind Off
Learn how to get the stitches off your needles!
Learn how to get the stitches off your needles!
Learning how to bind off knitting gets your stitches off the needles and finishes your project. This easy knit bind off is the quickest cast off to learn! When you’re ready to finish your knit project, you can use this simple and easy-to-memorize method to create a nice, sturdy edge. It’s a great, easy method for any knit project
This technique uses the same skills and movements as the knit stitch. Whether you’re already familiar with the knitting or just getting started, this technique is great practice.
We’ve also included a quick troubleshooting guide in this tutorial if your edges are too tight. It’s a common problem for both new and experienced knitters. You’re not alone! Make sure to read to the end to learn more about what an ideal tension looks like.
Ready to get started? Let’s learn how to bind off!
The terminology here can be a little confusing, but a “bind off” and a “cast off” are the exact same thing! Both terms refer to the process of securing the yarn at the end of a project so you can take it off your needles.
The best part of this method is that it’s fast and easy to learn. It creates a nice sturdy edge that works with most projects. It’s especially good for simple projects like dishcloths, afghans, or scarves with edges that don’t need to flex or stretch to fit.
You can use this easy bind off on knit, purl, or ribbed projects! The instructions in this tutorial are specifically written with the knit stitch in mind, however, it’s easy to convert for the purl stitch! Make the swap by simply replacing “knit stitch” with “purl stitch” throughout. For ribbing, knit all knit stitches and purl all purl stitches as they appear in the previous row.
Note: This tutorial was written for right-handed knitters. If you’re a left-handed knitter, you can follow the same instructions. However, you’ll need to replace “right needle/hand” with “left needle/hand” for all steps.
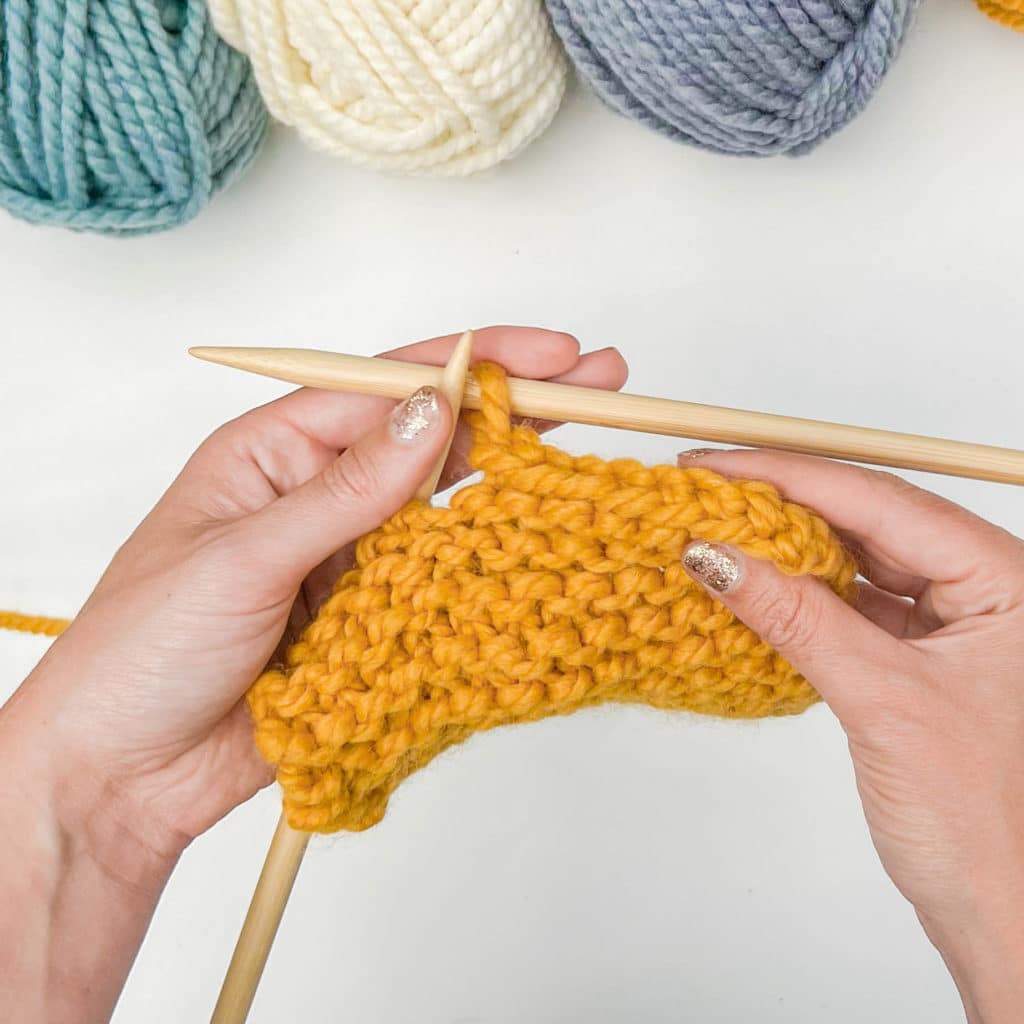
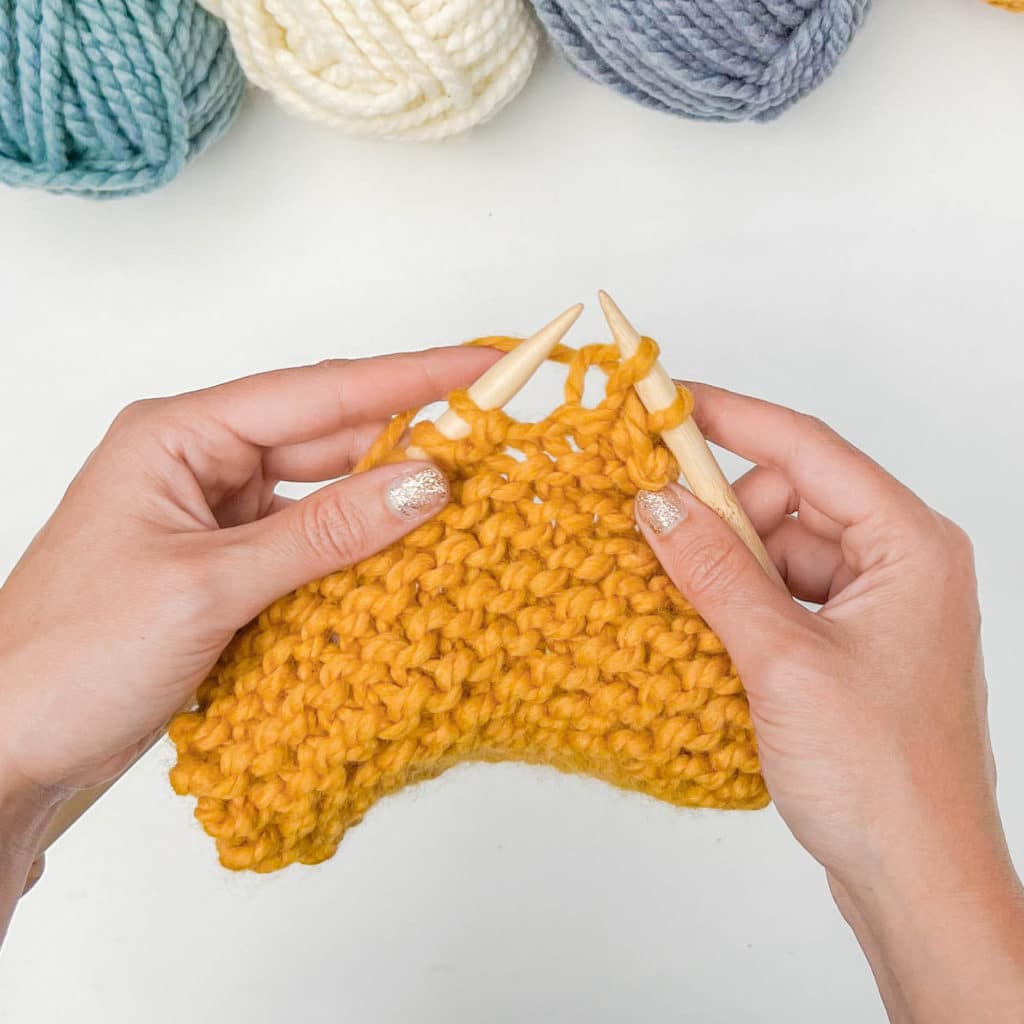
STEP 1
Knit the first two stitches of the row.
STEP 2
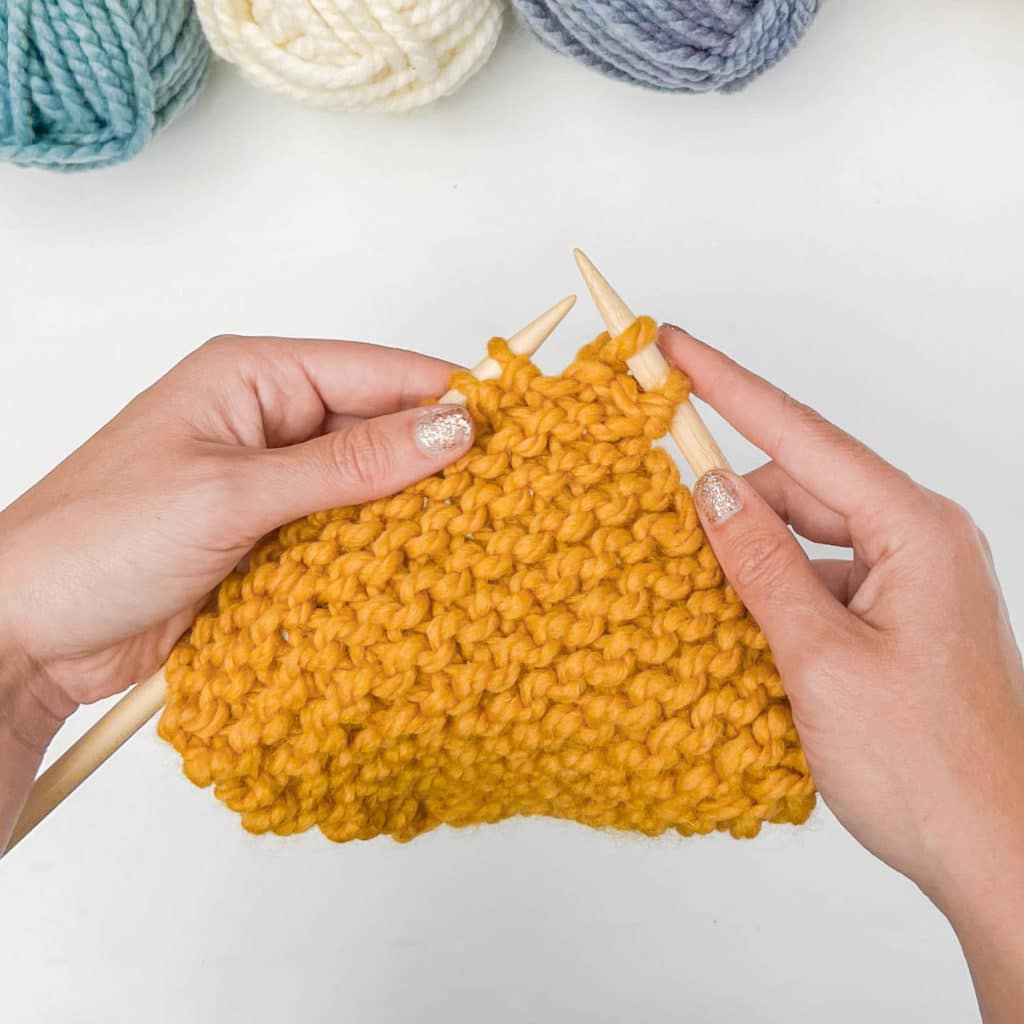
Insert your left needle through the front loop of the first stitch on your right needle.
Hook that stitch up and over the second stitch, dropping it off the tip of your needle.
You’ve now bound off one stitch!
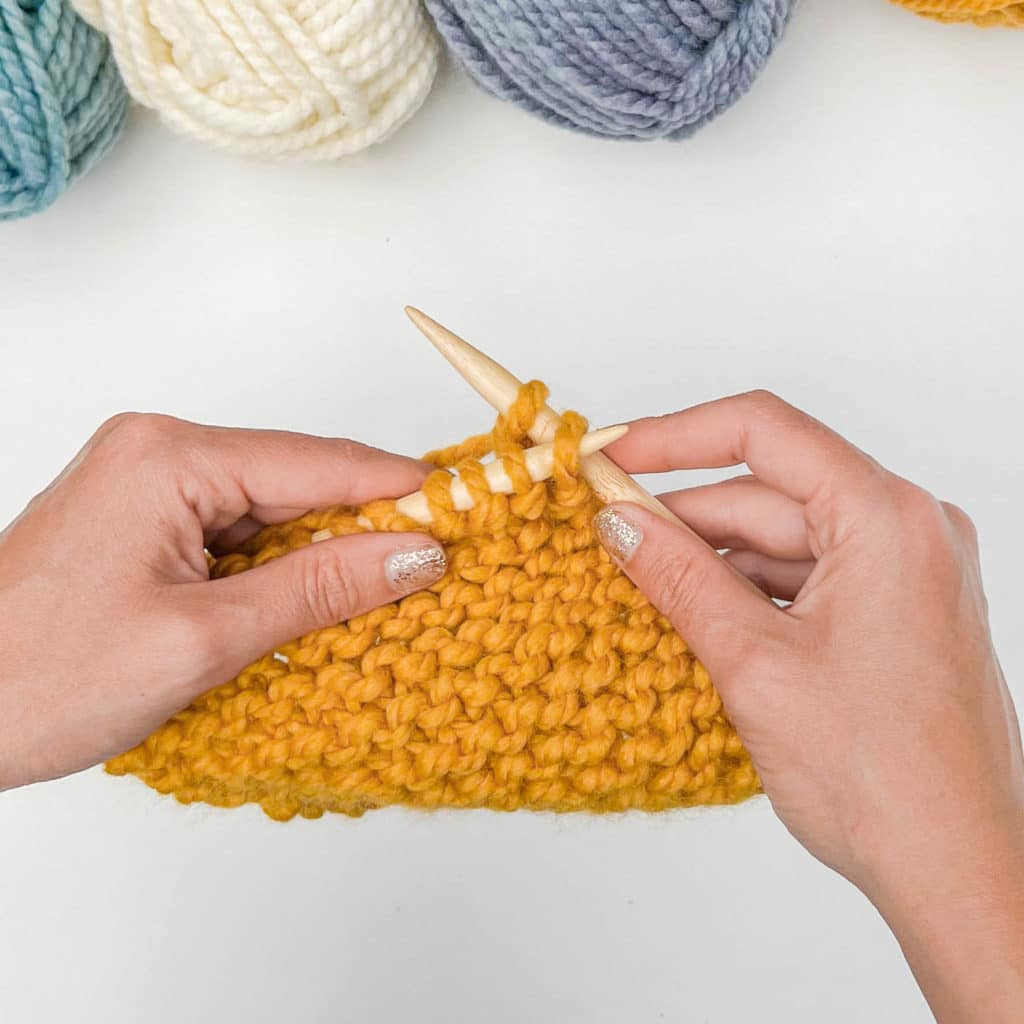
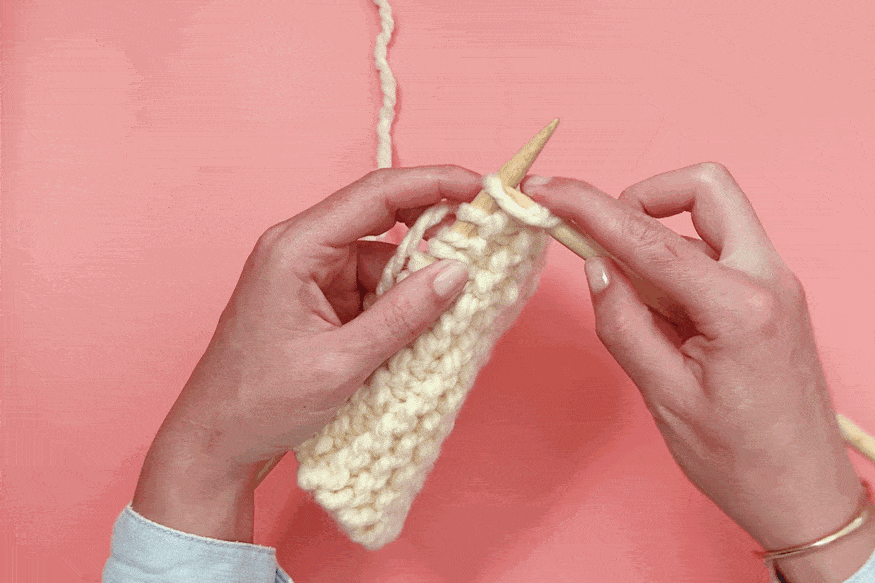
STEP 3
Knit the next stitch on your left needle so you have two stitches on the right needle again.
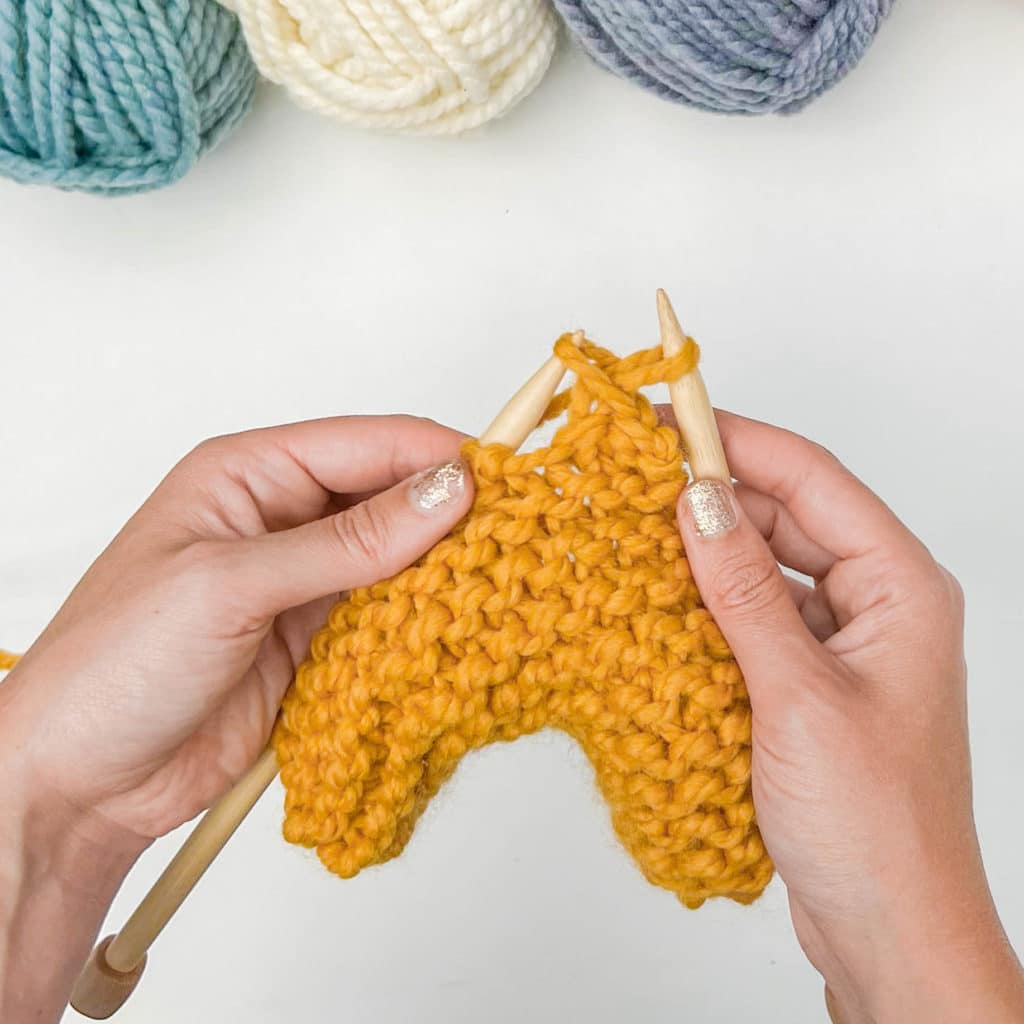
REPEAT
Repeat steps 2-3 until you have bound off all the stitches in the row and you have no stitches on your left needle and one stitch remaining on your right needle.
FINISHING:
Cut your yarn, leaving an 8” yarn tail. Remove your needle and thread the yarn tail through the last stitch, drawing the loop closed by tugging on the yarn tail to tighten.
We’ve condensed the instructions above into a text-only set of instructions to make it easy to practice the knit bind off! Use the steps below for a quick refresher on each step. Note: This tutorial was written for right-handed knitters.
Step 1: Knit the first two stitches of the row. You now have two stitches on your right-hand needle.
Step 2: Insert your left needle through the front loop of the first stitch on your right needle. Pulling gently to loosen it, bring that stitch up and over the second stitch on your needle, dropping it off the tip of your needle.
Ta dah! You’ve cast off the first stitch!
Step 3: Knit the next stitch on your left needle. You now have two stitches on the right needle once again.
Repeat steps 2-3 until you have bound off all the stitches in the row. You’ll have one stitch remaining on your right needle.
Finishing: cut your yarn, leaving an 8” yarn tail. Slip your needle out of the last stitch and thread the yarn tail through the loop. Draw the stitch closed by tugging on the yarn tail to tighten.
While we love this technique for learning the basics of how to bind off knitting, it is not as stretchy or elastic as other methods.
Does your project have ribbing at the edge? That usually means the fabric is designed to stretch and will need a different, more elastic method like a Tubular Bind Off or Jeny’s Surprisingly Stretchy Bind Off instead.
Too-tight bind off edges are something most knitters will struggle with at some point. The knit bind off doesn’t naturally stretch easily, and we have a few tips and tricks for avoiding tight edges on your knits!
When you’re ready to bind off, swap your working needle for one that is 1-2 sizes larger than what you were using for your last row. No need to swap both needles out!
Your working needle is the one held in your dominant hand. For example, your working needle is one that’s actively creating stitches in your right hand if you’re right-handed.
The working needle is the one that determines the size of your stitches as you work. By swapping it out for one size larger, you’re able to create loops that are slightly larger than the stitches in your previous row. This means that the edge will naturally be slightly looser than the rest of your project and will allow that edge to relax and match the rest of your fabric once it’s blocked.
If you’re in a pinch and don’t have larger needles close at hand, you can focus on making each stitch slightly looser than you normally would. As you form each new stitch, pull the working needle up or slightly towards you to create an enlarged loop.
Reminder: each cast off stitch should be tight enough to touch the needle but not so tight that the yarn fibers look stretched. A stitch that is too tight on the needle will be hard to work, and one that is too loose might not look smooth and even on your finished edge. It’s worth practicing until it looks just right!


Thank you! I just watched binding off as I had forgotten. I wonder if you have a tutorial on knitting sock heels?