Mattress Stitch for Seaming Knits
The best all-purpose seam for knits!
The best all-purpose seam for knits!

The mattress stitch in knitting is used to seam two pieces of fabric together. We love the versatility and near-invisibility of the mattress stitch in knitting projects of all kinds. Super versatile and easy-to-memorize, this finishing technique will have you finishing your WIP pile like a total pro in no time!
Mattress stitch the most invisible way to connect finished edges in knit projects and is especially useful to sew a garter stitch seam in a pattern. You’ll often find mattress stitch used to seam the shoulders and to set sleeves into sweaters. This flexible technique can be used with either stockinette and garter stitch fabrics, as well as either vertical and horizontal seams!
Today, we’ll demonstrate seaming garter stitch using the mattress stitch. All you need is a yarn needle and a length of yarn to match your project. That’s it!
Need to seam stockinette stitch fabric? Check out this tutorial here!
Before you begin, start by setting the two sides you’d like to seam together parallel to each other.
You’ll be using either a fresh piece of yarn (to match your project) or a long yarn tail from either the cast on/bind off row (if you planned ahead). Either method works, just make sure you have enough yarn to span the length you’d like to seam twice (beginning to end and back again) to be safe. You’ll trim off any excess at the end.
Having trouble threading your yarn needle? We’ve got a handy hack that will make it easy to thread even the most textured yarns!
NOTE: In this tutorial we use a contrast yarn color to demonstrate the mattress stitch. In your own project, make sure to choose a length of yarn that matches the rest of your project to create the most invisible seam.
Beginning on one edge, find the first stitch closest to the bottom along the seam. You can start from the left or the right (lefties might find starting on the left is easier). In this case, because I’m right handed, I’m starting on the right.
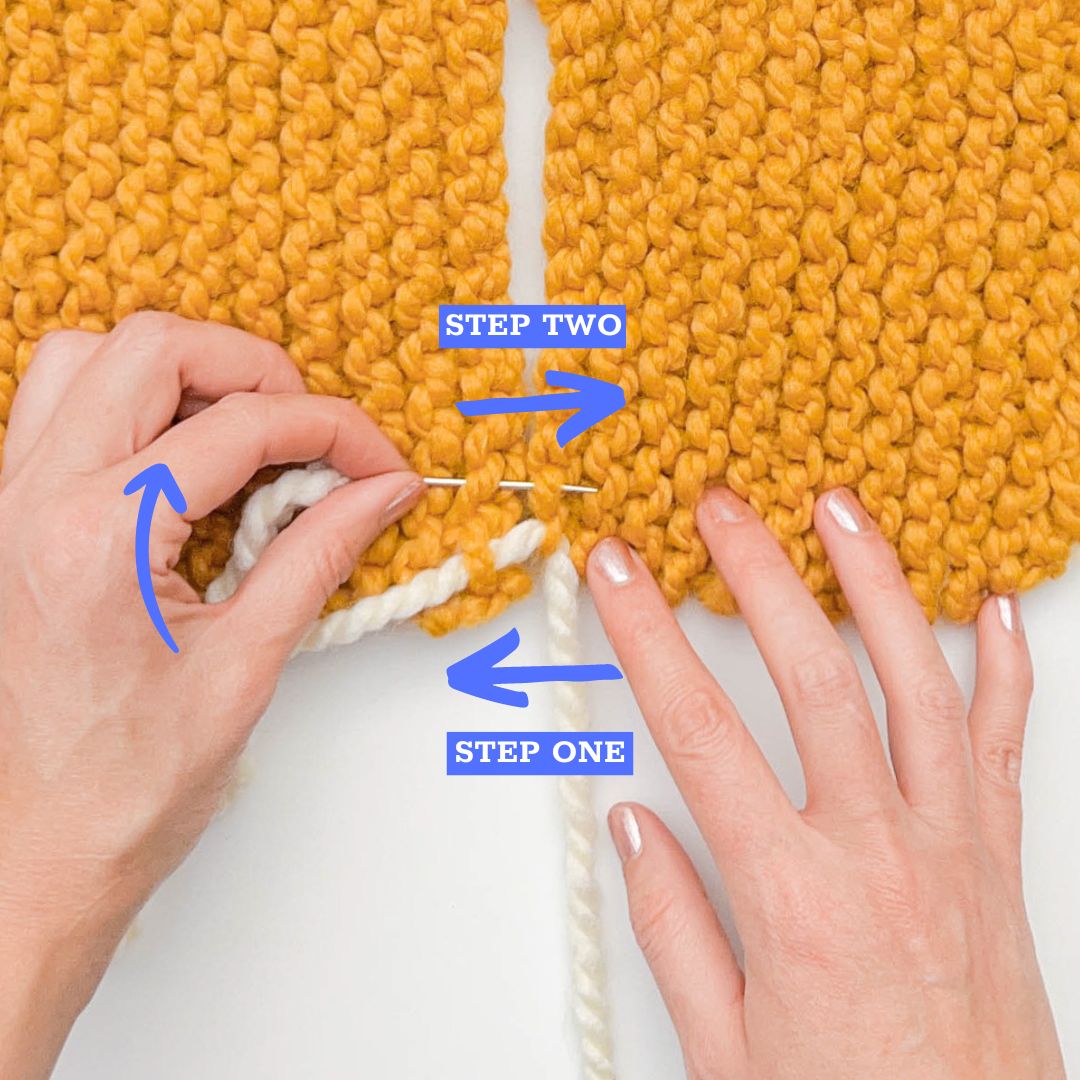
Step 1:
Insert your yarn needle under the purl bump at the seam edge, closest to the bottom (right side in the example). Jump the gap and insert the yarn needle under the bump on the opposite side (left in the example) directly across from the first bump.
Pull the yarn all the way through both stitches.
Step 2:
Working on the same side (left, in the example), find the next purl bump directly above where your needle came out. Insert your yarn needle under the bump (moving from left to right). Jump the gap. Insert the yarn needle under the corresponding bump on the opposite side of the seam. Pull the yarn through.
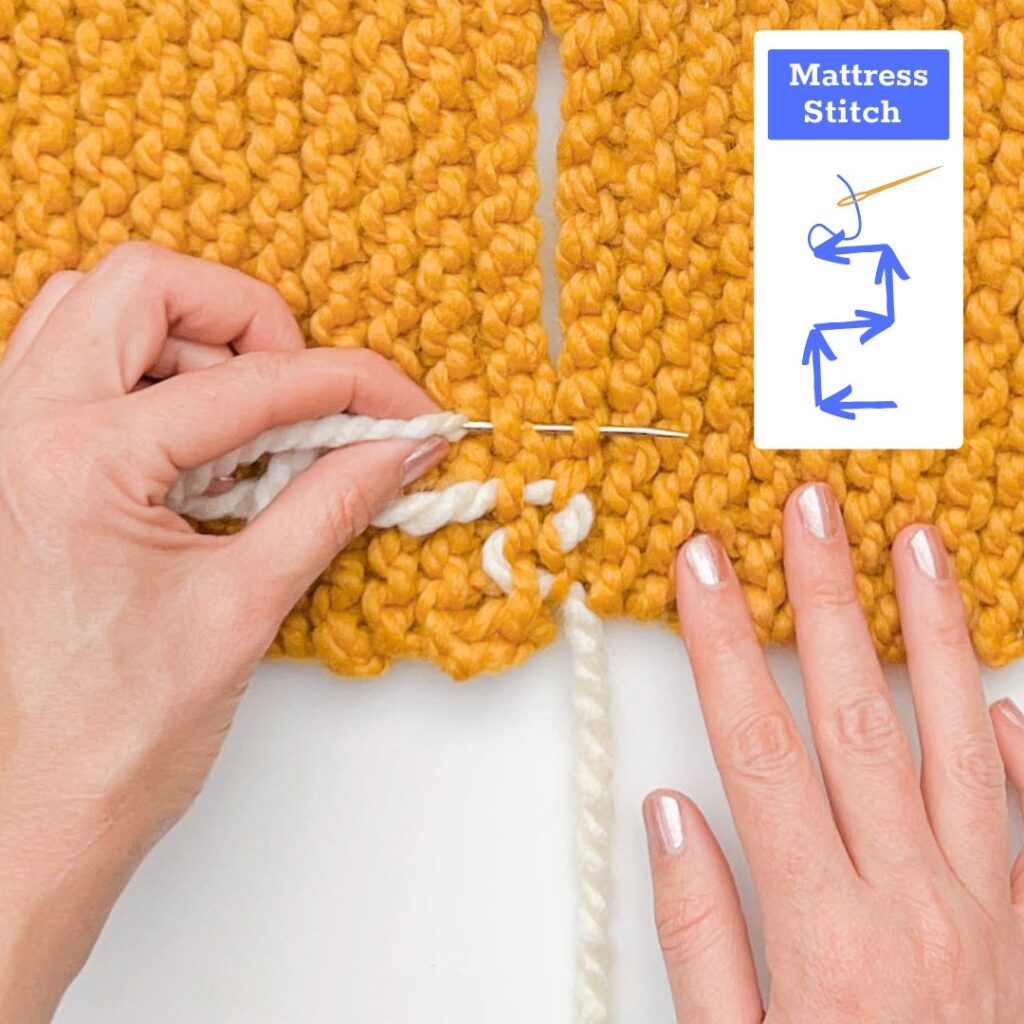
Repeat step 2 all the way up the seam. The diagram above shows how the needle and yarn follows a stair-step path through the fabric.
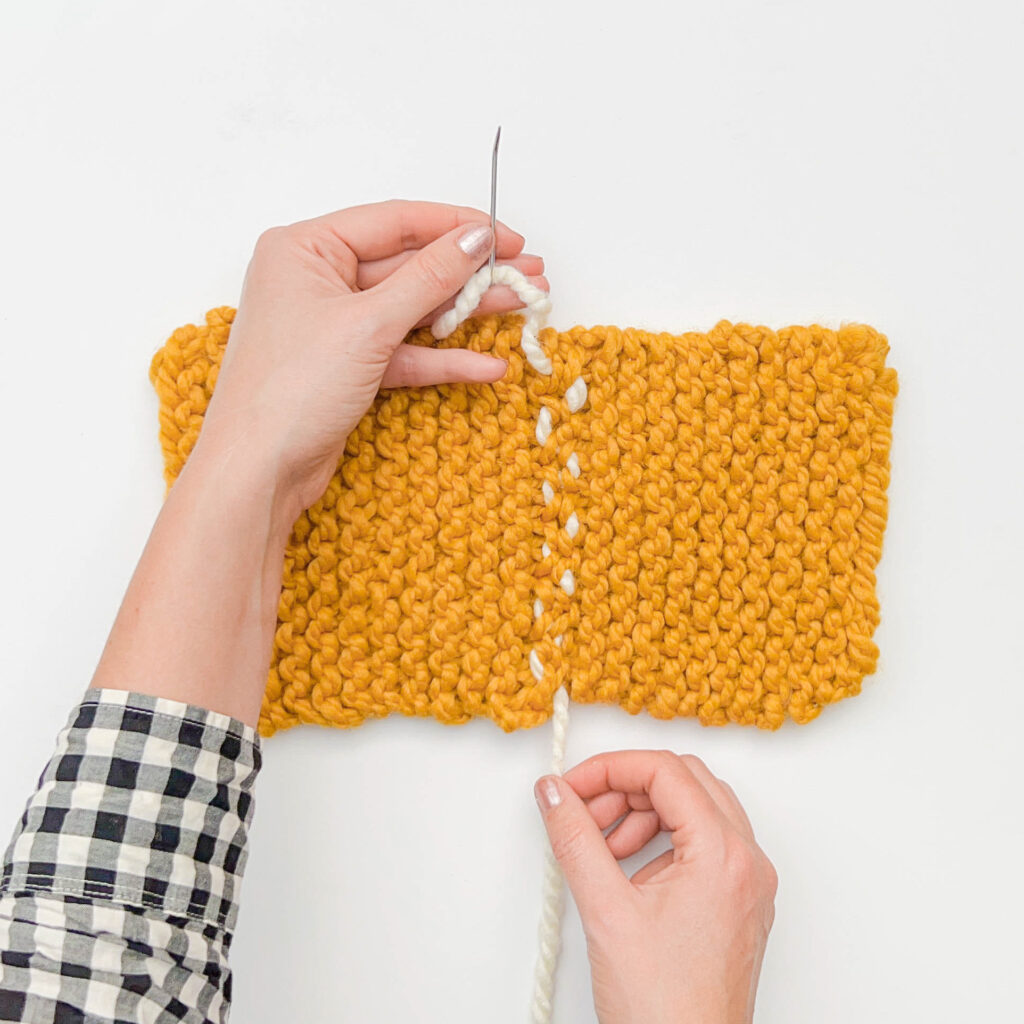
This tutorial demonstrates seaming garter stitch together, end-to-end (aka: the cast on and bind off sides). The same method is used to seam the sides of two garter stitch pieces together too!
As you work, make sure to periodically check to make sure your fabrics are linining up! If you find that one side is becoming shorter than the other, try skipping one purl bump on the longer side in your next stitch. This only works a few times in a seam before it starts to get wavy and bulky.
Taking the time to carefully line up each piece is key to an invisible seam!
Once you’ve finished using the mattress stitch knitting to seam your piece, it’s time to weave in your ends! For a helpful guide, check out our “How to Weave Ends in Knitting” tutorial. Make sure to weave your ends in on the back or inside of your piece.


