How to Weave Ends in Knitting
Finish your knit so that it doesn't unravel!
Finish your knit so that it doesn't unravel!
Weaving in your yarn ends, also known as yarn tails, is the last step in every knitting project. Once you’ve learned how to weave in ends in knitting, you’ll have all the skills you need to finish a knitting project all the way through!
Before beginning, it’s important to note that the number one rule for weaving in ends in knitting stays the same no matter what your project is: You want to aim for an invisible, sturdy finish.
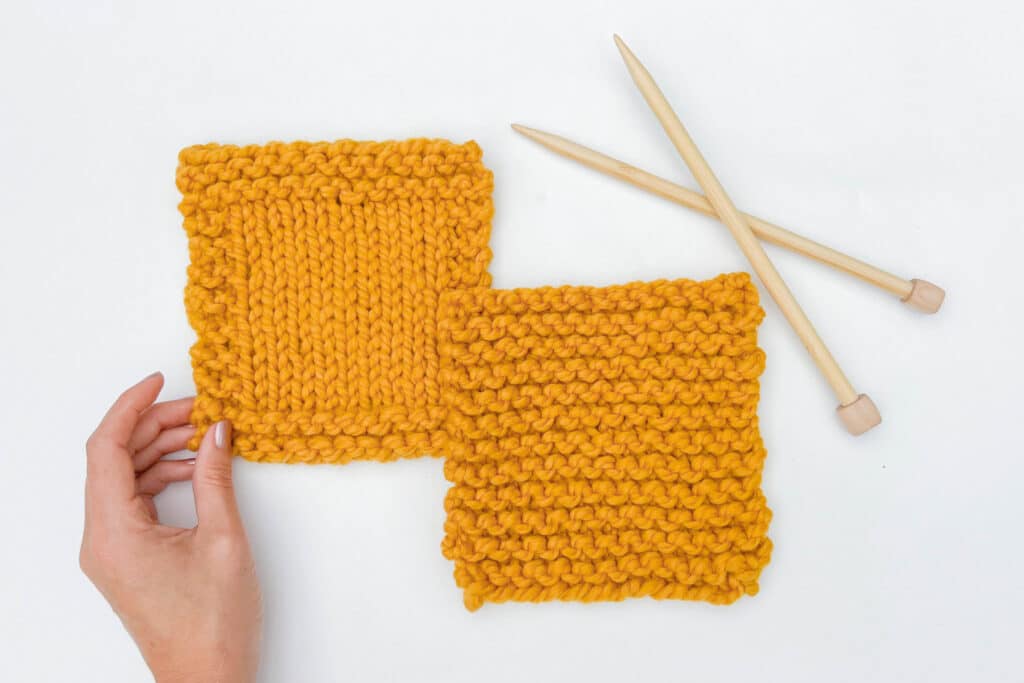
In this tutorial, we’ll go over how to weave in ends on two basic fabrics: garter stitch and stockinette stitch.
It can be tempting to skip this step and just leave your yarn tails hanging loose (we’ve all done it!), especially when you’re working on a project with multiple yarn tails. We’ve heard a few stories of knitters opting to trim their yarn close to the fabric. It’s quick, it’s easy, but it is NOT a good idea. Eventually, your fabric may start to unravel, or the loose yarn tails could pull on the fabric, leaving a hole in your beloved knit.
After working so hard for so long on a project, give it the extra loving it deserves — weave in those tails for a sturdy finish to keep your knits looking great year after year.
Before we kick things off, you should know that there’s no “one right way” to weave in ends in knitting. There are many ways to do it: vertically, diagonally, or even by splitting the yarn strand to weave in each yarn ply separately. Most patterns leave it up to you.
Each technique is worth knowing so you can choose the best method for your project. As long as you’re aiming for that sturdy, invisible finish, you’re on the right track.
The technique we show you today is the technique we find the most effective for Garter and Stockinette projects.
In general, weaving in ends is easy to learn! After you’ve gotten the hang of it, you’ll find that it’s quick and satisfying. It can just get a little tedious.
Some projects may have many ends to weave in, which honestly, can be a pain. Our advice, in that case, is to weave them in as you go. Or, if possible, use the spliced yarn method or a “magic knot” to join yarn ends together rather than leaving a yarn tail to weave in later.
There are no hard and fast rules for how to weave in ends, every stitch pattern and yarn is different! However, there are some basic things to keep in mind when you’re about to grab your yarn needle.
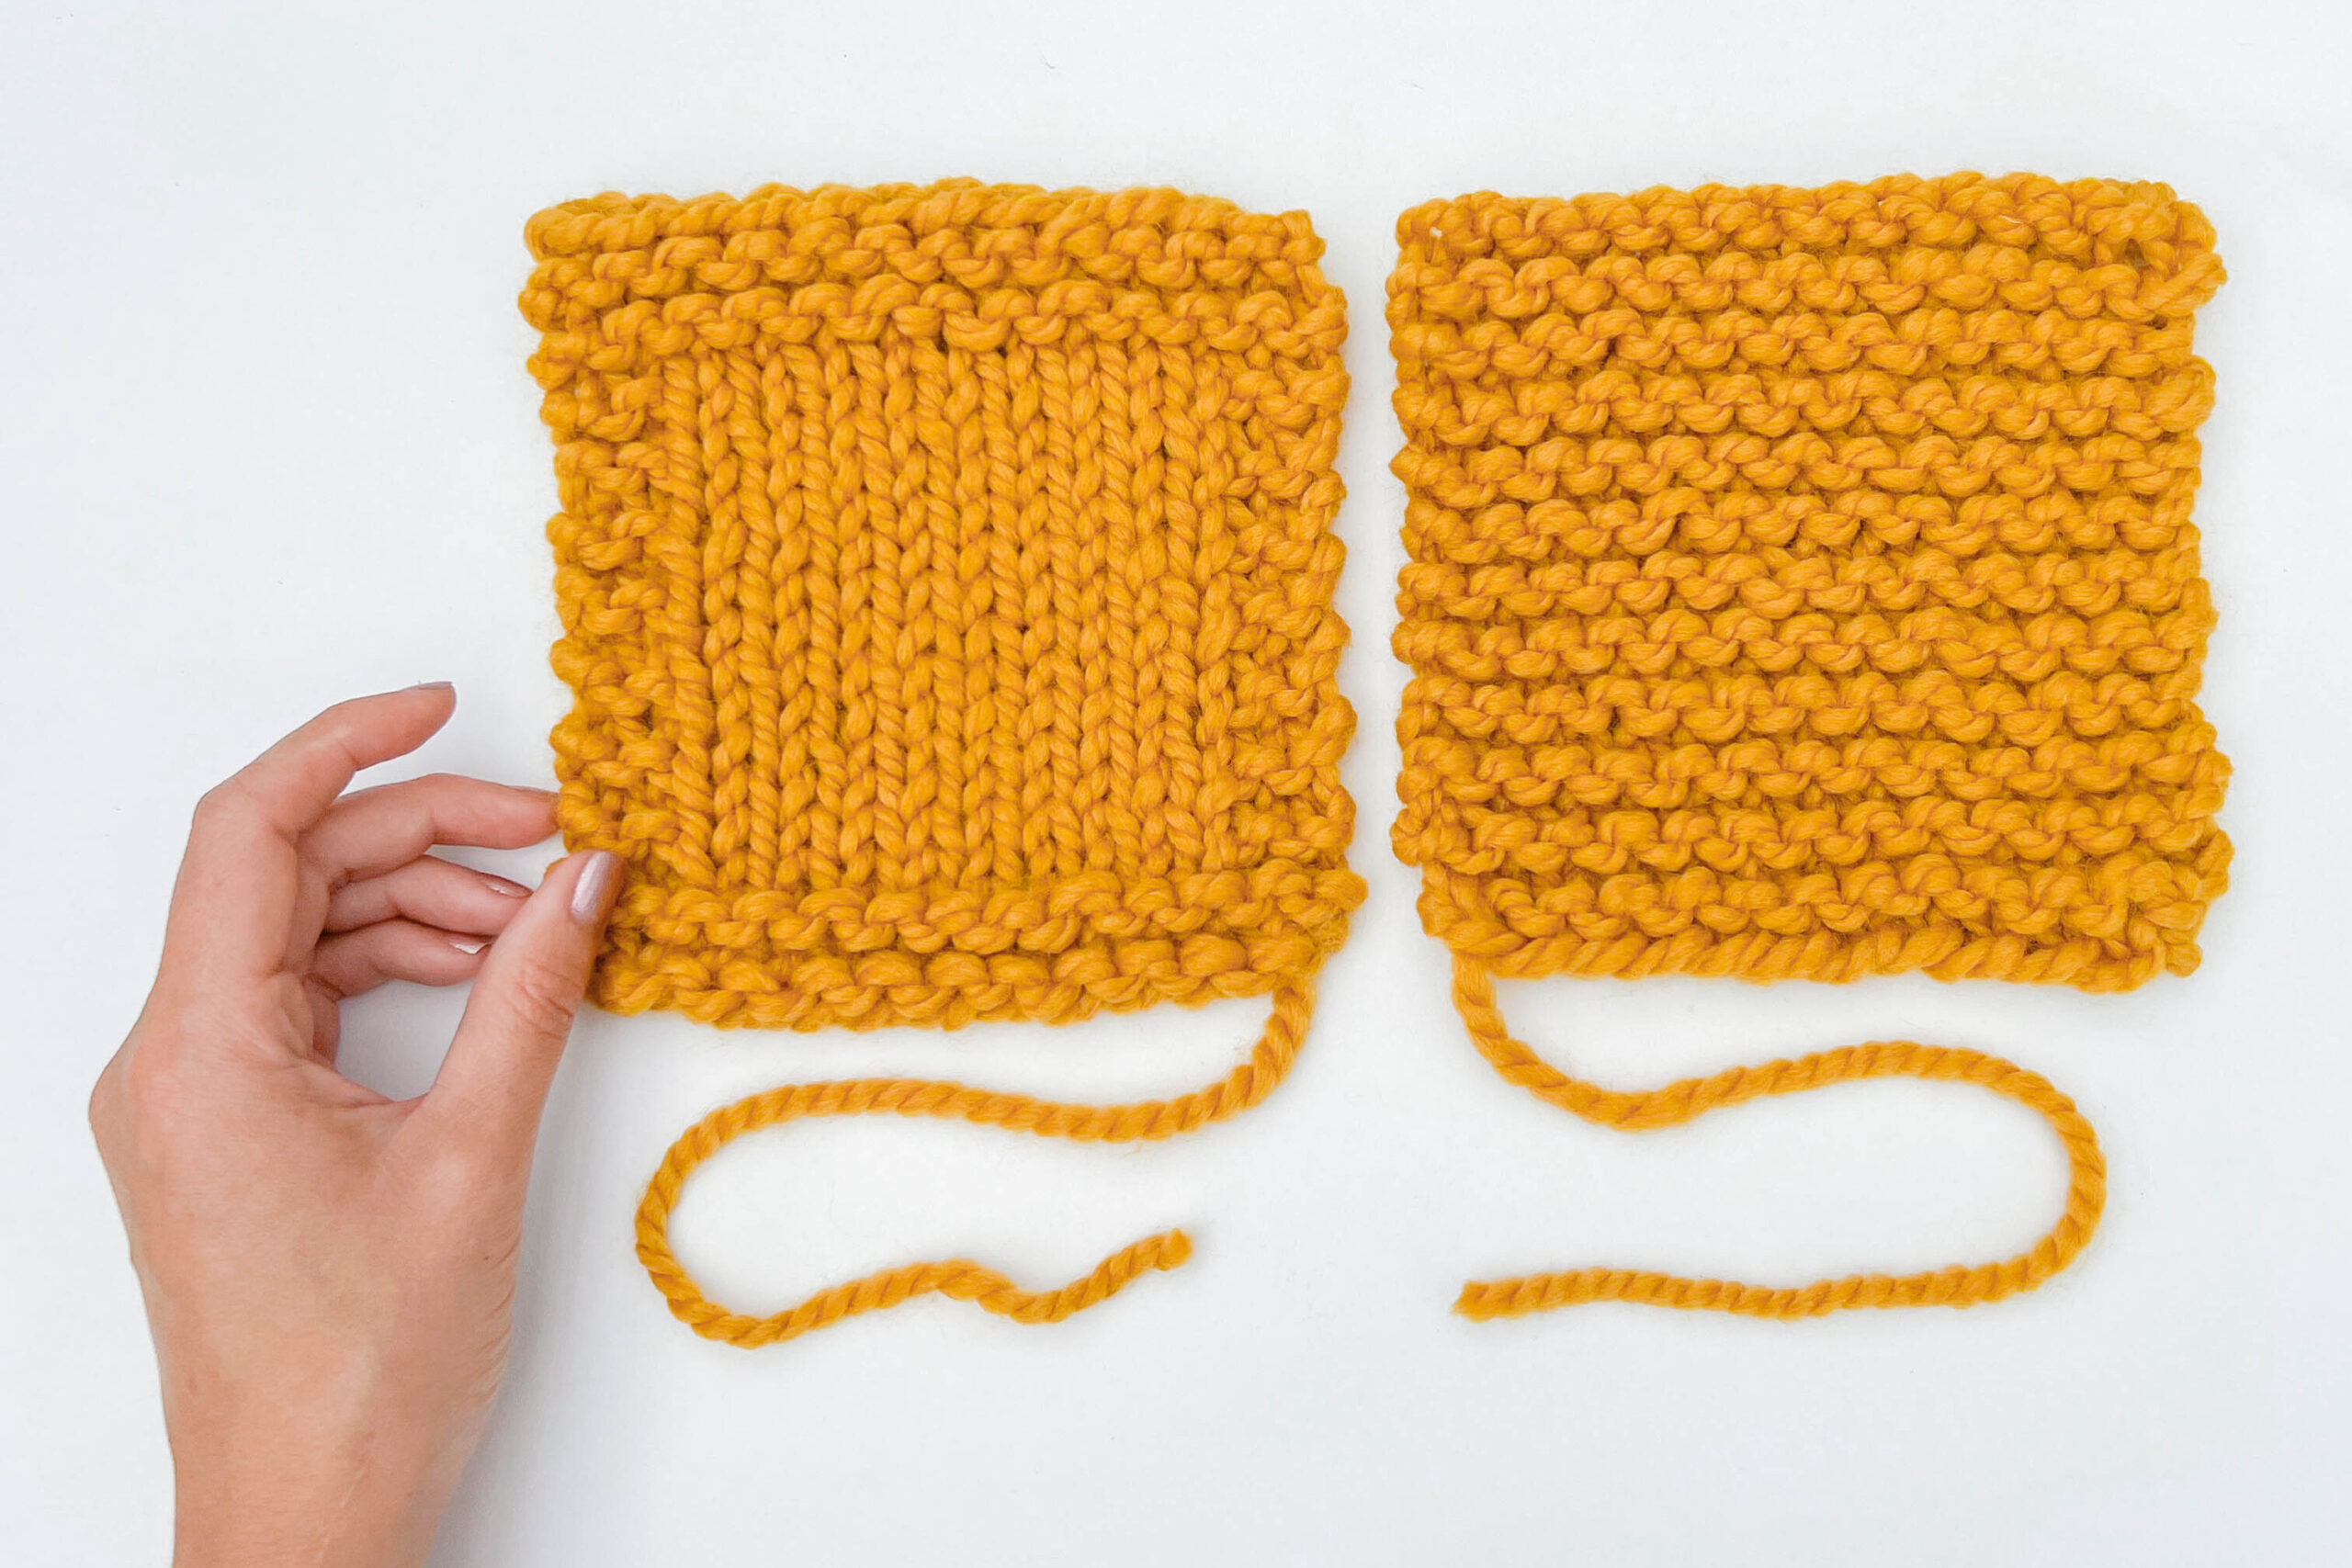
At a minimum, you’ll have two yarn tails in every project: one at the beginning and one at the end. For every project, you should aim to leave about 5-6 inches of yarn to weave in. You can make it work with less; however, it will be fiddly work. Likewise, a longer strand might tangle as you thread it through.
Note: both tutorials show how to weave in ends as a right-handed knitter. For lefties, you can change the direction you’re weaving your yarn in to make it more comfortable.
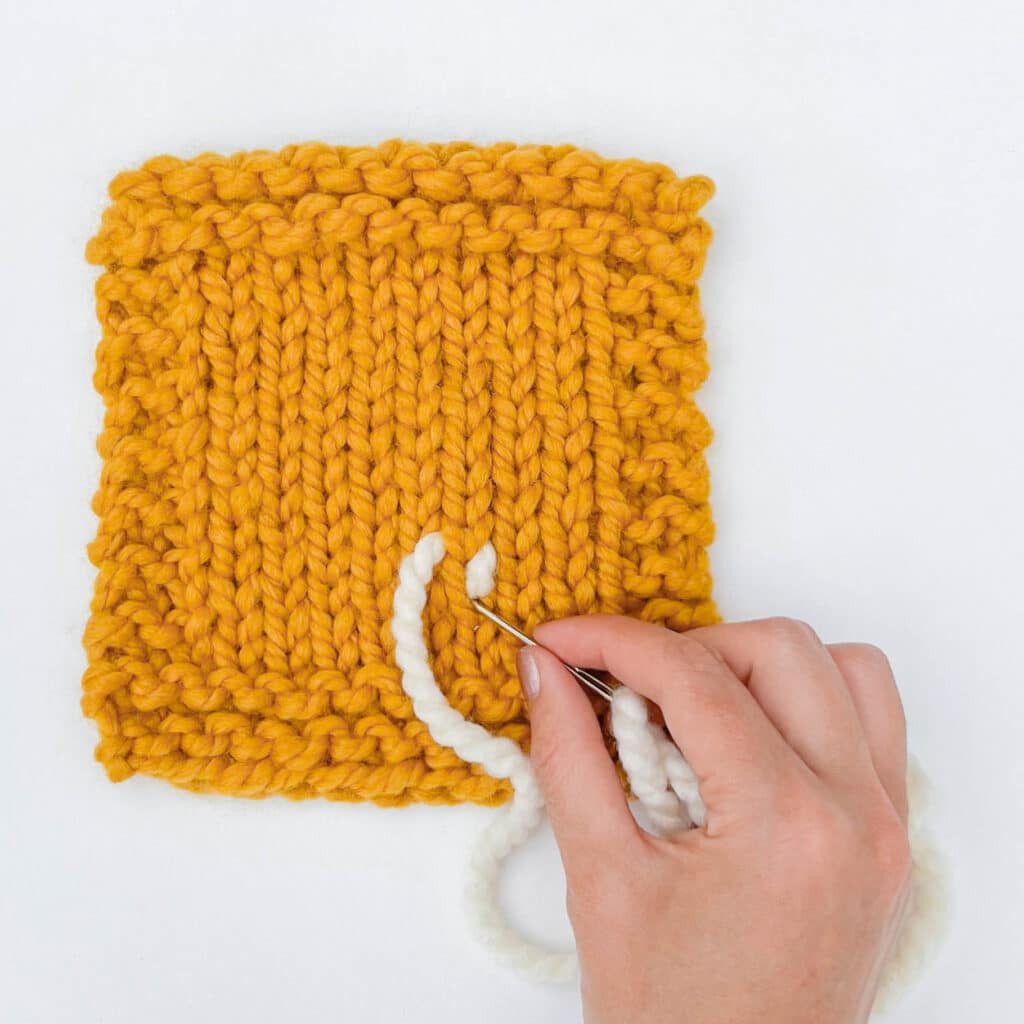
This section describes how to weave in loose ends in knitting for stockinette stitch or on the knit side of a fabric.
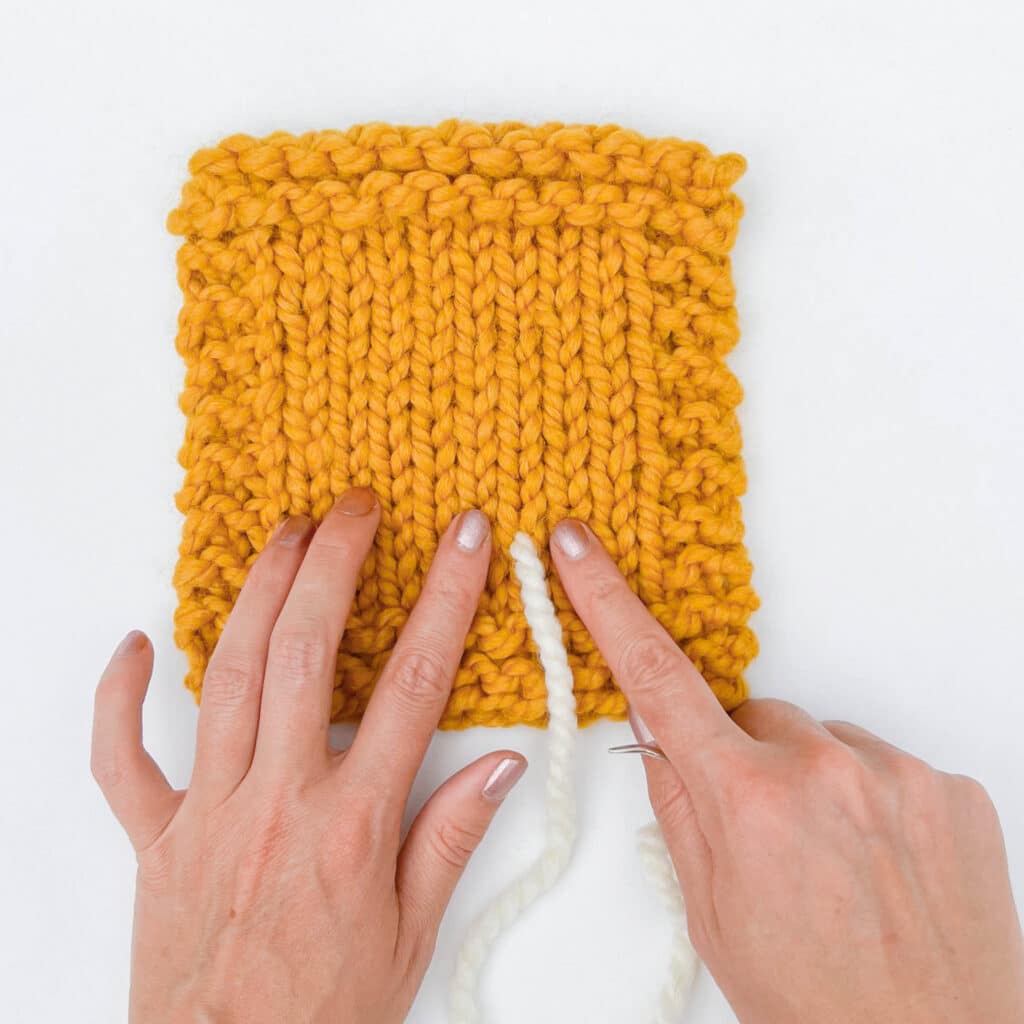
STEP 1
Look at your work and find the nearest complete V-shaped stitch to the edge of your project. (Note: we chose this spot in the photo for demonstration)
Insert your yarn needle from back to front through the base of that first “V”.
Make sure to find an opening in your fabric, don’t pierce the yarn.
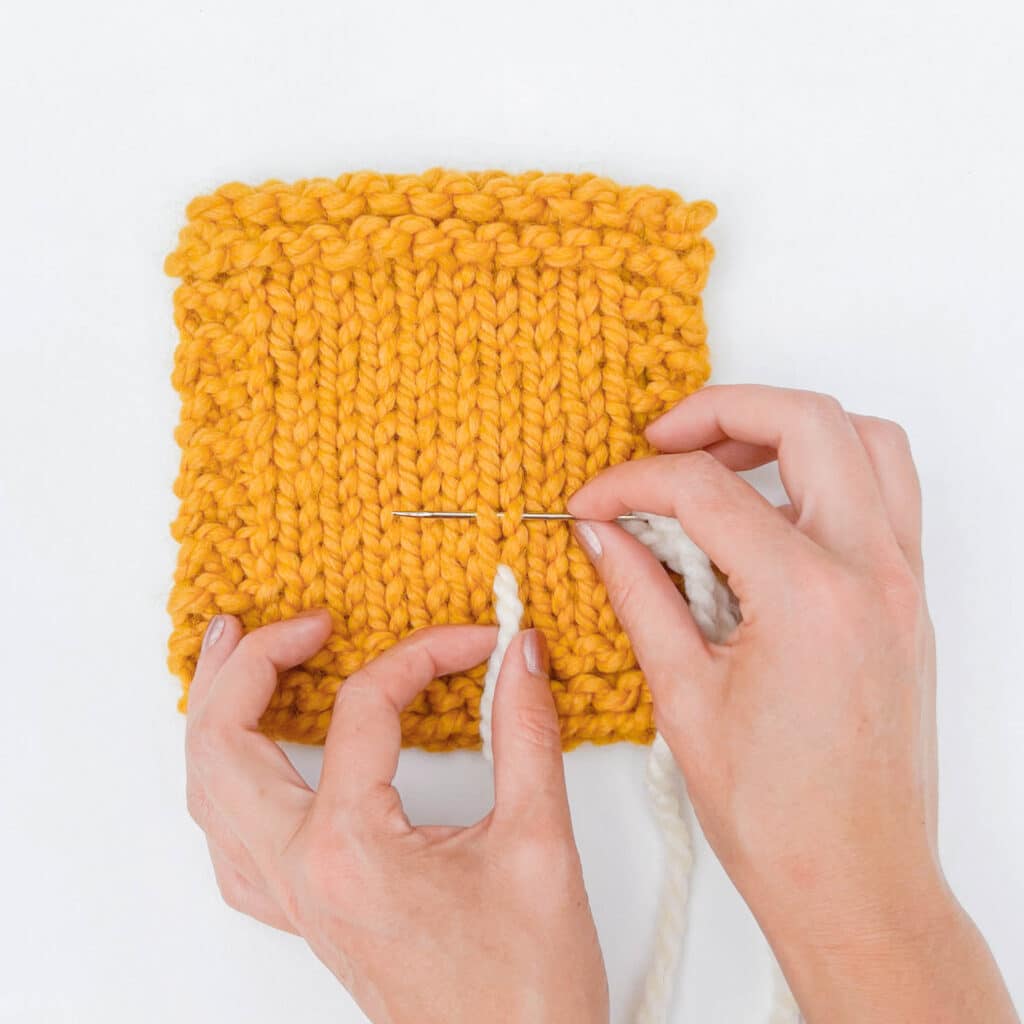
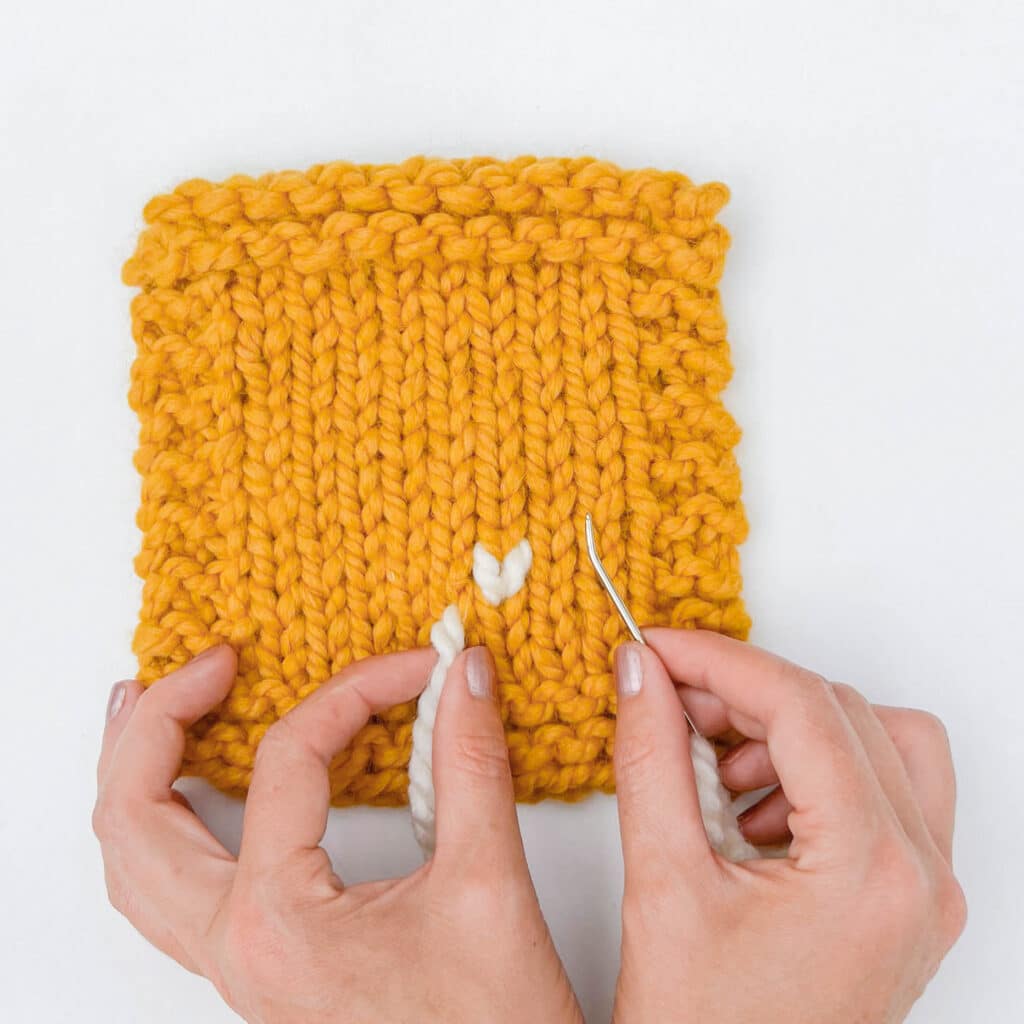
STEP 2
Find the “V” stitch directly above the one you came through with your yarn needle.
Insert your needle through both loops of that stitch.
Pull the yarn tail through until the stitch sits flush against the fabric but not so tight that it puckers.
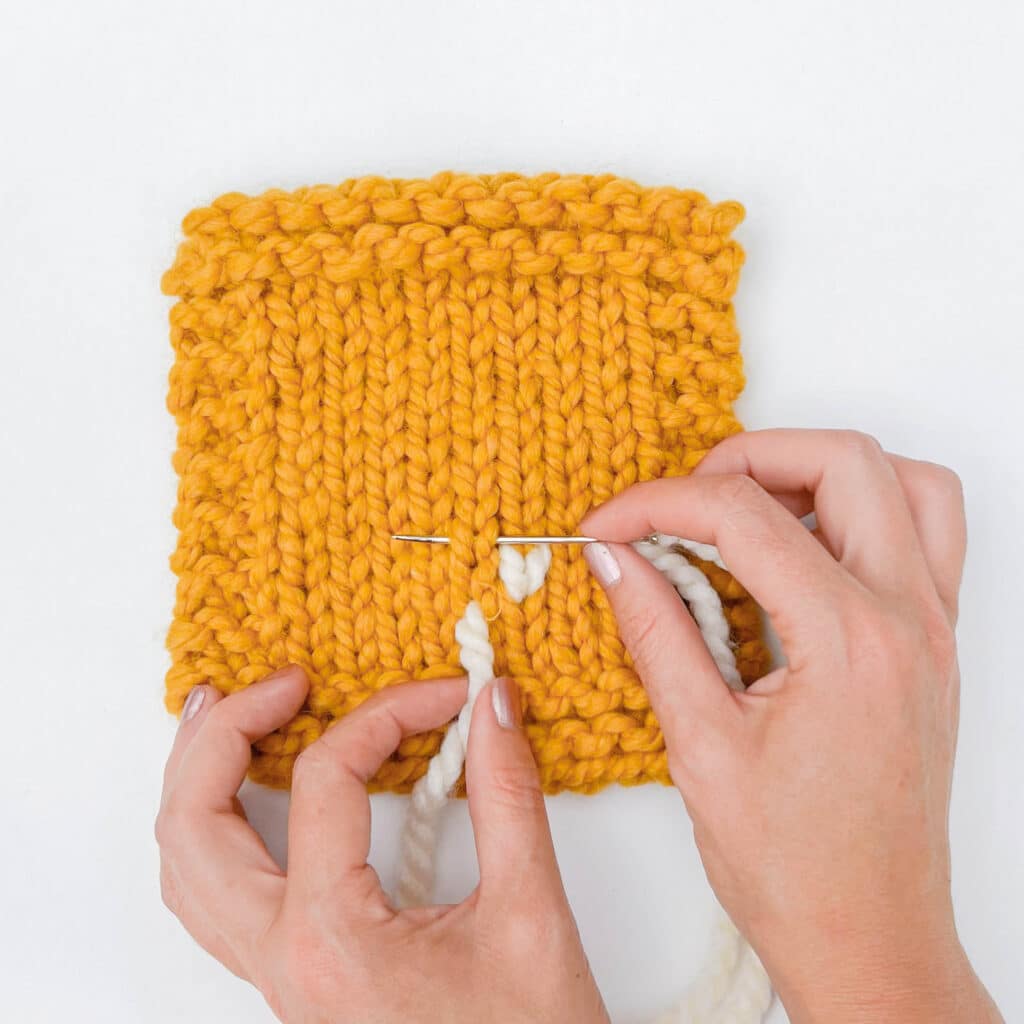
STEP 3
Insert your yarn needle through the same spot you started in Step 1, this time going from the front to the back.
Pull the yarn through. Again, make sure that it sits flush against the fabric — not too loose and not too tight.
You will end up with a stitch that traces the shape of the original knit stitch on your fabric!
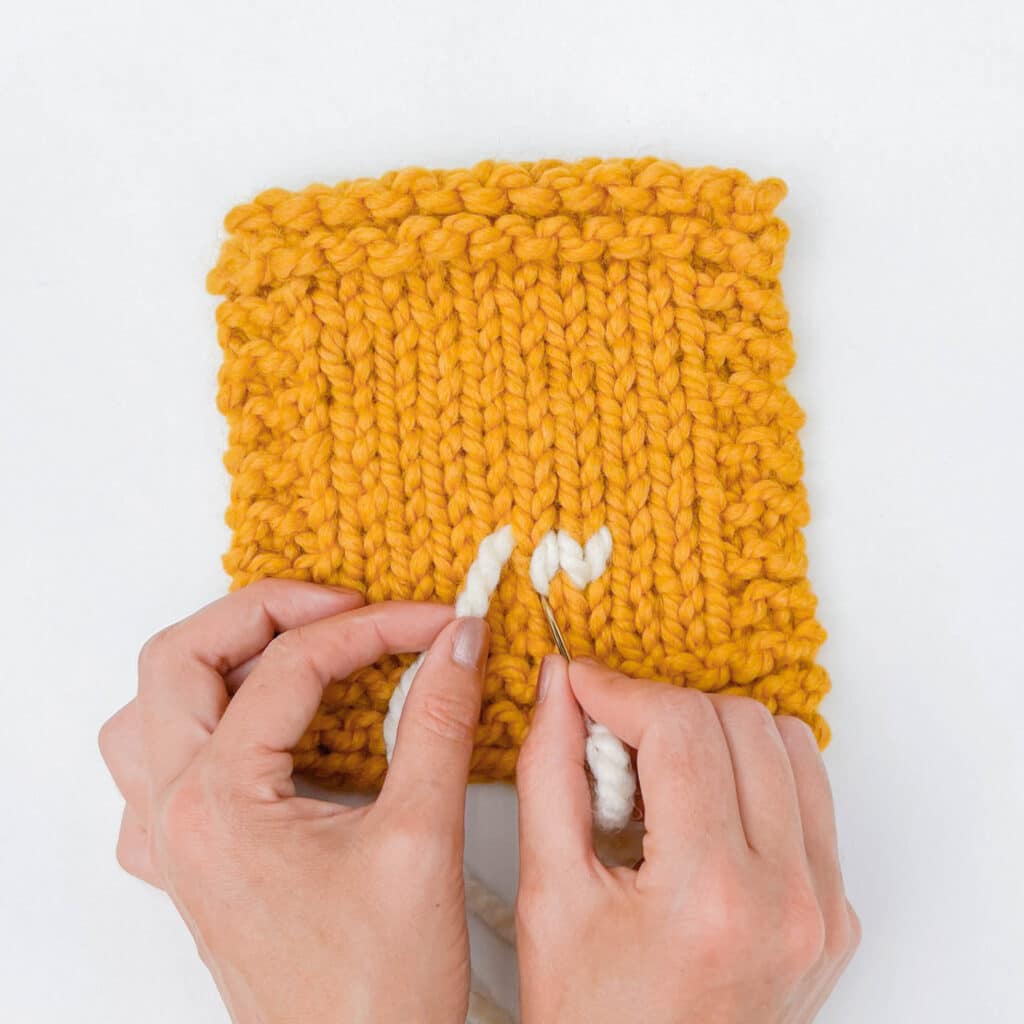
STEP 4
Find the next knit stitch over. That would be the next V-shape, either to the left or right of where you first started weaving your ends in.
Insert your yarn needle from back to front through the fabric at the base of that second “v” stitch.
Pull the yarn strand through all the way, again checking to make sure there isn’t any extra yarn left loose at the back of your fabric.
STEP 5
Just like in Step 2, insert your yarn needle through both legs or loops of the knit stitch directly above the one you came through with the yarn needle.
STEP 6
Insert your yarn needle through the same spot your needle came through the fabric in Step 4.
Draw the yarn through so that the strand sits flush against the fabric.

REPEAT
Repeat steps 4 – 6 for at least five stitches or until your yarn tail has been fully woven in. Snip the remaining yarn flush with the fabric.
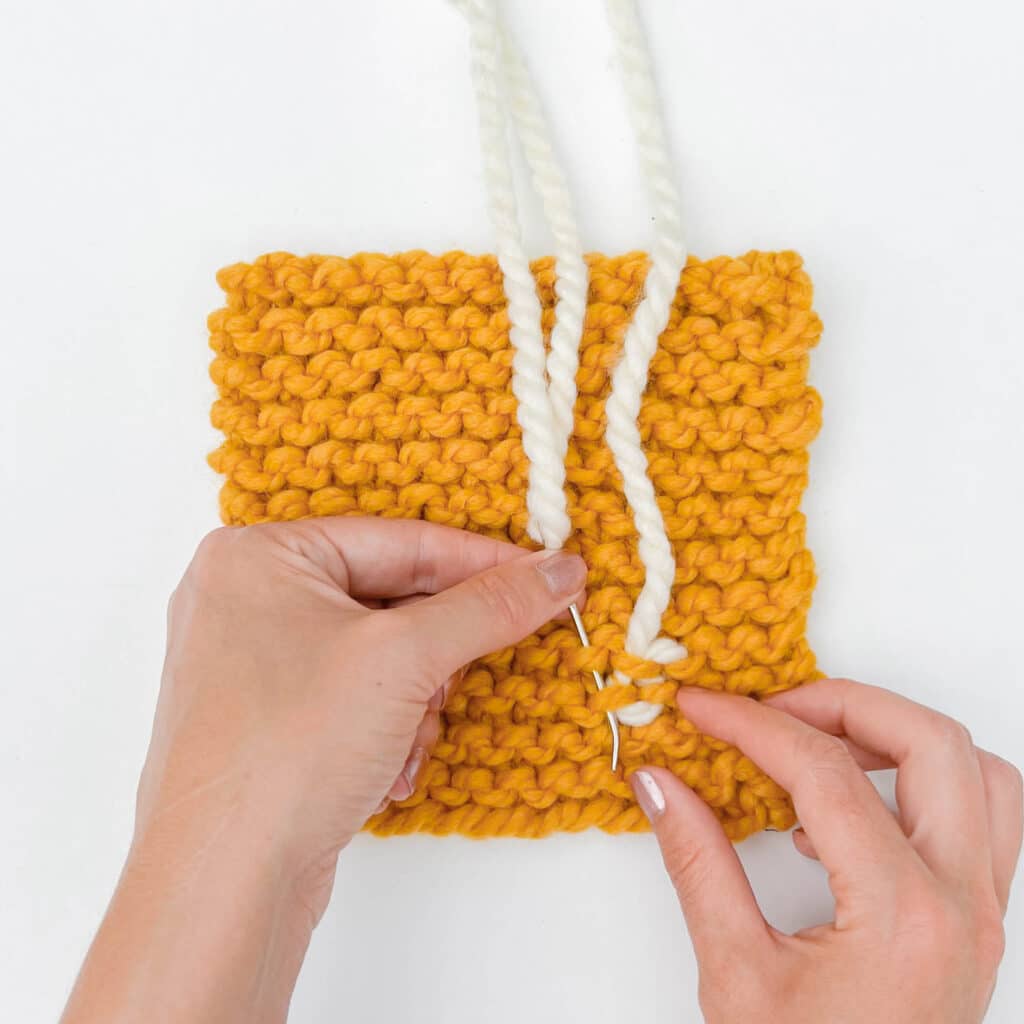
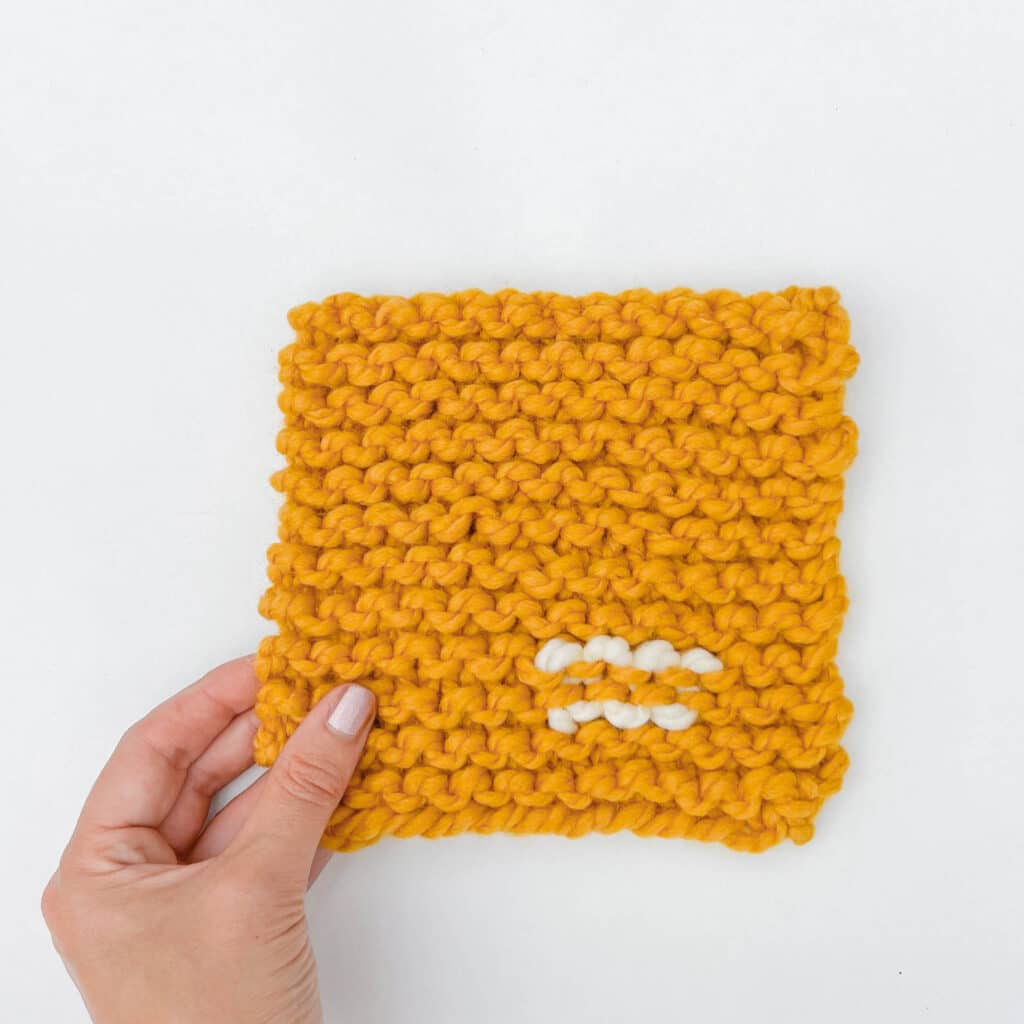
This section describes how to weave in loose ends in knitting for garter stitch or on the purl side of a fabric.
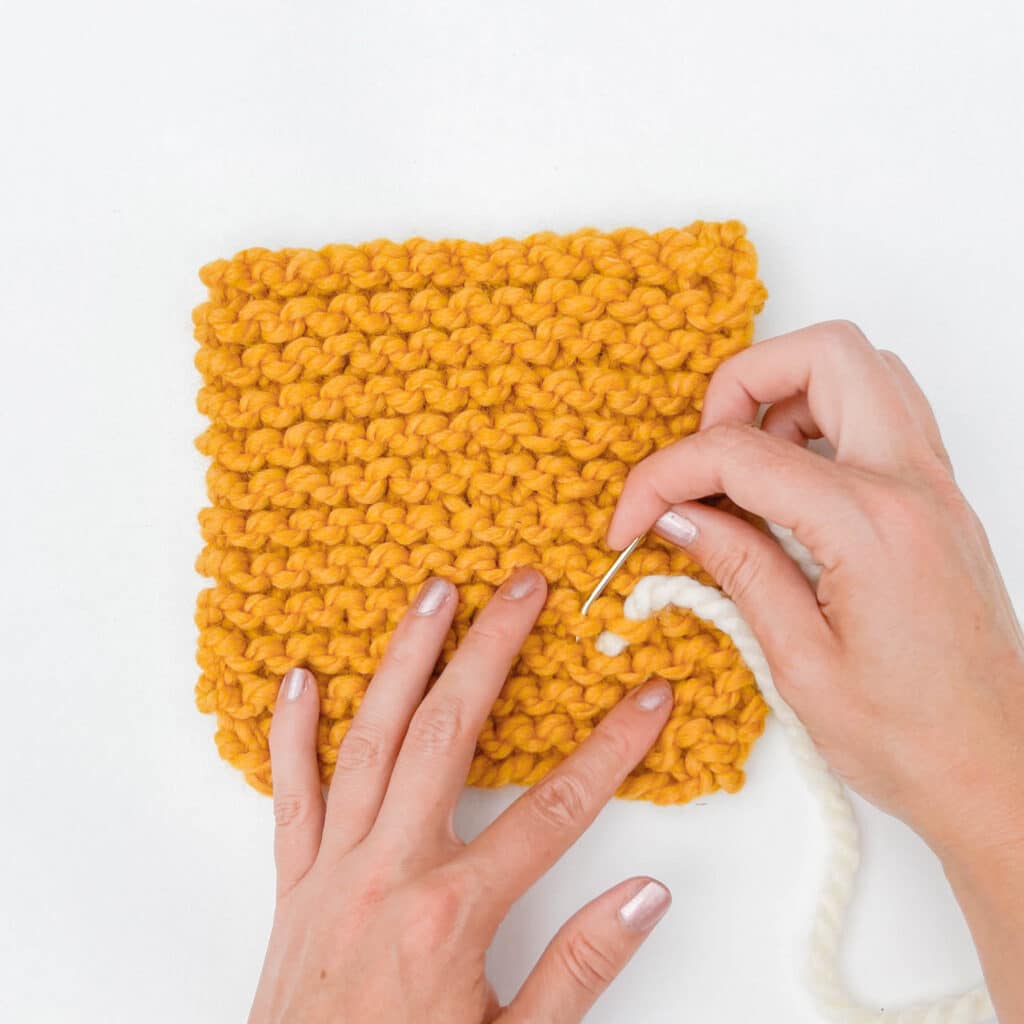
STEP 1
Insert your needle through an opening in the fabric, from back to front.
Try to choose a spot on your project nearest to the corner with the yarn tail.
Run your yarn needle under the nearest U-shaped purl bump above where your yarn comes through the fabric, drawing the strand all the way through.
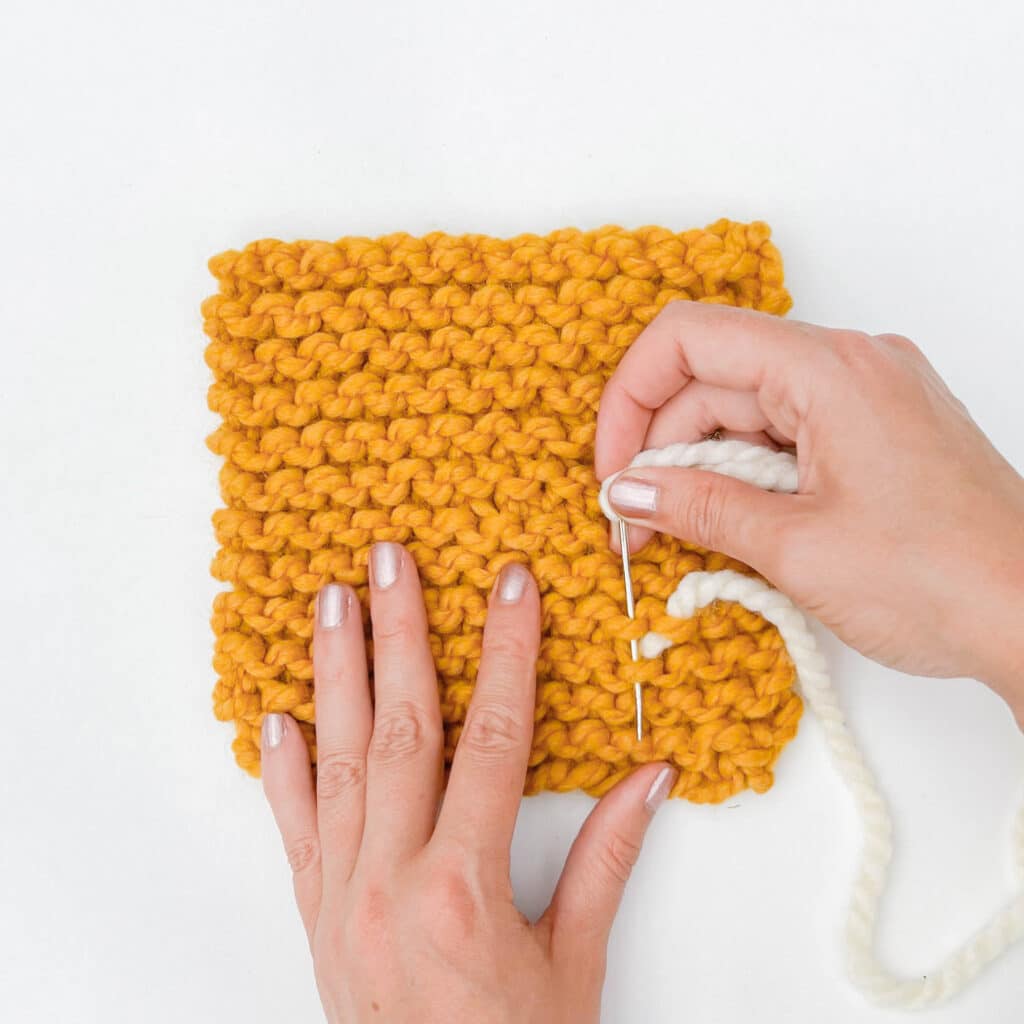
STEP 2
Find the next U-shaped purl bump to either the left or right. Insert your needle down through the “u” bump and the one directly below it in the next row down. The second “u” should be right next to where your yarn came through the fabric in Step 1.
Pull the strand all the way through, making sure to pull just tight enough so that the new “stitch” you made with the yarn tails sits flush against the fabric.
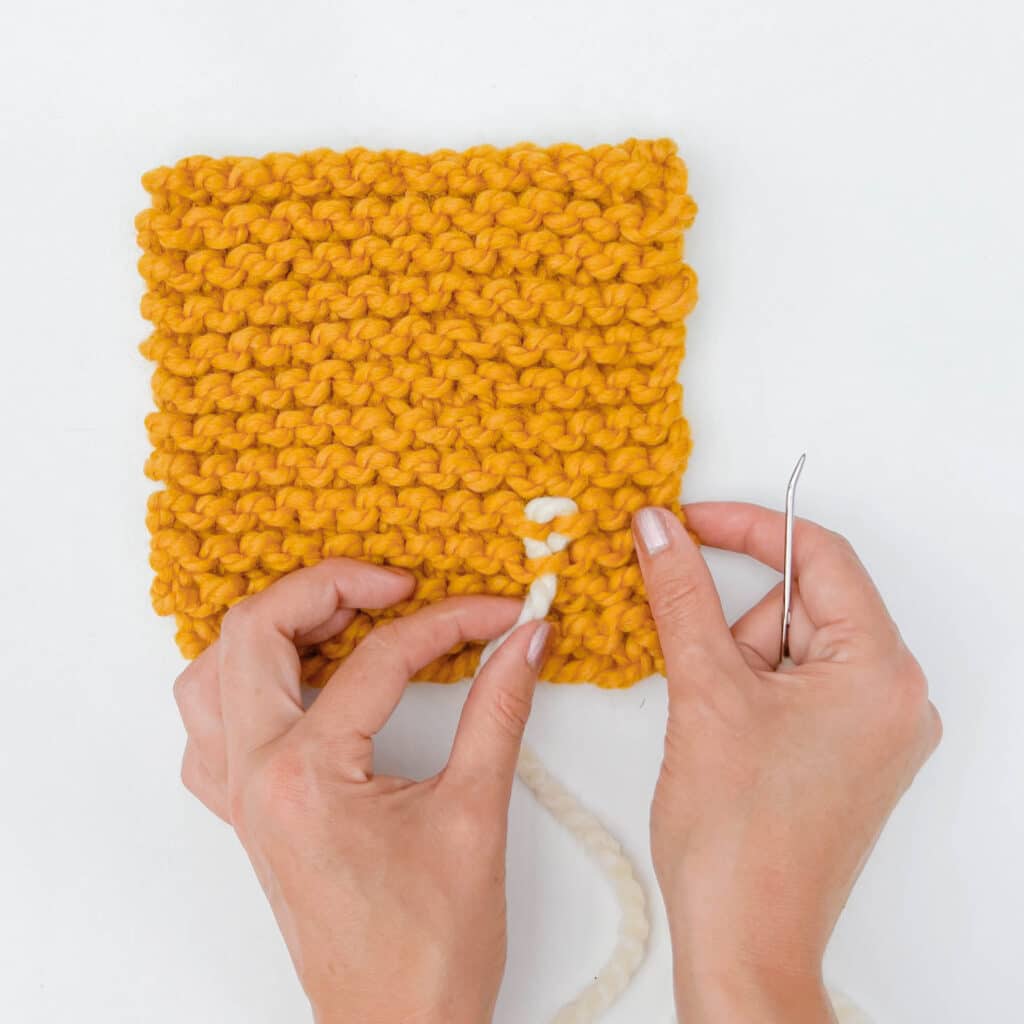
STEP 3
Run your needle under the next “u” purl bump over and the “u” bump directly above it (the same one you went through in Step 2.
Pull the strand all the way through, but don’t pull too tight or the fabric will pucker.
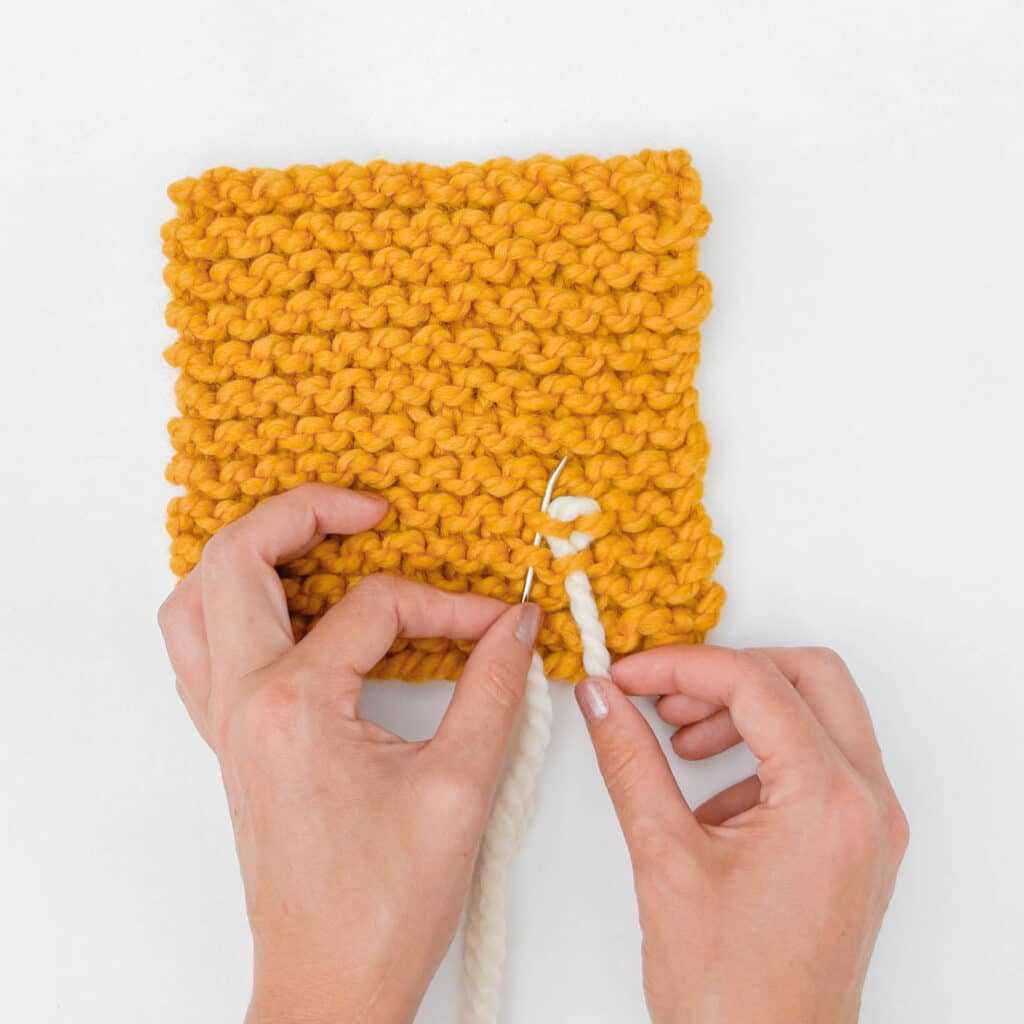
STEP 4
Once again, turn the needle, so it points downward. Thread it through the next purl “u” bump and the one directly below it (the same as in Step 3).
Pull the strand all the way through.
REPEAT
Repeat steps 3 & 4 for at least five stitches or until your yarn tail has been fully woven in. Snip the remaining yarn flush with the fabric.
Need to brush up on your needle threading skills? We’ve got the perfect tutorial for you! h
This same technique we show for weaving in ends on Stockinette Stitch fabric is also called duplicate stitch! Knitters also use duplicate stitch to add colors, designs, and motifs to stockinette stitch projects. It’s often easier to go in and duplicate stitch a small area with a contrast color than it is to knit with a small section with that color yarn. Want to see some great examples? Hop over to Ravelry to see 800+ free duplicate stitch patterns!


