P2tog & SSP Knitting Decreases
Learn how to decrease stitches on a purl row!
Learn how to decrease stitches on a purl row!
P2tog and SSP are the easiest and most common way to decrease stitches in a purl row. Each time you work one of these decreases a single stitch is decreased and the new stitch slants either to the left or right depending upon whether it’s a P2tog or SSP.
These decreases are always worked on the wrong side of stockinette fabric, or on a purl row. If you’re looking for decreases designed on the right side of stockinette, or a knit row, check out the K2tog and SSK decrease tutorial! Together, these four decrease stitches can be used in almost every knit project.
P2tog is the shorthand way to write out “purl two stitches together” while SSP stands for “slip, slip, purl”. These decreases are designed to slant left (P2tog) and right (SSP) while removing a single stitch from your row.
Fun fact, P2tog and SSP decreases mirror K2tog and SSK decreases. This means that when you work these decreases on the wrong side of a piece of stockinette fabric, they’ll look like K2tog and SSK decreases on the right side! Knowing how to work all four decreases means that you’ll be able to decrease stitches evenly on both a right and wrong side of stockinette stitch fabric in a way that is smooth and consistent.
P2tog decreases are easy to do! A P2tog is worked almost identically to a regular purl stitch (so fast, so easy!). However, a SSP decrease is slightly more challenging and involves some extra steps to get the stitches positioned correctly. It’s worth watching the video tutorial for the SSP decrease method and reading through all of the steps before diving in.
With a little practice these decreases are easily memorized and will become a go-to decrease method for most projects. If you’re having trouble keeping track of which direction each decrease leans, or need a quick reference guide, we’ve included a quick at-a-glance guide at the end of this tutorial you can screenshot and save or pin!
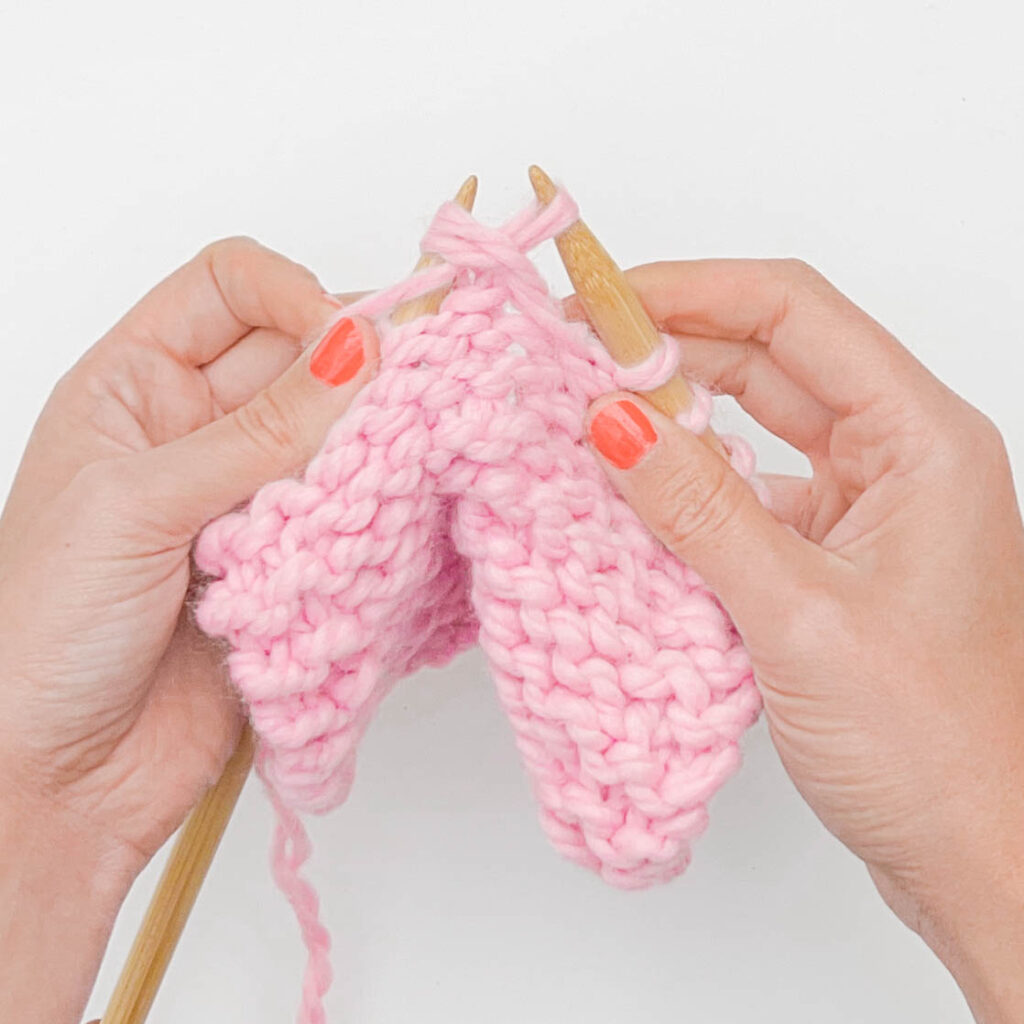
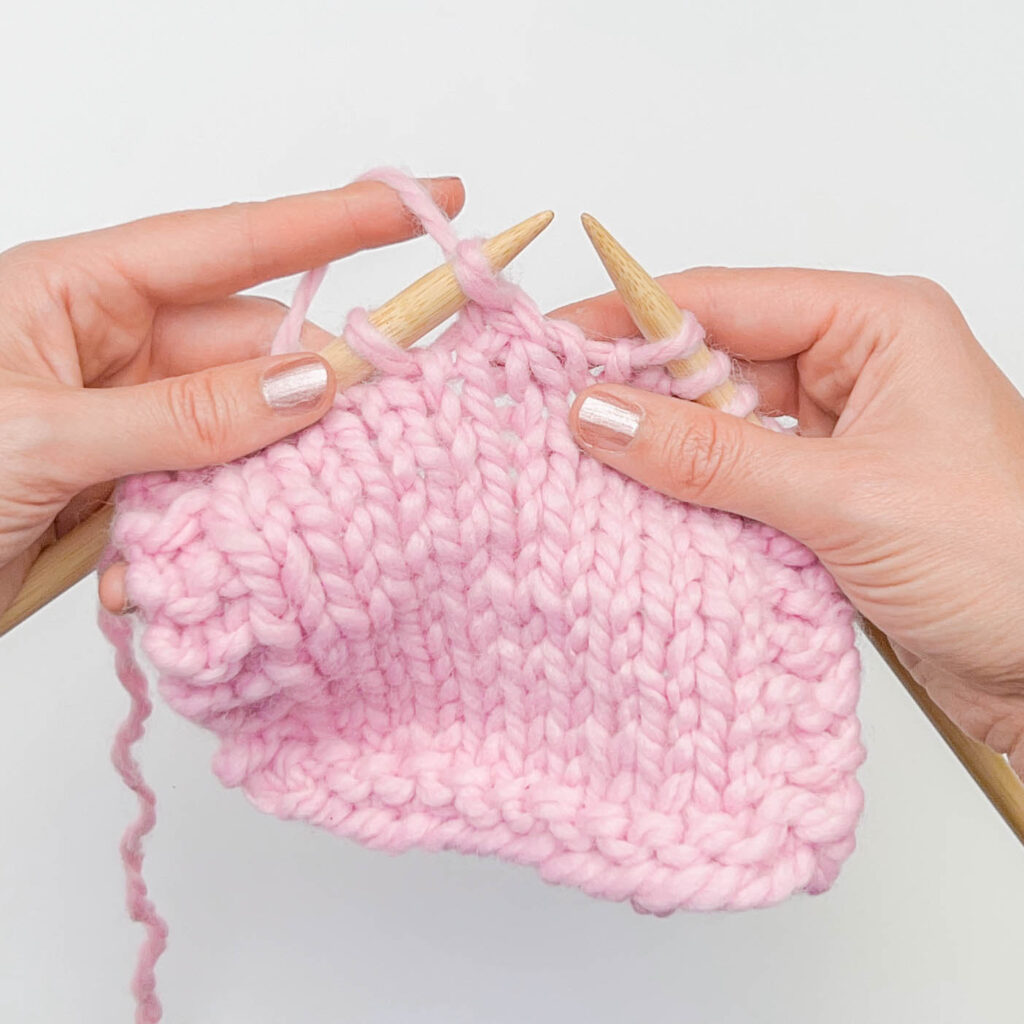
You’ll be making a slip, slip, purl decrease, commonly abbreviated as SSP in knitting patterns! This decrease slants to the right in your fabric. Each time you work a SSP knitting decrease you are removing a single stitch from your row count.
Make sure that your yarn is at the front of your piece before working the decrease.
Note: This tutorial was written for right-handed knitters.
Step 1:
First you’ll be twisting two stitches before working the decrease.
To twist a stitch, insert your right needle into the next stitch on your left needle as if to knit (from left to right through the front loop) with your working yarn at the front of your work.
Drop it off the left needle.
Step 2:
Twist a second stitch the same way you did in steps 1.
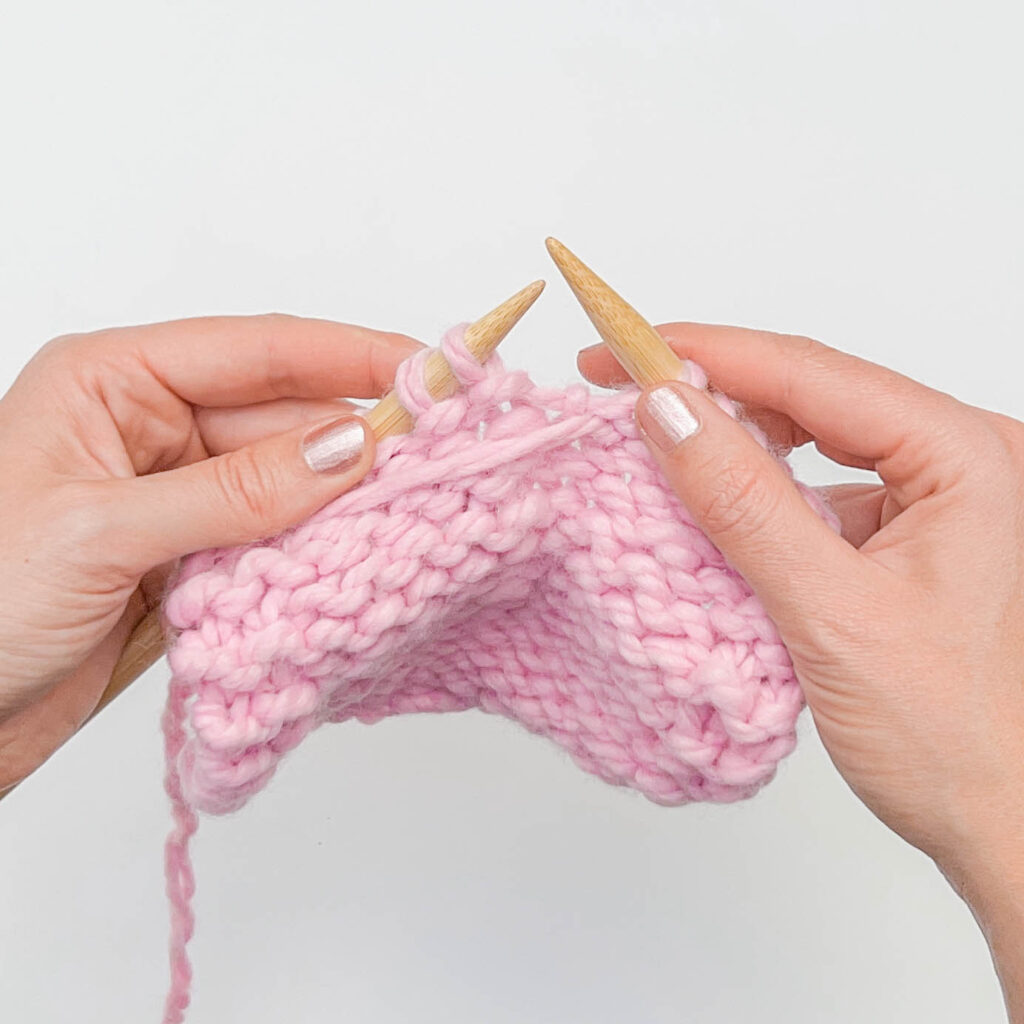
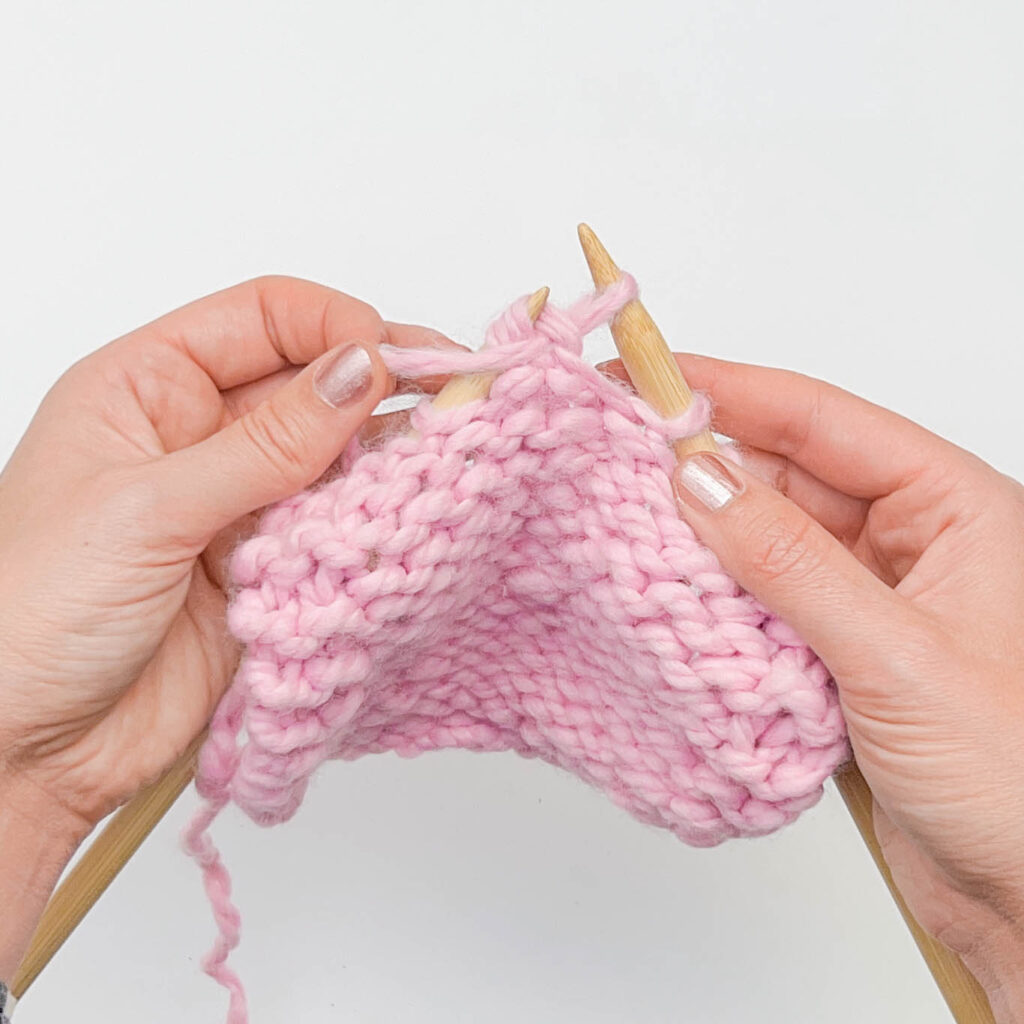
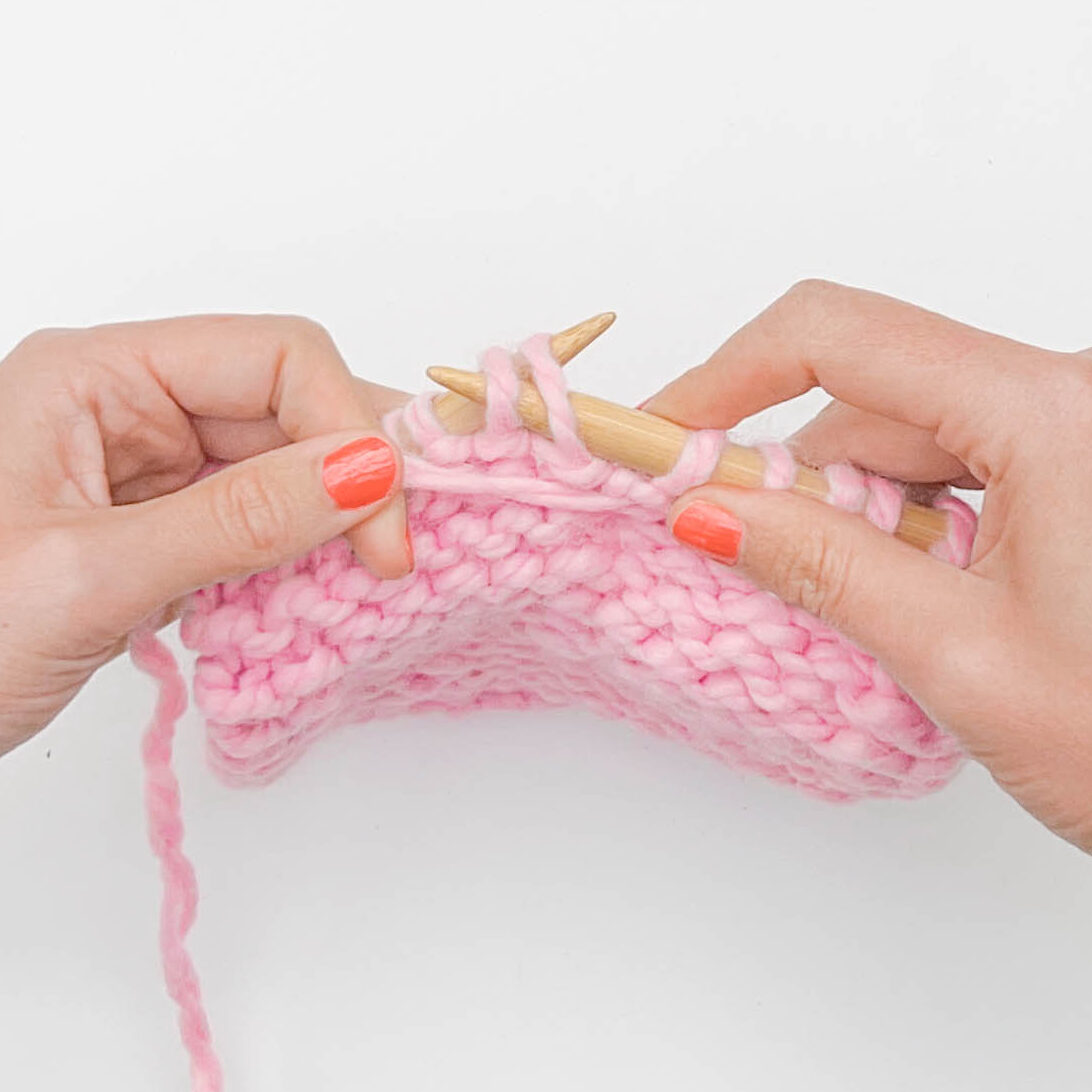
Step 3:
Slide both twisted stitches from the right back to the left needle. Insert your left needle directly through the stitches along the underside of the right needle.
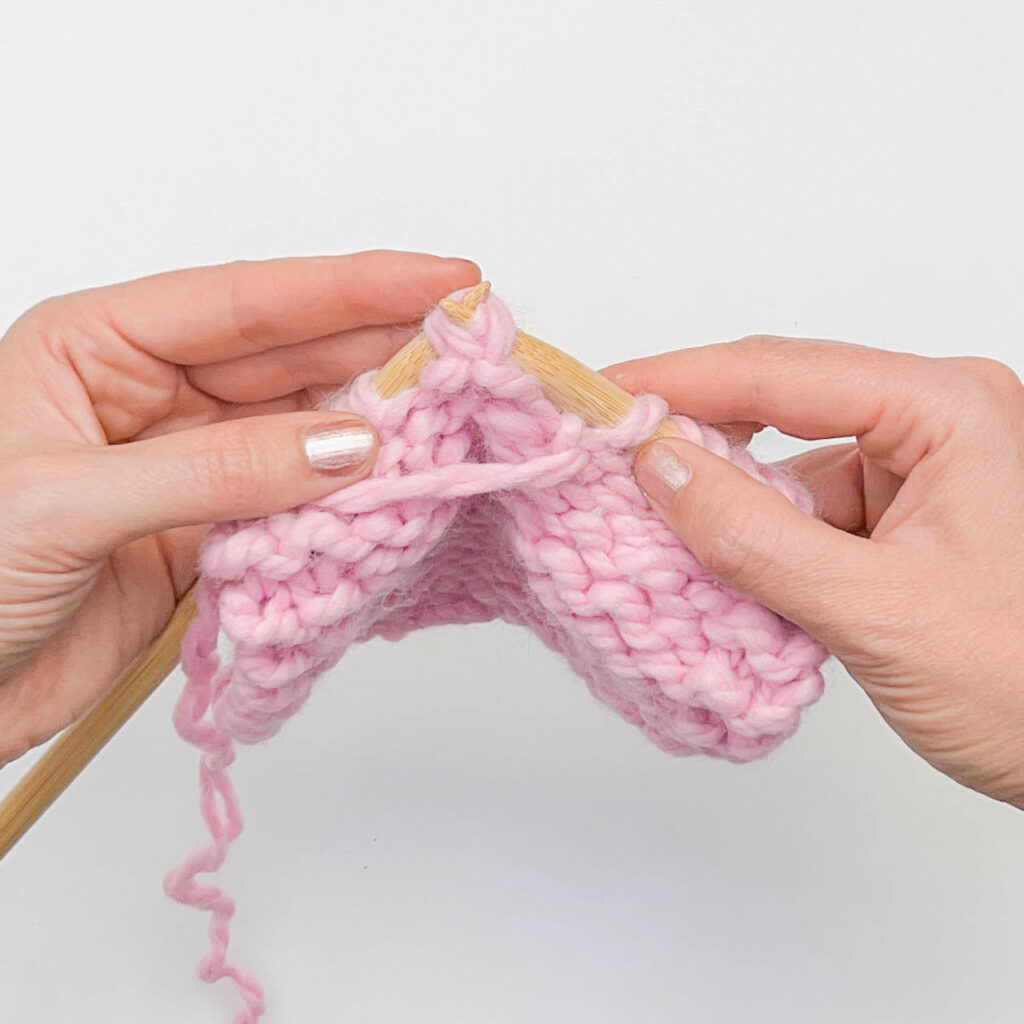
Step 4:
Insert your right needle through the back legs of the twisted stitches on the left needle, moving from left to right.
This step can be a little bit tight and tricky. Take your time and use your pointer fingers to hold stitches in place if needed.
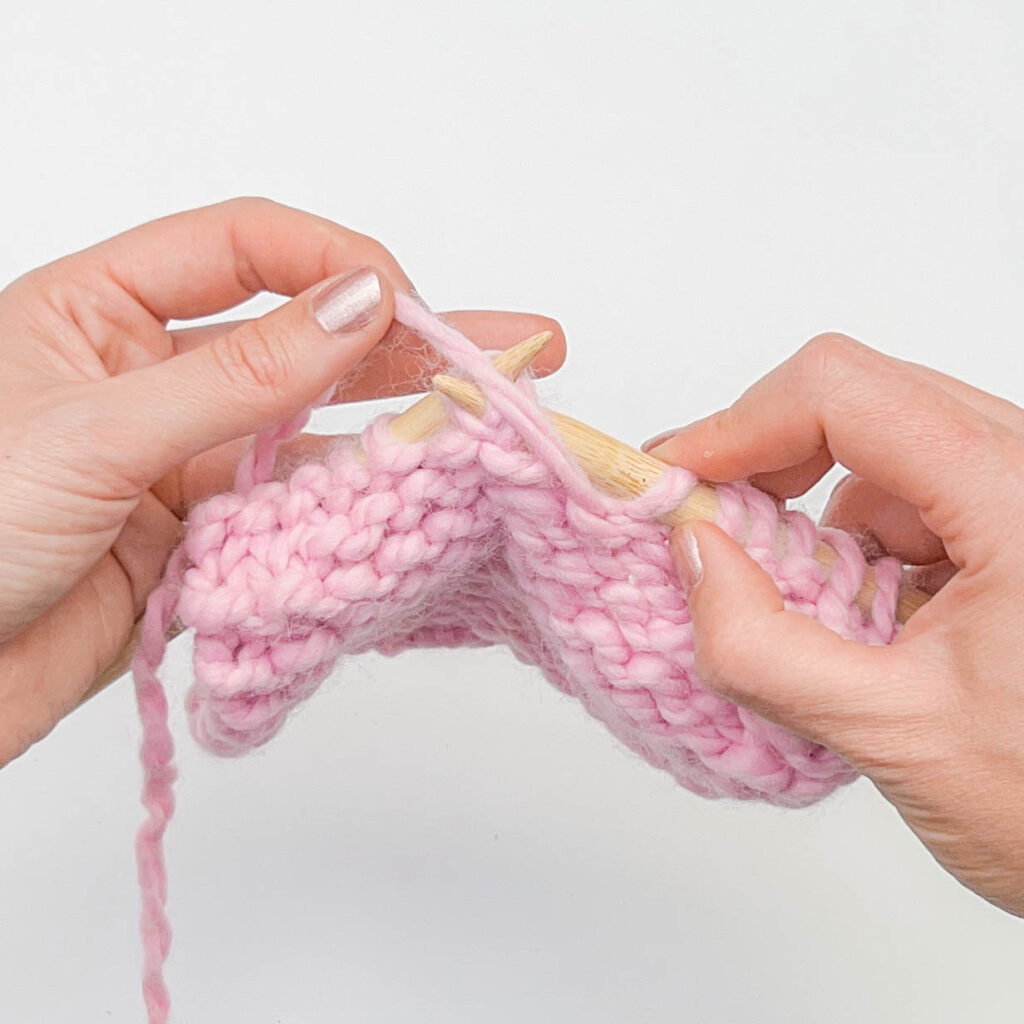
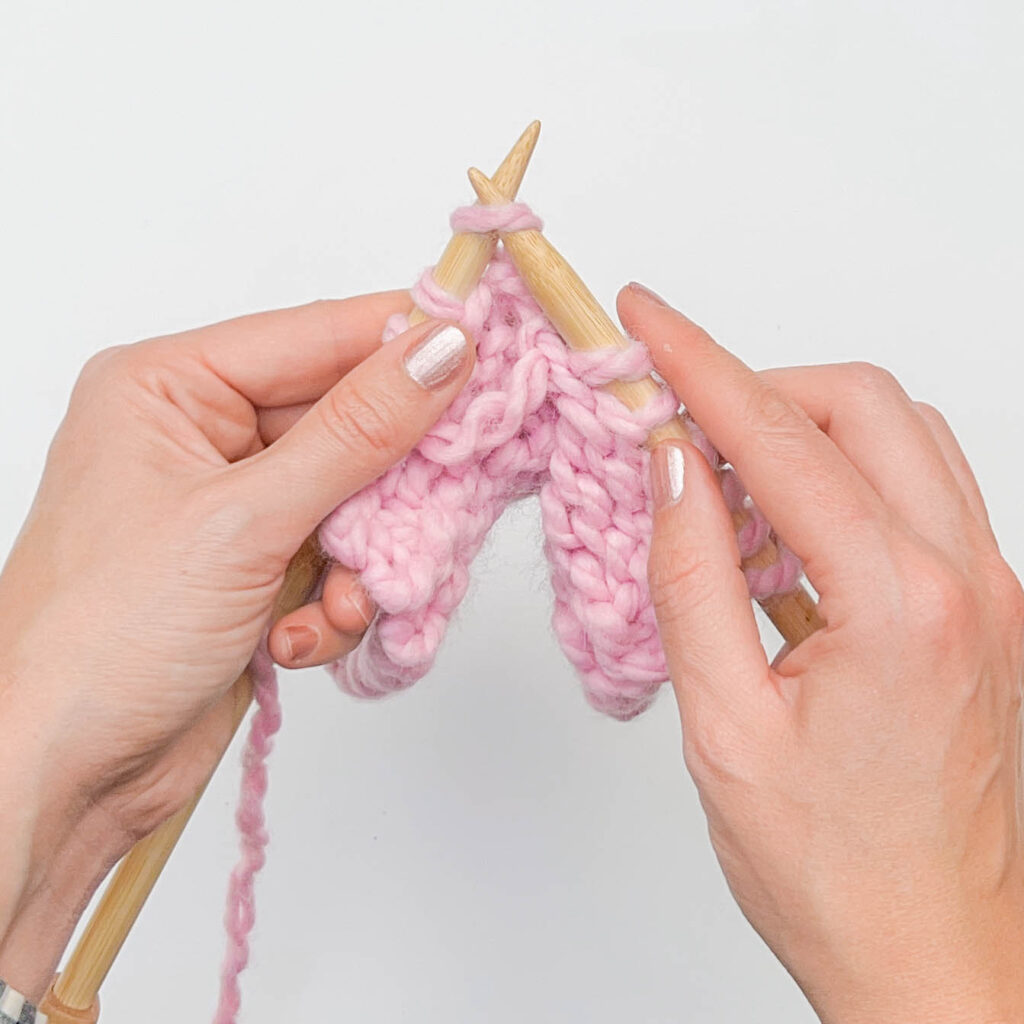
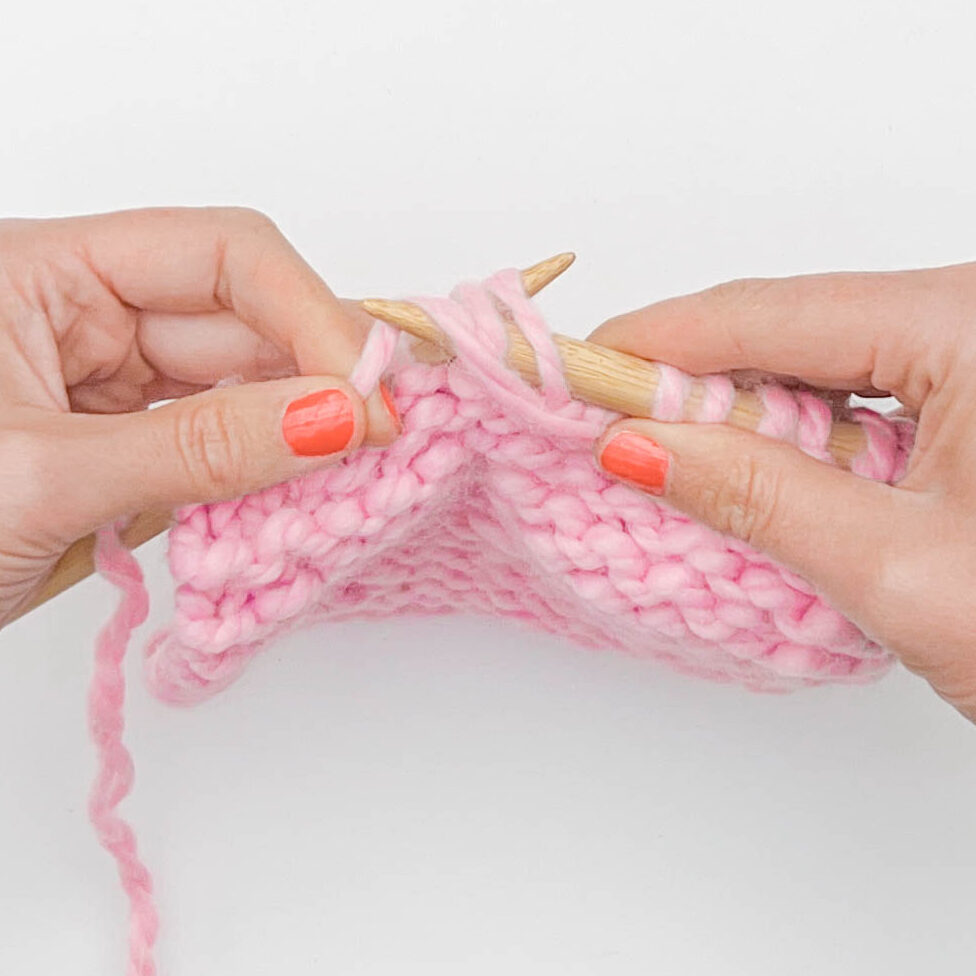
Step 5:
Purl these stitches together by wrapping the yarn up over the right needle counterclockwise.

Pivot the right needle away and down and through the twisted stitches.
Again, it might be helpful to pin the twisted stitches to the needle using your right hand in this step so that they stay put as you pull the yarn through.
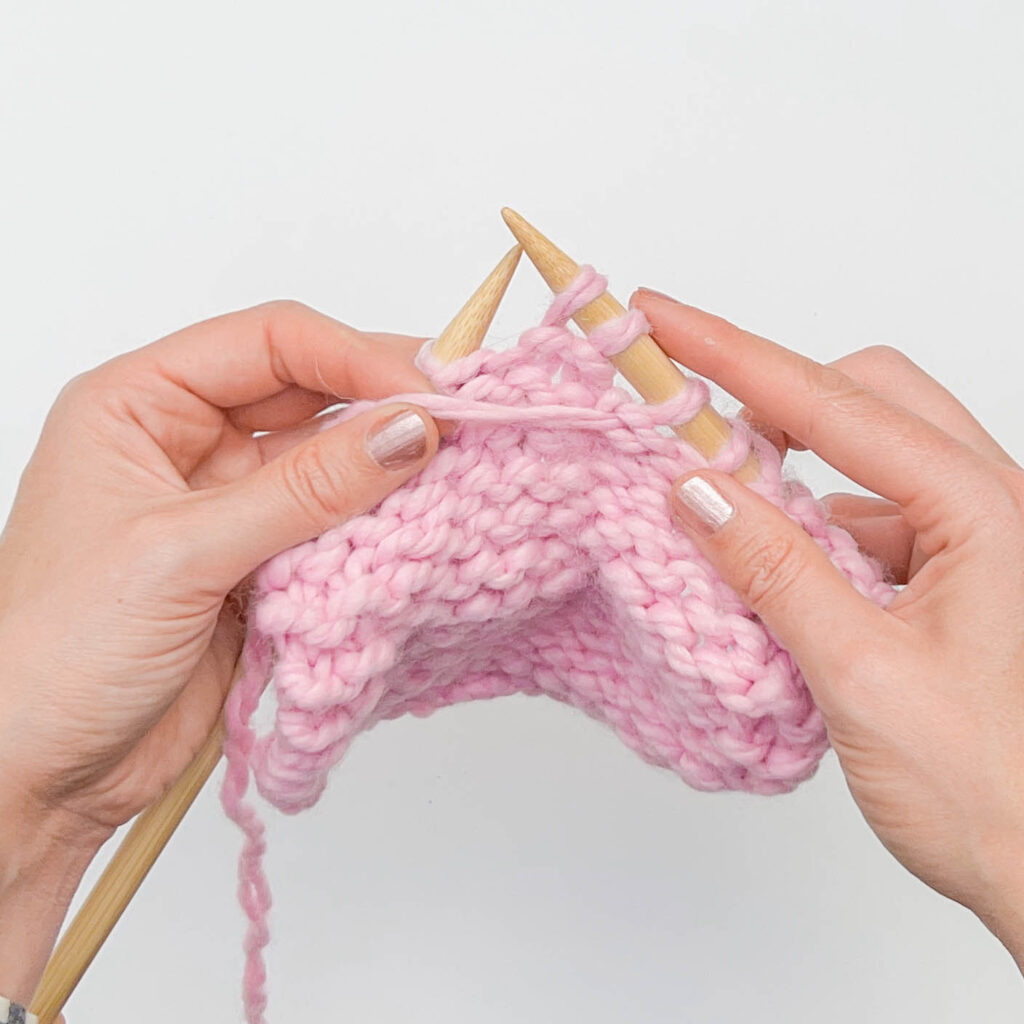
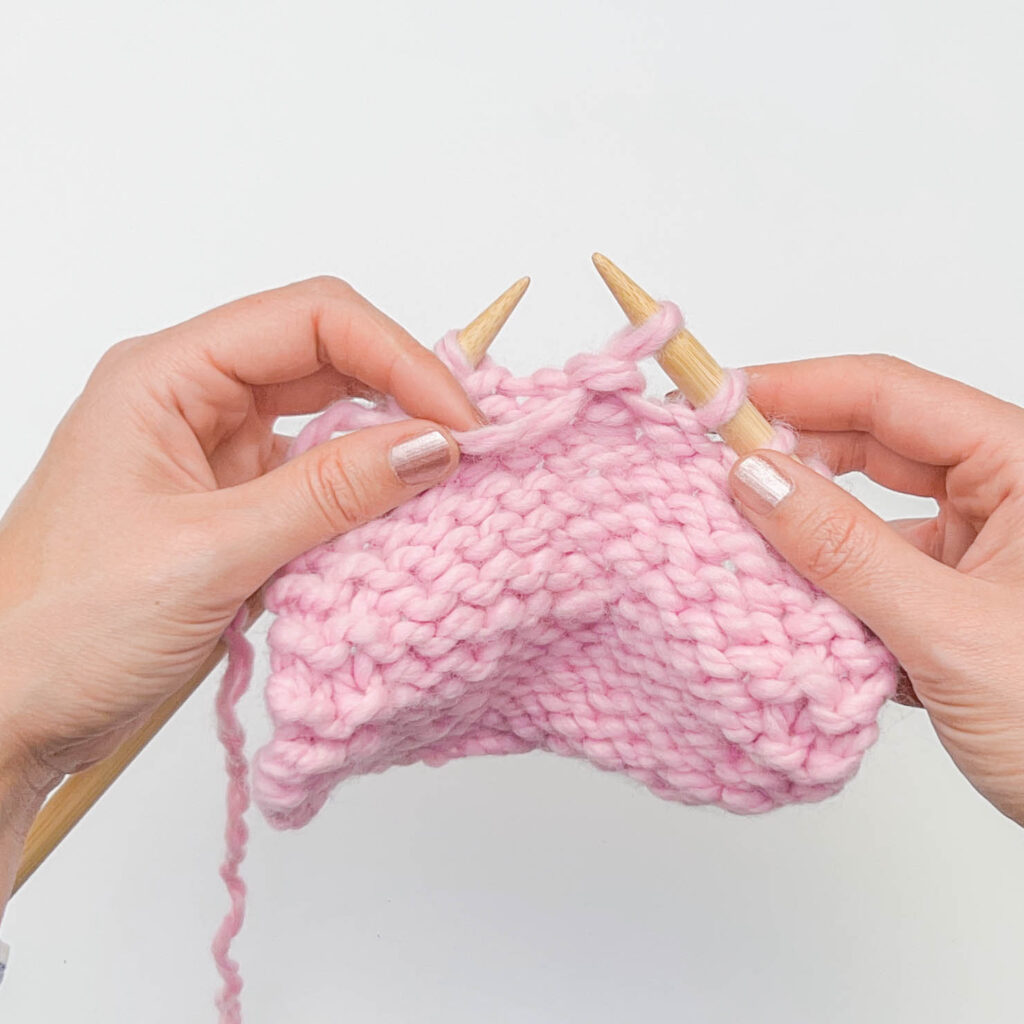
Drop the twisted stitches off the left needle. You’ve now decreased one stitch and the two stitches in the row below lean to the right.
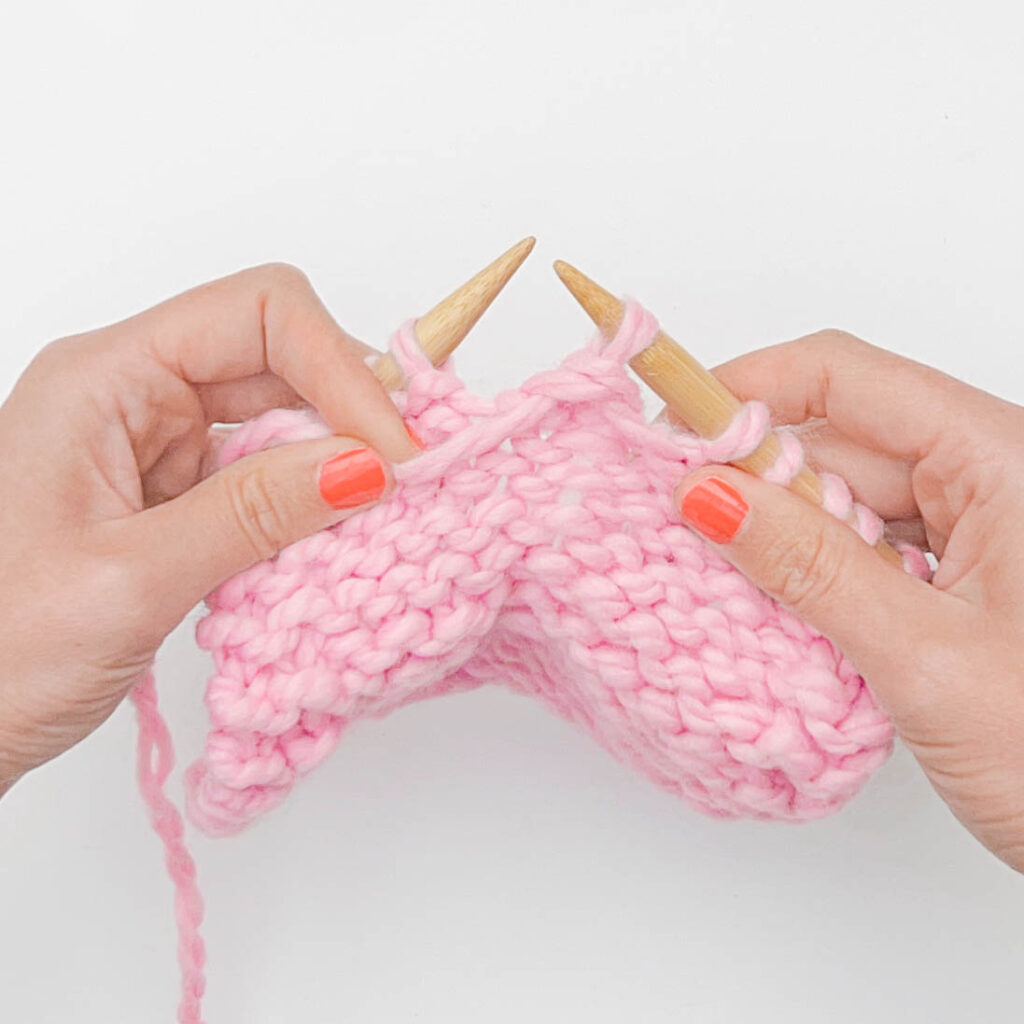
Step 6:
Purl these stitches together by wrapping the yarn up over the right needle counterclockwise.
You’ll be making the P2tog decrease, as the name suggests, is worked by purling two stitches together into a single stitch. This decrease slants to the left in your fabric. Each time you work a P2tog decrease you are removing a single stitch from your row count.
Make sure that your yarn is at the front of your piece before working the decrease.
Note: This tutorial was written for right-handed knitters.
Step 1:
With your yarn in the front, insert your right needle through the next two stitches purlwise, from the right to left through the front legs of both stitches at once.
Step 2:
Wrap your yarn counterclockwise, up and over the right needle tip.
Step 3:
Pull the yarn through both stitches at once, up and to the right.
Step 4:
Drop both stitches off the left needle. You’ve now decreased one stitch and the two stitches in the row below lean to the left.
While they’re a great stitch to know, decreases can be tight and fiddly to work, particularly the SSP decrease. Not only are you twisting stitches, you’re also trying to purl through two stitches at once which certainly makes for some tight quarters for your needles to navigate.
The sharper your needle tips are, the more nimble they are. Sharp points take a lot of frustration out of complex stitches and also makes it less likely to accidentally drop a stitch at the wrong time.
Knitting needle tips taper to a point which means you have about a ¼” of needle that you can slide your stitches to for a little more breathing room. While there’s a slight chance you’ll accidentally drop a stitch when you’re working so close to the needle tips, it’s worth gaining a little maneuverability. Try using your pointer fingers to pin stitches to your needles as you insert the other needle and draw yarn through to keep your stitches from slipping off!


