KFB & PFB Increases
The easiest way to add stitches in a project!
The easiest way to add stitches in a project!
KFB knitting and PFB knitting are two easy methods used to increase the number of stitches in knitting projects. While these increases aren’t invisible (you’ll have a little purl bump in your fabric each time) they are super easy to do and can add nice design detail to your knit fabric.
KFB stands for “knit front and back” while PFB is a shortened version of “purl front and back” increases.
These “front-and-back” increases refers to the way the new stitch is made. In this technique, your working into one stitch twice: once through the front and a second time through the back loop of the same stitch.
These PFB and KFB increases are asymmetrical! When you work one of these increases in a stitch you’re actually creating both a knit stitch and a purl stitch. PFB increases are typically used on a purl row, while KFB increases are used on a knit row.
However! There’s another way to think about using these two stitches. Choosing a PFB or KFB increase simply means you’re choosing the order of the knit/purl stitch increase you’re making. Use a PFB when you want the purl stitch to come first in the pair and a KFB when the knit should come first. This is particularly helpful when trying to keep an existing pattern, like ribbing, intact!
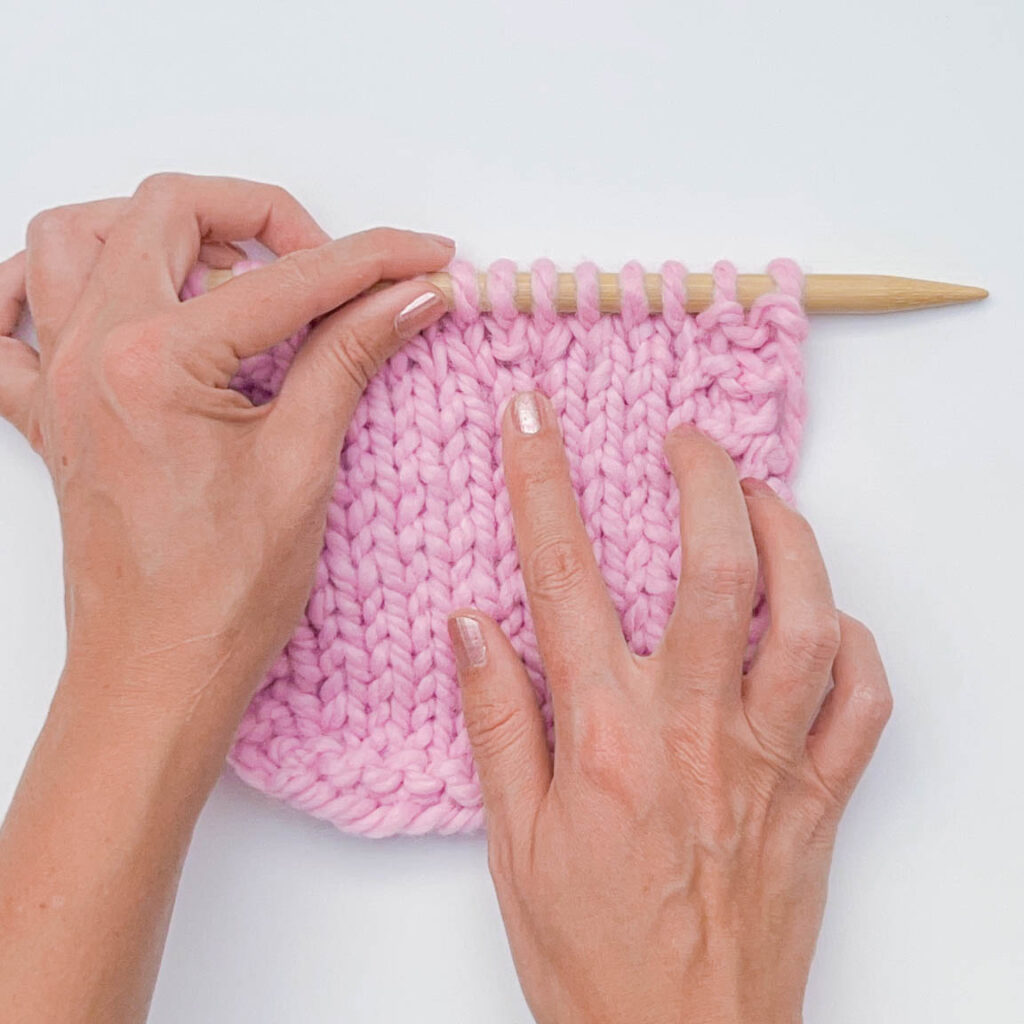
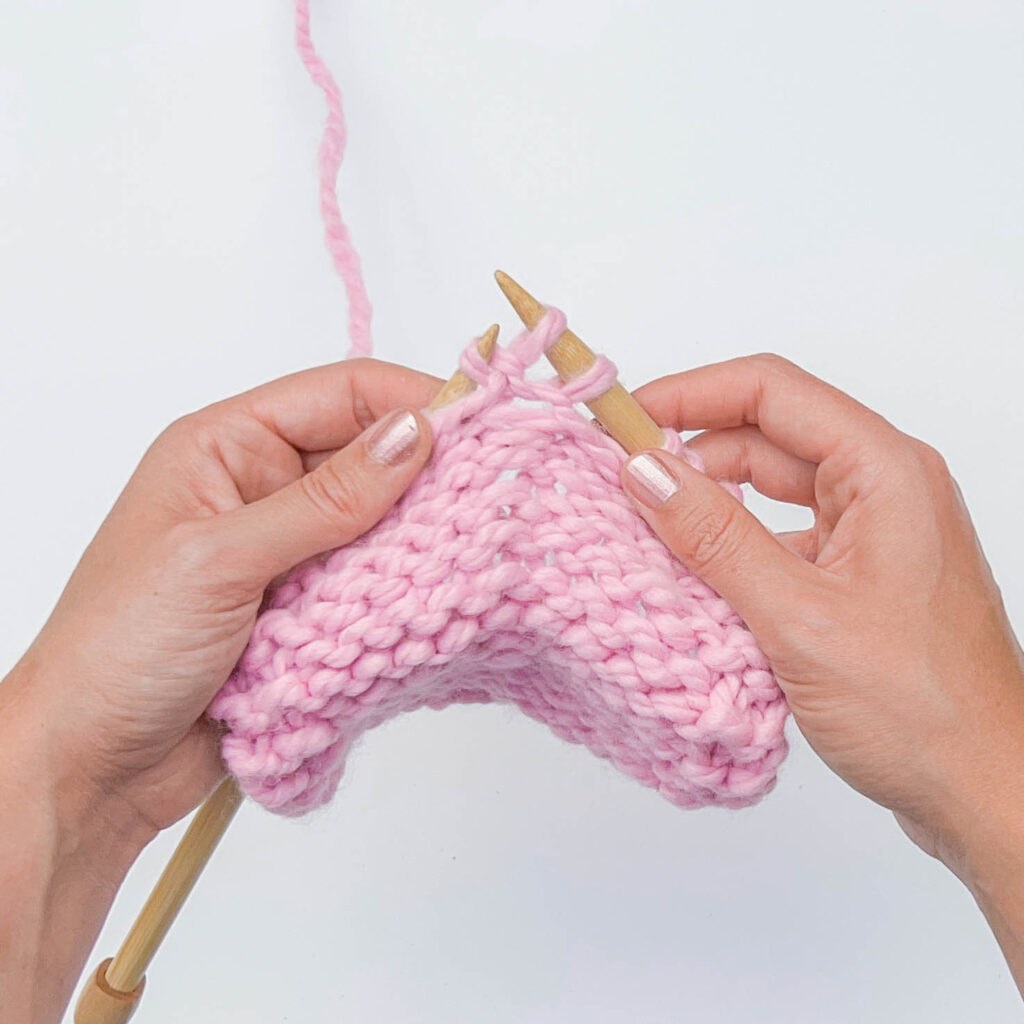
This tutorial shows you how to increase stitches, make sure you’ve worked to the area in your project where you’d like to add a stitch before following the steps!
We’re also going to show you how to work a PFB on the purl side of a fabric and a KFB on the knit side of the fabric.
Lastly, this tutorial shows instructions for knitting right-handed. In this case, you can convert the instructions for left-handed knitting by replacing “right” with “left” in the instructions.
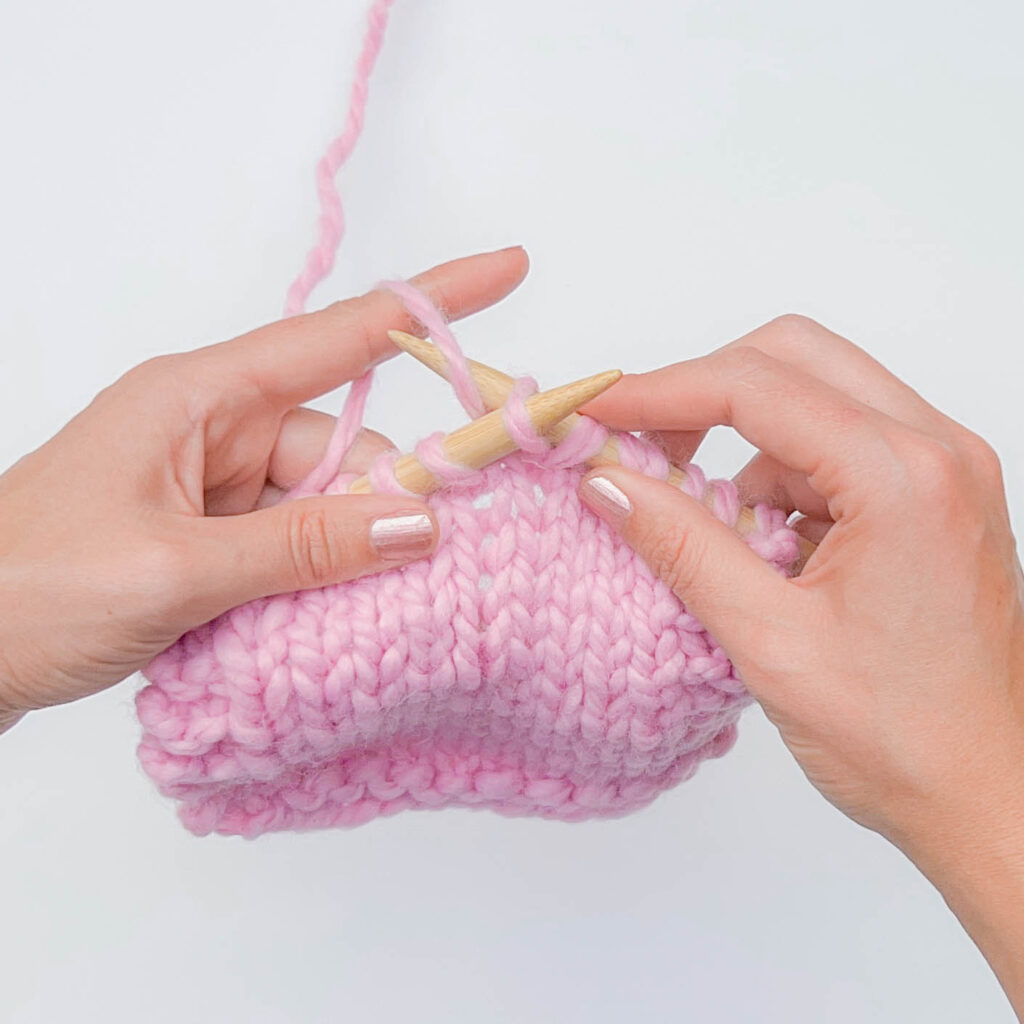
You’ll be making the KFB increase by knitting twice into a single stitch. This increase will result in a knit and purl stitch (in that order) in that row!
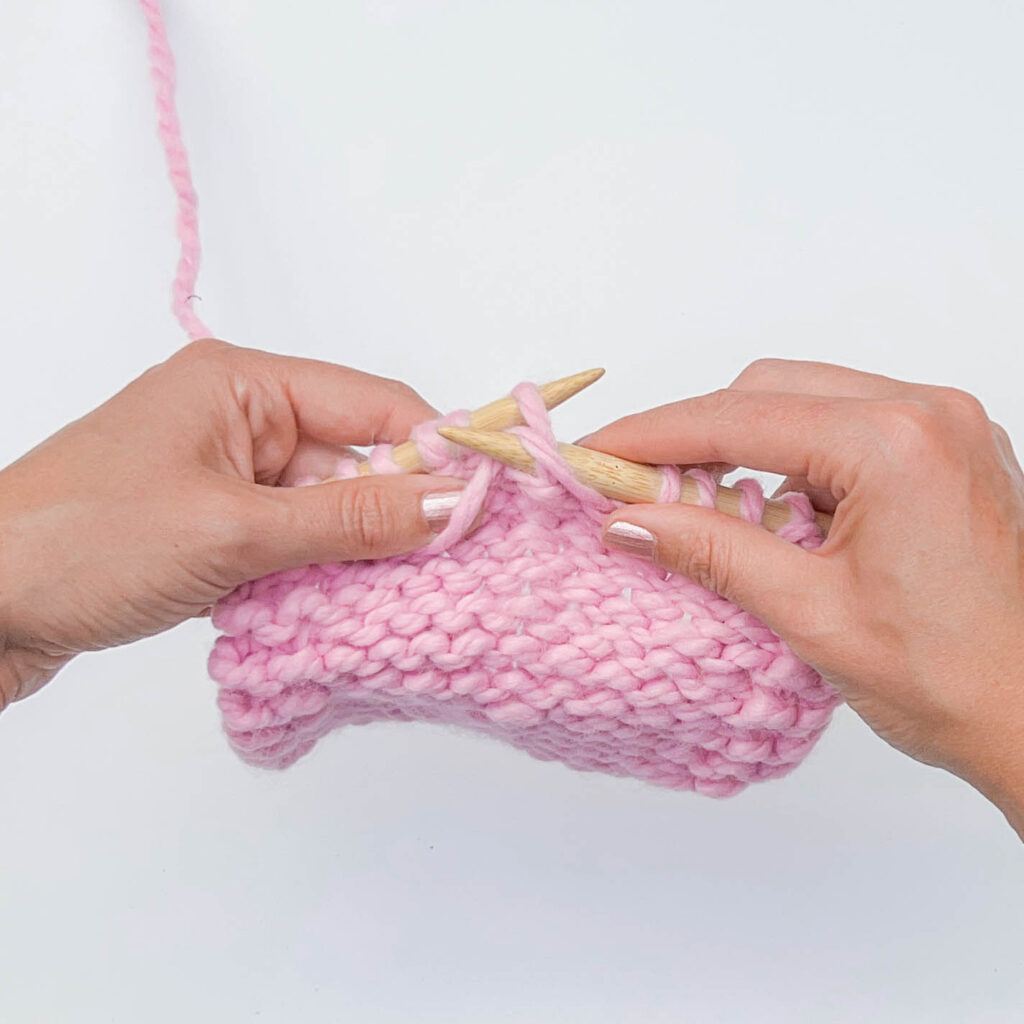
Step 1:
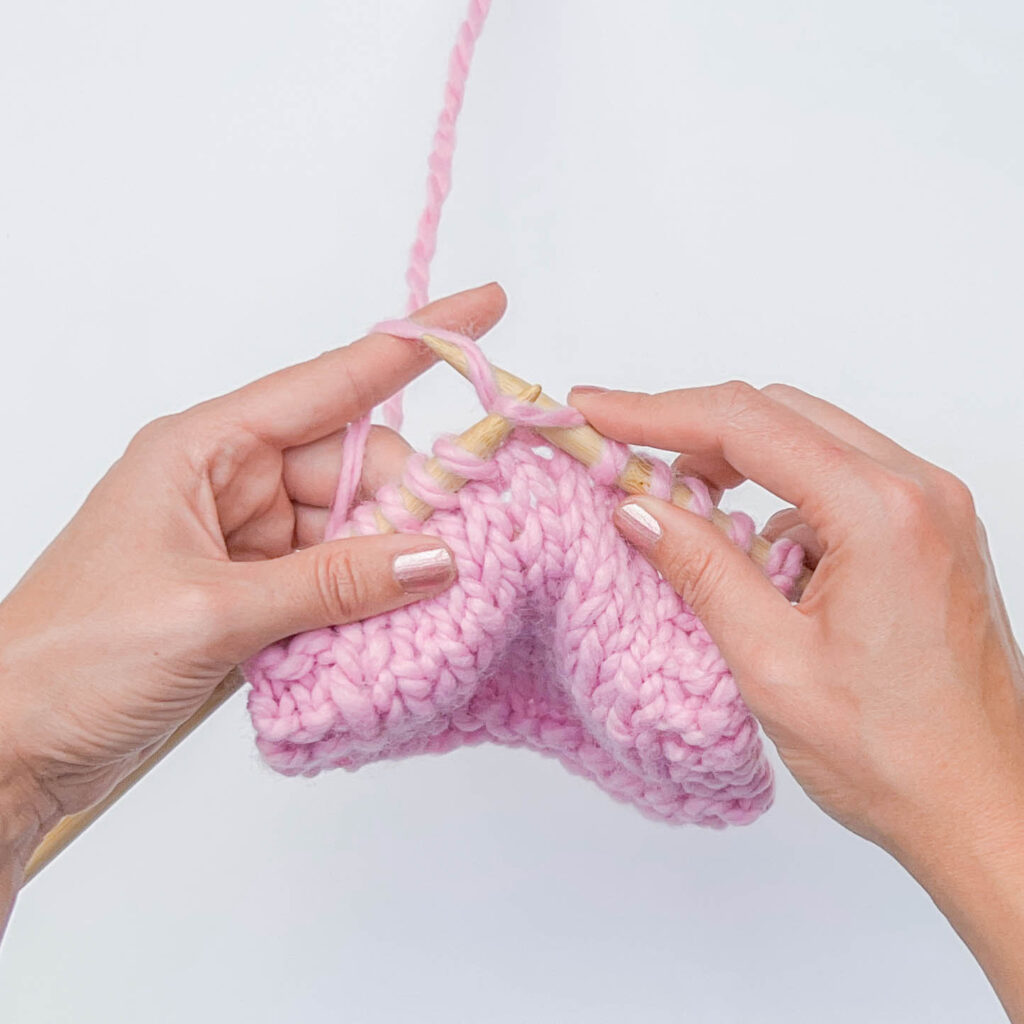
With your yarn in the back, knit once through the front leg of the stitch. Don’t drop the stitch off the needle as you would for a regular knit stitch.
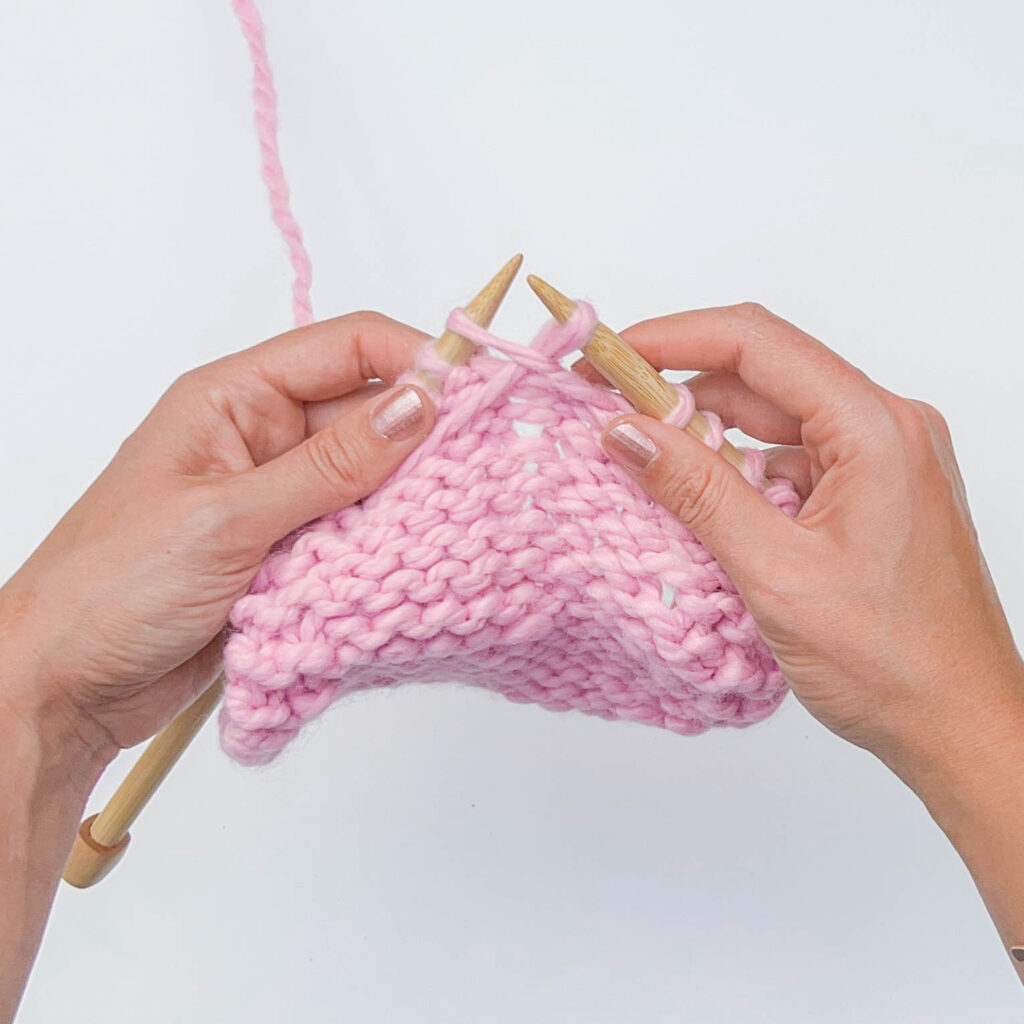
Step 2:
Move your right needle tip around to the back of that same stitch and insert it from right to left through the back leg of the stitch.
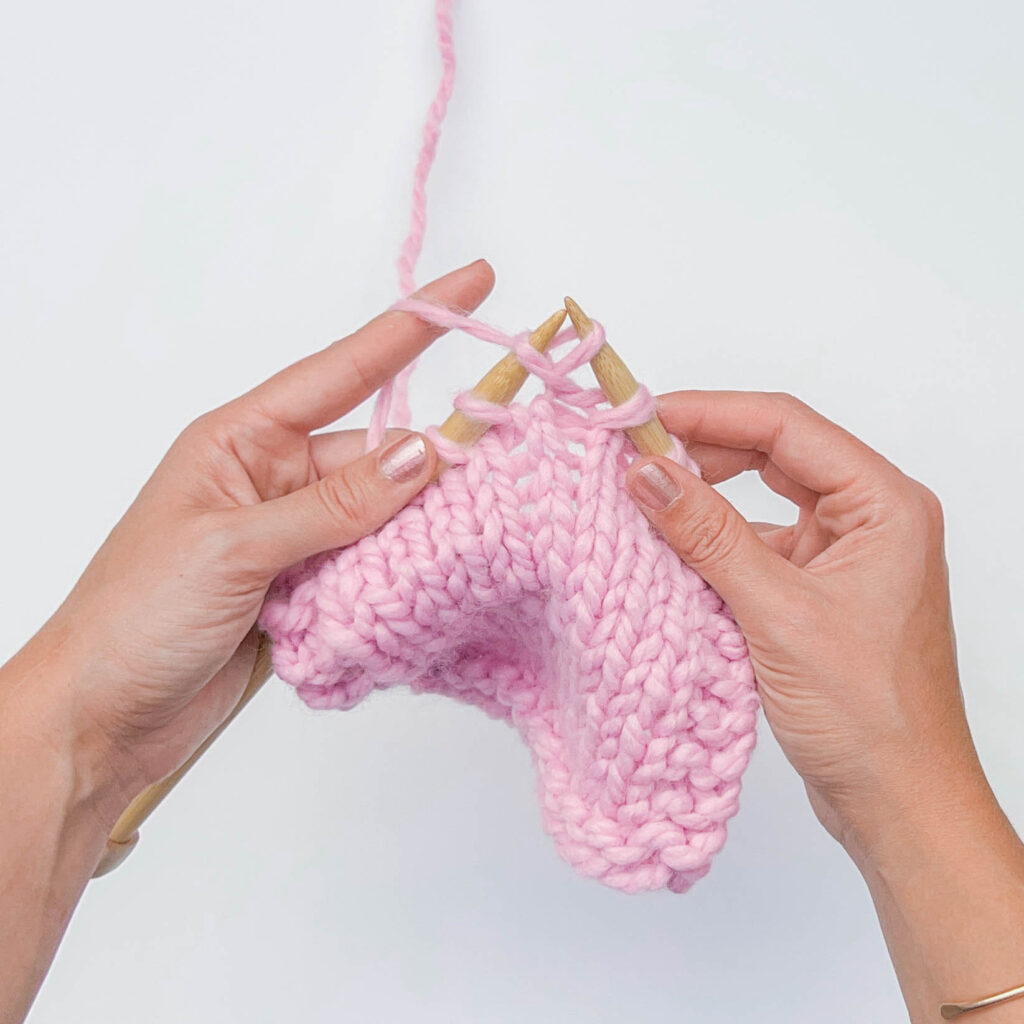
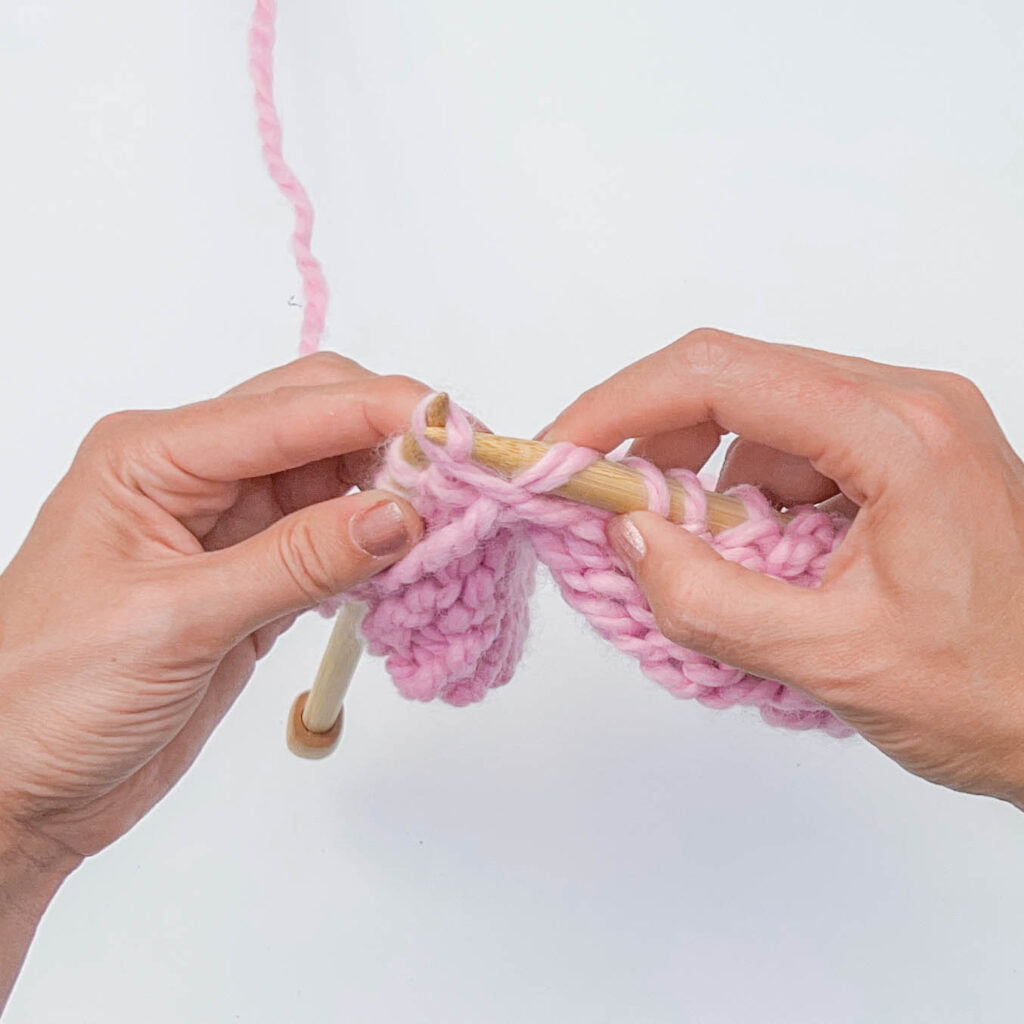
Step 3:
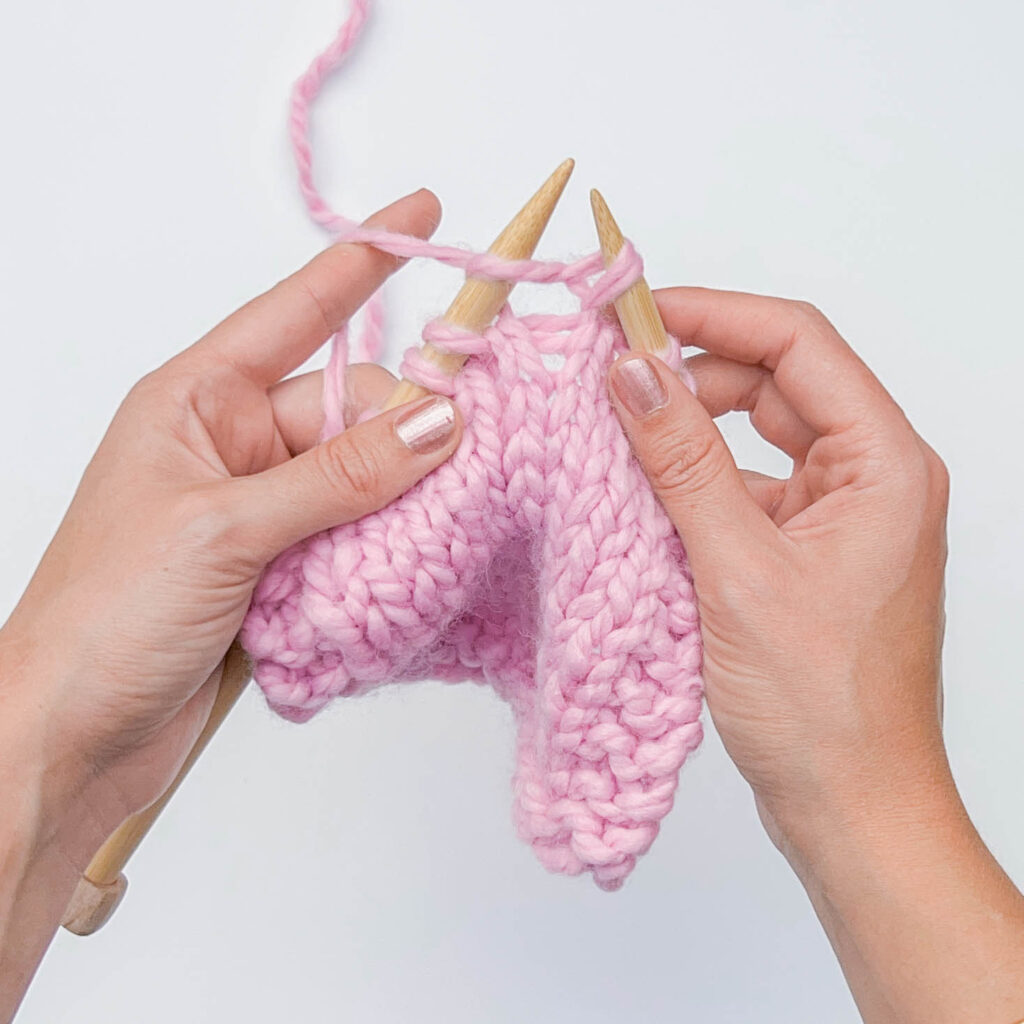
Wrap the yarn up and over the right needle counterclockwise. Pull the strand through the stitch by pivoting the right needle tip to the right.
It might be helpful to anchor the first stitch you made to the needle using your right index finger in this step.
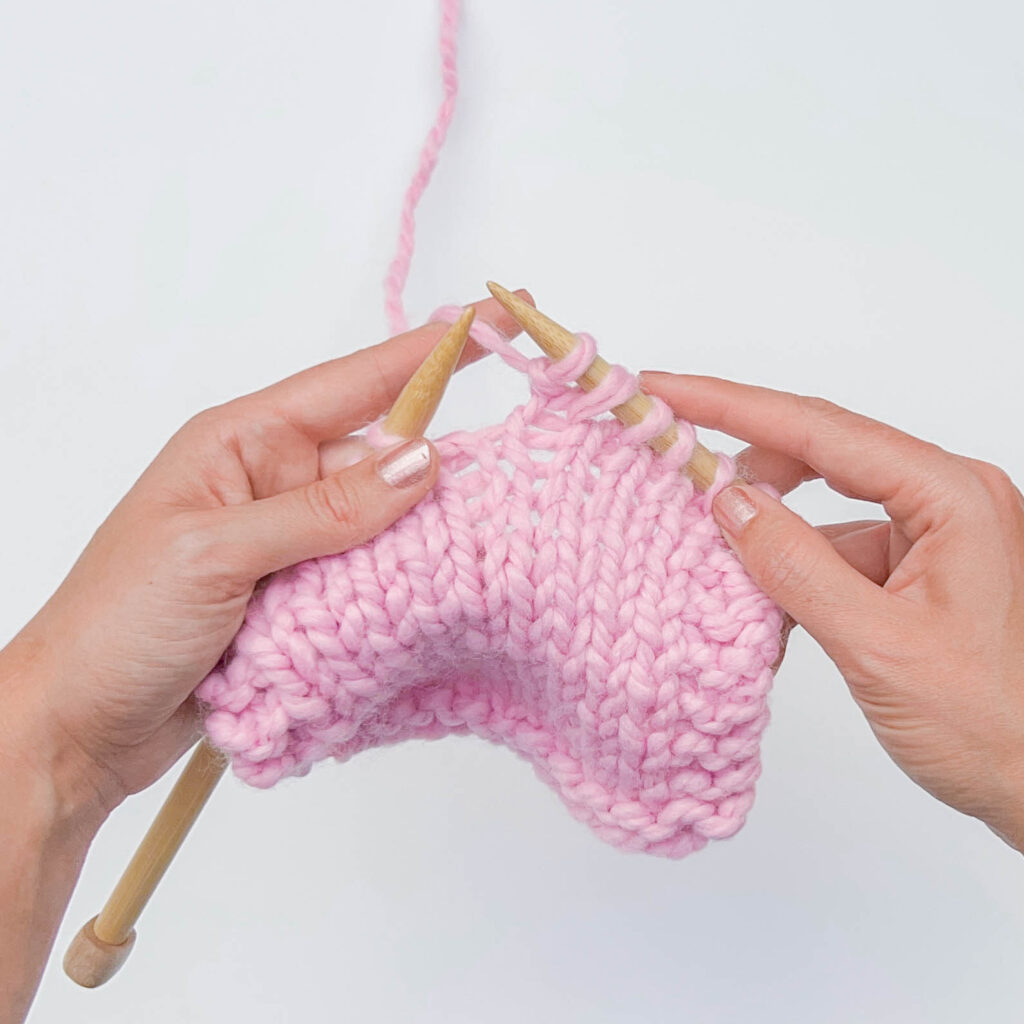
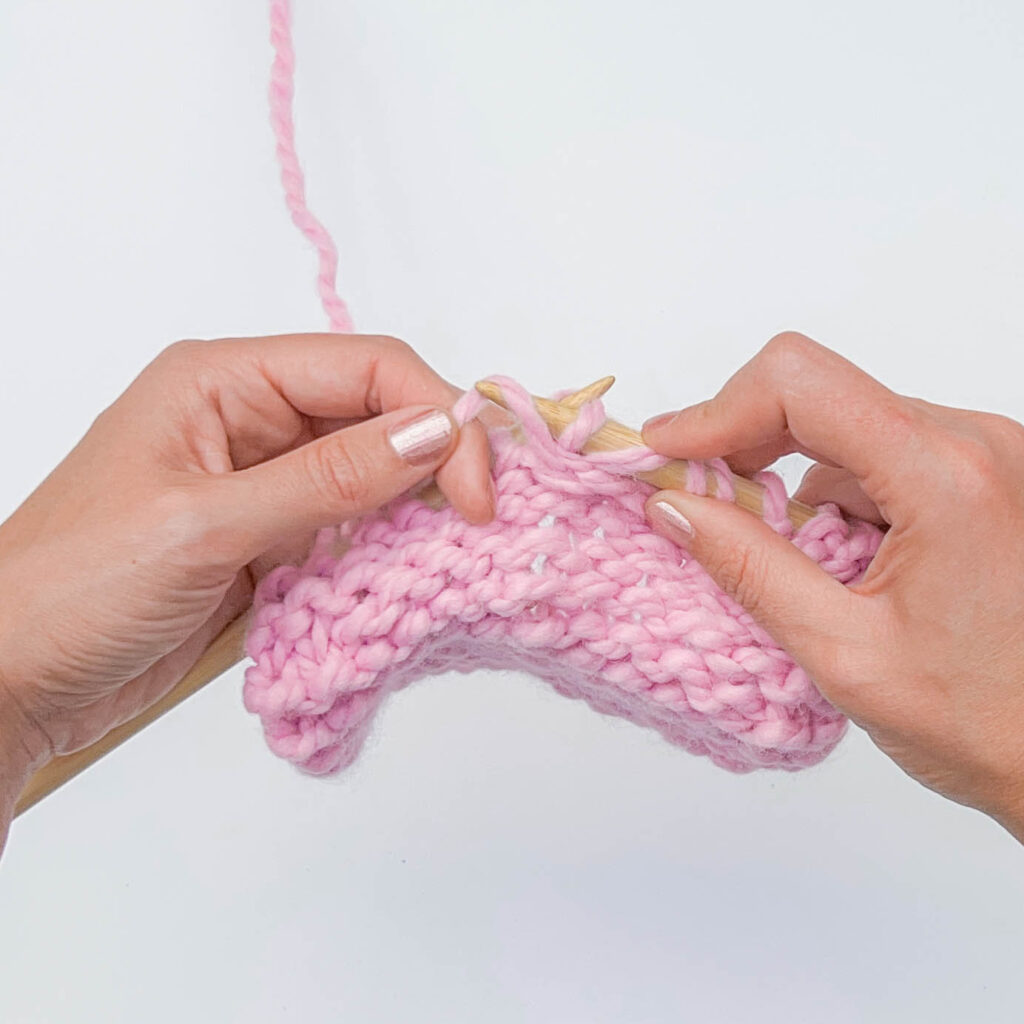
Step 4:
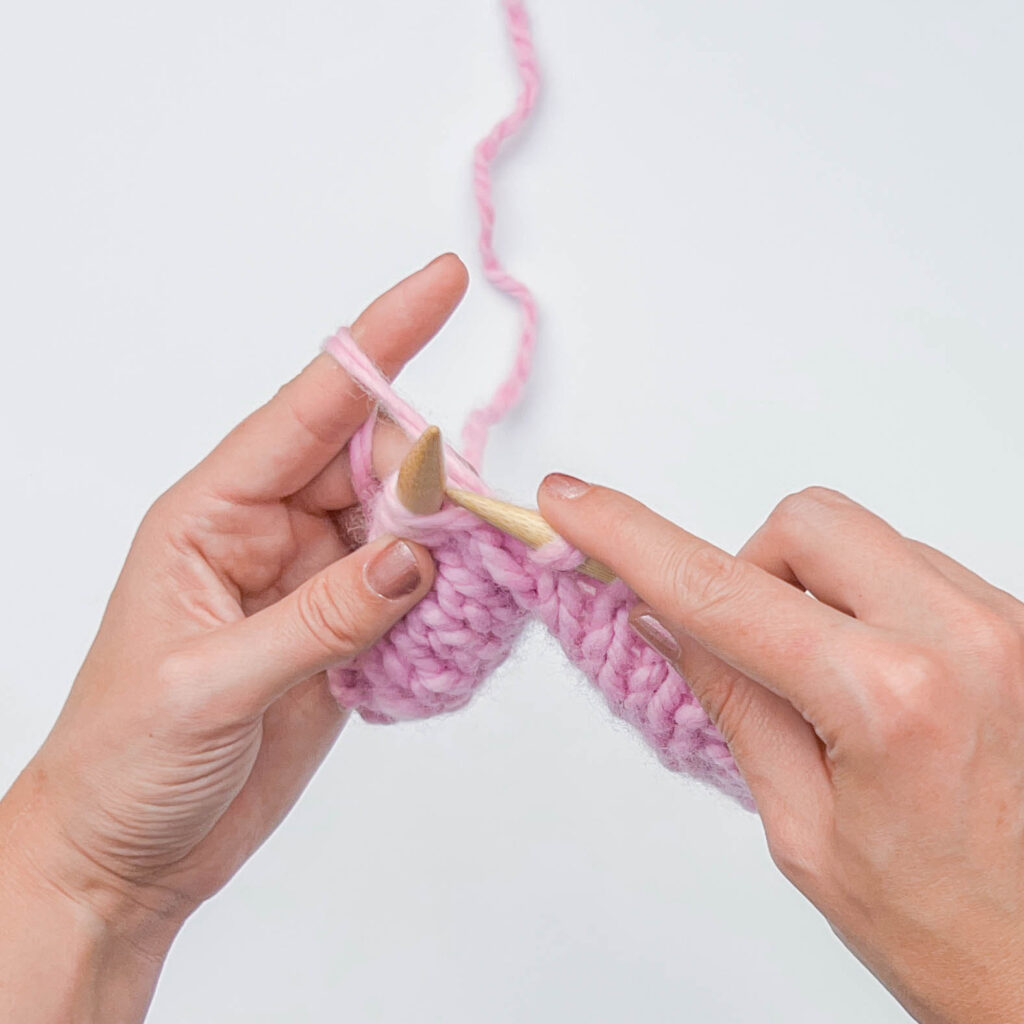
Drop the stitch off the left needle.
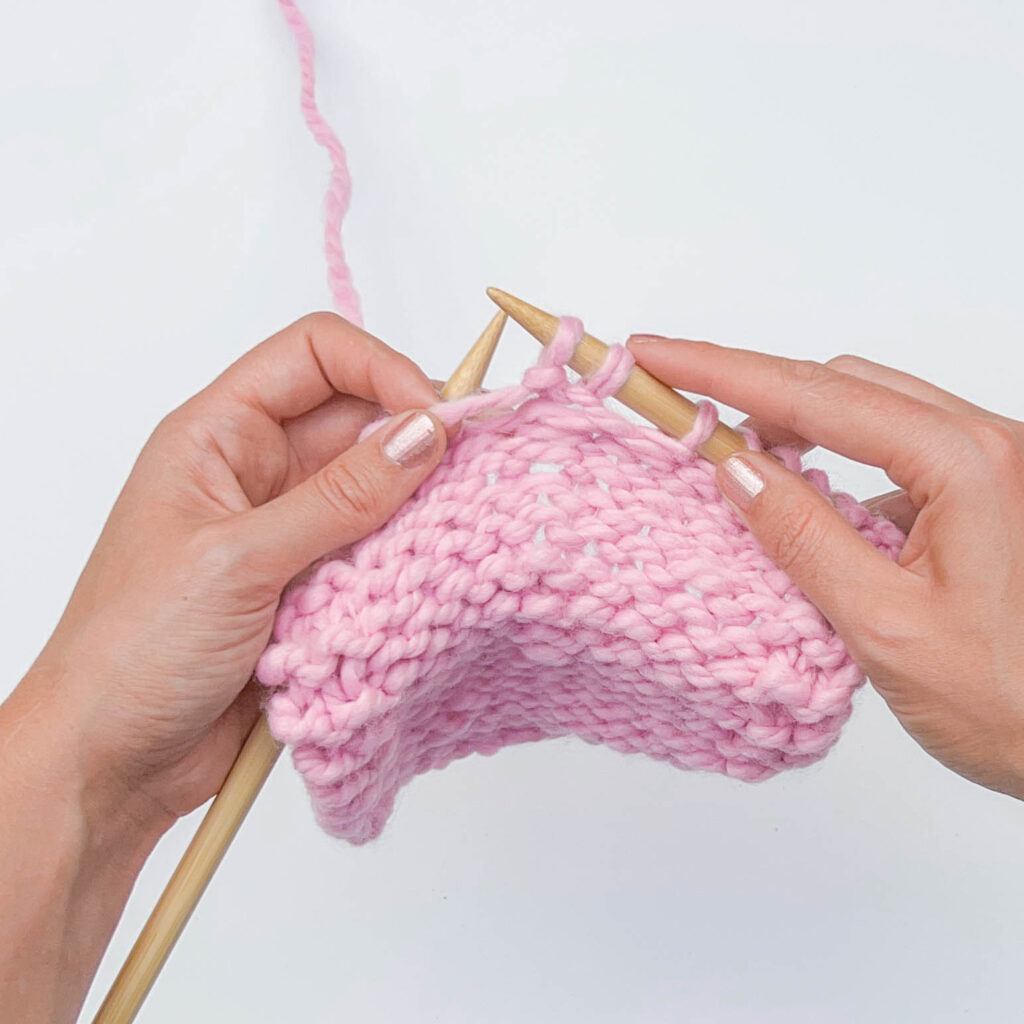
You’ve now added a new stitch to your row!
You’ll be making the PFB increase by purling twice into a single stitch. This increase will result in a purl and knit stitch (in that order) in that row!
Step 1:
With your yarn in the front, purl once through the front leg of the stitch. Keep the stitch on the left needle, don’t drop it off as you would for a regular purl stitch.
Step 2:
Move your right needle tip around to the back of the same stitch. Insert it from upward, from right to left through the back leg of the stitch.
Step 3:
Wrap the yarn up over the right needle, counterclockwise. Pull the strand through the stitch by pivoting the right needle to the right.
It might be helpful to anchor the first stitch of the PFB increase to the needle using your right hand in this step.

Step 4:
Drop the stitch off the left needle.
You now have two new stitches, a purl and knit stitch!
Knitting patterns use increases to add three dimensional curves and angles to knitting. When used along with decreases, increases can dramatically change the shape of flat knit fabric. KFB and PFB increase can typically be found in hats, sweaters, mittens, and all sorts of knit garments.
Because front-and-back increases are asymmetrical they tend to stand out in some stitch patterns and blend into others. Each time you increase using this technique you’ll have both a knit “v” and purl “bump” next to each other every time you work an increase.
Make sure to take the fabric and stitch pattern into consideration when choosing to use a front-and-back increase. In stockinette or garter stitch fabric this method of increasing will stand out in the fabric because there are knit and purl stitches created each time. In ribbing, seed stitch, or moss stitch the pair of stitches will blend in and might even disappear completely into the overall pattern.
As always, you can work any increase you’d like! Considering how the increase will look in context with the rest of the pattern will help you decide which increase to use in each project. Also, your pattern might specify a certain increase, it’s sound advice to use whatever stitch the designer recommends in each pattern.


