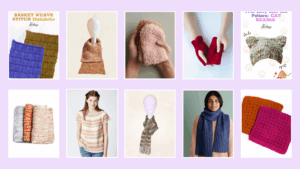
Free Easy Knit Scarf Pattern: The Hurdle Knit Stitch Scarf [5 Exclusive Patterns Included]
Learn the beautiful Hurdle Knit Stitch!
Learn the beautiful Hurdle Knit Stitch!
The hurdle stitch is a simple, yet beautiful stitch that can be used in a wide variety of knitting projects. It’s packed with texture that easily compliments both plain and multi-color palettes!
So let’s put this beautiful stitch to use. Today, we’re making this beautiful knit scarf pattern that I named The Berry Row Scarf! The hurdle knit stitch has these pretty ridges that, with the multicolor yarn used, looks like rows of adorable berries.

This knit scarf pattern will show you just how easy it is to make the hurdle knit stitch and how to add fringe to a scarf. Ready to expand your knitting abilities? Keep on reading!

Note: Red Heart Holly & Ivy has been unfortunately discontinued but you can still achieve a similar vibe with Red Heart Pink Camo. Trust me, it’ll be just as gorgeous!
5 inches x 60 inches
12 stitches x 18 rows = 4” x 4” in Hurdle Stitches
CAST ON: Basic knitted cast on 16 stitches.
Row 1 – Row 2: Knit the whole row
Row 3 – Row 4: *K1, P1* until the end of the row
Repeat Rows 1 – Row 4 until you reach your desired length!
CAST OFF: Basic Bind Off
Weave in your ends!
The Hurdle Stitch is a pretty straightforward pattern. If you want to widen your scarf, you just have to cast on more loops in even numbers!
Sometimes we want to zhuzh up our knitted scarves. So why not add some cute fringes? Here’s how you do it:

NOTE: You can use the same colors as the rest of your scarf or opt for a contrasting shade for extra spice!
Step 1: Cut a 12” long strand of yarn.
Fold it in half and see if you’re satisfied with the length. If you are, cut 19 more for a total of 4 strands in each fringe piece.
Step 2: Divide your scarf edge by 5.
Add a fringe on the first stitch. Starting from the edge, count 4 stitches. Attach the fringe on the 4th stitch. Repeat this until you reach the end of your scarf.
Tip: Use your stitch marker to mark the edge of the scarf. Count 4 stitches in and mark the 4th stitch. Repeat this until you reach the other edge. You should have a total of 5 markers from one edge to the other.
Step 3: Add the fringes
Take 4 strands, make sure they line up perfectly, and fold them in half. Take a crochet hook or the a spare stitch marker and use that to hook the loop through one stitch of the scarf.


Tie on the fringe the same way shown in the photo tutorial below!

Pull the yarn halfway through the first stitch in the corner.

Remove your stitch marker or crochet hook and open the loop.
Pull the other half of the fringe through the loop.

Tug the tails to lock in the fringe.
Your scarf’s fringes should look like the photo below! Make sure not to tug on the tails too much so it doesn’t warp the edge of your knit.

Your Berry Row Scarf should look link this! You can make it as long and as wide as you want. I also encourage you to use other color combinations to create a truly personalized piece.