Backward Loop Cast On
The easiest way to get yarn on your needles!
The easiest way to get yarn on your needles!

The backward loop cast on uses just one needle for a quick, efficient way to start a knit project! This technique is a beginner-friendly way to learn how to cast on for knitting. This cast on is easy to memorize and creates a sturdy edging, perfect for simple home decor projects like dishcloths or blankets. You can also use this method to add stitches in the middle of your row!
The backward loop cast on is the quickest, easiest cast on to learn. A few simple movements with one hand create a tidy row of brand new stitches on your needle. This is a great technique for brand-new knitters because, as you work a backward loop cast on, you’ll become familiar with some of the basic hand motions in knitting and get used to looping yarn onto your needles.
A backward loop cast on is often used when you want to add stitches to your knitting in the middle of a row. It’s a quick and easy way to cast on, and also creates a nice, tight edge.
We turn to this technique for any project with edges that don’t need to flex or stretch to fit. Choose simple projects like dishcloths, afghans, or scarves.

Don’t you just hate when yarn slips off your knitting needles?
Introducing BeKnitting’s Set of 9 Straight Bamboo Knitting Needles! Sleek, sturdy, and slip-proof, these needles will give you the smoothest knitting experience ever.
Find them on Amazon!
Before you begin, you’ll need to put a slip knot on your right-hand needle. Make sure the working end of your yarn is positioned towards you on the needle with the tail end of your yarn at the back (away from you).
Need a refresher? Learn how to make a slip knot here!
Note: This tutorial was written for right-handed knitters. If you’re a left-handed knitter, you can follow the same instructions. However, you’ll need to replace “right needle/hand” with “left needle/hand” for all steps.

STEP 1
Grasp the yarn strand in the closed fingers of your left hand and wrap the yarn around the back of your thumb.
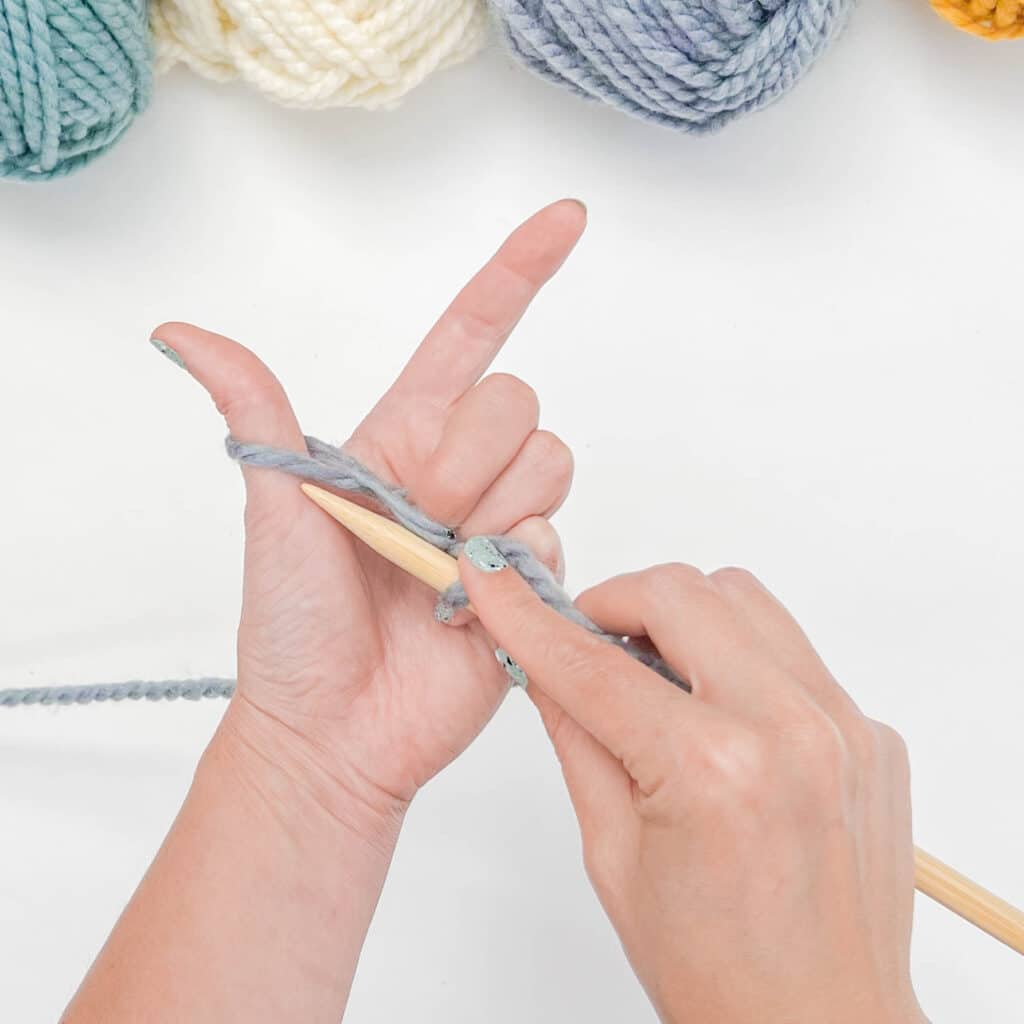
STEP 2
Bring the right needle tip towards you, in front of the strand of yarn, until the tip is pointed to the base of your thumb…
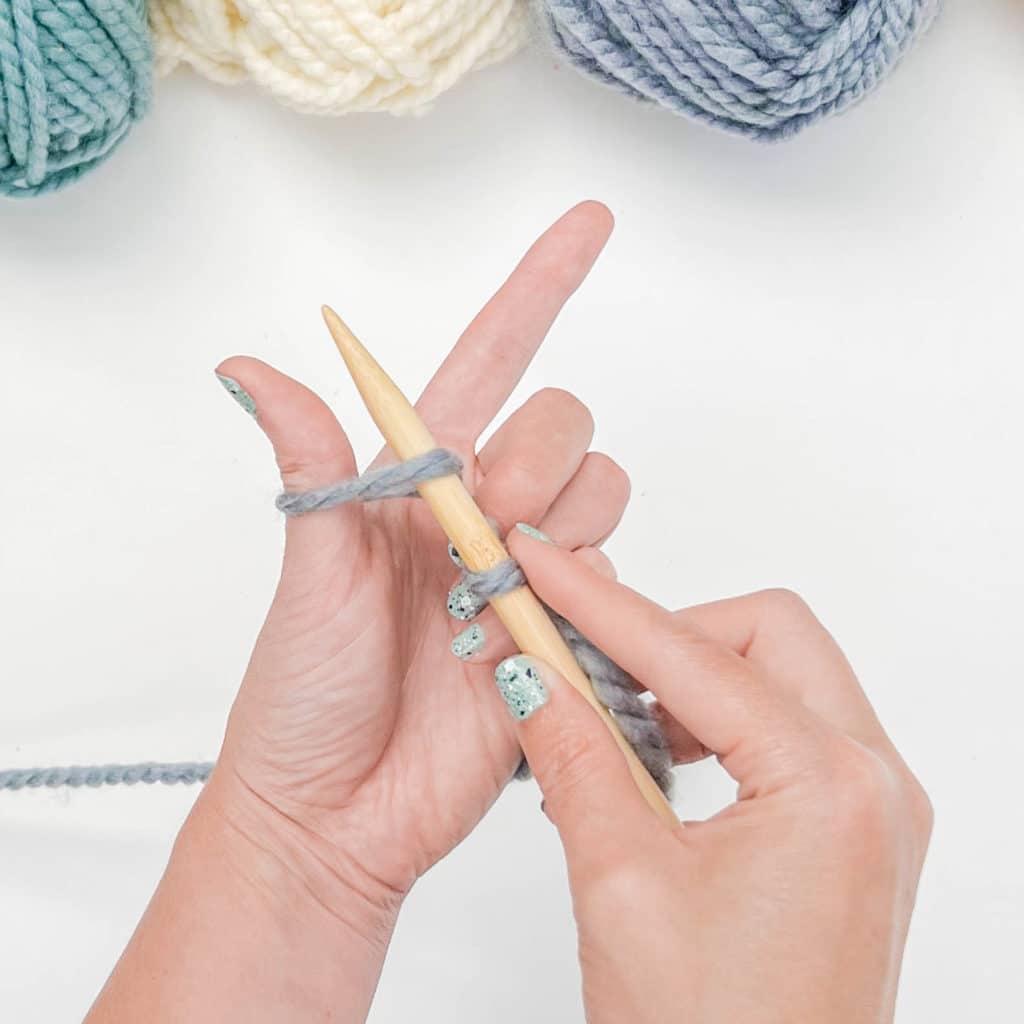
…move the tip up, under the yarn strand until it’s parallel to your thumb.
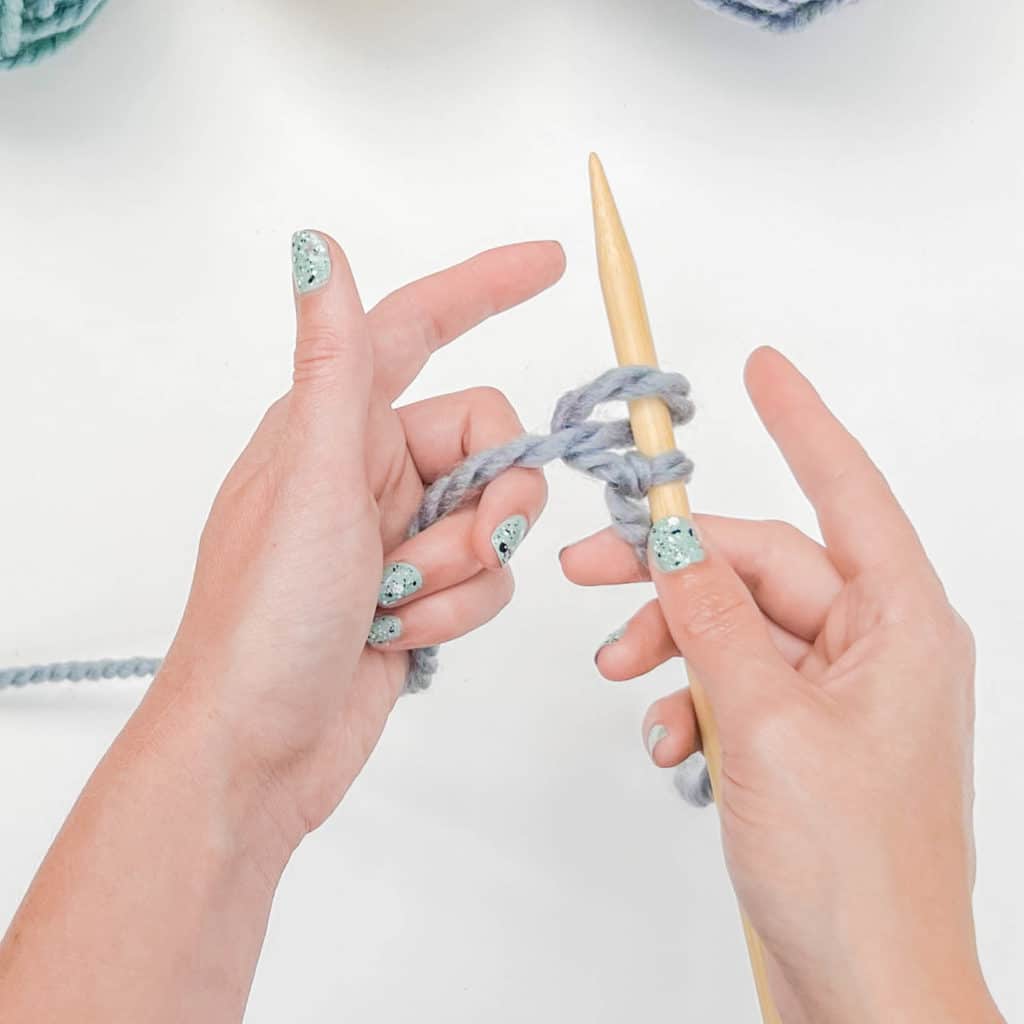
STEP 3
Drop the loop off your thumb, gently pulling on the yarn strand to tighten the loop on the needle.
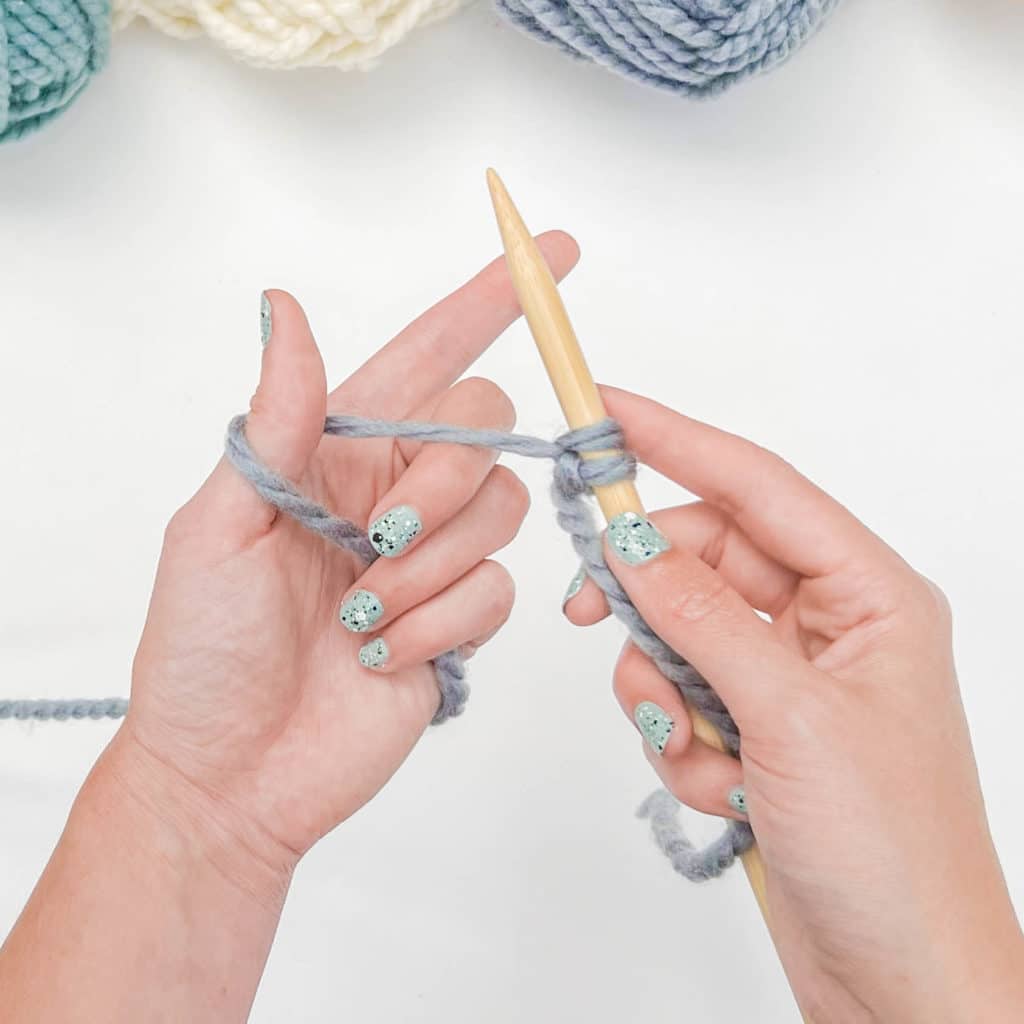
REPEAT
Repeat steps 1-3 until you have cast on the number of stitches you need.
Remember, your slip knot counts as a stitch too!
We’ve condensed the instructions above into a text-only set of instructions to make it easy to practice the backward loop cast on! Use the steps below for a quick refresher on each step. Note: This tutorial was written for right-handed knitters.
Step 1: Grasp the yarn strand (the one attached to the ball) in your palm by closing your fingers over the strand. Loop the working strand around the back of your thumb.
Step 2: Hook your right needle tip in front of the strand of yarn at the base of your thumb, moving it up under the strand between the yarn and your skin.
Step 3: With the yarn seated on the needle, drop the strand off the back of your thumb and gently tug the loop closed so that the strand is touching the needle.
Repeat steps 1 – 3: until you have cast on the number of stitches you need. Remember, your slip knot counts as a stitch too!
This method is also known as the e-wrap cast on, because the loop made around the needle resembles the letter “e”. It’s also known as the thumb cast on method too because the yarn is looped just around the thumb for this technique.
This technique does not create a stretchy or elastic edge. If you have a project where stretchiness is important, try either a Knitted Cast On or Long Tail Cast On.
You can use the backward loop cast on to add stitches to your knitting in the middle of a row. A good example: to create button holes you need to cast off stitches on one row and then add them back to create the other side of the buttonhole on the next row. You’ll see this technique in quite a few patterns, which makes this tutorial a great one to know.
We have a few tips and tricks for avoiding tight stitches in your knits!
As you form each new loop, keep yarn loose on the needle. Each cast on stitch should be tight enough so that it’s touching the needle but not so tight that the fibers look stretched.
A stitch that is too tight on the needle will make it hard to wiggle your needle through it on the next row. A stitch that is too loose might not look smooth and even on your finished edge. It’s worth practicing until it looks just right!
Our Tip: For brand new knitters, we recommend practicing just casting on without starting a project. Simply cast on until your needle is full, and then pull your stitches off the needle to start again. This gives you a chance to get the hang of this new technique without the added pressure of knitting your first row.


