How to Finger Knit: Two Easy Ways
How to knit without knitting needles!
How to knit without knitting needles!
Did you know that you don’t need knitting needles to knit?
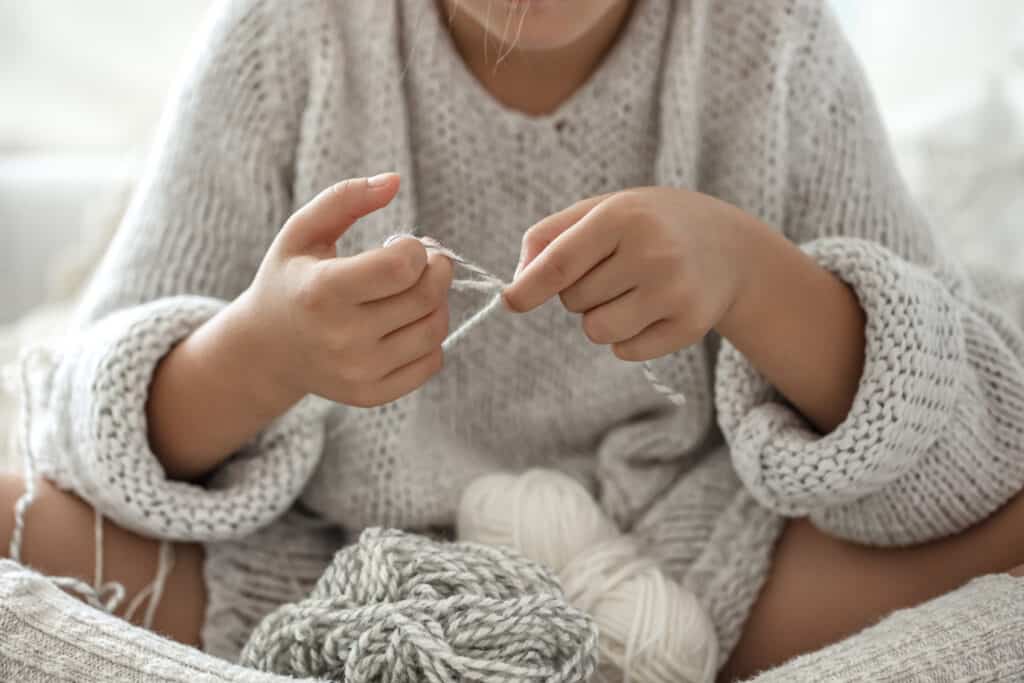
There are a few ways to create beautiful knitted pieces without knitting needles and all you need is yarn and your fingers! This technique is called…. wait for it… finger knitting! It’s almost like traditional knitting, except you’ll be using your fingers to make stitches instead of knitting needles.
Finger knitting is fun and stimulating for both adults and young children. Plus it gives you something to do when you’re bored!
Imagine this: You’re catching an international flight and you get your needles confiscated at the airport. Now what? Well, because you know how to finger knit, you can still make knitted projects during your flight!
(P.S. Teaching an energetic child how to finger knit is a fantastic way to keep them occupied during long trips!)
Is finger knitting the same as traditional knitting?
Yes and no.
Yes, because both techniques involve looping the yarn strands to create the stitches — and no because, unlike traditional knitting, you’re limited in the number of stitches you can have going by the number of fingers you have!
In finger knitting, you can only work with the number of fingers that you have which means you can have between 1-4 active stitches at any one time. In traditional knitting, you can work on as many stitches as you want as long as they fit on your knitting needles.
“But what about the thumb? Doesn’t that count as a finger?”
No thumbs allowed! The distance between your thumb and other fingers is too big. This will result in a much looser stitch—and we don’t want that. You also need to be able to hold the end of your yarn down during the first few rows and the best way to do that is to use your thumb!
Is it hard to learn how to finger knit?
Not at all! This is a beginner-friendly technique—though it does need some getting used to. But don’t worry, I’ve put together a you a step-by-step tutorial on how to finger knit TWO different ways!
Excited to learn more? Let’s get started!
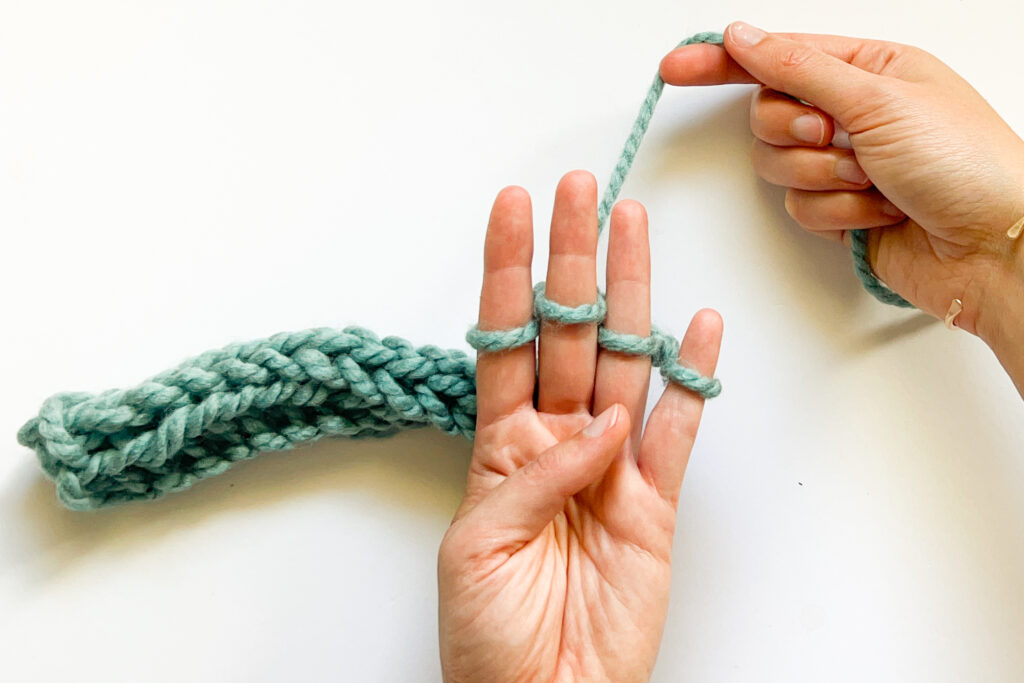
Today we’re going to talk about two different ways to finger knit. The number of fingers you use to make stitches in finger knitting determines how wide your project is! Two fingers will give you a narrow band of knit fabric. Using four fingers will give you twice the width! Check out the photos above to see the difference!
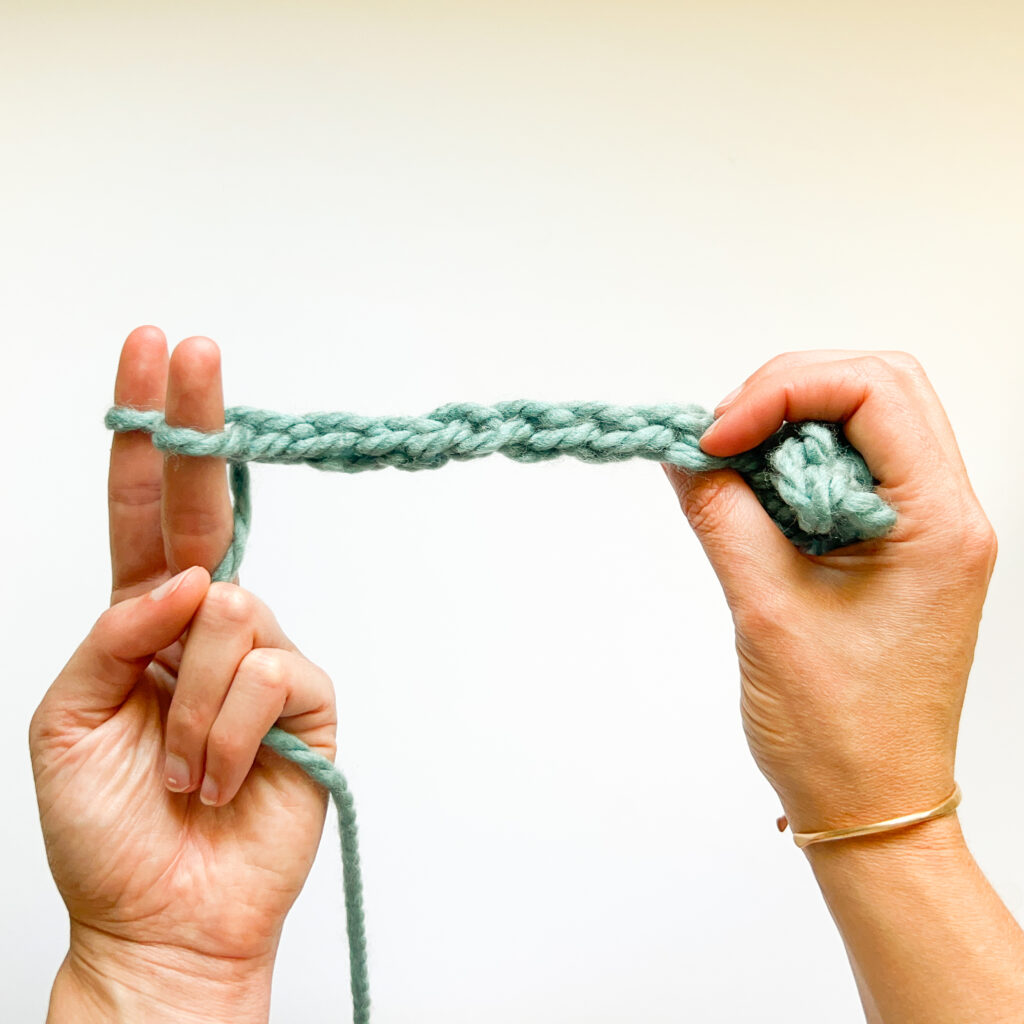
For beginners, it might be easiest to learn using just two fingers. It’s faster to set up and faster to knit a whole project with just two stitches! For thicker projects like scarves or even blankets, try knitting with all four fingers to make wider bands that are easier to work with later in a larger project.
Let’s get knitting!
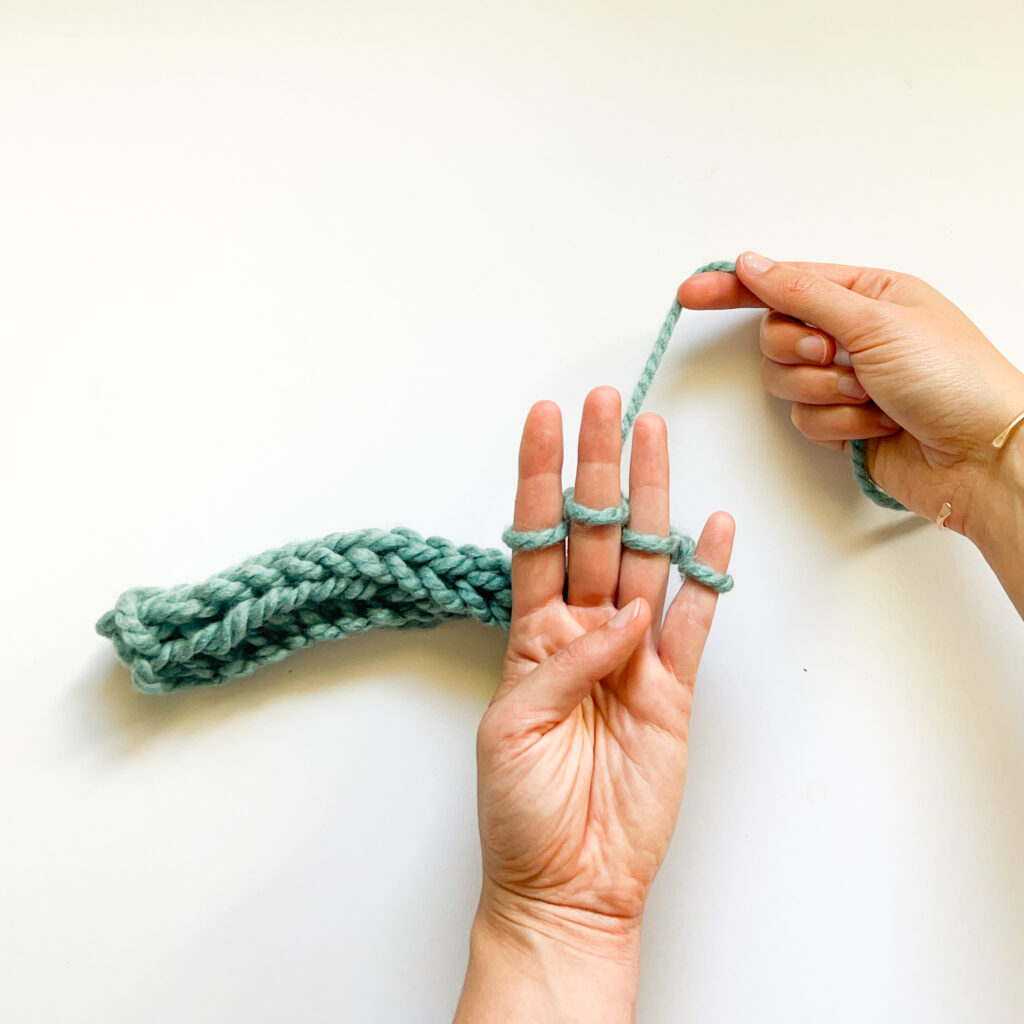
To knit on two fingers, you’ll be wrapping the yarn around the fingers of your non-dominant hand. Your dominant hand will be the one holding the yarn. Because this method uses just two fingers the yarn will move in a simple “figure 8” motion that’s easy for beginners to remember!
The set up rows will be slightly different than the steps for knitting the rest of your project. Pay attention and don’t skip ahead!
You’ll follow the “setting up” instructions just once, then you’ll repeat the second half of this section over and over until your piece is long enough. Let’s go!

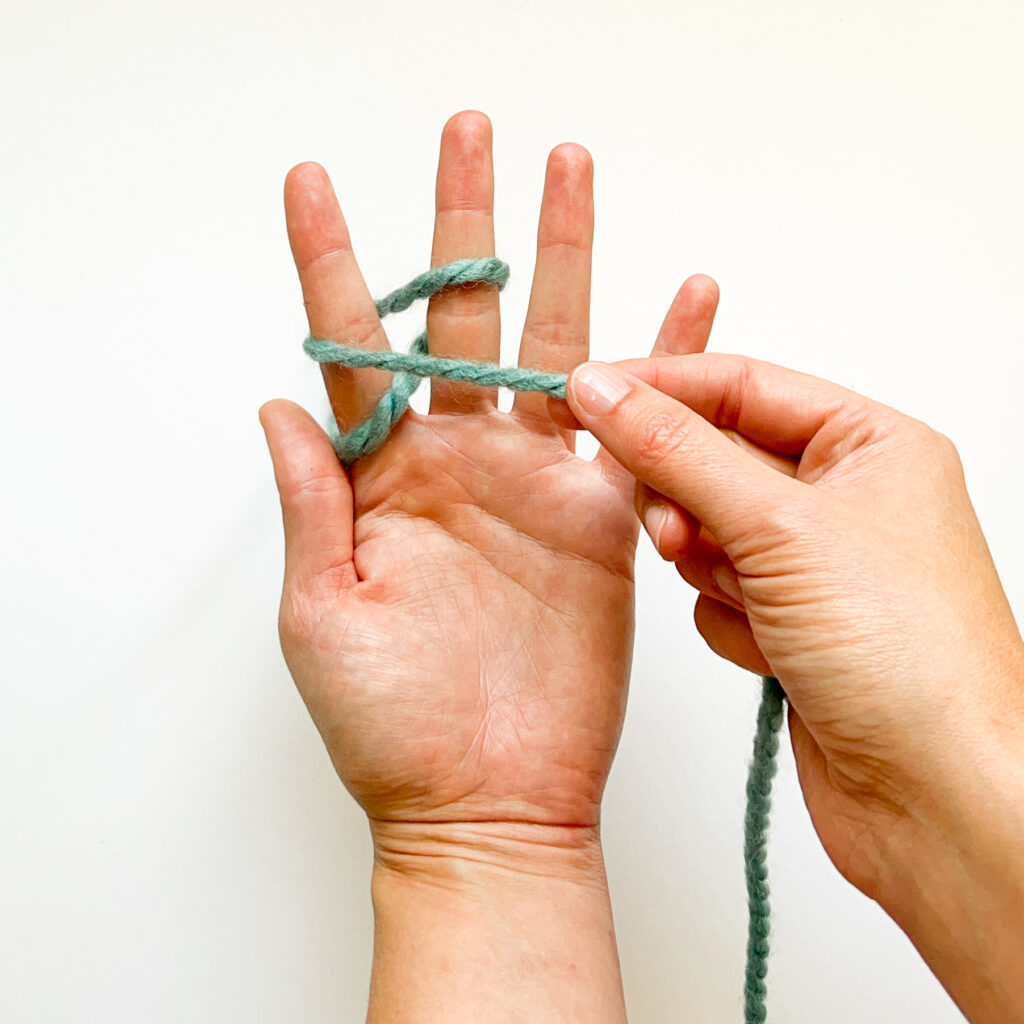
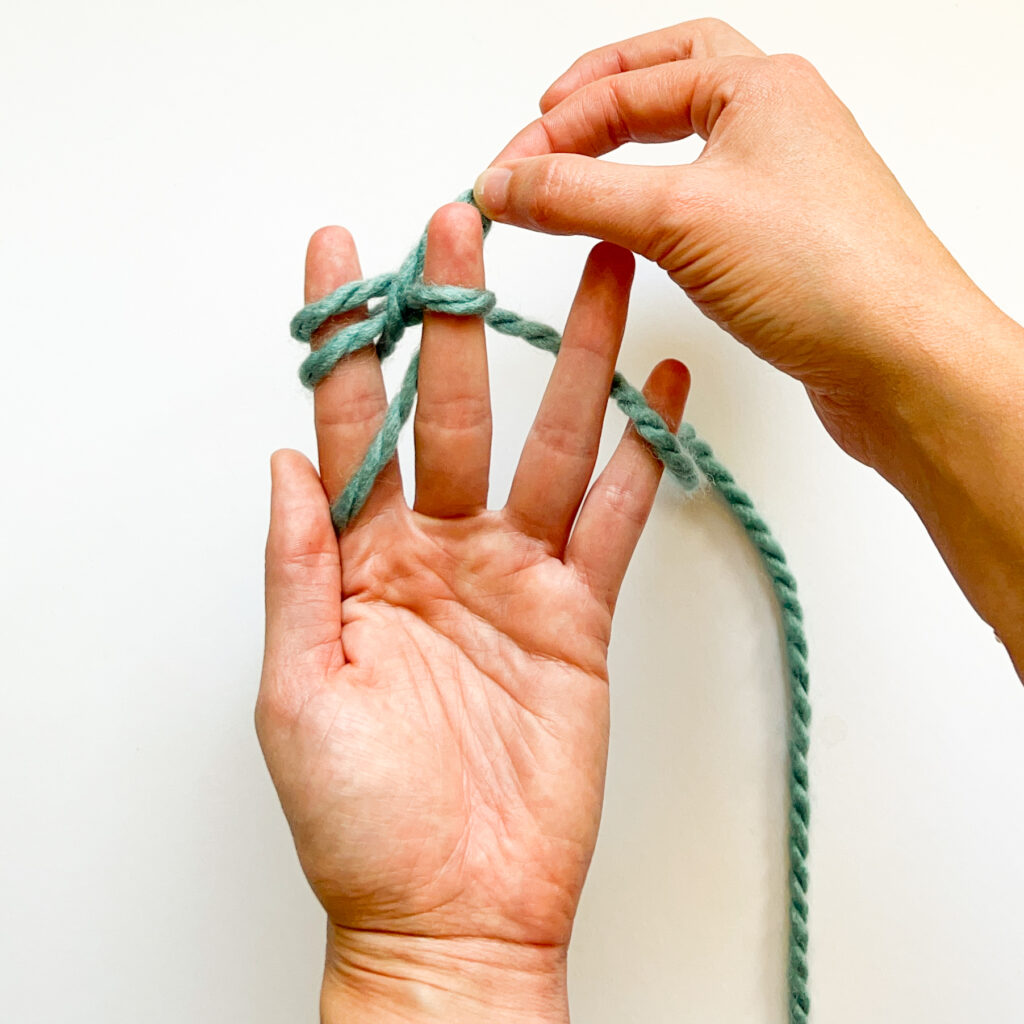
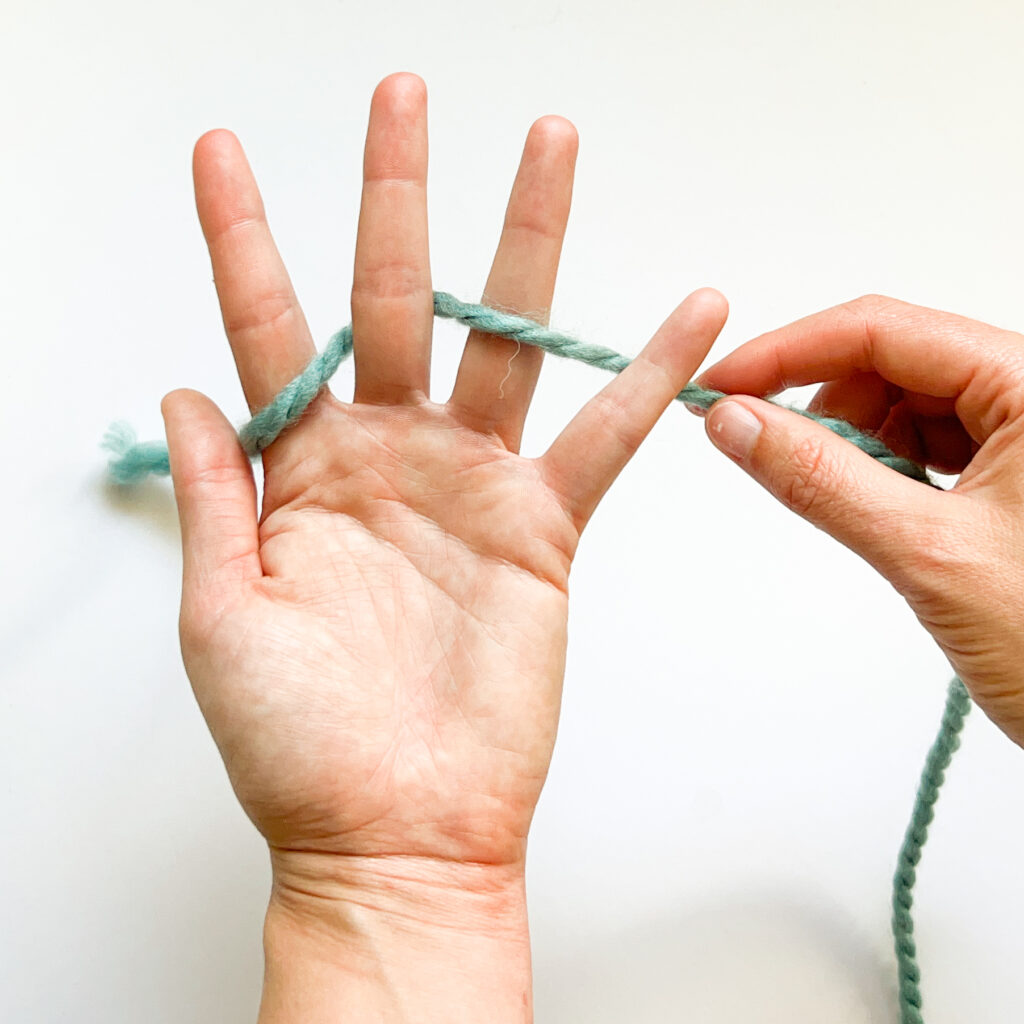
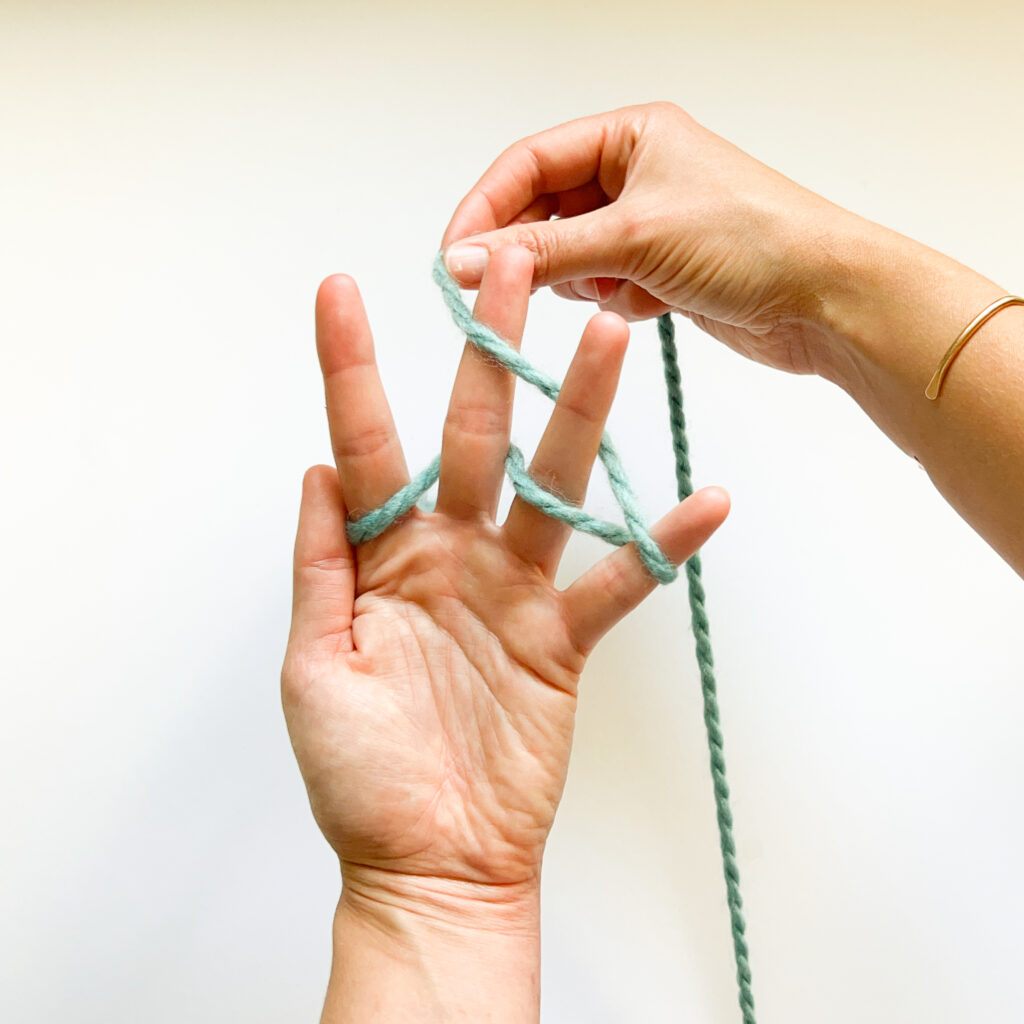
Pinch the yarn tail (the cut end!) between your thumb and palm. Next, bring the yarn behind your middle finger.
Bring the yarn around the front of your middle finger and back behind your first finger.
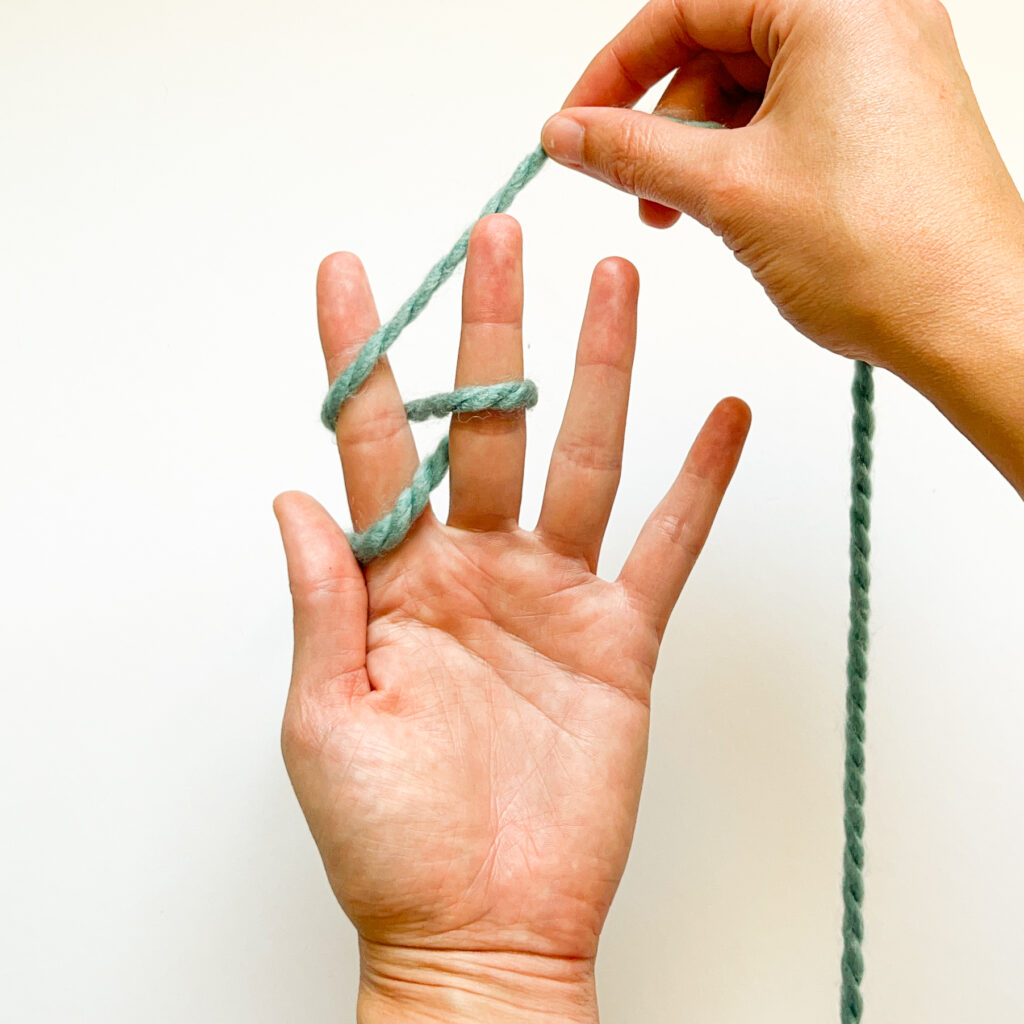
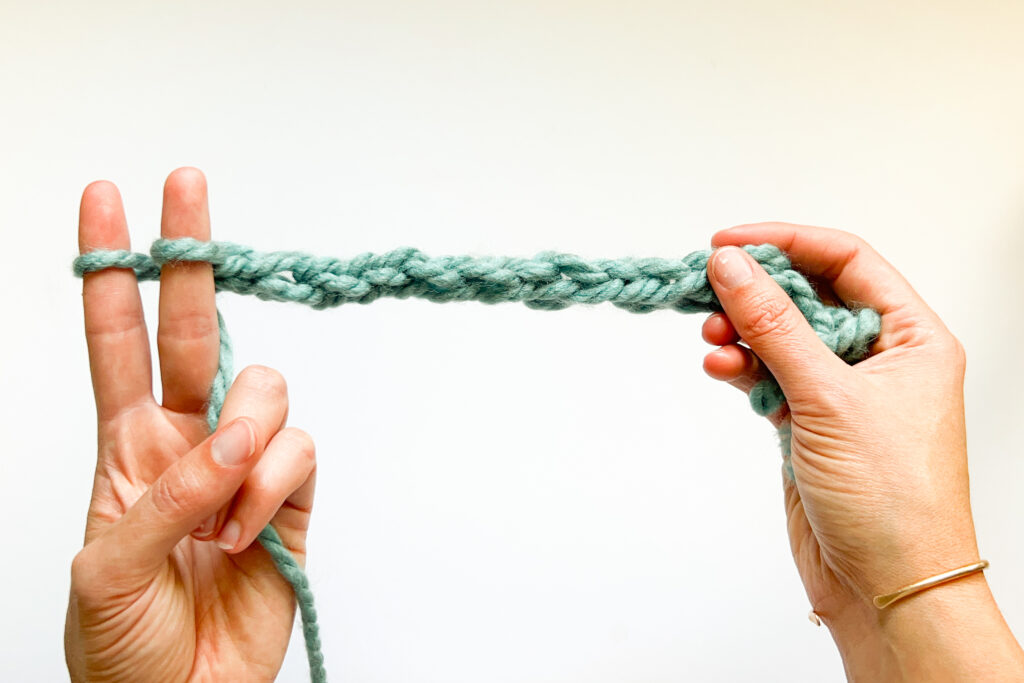
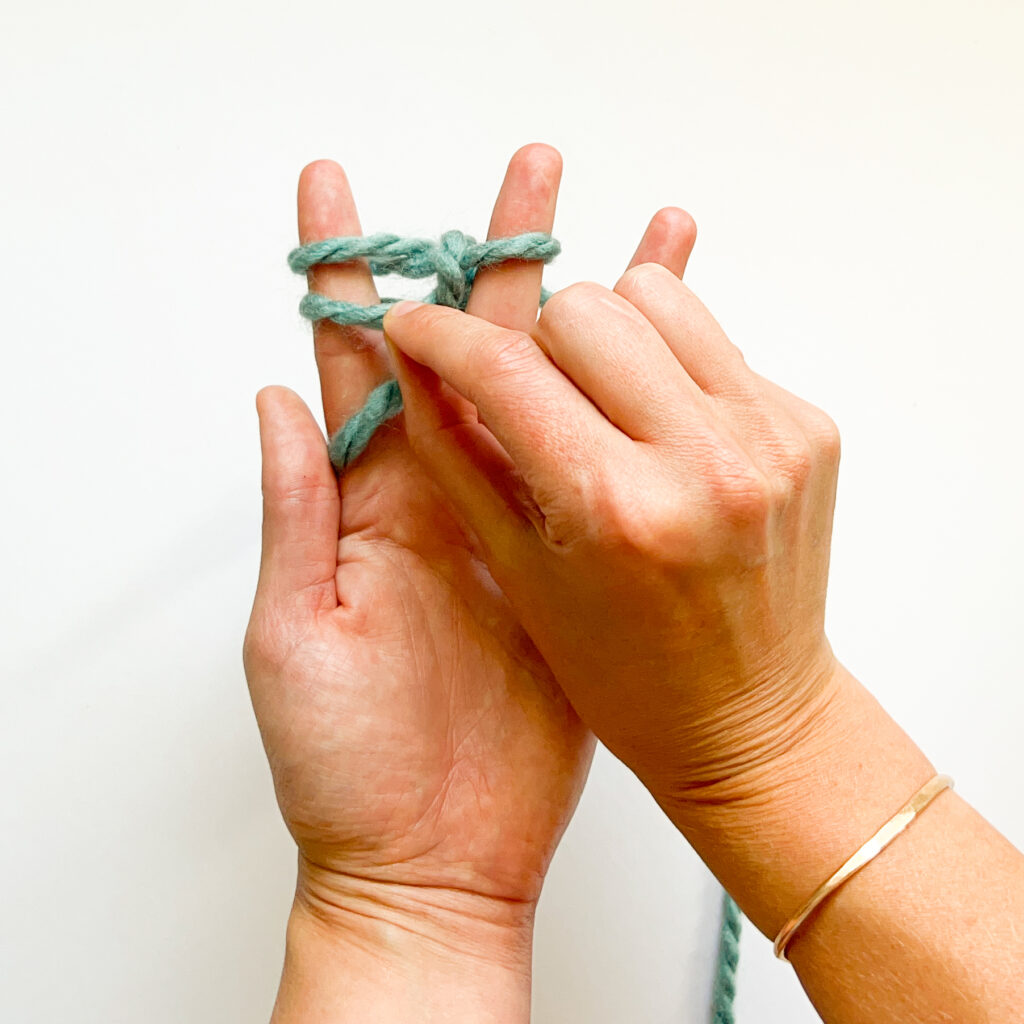
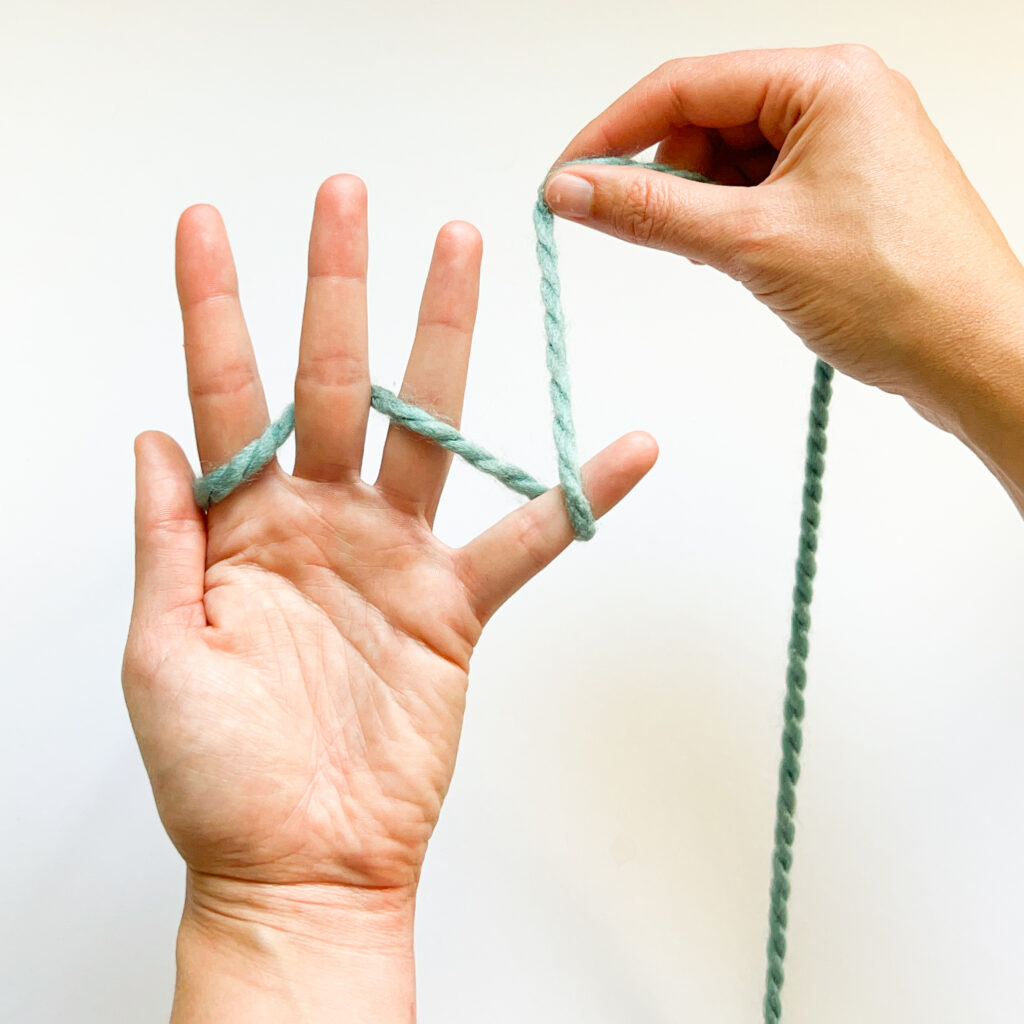
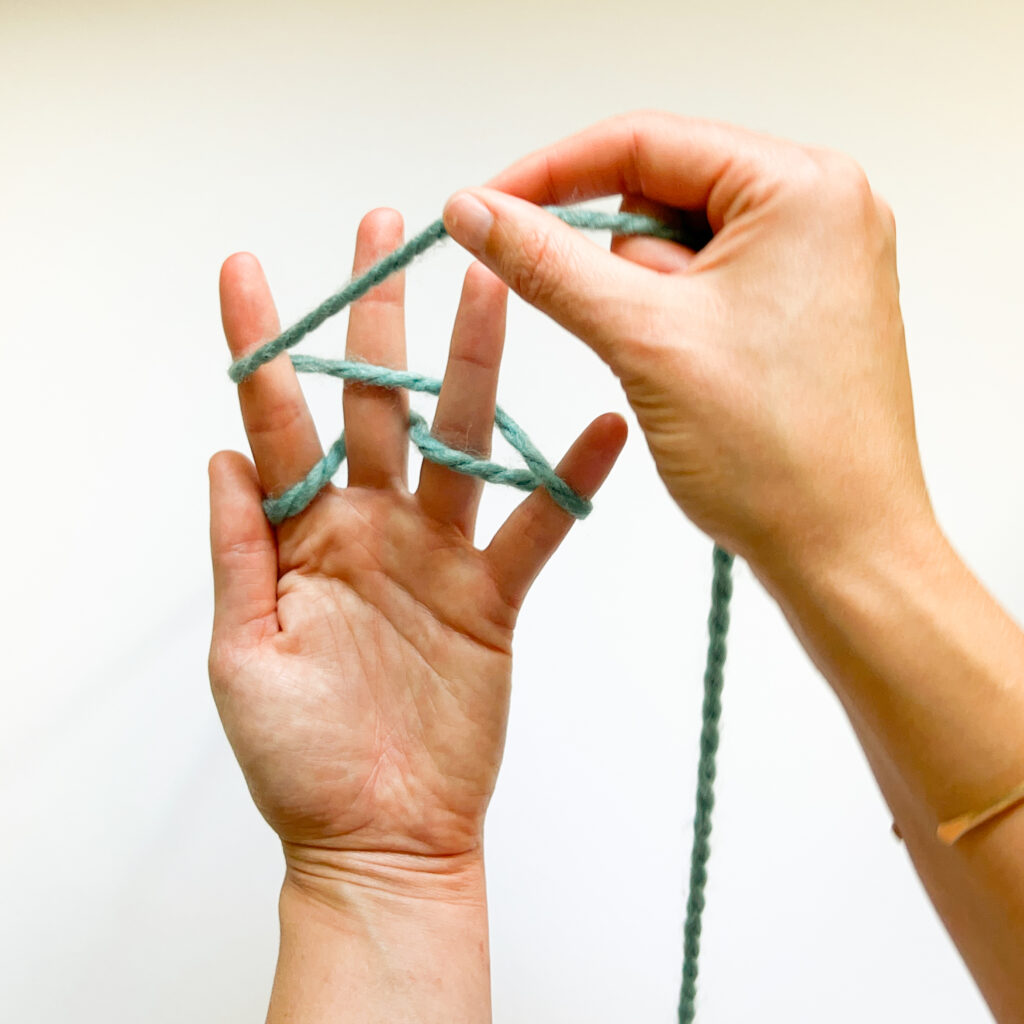
Wrap the yarn around the front of your first finger and back behind your middle finger. You now have one wrap around the front of each finger!
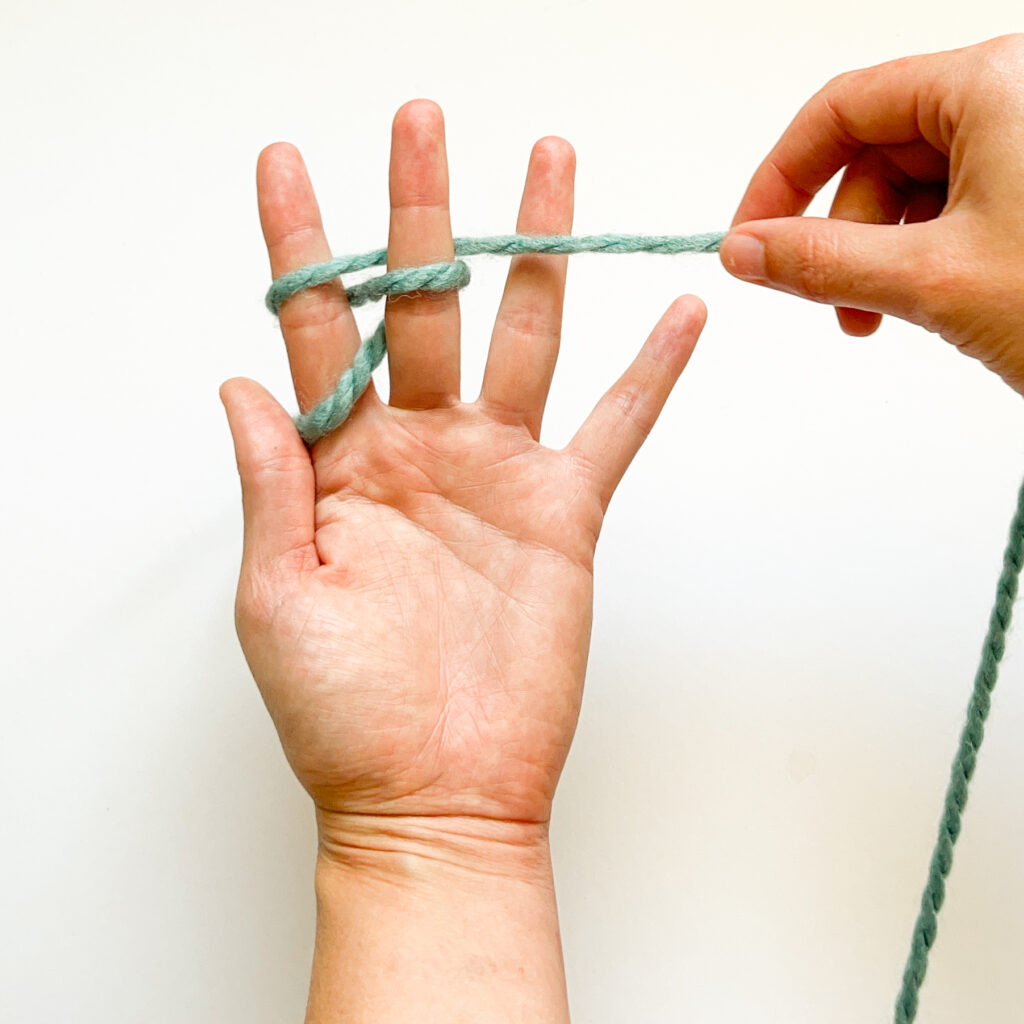
Wrap the yarn around across the front of your middle finger and behind your first finger. Bring it back across the front of the first finger and behind the middle finger again.
You now have two wraps around each finger! It’s time to knit!
You’ll repeat the remaining steps in this section until your project is as long as you’d like!
Knit the First Stitch:
Pinch the bottom wrap on your middle finger, pull it up over the second yarn wrap and off the back of your finger, letting it go. You now have one wrap on your middle finger and one stitch resting on the back of the same finger.
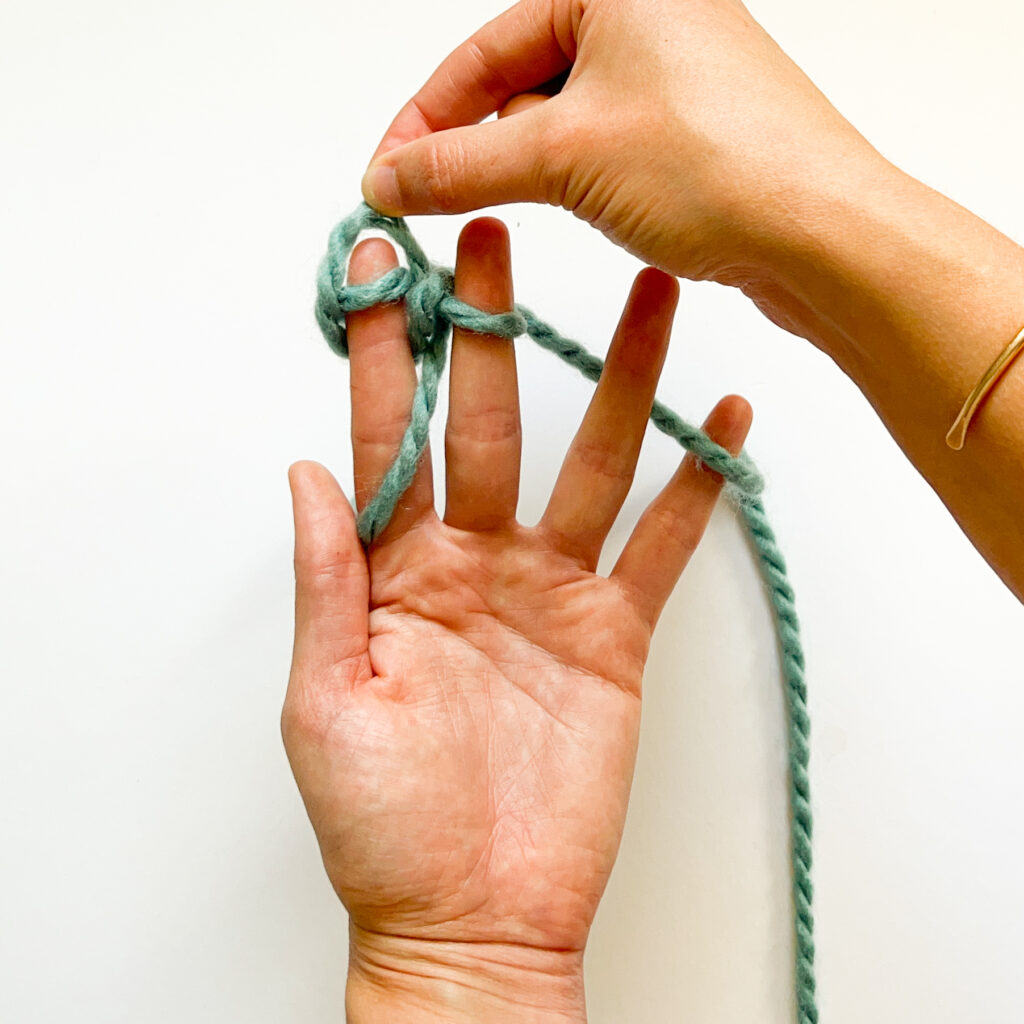
Knit the Second Stitch:
Pinch the bottom wrap on your first finger, pull it up over the second yarn wrap and off the back of your finger, letting it go. You now have one wrap on your first finger and one stitch resting on the back of the same finger.
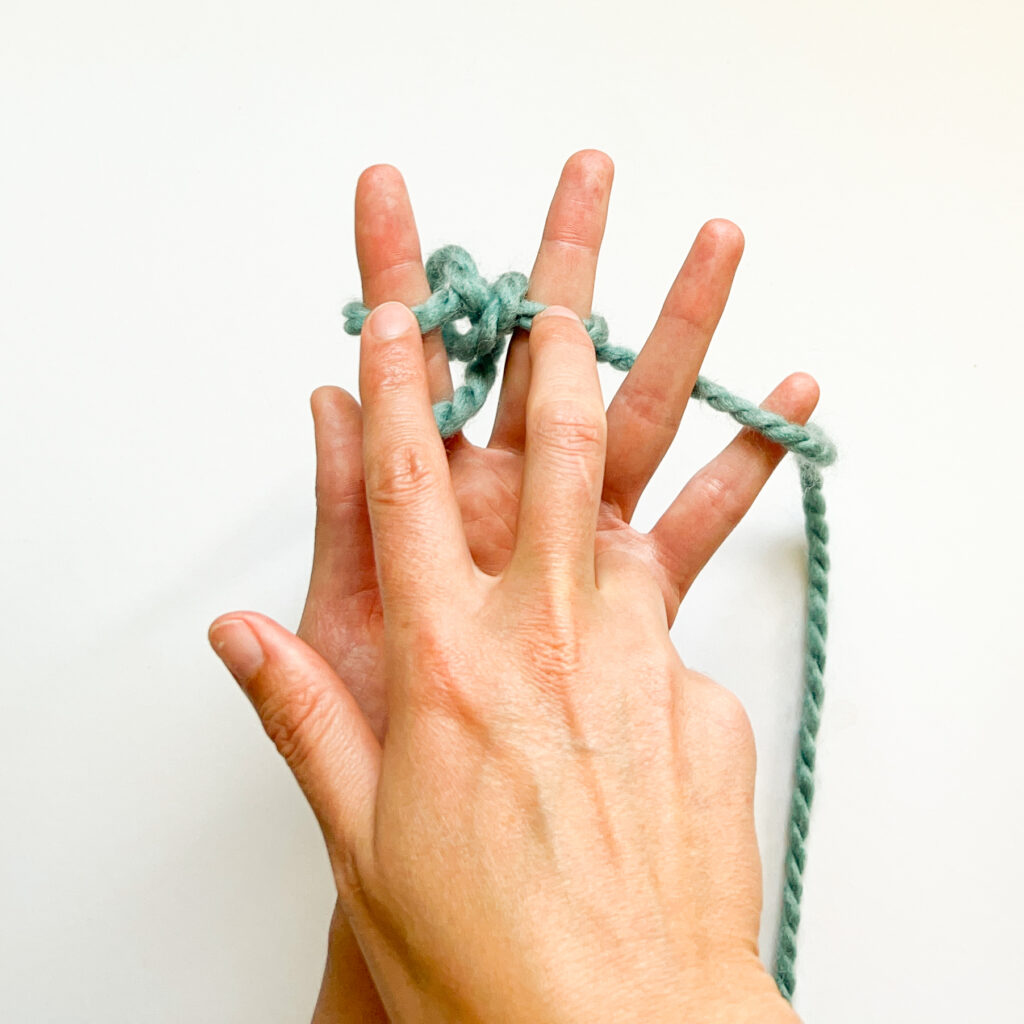
Use your dominant hand to push the yarn wraps down on your fingers toward your knuckles.
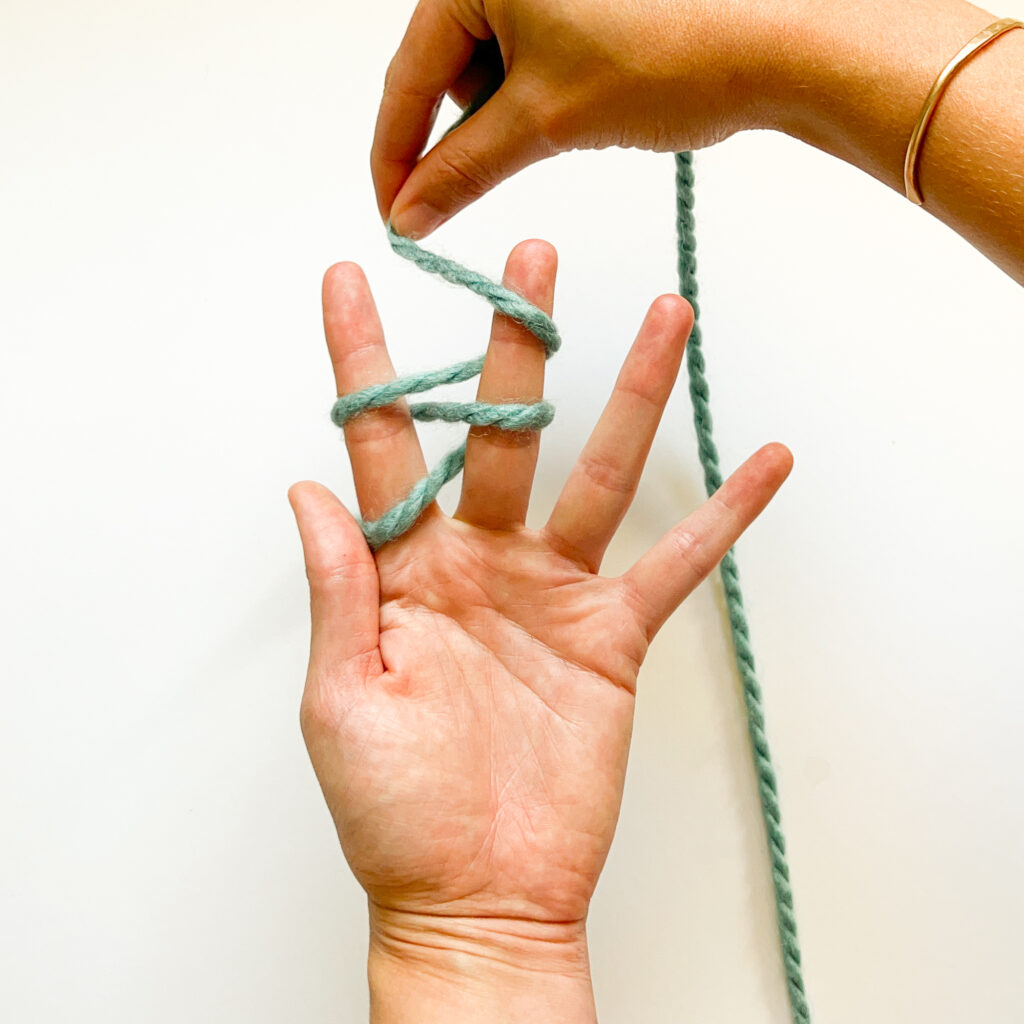
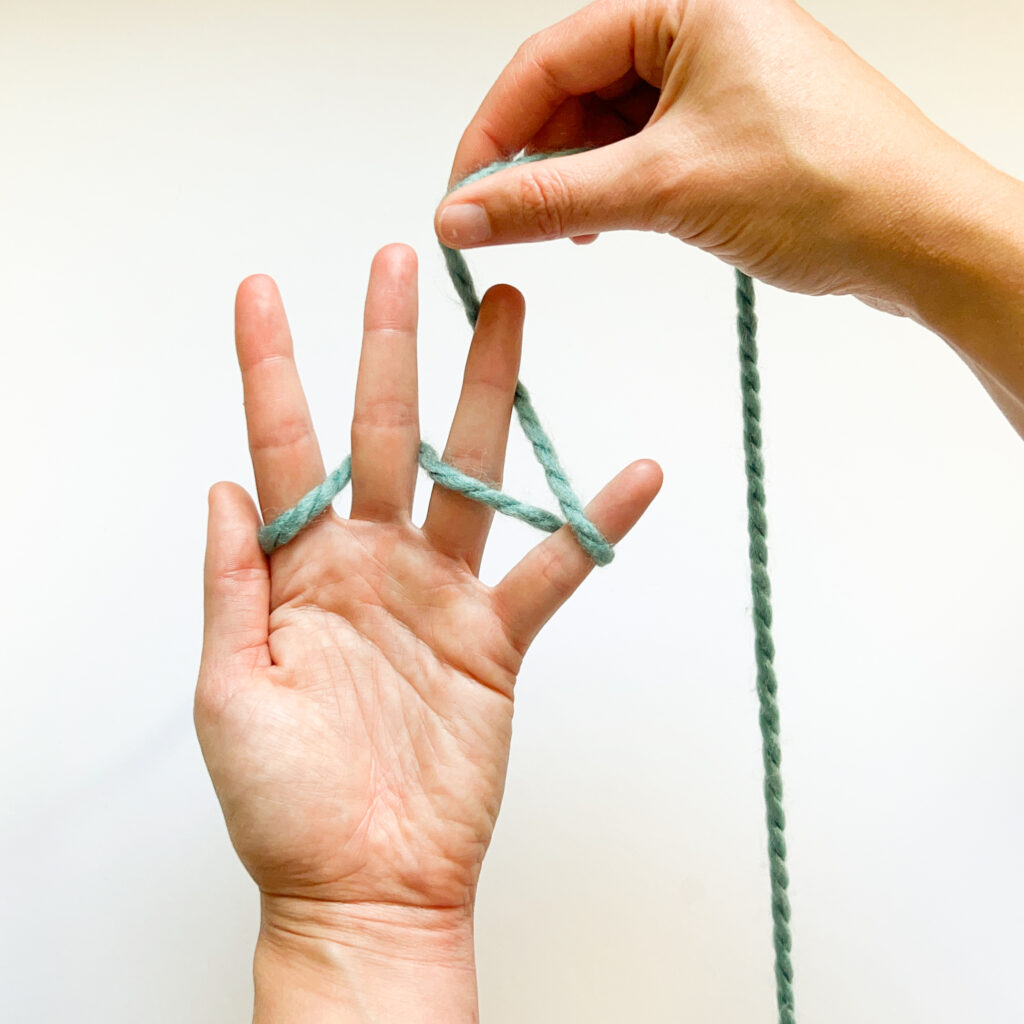
Pick up the yarn strand, it should be in the space between your two fingers.

Wrap the yarn around the middle finger by bringing it behind, around the outside, and across the front of the middle finger.
Wrap the yarn around your first finger by bringing it behind the first finger, around the outside, and across the front of the first finger.
You’re done wrapping and can drop the yarn back between the two fingers for the next steps.
Repeat the instructions above starting at the Two Finger Knitting section header until the end until you have a piece that’s the length you want. Ta dah! Now you know how to finger knit on two fingers.
To knit on four fingers, you’ll be wrapping the yarn around the fingers of your non-dominant hand. Your dominant hand will be the one holding the yarn. We’ll be using the same “figure 8” motion from the two-finger version above but with more fingers!
The set up rows will be slightly different than the steps for knitting the rest of your project. Pay attention and don’t skip ahead!
You’ll follow the “setting up” instructions just once, then you’ll repeat the second half of this section over and over until your piece is long enough. Let’s go!
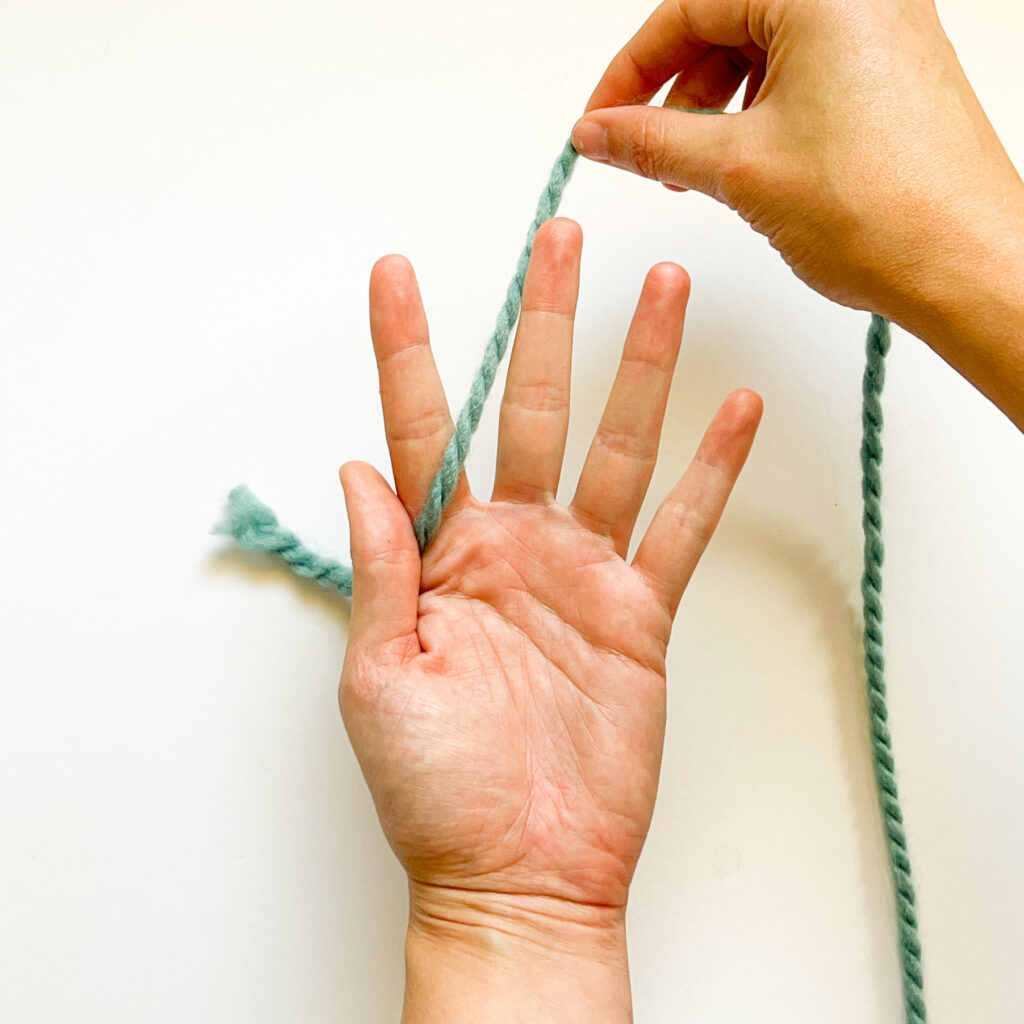
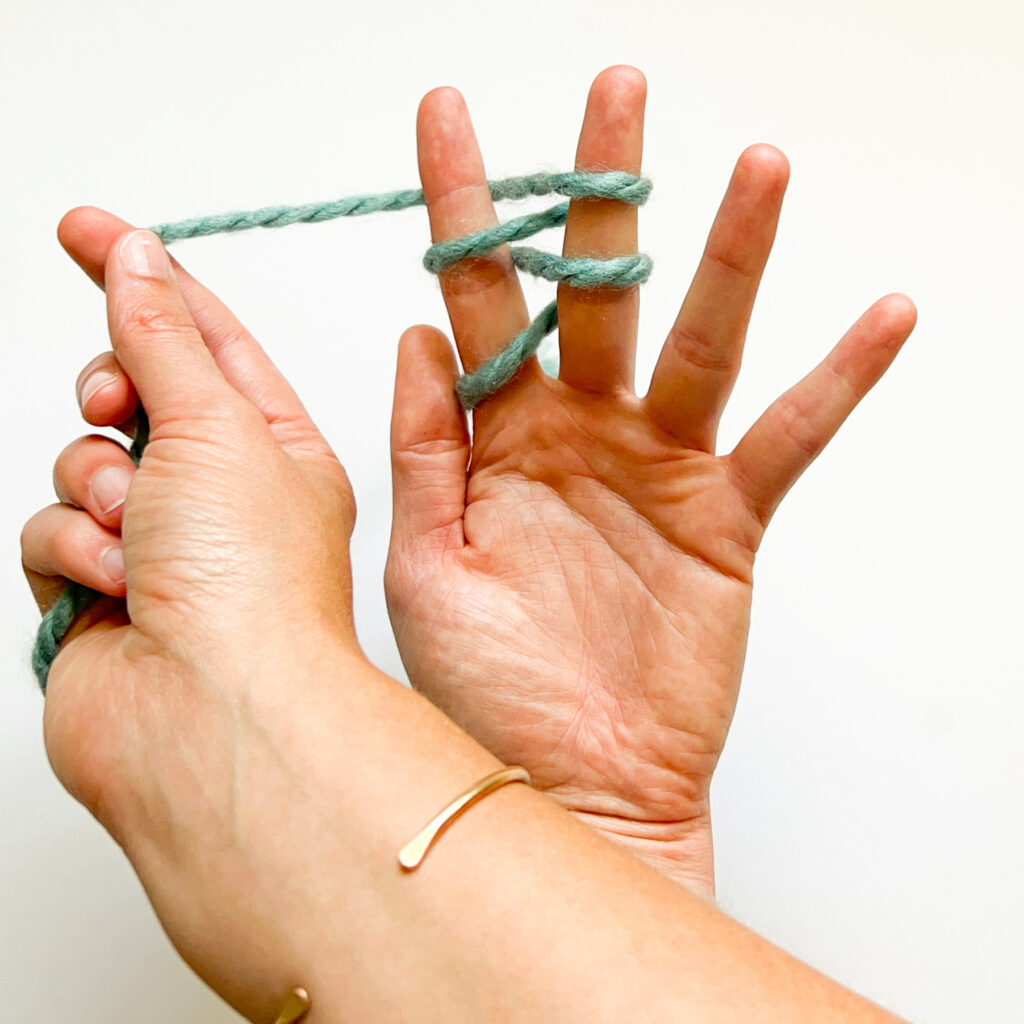
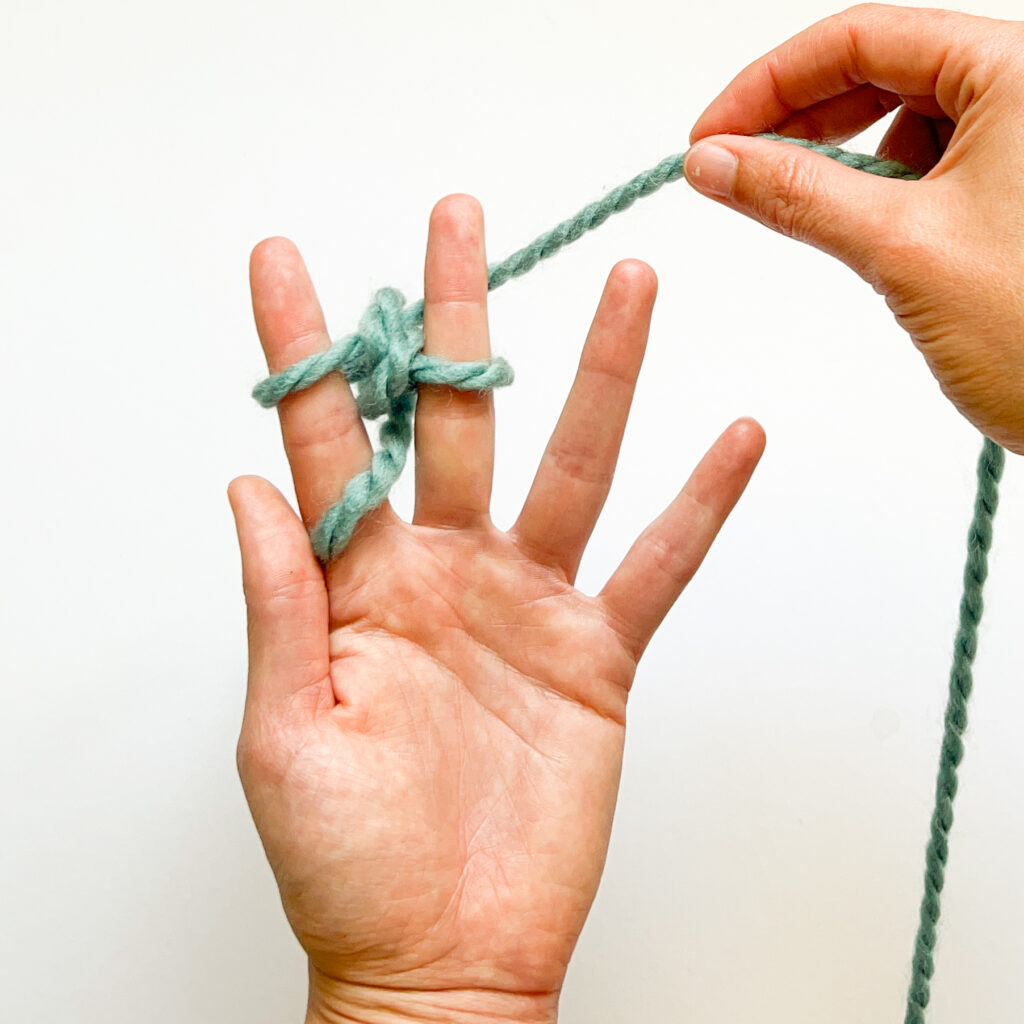
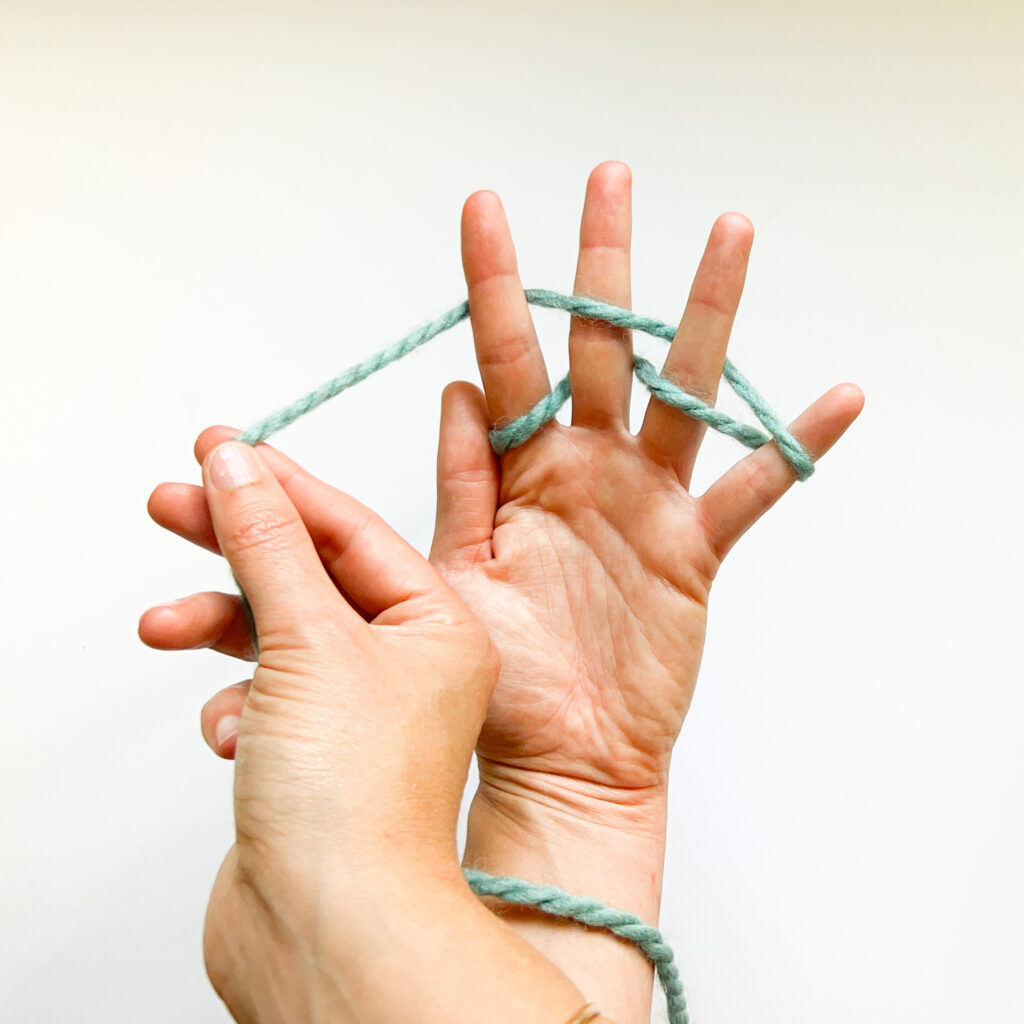
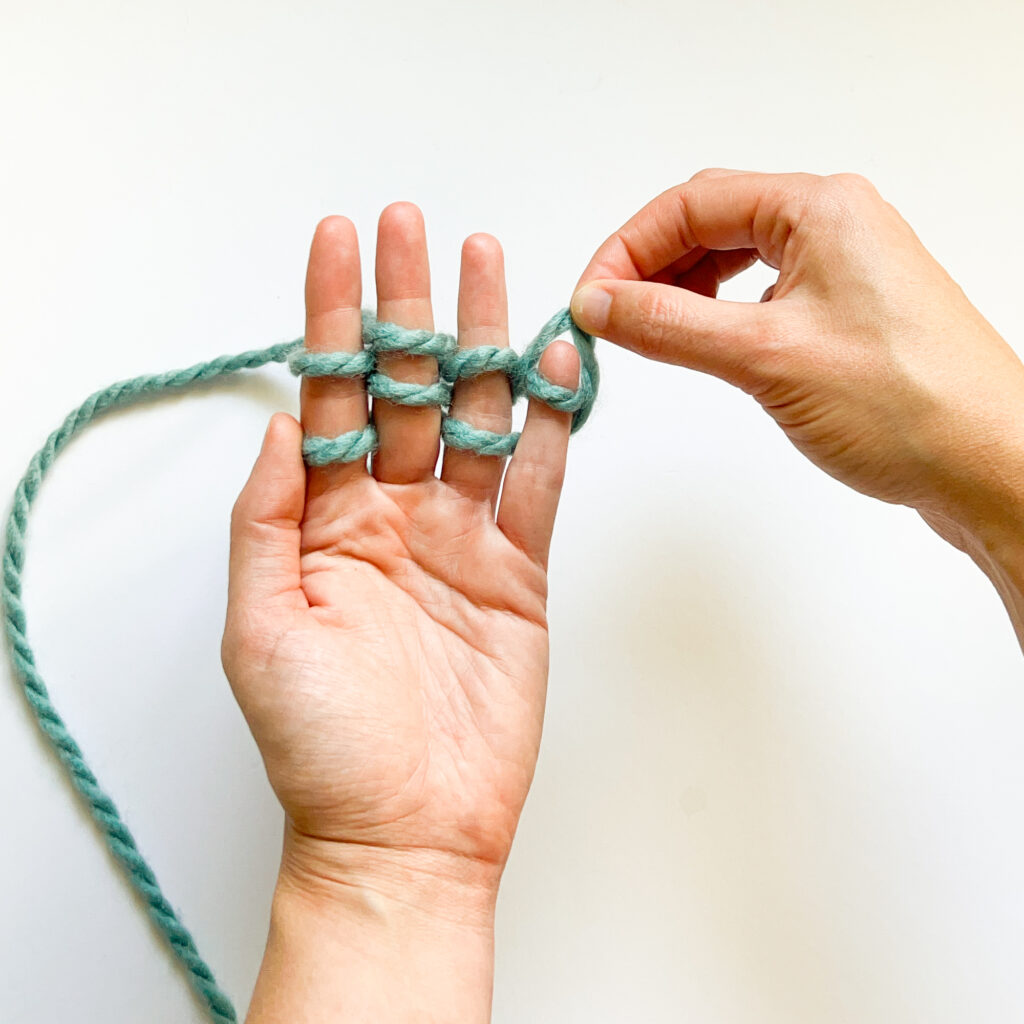
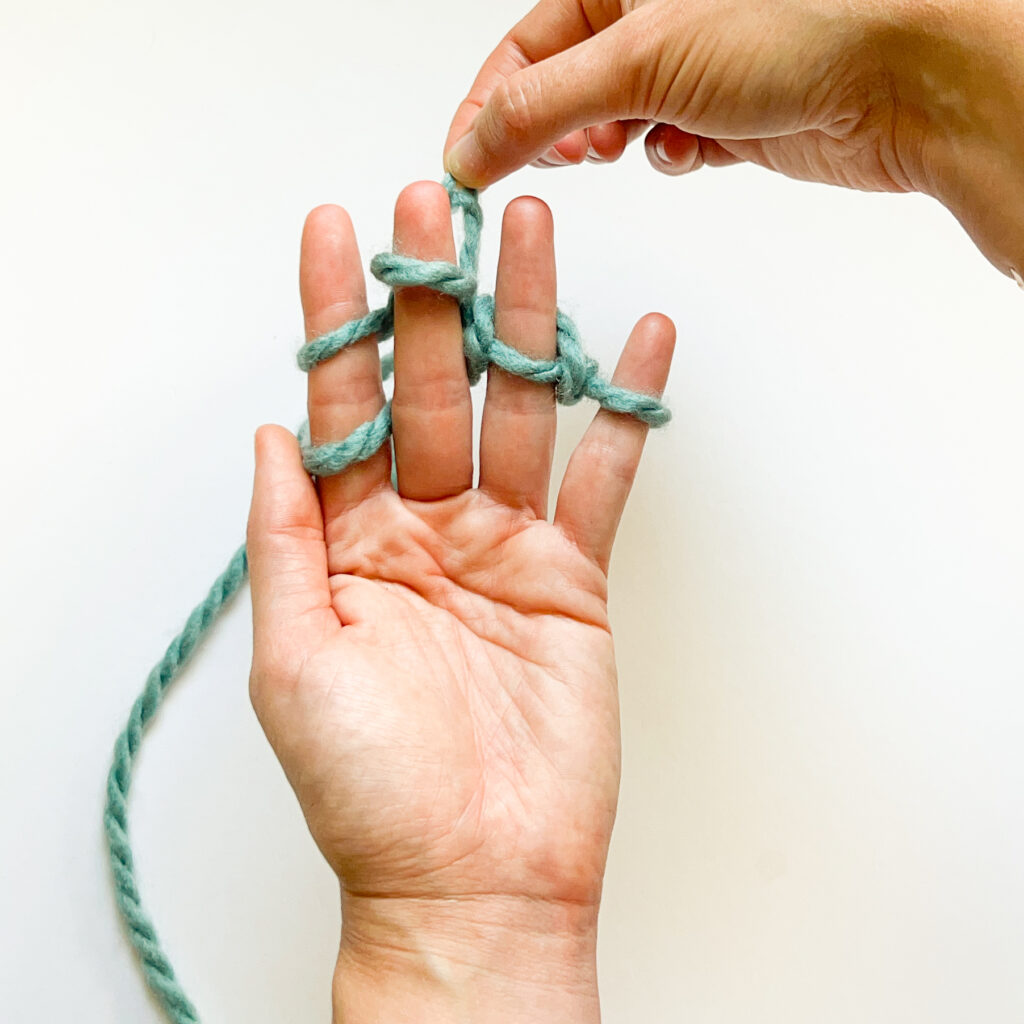
Pinch the yarn tail (the cut end!) between your thumb and palm. Bring the yarn behind your middle and pinky fingers.
Wrapping the First Row
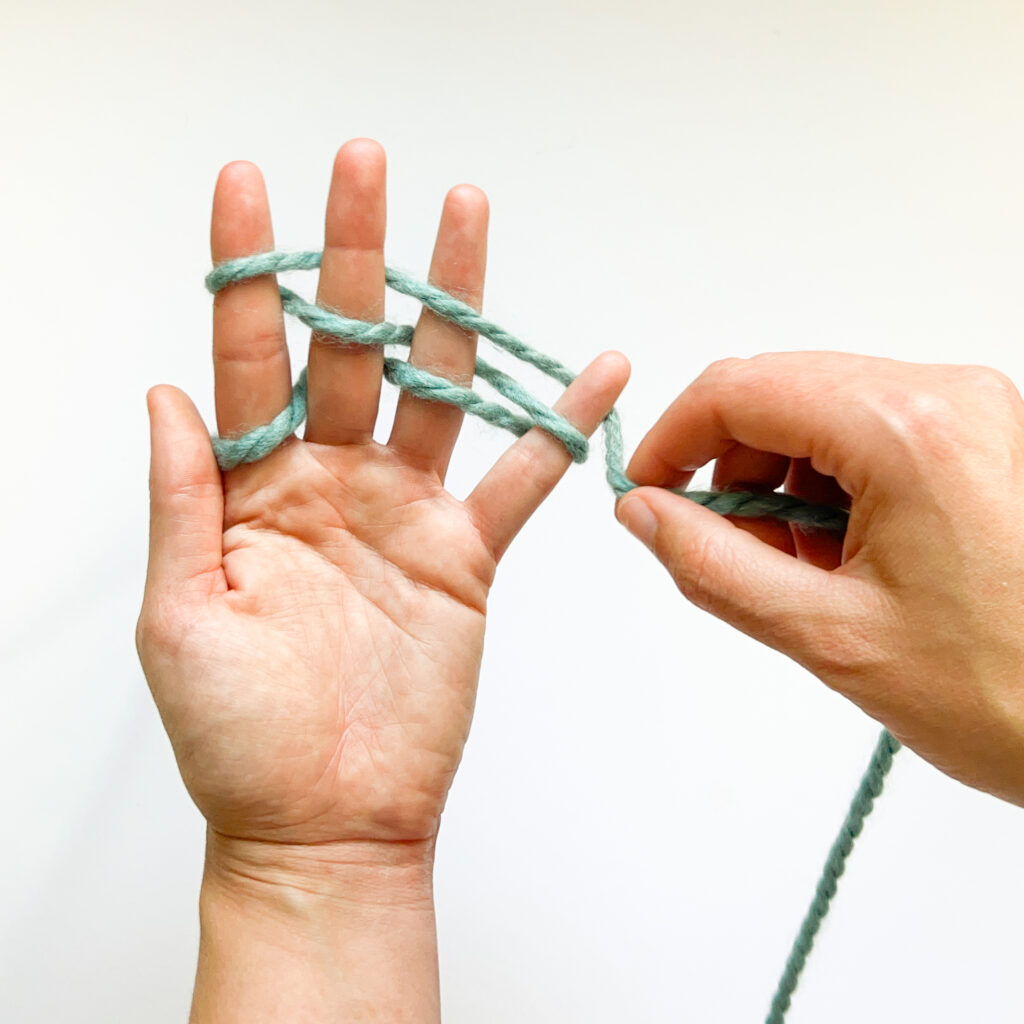
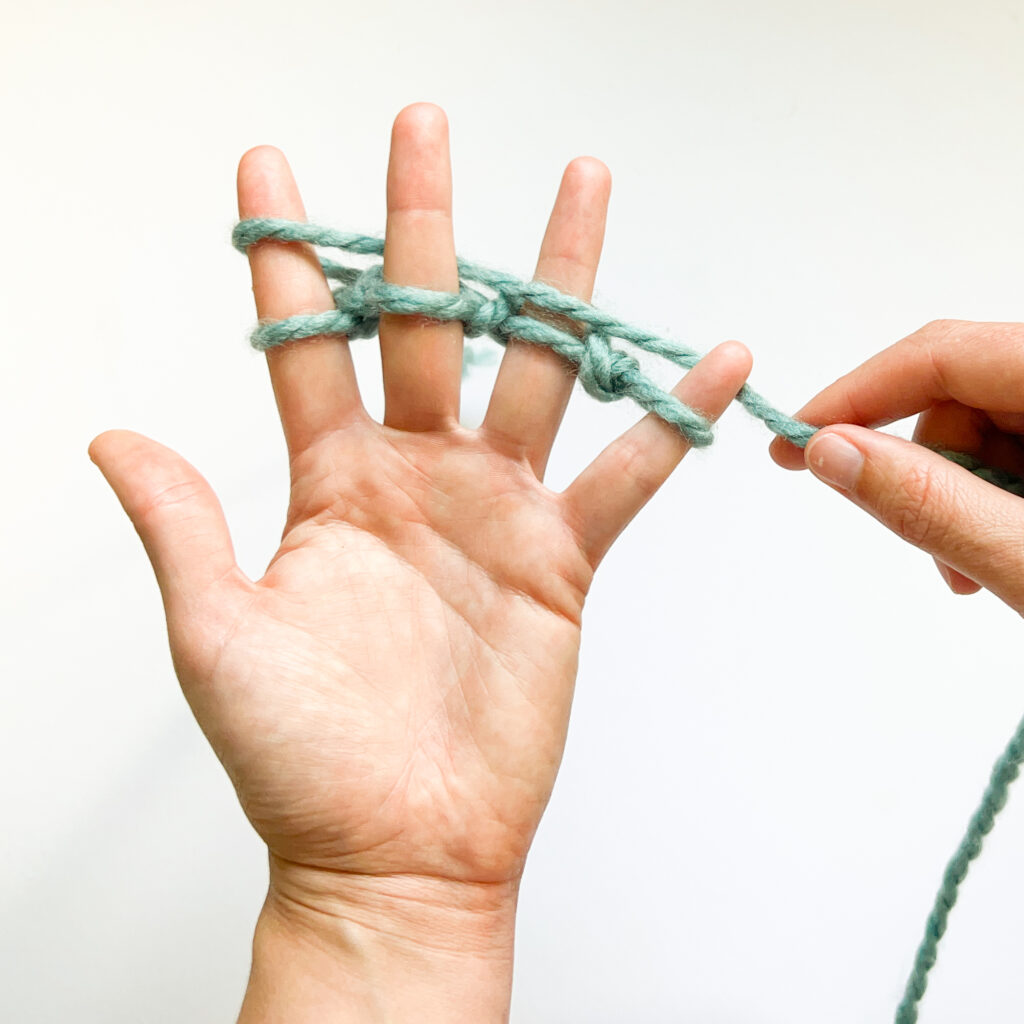
Wrap the yarn around the outside and across the front of your pinky, behind your ring finger, in front of your middle finger, and behind your first finger.
You now have one wrap across the front of each finger.

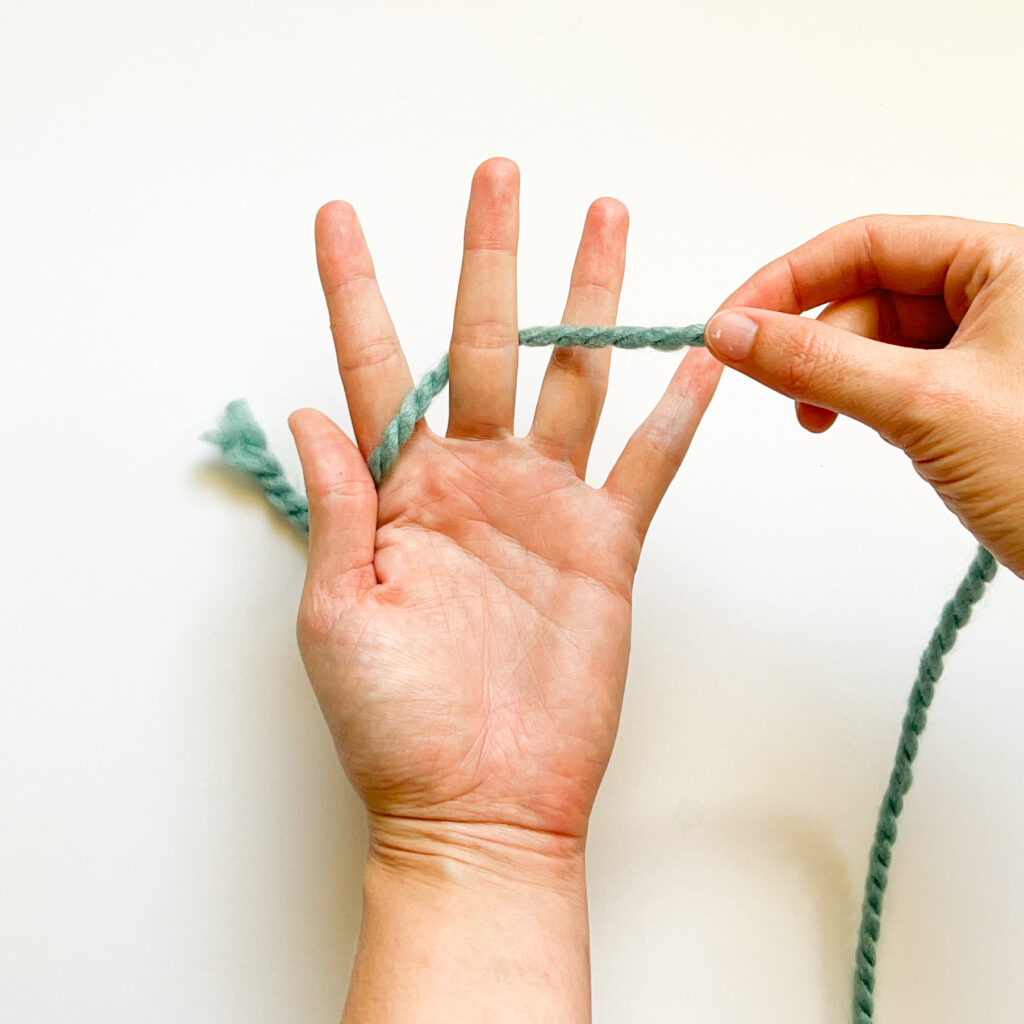
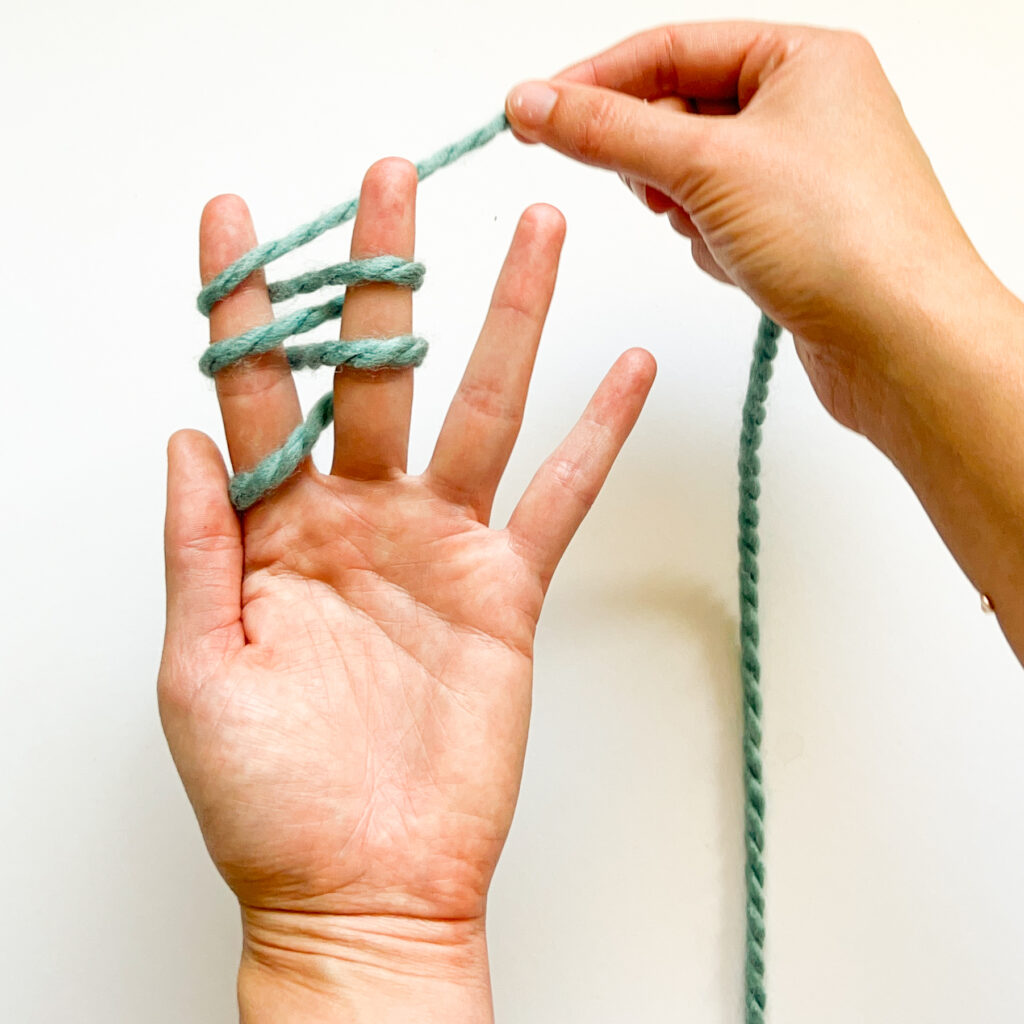
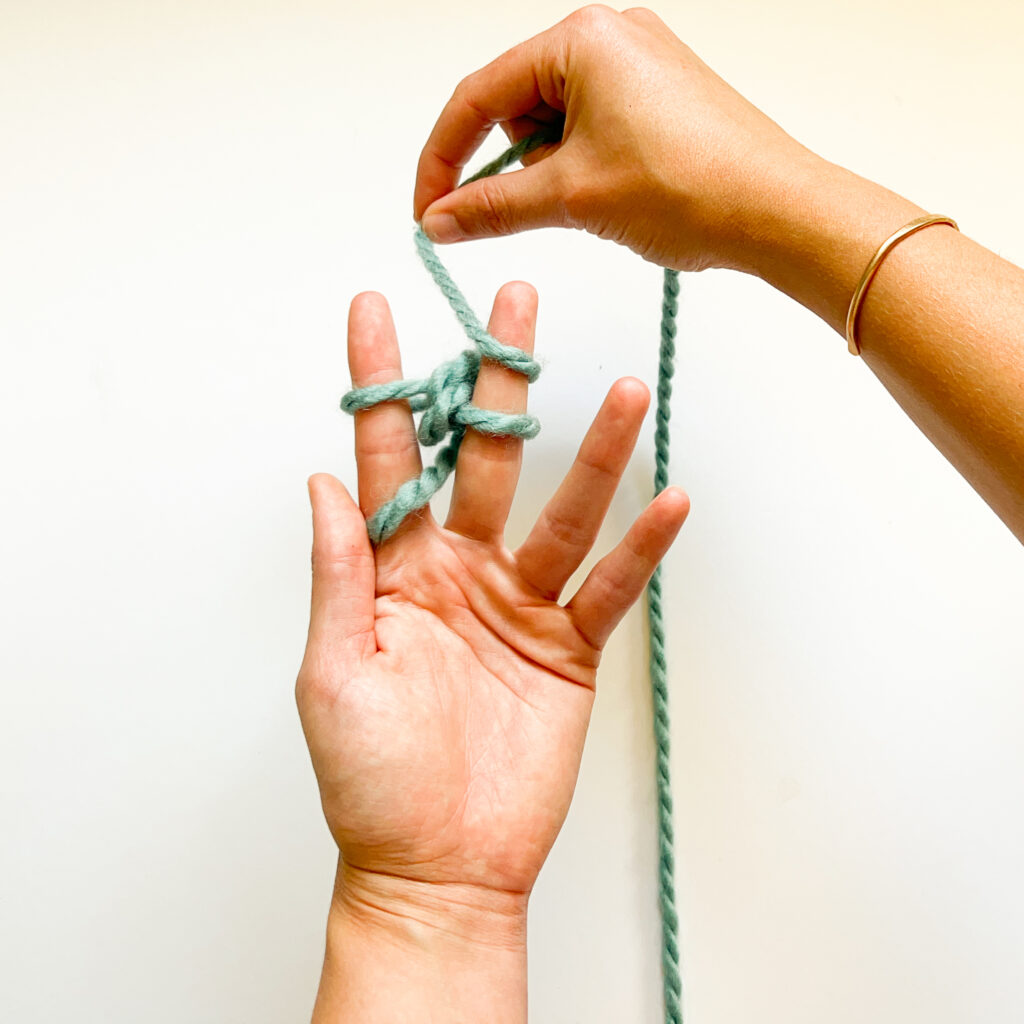
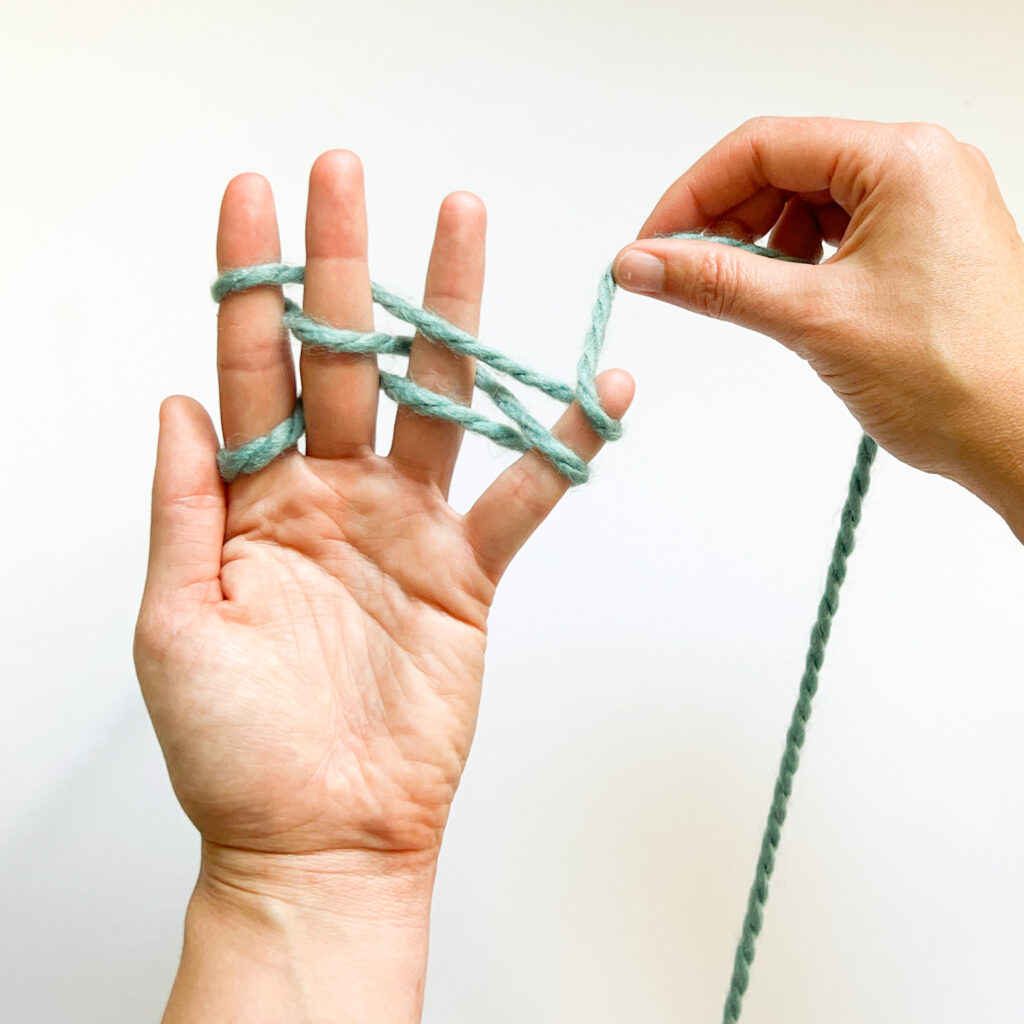
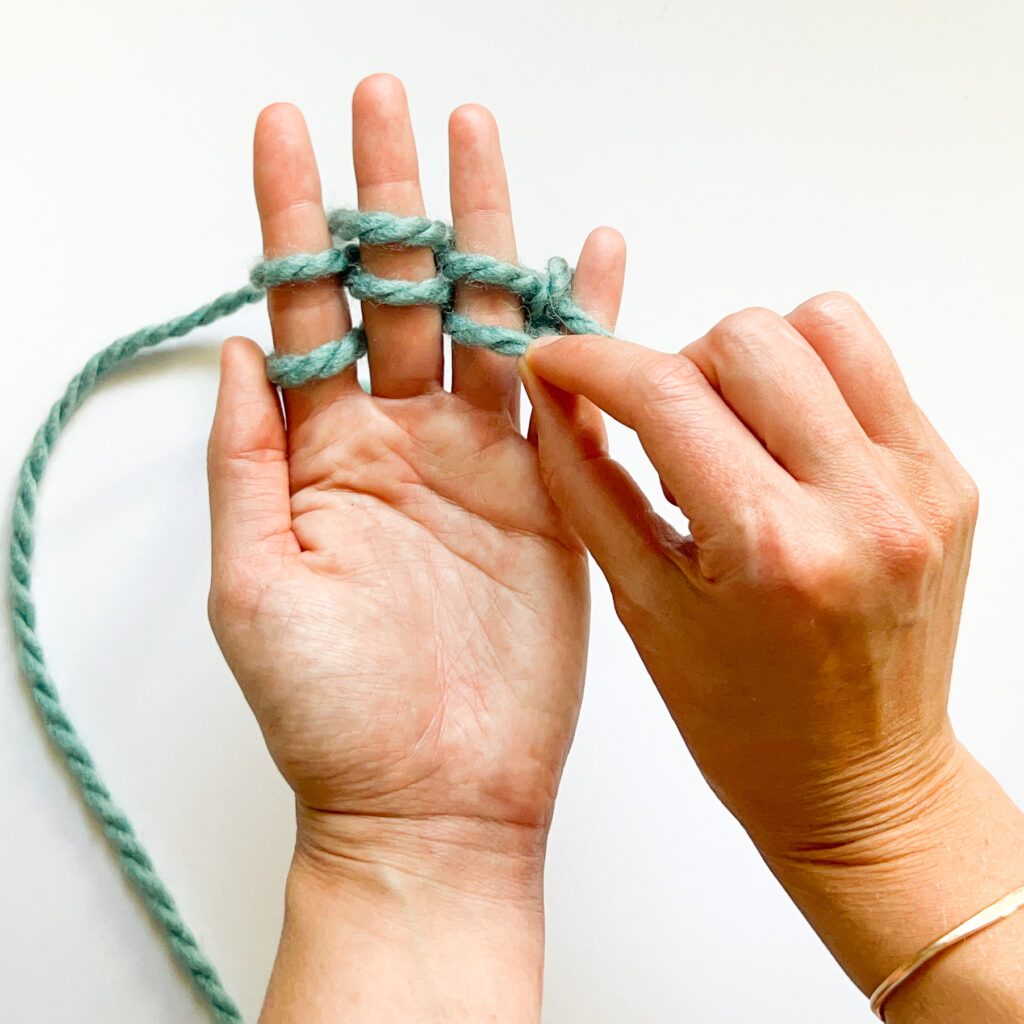
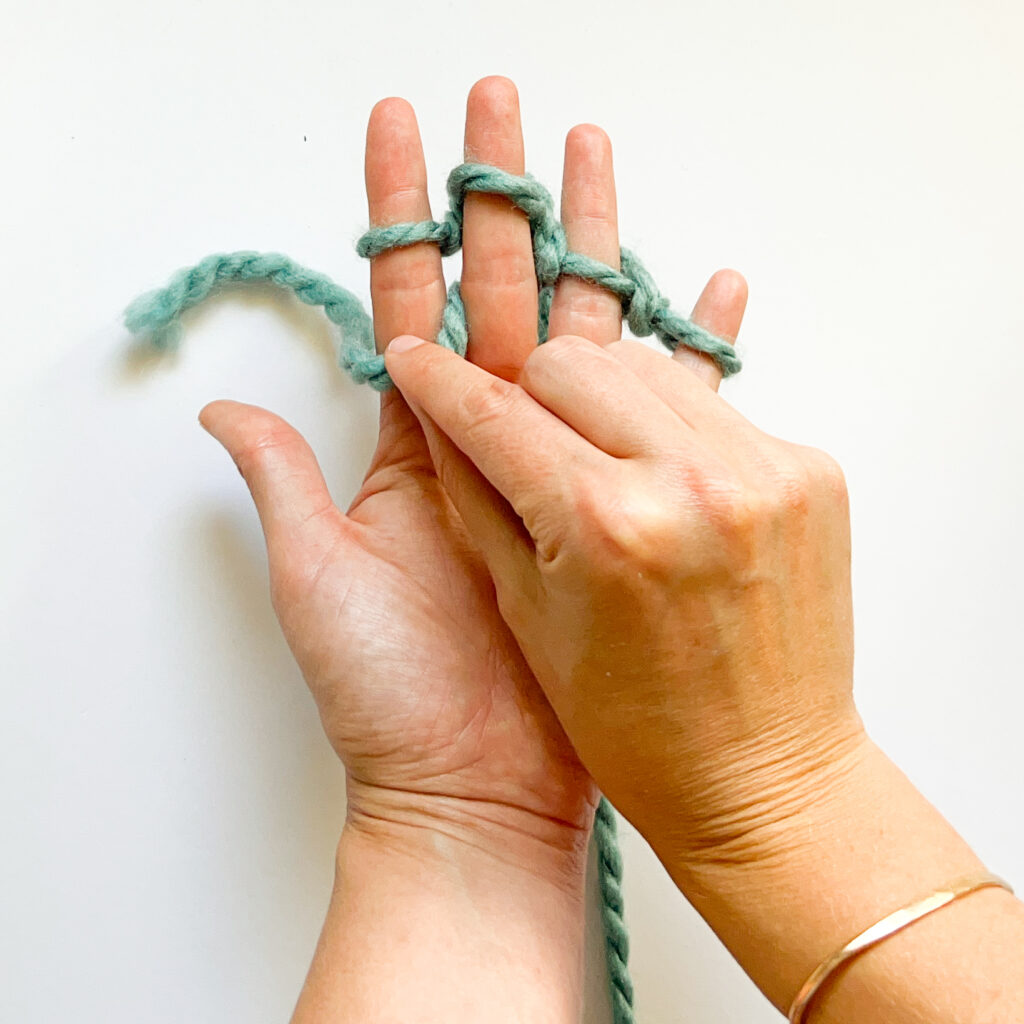
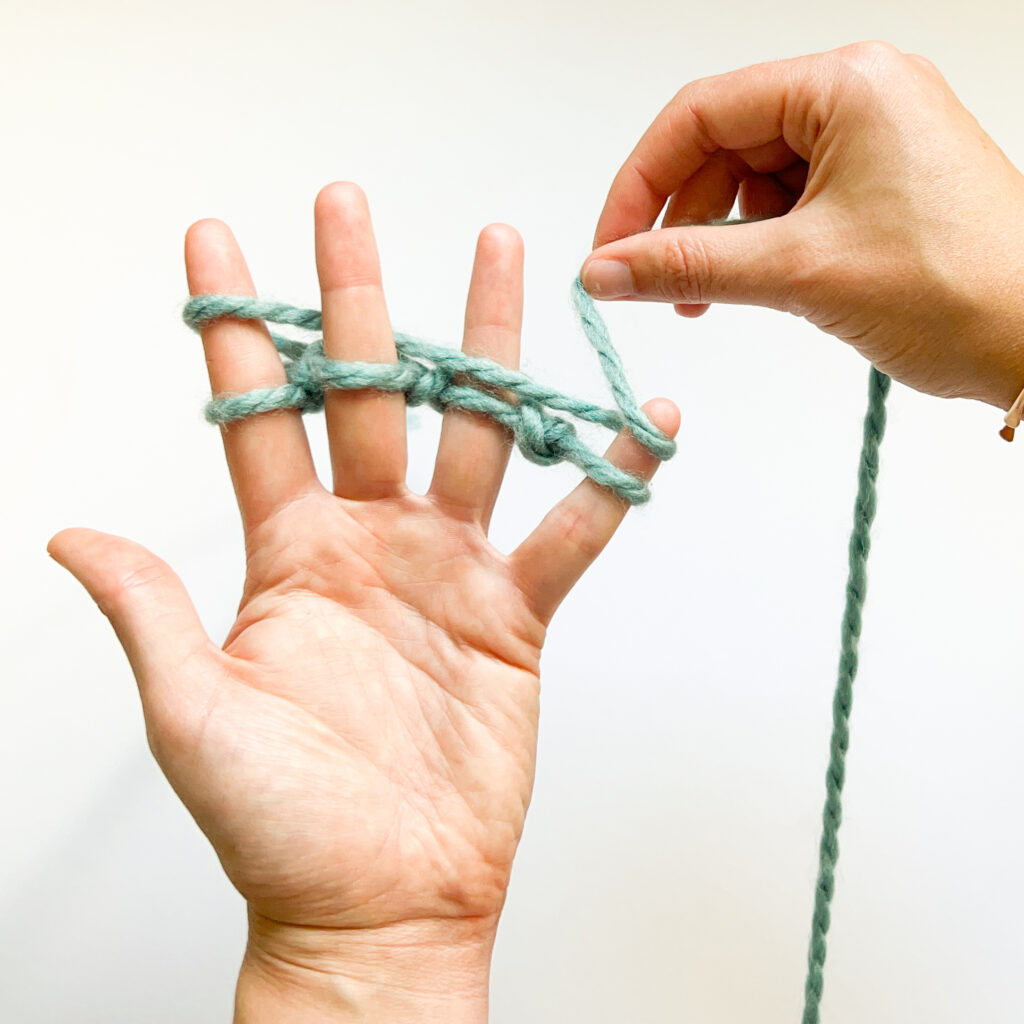
Wrapping the Second Row
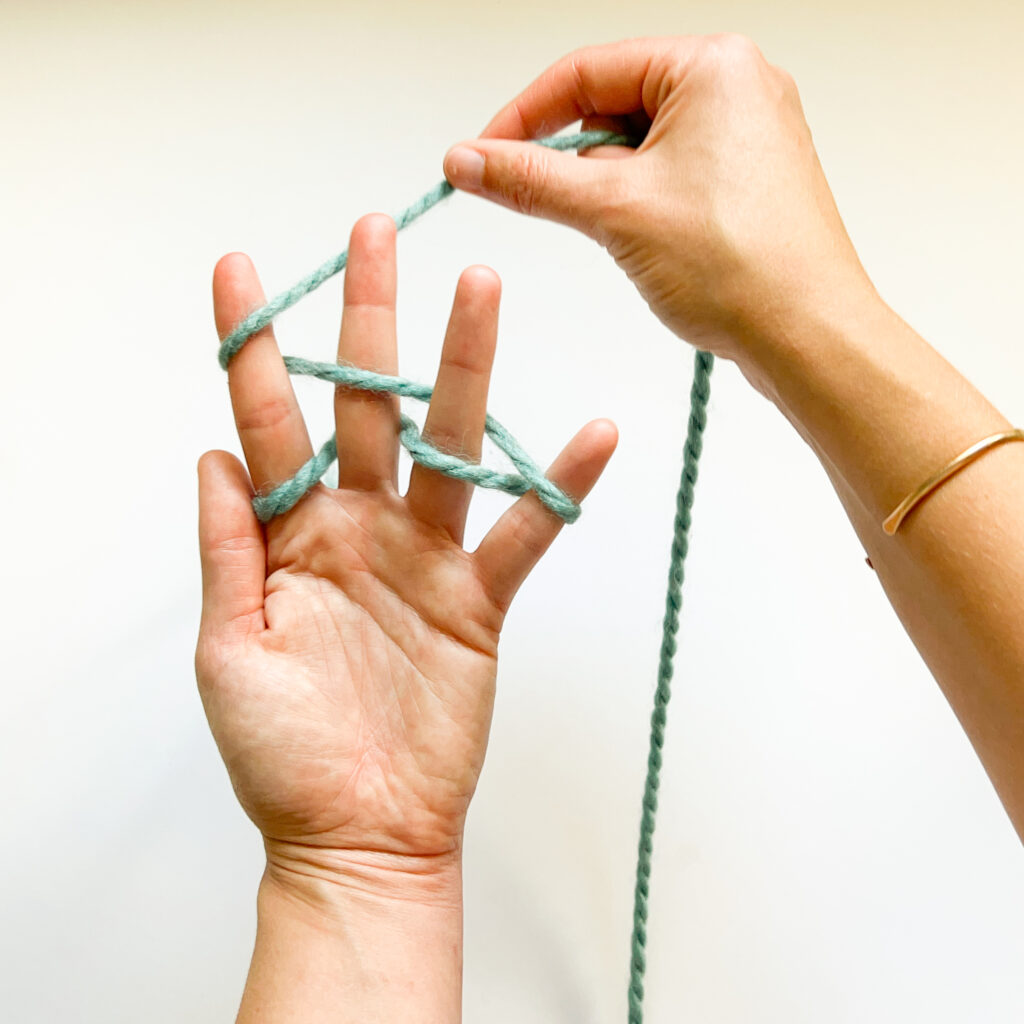
Wrap the yarn around the front of your first finger, behind your middle finger, in front of your ring finger, and behind the pinky.
You now have two rows of yarn coming across the front of your first and ring fingers.
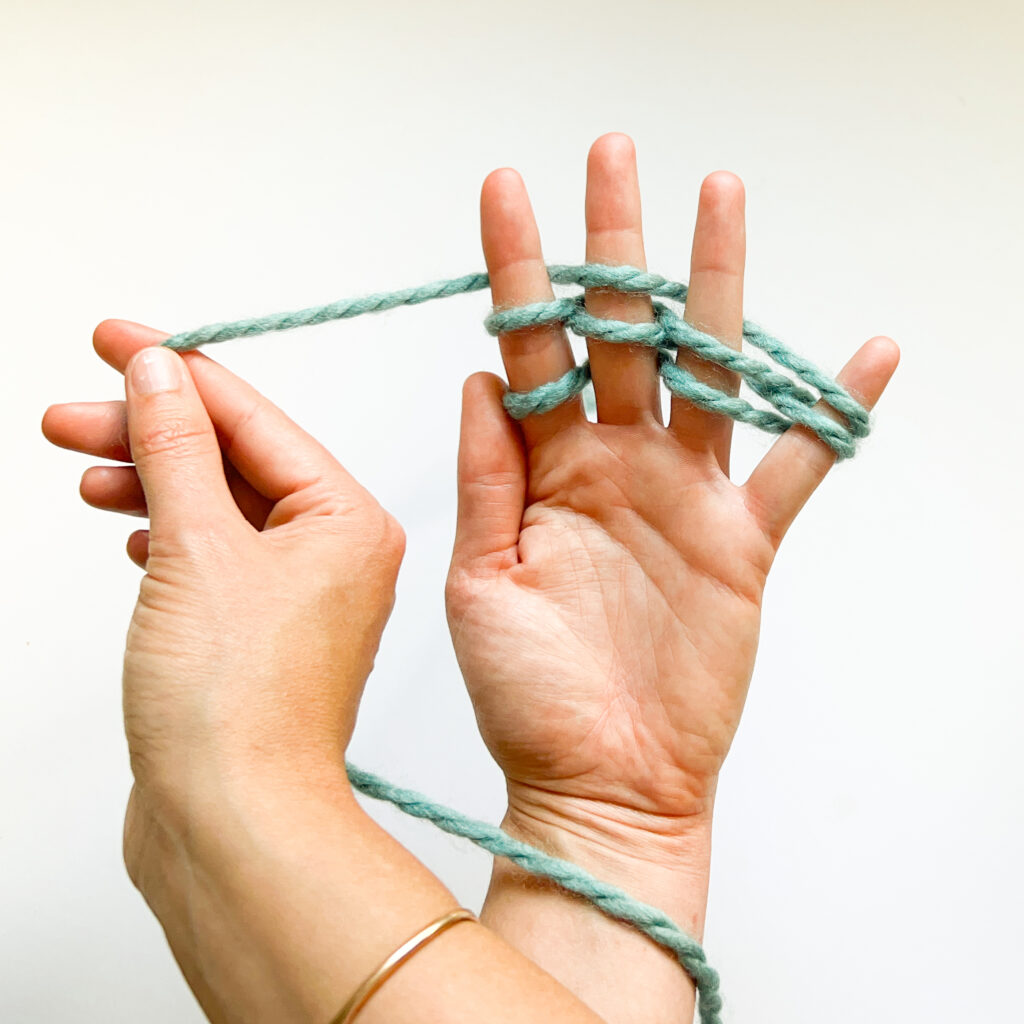
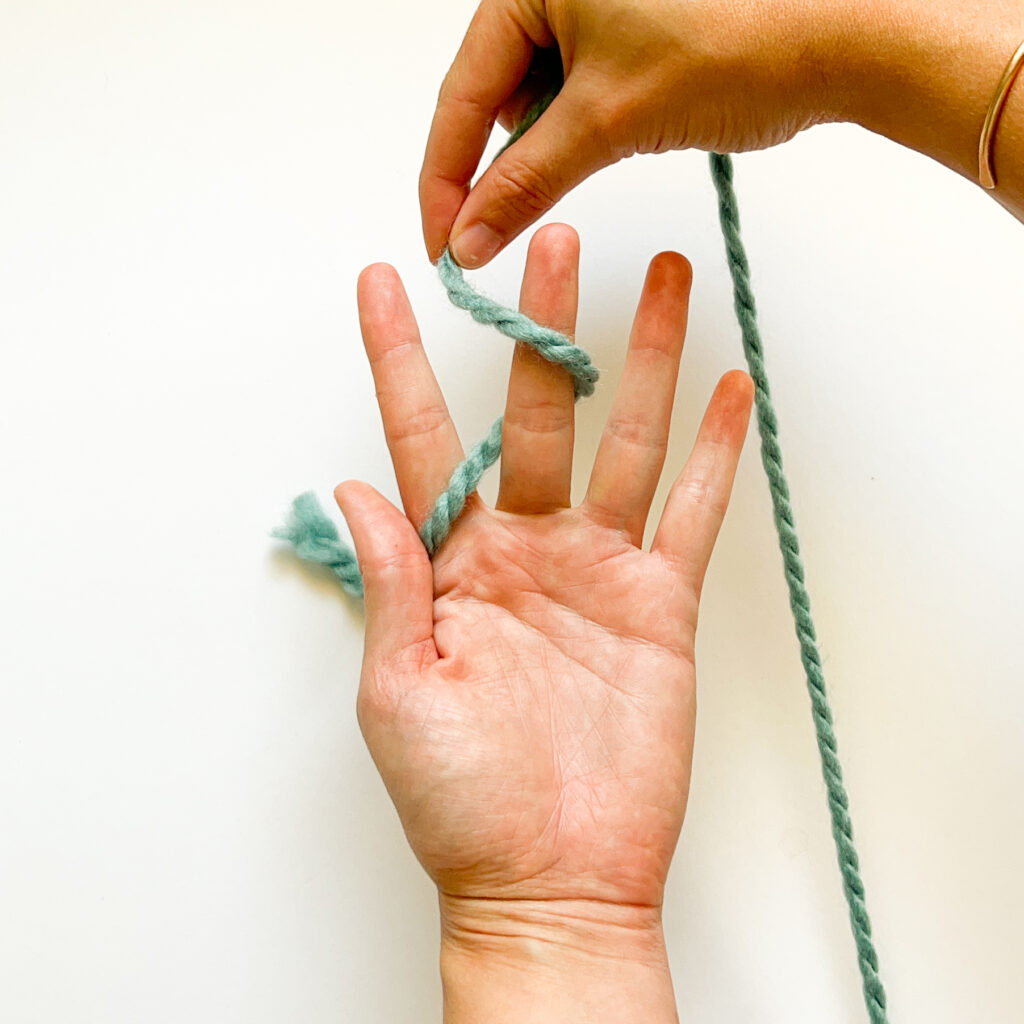
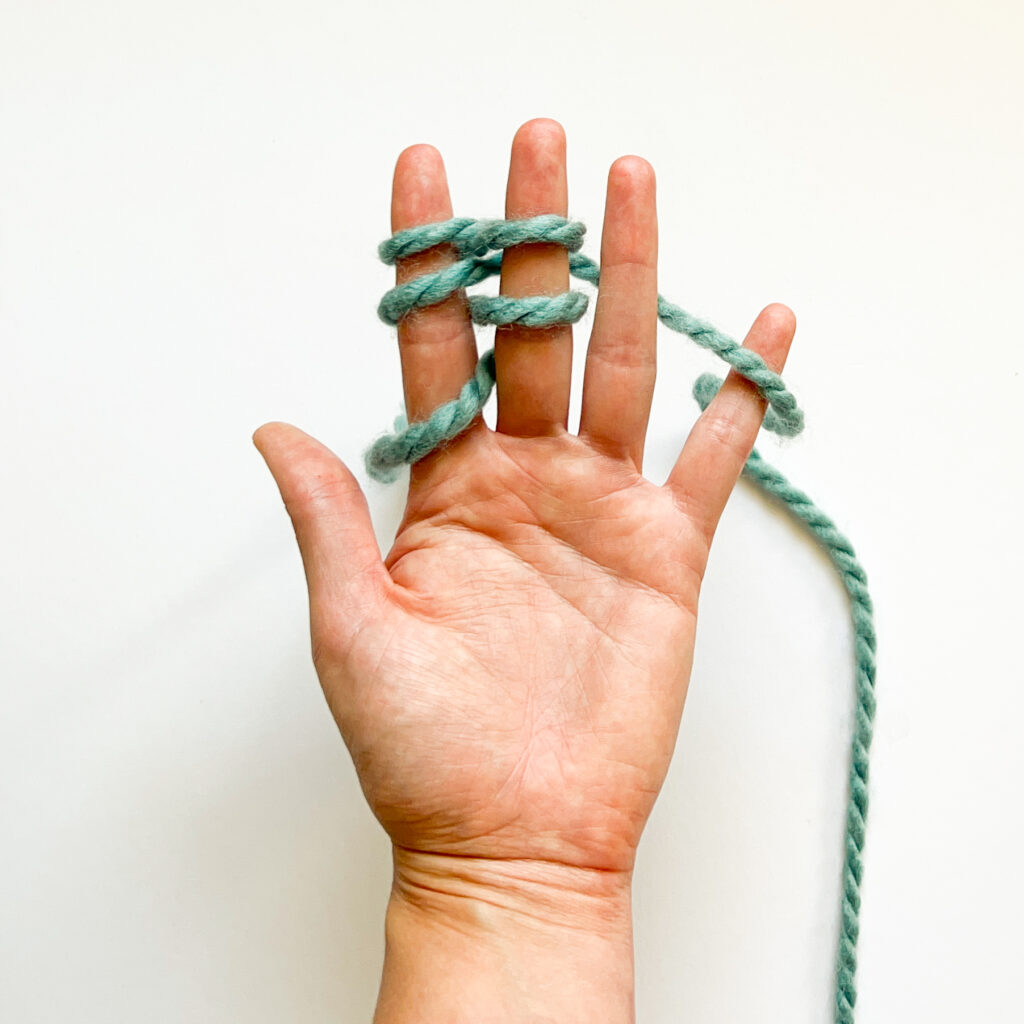
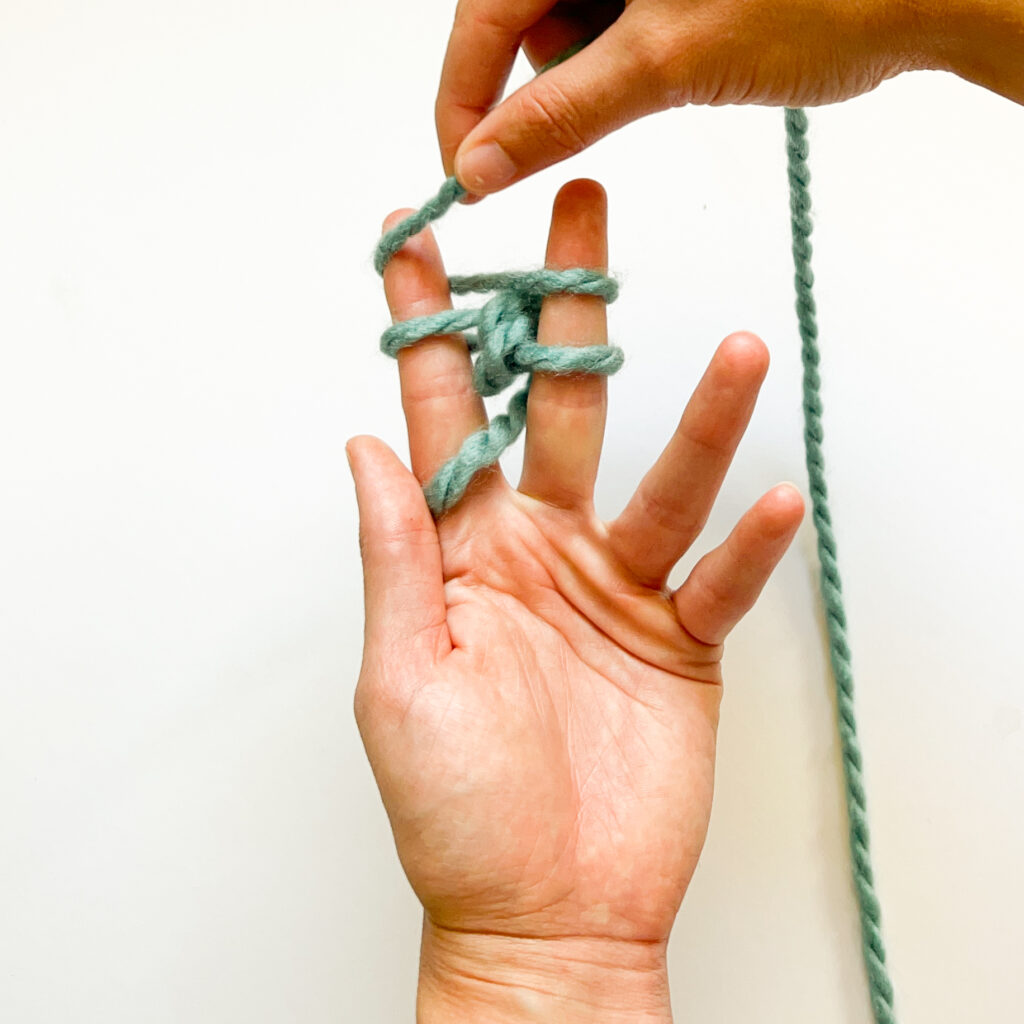
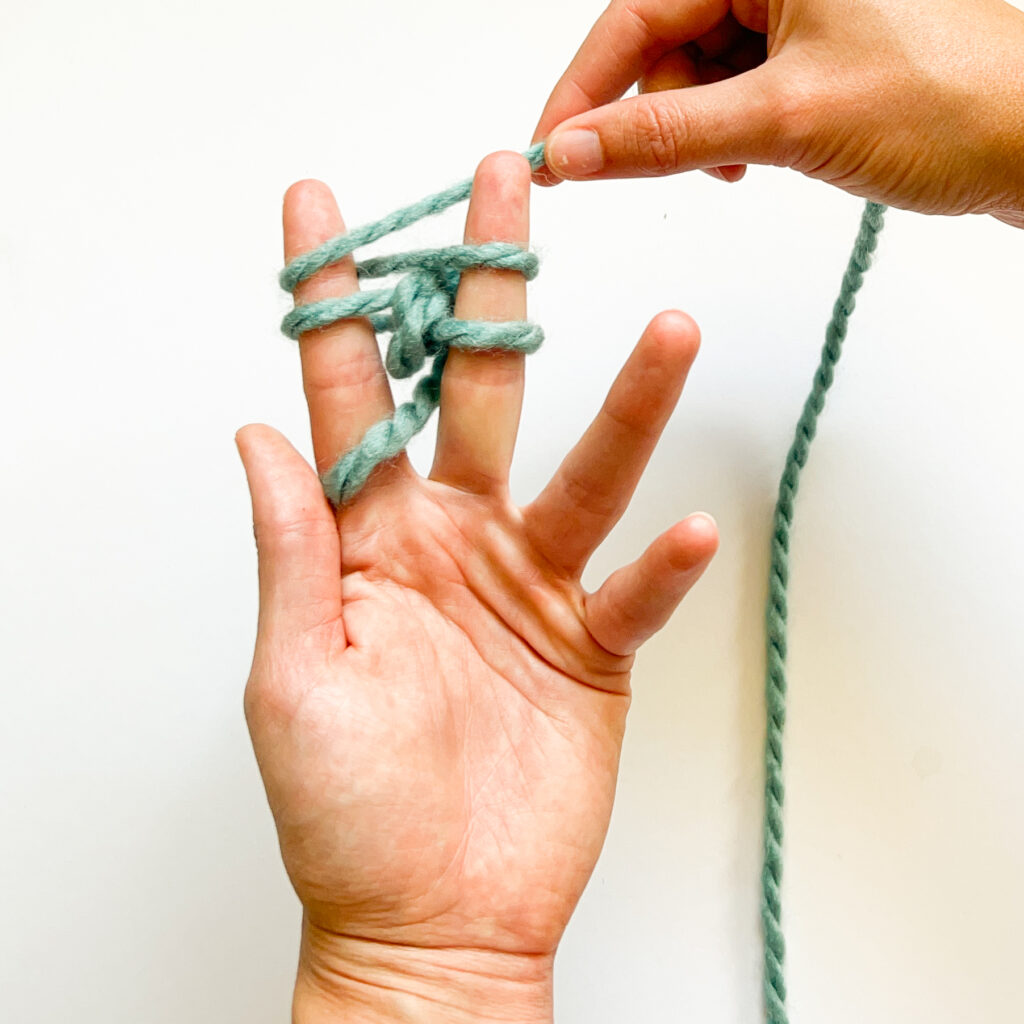
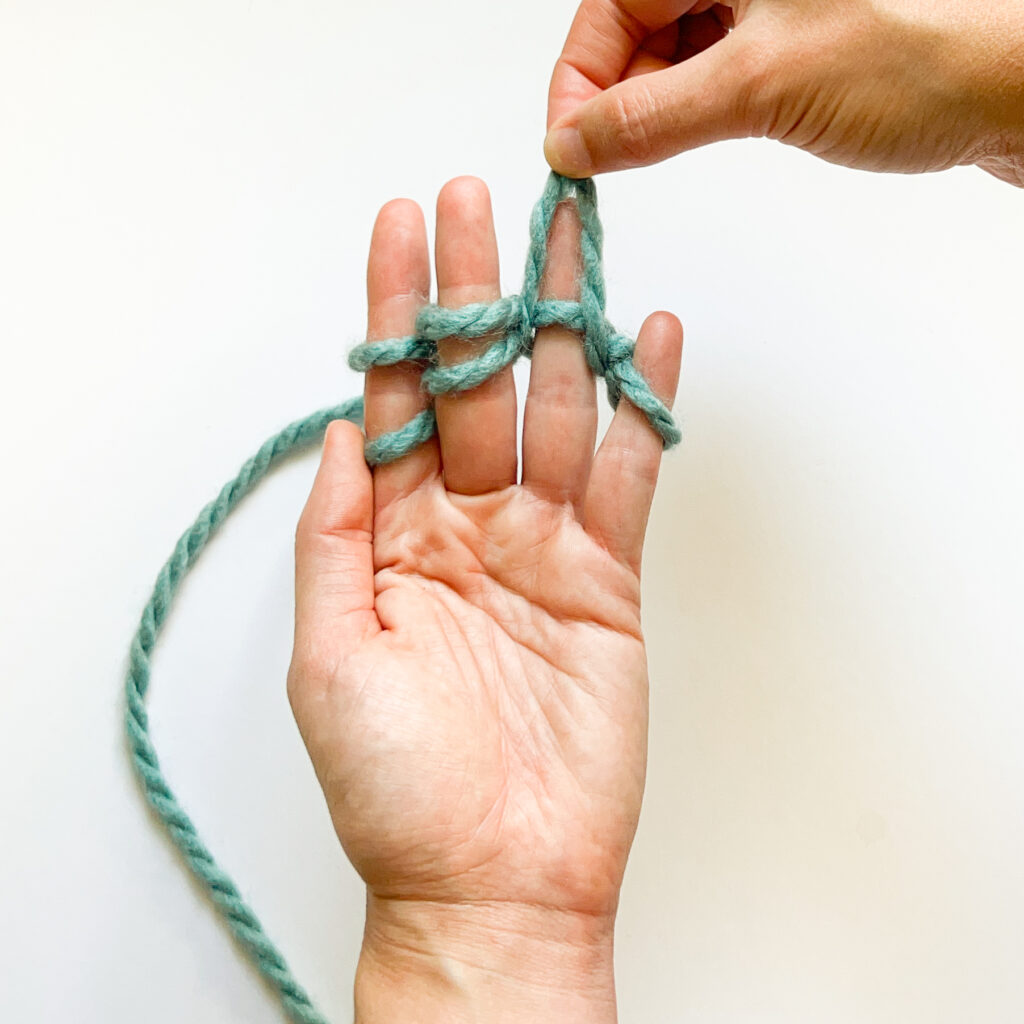
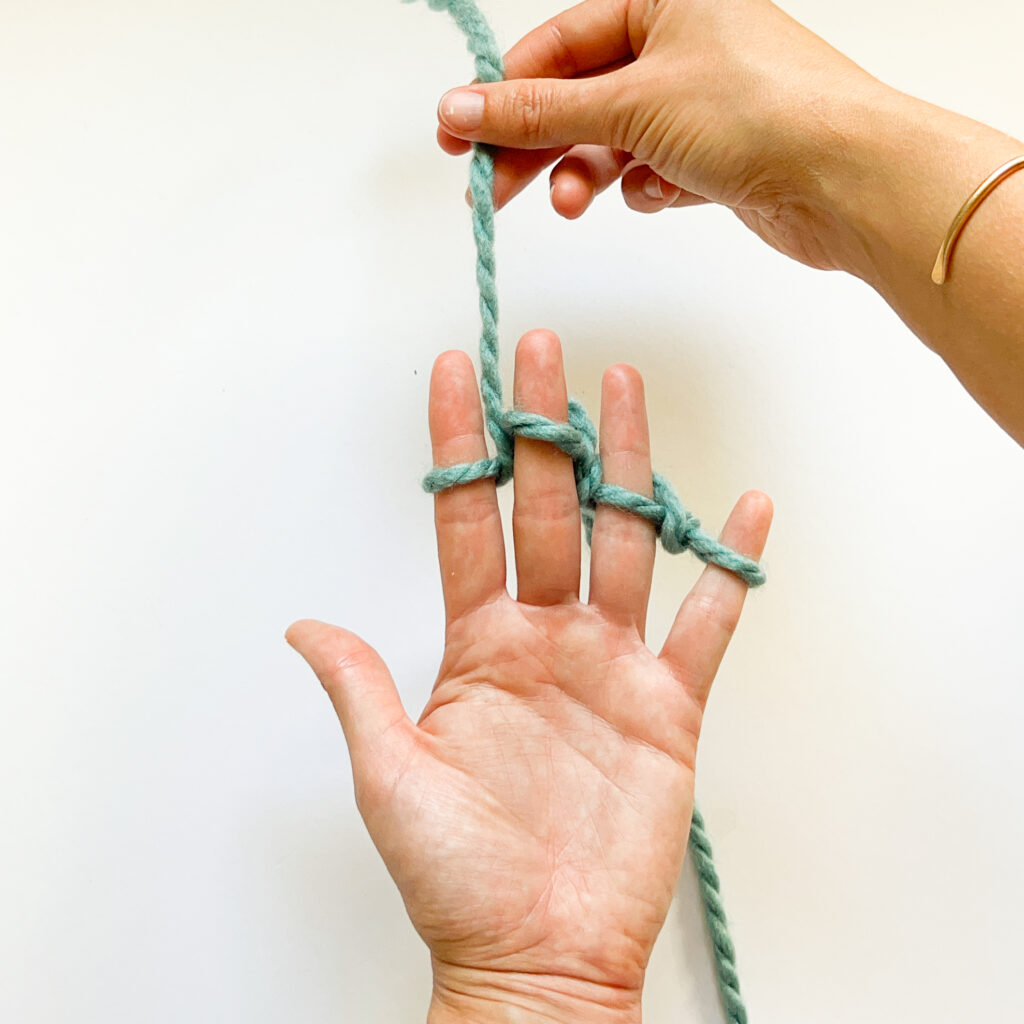
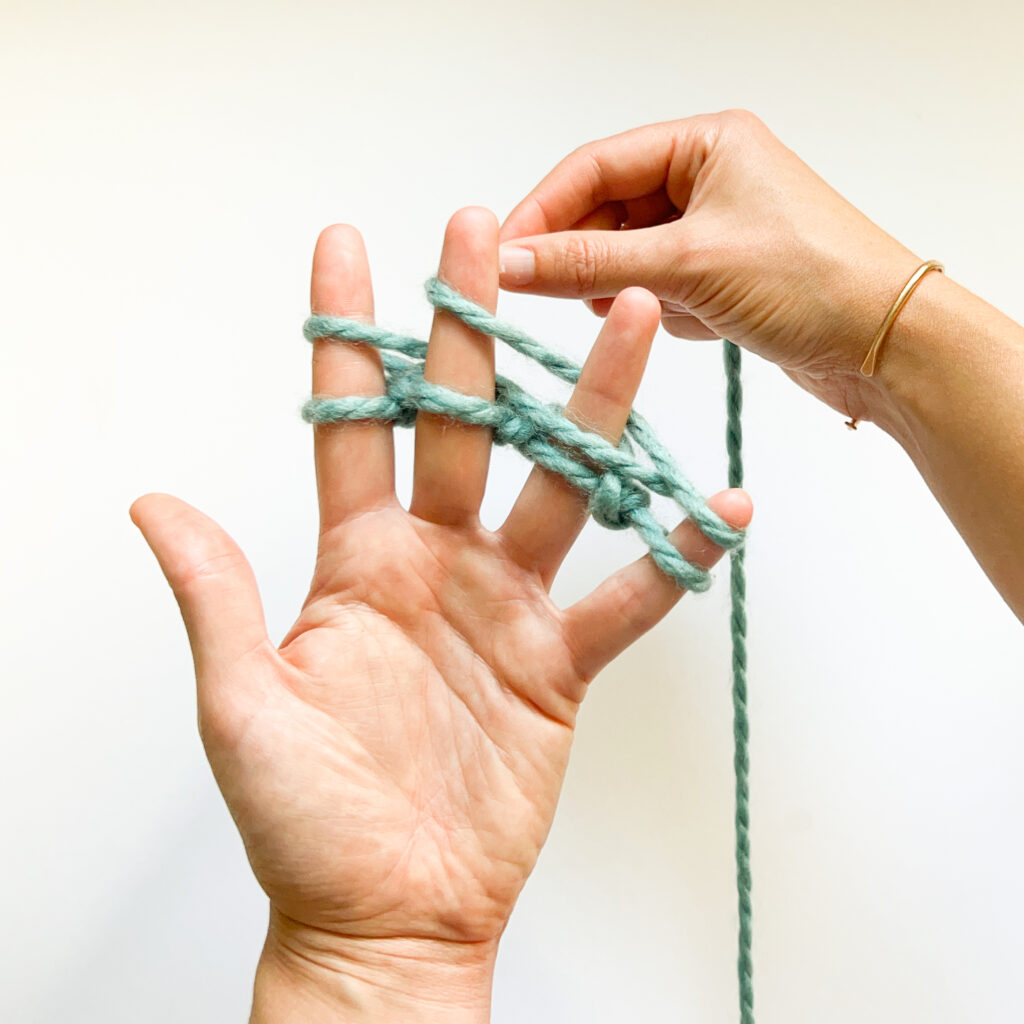
Wrapping the Third Row
Wrap the yarn around the outside and across your pinky, behind your ring finger, in front of your middle finger, and behind the first finger.
Each finger now has two rows of wraps facing you. Let go of the yarn, it’s time to knit!
You’ll repeat the remaining steps in this section until your project is as long as you’d like!
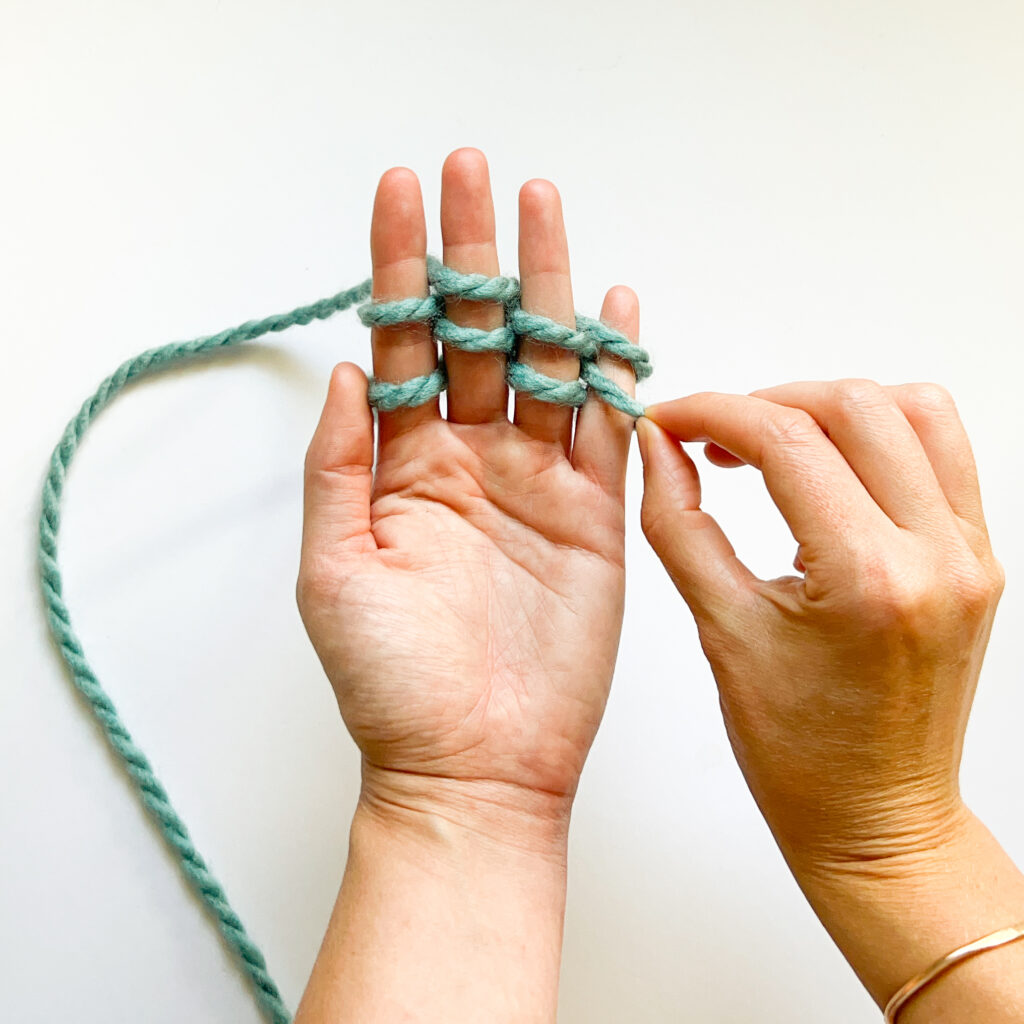
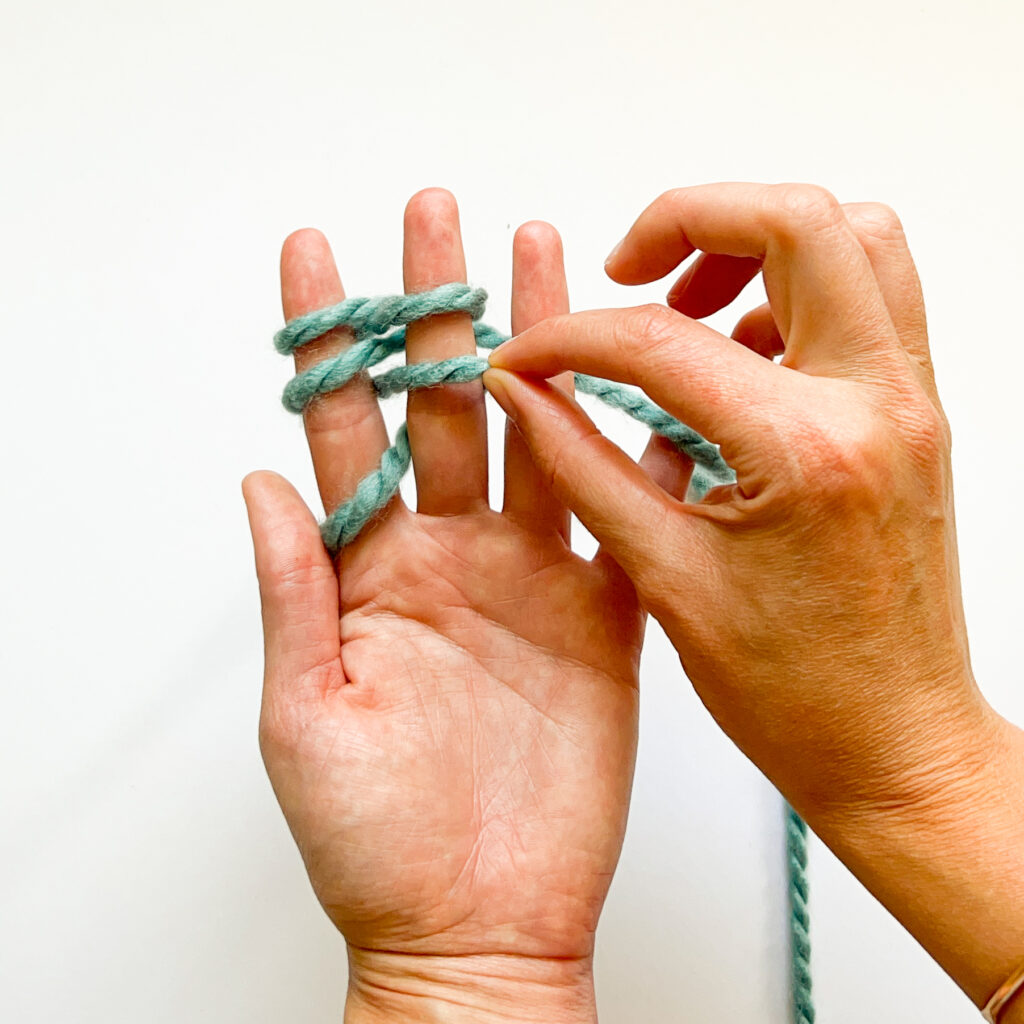
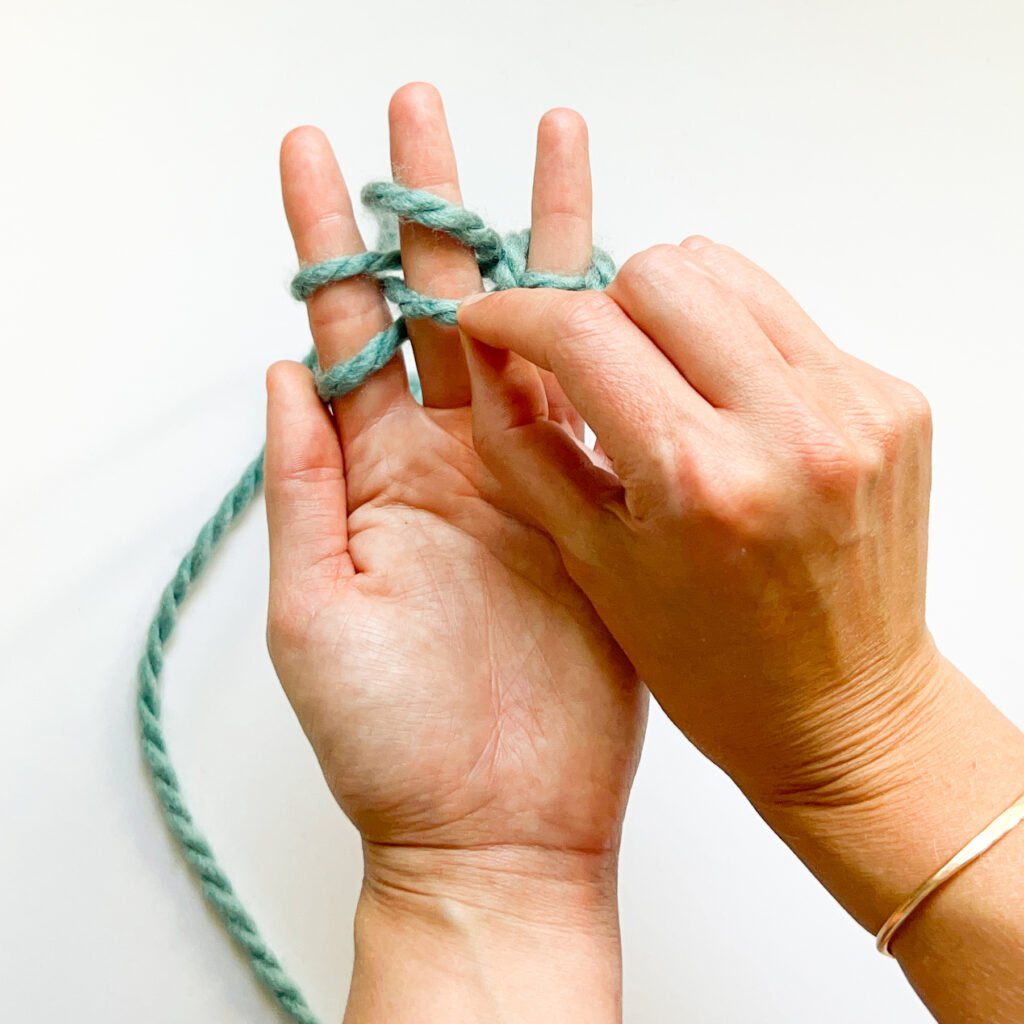
Knit the First Stitch:
Pinch the bottom wrap on your pinky finger, pull it up over the second yarn wrap and over the top of your finger, letting it go. You now have one wrap on your pinky finger.
Knit the Second Stitch:
Pinch the bottom wrap on your ring finger, pull it up over the second yarn wrap and off the back of your finger, letting it go. You now have one wrap on the last two fingers.
Knit the Third Stitch:
Pinch the bottom wrap on your middle finger, pull it up over the second yarn wrap and off towards the backside of your finger, letting it go. You now have one wrap on the last three fingers.
Knit the Fourth Stitch:
This last stitch is knit differently than the others during this first row only. This one-time move helps lock in the yarn tail! Release the yarn tail from your thumb and pull it up between the first and middle fingers. Drop it to the back.
All four fingers have been knit once!
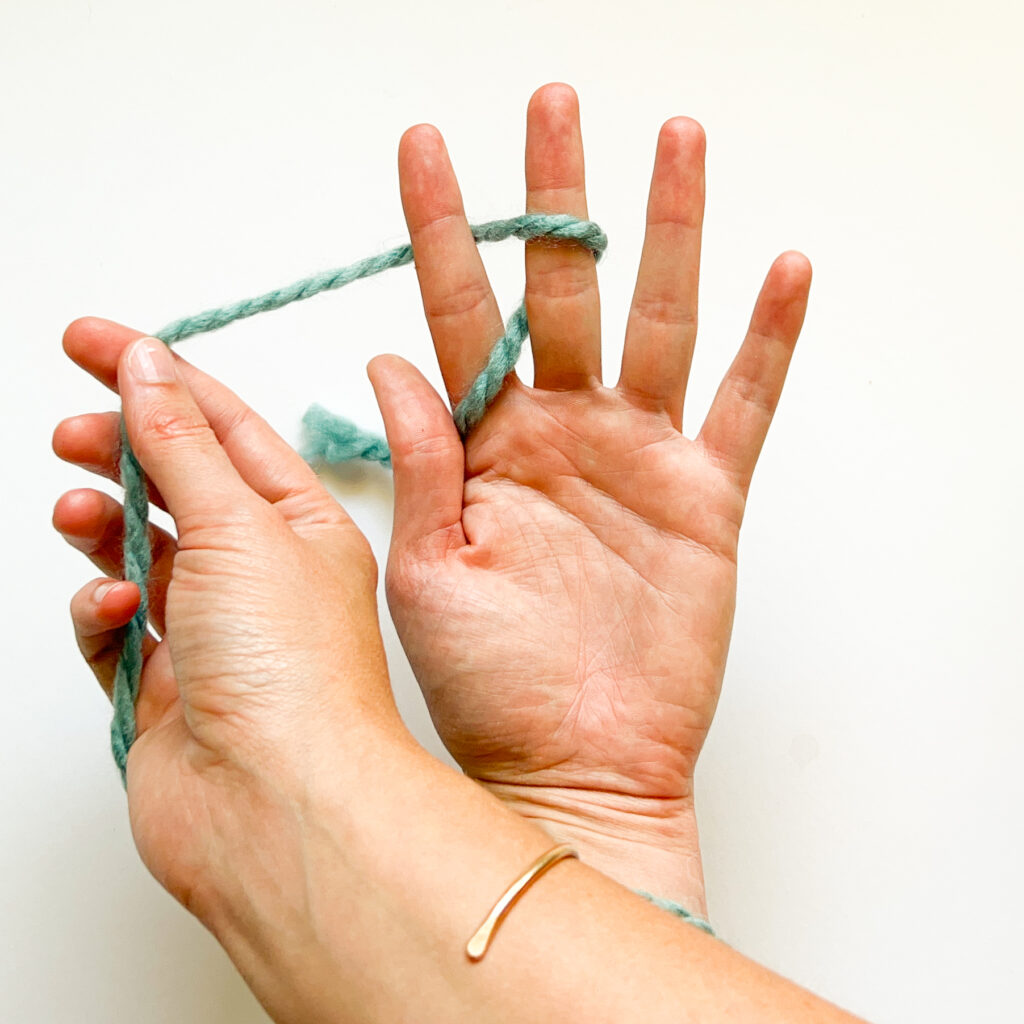
Pick up the yarn strand, it should be in the space behind your first two fingers.
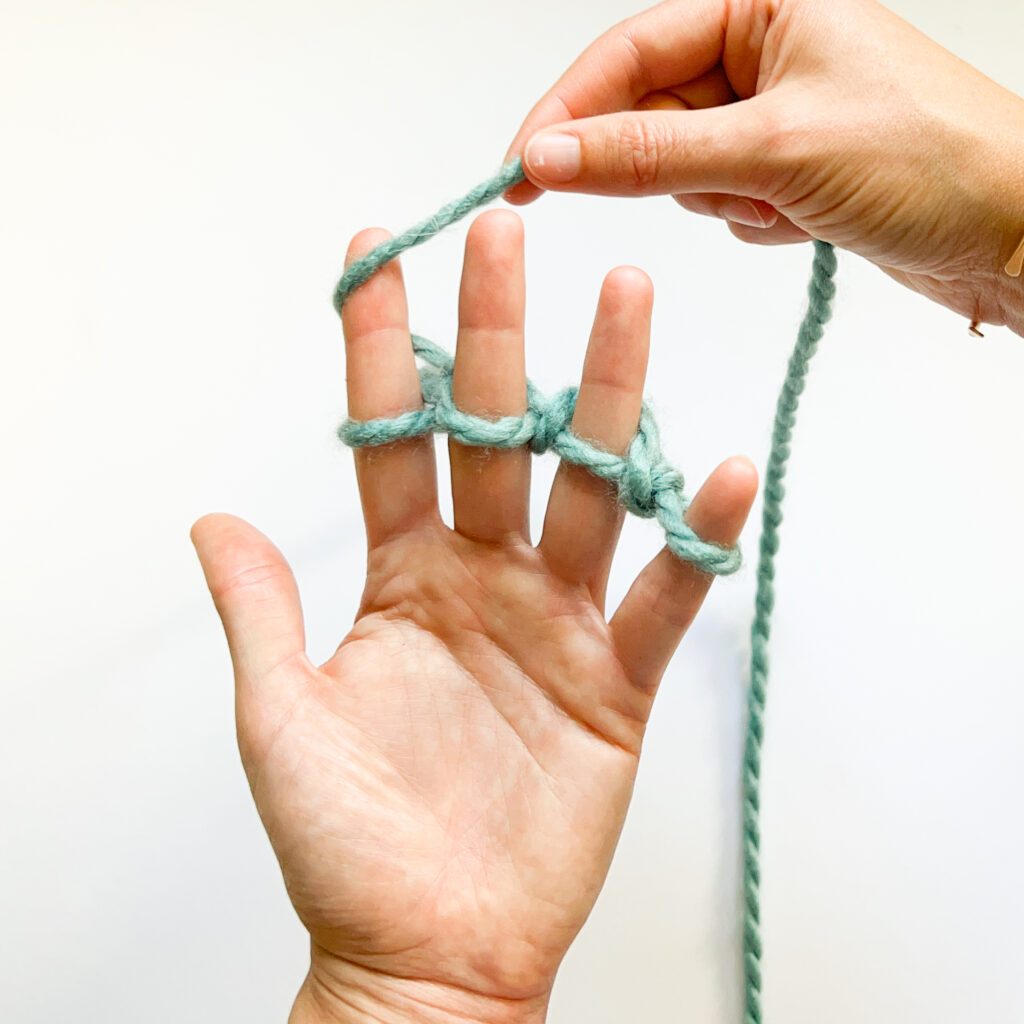
Wrap the First Row:
Wrap the yarn around the outside and across the front of the first finger, behind the middle, in front of the ring finger, and behind your pinky.
Wrap the Second Row:
Wrap the yarn around the outside and across the front of the pinky, behind the ring finger, in front of the middle finger. Drop the yarn.
Repeat the instructions above starting at the Four Finger Knitting section header until the end until you have a piece that’s the length you want. Ta dah! Now you know how to finger knit on four fingers.
Finger knitting for beginners can be a little tricky at first. Loose stitches and tangled yarn can happen as you learn a new craft. That’s completely normal for crafters who are getting the feel of things! So here are some finger knitting pro tips for you:
Unless it is specified in the finger knitting pattern, always avoid loose stitches. A quick solution would be to lightly tug on the working end of the yarn as you go. This ensures that your stitches have the same or close to the same tension. Try to keep your fingers relaxed and spaced evenly as you go too!
Looping stitches over one another can be tricky for many beginners. Keeping your stitches close to your fingertips can make it easier for you to make new stitches!
Try using a mid-to-thicker yarn for your first project! Some things to consider when choosing a yarn: thin yarns will make an airy fabric, thick yarns might be too hard to knit on small fingers. Play around with a few different yarn weights to get a feel for how they are to knit!
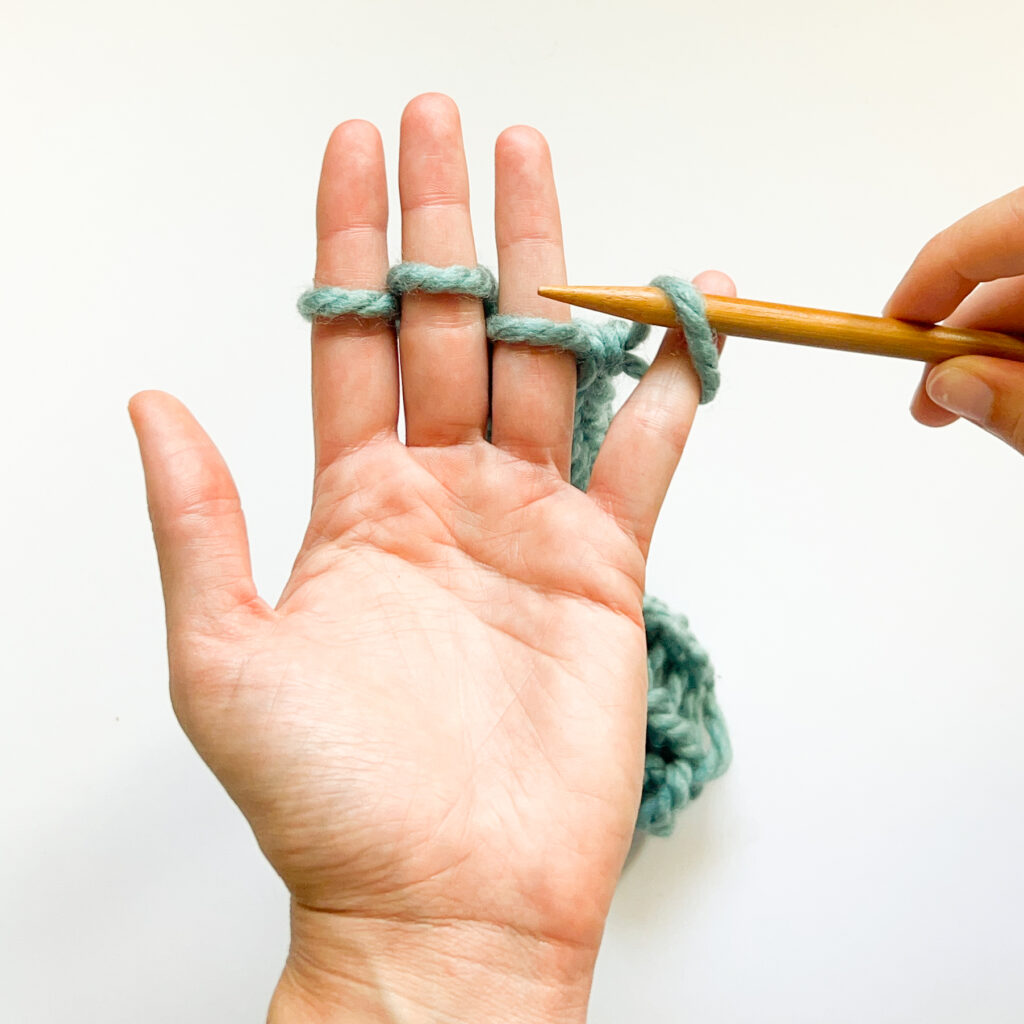
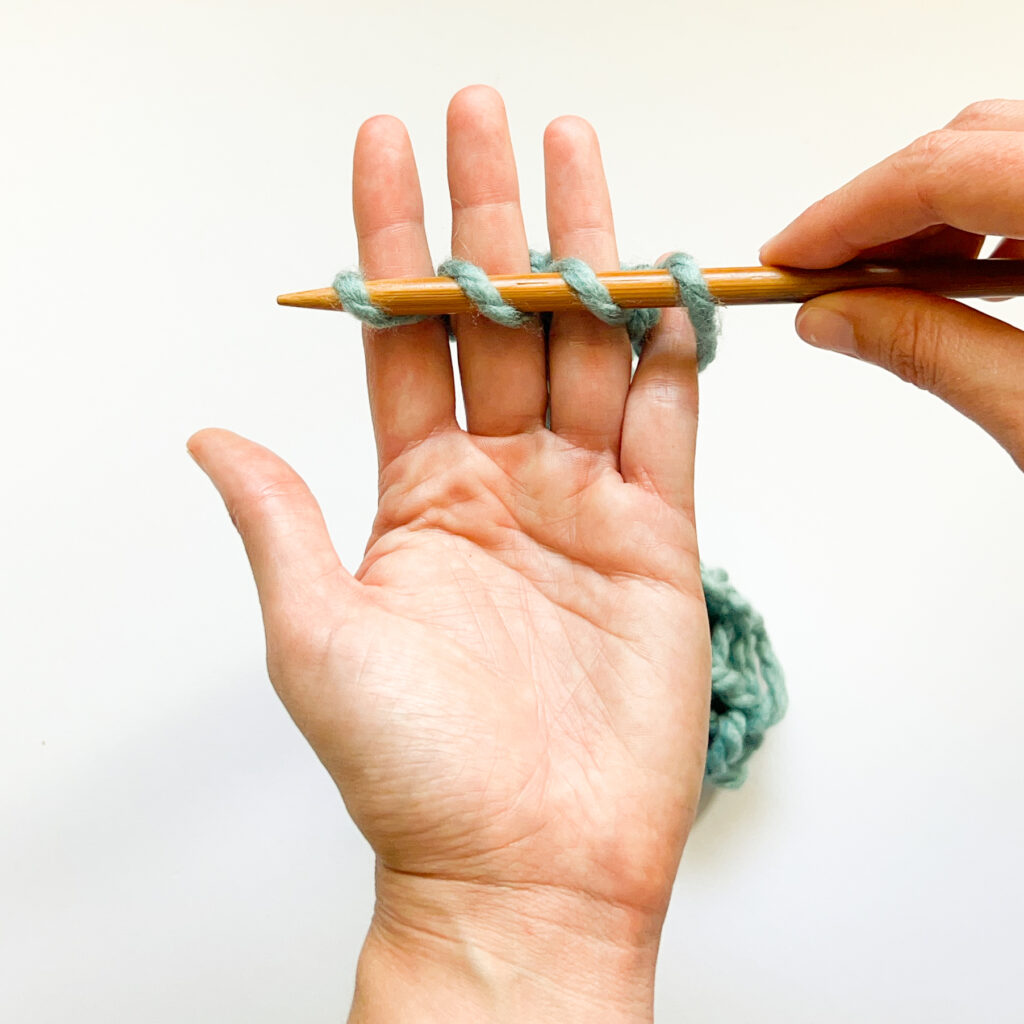
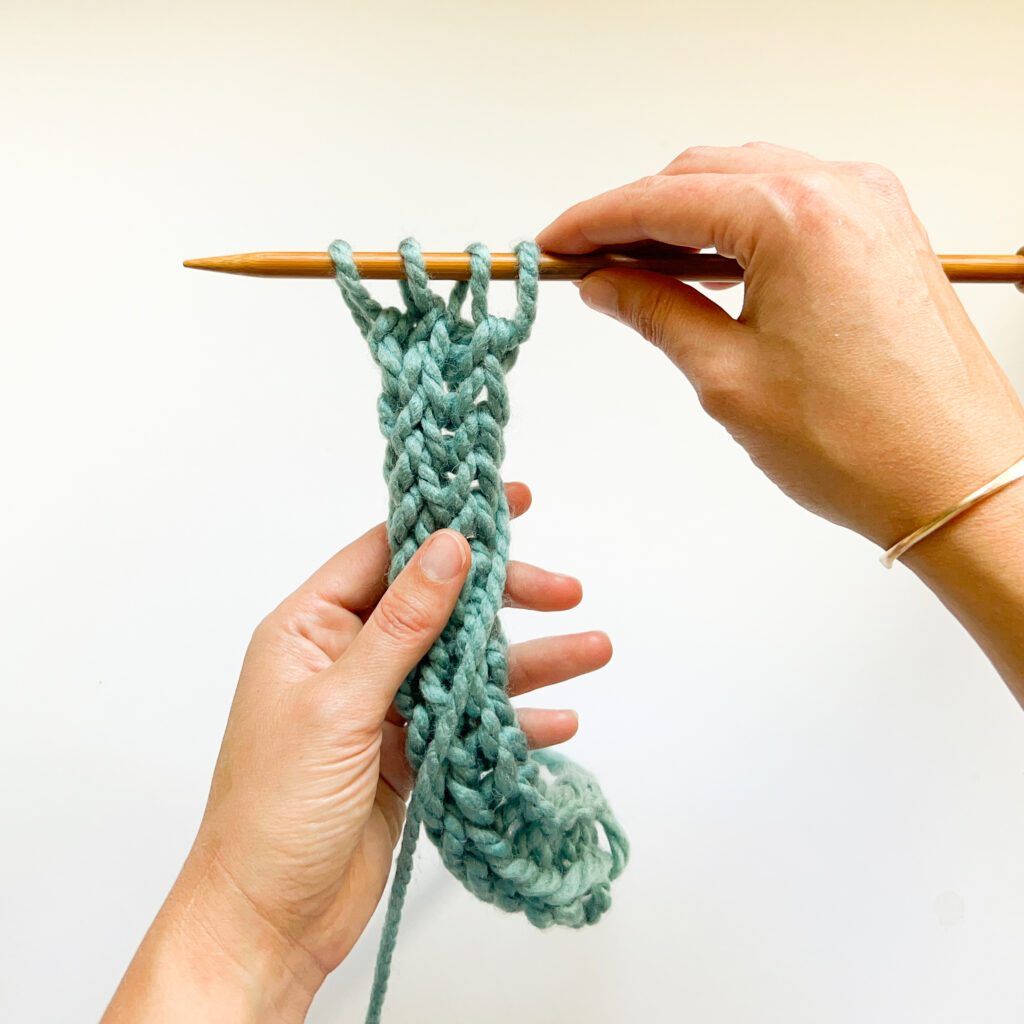
If you need to take a break, use a chopstick or knitting needle to put your stitches on hold! Make sure you insert the holder through each stitch at the same angle each time before removing your hand. To put the stitches back on your fingers insert them one at a time up through the stitches matching the angle.
Now that wasn’t too hard was it! Finger knitting is a great way to make some last-minute knit gifts or learn how to knit without knitting needles. Plus, finger knitting is a great craft for kids.
Ready to learn more about alternative methods of knitting? Don’t forget to check out our Arm Knitting and finger Knitting for Beginners article. We also have a great round-up of 10 Free Finger Knitting Blanket Patterns for Beginners!


