Knitting Gauge
Gauge ensures your project and knitting pattern match perfec
Gauge ensures your project and knitting pattern match perfec
Knitting gauge is a crucial aspect of any knitting project that often gets overlooked, especially as new knitters are learning! What’s a knitting gauge? Gauge refers to the number of stitches and rows per inch in finished knit fabric. Knitting patterns will recommend a specific knitting gauge at the beginning of the pattern for knitters to match at home! Every knitter does things a little differently and these small variations add up to create BIG changes in a finished project.
Achieving the correct knitting gauge ensures that your project will turn out as intended in terms of size, fit, and finished fabric characteristics. If your gauge is off (compared to the designer’s), it can result in a finished piece that is too big or too small. Almost all knitters have had a sad moment when the project is hot off the knitting needles and it doesn’t fit or look as imagined. Knitting gauge is designed to avoid that deep disappointment after you’ve put in time and effort into knitting something.
A small difference in gauge can compound over the entire project and result in significant differences in the finished size. For example, a sweater that was meant to be a cozy fit may end up being too loose or too tight if the gauge is not accurate.
Luckily, there are ways to adjust your knitting gauge if you find that it doesn’t match the gauge defined in your knitting pattern. Changing needle sizes, yarn types, and even your tension or knitting style can help adjust personal knitting gauge to match the pattern.
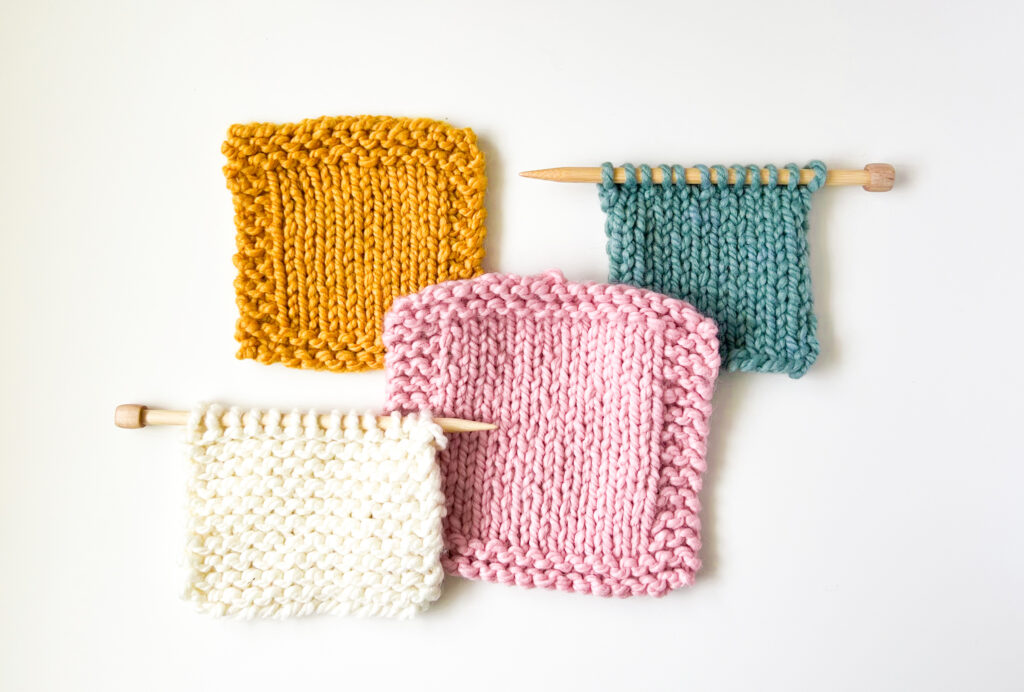
The best way to measure gauge is to create something called a gauge swatch! When knitting a gauge swatch, there are a few things to keep in mind.
First, always use the same yarn and needles that you plan to use for your actual project. Different yarns and needle sizes can produce different gauges, so it’s important to use the exact materials you’ll be using for your project.
Also, make sure you’re using the stitch pattern called for by the designer. Most often it’s stockinette stitch, but patterns will also specify a stitch pattern used in the rest of the project for the swatch as well.
Next, make sure your gauge swatch is large enough to measure accurately. A standard swatch is 4″ square (aka: 10 cm square) and gives enough fabric to get an accurate average “stitches per inch” count.
Lastly, block your gauge swatch before measuring. Blocking is the process of soaking or steaming your swatch and laying it flat to dry. Blocking knits is important because it allows each stitch to relax and creates a more uniform finished fabric.
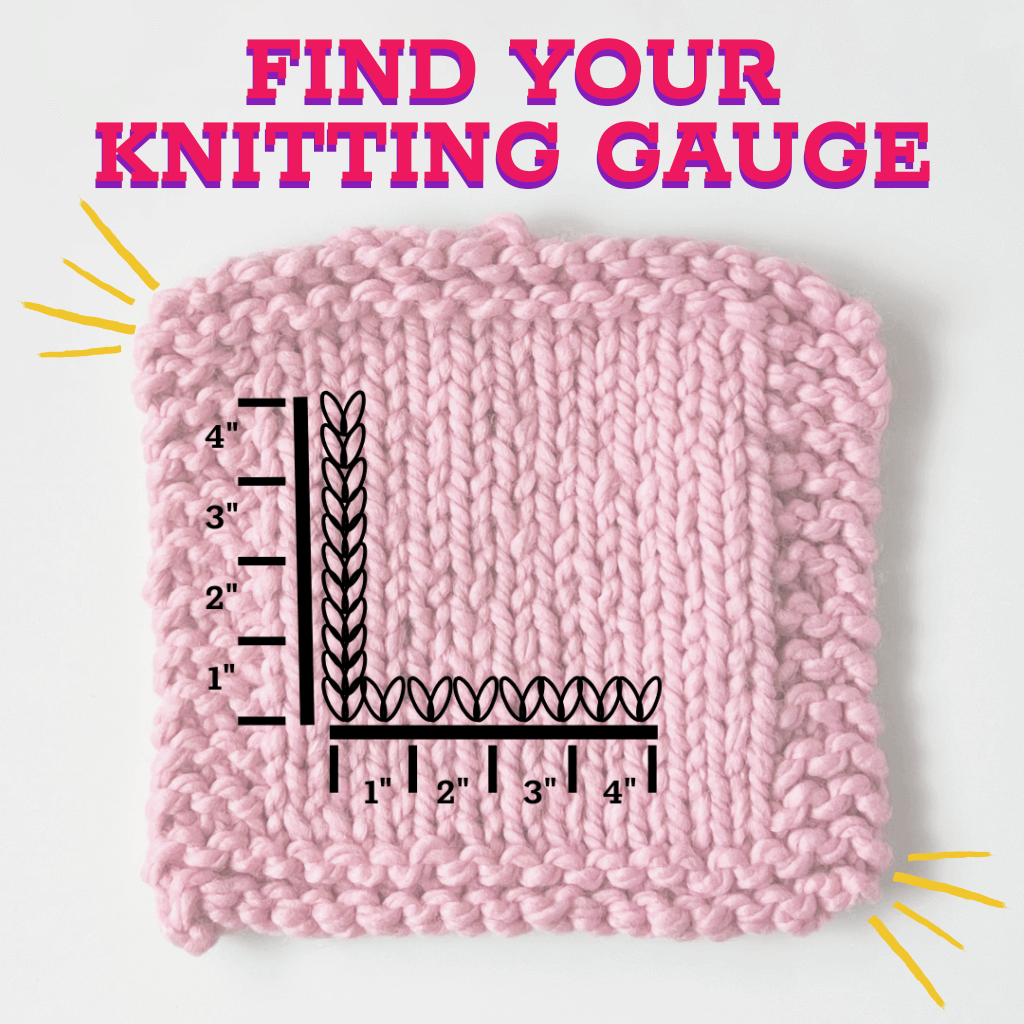
Above, you’ll see a 4″ square knit swatch. In this case, we used a stockinette stitch for the part we’ll be measuring because the stitches are easy to see and count.
Pro tip: including a 3-4 stitch garter stitch border on the swatch can help it to lie flat and make it easier to measure!
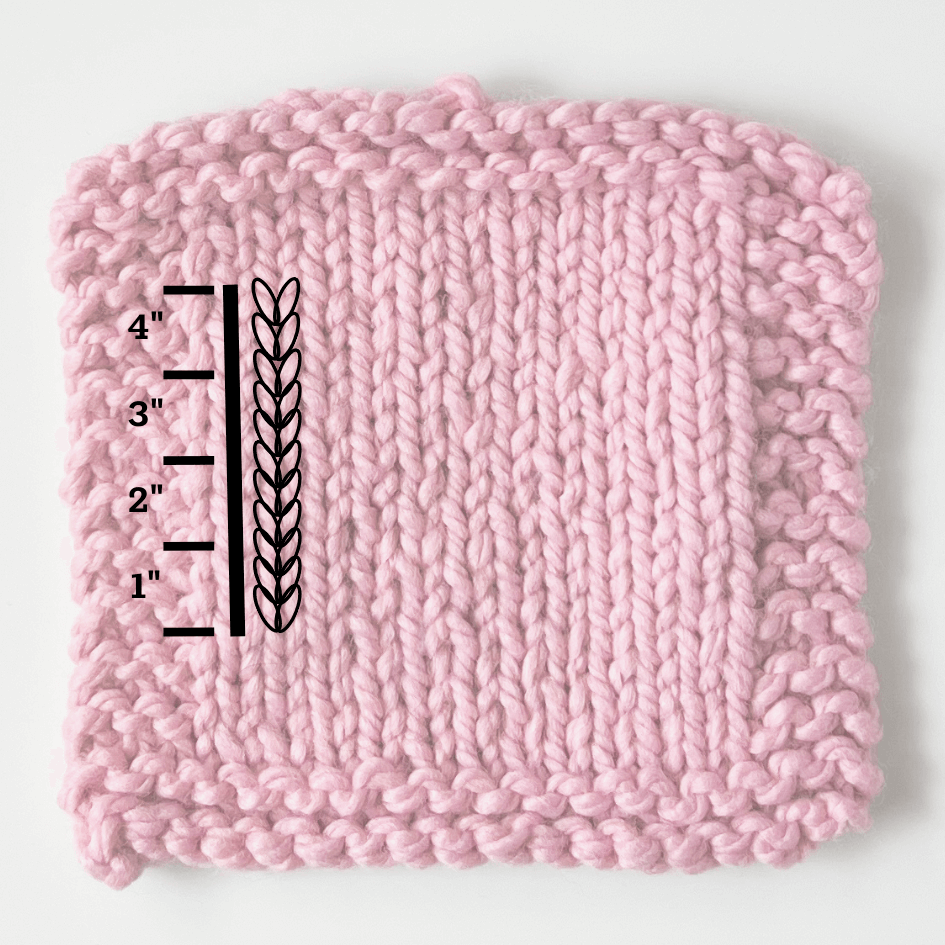
In the swatch above you can see the rows of knitting count. Learning how to count knitting rows is half of getting an accurate gauge measurement for your project. To measure knitting rows place the bottom of your ruler at the base of one of the “v”s and count all of the stitches in a vertical column above it until you get to 4”. Make sure to count partial stitches too! In this case we have 11 rows.
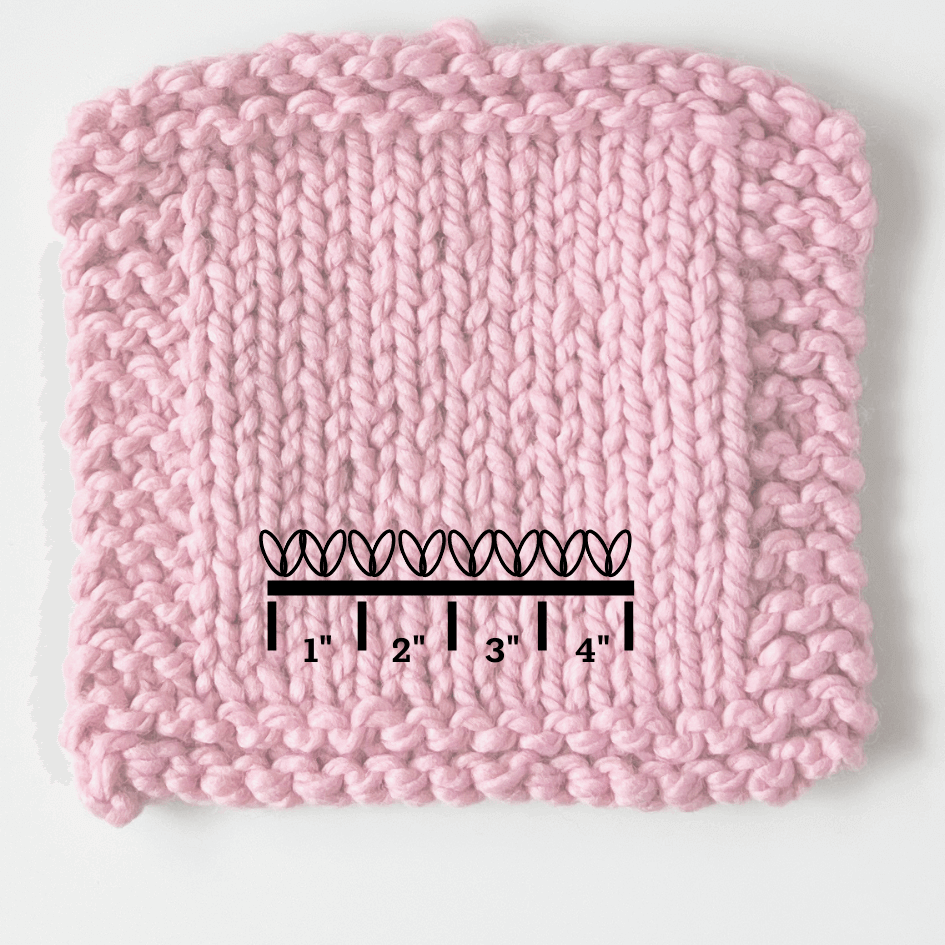
In the swatch above you can see the row of stitches to count. Line up the start of the ruler with the left edge of one knit “v” and count all of the stitches in a horizontal row to 4″. Make sure to count partial stitches too! In this case we have 8 stitches in 4″.
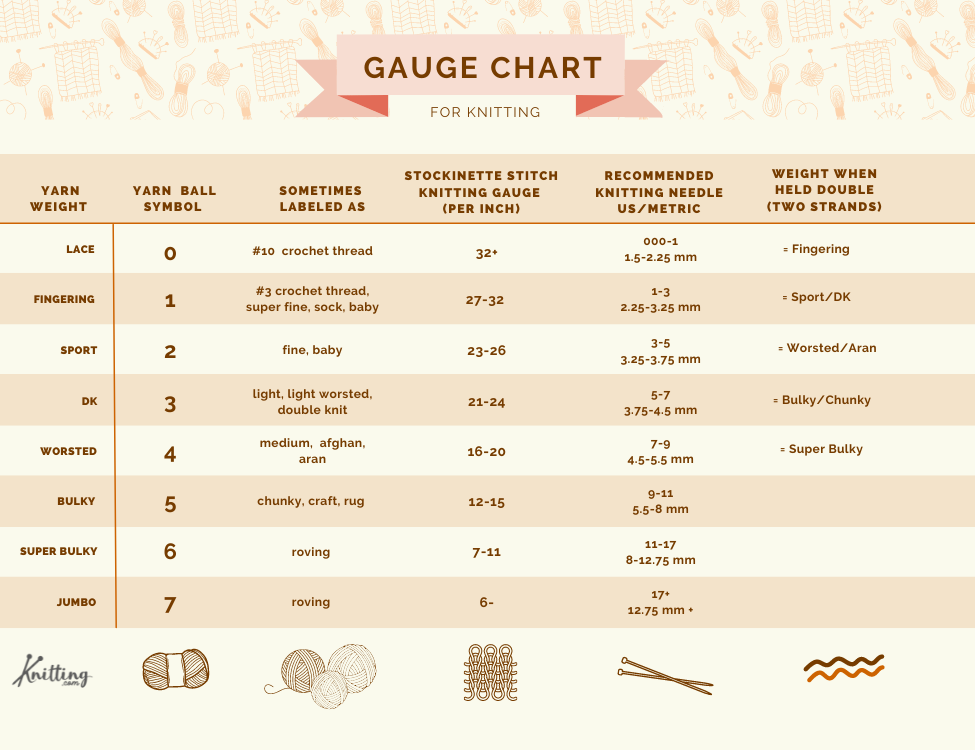
Need a quick guide cheat sheet for yarn gauge? We’ve got you covered! The chart below shows the different yarn weights and the typical number of stitches per inch you can expect on a certain size knitting needle. This is just a starting point and your tension or gauge might be different based upon how tightly or loosely you knit.
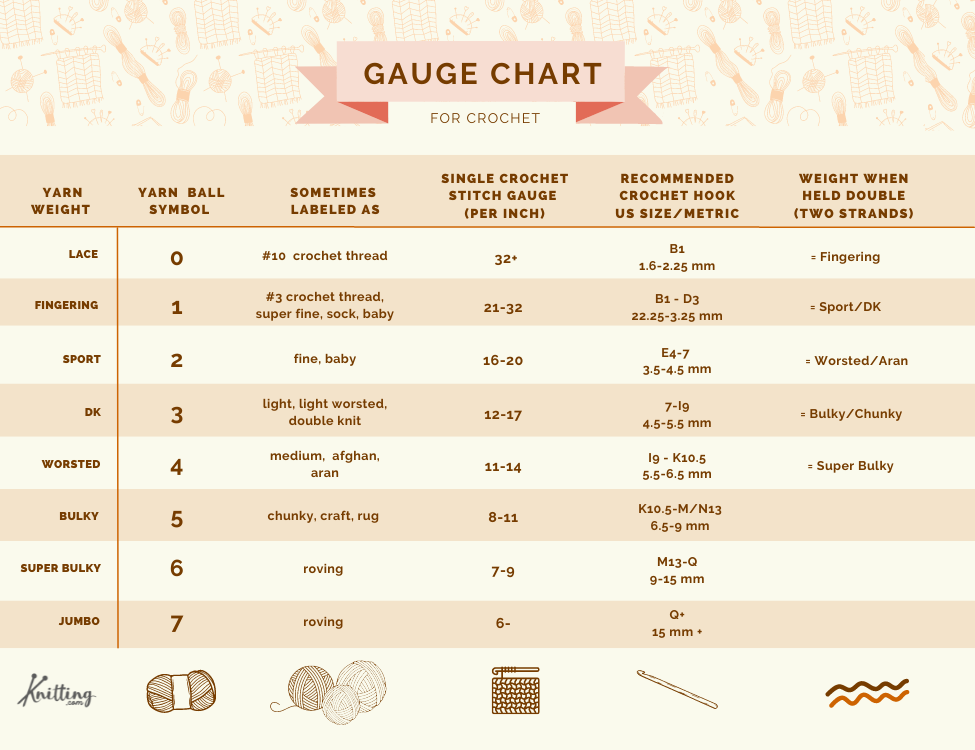
The gauge for crochet vs. knitting is slightly different. The chart below shows the different yarn weights and the typical number of single crochet stitches per inch you can expect on a certain size crochet hook. As with knitting gauge, this chart is just a guide. Your personal crochet gauge might be different based upon how tightly or loosely you work.
SO! You’ve got the wrong gauge. Now what?
Most beginner knitters are also TIGHT knitters. There are two factors for tight knitting: holding the knitting needles too tightly, and pulling the yarn tightly as you work. Practice making exaggeratedly large stitches for a little while to gain some muscle memory around forming looser stitches.
Understanding and achieving the correct knitting gauge is the most important step toward getting a successful knit project. Remember that adjusting your gauge is possible with experimentation, and always make a gauge swatch to measure before starting your project! By paying attention to gauge, you’ll be on your way to creating beautifully knitted items that you can be proud of!


