M1L Knitting & M1R Knitting Increases
Learn how to make a leaning increase!
Learn how to make a leaning increase!
Let’s talk about directional increases! M1L (make one left) and M1R (make one right) knitting increases are both standard ways to add stitches to a row. They also create a twisted stitch that leans either left or right. These directional increases can be used to shape garments or add decorative details to your knitting projects!
M1L is an abbreviation used in knitting patterns and stands for “make one left“. M1L left knitting increases are worked on the right side of the fabric and create a left-leaning increase.
M1R is an abbreviation used in knitting patterns and stands for “make one right“. Make one right knitting increases are also worked on the right side of the fabric and create a right-leaning increase.
There are several reasons why you might want to use M1L and M1R knitting increases in your knitting projects:
Overall, M1 knitting increases are useful tools to learn! Today we’ll show you how to work a M1L knitting increase and a M1R knitting increase.
Note: This tutorial was written for right-handed knitters.
Step 1:
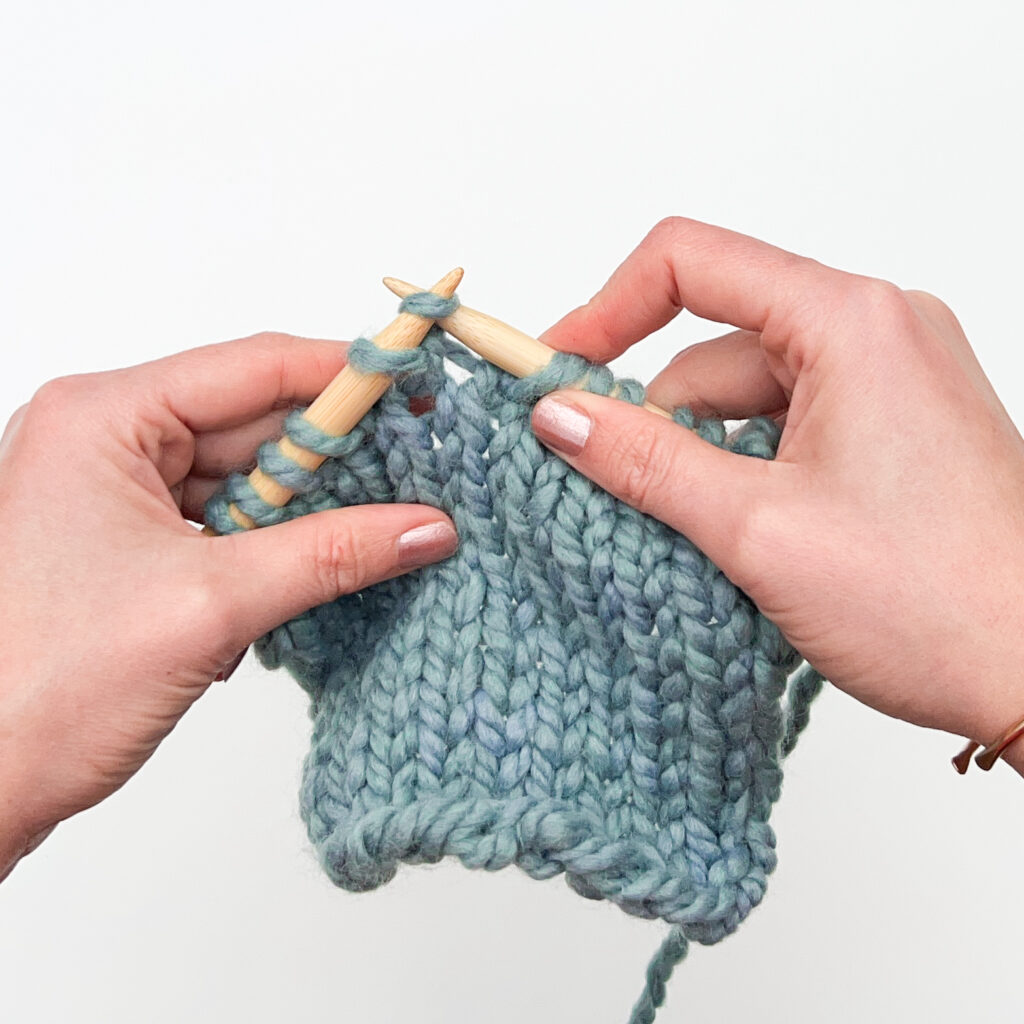
Spread the stitches on either needle apart to find the “bar” of yarn at the base of the stitches.
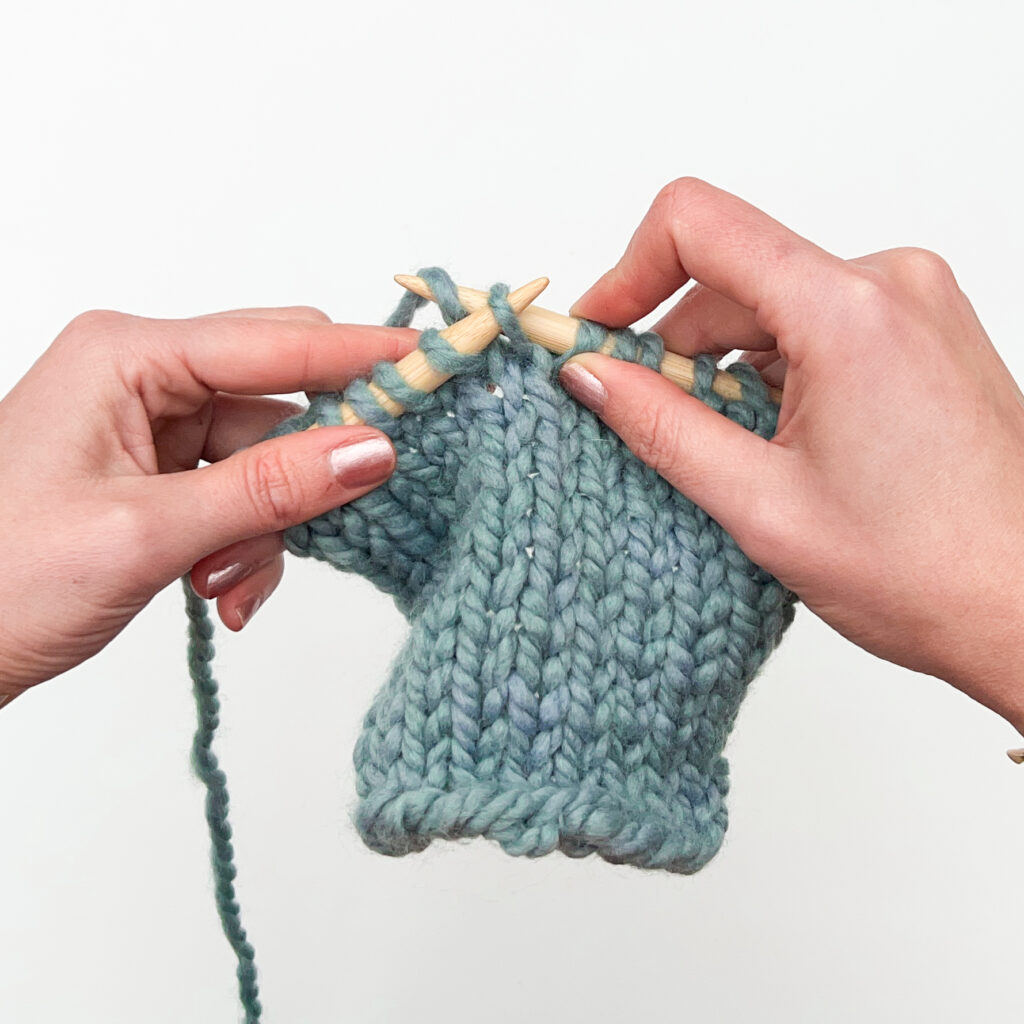
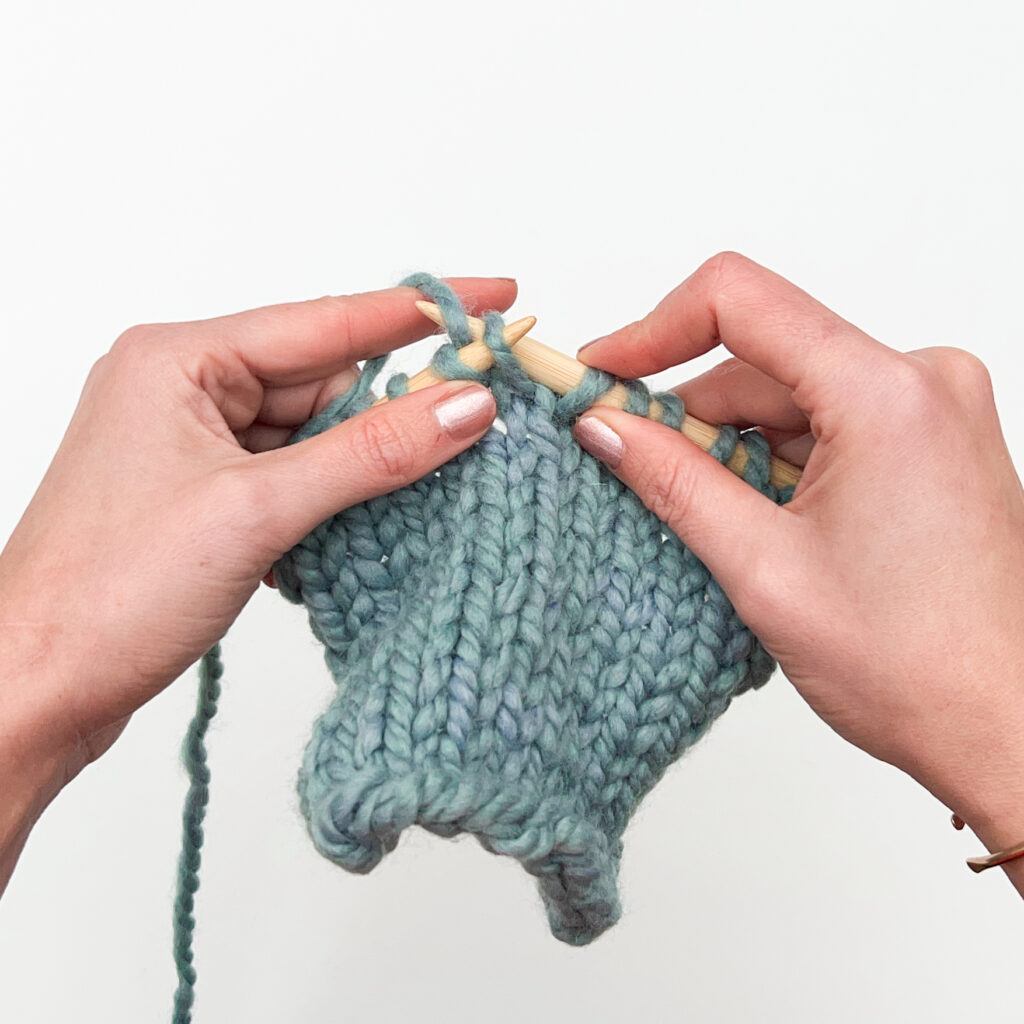
Step 2:
With the left needle, lift the strand of yarn between the two needles by inserting the needle from front to back.
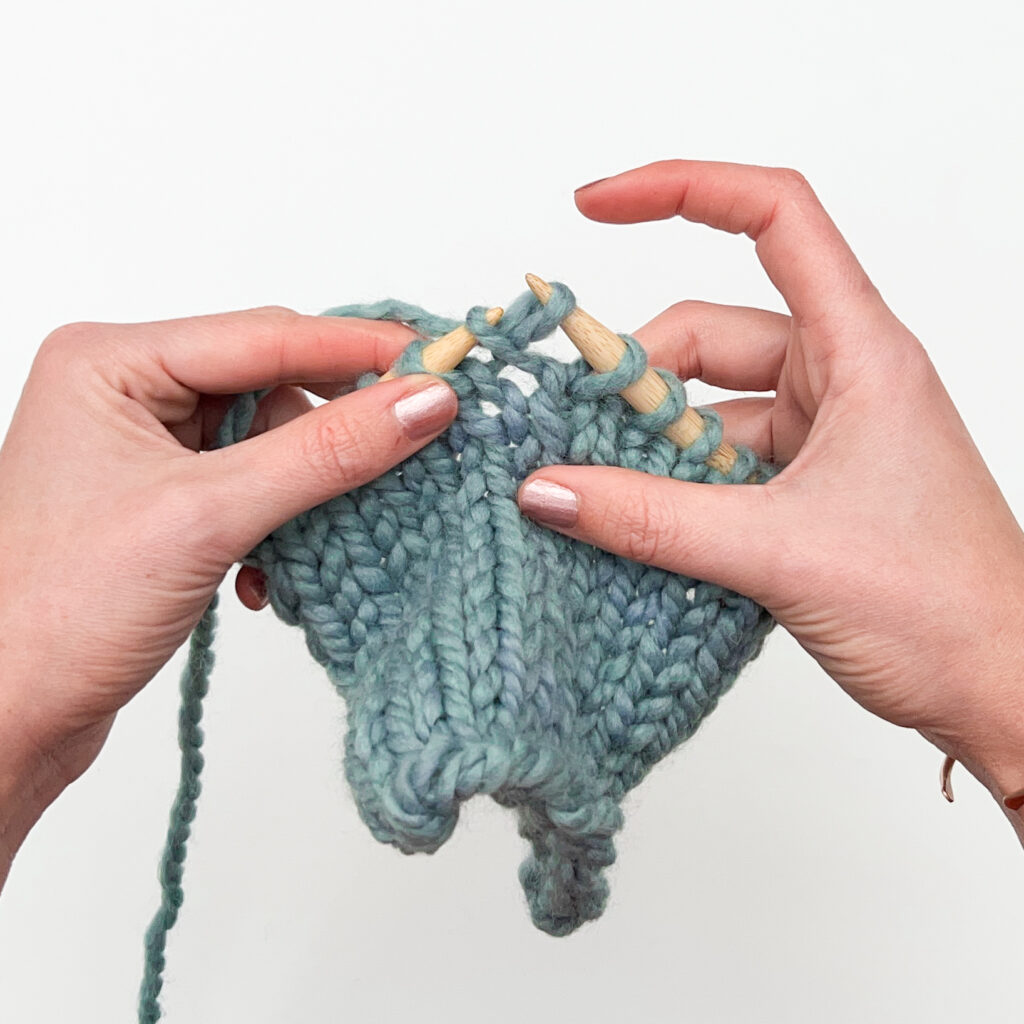
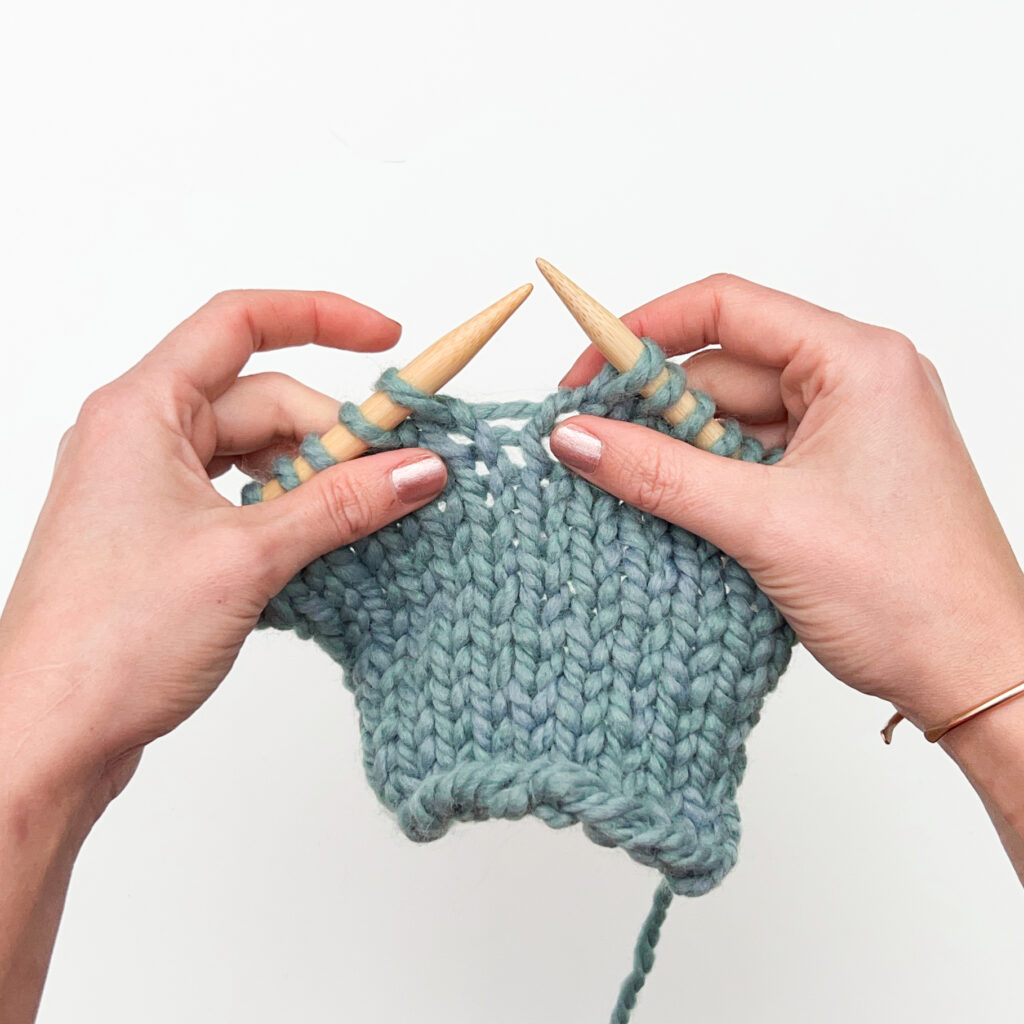
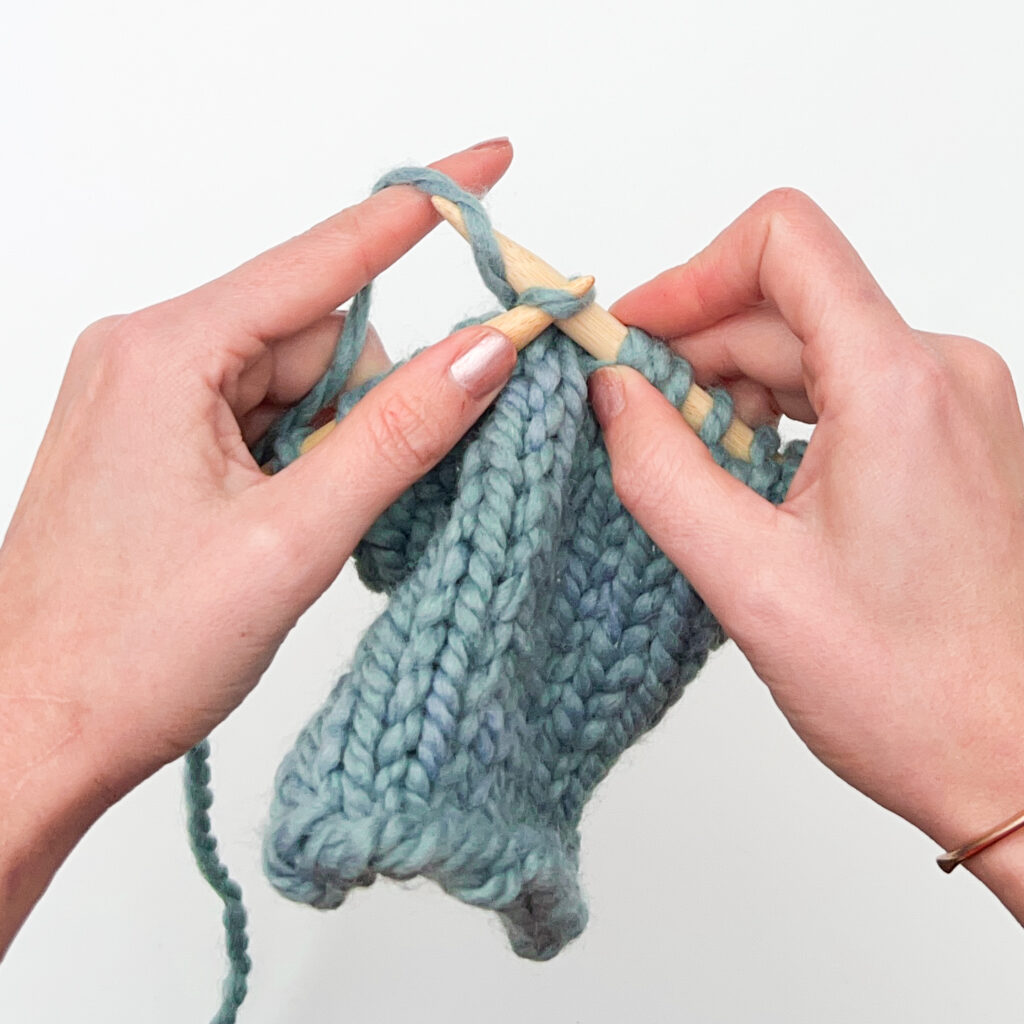
Step 3:
Knit the lifted stitch through the back loop by inserting the right needle from right to left under the back leg of the stitch. Wrap the yarn counter clockwise up over the back needle and pull it through.
Drop the stitch off the left needle.
Ta dah! You’ve just increased on stitch by working a M1L increase.
You can see here that the new stitch twists to the left in the finished fabric.
Note: This tutorial was written for right-handed knitters.
Step 1:
Spread the stitches on either needle apart to find the “bar” of yarn at the base of the stitches.
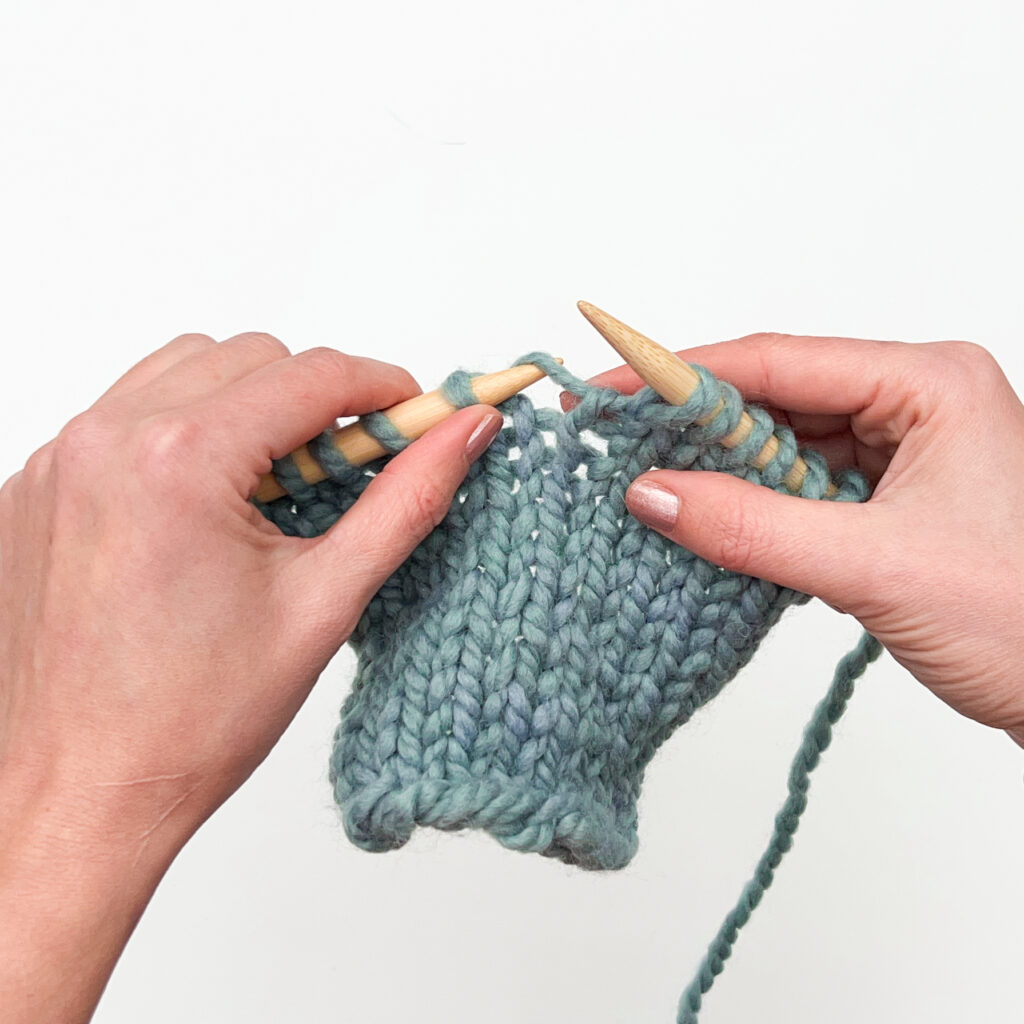
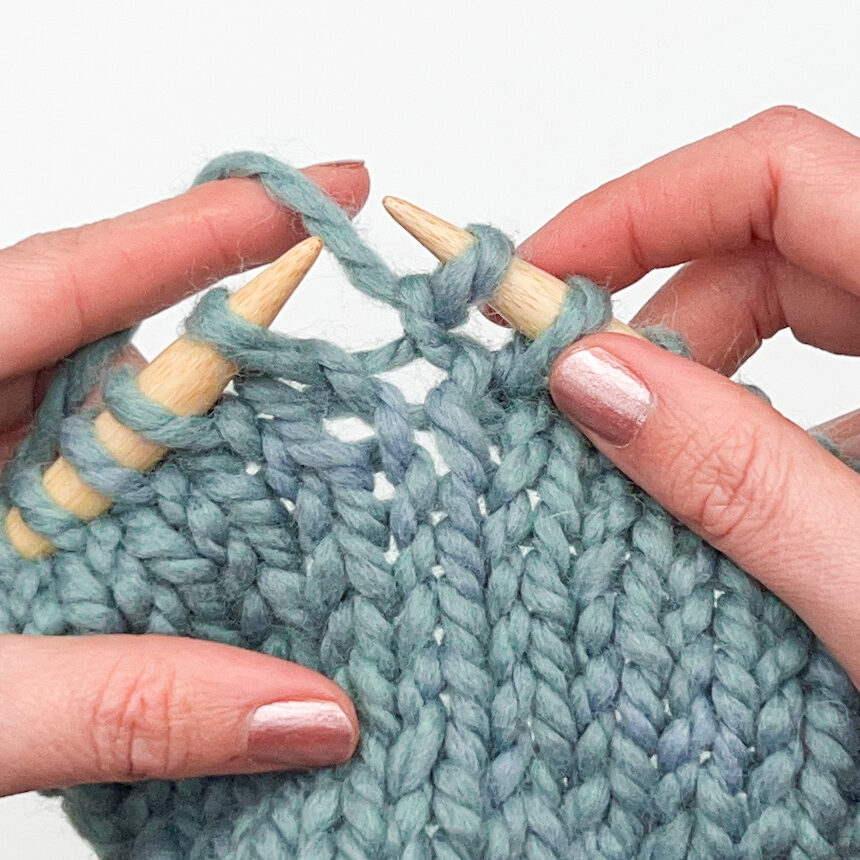
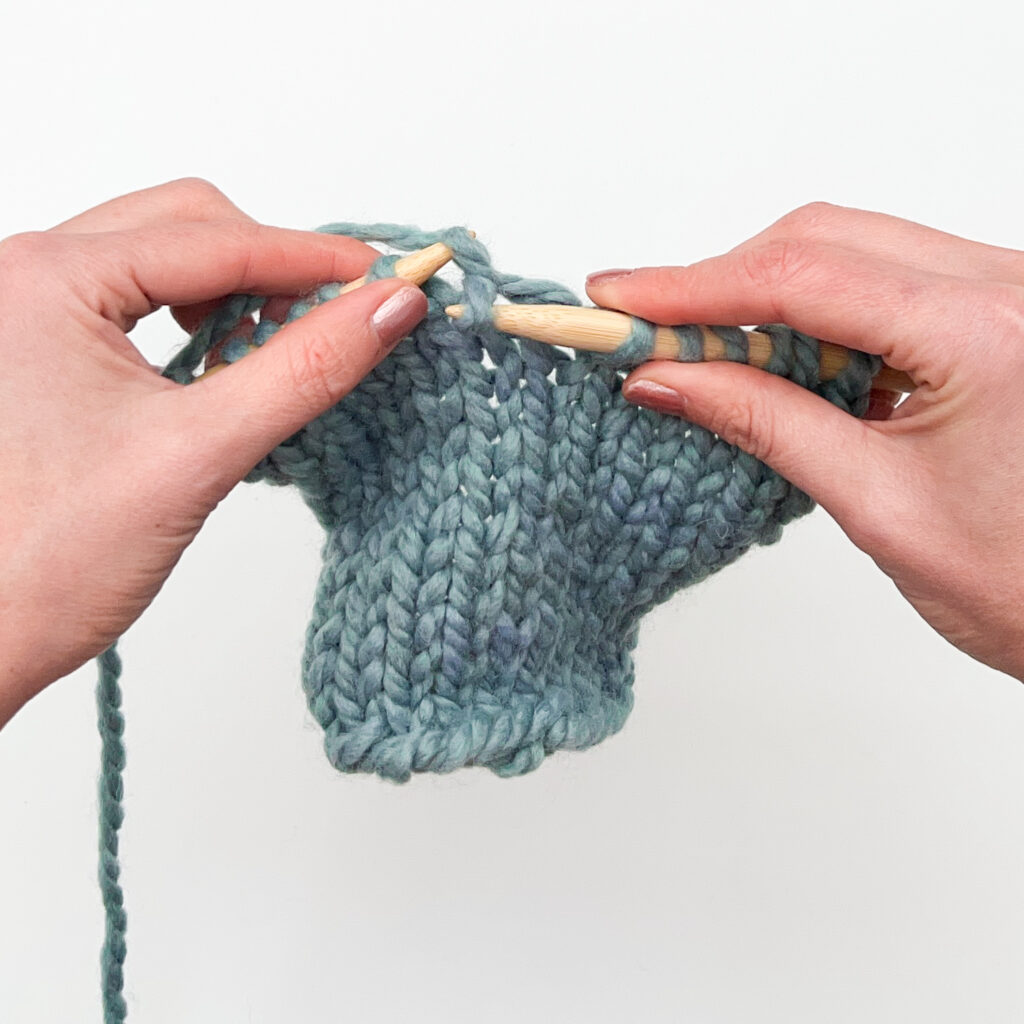
Step 2:
Lift the bar running between the stitches by inserting the needle from back to front.
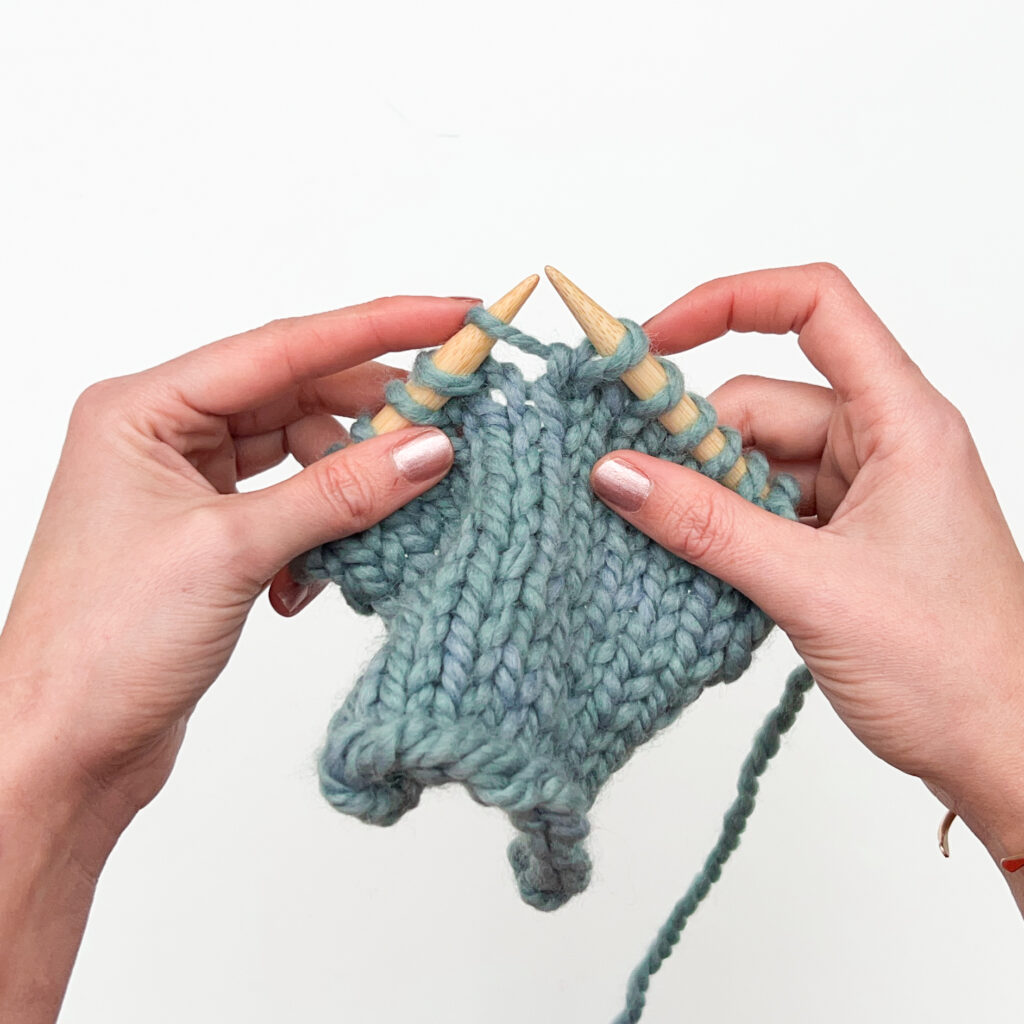
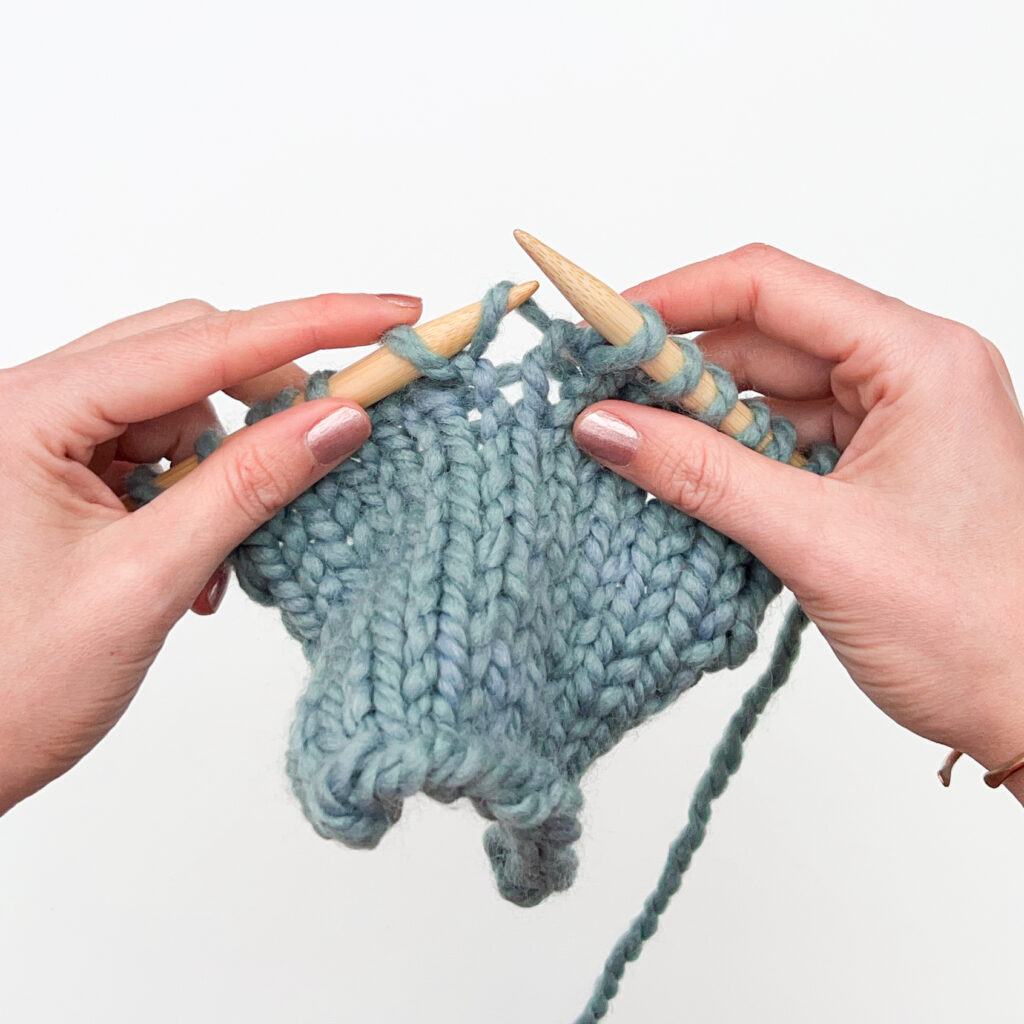
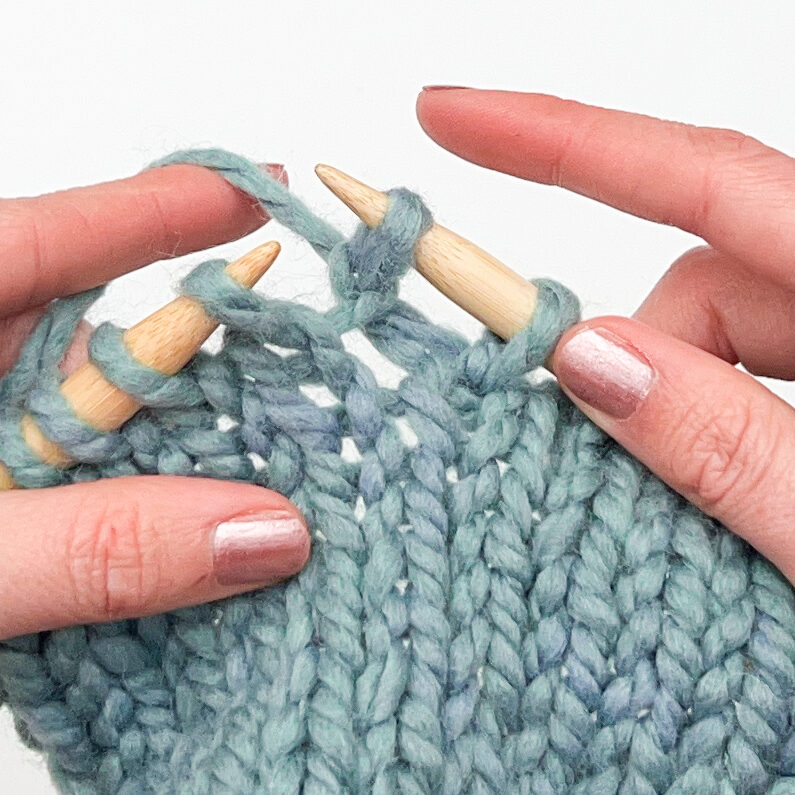
Step 3:
Knit the lifted stitch through the front. Insert the right needle from right to left under the front strand of the stitch.
Step 4:
Wrap the yarn counterclockwise up over the back needle before pulling it down and through the stitch.
Drop the stitch off the left needle.
Ta dah! You’ve just increased on stitch by working a M1R increase.
You can see here that the new stitch twists to the right in the finished fabric.

Sure! It’s always possible to substitute other types of increases in knitting patterns. However, your end fabric may have a different appearance and drape because the shapes of these increases is different. You also won’t get the additional angled shaping from the stitches with other knit increase techniques.
Other popular and useful techniques include lifted increases or even yarn over increases. In general, M1L and M1R are more subtle than yarn overs, which can create a larger hole in the fabric. However, lifted increases are a more invisible way to add stitches in a row of knitting compared to make one increases. Each technique is different and yields different results!
M1L and M1R knitting increases can be worked in any type of knitting including stockinette stitch, garter stitch, and cables! If a pattern specifies a specific increase, however, we always recommend following what the designer suggests in each pattern.
Make one knit increases don’t usually leave a visible hole in the finished fabric, but it is possible for the increases to be noticeable depending on the yarn and needle size you are using.


