Magic Knot for Joining Yarn
A quick way to join two pieces of yarn!
A quick way to join two pieces of yarn!
A magic knot is a handy way to join two pieces of yarn together for knitting or crochet! Also known as a double overhand knot, or fisherman’s knot, the magic knot is one of the most classic ways to add a new ball.
While there are many ways to tie in a new ball for an in-progress project, this method is a fast, easy, and sturdy way to quickly join yarn in a way that will get the job done with minimal fuss. If you’re looking for other ways to join yarn, you can find some handy tips and tricks at the end of this post!
Today we’ll cover how to tie the magic knot in a step-by-step photo tutorial as well as show you in a quick tutorial video too!
These step-by-step photos will demonstrate how to tie a magic knot knitting yarn join and a magic knot crochet yarn join. The best part about this tutorial is that it works for either right or left-handed crafters! It also doesn’t matter which yarn strand you start with first, the principle stays the same no matter where you tie the first knot.
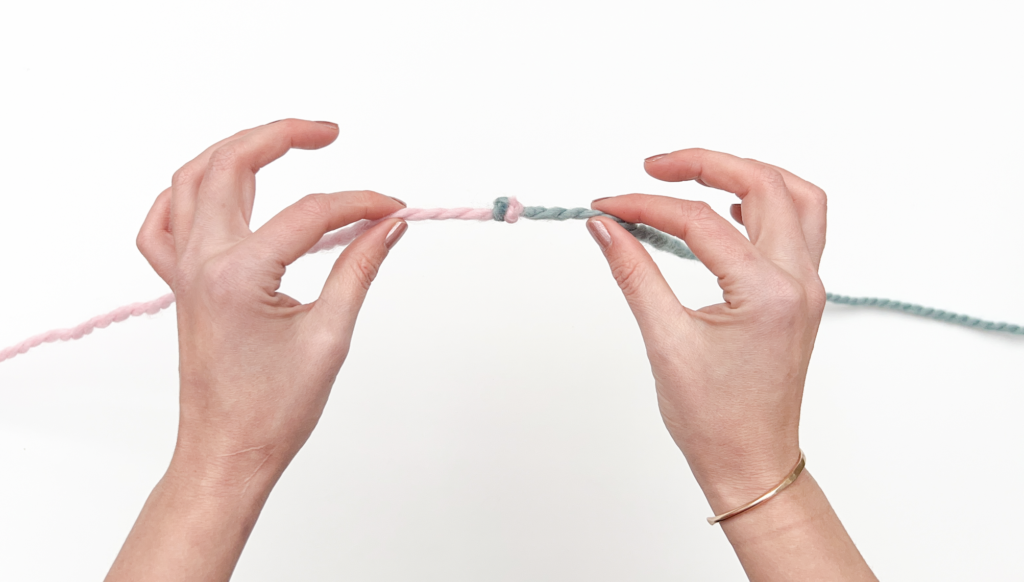
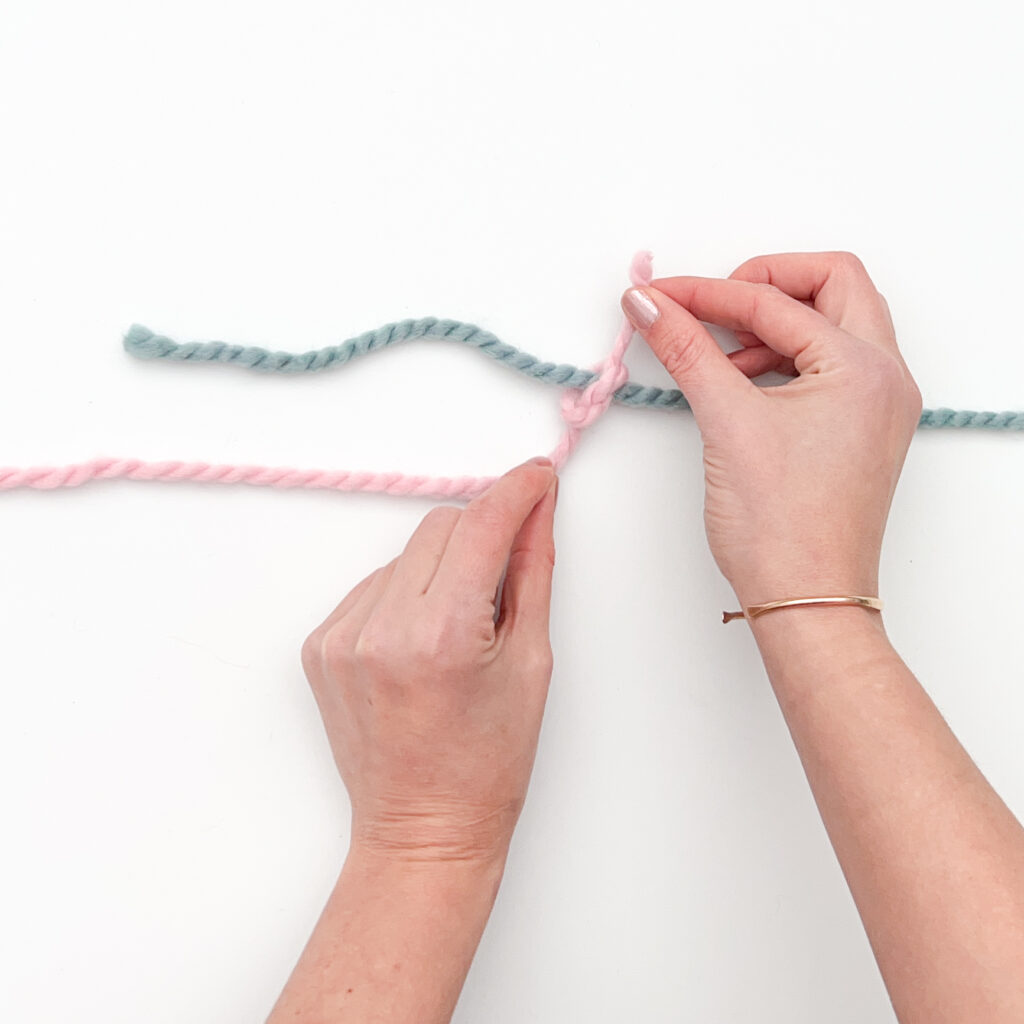
Step 1:
Lay both pieces of yarn parallel to each other on a flat surface facing in opposite directions.
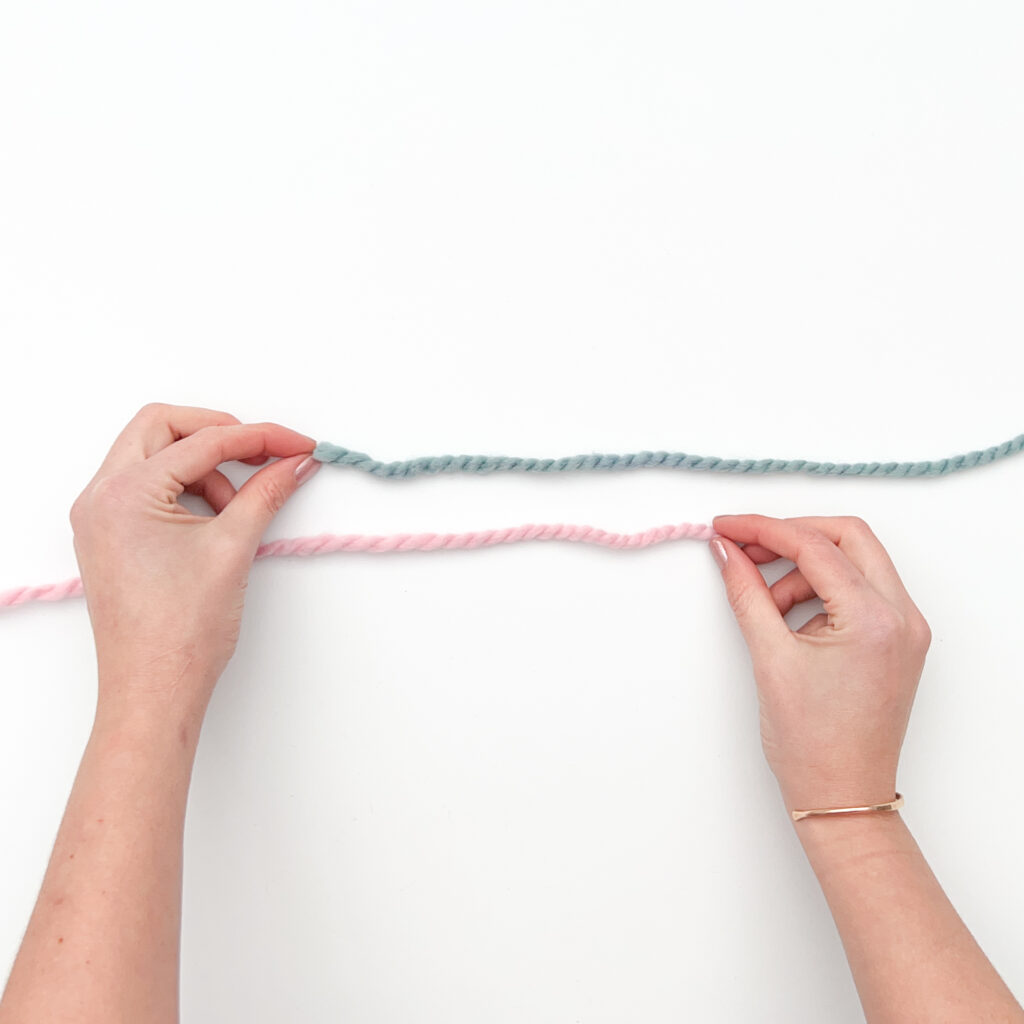
Step 2:
Starting with the lower strand, wrap the end over and behind the upper strand before bringing it over itself.
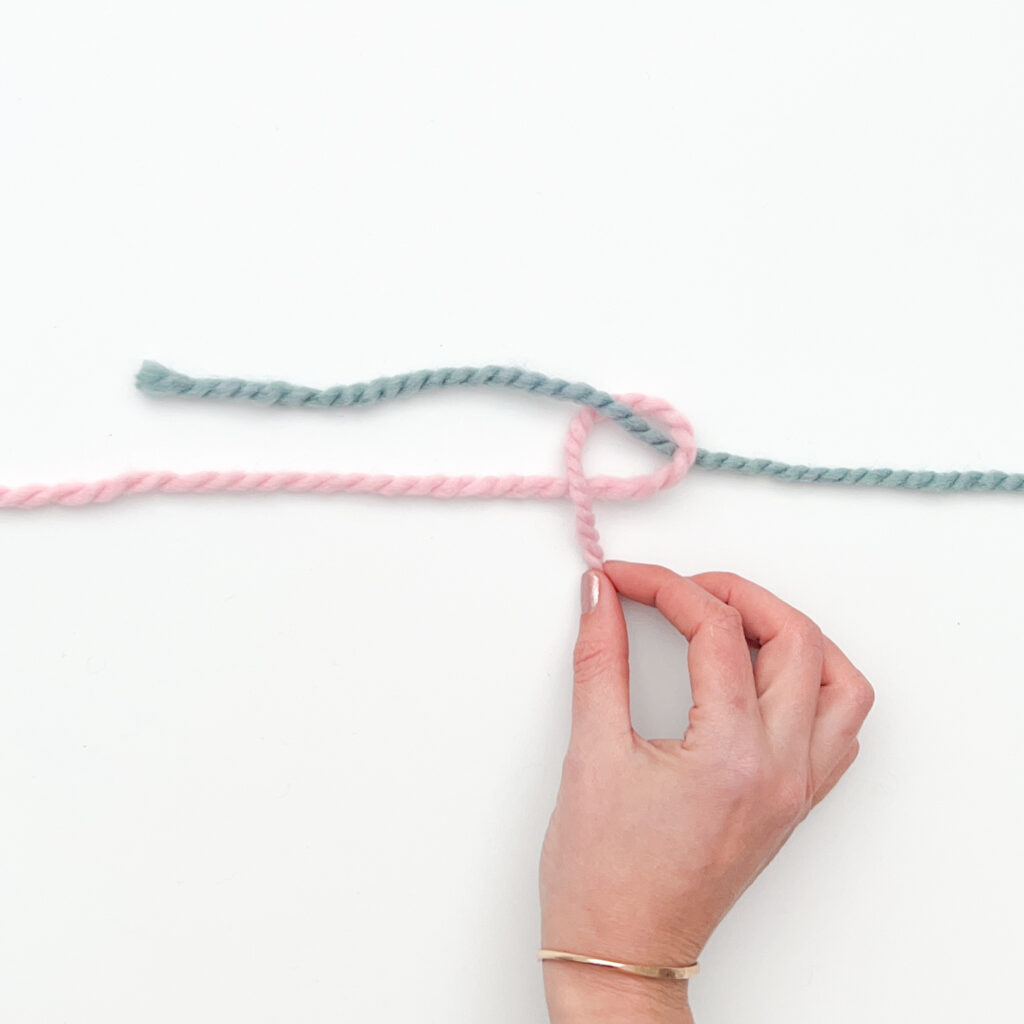
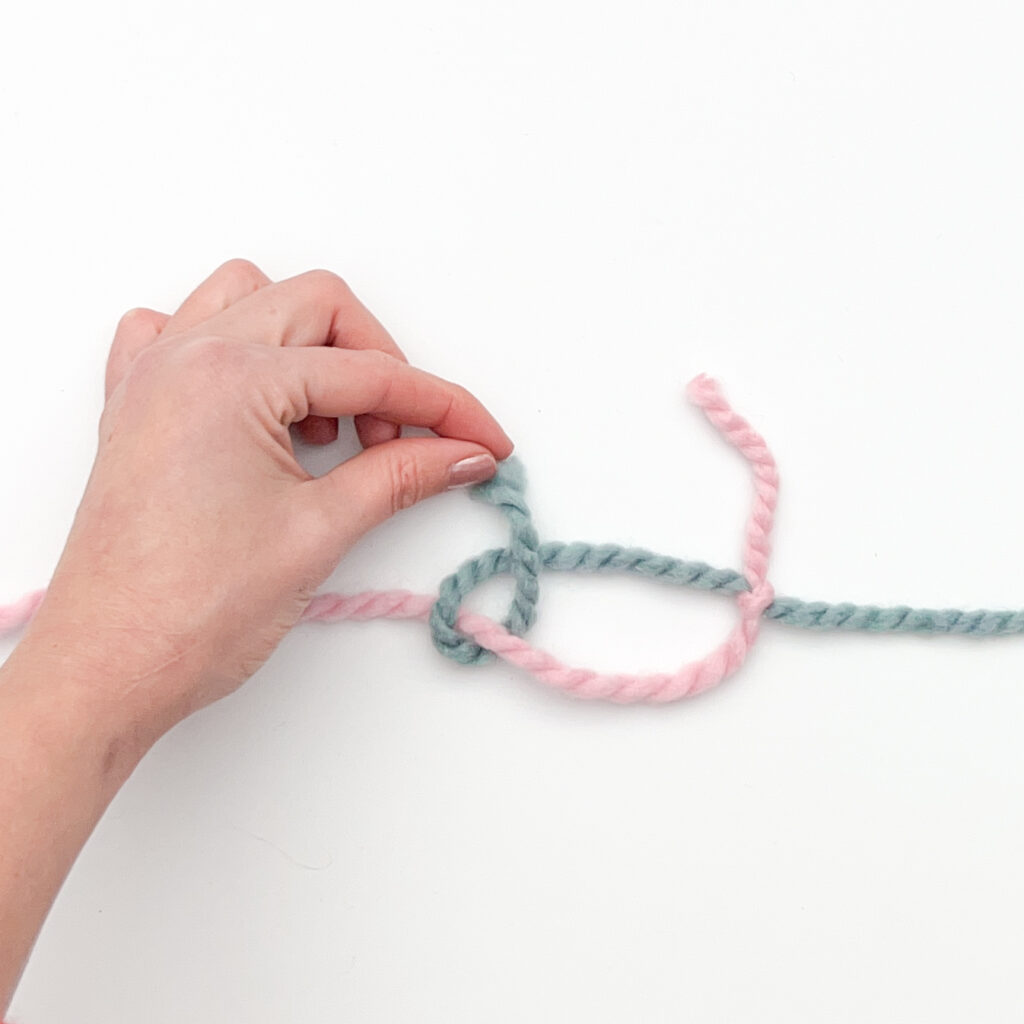
Step 3:
Loop the yarn end behind itself, pulling the tail and strand tightly to cinch the knot around the top strand.
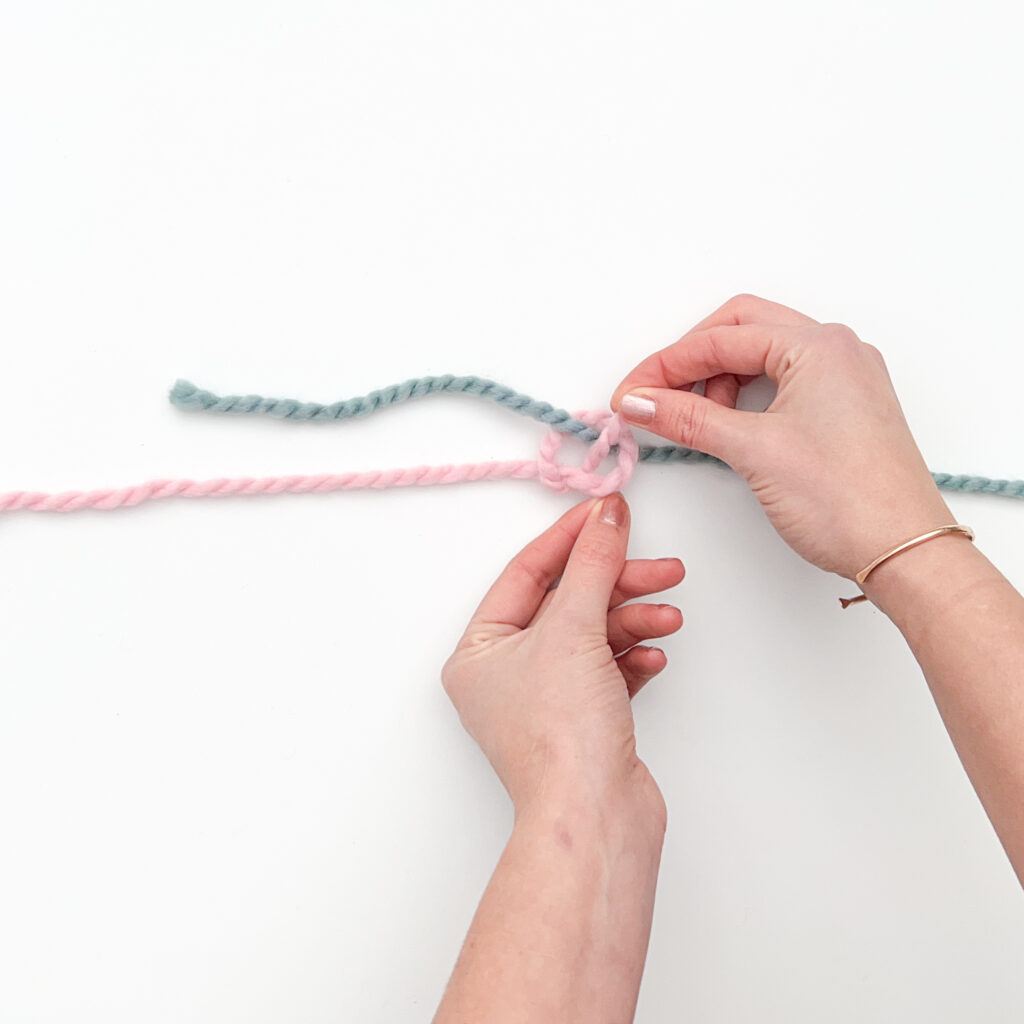
Step 4:
Loop the yarn end behind itself, pulling the tail and strand tightly to cinch knot around the top strand.
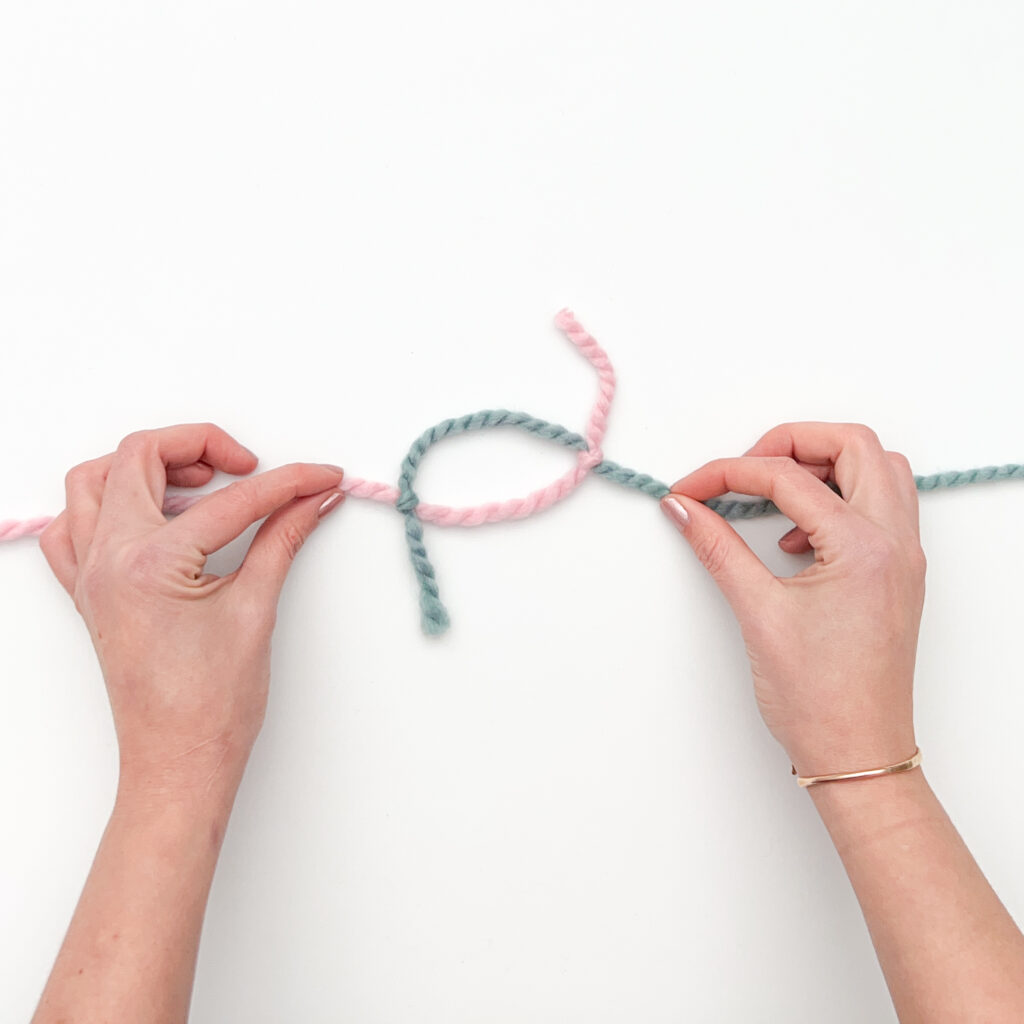
Step 5:
Starting with the upper strand, wrap the end over and behind the lower strand before bringing it over itself.
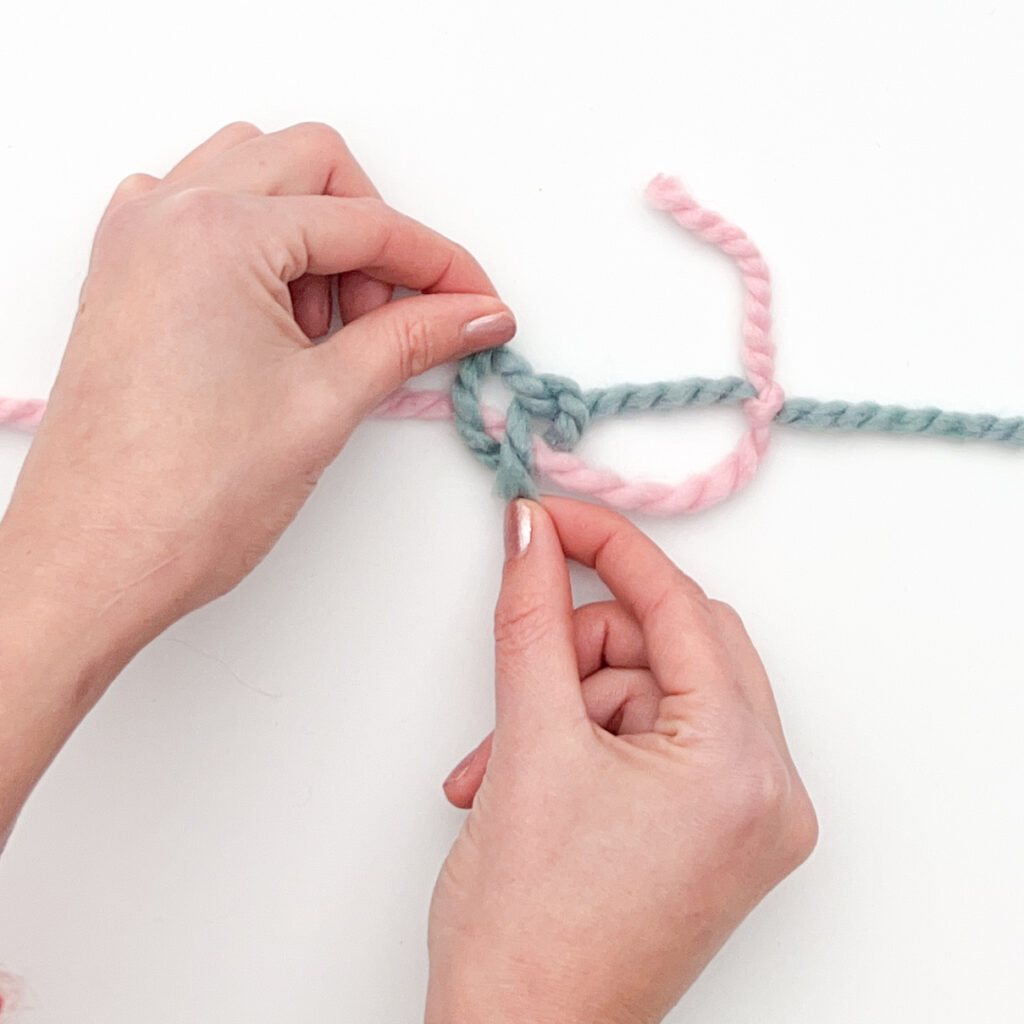
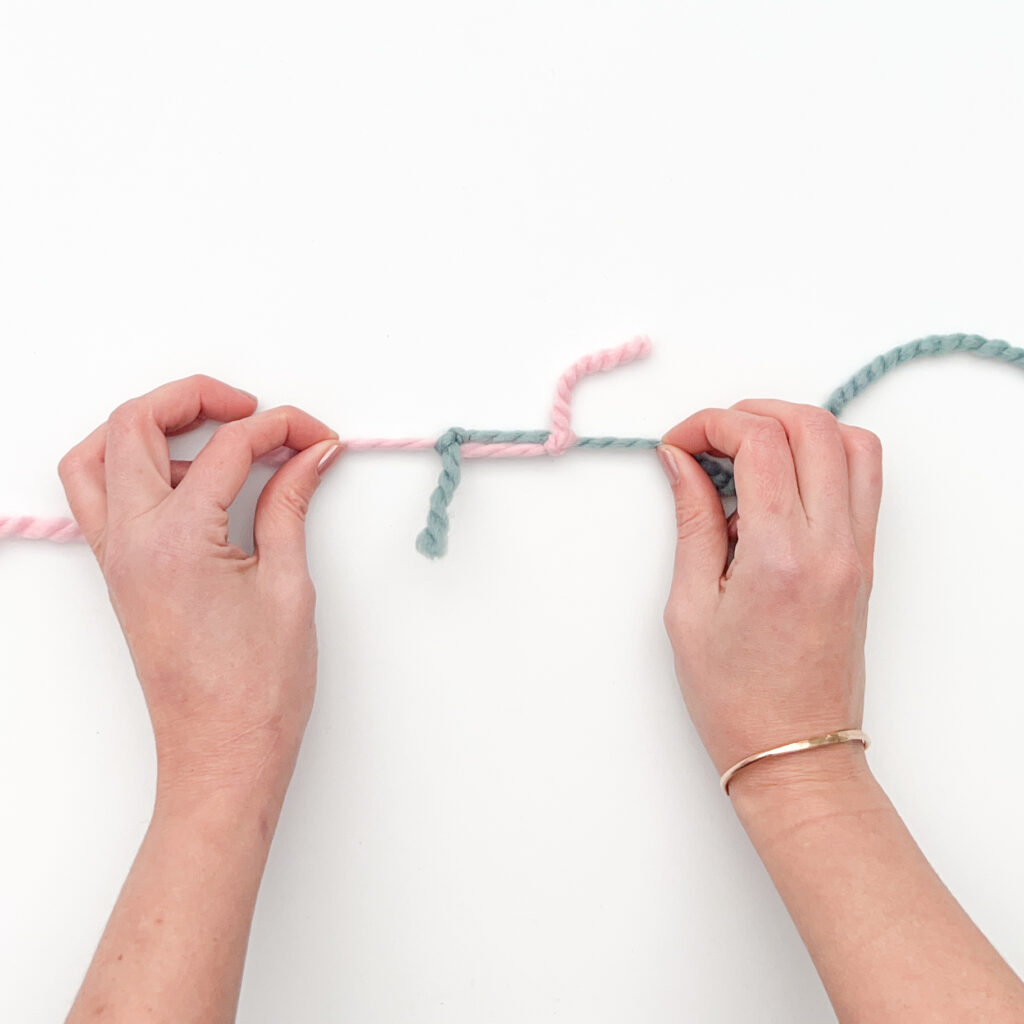
Step 6:
Tuck the yarn end behind its own strand, pulling the tail through the loop.
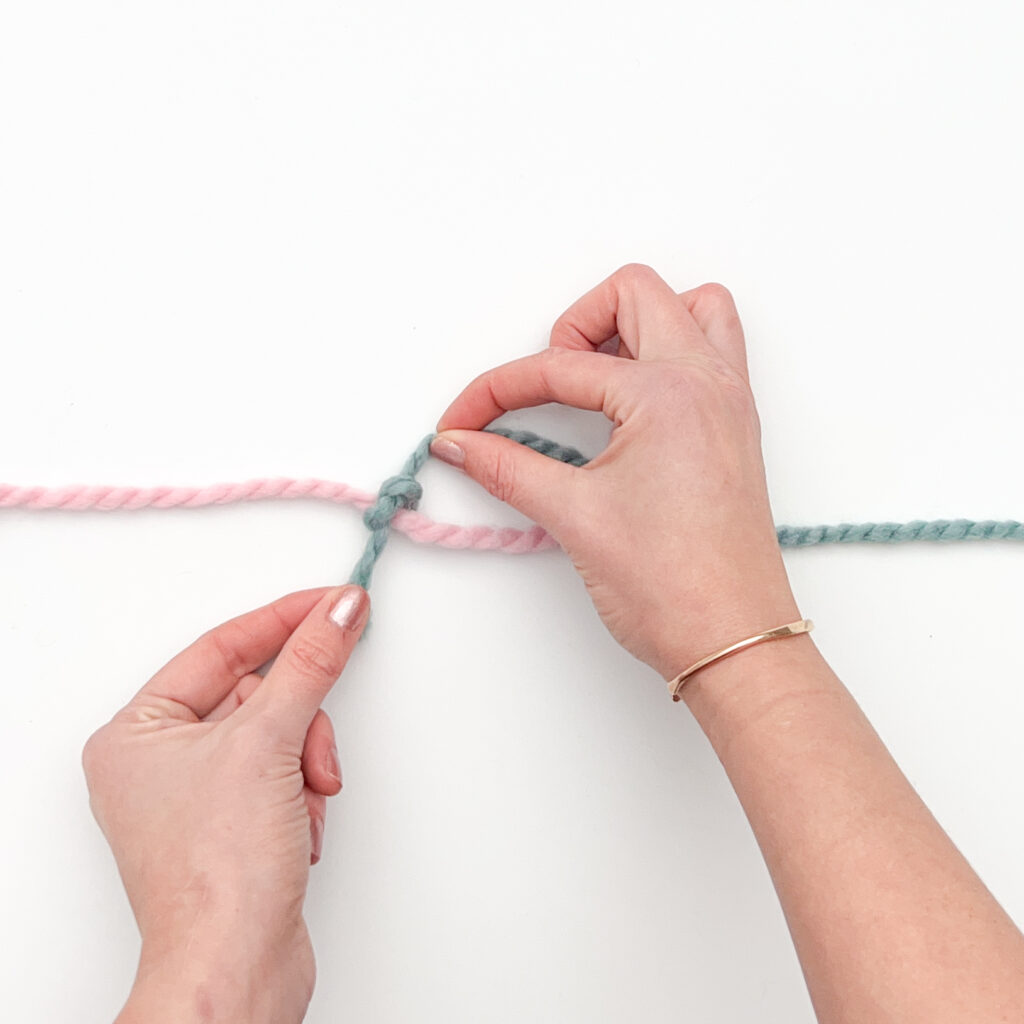
Step 7:
Pull the tail and strand tightly to cinch knot around the bottom strand.
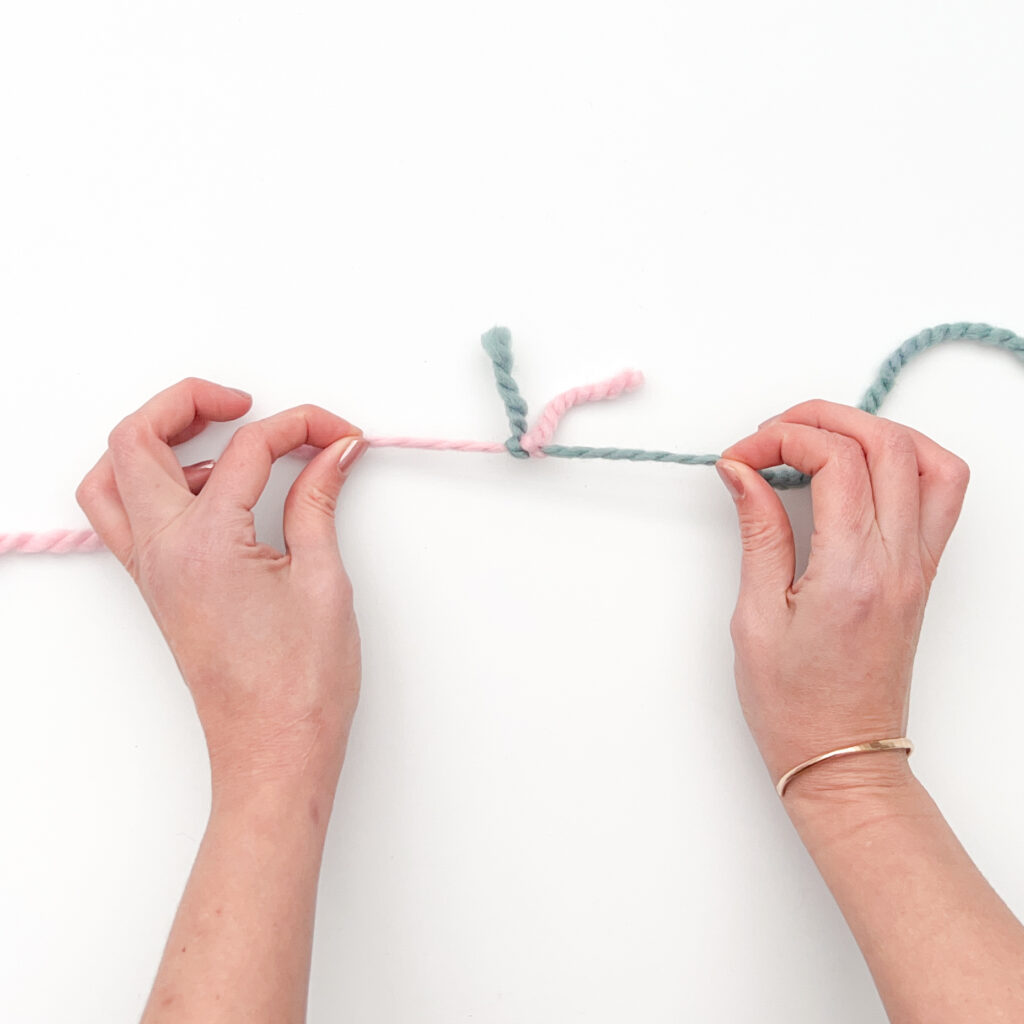
Next, pull both yarn strands away from each other, bringing the two knots together in the center. Trim the extra yarn tails close to the knot.
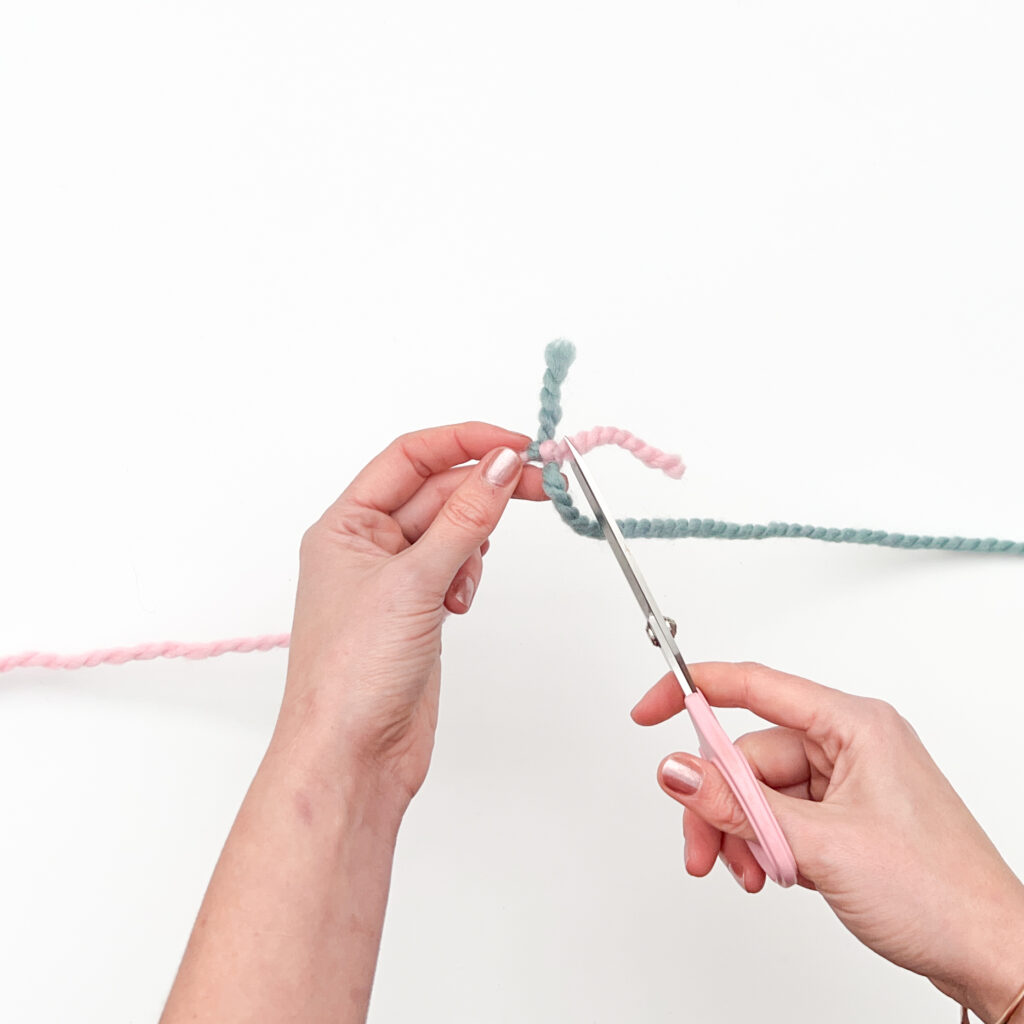
Ta dah! Now you’ve now completed a magic knot yarn join.
If you’re a fan of the magic knot yarn join and love to crochet, you’ll be pleased to know that this same technique can be used for creating seamless joins in your crochet projects – also known as the ‘magic knot crochet’ technique.
Magic knot yarn joins are fast and easy, however, they’re not the most invisible way to join yarn together. This joining technique is most often used for crochet. The visible knot is easier to hide in the thicker crocheted fabric than knitting. It also is a sturdy way to join yarn without having to hassle with weaving the leftover yarn tails into big projects like afghans or throws.
The magic knot is a fantastically fast technique however, it might not be the best choice for every project! If you’re working with a particular slippery yarn, silk or bamboo, for example, this knot might come apart over time. Also, if you’re working with a super bulky or jumbo yarn, your knot will be quite large and might not ease into the surrounding fabric.
Our best recommendation when trying a new technique is to practice using your pre-project gauge swatch. That little piece of fabric you make to test your needle/hook/yarn choice is also a great time to see how different finishes will look in your project, including different yarn joins.
Taking the time to experiment can save a lot of headaches later on!
Yes! There are several ways to join yarn in crafts. If you’re using a natural fiber it’s easy to splice your yarn for the most invisible way to join a new ball of yarn mid-project.
You can also do an overlap join by holding the two yarns double for a few stitches in your project. This technique creates a bulkier area where the yarn is held together in the finished fabric.
The third way to join a new ball of yarn is to simply stop working with one ball and start working with the new one in the next stitch! You’ll need to leave 6″ of yarn tail for both balls so that you can weave the ends in later.
The last technique is a quick join at the end of a flat row. After you’ve worked to the end of a row, leave a 6″ yarn tail in your project yarn. Leaving a 6″ tail in the new yarn, work the next row using the new ball. Come back at the end of the row and tie the ends together in a double knot and trim, or simply weave the ends into the body of your work for a more invisible finish.


I ❤️ Love this tip!I know I will use it often. Thankyou!
Yay! So glad you find it useful!