A Snazzy Loom Knit Headband In Just 2 Easy Steps!
Do you know how to loom knit a headband?
Do you know how to loom knit a headband?
I have to admit, when I first heard about loom knitting, I wasn’t quite sure if I wanted to try it out. It sounded complicated.
But the more I practiced, the easier it got. So now I’m sharing a series of free loom knitting patterns that you might enjoy!
To start off your loom knitting journey, I’m sharing this simple knit headband pattern so you can get to know the movements involved in working with a knitting loom!
In traditional knitting, knitting a headband allows you to learn the basic knit and purl stitches, as well as how to work on stitches in a round. But in loom knitting, all you have to do is learn how to create the knits and purls.
Ready to get stitching? Let’s begin!
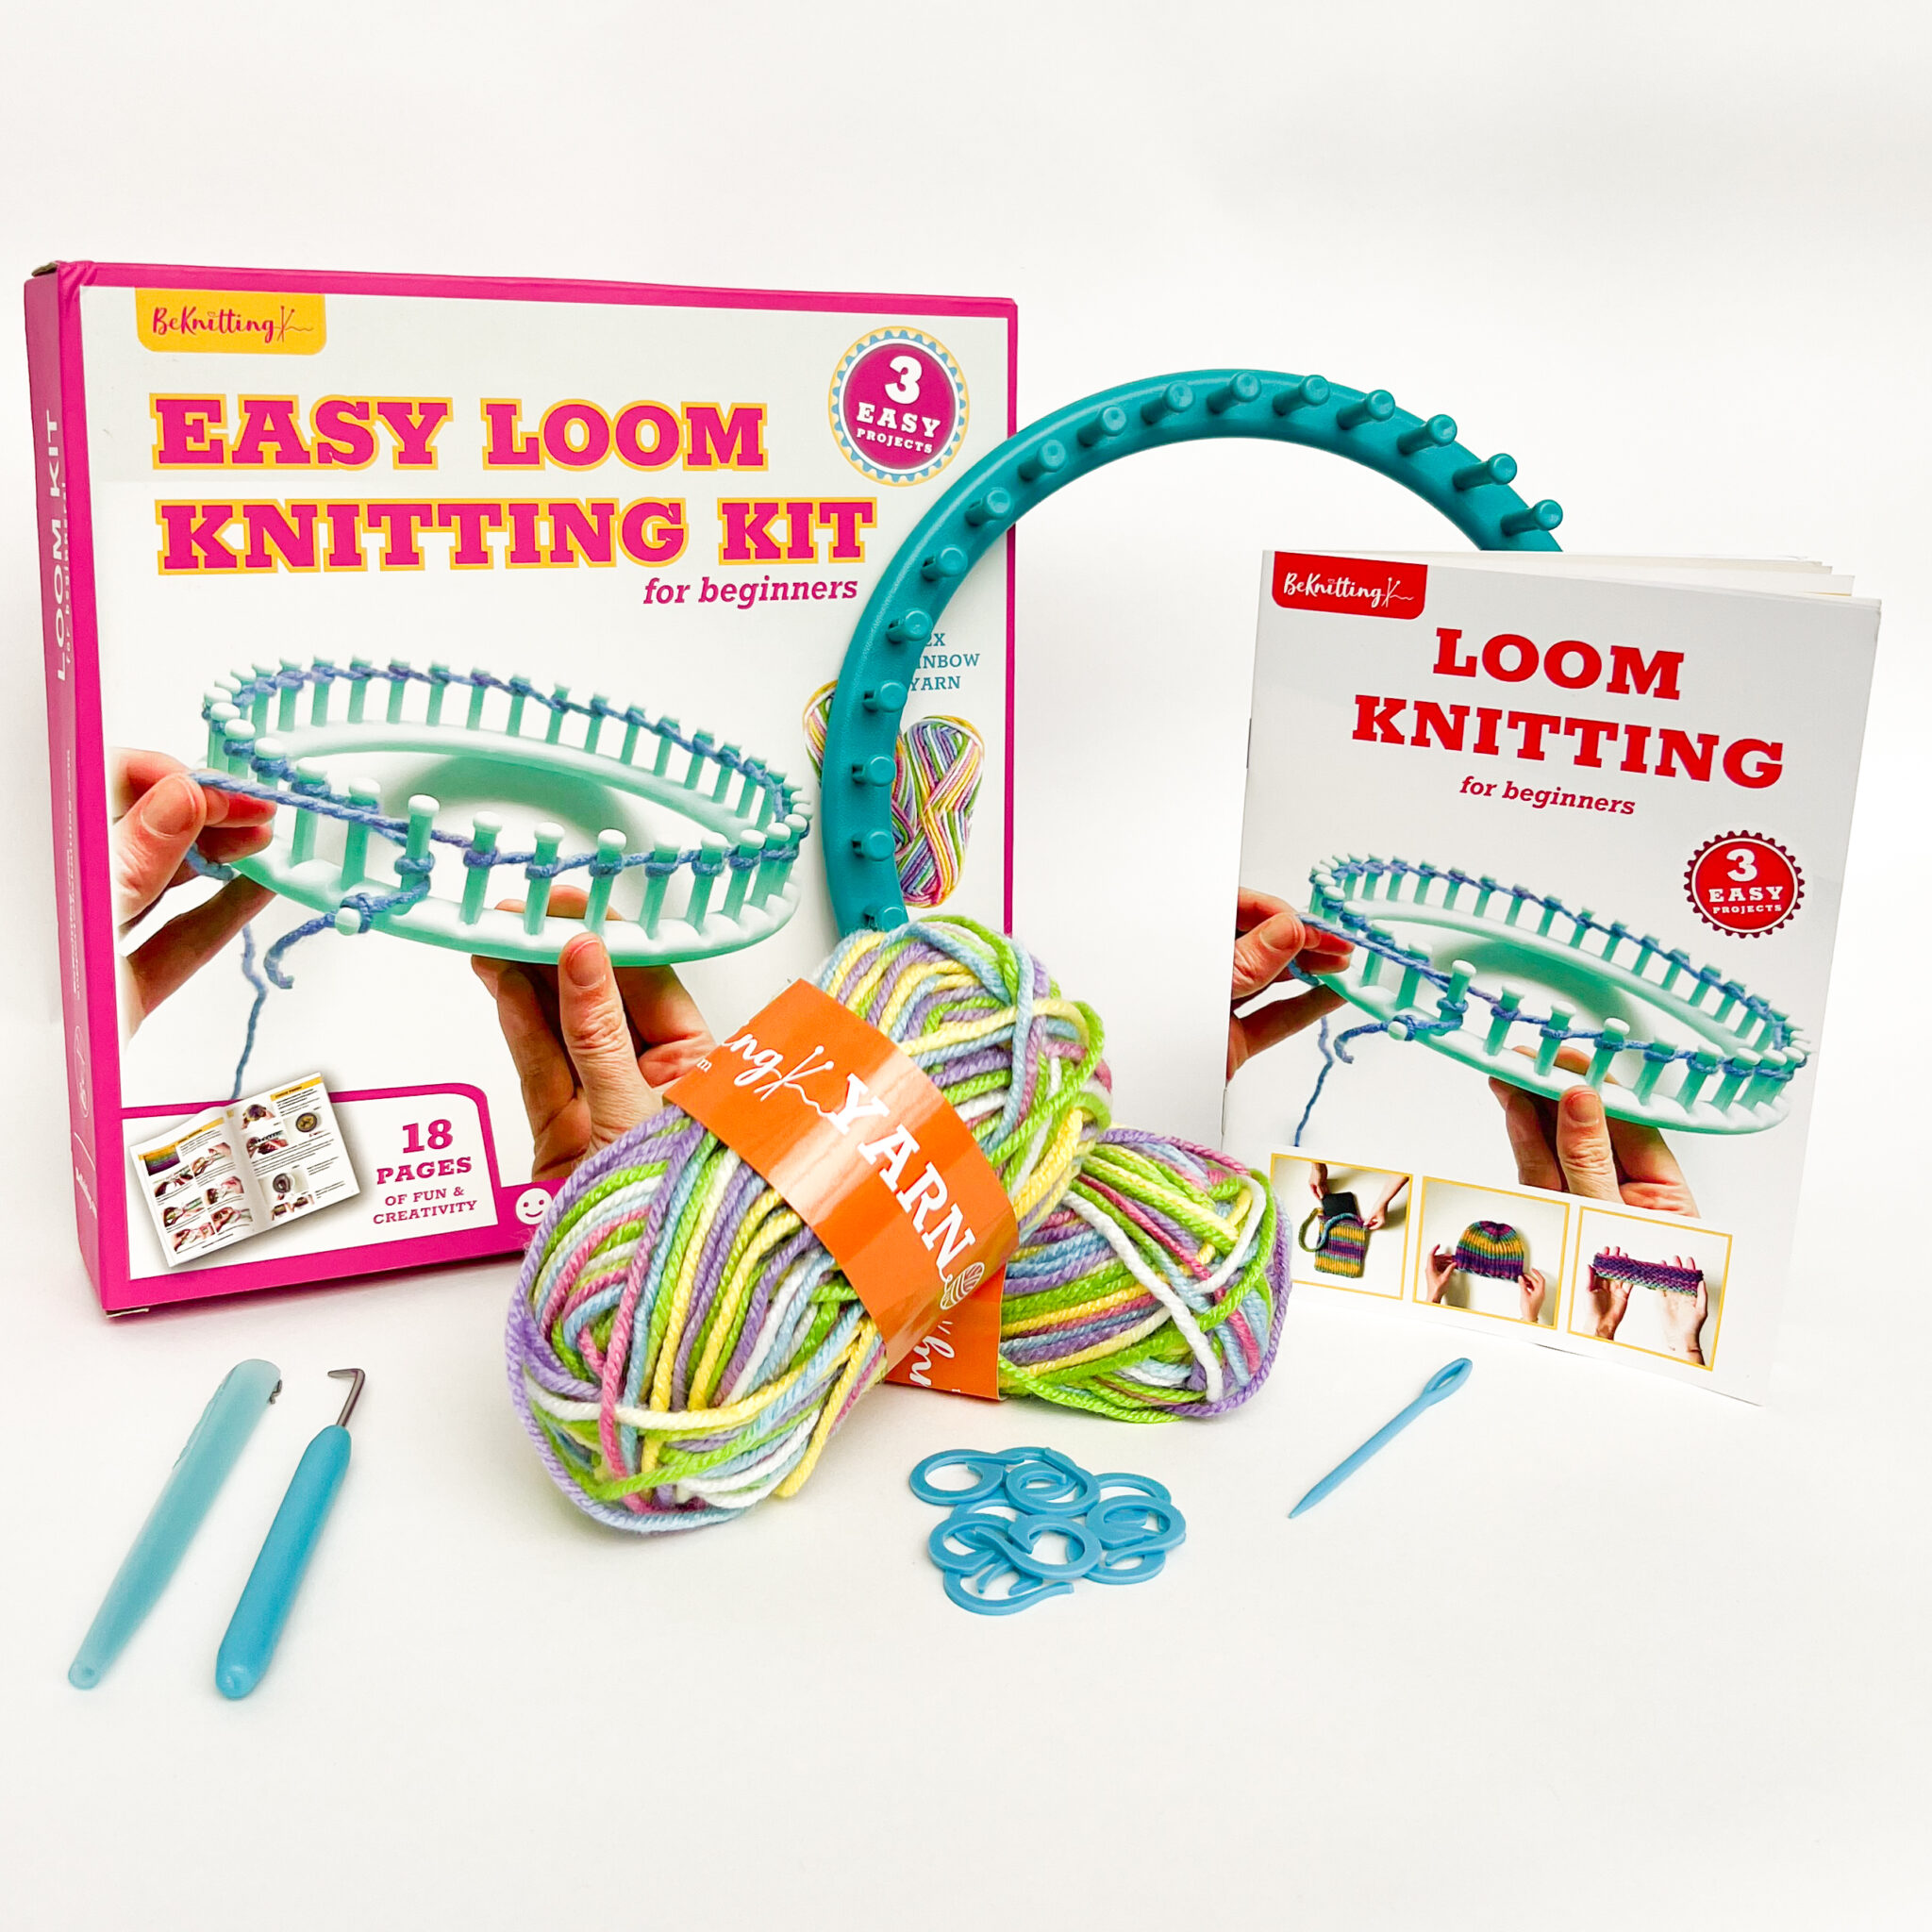
You can find the BeKnitting Easy Loom Knitting Kit on Amazon! 3 fun projects teach you how to use a knitting loom and are designed with new crafters in mind.
Never touched a knitting loom? We’ve got you covered!
Each kit comes with two balls of worsted weight (medium) yarn, one instruction booklet, a yarn needle, a loom hook, a loom pen, stitch markers and, of course, a knitting loom!
Let me show you just how easy loom knitting can be.
Firstly, I’ll be touching up on the basics of loom knitting. Once that’s done. we’ll head straight into the pattern.
I’ve already given a more in-depth tutorial on the basics of loom knitting in a previous blog post. So if you haven’t read that up yet, feel free to read it and come back here for your knitted headband pattern!
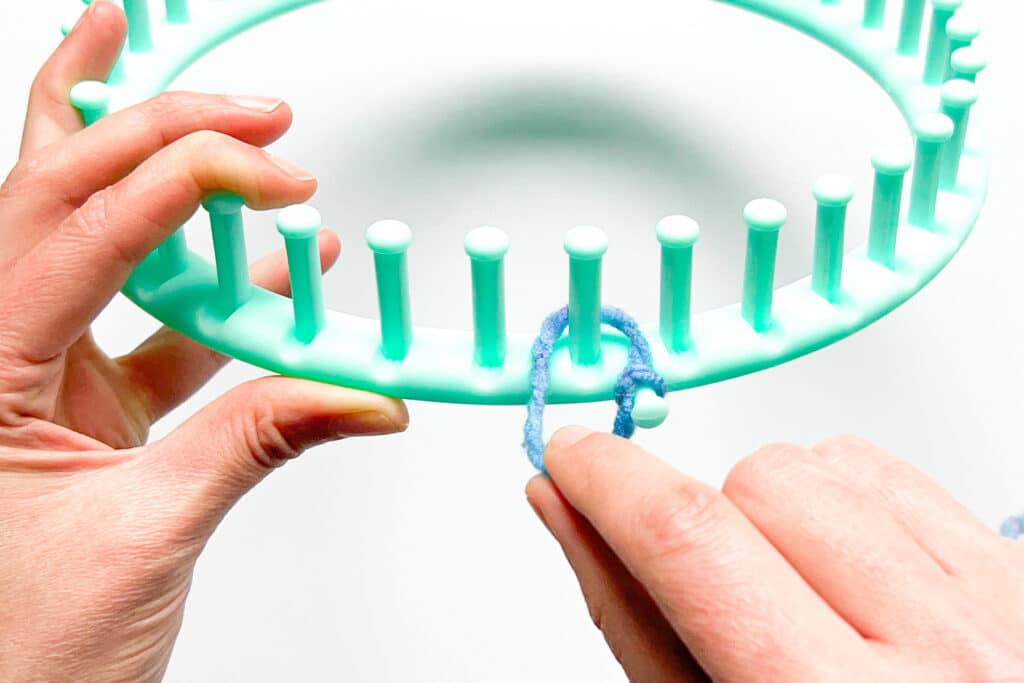
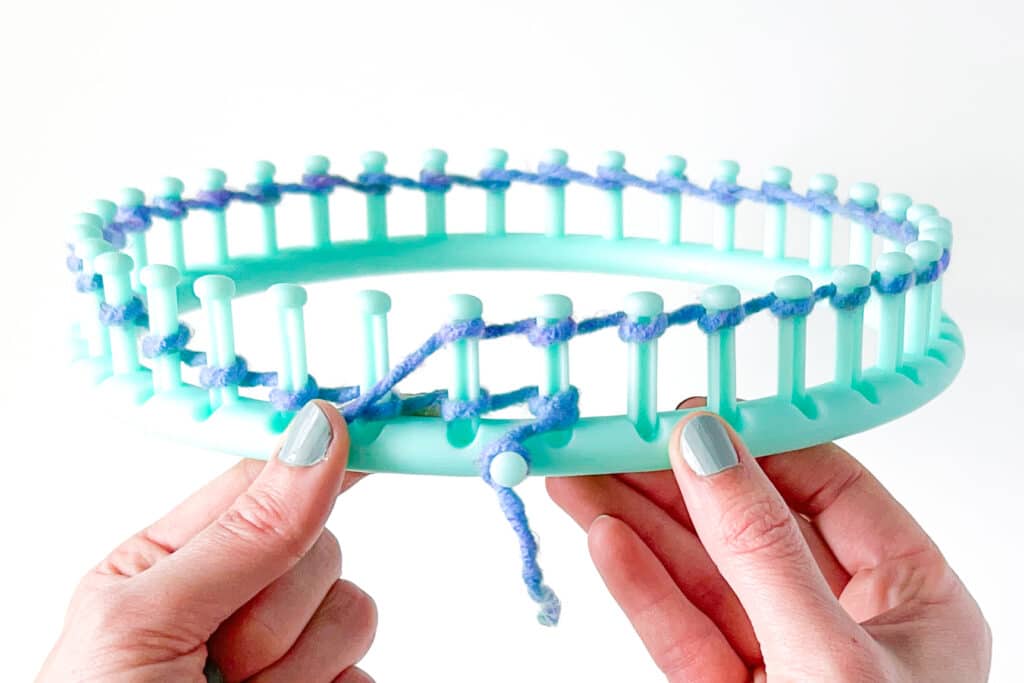
Casting on yarn in loom knitting patterns is a lot different from how you cast on in traditional knitting. Here’s how you do it:

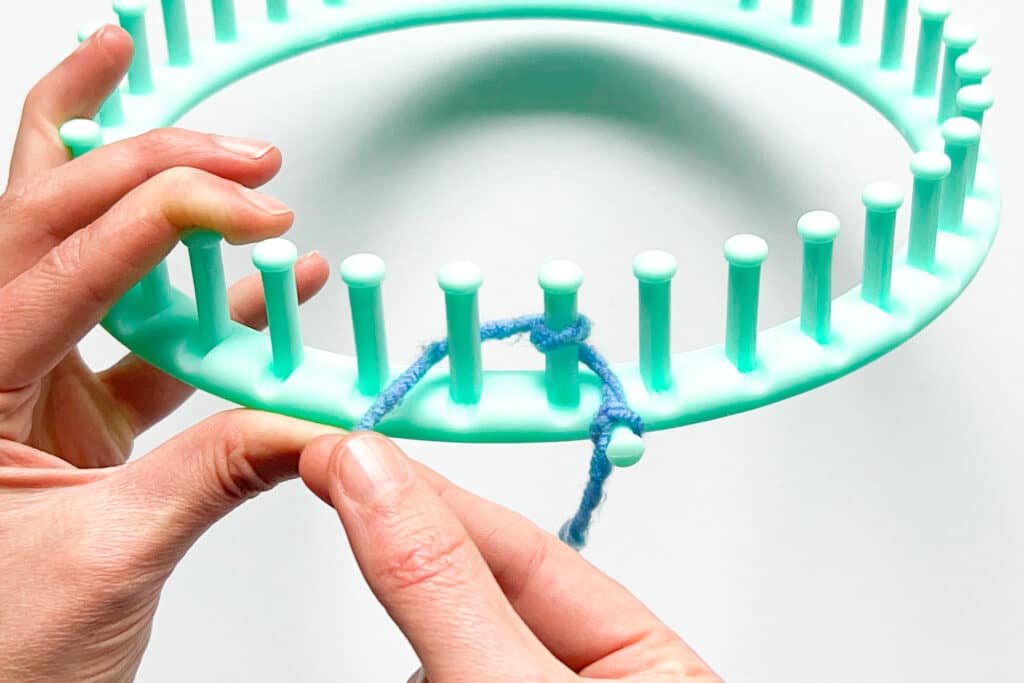
To start, tie the yarn in a quick knot
around the side peg on the loom to
anchor it for the first few rounds.
If you are using a loom pen, make sure to thread the yarn through before this step.
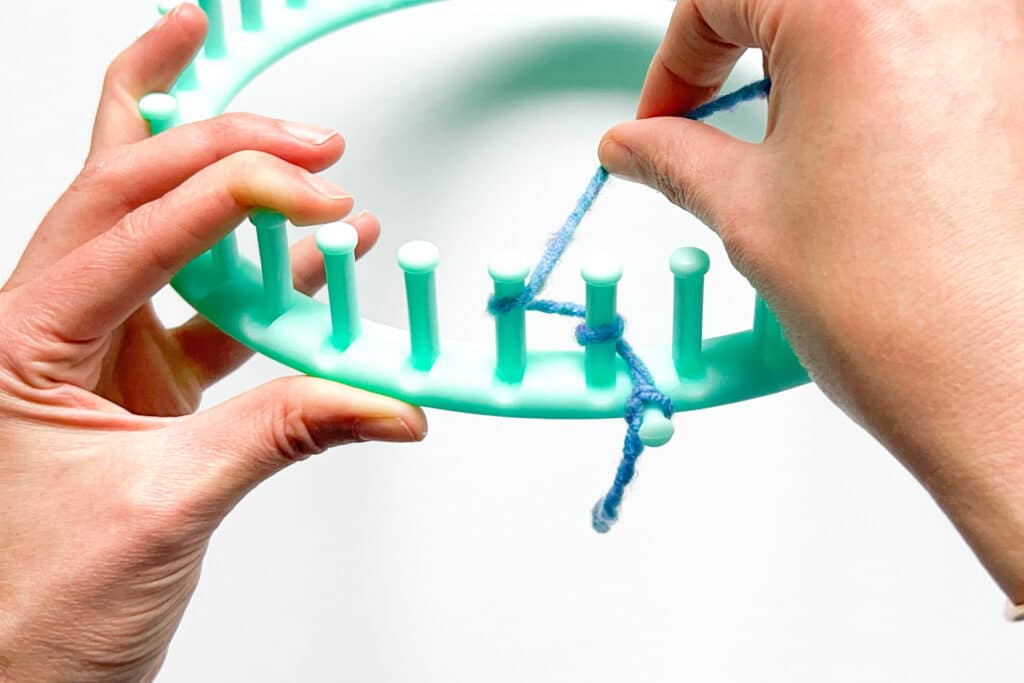
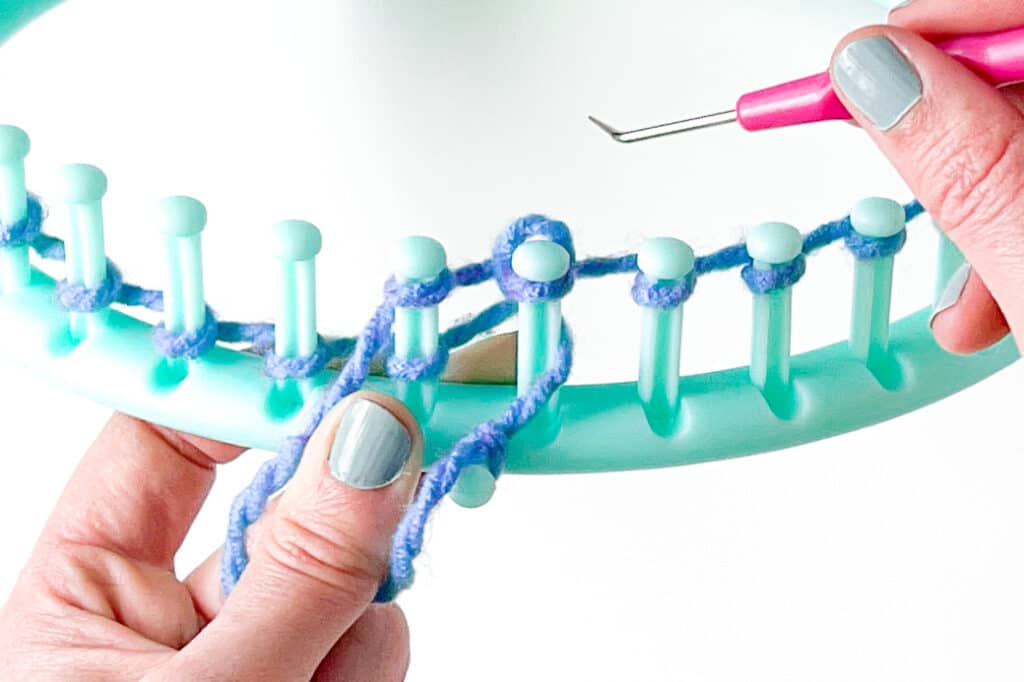
Casting on starts the yarn on your loom and creates the first round/row of your project! There are different ways to cast on, we’re going to use the “E-Wrap” cast on technique which is stretchy and easy to do.

Bring the yarn to the back, between two pegs. Loop the yarn around the back of a peg, bringing it back to the front between the next set of pegs.
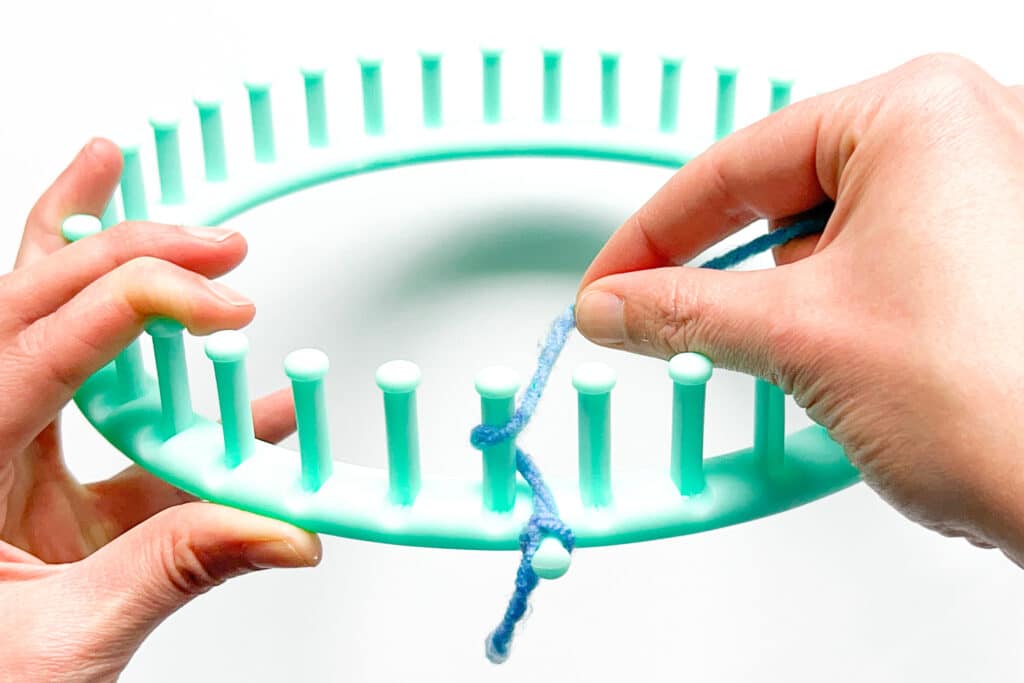
Loop the yarn all the way around the peg bringing the yarn around the back of the next peg. The yarn between two pegs should be at the BACK/INSIDE of the loom.
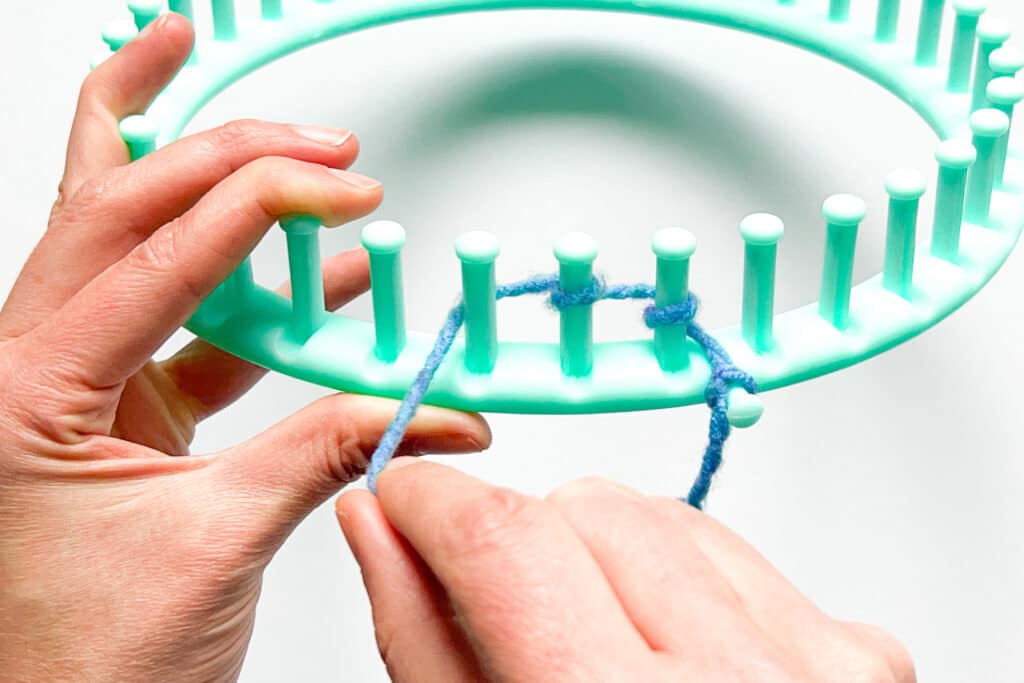
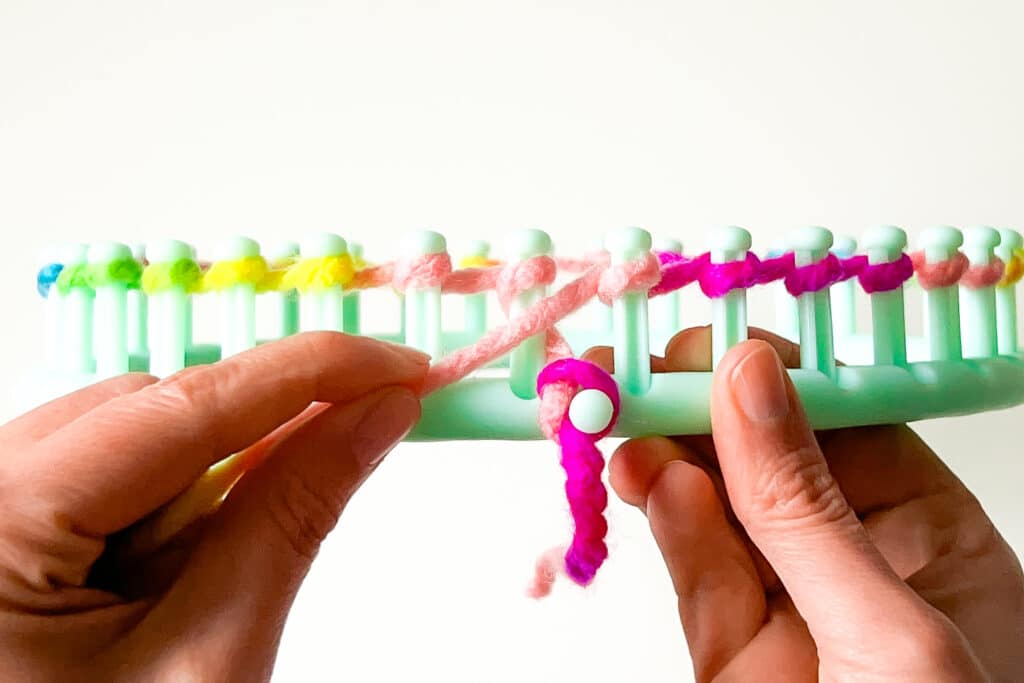
Continue to loop the yarn around the
pegs until you’re back to the anchor peg.
Once you’re back at the first peg, wrap
the pegs for that round following the
instructions for the particular stitch you
want.
Once you’ve familiarized yourself with the loom knitting cast on, it’s time to introduce this pattern’s main stitch: The E-Wrap Knit Stitch and Purl Stitch.
Don’t worry, I’ll walk you through each step here too!
The “E-Wrap” knitting stitch is extra
stretchy which means the fabric will be
elastic and springy. This stitch creates a
flat “v” shaped stitch that’s smooth and
elastic.
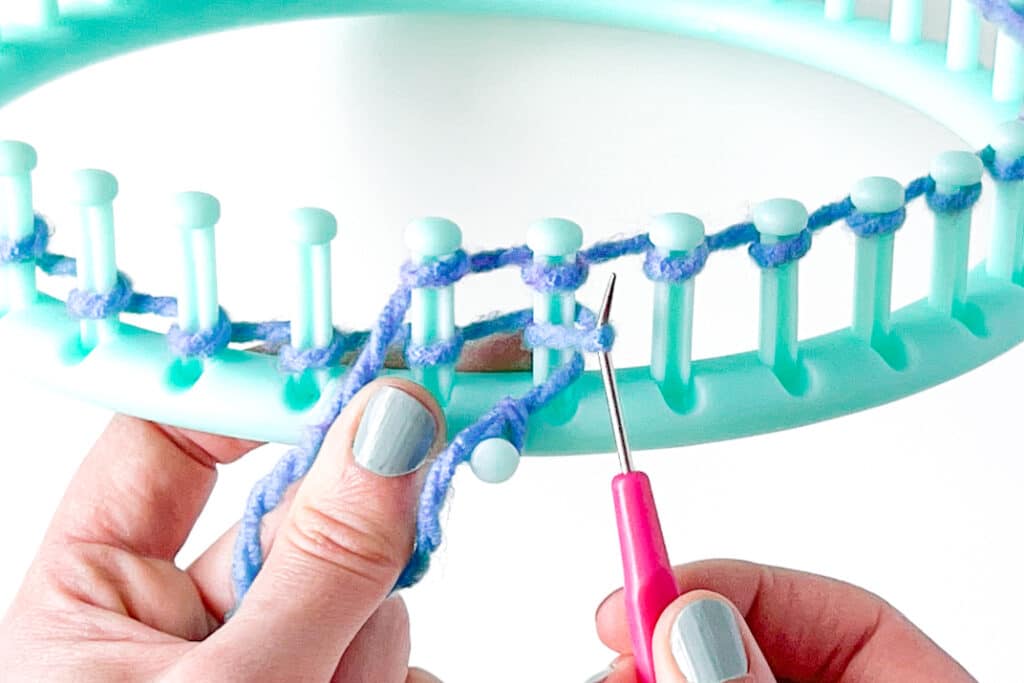
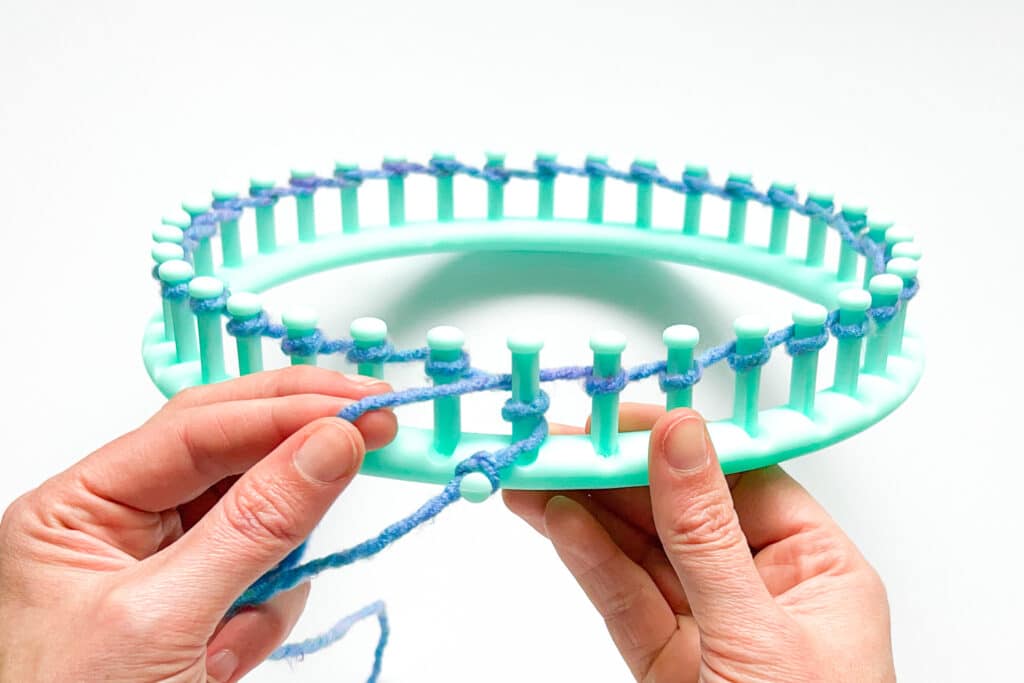
Step 1: Loop the yarn around the tops of the pegs in a second row the same way as the E-Wrap Cast On. You can either wrap each peg as you come to it or wrap a bunch of them at once. Either way, don’t let go or your yarn will unravel from around the pegs!
Step 2: Use the loom hook to lift the bottom loop from the first row up and over the
second loop. Continue lifting the loop over the top of the peg. Drop it off the hook.
Repeat Steps 1-2: continue to wrap the pegs with a second row of yarn, lifting the first round up over the second all the way around the loom.
The purl stitch is sturdy and features a “bump” in the fabric rather than a “v” like knit
stitches. Paired with a knit stitch you can get several different textures and patterns like ribbing or garter stitch.

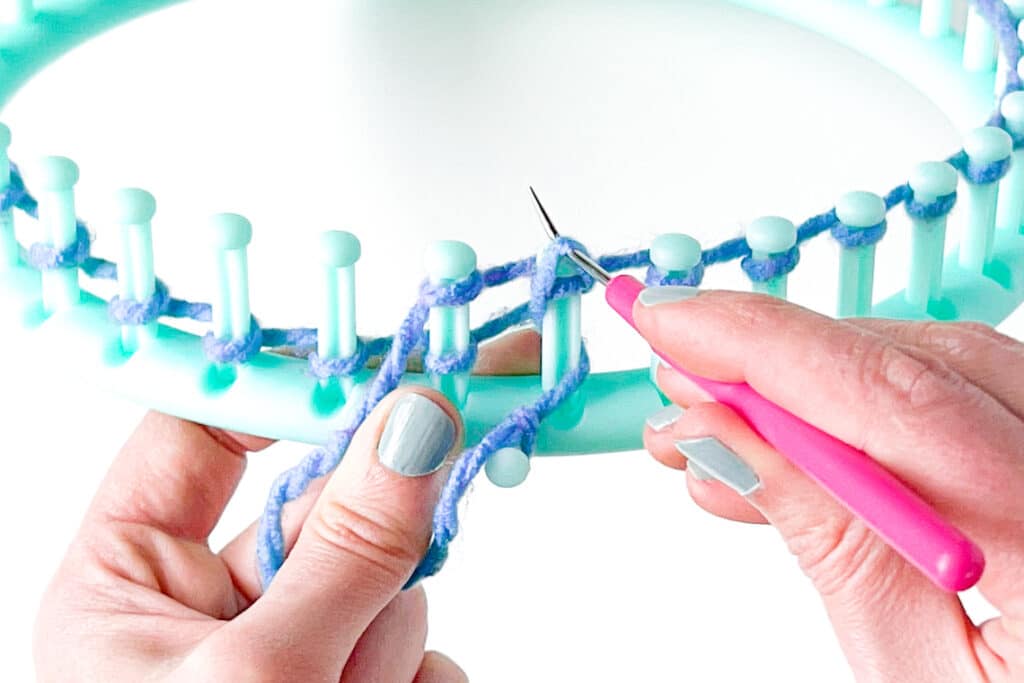
Step 1: Bring the yarn across the front of the peg below the looped yarn already on the peg.
Step 2: Insert the loom hook down through the looped yarn with the hook facing the peg. The hook should come in front/on top of the lower yarn strand.
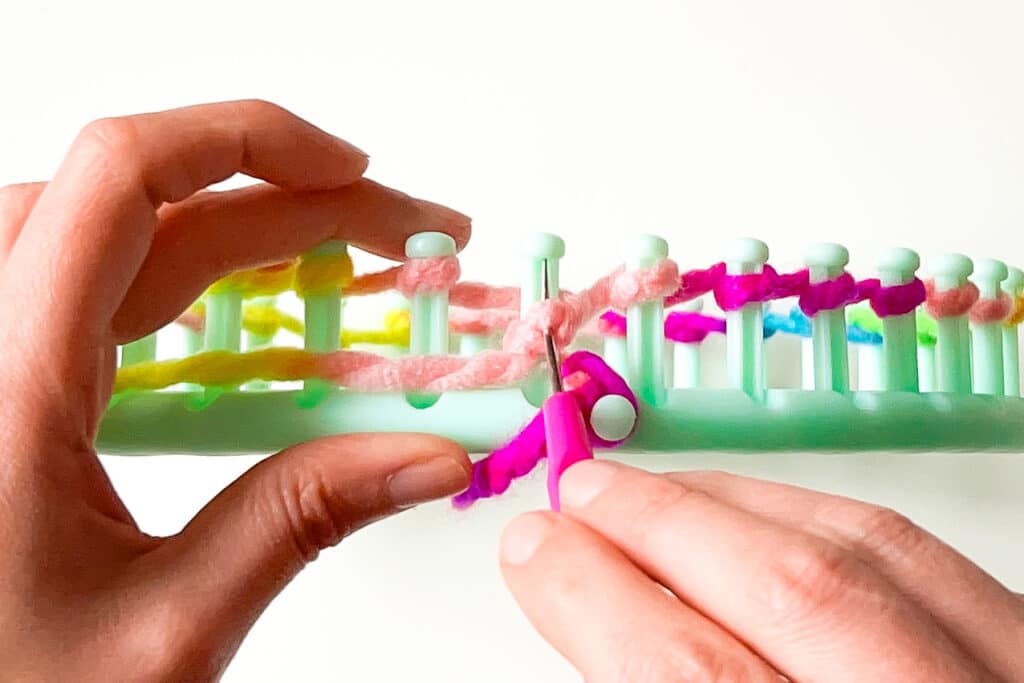

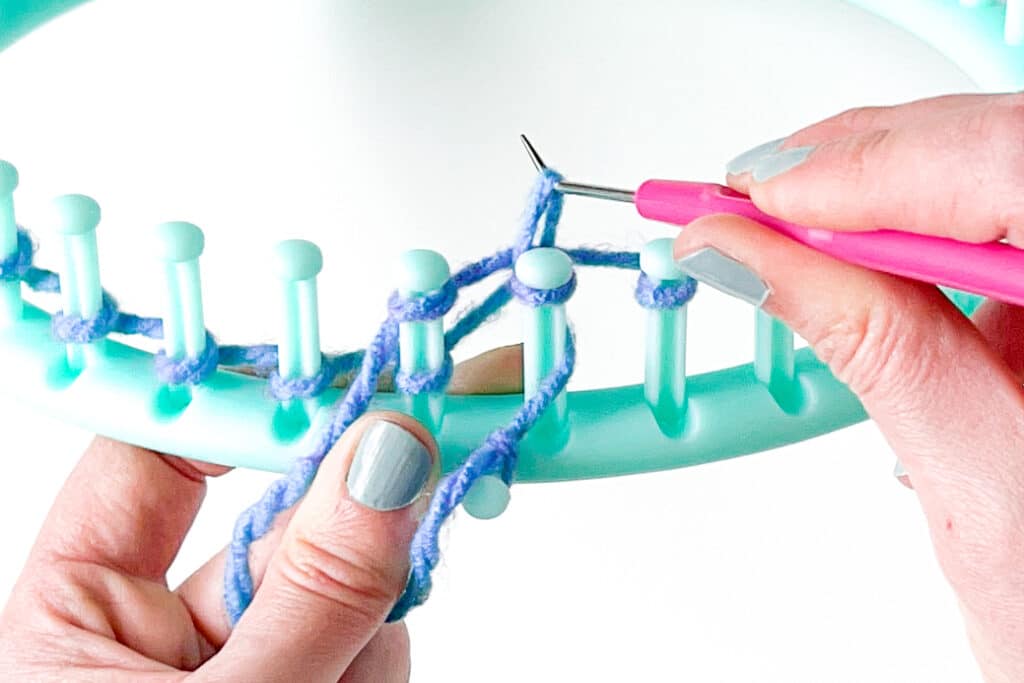
Step 3: Pivot the hook down, pulling the yarn strand up through the top looped yarn.
Step 4: Continue pulling the the hooked yarn up until it slips the stitch off the peg.


Step 5: Open the loop on the hook.
Step 6: Slide the new loop onto the peg.
Repeat steps 1-6 to knit each peg.
To make your headband, you’ll alternate rounds of knit stitches and purl stitches.
Change from one stitch to the other at the beginning of the round.
Round 1: Knit Stitch
Round 2: Purl Stitch
Repeat Rounds 1 & 2 until you have 2” of fabric measured from the bottom edge.
End after working a purl row, stopping at the anchor peg.
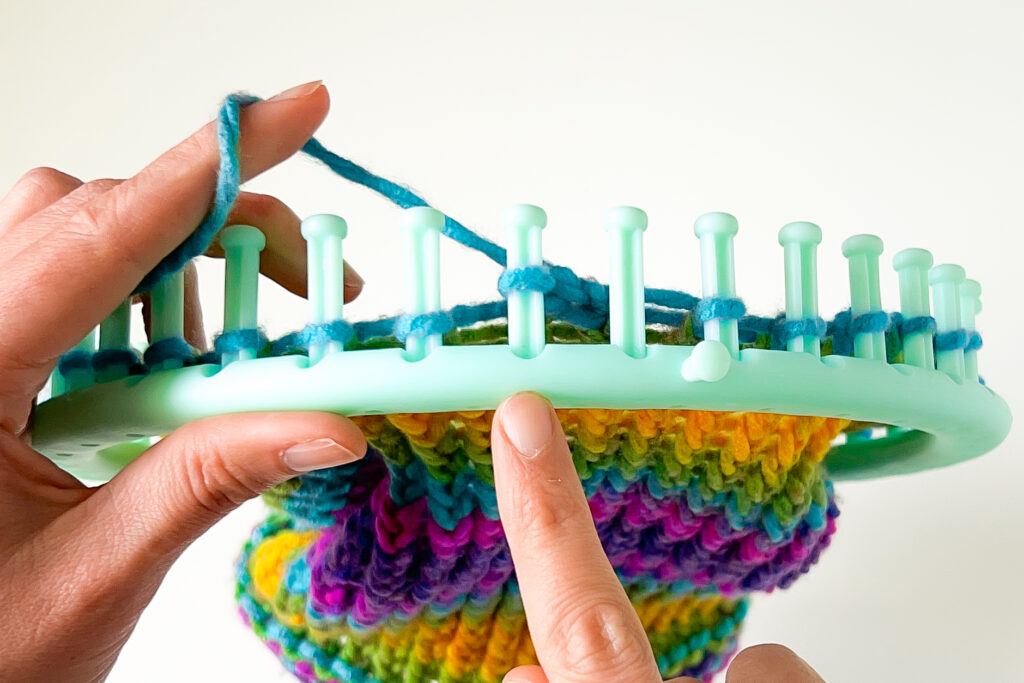
Once you have 2″ of fabric, it’s time to bind off your project!
Binding off your knit headband is super easy. Here’s how:

Step 1: Knit the first 2 pegs
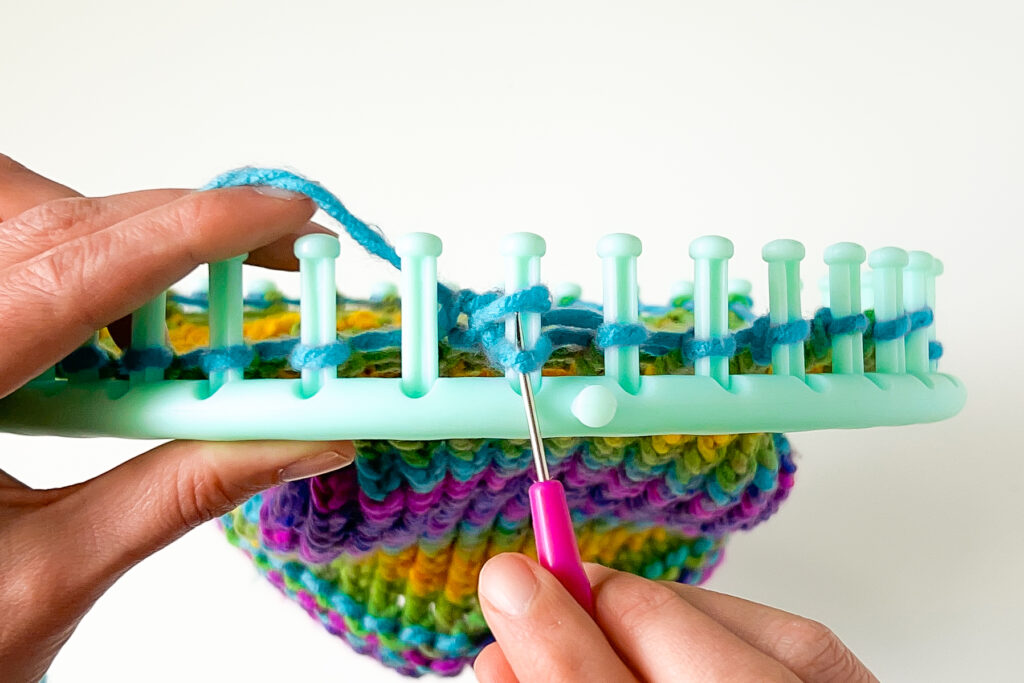
Step 2: Move the second stitch over to the first peg so that it stacks on top of the first stitch.


Step 3: Knit the 2 loops on the peg. You now have one stitch on the first peg and an empty second peg.

Step 4: Use the loom hook to lift the stitch up off peg 1 and move it to peg 2.
Step 5: Knit the next stitch (peg 3) normally.
Repeat Steps 2-5 until all the stitches have been bound off.
Finishing: Cut the yarn leaving 6”. Pull the yarn through the last stitch and cinch it
shut. Now you have this super flat and secure edge to your knit headband.
The last thing you want is for your project to start unravelling. Here’s how you secure your yarn tail.
Here’s how you weave in yarn tails after you’re done with the knitting loom cast off:

Step 1: Turn the project inside out. Thread the yarn tail through the yarn needle.
Step 2: Weave the needle through either a row of stitches or column of stitches for 1-2”.
Step 3: Pull the yarn through the stitches and trim the extra yarn close to the fabric.
Weaving in the ends for “traditionally” knitted items and items that are knitted in a loom is practically the same. Just remember to weave the ends in on the wrong side or back side of your project!
BONUS TIP: If you don’t want your yarn end to slowly unravel as you use your knit item, add a dab of fabric glue to keep it in place. That yarn tail is not going anywhere!

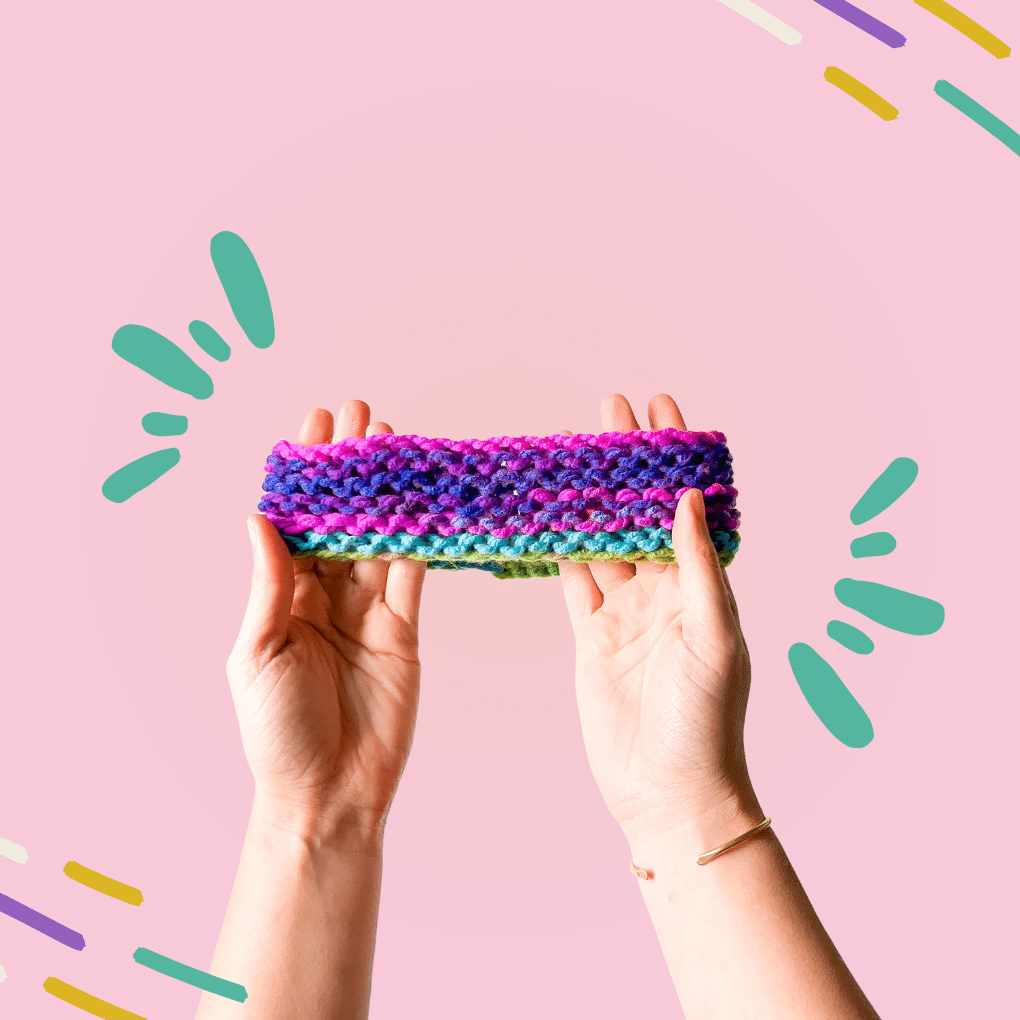
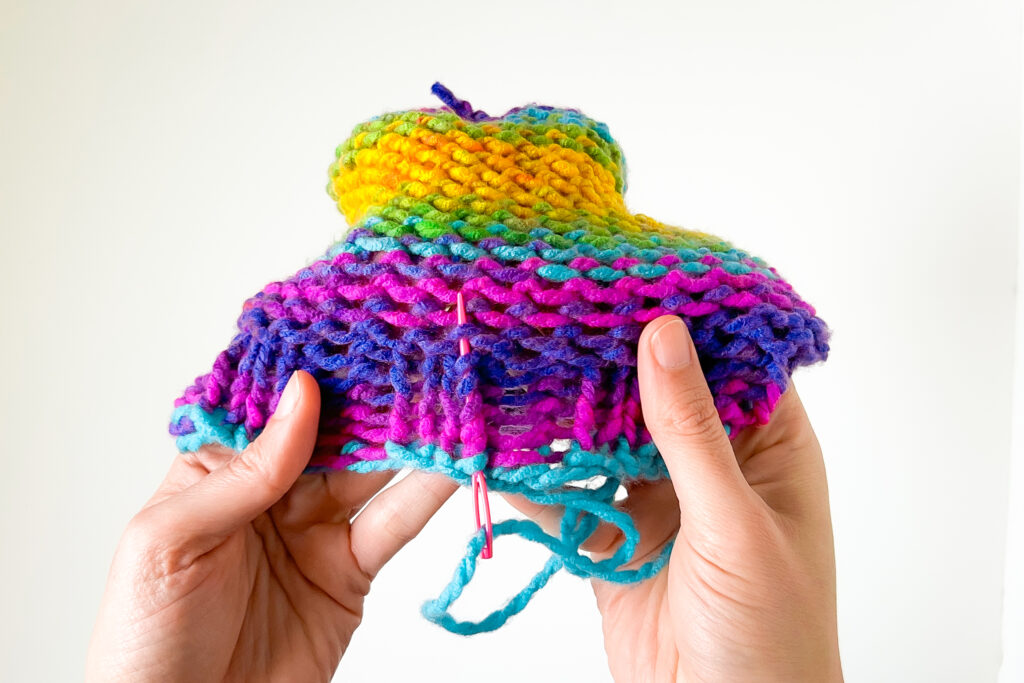
By the end, your loom knit headband should look like this! I swear, knitting on a loom only looks hard. But it’s honestly one of the most inclusive crafts there is.
This headband may not look chic and bougies, but it’s an EXCELLENT project to practice the basic knits and purls in loom knitting.
Excited to try out loom knitting patterns? Don’t worry, we have free loom knitting patterns for beanies, headbands, bags, and more!
Here’s an awesome step-by-step YouTube tutorial on how to loom knit a snazzy beanie!


