Free Loom Knit Scarf Pattern: The Mossy Forest Path Infinity Scarf
Let's learn the gorgeous linen stitch on a loom!
Let's learn the gorgeous linen stitch on a loom!
The Mossy Forest Path Infinity Scarf is inspired by the green moss that grows in the forests of my hometown. We have plenty of trees that provide enough shade for these squishy plants to grow and thrive.
By mixing two shades of green, we achieve this interesting colorway that elevates the simple textures of the loom knit linen stitch.
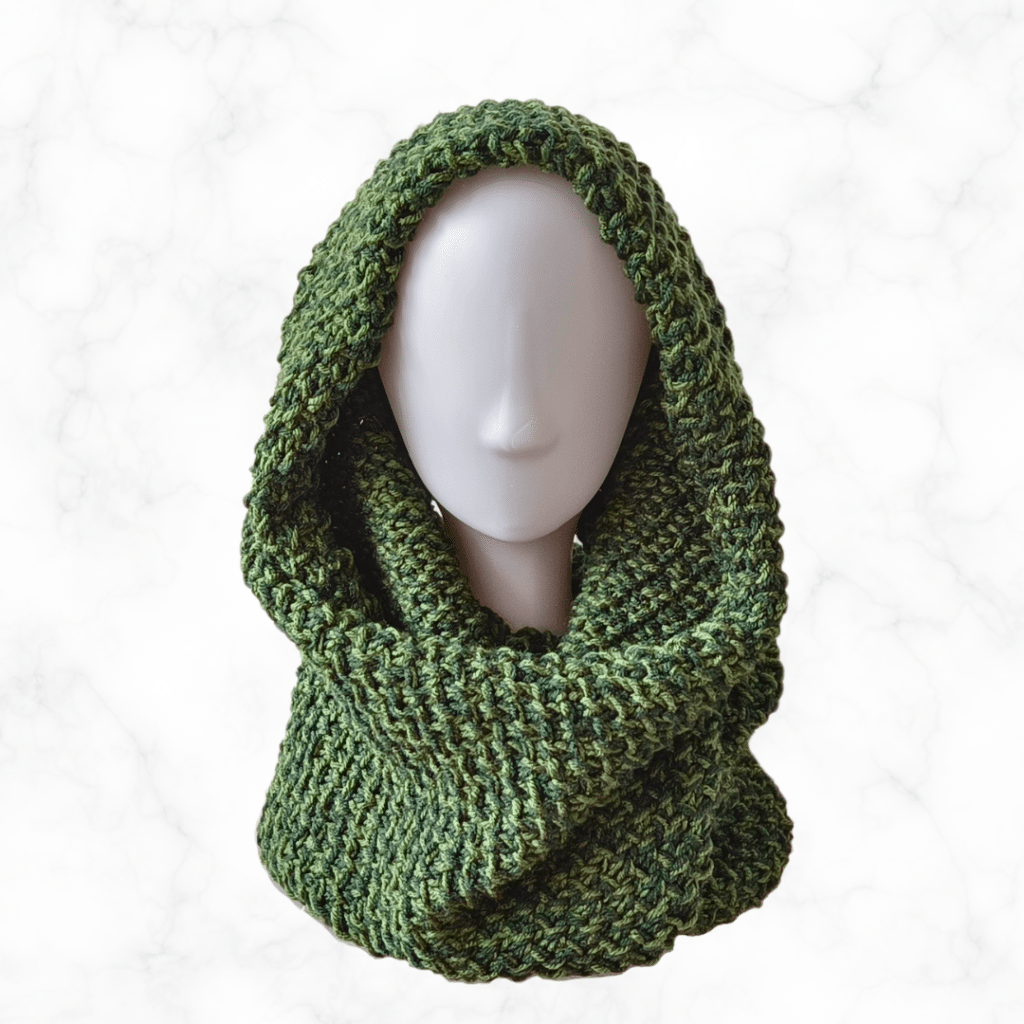
This pattern is beginner-friendly, but will still take some getting used to. However, once you find your rhythm, you’ll be able to quicky breeze right through all the rows!
Ready to learn a new round loom knitting pattern? Then keep on scrolling!
The Mossy Forest Path Infinity Scarf is knitted back and forth on a round knitting loom. Using the linen stitch, we will create little bumps that resemble traces of moss along forest pathways.
Before we dive into the full pattern, I’ll show you how to create the slip stitch on a knitting loom. You don’t need to connect the last stitch to the starting stitch as this pattern is meant to be knitted flat.
The linen stitch is created by alternating the slip stitch and the knit stitch in the same row and a row of knit stitches in between. You will find step-by-step instructions below!
You’ll only need a few things for this round loom knitting pattern. Let’s talk about them:
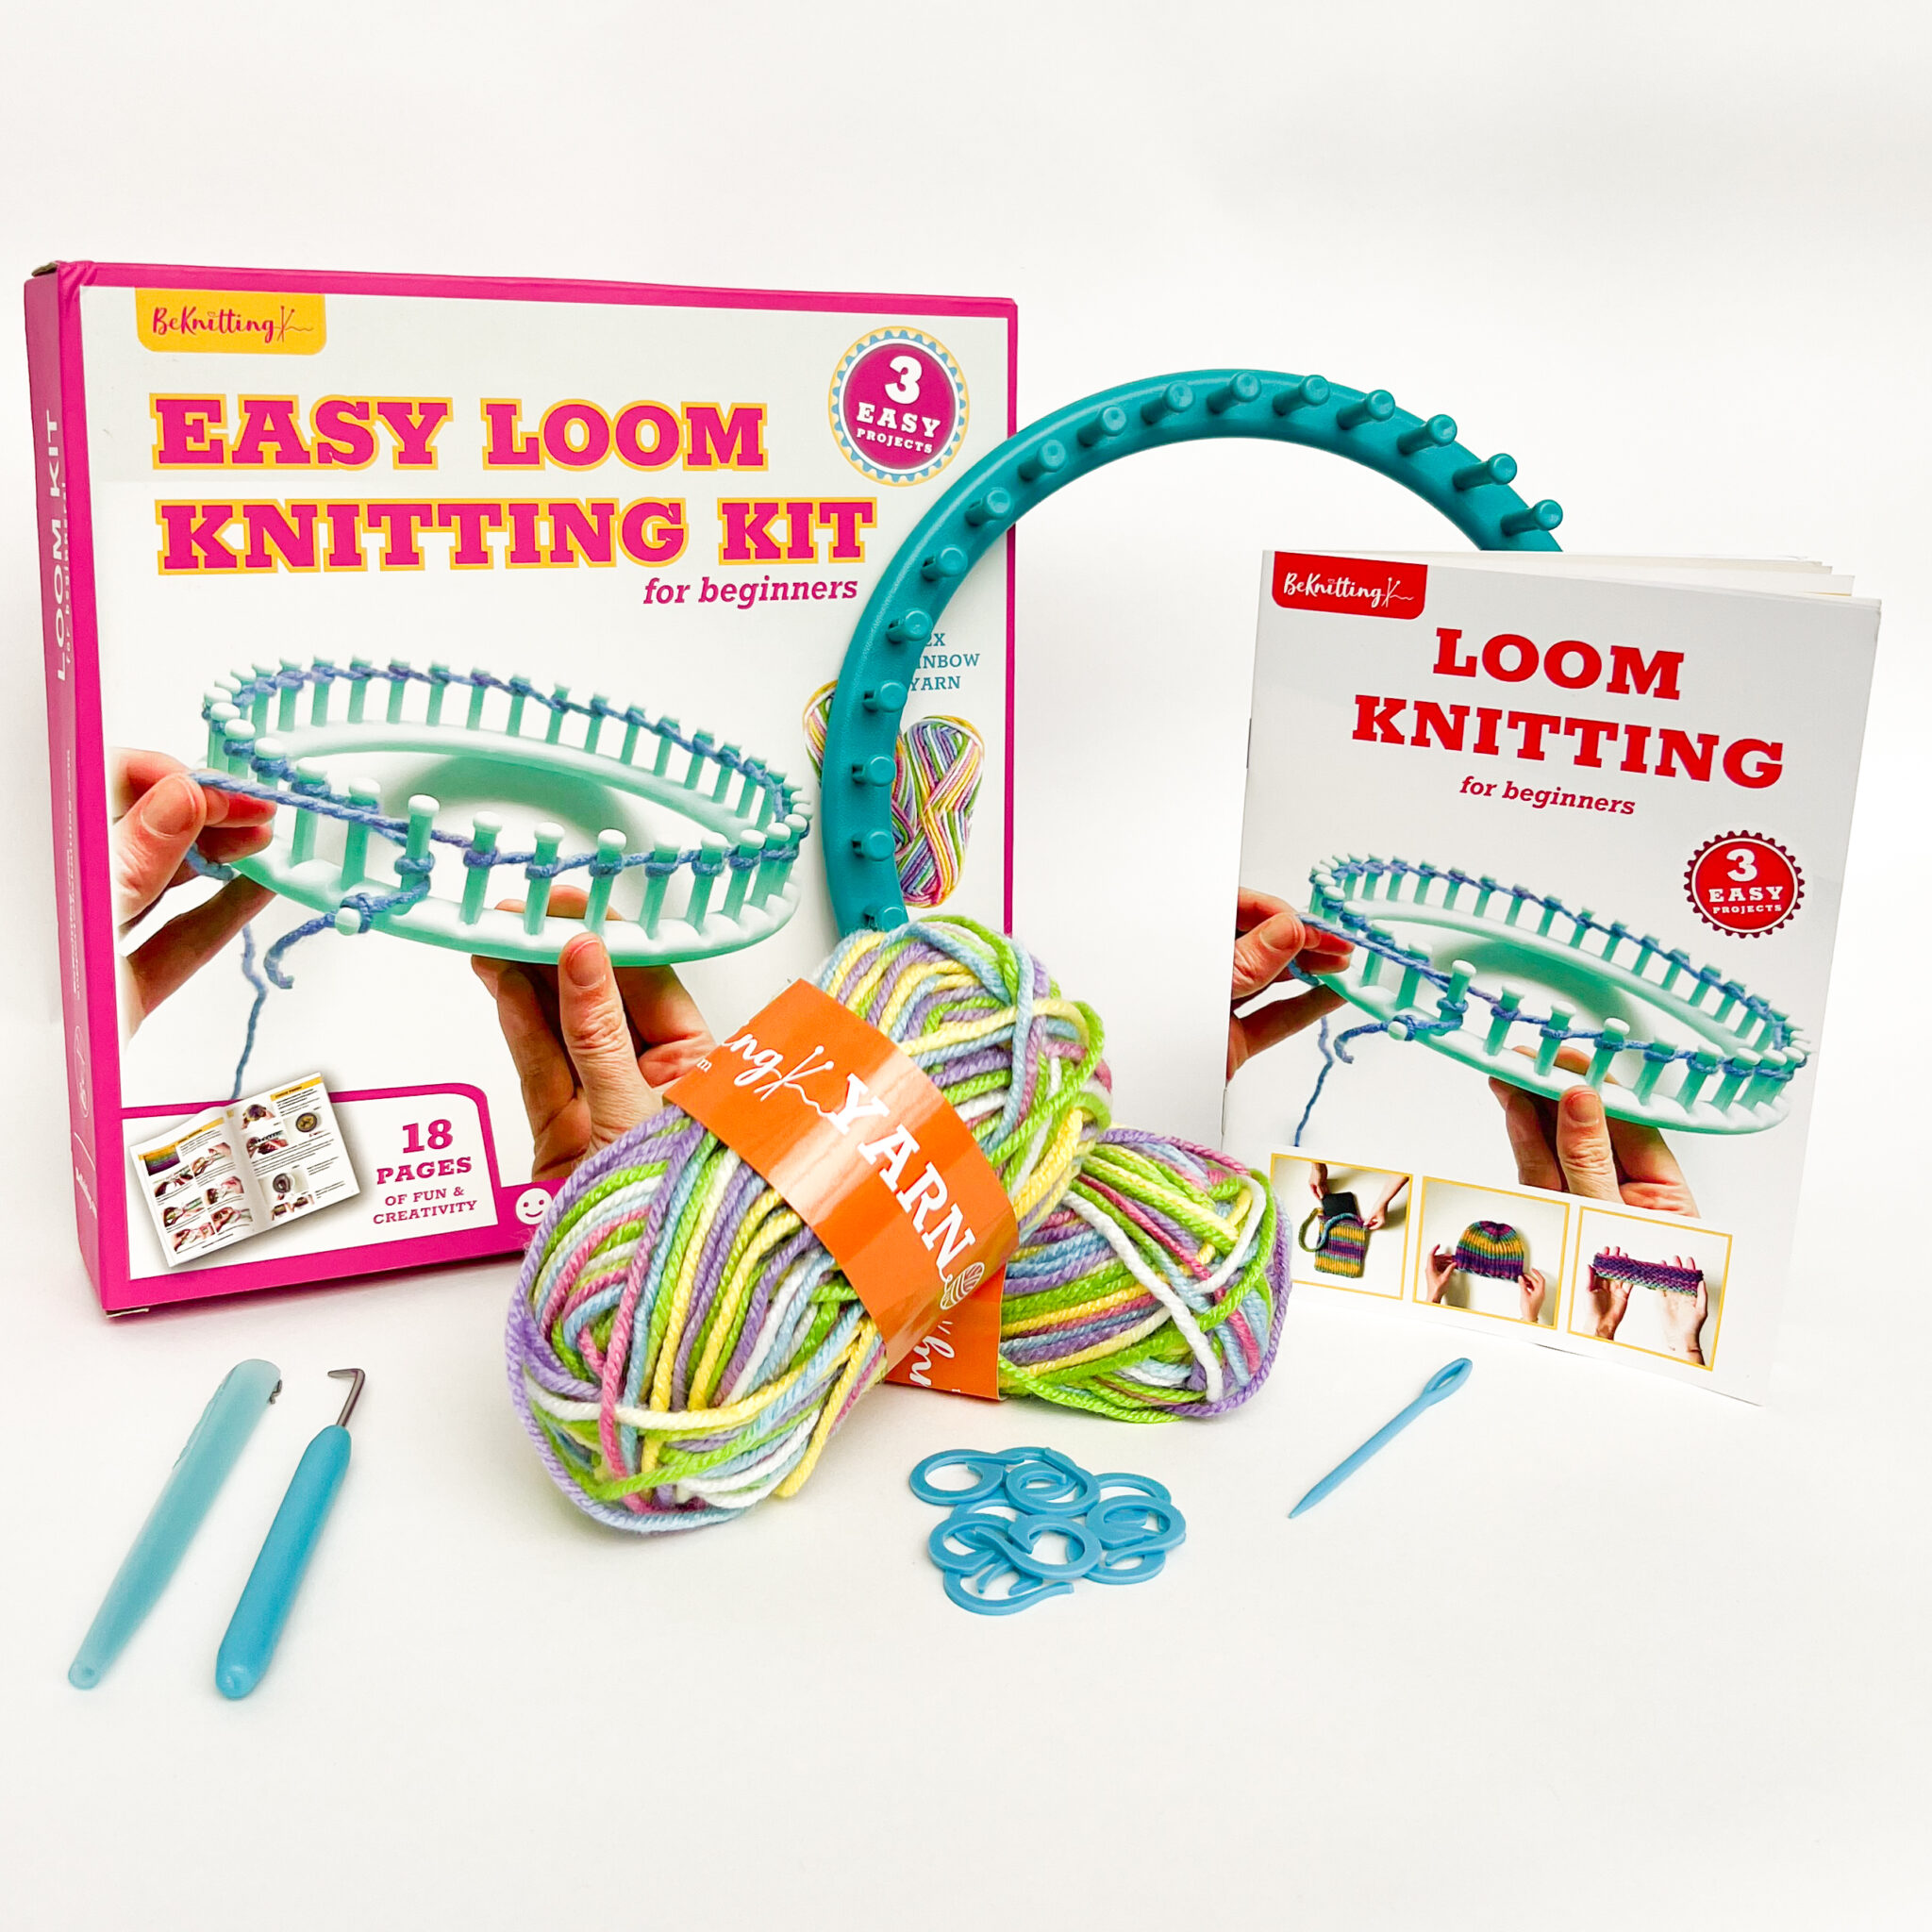
You can find the BeKnitting Easy Loom Knitting Kit on Amazon! 3 fun projects teach you how to use a knitting loom and are designed with new crafters in mind.
Never touched a knitting loom? We’ve got you covered!
Each kit comes with two balls of worsted weight (medium) yarn, one instruction booklet, a yarn needle, a loom hook, a loom pen, stitch markers and, of course, a knitting loom!
This handy-dandy PDF for the Mossy Forest Path loom knit scarf pattern has everything you need to knit your very own infinity scarf!
Ready to try beginner-friendly round loom knitting patterns that isn’t just the knit stitch? Give the linen stitch a try! Trust me, you’ll love the infinity scarf you’re about to make.
This round loom knitting pattern is so much easier than it seems. Below is a step-by-step guide on how to create the slip stitch on a loom in the most beginner-friendly way possible.
We’ve also included a download link to this loom knit scarf pattern in case you want a copy to print out without the pesky ads. Enjoy!
L = 65 in x W = 14 in
Slip stitch is a way to skip a stitch (aka: not looping yarn through it), creating an extra tall stitch with a horizontal bump of yarn in front of it. This is the stitch that gives this pattern all that gorgeous texture!
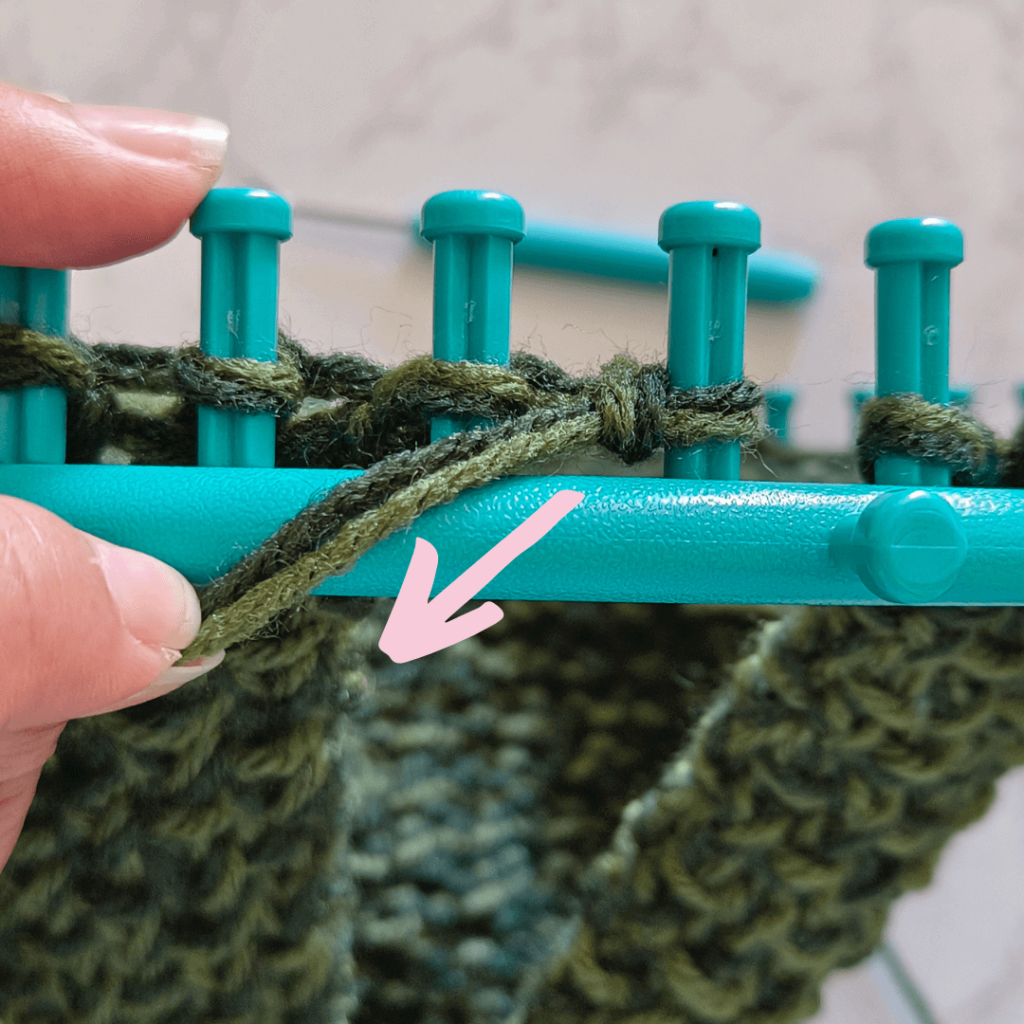
Slip Stitch Step 1: Tug your yarn strand towards the base of the peg.
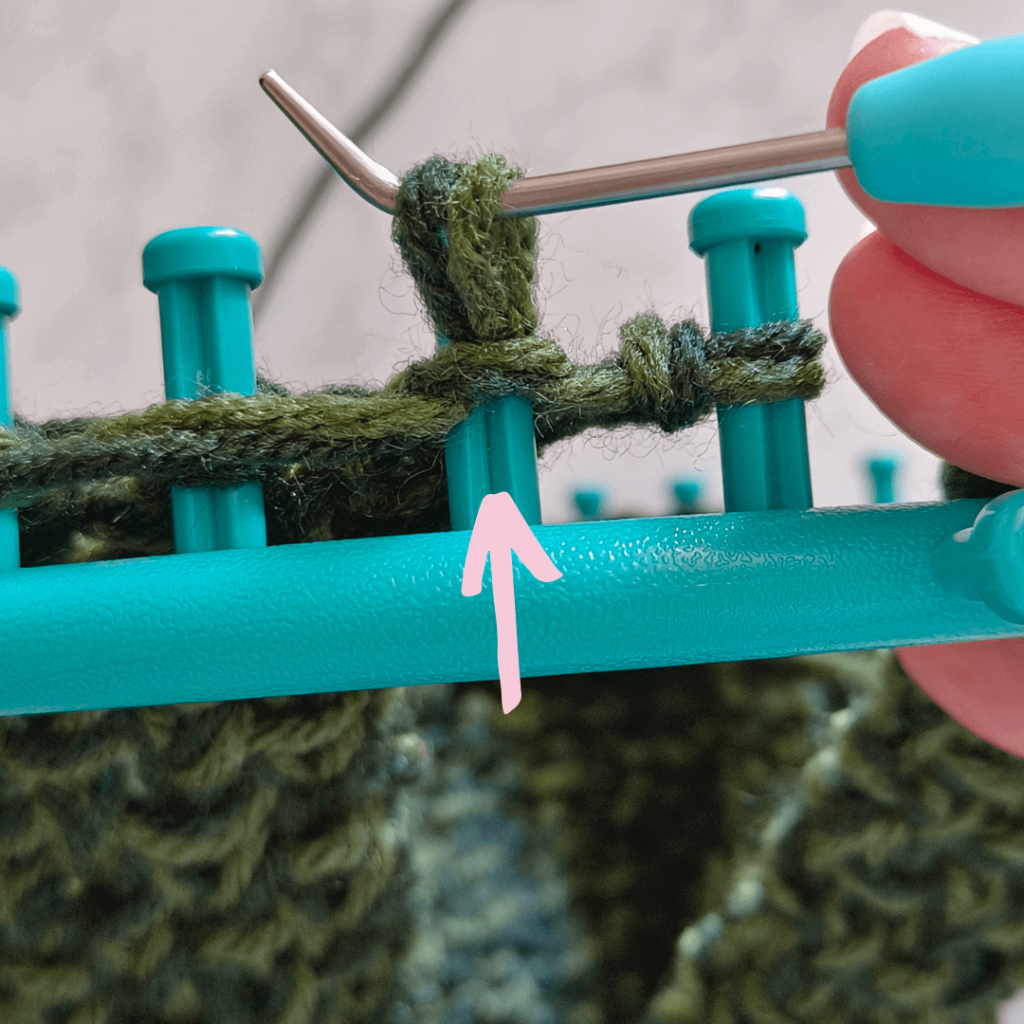
Slip Stitch Step 2: Coming in through the top of the stitch, hook the yarn strand up through the stitch on the peg.
Don’t pull the old stitch off the peg!
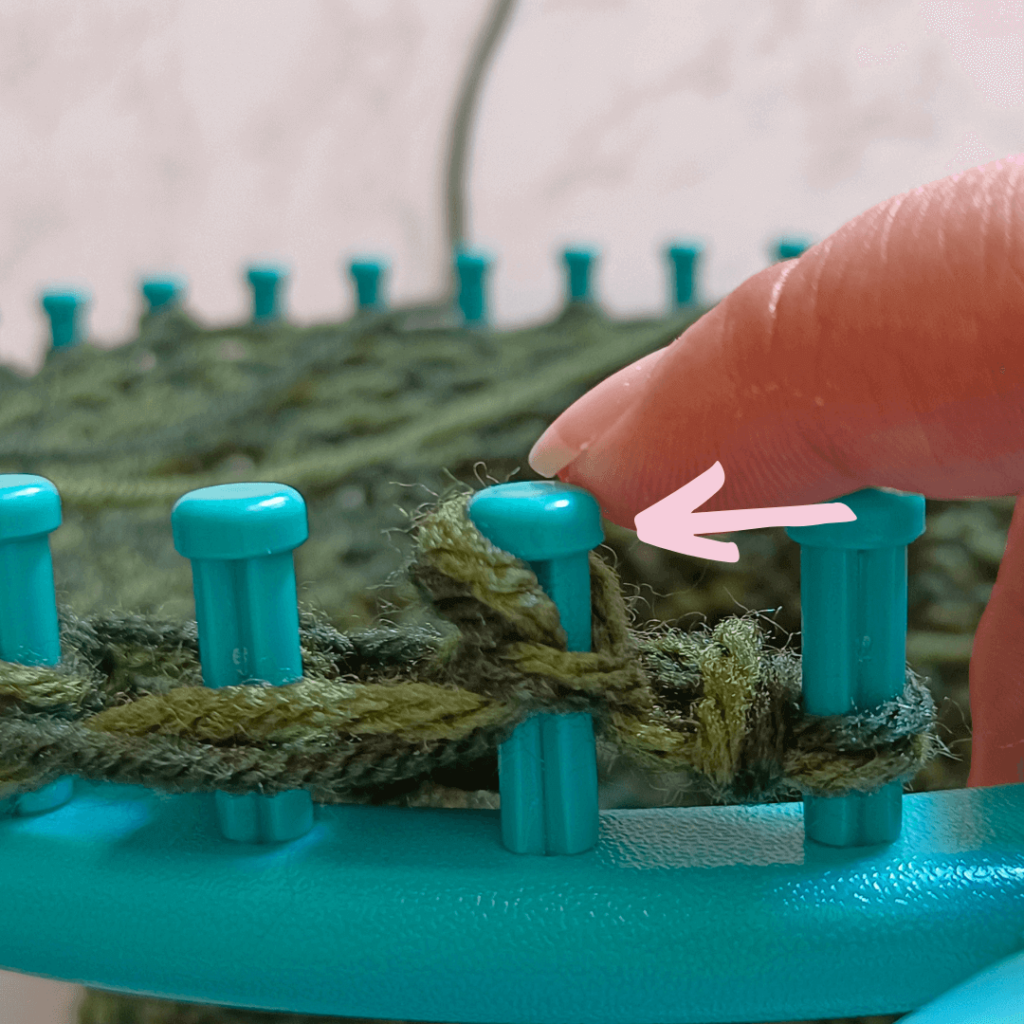
Slip Stitch Step 3: With the yarn still hooked, bring the yarn up over the top and to the back of the peg.
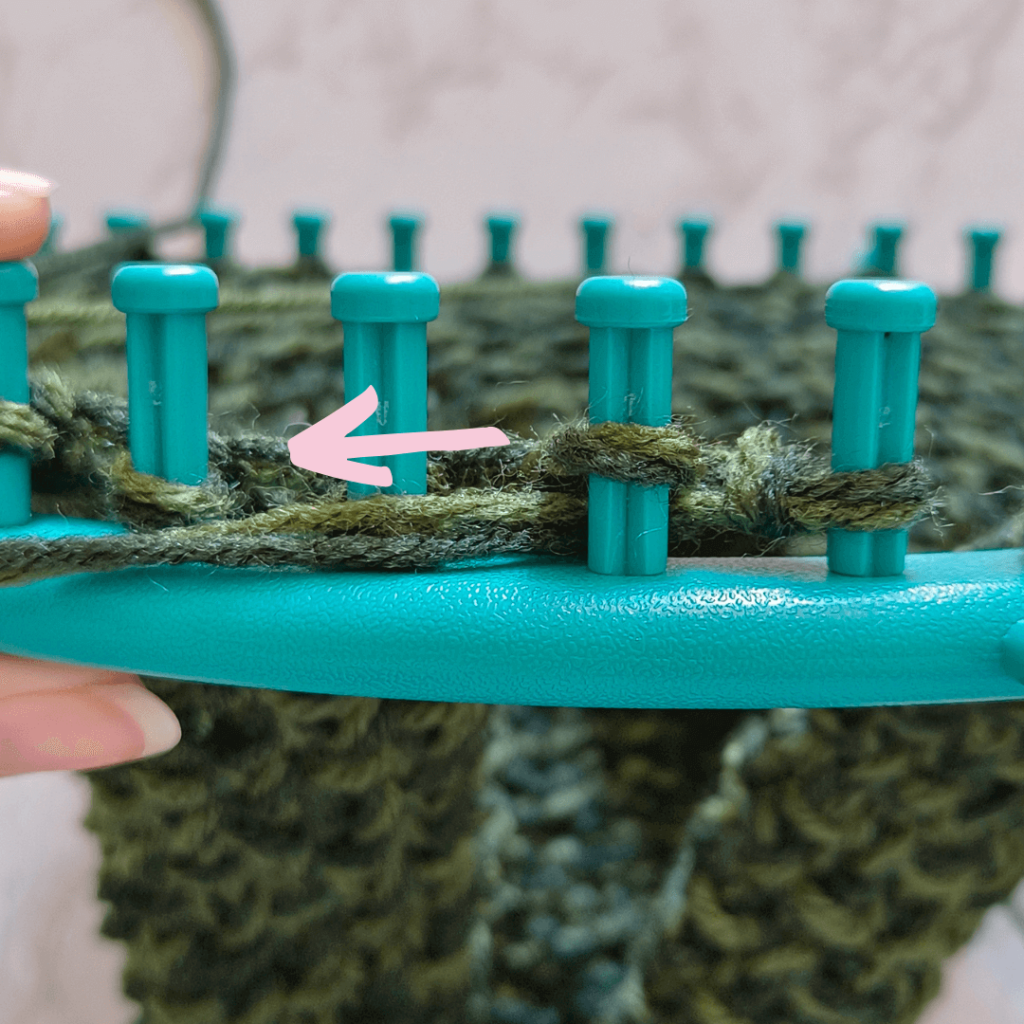
Slip Stitch Step 4: Tug the working yarn tail until it drops down and lies flat behind the peg.
After casting on, you will be alternating the knit stitch and slip stitch every other row, with a row of e-wrap knit stitches in between.
Casting On:
E-Wrap cast on all 36 pegs. Do not connect the first/last stitch on the loom (remember you’re working back and forth, not in a complete circle).
Linen Stitch Pattern
Row 1: E-Wrap knit stitch on all pegs to the end of the row.
Row 2: *Knit 1, slip 1* repeat the pattern between * * to the end of the row.
Row 3: E-wrap knit stitch all pegs to the end of the row.
Row 4: *Slip, knit* repeat the pattern between * * to the end of the row.
Repeat Rows 1 – 4 until your piece is 65″ long, measured from the cast on row.
Sometimes we get a little bit lost in the pattern. You can keep all the notes you want but it’s a good idea to learn how to study your fabric to see what stitch comes next. Below, we’ll help you “read” your knitting to see whether you’re on row 2 or row 4 of the linen stitch loom knit pattern.
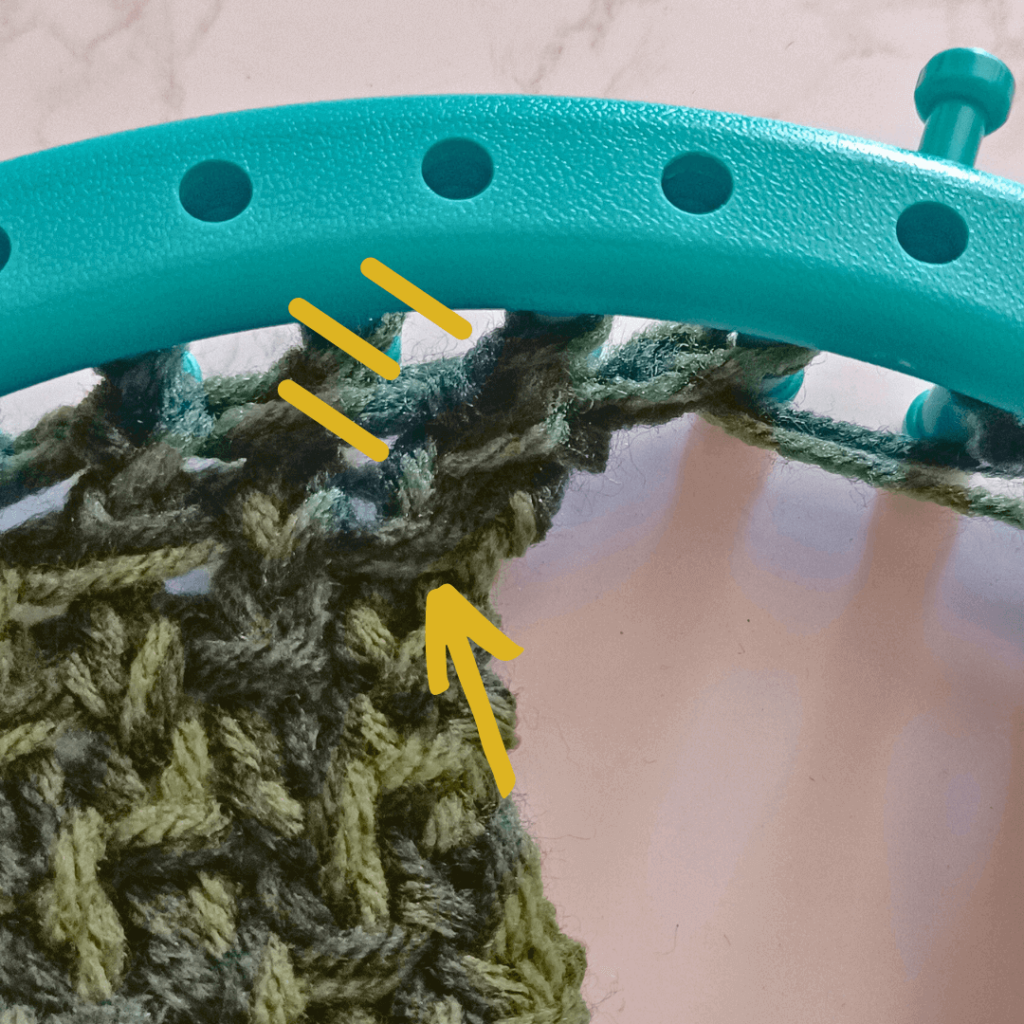
When to start with *Slip, Knit*:
If the 3 stitches below your peg do NOT have a slip stitch, start the row with a SLIP STITCH.
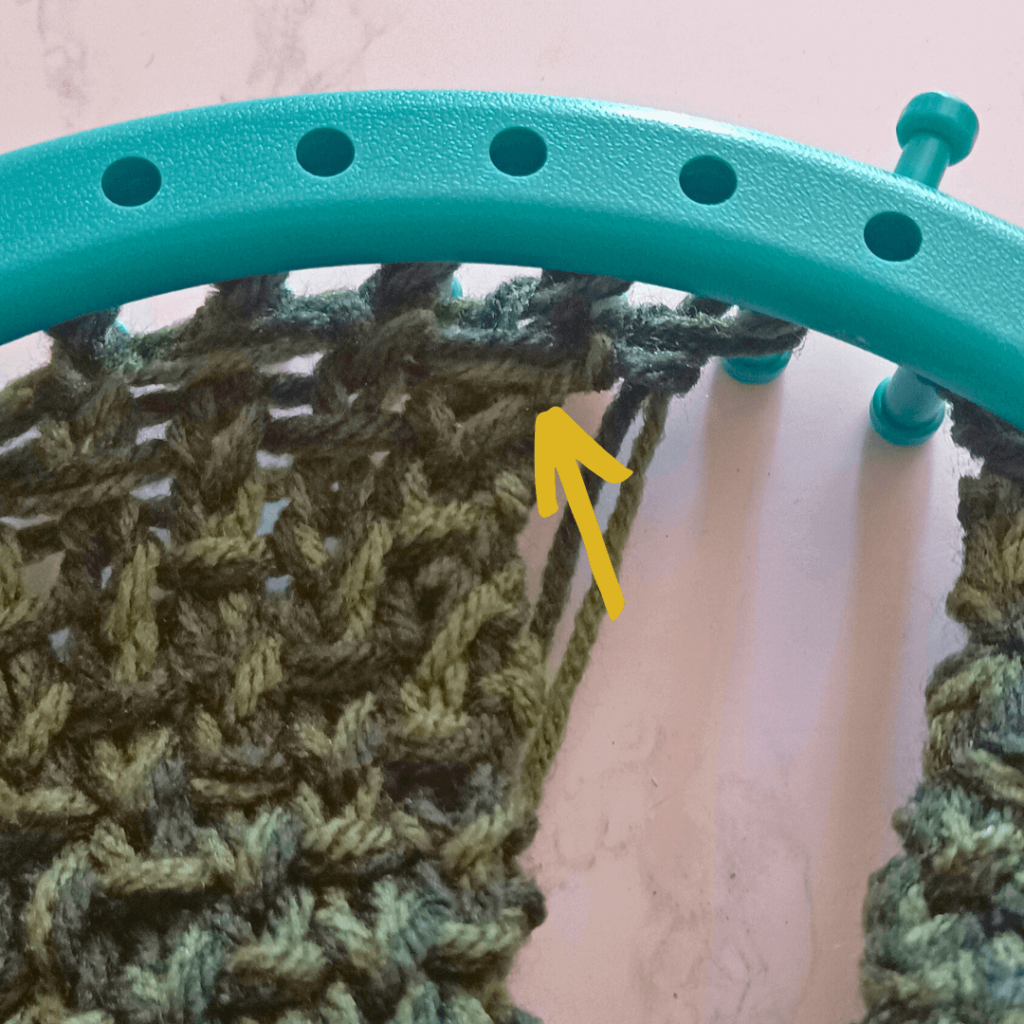
When to start with *Knit, Slip*: If the 3rd stitch below your second peg HAS a slip stitch, start the row with a KNIT STITCH.
ALWAYS make an E-wrap knit stitch row after making a “knit, slip row” and after making a “slip, knit” row. You’ll also always make the e-wrap knit stitch row when you’re heading back toward the starting peg!
Take all the stitches off your pegs using the loom knit flat edge bind off.

Step 1: E-wrap knit the first 2 pegs.
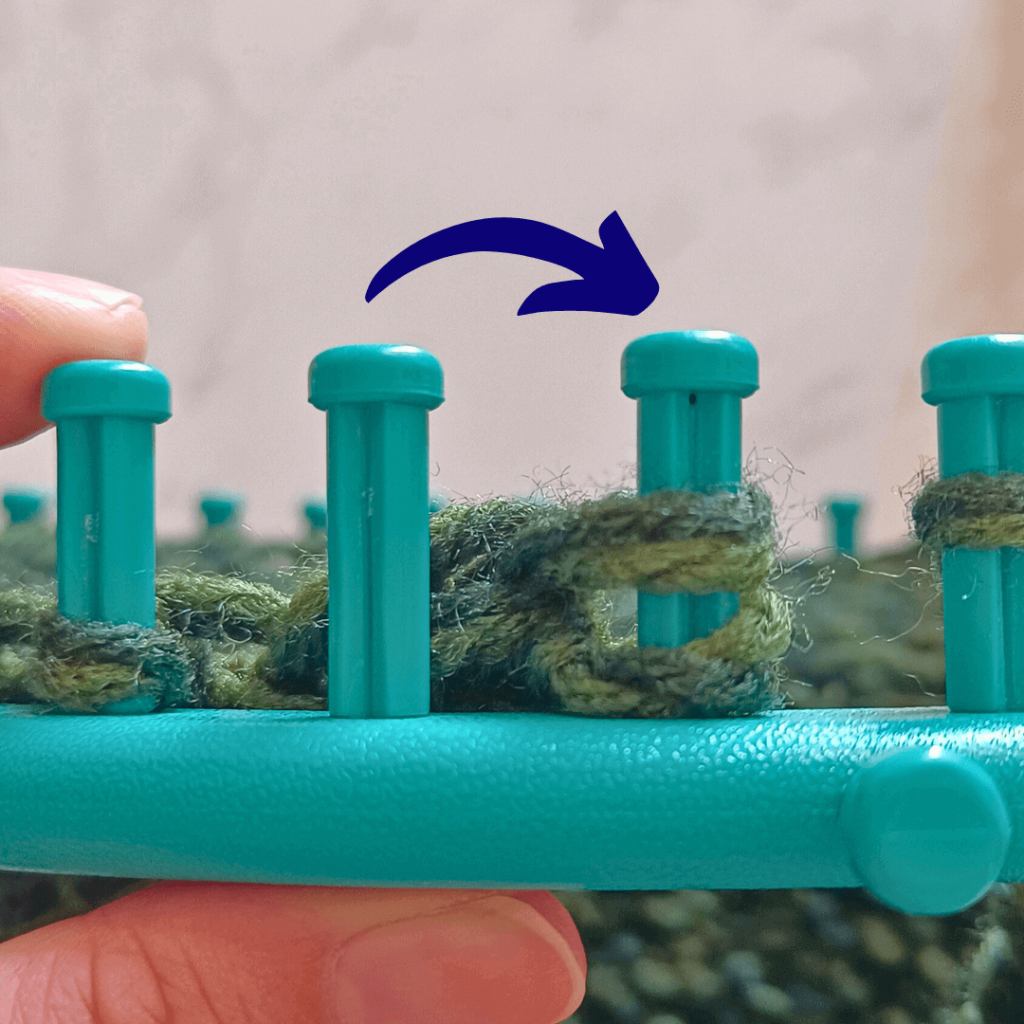
Step 2: Transfer the second loop over to the first peg. Knit these stitches together.
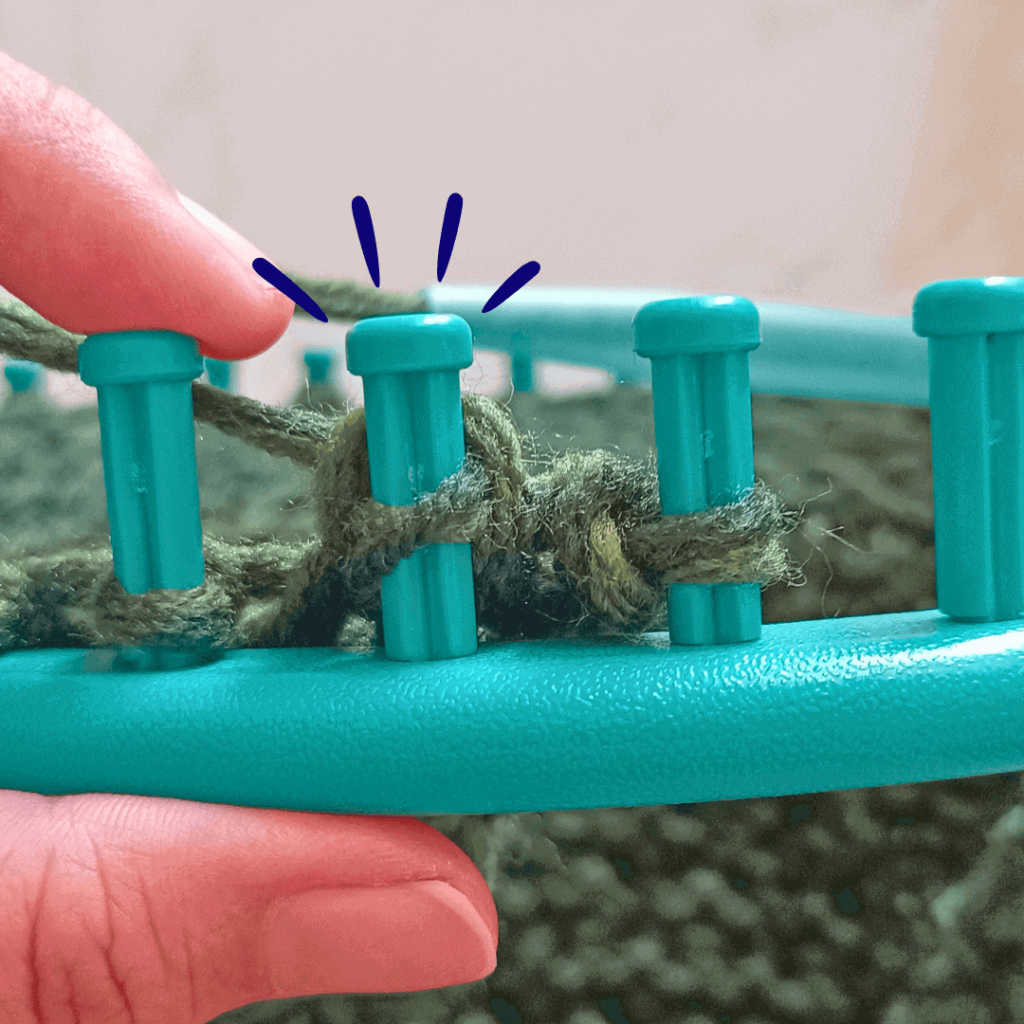
Step 3: Move the loop over to the empty peg. Knit the next peg over.
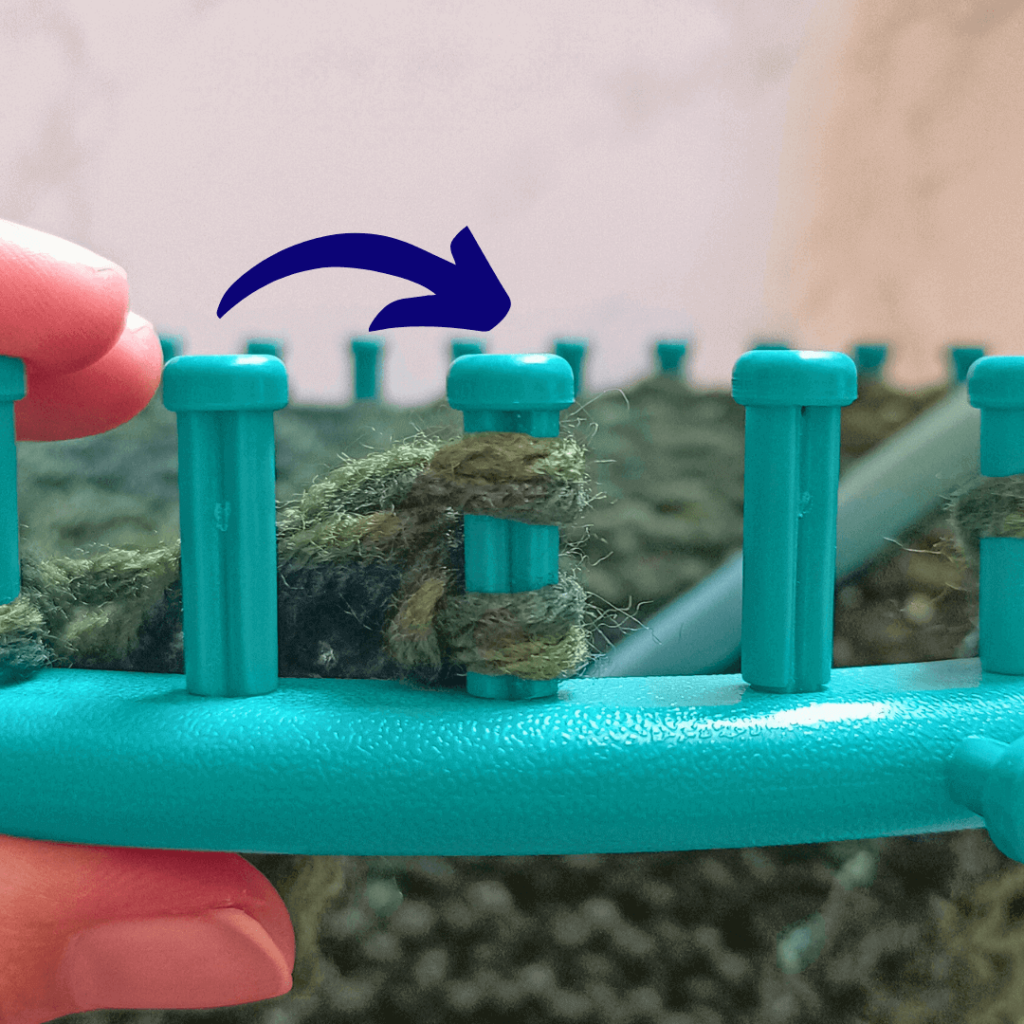
Step 4: Transfer the new stitch onto the previous peg. Knit them together.
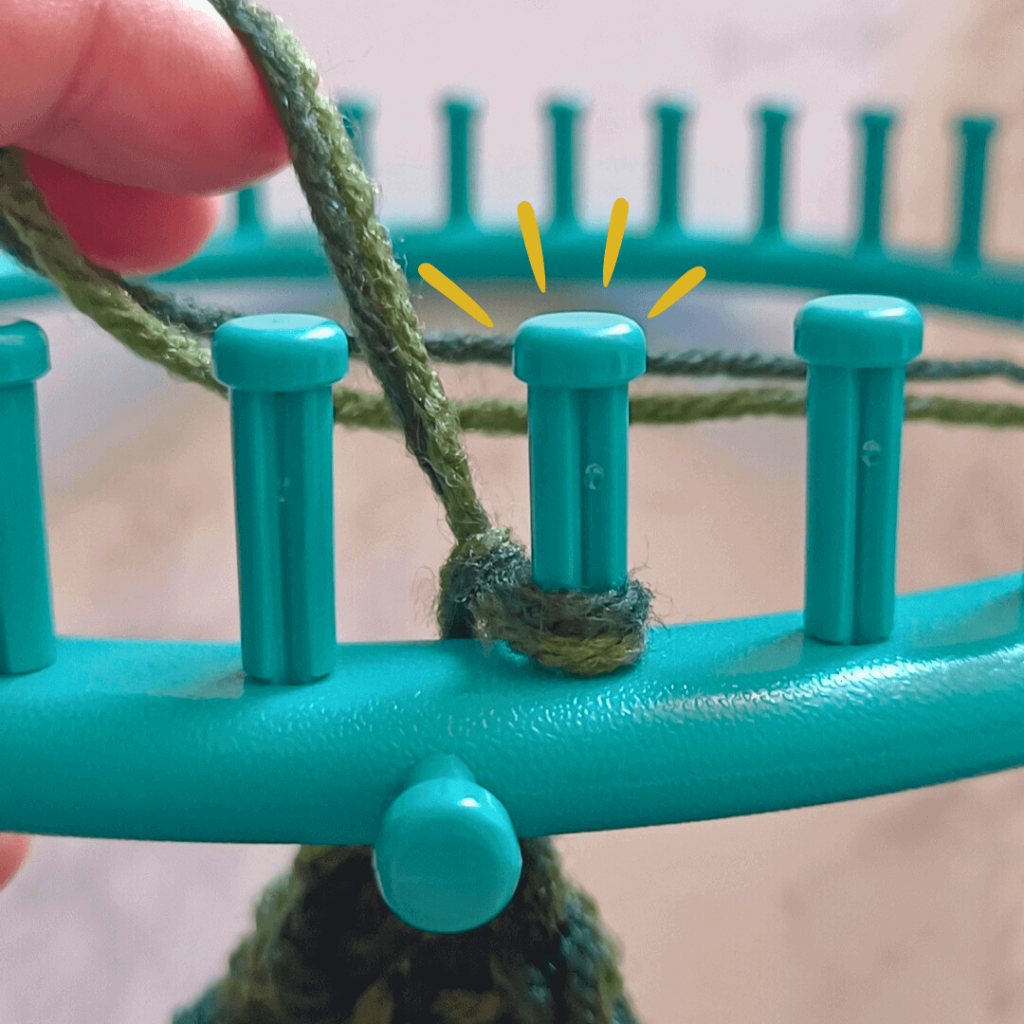
Repeat steps 3 & 4 until you have cast off all of the stitches!
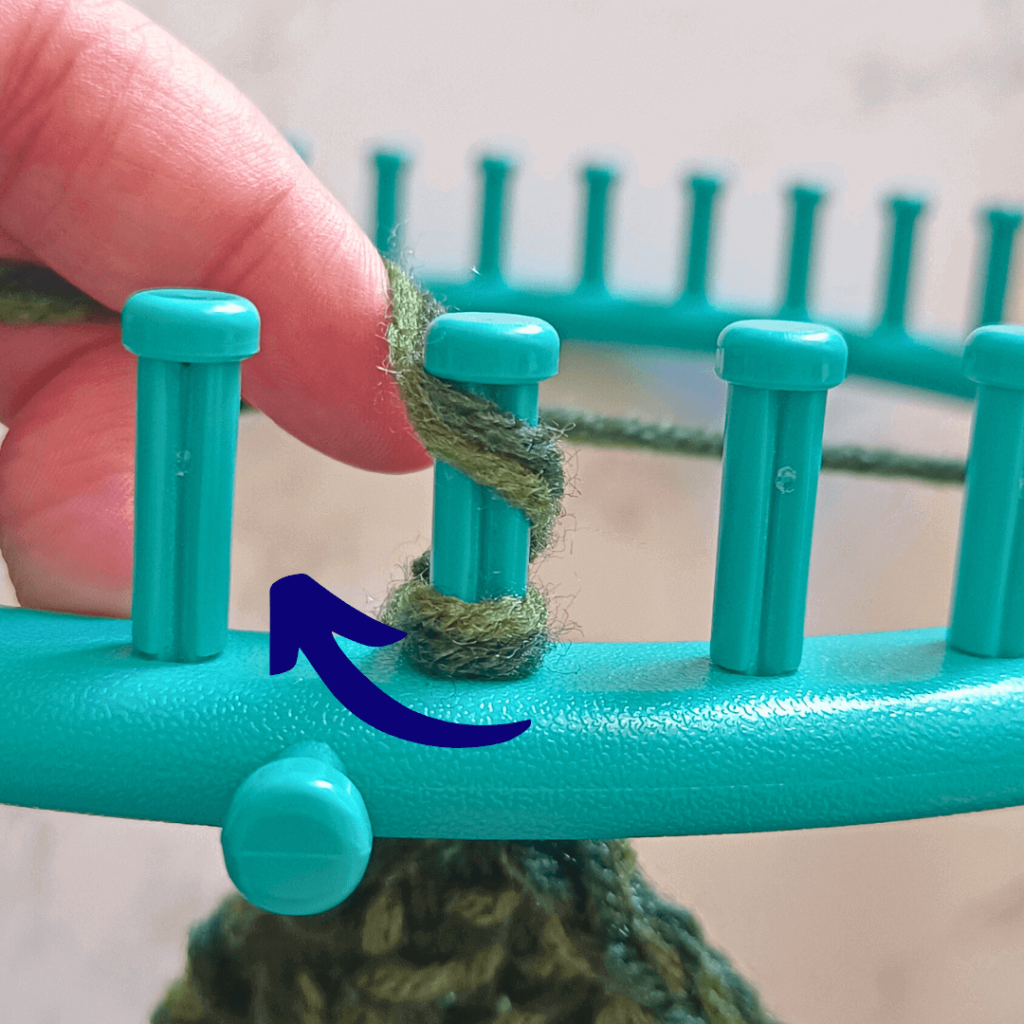
Don’t forget to knit the FINAL peg!
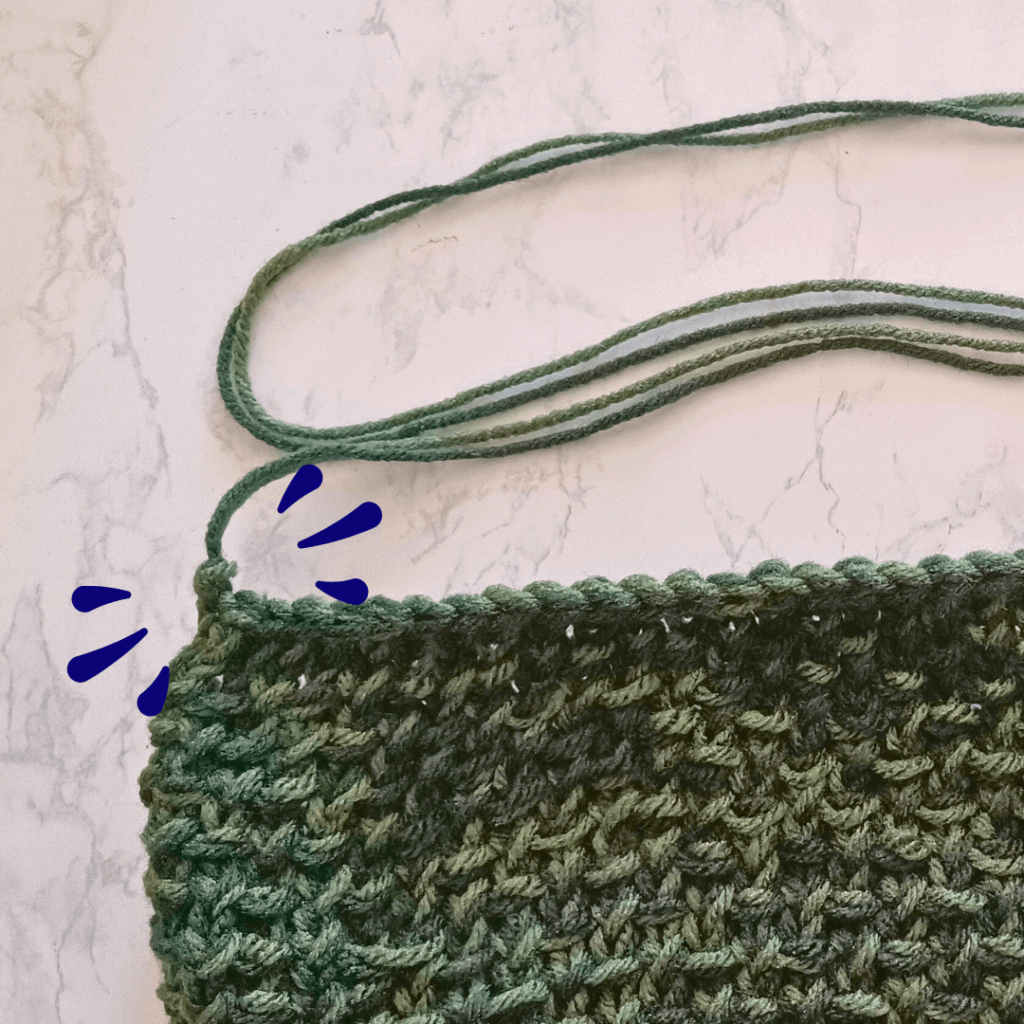
Cut the yarn, leaving about 40 inches of yarn tail!
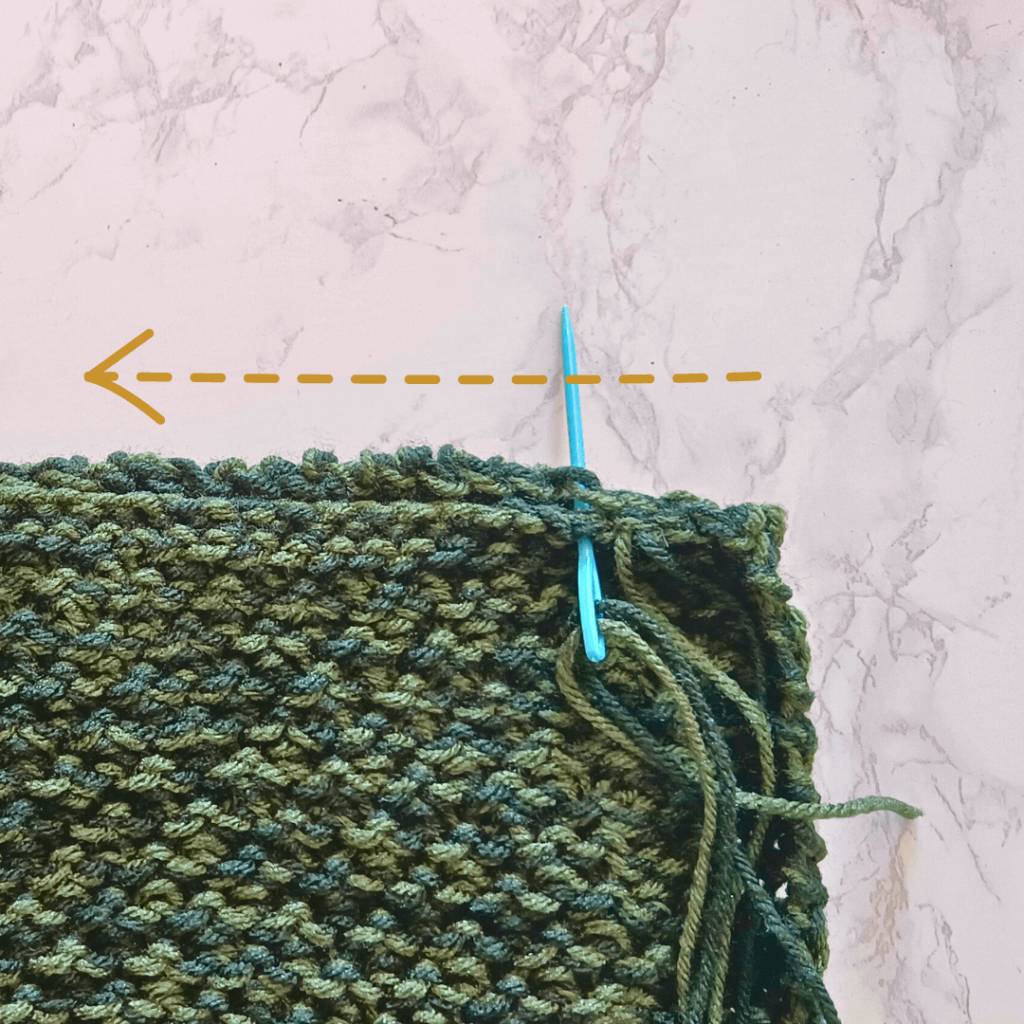
Fold your finished fabric with the short ends together. Sew the short ends of your finished scarf together using a whip stitch!
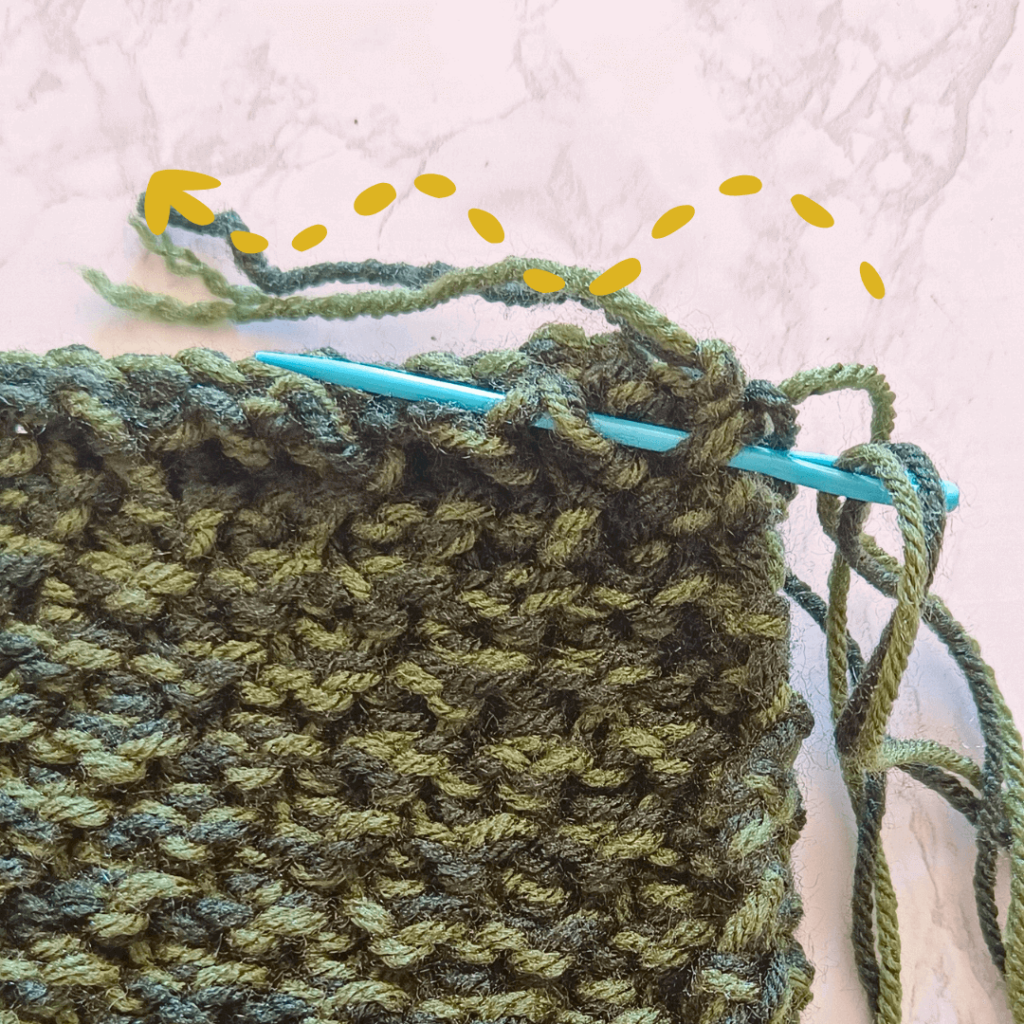
Once you reach the end of your scarf, it’s time to hide your yarn tails!
Here’s how the Mossy Forest Path Infinity Scarf should look. Gorgeous, right? This has to be one of my favorite round loom knitting patterns that I’ve created. It’s on the simpler side. No cables and whatnot, but it’s still pretty!
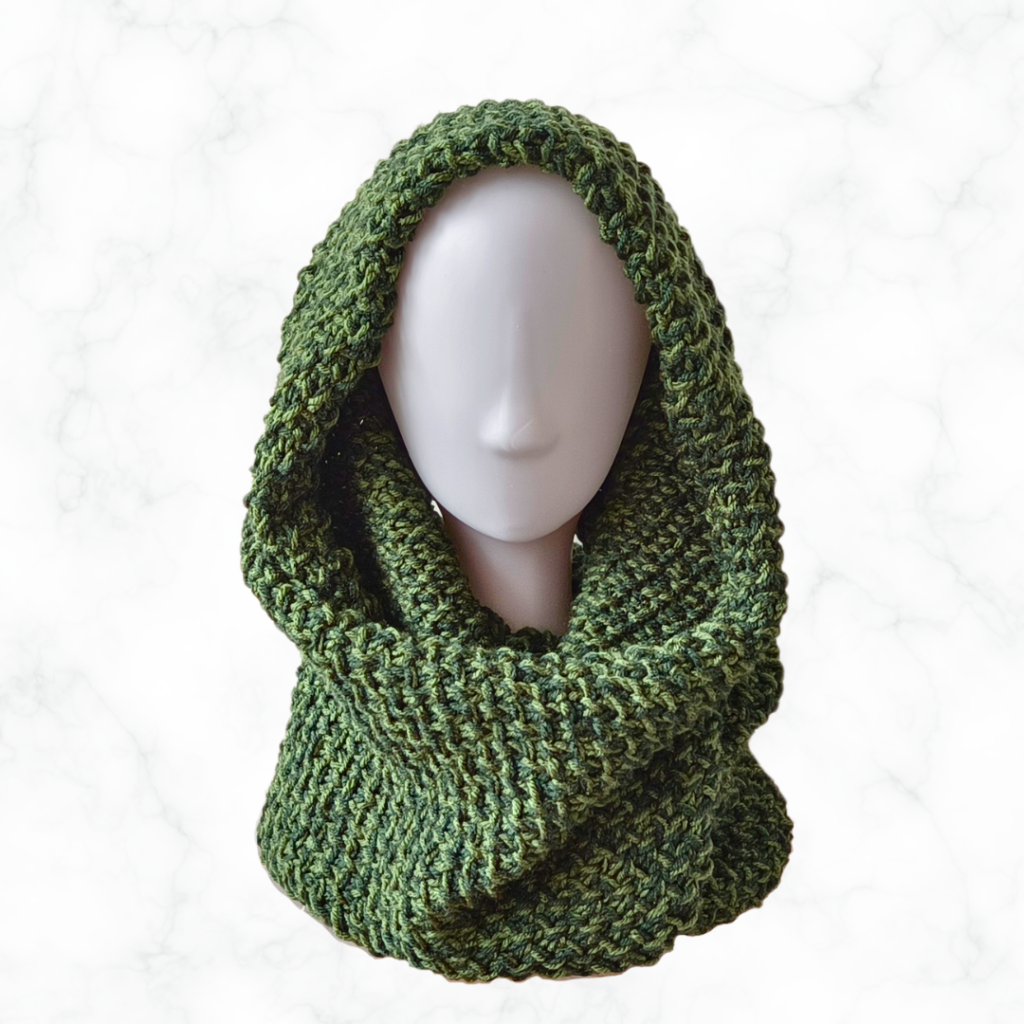
This infinity scarf is wide enough to serve as a hood to shield your face from the sunny rays. It is also chunky enough to keep your warm throughout cold nights.
For teens to adults, you can use the usual acrylic yarn or acrylic mix. If you have sensitive skin, make sure to use natural fibers like cotton and bamboo yarn. This will help prevent any skin irritation.
Check out our yarn guide for more details on baby-friendly fibers!
There are plenty of forests where I live and I always see many pathways covered in green moss. It’s always been a pretty sight. Especially when I spot patches of moss with different shades of green. So I thought that I’d bring that look into something we all wear!
I wanted a pattern that uses new textured stitches while also being simple enough for those just learning how to loom knit a scarf. I also wanted a loom knit scarf pattern that will look good using basic colors.
The Mossy Forest Path Infinity Scarf is made to look good on everyone and I hope you give it a try. Don’t forget to show off your masterpiece by tagging us on Instagram. I can’t wait to see your work!
Check out more free knitted hat patterns:


This was a really helpful tutorial! All the other loom knitting tutorials didn’t give any steps for finishing, so this was superior to any other video or post I’ve seen. Unfortunately I was dumb and finished it together while it was still on the loom the first time, but still helped.
That’s okay! I’m sure your scarf turned out beautifully either way! I’m very happy to hear you like this tutorial!
Hi, I’m a new knitter. Your tutorial is very helpful, anyway I’ve a question: in row one and three I knit e-wrap stitch, but in row 2 and 4 what kind of knit stitch I’ve to make?
E-wrap, u-wrap, flat or classic knit stitch?
Thank you so much for your help.
Hi there! For rows 2 and 4, I used the flat knit stitch because it’s faster to make (for me). But feel free to use whichever feels more comfortable to you!