Beginner Loom Knitting Tutorial: The Flat Edge Cast Off
Loom knit cast offs for flat edges!
Loom knit cast offs for flat edges!
Loom knit scarves, blankets, and shawls have one thing in common: they all use the Slip Stitch Cast Off!
The slip stitch cast-off is perfect for loom-knitted projects that have flat edges! These include dishcloths, mats, scarves, headbands, hat brims, and pot holders. It’s easy to do and completely beginner-friendly too.
Casting off takes a project off the loom and makes a finished edge all at once! That way your stitches don’t unravel and you’re ready to use your finished knit right away.
The most beginner-friendly way to take your project off the loom with a flat, open edge is the Slip Stitch loom knit cast off. This type of cast off (also called a “bind off”) gives your project a nice firm flat edge that you can make as stretchy or as tight as you need.
Not sure what projects are best for this cast off technique? Any loom knitting project that is knit flat (aka: back and forth rather than in a tube) will need a flat finished edge. Scarves, dishcloths, shawls, or blankets are all great examples of projects that will have you casting off using the slip stitch.
Need a different method? Skip to the end of this post to see another way to bind off, or cast off your knitting loom project!

This loom knitting cast off is also quite handy if you’re learning since you’ll have much more control over how much stretch or stability you want on your project.
I’m going to walk you through every step in creating the Slip Stitch loom knit cast off. So grab your knitting loom and let’s get stitching!
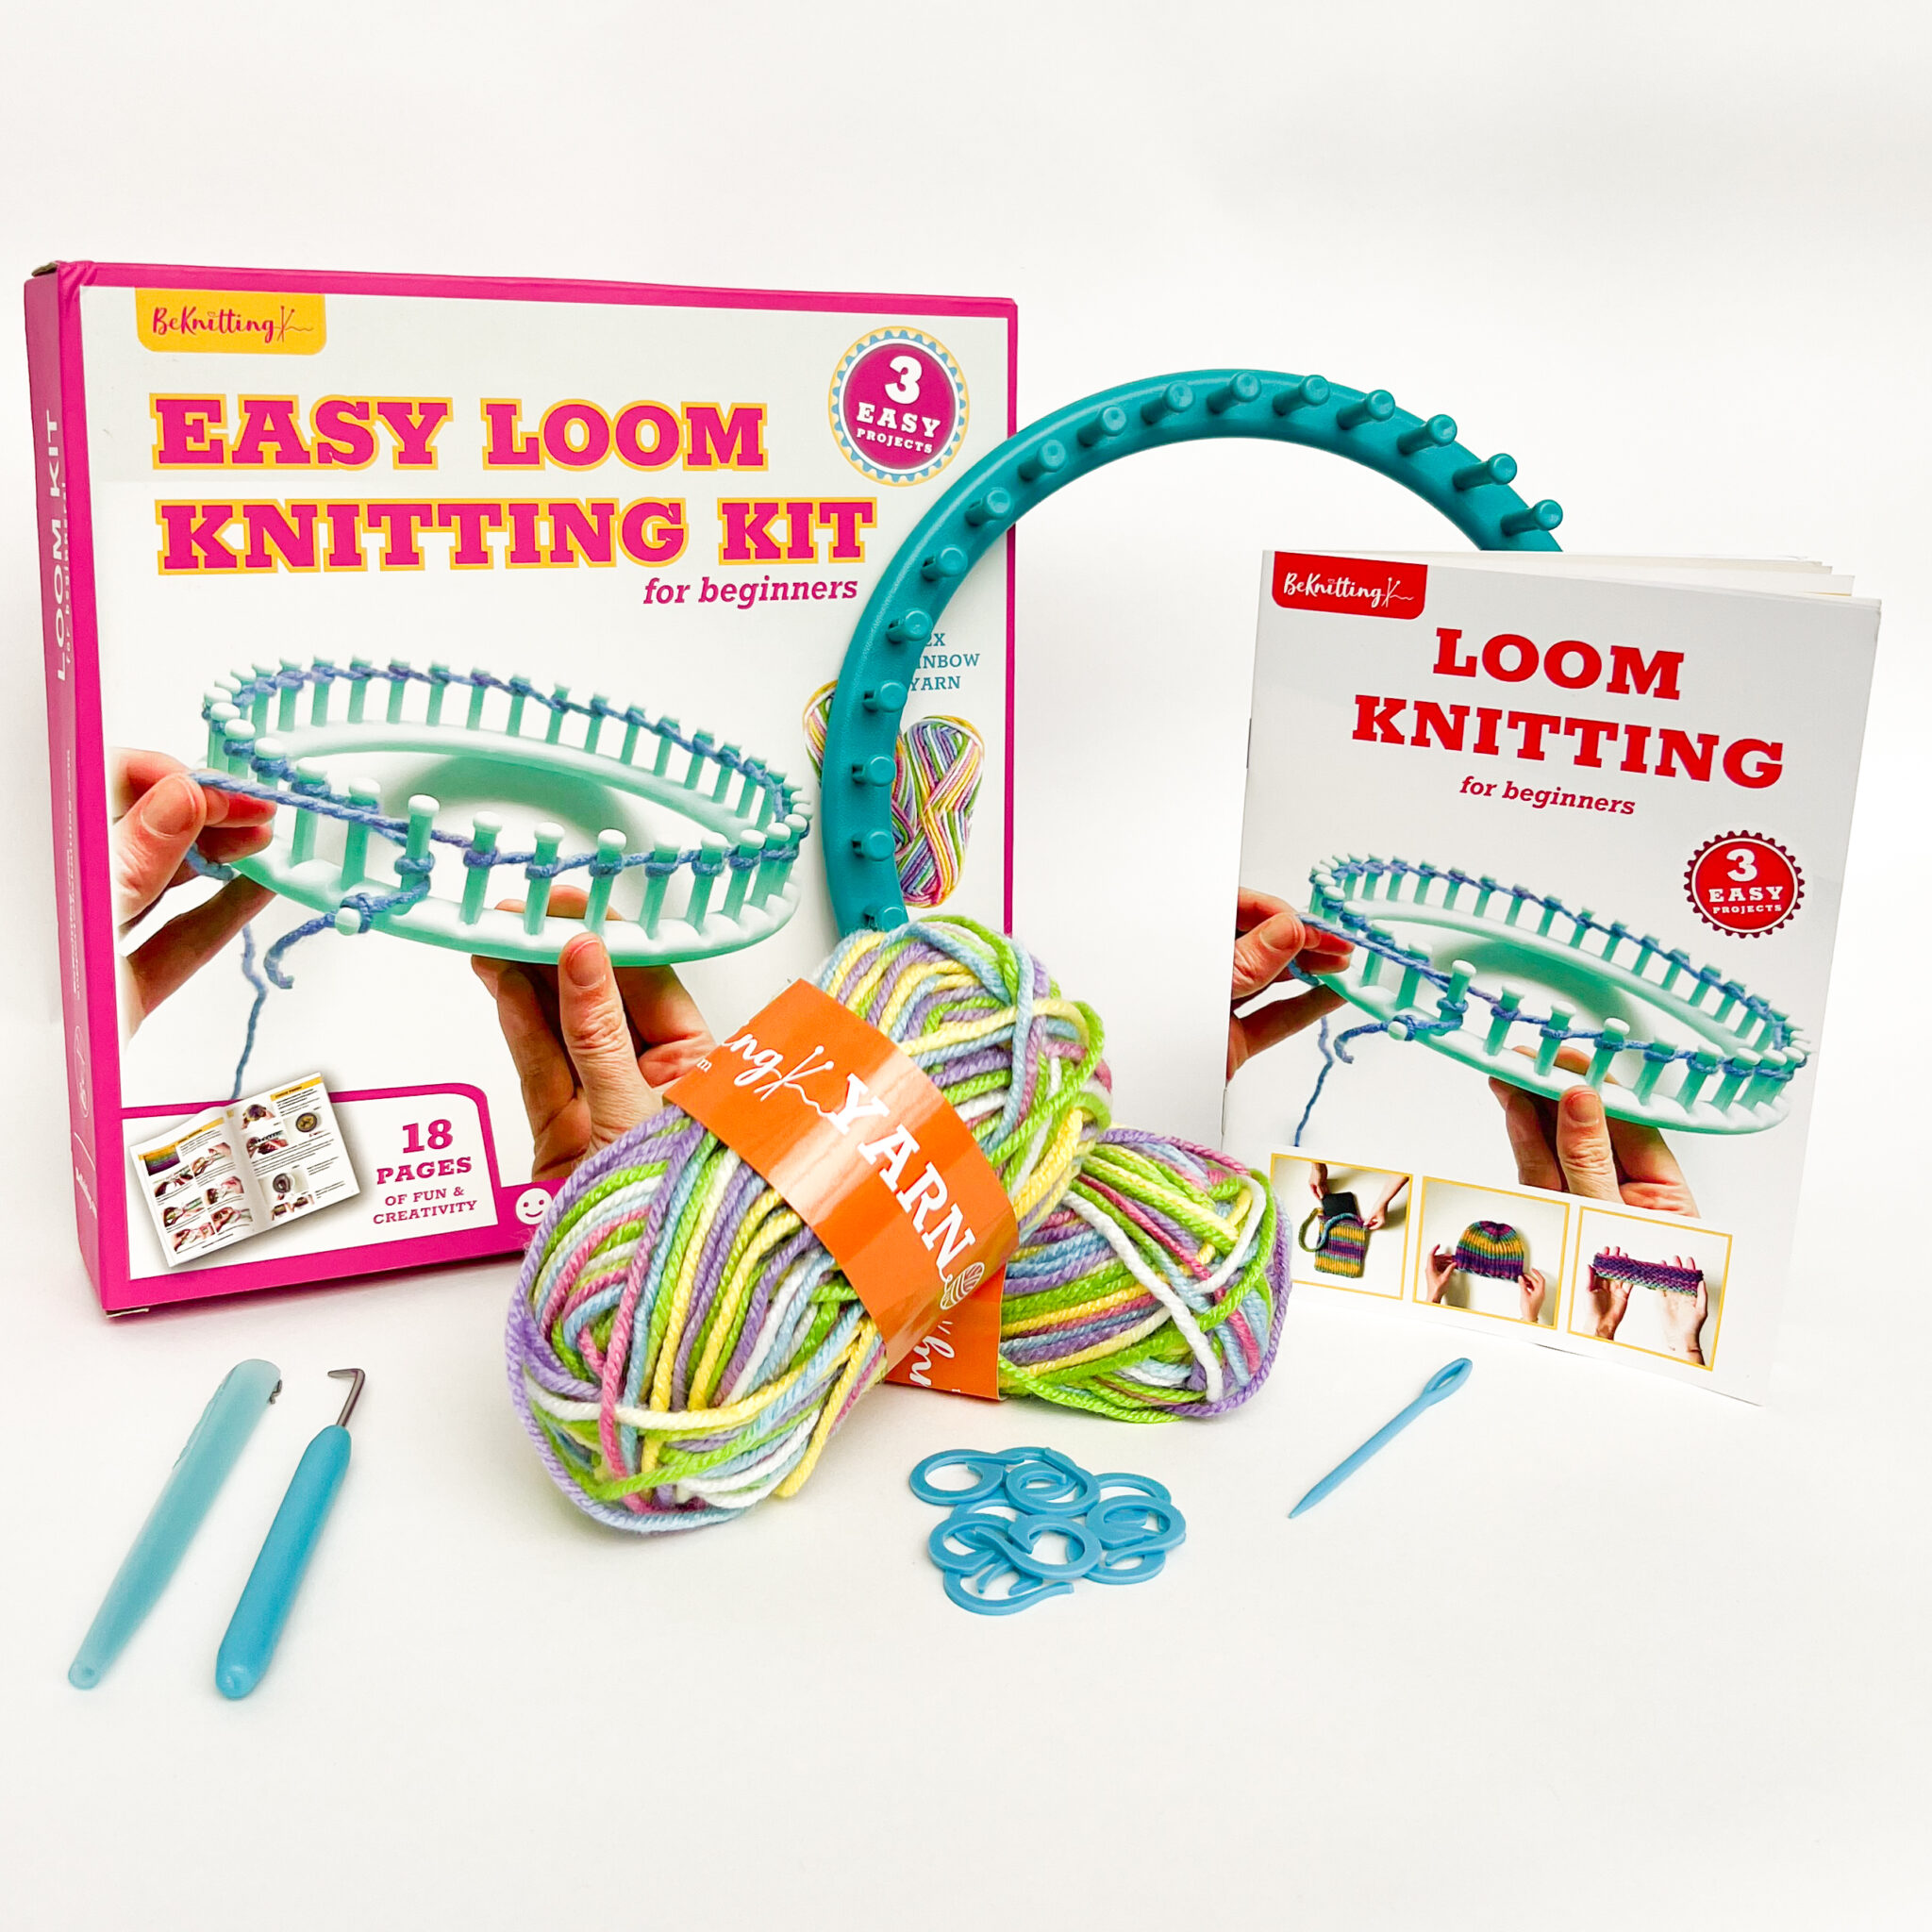
You can find the BeKnitting Easy Loom Knitting Kit on Amazon! 3 fun projects teach you how to use a knitting loom and are designed with new crafters in mind.
Never touched a knitting loom? We’ve got you covered!
Each kit comes with two balls of worsted weight (medium) yarn, one instruction booklet, a yarn needle, a loom hook, a loom pen, stitch markers and, of course, a knitting loom!
Casting off flat knits from a loom is easier than you think. There are a few ways you can do that. But this time, we’re going to learn the Slip Stitch loom knit cast off.
Don’t worry, I’m keeping the instructions as beginner-friendly as possible so you can comfortably follow along. Excited? Then let’s get started!
Make sure you start the cast off steps starting at the side anchor peg. This marks the beginning and end of your row!

Step 1:
Work two stitches following the pattern you were using for the rest of your project (if you were knitting for your project then knit those stitches, if purling, purl them).
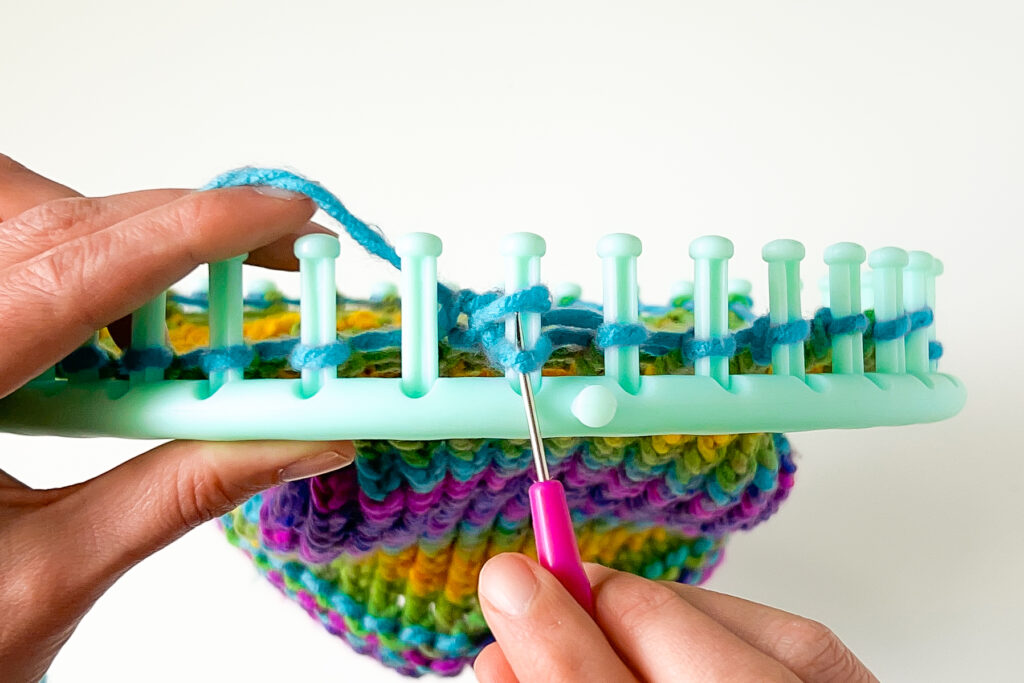
Step 2:
Move the second stitch over to the first peg so that it stacks on top of the first stitch.


Step 3:
Use the loom hook to pull the bottom loop up over the top loop, dropping it off the peg. You now have one stitch on the first peg and an empty second peg.


Step 4:
Use the loom hook to lift the stitch up off peg 1 and move it to peg 2.
Step 5:
Knit the next stitch (peg 3) normally.
Repeat
Steps 2-5 until all the stitches have been bound off.
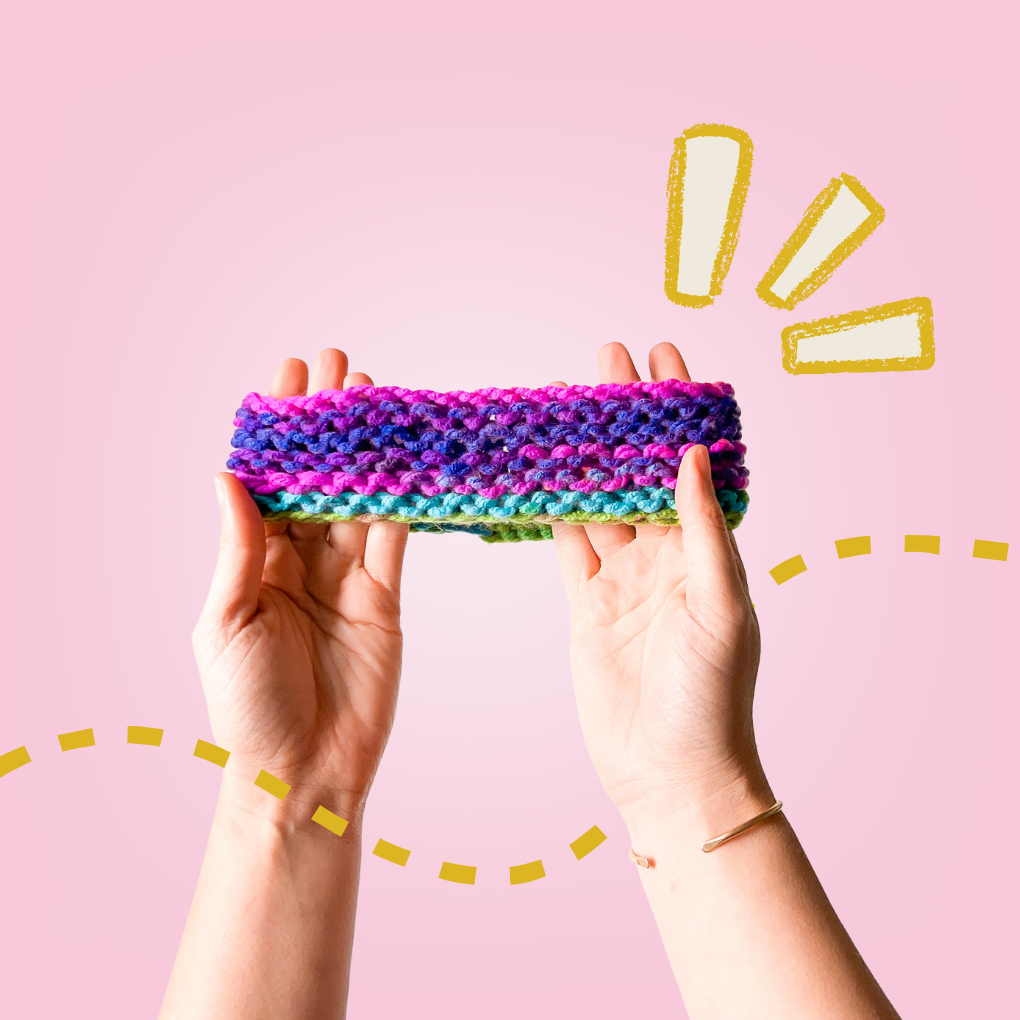
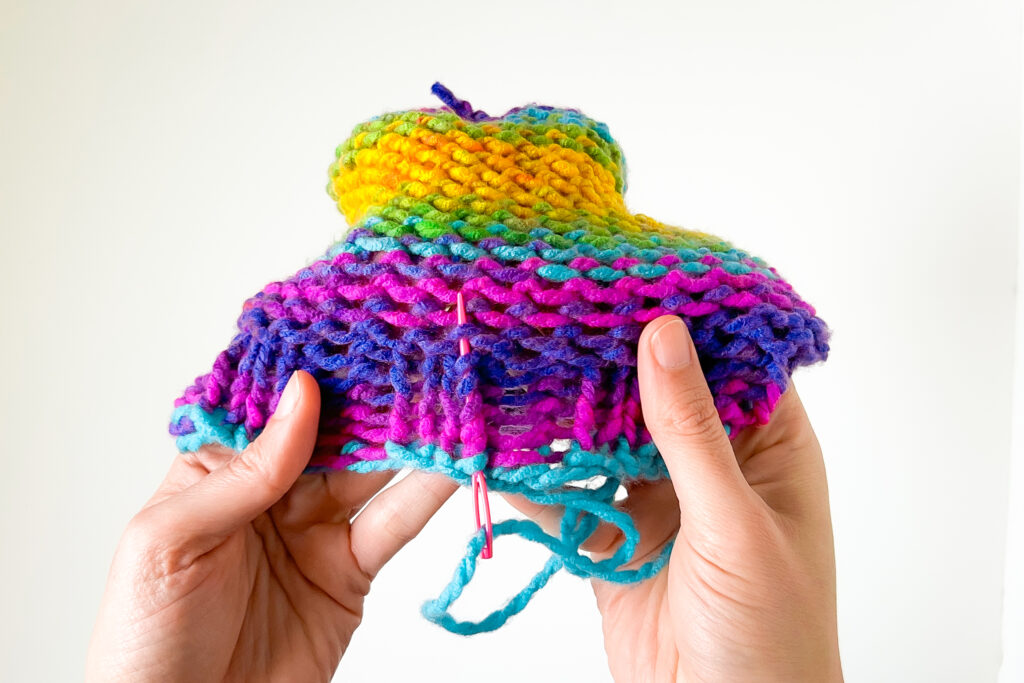
Finishing: Cut the yarn leaving 6”. Pull the yarn through the last stitch and cinch it
shut. Your edges should be flat like the loom knit headband project above!
Now that you’ve taken the project off the knitting loom, it’s time to secure the yarn end. You do this so that your project doesn’t start to unravel!
Here’s how you weave in yarn tails after you’re done with the knitting loom cast off:

Step 1: Turn the project inside out. Thread the yarn tail through the yarn needle.
Step 2: Weave the needle through either a row of stitches or column of stitches for 1-2”.
Step 3: Pull the yarn through the stitches and trim the extra yarn close to the fabric.
Weaving in the ends for “traditionally” knitted items and items that are knitted in a loom is practically the same. Just remember to weave the ends in on the wrong side or back side of your project!
BONUS TIP: If you don’t want your yarn end to slowly unravel as you use your knit item, add a dab of fabric glue to keep it in place. That yarn tail is not going anywhere!

Want to be able to cinch the end of your project closed? Try the Cinched Cast Off! This technique uese a yarn needle to thread the yarn through each loop before you pull the yarn to close the top. Easy! This method is perfect for bags or hats where you want to have a totally closed side.
So, how was it?
This method of casting off does need some getting used to. Plus, loom knitting cast offs are a lot different from the “traditional” knitting cast offs. They do have similar appearances though!
With enough practice, casting of for loom knitting will start feeling like second nature to you. So don’t feel down if your first few attempts don’t turn out the way you want it to.

As with any new hobby, practice makes perfect. So make sure to take your time learning everything you can about loom knitting.
Soon enough, you’ll be breezing through your loom knits like a machine!
Need a refresher on the other loom knitting stitches? Don’t worry, you can find everything you need and more on our website!
Casting On: How to start the yarn on your knitting loom! Read the Post…
How to do the Knit Stitch on a Knitting Loom! Read the Post…
How to do the Purl Stitch on a Knitting Loom! Read the Post…
Casting Off: how to do a cinched finish! Read the post…


