Easy 3-Step Toque Knitting Pattern: The Brimless Loom Knit Ribbed Toque
Let's learn the loom knit rib stitch!
Let's learn the loom knit rib stitch!
Toques are close-fitting hats that people wear to fight the cold. These accessories are often brimless and quite comfy to wear. They are also perfect projects to practice the loom knit rib stitch on!
A toque knitting pattern is on the smaller side and can be completed within a single day. Who doesn’t want that? Even pro knitters indulge in quick knits every now and then.
If you want to learn a new round loom knitting pattern, be sure to stick around. We have a fun pattern for you to try out, plus other loom knitting patterns by creative designers!
This super easy loom knit toque will start with a knit round and a purl round to prevent the edges from curling up. Then you will alternate 4 E-wrap knit stitches and 2 purl stitches all around the loom. Doing this will give you a stretchy loom knit toque that you can show off to your friends or sell in your next craft fair!
Time to prep! Here is everything you need for your toque knitting pattern, plus the skills you will use as you knit along:
The loom knit rib stitch can be confusing for new loom knitters. But with enough practice (and maybe a few stitch markers) you’ll breeze right through the rows before you know it!
You can check out the step-by-step pattern for a fun new toque below:
L = 8” x C = 22”
The rib stitch is quite easy to knit on a loom. But you need to pay close attention during the first few rows. Missing a peg or two can cause the stitches to look wonky. Here’s how to create the loom knit rib stitch:
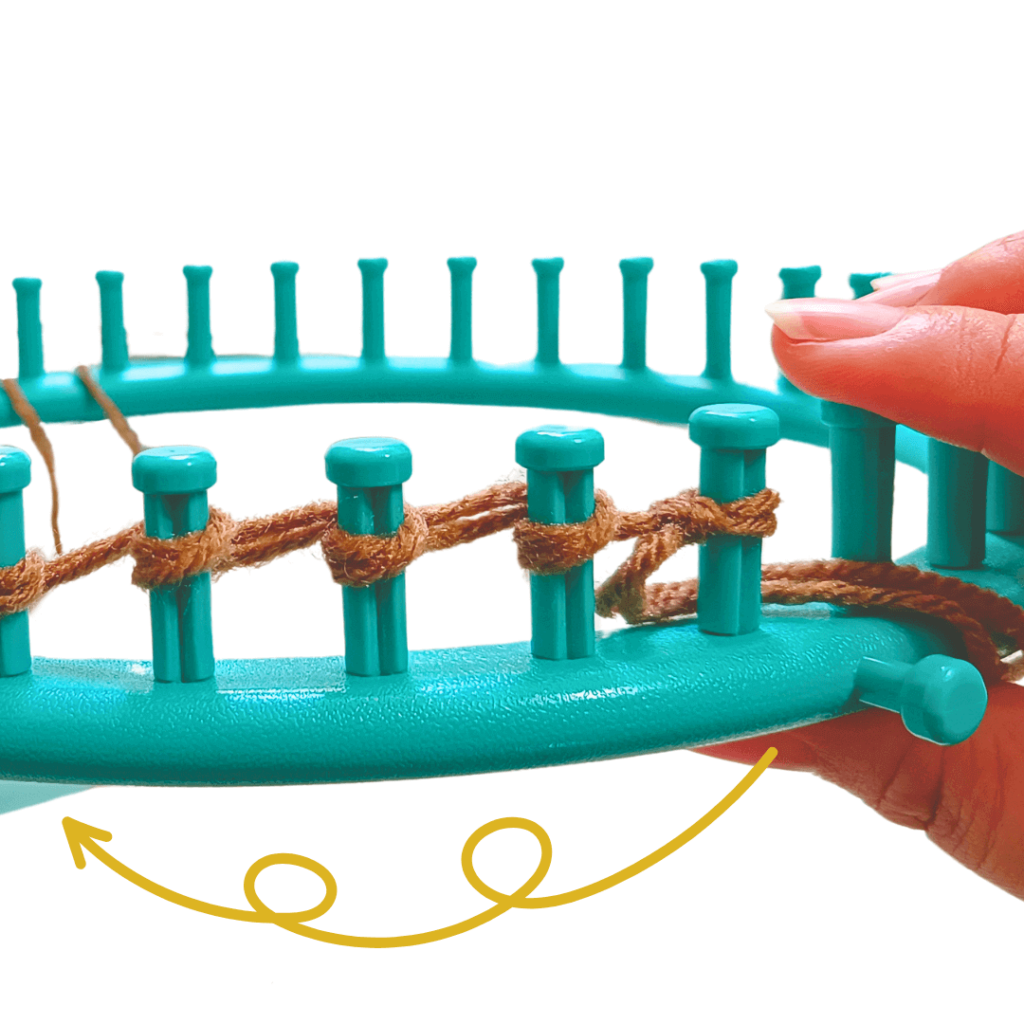
Row 1: E-wrap knit stitch around.
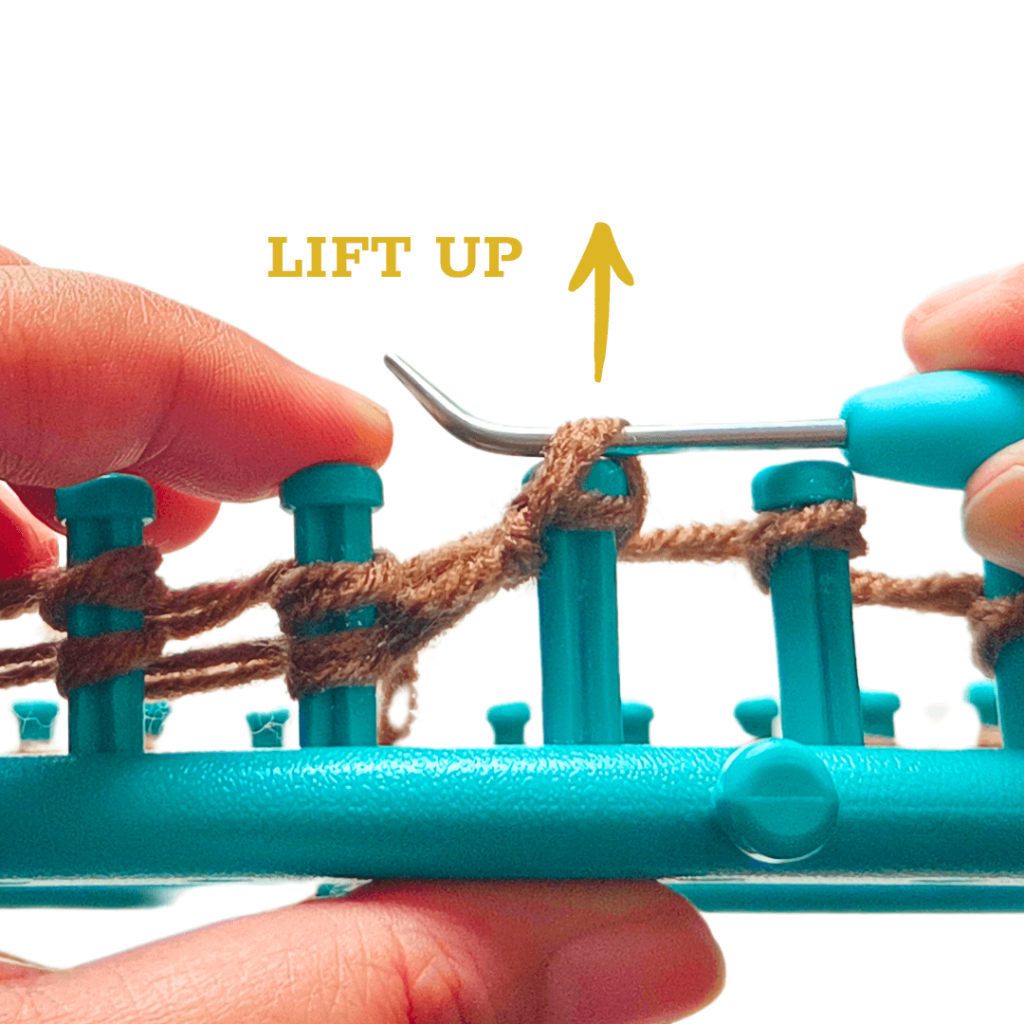
Take the bottom loop and drape it over the top loop.
Drop the stitch behind the peg and push the stitch down.
Now you have a knit stitch. Repeat this on all of the e-wrap knit stitch pegs!

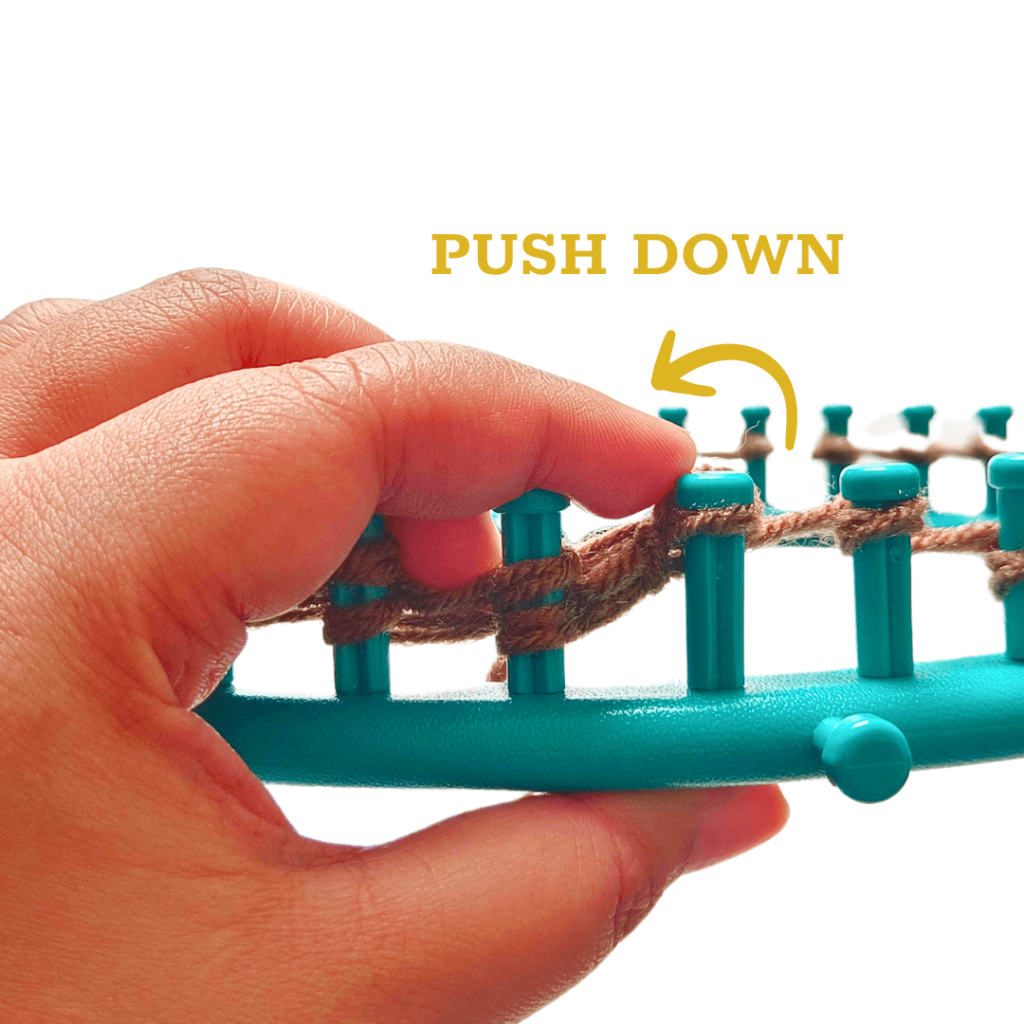
Row 2: Purl around.
Lift the loop off the peg using your loom hook.

Pinch the loop to stop it from unravelling.
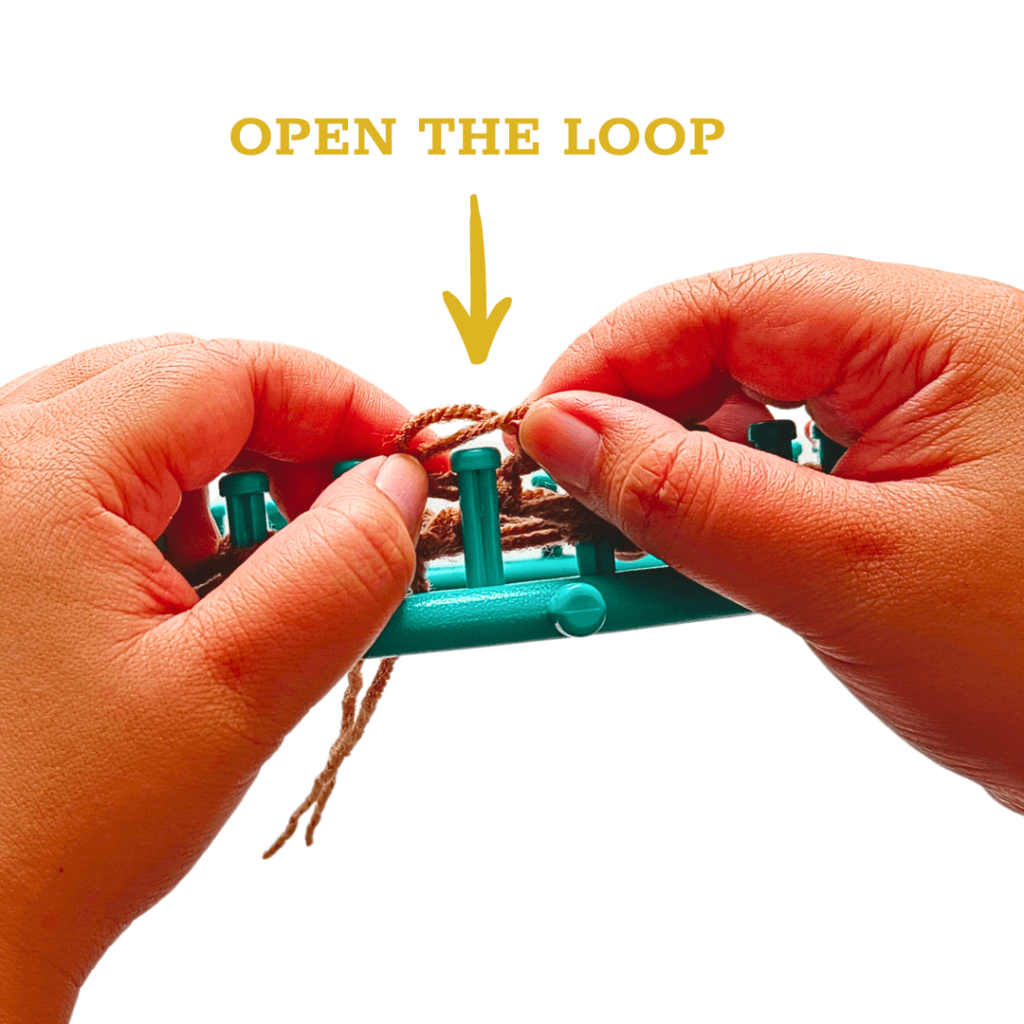
Using your fingers, open the loop and put it over the peg.

Push the loop down onto the peg. Tug the yarn downwards to tighten the loop on your peg.
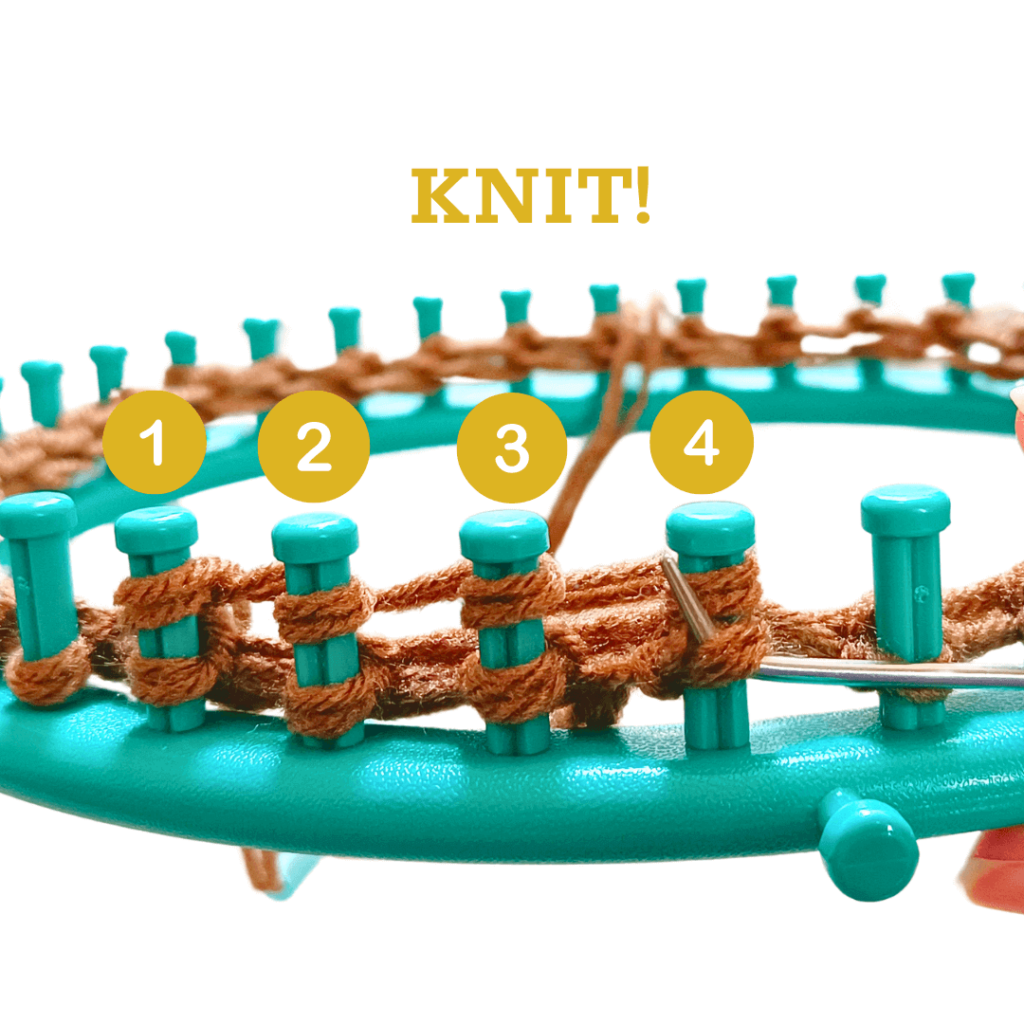

Row 3: *Knit 4 pegs, Purl 2 pegs*
Pro tip: Add your stitch markers or elastic bands on the purl pegs to help you keep track of the stitches.
Repeat ROW 3 until you have 8” of fabric from the edge of the toque to the loom.
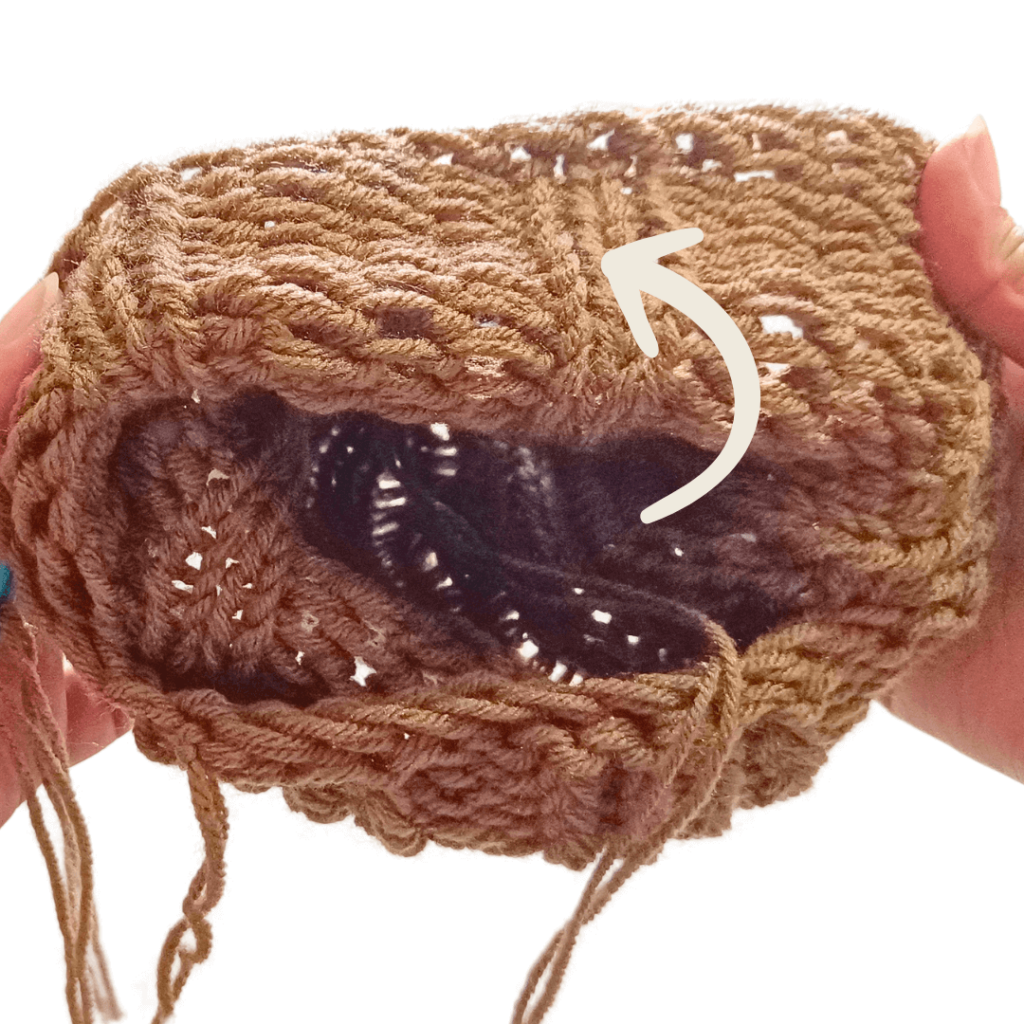
Leave around 20” of yarn and cut your tail. Thread your darning needle. Coming from the bottom of your peg, thread the yarn through. Remove the stitch from the peg.
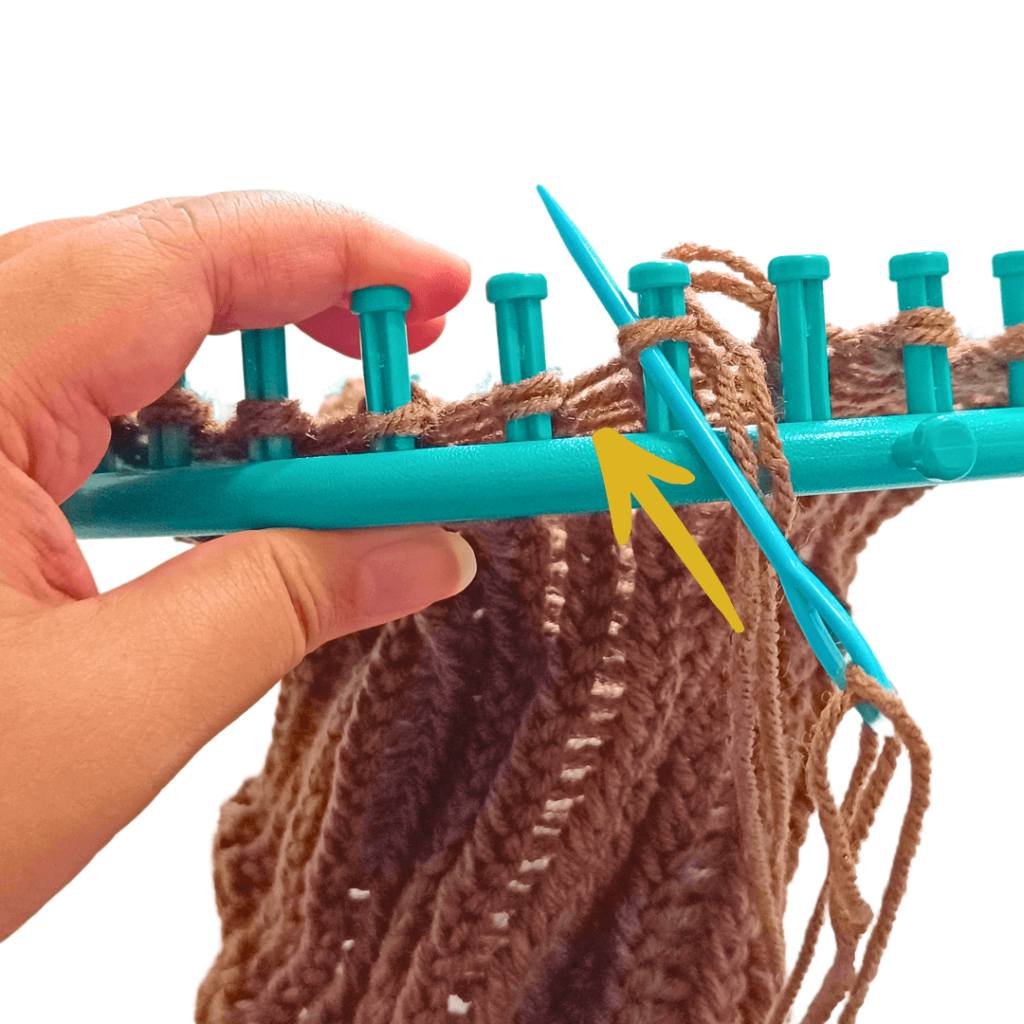
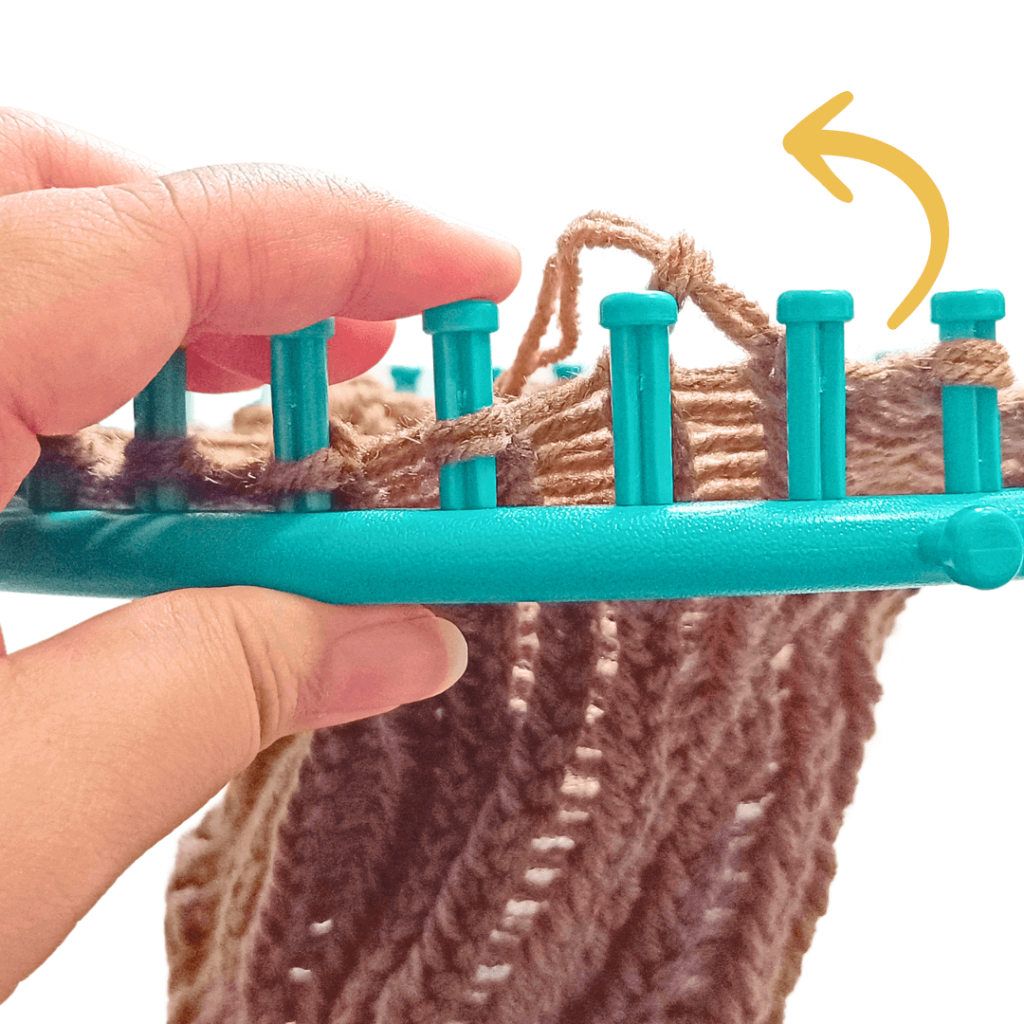
Move onto the next peg and repeat.
Keep repeating this until all of the loops are casted off the pegs.
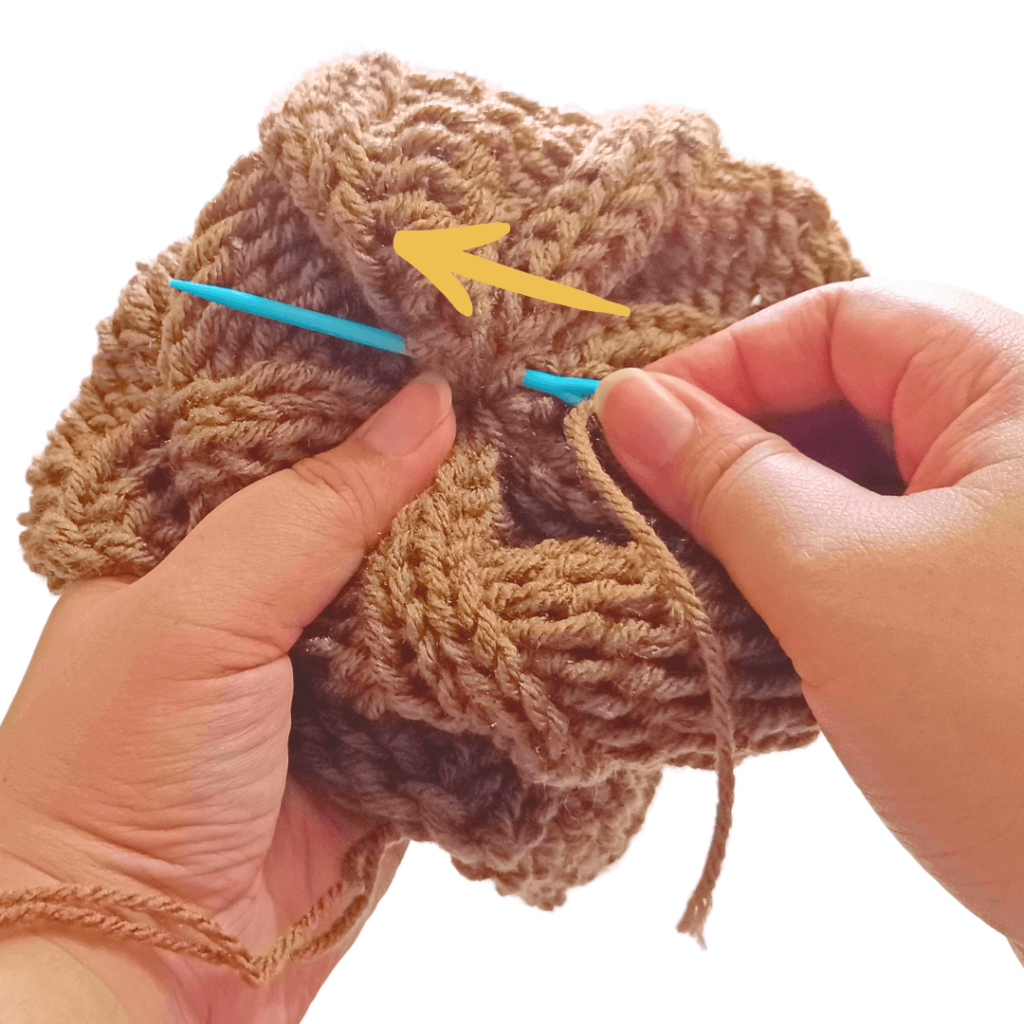
Tug on your yarn tail to cinch the opening shut. Weave in your yarn on the tip of your toque.
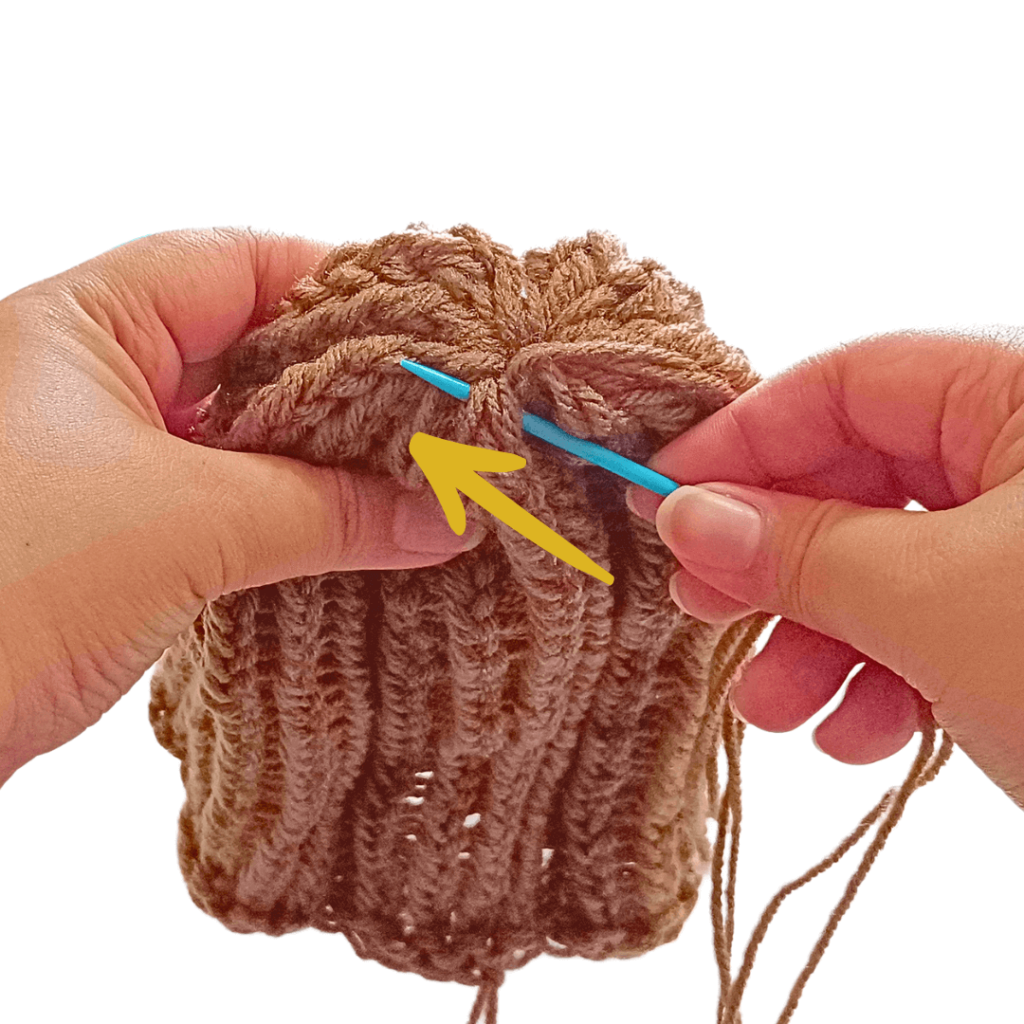
Tie a double knot.
Weave your yarn tail into the wrong side of your toque. Hide your tails.
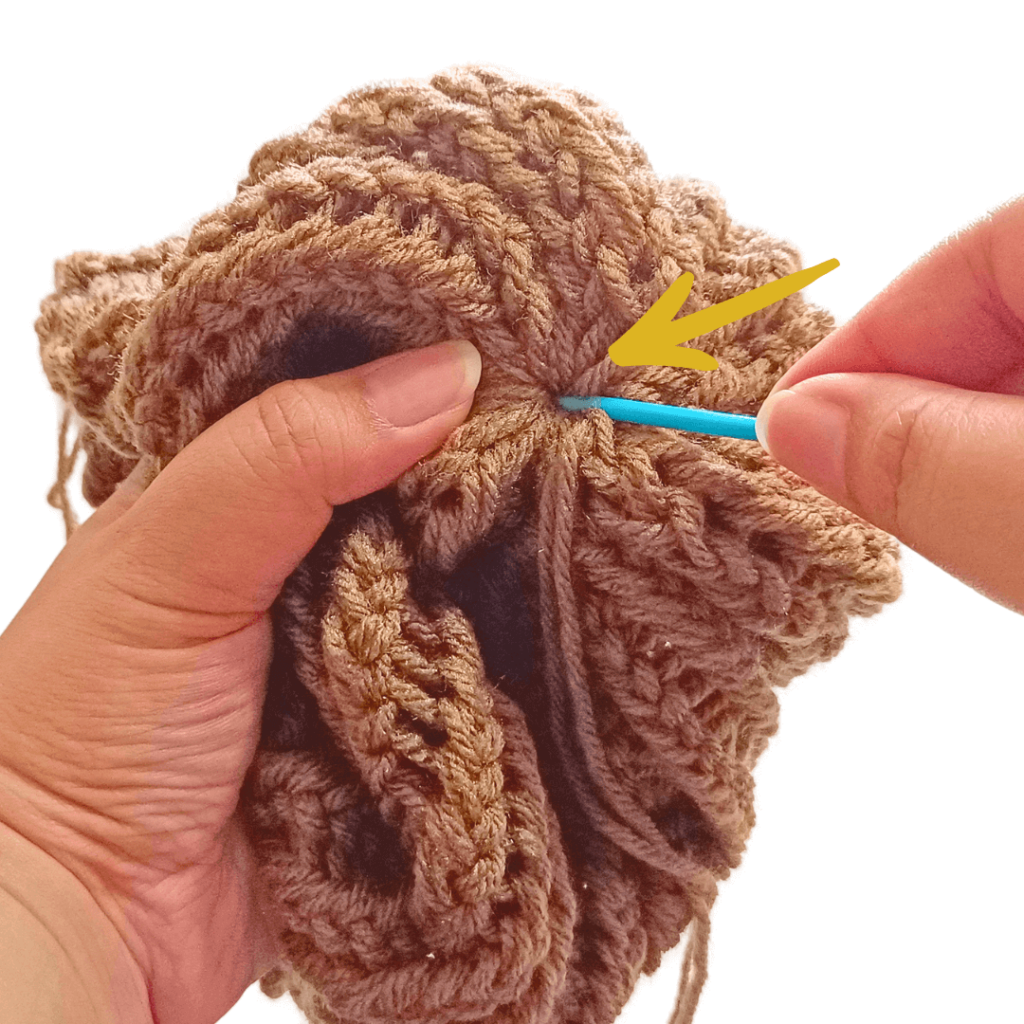
Flip your toque inside out.
Weave in your remaining yarn tail and snip.
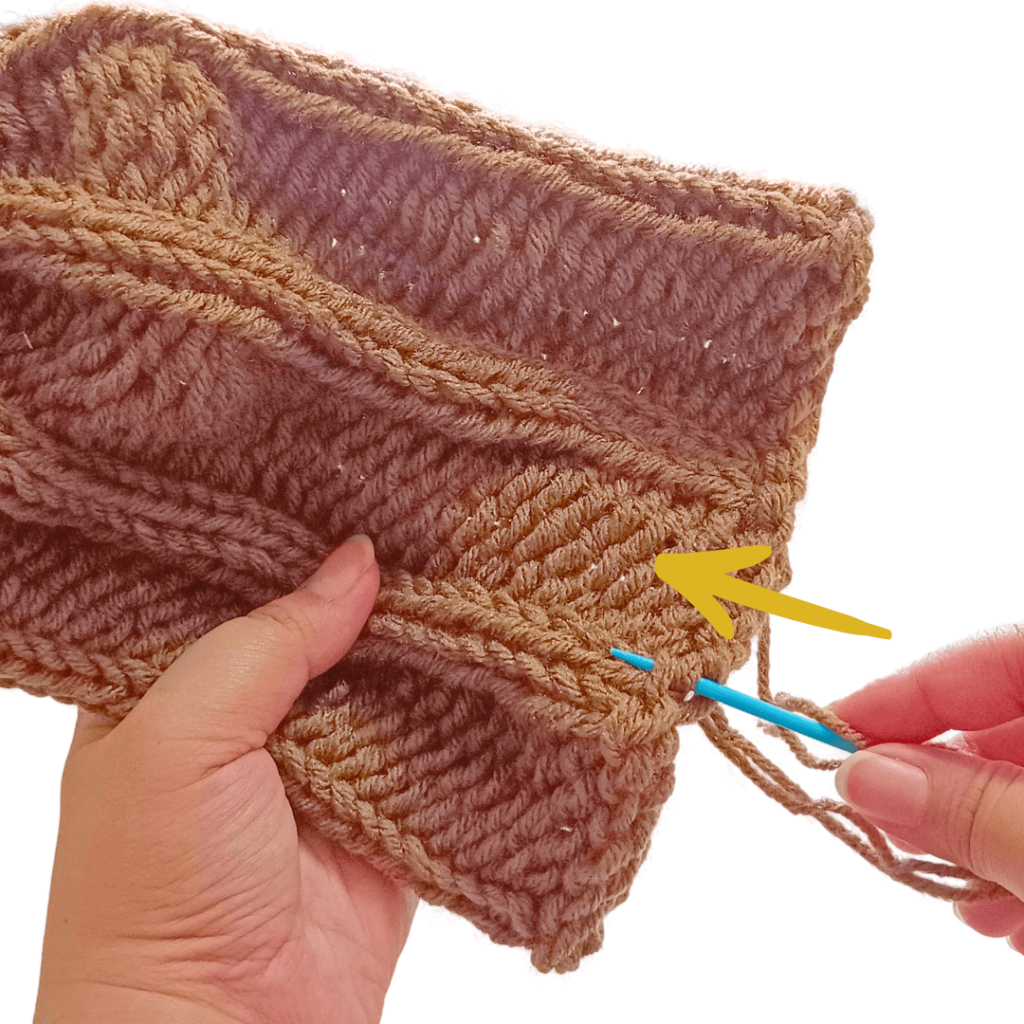
Weave in the yarn tail on the cast on edge of your toque.
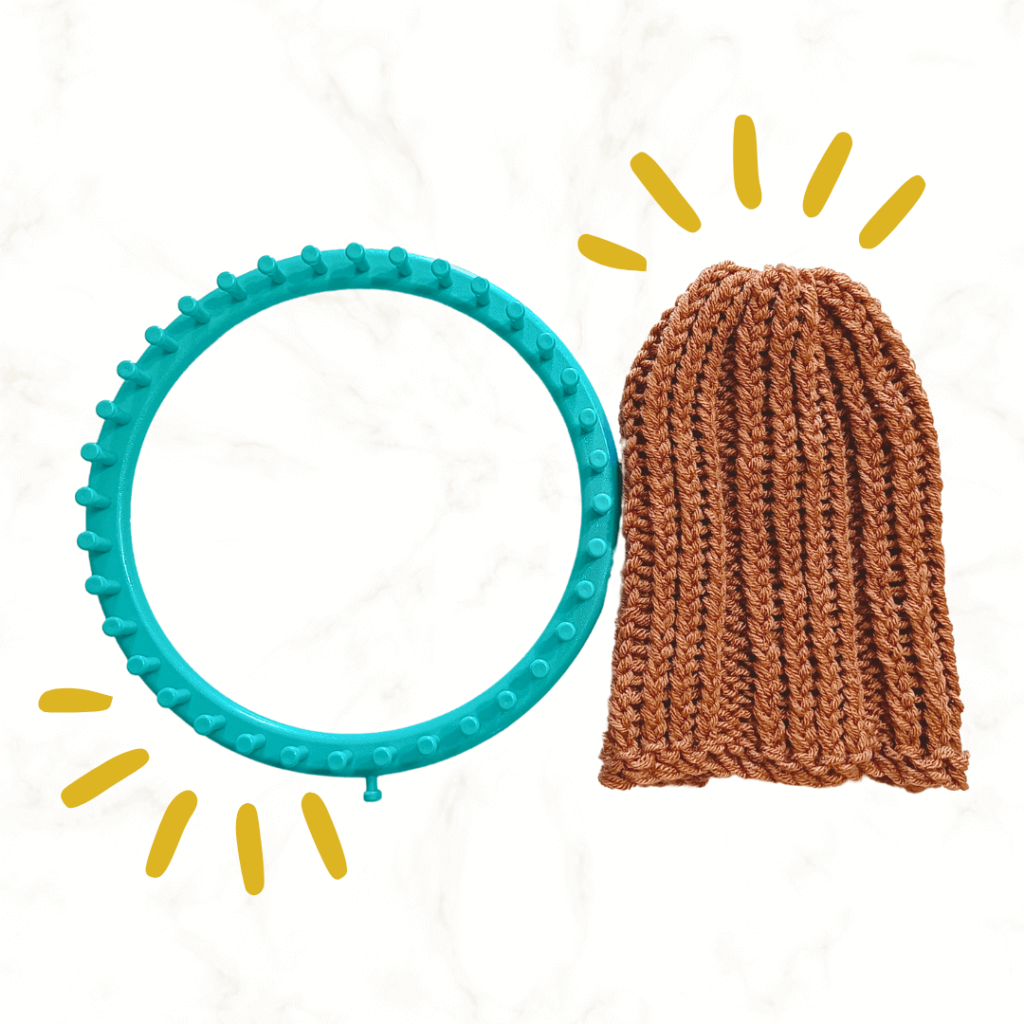
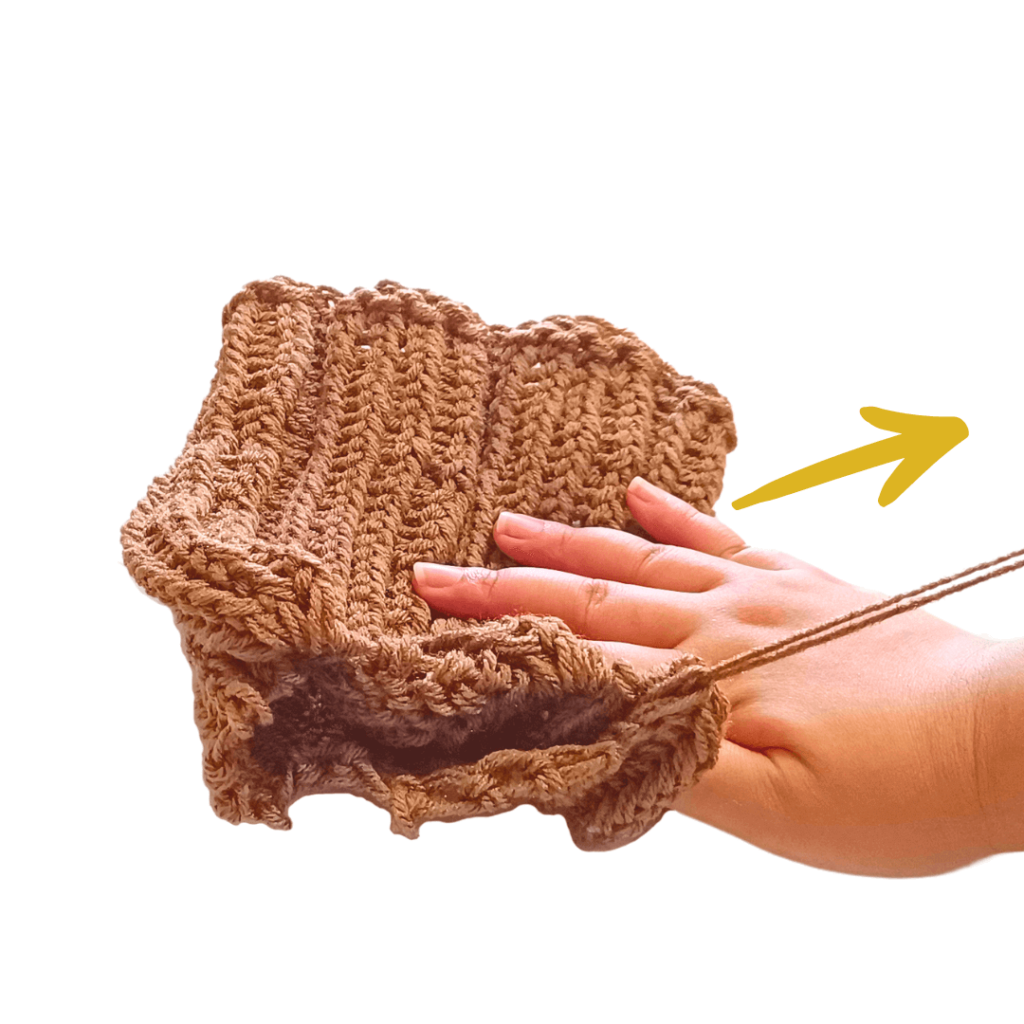
By the end of the toque knitting pattern, your project should look like this! I love the fun textures that the loom knit rib stitch gives. This round loom knitting pattern is just the tip of the iceberg of fun patterns you can make with just this stitch.
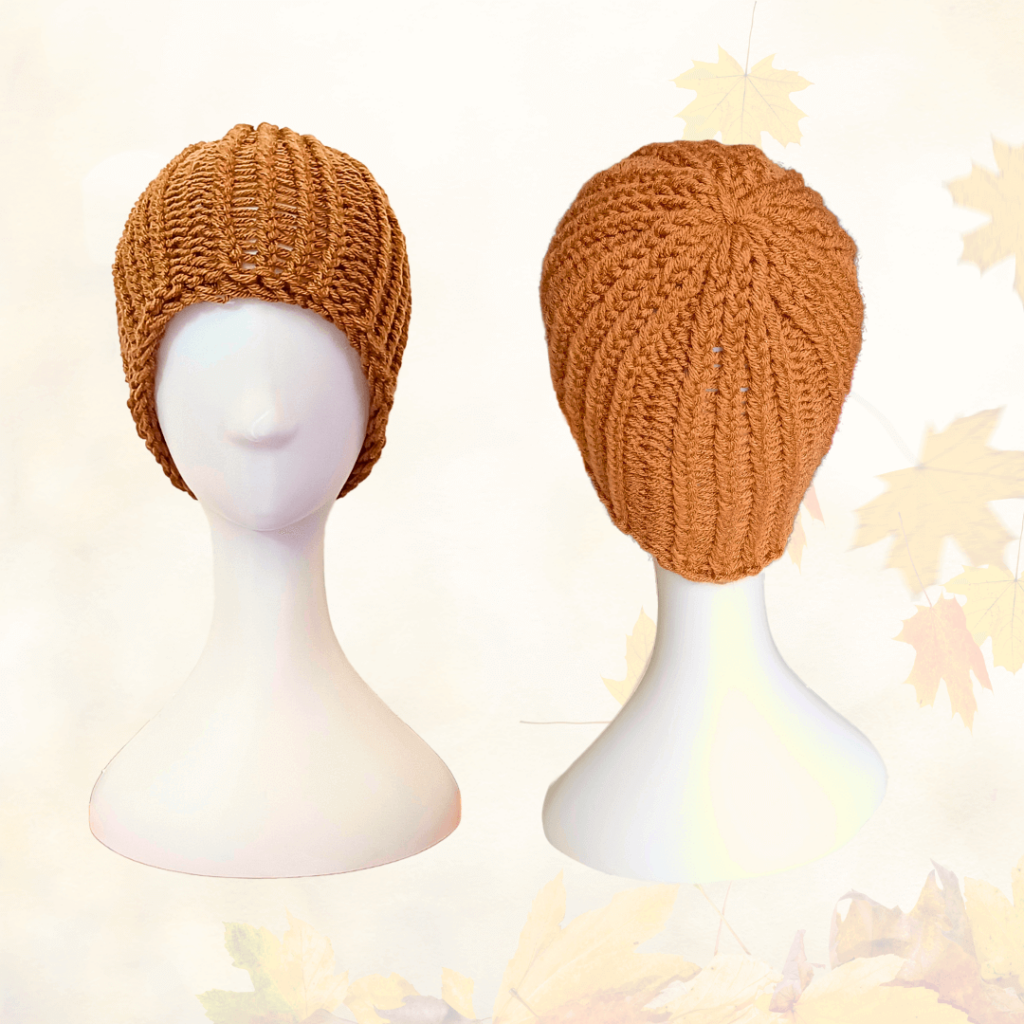
This toque knitting pattern only used a single shade of brown, but I encourage you to experiment with your favorite colors. I’m thinking of recreating this round loom knitting pattern in brown and cream colored yarns for a sort of mocha frappuccino look!
For teens to adults, you can use the usual acrylic yarn or acrylic mix. If you have sensitive skin, make sure to use natural fibers like cotton and bamboo yarn. This will help prevent any skin irritation.
Check out our yarn guide for more details on baby-friendly fibers!
I wanted this round loom knitting pattern to be as easy as possible for new loom knitters. But I also wanted a pattern that has some texture and pizzaz. So I went with one of my favorite stitches: the loom knit rib stitch!
This particular stitch pattern is quite easy to make and gives you an ultra stretchy fabric that will comfortably fit around your head — and who doesn’t want a comfy toque to fight the cold?
I normally mix and match colors in my projects but I opted for the same shade of brown to make it easier to see the stitches. I hope you enjoy making this pattern. The rib stitch may take some getting used to, so make sure to take all the time you need!
Learn more about the types of knitting looms for you:
Learn the basic loom knitting stitches:
Check out more free knitted hat patterns:


