Seed Stitch
A beginner-friendly stitch pattern with extra texture!
A beginner-friendly stitch pattern with extra texture!
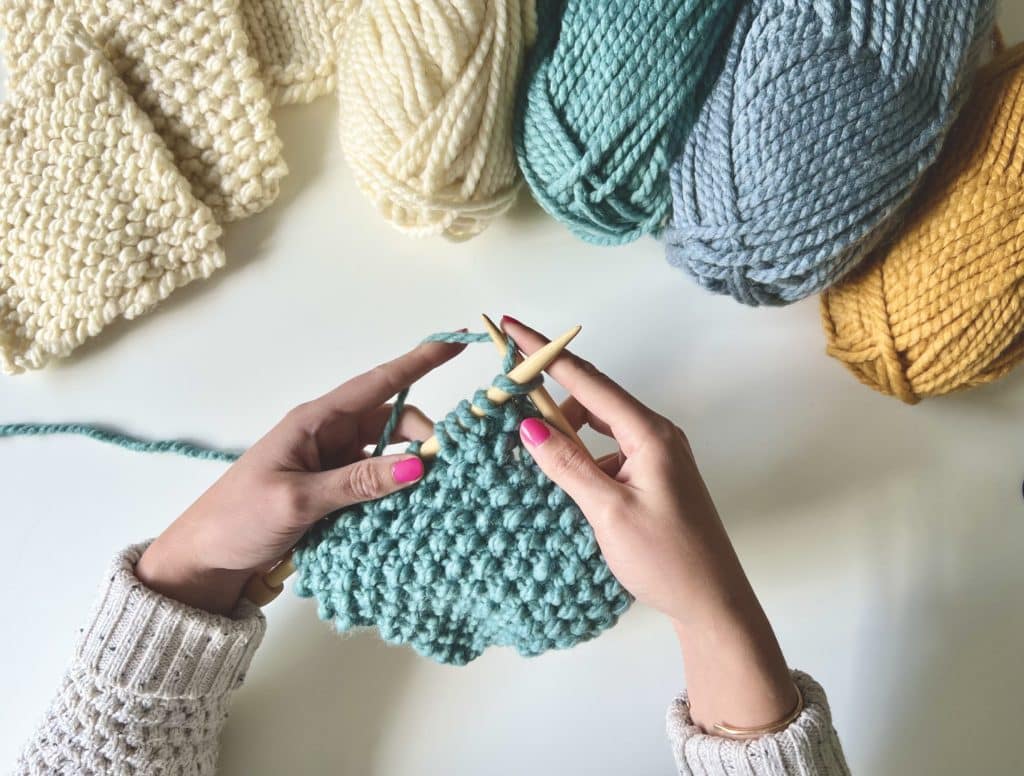
Knit Seed Stitch is a great beginner stitch to learn! The seed stitch pattern is created by alternating knit and purl stitches. These alternating stitches create a densely textured fabric that looks like rows of seeds. Seed stitch is a beginner-friendly stitch that is easy to memorize and work once you’re familiar with both the knit stitch and purl stitch.
Learning how to knit seed stitch is a great way to practice all the beginner-level skills you’ve learned as a new knitter. We recommend trying this stitch out once you know how to cast on, knit, purl, and cast off.
With just two stitches to memorize, this stitch is a great way to practice memorizing pattern repeats. We also like using this stitch to practice “reading” your fabric. Being able to recognize mistakes in your pattern is an important skill to learn before knitting more complex stitches.
Make sure to read all the way through this tutorial for helpful tips and tricks for troubleshooting mistakes in your knits!
Like garter stitch, seed stitch fabric doesn’t curl! This means you can knit an entire project using just seed stitch and have a finished knit that lies flat without blocking or special treatment. This stitch pattern is also one of the few that can be knit flat or in the round using the same instructions!
We love pairing seed stitch with simple projects. This stitch pattern adds an instant, easy texture that keeps basic patterns interesting. This stitch looks the same on both sides making it a great choice for reversible projects or knits where you’ll see both sides of the fabric at the same time.
Every project starts with a cast on row. If you’re following a pattern, cast on the number of stitches noted in your project. If you are just knitting a quick swatch or test piece, go ahead and cast on enough stitches for 4” of fabric using the needles and yarn of your choice. Check out our page of beginner-friendly cast on techniques here!
You can cast on either an odd number or even number of stitches to knit a seed stitch pattern flat. We recommend casting on an odd number of stitches to make the instructions for the front and back identical!
For knitting seed stitch in the round, you need to cast on an even number of stitches so that the pattern begins and ends without the same stitch next to each other.
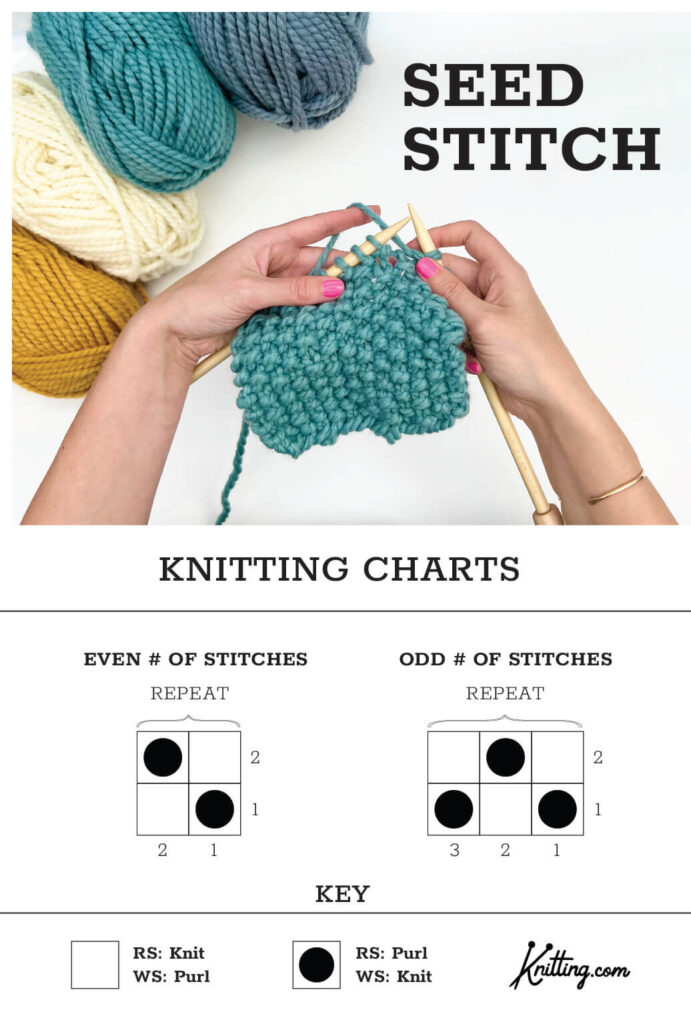
See the cast on note above for knitting seed stitch flat vs. knitting in the round before casting on!
Pattern for all rows/rounds: Repeat the following two-stitch pattern (Knit 1, Purl 1) until the end of the row. Turn your work.
Row/round 1: (Knit 1, Purl 1) repeat this two-stitch pattern to the last stitch, Knit 1. Turn your work.
Row/round 2: Repeat the following two stitch pattern (Purl 1, Knit 1) until the end of the row. Turn your work.
Repeat rows/rounds 1 & 2 until the desired length.
Note: These tutorials were written with instructions for right-handed knitting.
These step-by-step instructions show you how to form a knit stitch. Click here for the full-length step-by-step knit stitch tutorial!
Step 1: Insert the right needle through the first stitch upwards from right to left through the front loop. Wrap the yarn up and over the right needle counterclockwise.
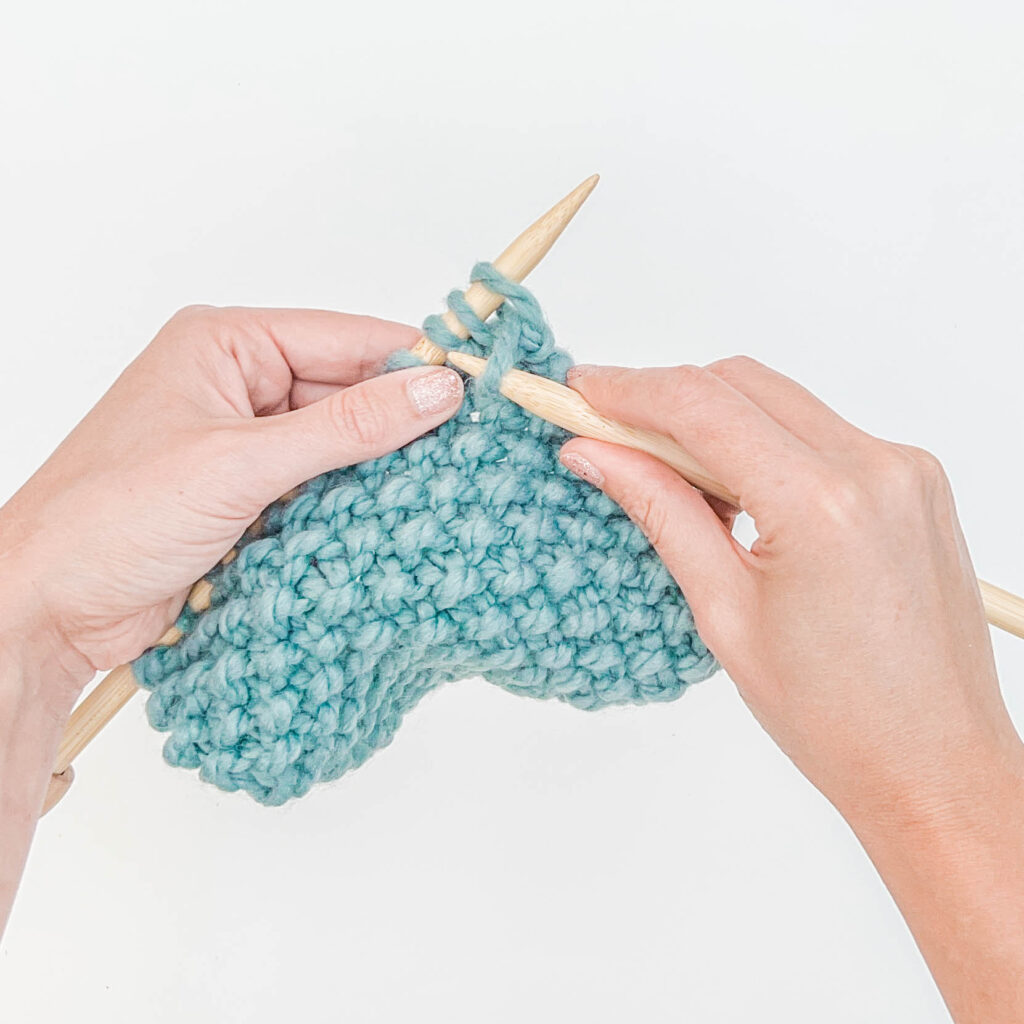
Step 2: Pull the yarn through the stitch by pivoting your right needle downward toward the left.
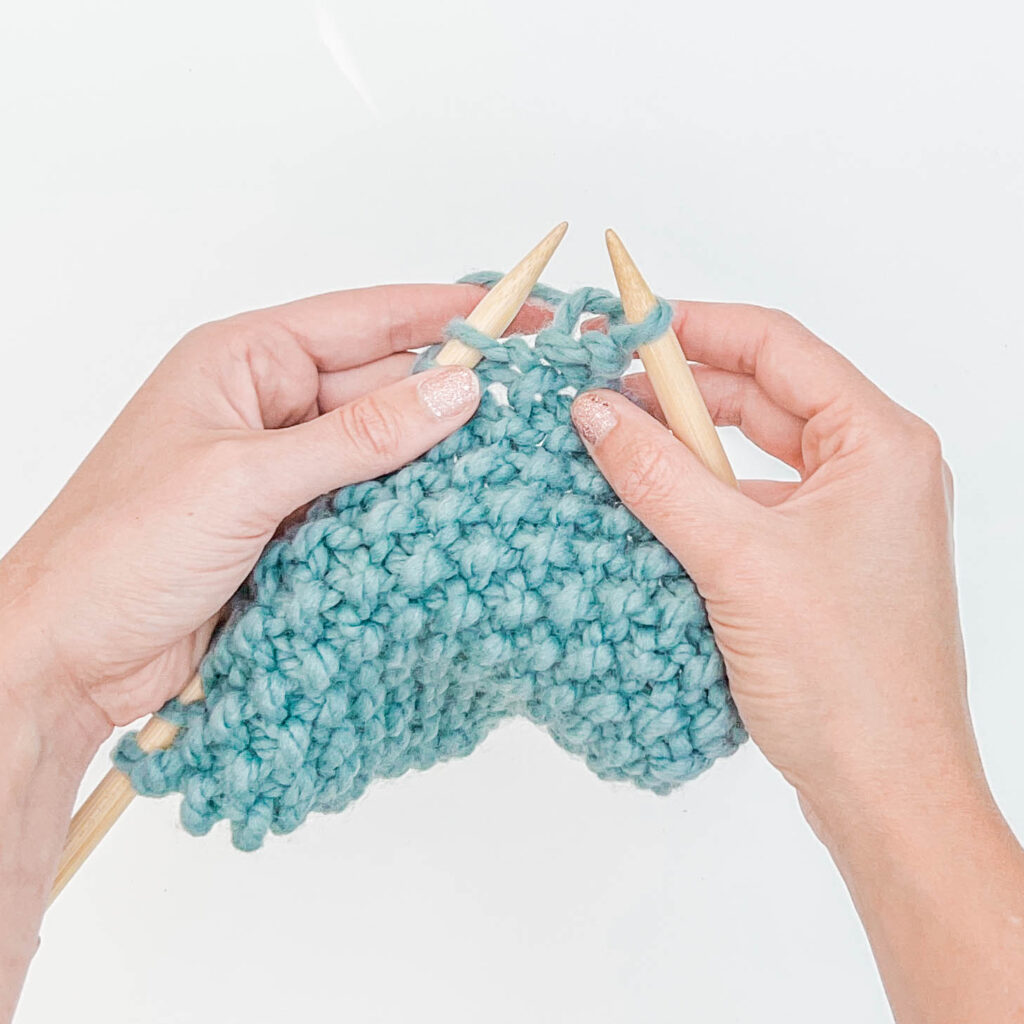
Step 3: Slip the stitch off of the left needle.
These step-by-step instructions show you how to form a purl stitch. Click here for the full-length step-by-step purl stitch tutorial!
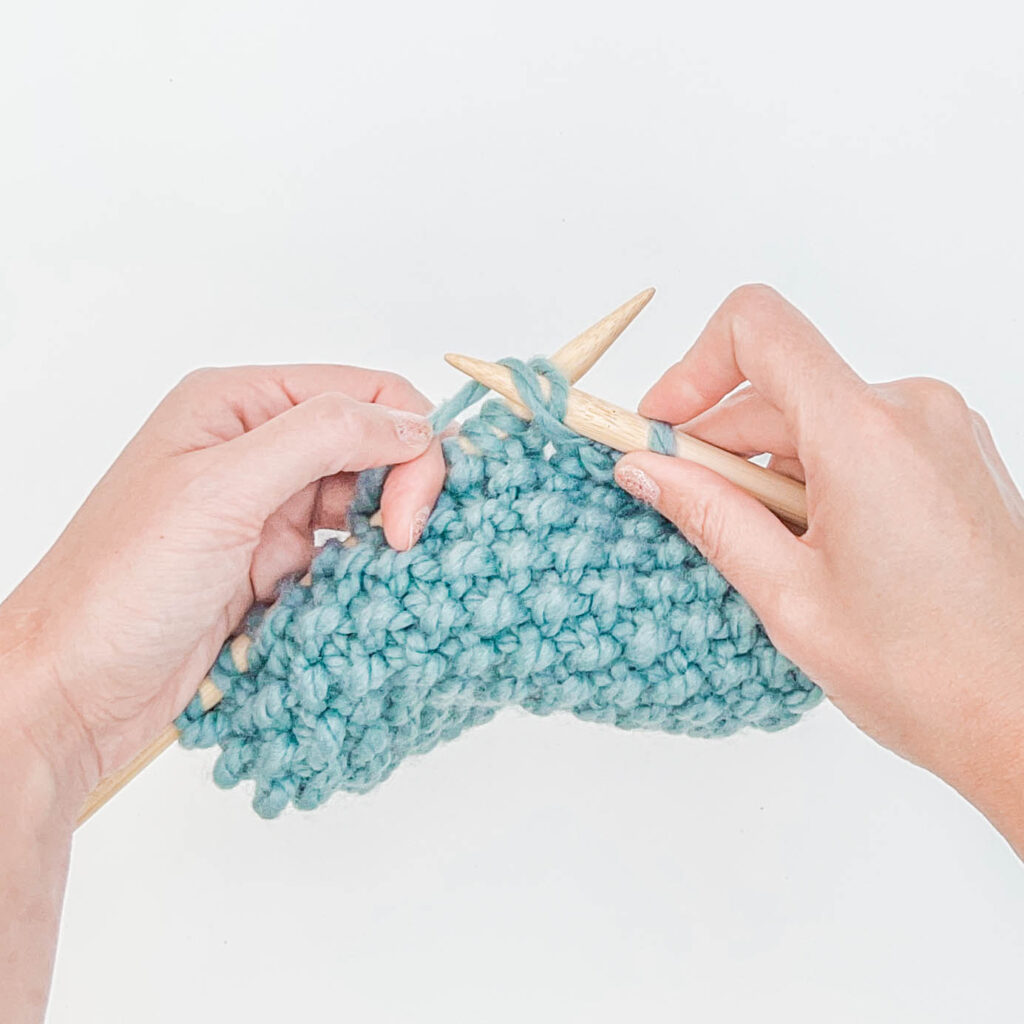
Step 1: Insert the right needle downward through the front leg of the stitch from right to left. Wrap the yarn counterclockwise up and over the right needle.
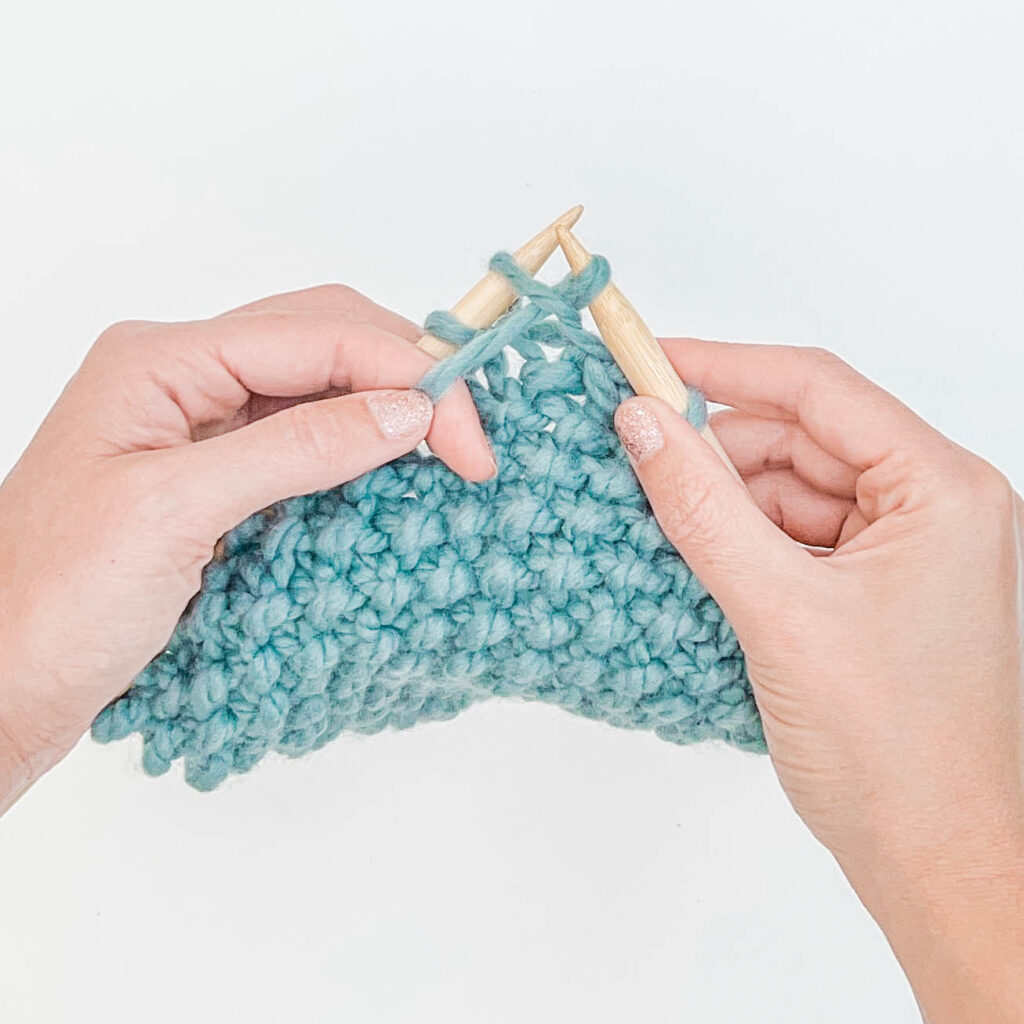
Step 2: Pull the yarn through the stitch by pivoting your right needle tip upward towards the right.
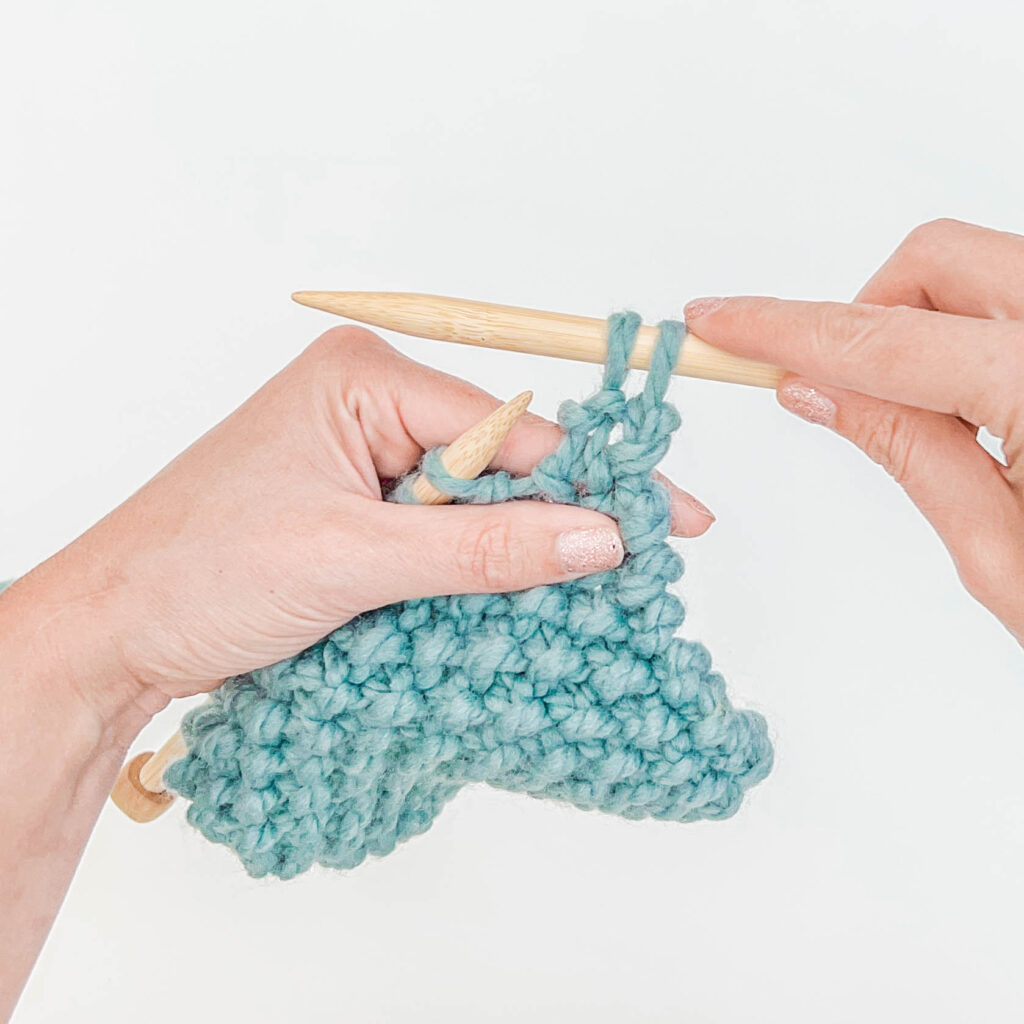
Step 3: Slip the stitch off of the left needle.
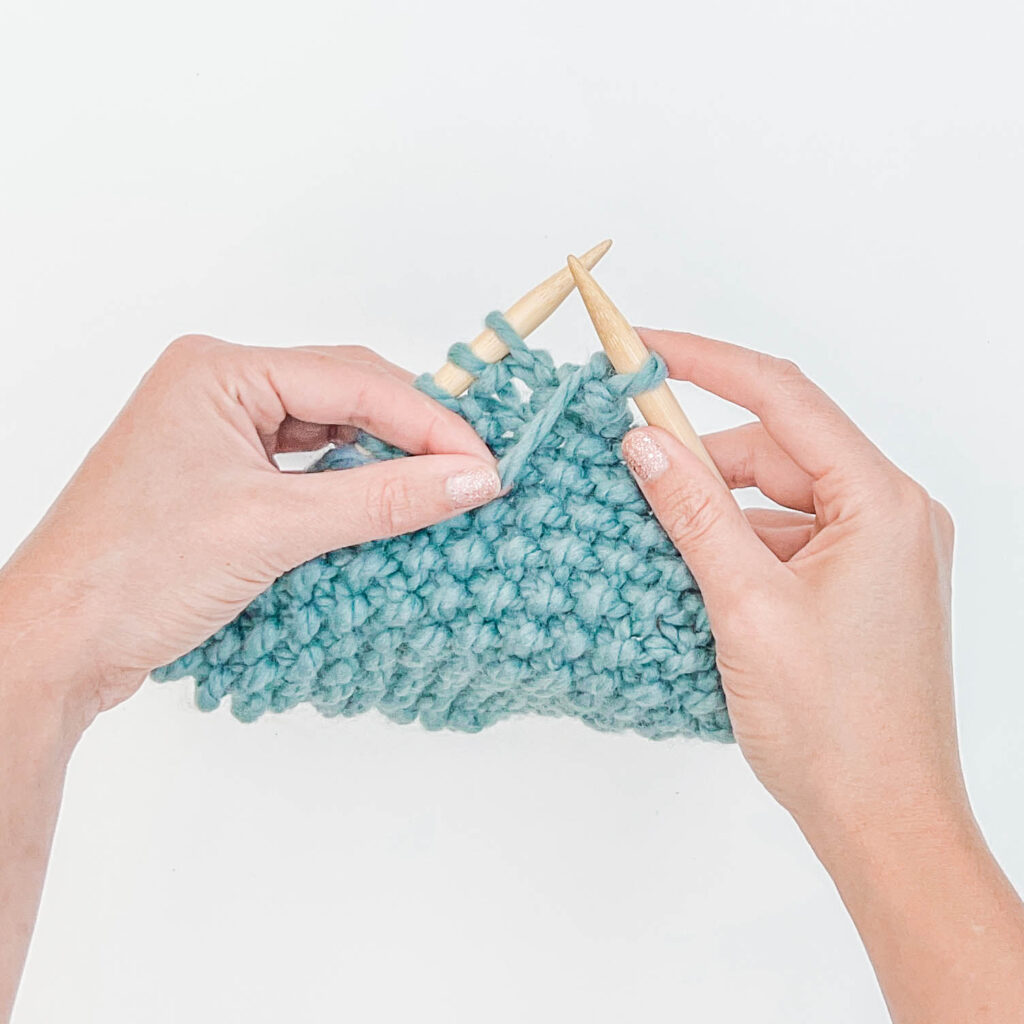
When moving between a knit stitch to a purl stitch, you’ll need to move your working yarn from the back of your work to the front (and back again!). Remember, when moving your strand back or forward, always bring the yarn between your needles rather than up and over them.
Bringing the yarn over your needle will accidentally create a new stitch (called a ‘yarn over’) on your needles. This will both widen your fabric and also break your stitch pattern. Read more about yarn overs here!
Being able to “read” your fabric by recognizing when a stitch is correct or incorrect in each row is an important skill. The seed stitch is slightly more challenging to read than stockinette or garter stitches. Each time you learn a new stitch it’s important to take the time to pause and look at your fabric periodically to check for mistakes.
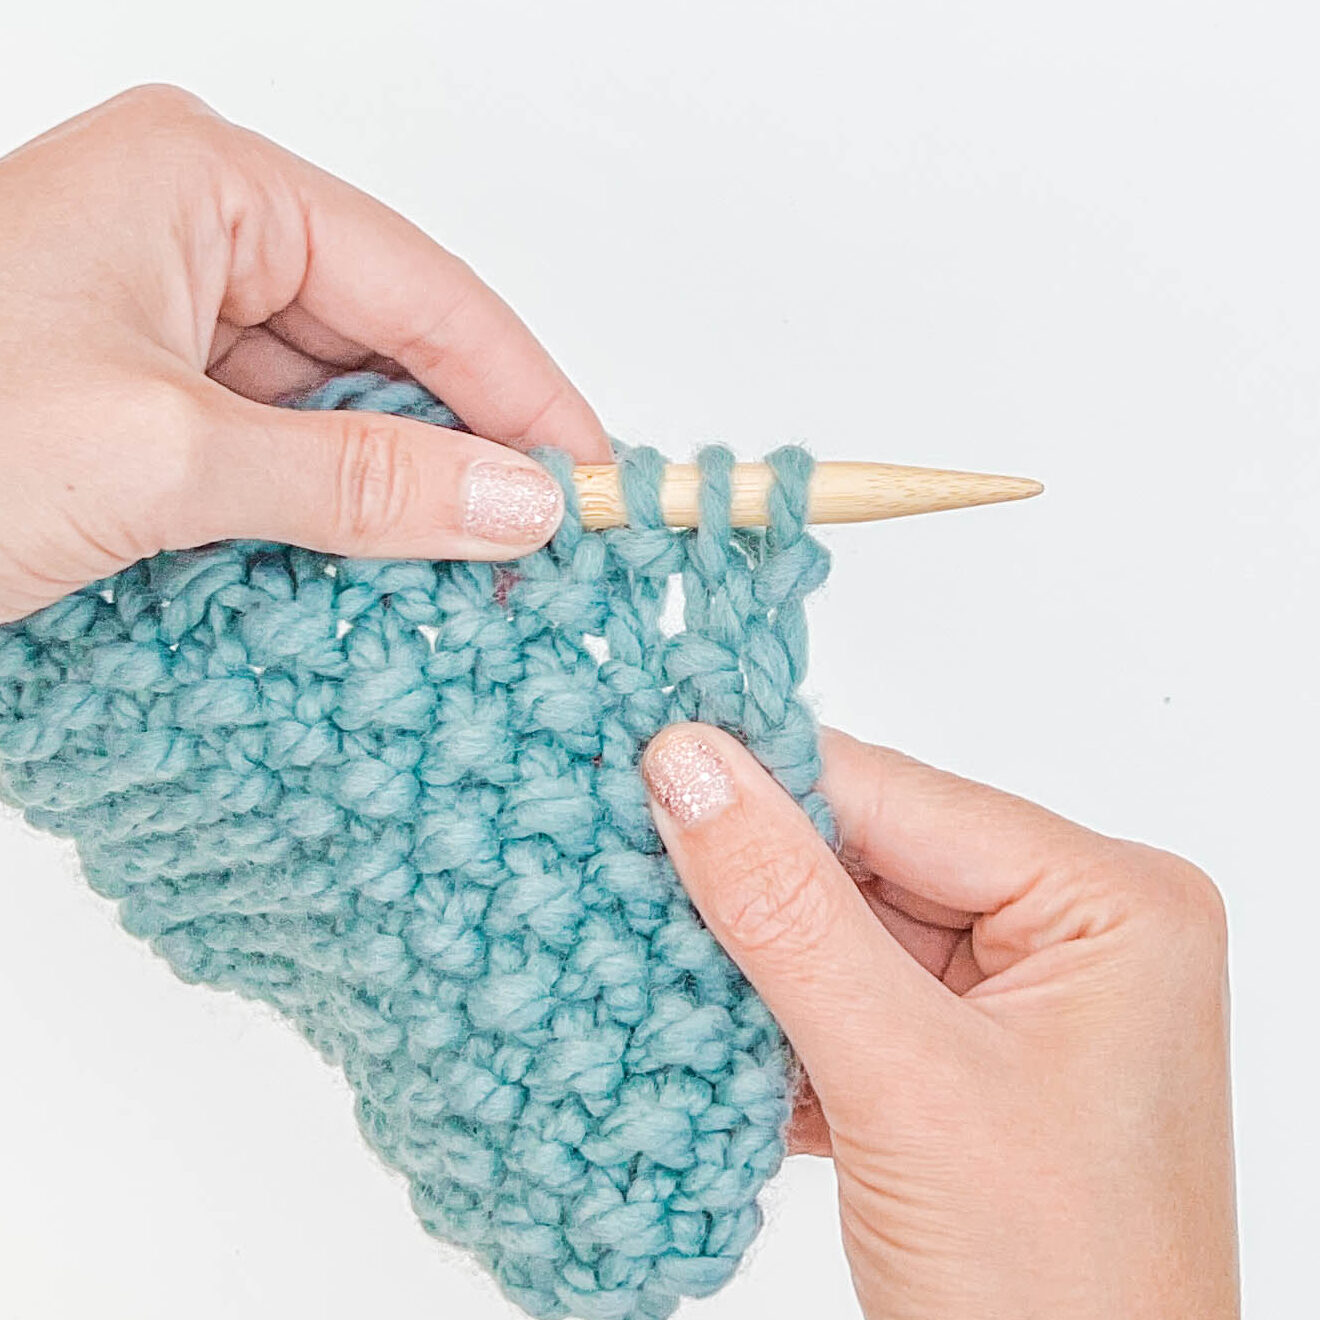
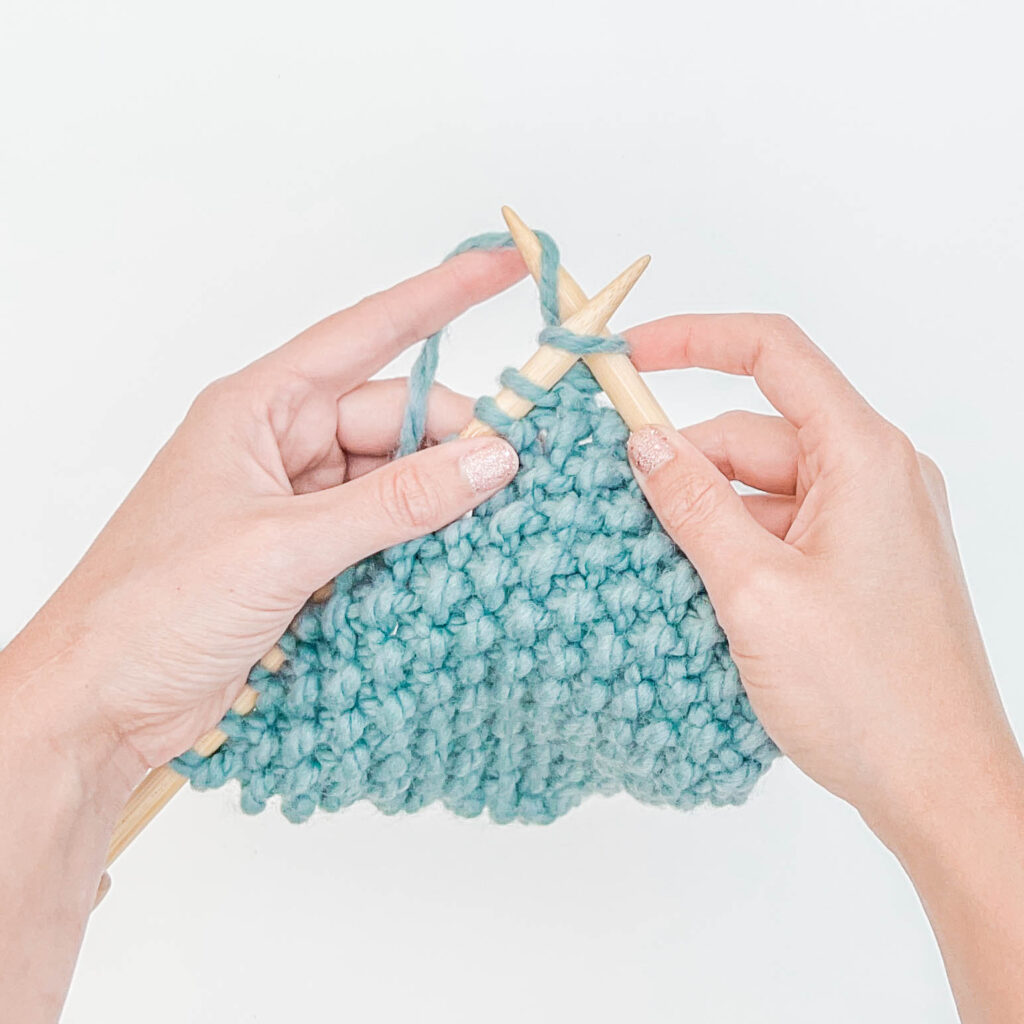
Here is an example of seed stitch fabric on the knitting needles. In this example, the first stitch at the needle tip is a purl, the middle is a knit, and the stitch furthest in is another purl.
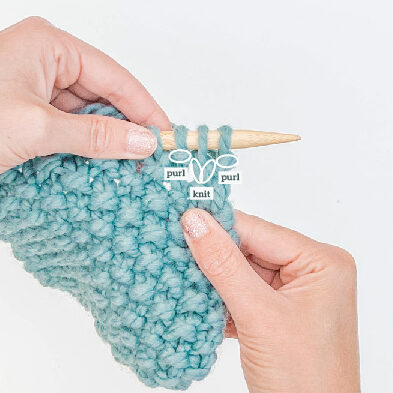
A purl stitch always has a little horizontal bar of fabric at the base called a ‘purl bump’ and a knit stitch has a ‘v’ of yarn.
We have a tip for easily knitting the seed stitch after the first row without having to memorize all the stitches in a row. In each row you’ll be doing the opposite of whatever the existing stitch is on your needle. If it’s a purl stitch (look for the ‘bump’!) then you should knit it. If it’s a knit stitch (look for the ‘v’!), purl it! Remembering to do the opposite of whatever the stitch looks like from the row before is an easy way to stay in the pattern.
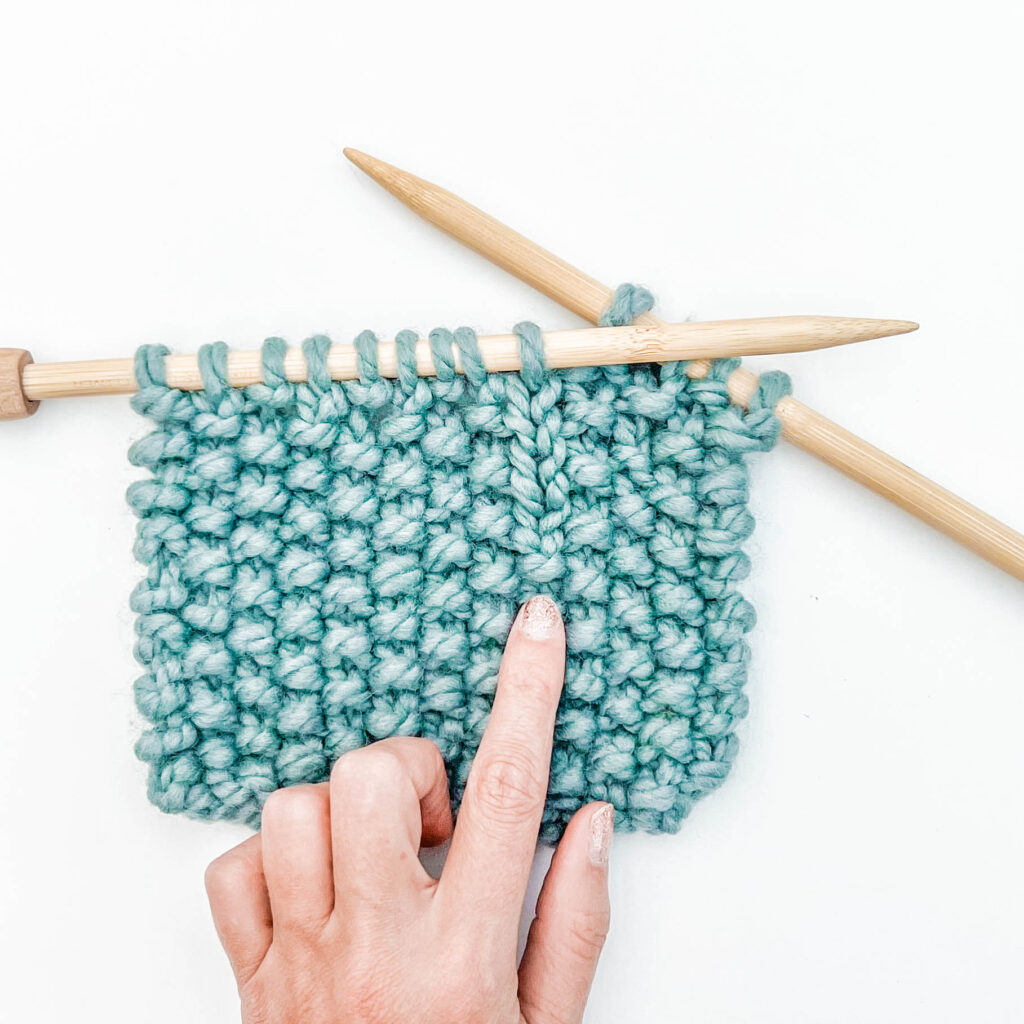
Forgetting which stitch comes next and accidentally purling when you’re supposed to be knitting happens all the time (and vice versa!). Make sure to study the next stitch on your needle carefully before working it. You can also work that stitch as you think and as soon as you put it on your right-hand needle look at it to make sure it looks the way it’s supposed to.
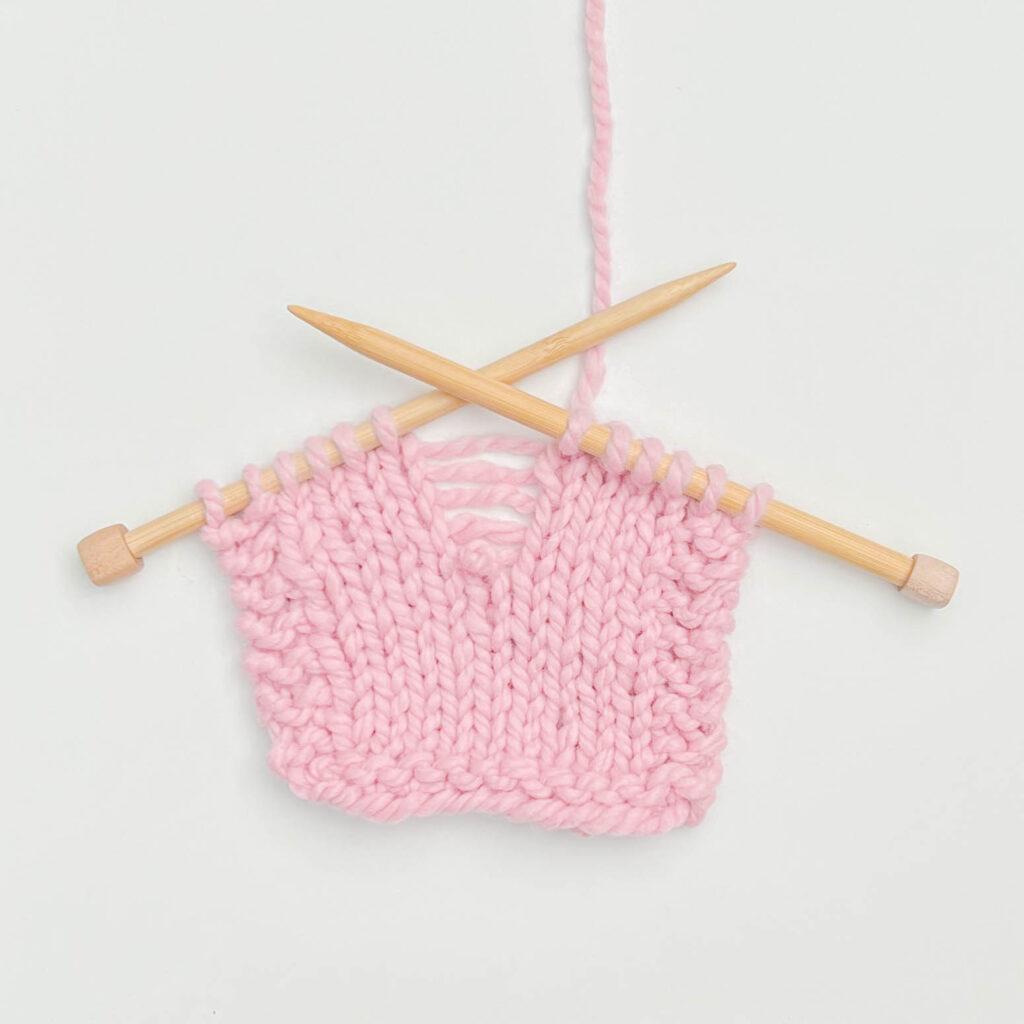
In the example above you can see a column of knit stitches. Oh no! To fix a mistake a few rows down in your knits is easy! Start by finding your mistake. Trace the stitch directly above it, working your way up the rows until you get to the stitch still on your knitting needle that connects back down to the mistake. On the next row, drop that single stitch off the needle when you come to it, unraveling it down until you get to your mistake. From here, you can follow our tutorial for picking up a dropped stitch!
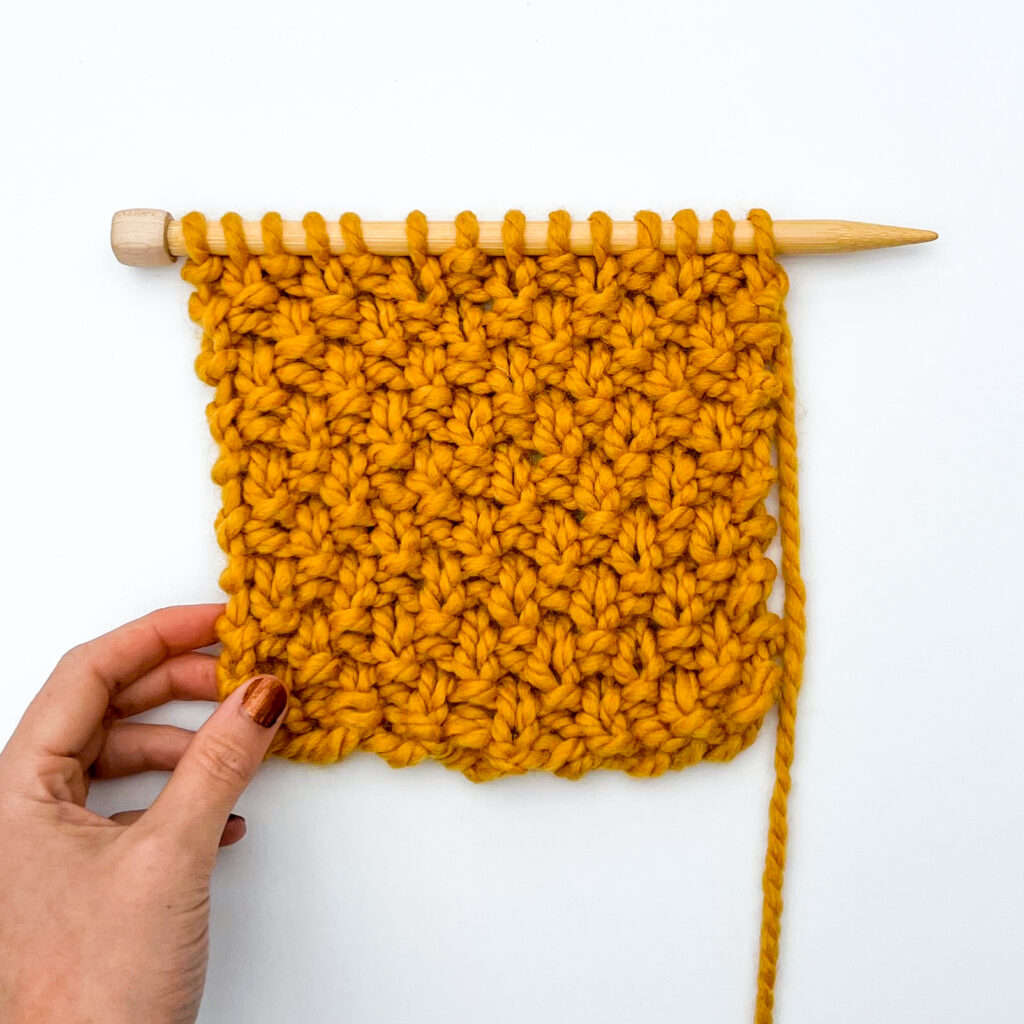
Like the look of seed stitch but want to try something new? Moss stitch is related to seed stitch and also creates a lovely textured fabric that doesn’t roll at the edges.
Need some help picking a project? Try using seed stitch for washcloths and dishcloths! The raised bumps add a soft-yet-sturdy scrubbing power that will get the job done. Other simple projects like blankets, scarves, and baby sweaters are great ways to showcase texture while keeping the knitting experience beginner-friendly.
Want to try it out on a free pattern? Check out these fantastic free seed stitch patterns on Ravelry!
