How to Knit Socks for New Knitters (Plus 20 Free Patterns!)
Let's learn all about knitting sock patterns!
Let's learn all about knitting sock patterns!
Socks are fun projects to knit year-round. Just imagine a drawer full of soft and cozy socks that don’t fall down as you walk — ah, the DREAM!
But sock knitting patterns can look intimidating to a new knitter. Well, I’m here to help! Today, we’re talking about how to knit socks, specific terms and techniques for knitting sock patterns, the different types of sock heels, fun patterns, and so much more.
“Are socks even beginner-friendly?” Actually, yes! There are quite a number of free beginner-friendly sock knitting patterns online ready to be added into your growing list of knitting projects.
Learning more about a topic is a fantastic way of removing the anxiety surrounding it. So let’s talk all about sock knitting patterns and other fun tidbits!
Disclaimer: This article contains links to external unaffiliated websites.
The yarn you use, your knitting needles, and the type of sock knitting pattern you follow can affect your knitting experience for any project. So we’re talking about all of that first!
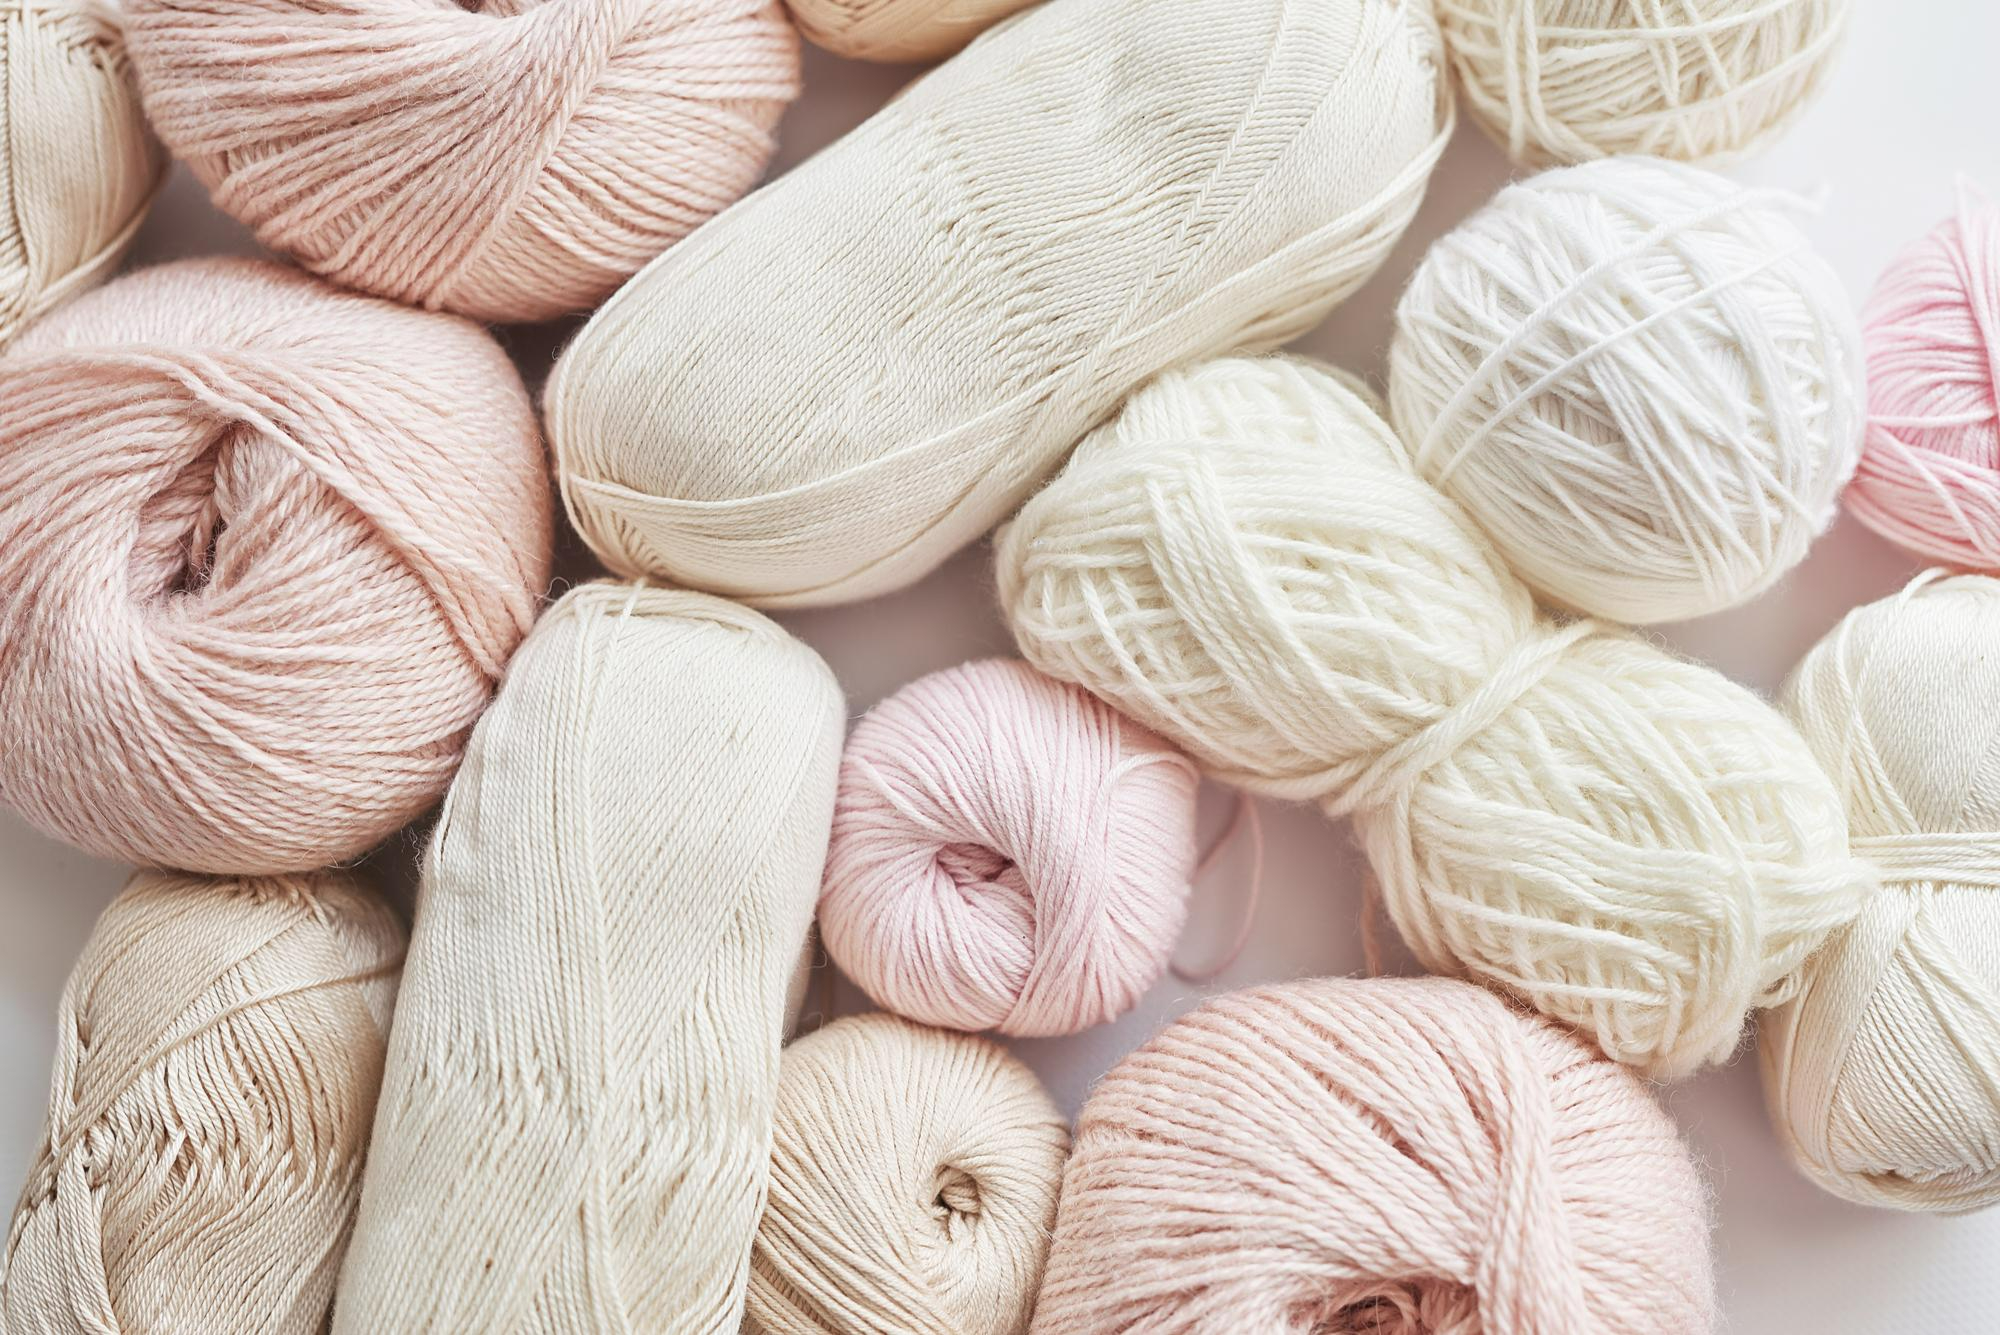
Yarn is SO important when it comes to knitting socks. You want a pair that’s comfortable, durable, and fit your feet like a…. glove? Oh, you know what I mean!
Different fibers have different qualities. Synthetic fibers like acrylic and nylon are durable and tend to be machine-washable. Animal fibers like wool are super stretchy, breathable, and durable too but they need to be hand-washed. On the other hand, natural fibers like cotton and bamboo are breathable and gentle to your skin — but aren’t as stretchy and definitely can sag over time compared to the other two fiber types.
Yarn weight is also another factor worth considering. Typically, knitting sock patterns feature thin, fingering weight yarn resulting in a breathable pair of socks that are thin enough to be worn with a pair of shoes.
There are also chunky sock knitting patterns that call for, you guessed it, chunky yarn! These types of socks can be worn during rainy days spent lounging around at home in place of a pair of slippers.
Learn more about yarn weights!
Another important thing to consider are your knitting needles. Knitting needles come in different sizes and materials. For beginners, I encourage you to use wooden knitting needles. These are easier to work with and prevent your yarn from slipping off! Make sure the size needle you’re using works with the yarn you picked. Ideally, both the yarn weight and needle sizes will match what the pattern recommends. Not sure? Then it’s time to knit a gauge swatch to make sure everything matches the way it should!
There are two types of knitting needles frequently used for knitting sock patterns: Circular Knitting Needles and Double Pointed Needles (DPN). Both needle types can be used to knit in the round and have different pros/cons. Let’s talk a bit about both styles!
Circular knitting needles are AMAZING for projects knitted in the round. These types of needles have a tube or cord attached joining two pointed tips together.
Socks are projects you DO NOT want to slip off your needles. Especially when you’re working around the heels. So these circular knitting needles can be a life-saver. They are a life-saver when it comes to knitting those awkward angles around the heel and toe, plus you’re able to take breaks in between without worrying that your loops will slip off.
There are two sub-categories of circular knitting needles: fixed circular knitting needles and the interchangeable circular knitting needles.
In order to use circular knitting needles for socks you’ll either need to find a set of “short circular knitting needles” (super small to match the circumference of your sock!) or use the magic loop method to make a long set work.
DPN or Double-pointed knitting needles is another type of knitting needle perfect for projects that require a lot of flexibility. These needles are straight and have a point on each end. They come in a set (typically 4-6 needles) so that you can set them up in a circle to knit sock cuffs, toes, and heels!
DPNs are the perfect tool for stretchy sock cuffs. One BIG con, however, is that DPNs tend to be shorter and don’t have stitch “stoppers” on the other end so your stitches may slip off at some point and that can be frustrating for beginners to deal with.
Learn more about knitting needles for beginners!
Aside from knitting needles, you need other tools to have an easier knitting experience. These are:
Lastly, your knit sock patterns should be beginner-friendly. In order for a pattern to be beginner-friendly, it should:
We have a more in-depth article all about finding beginner-friendly knitting patterns. Read all about it here:
FINDING EASY KNITTING PATTERNS: 10+ FREE ROUND UPS!
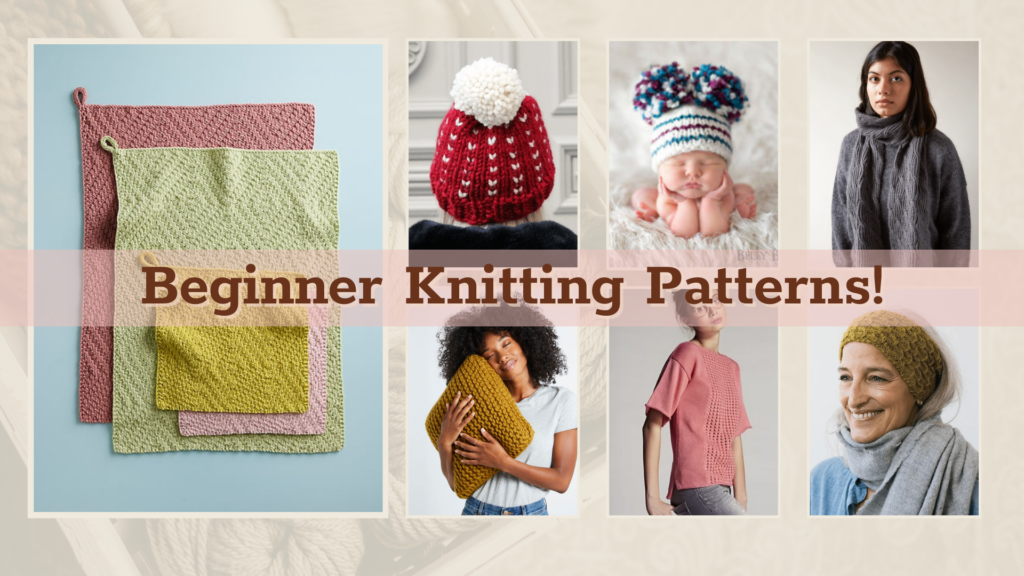
Beginner-friendly sock knitting patterns should only use the basic knitting stitches and easy-to-follow techniques such as the knit and purl stitch, a stretchy cast on, and one or two new techniques like the ribbed stitch.
Here are our top recommendations:
There are two ways to start knitting sock patterns: Cuff-Down and Toe-Up (We’ll talk about these in a bit!). Your cast on method will depend on which end you start. So we’re going to touch on some of the best ways to start off your socks:
German Twisted Cast On
The German Twisted Cast On is perfect for stretchy knits. It’s also perfect for cuff-down socks! This method creates a suuuper stretchy edge that ensures a perfectly-fitting sock cuff.
It’s a bit awkward to work on but you won’t ever regret learning this cast on! Here’s an easy step-by-step tutorial to help you out:
Long Tail Tubular Stretchy Cast On
The Long Tail Tubular Cast On is a great all-purpose cast on technique that is frequently used in a variety of knitted projects, including cuff-down socks.
It has similar hand movements to the German twisted cast on. But it’s just a bit simpler to do. Here’s a tutorial to help you along:
Judy’s Magic Cast On
The Judy’s Magic Cast On is a great method to use for seamless, toe-up sock patterns! Say ‘goodbye’ to that annoying seamline at the tip of your socks. This cast on technique will give you the smoothest and most seamless toes ever!
Here’s a video to help you out:
Learn More Cast On Techniques!
Sock knitting patterns for beginners typically use simple knitting stitches. So here’s a short list of the common ones you’ll find in most patterns and videos on how to do them yourself!
Stockinette Stitch
The Stockinette Stitch is created by alternating one knit stitch row and one purl row. You will see the stockinette stitch used in a variety of different projects like beanies, blankets, and socks.
One caveat with this stitch, however, is that it tends to curl up due to differences in tension of the knit and purl rows. But you can easily remedy this by creating a rib stitch or a garter stitch edge!
Rib Stitch
A sure-fire way to knit a stretchy project is to use the Rib Stitch. Knitters often use the rib stitch to create the sock cuffs. Rib stitches are made by alternating the knit stitch and purl stitch in the same round.
Here’s a tutorial on how to create stretchy rib stitches:
Time to bind off! There are a few great ways you can bind off your socks and they’re beginner-friendly too!
Jeny’s Surprisingly Stretchy Bind Off (JSSBO)
When it comes to stretchy knits like sock knitting patterns, Jeny’s Surprisingly Stretchy Bind Off (JSSBO) is hard to beat. This particular technique is super perfect for toe-up socks and so many other stretchy projects.
Don’t worry, we made sure to leave a tutorial video below!
Three-Needle Bind Off
Knitting some cuff-down sock patterns? The Three-Needle Bind Off could do the trick! This creates a seamless join that is invisible from the outside. Unfortunately, it does leave a seamline inside. Something that might feel annoying when wearing your knitted socks.
Learn More Bind Off Techniques!
New knitting projects often mean new terms to learn and memorize. Here are some common terms you’ll encounter as you learn how to knit socks:
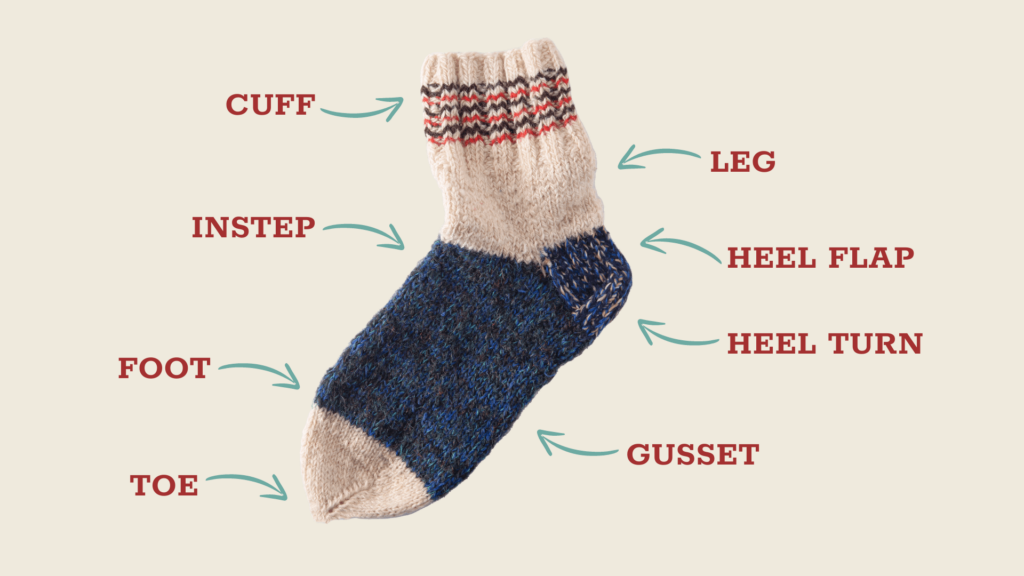
Sock Toe – This refers to the tip of your sock where your toes go. You can either start off your sock knitting patterns from the sock toe or start from the cuff down. Many knitters use a contrasting color to add a decorative feature to a plain knit!
Sock Foot – The area between the heel and the toe is the foot. This is the remaining length of the sock that you have to knit back and forth until you reach the right measurements to start knitting the toe.
If you’re working on toe-up sock knitting patterns, you’ll be knitting the sock foot before starting on the heel onwards.
Sock Cuff – This part refers to the stretchy opening at the top of the sock. The cuff is usually created using the rib stitch so that it’s extra stretchy (easy to put on and comfy to wear).
Sock Leg – The sock leg is the part that covers your shin. This part is usually plain stockinette stitch or whatever the overall stitch pattern is.
Some sock patterns skip the sock leg and carry the rib stitch cuff pattern until you reach the heel flap.
Heel Flap – If you’re working on top-down sock knitting patterns, you will be knitting the heel flap right after the sock leg. This part is often knitted back and forth using a simple repeating slip stitch repeat and sits at the back of your heel. This section will also usually have a special slip stitch pattern to make a thicker/denser fabric. Hopefully this extra thickness will keep your socks from wearing out too soon!
Switching to a different color for your sock heels can level up the look and I highly encourage you to try this out!
Turn Heel/Heel Turn – This is the little curve that cups your heel and is created using short rows that bend the sock into an “L-shape”.
Gusset and Instep – The gusset and instep are worked at the same time. The gusset is worked with decreases along the side of the sock in order to get rid of the extra stitches added when knitting the heel.
The instep simply refers to the top of the sock. Sometimes the same pattern of stitches are carried over from the sock leg to the instep, but not always.
Knitting sock patterns as a newbie comes with a lot of new challenges. So we made sure to add other useful tips that you may not know about!
Despite the standard sizing, we ALL have different feet. This means that some sock knitting patterns give you a sock that doesn’t quite fit your feet. So it’s time to take out your pen and paper and start taking your feet measurements.
Once you have these measurements, you can now add or subtract stitches according to your knitting gauge!
The heel, specifically the gusset, has some loose holes that can form gaps in your knits. You can solve this issue by picking up stitches from the back loops of your edge stitches.
The best way to care for hand knit socks is by washing them in cold water, using mild soap, AND through gentle hand washing. Some yarns can be machine washed in a gentle cycle, but others are strictly hand-wash only. So make sure to check your yarn labels!
Pausing to add yarn into your work can ruin your rhythm. It could also mean more yarn tails to weave in. You need a trusty method for joining yarn.
There are a few ways to join new yarn into your work. But our favorite is the Magic Knot. I made sure to attach an easy-to-follow tutorial below:
Knitting gauge can vary from one knitter to the next — even if you’re using the same exact materials! That means there’s a possibility that your socks will look and fit different from the sock knitting patterns you’re following.
This is where the knitting gauge helps out. Gauge is the number of stitches per inch in the finished fabric. We use this measurement so that knitters can match the designer’s tightness and achieve similar results.
We have a more in-depth tutorial on how to perform a gauge check. So make sure to check it out here:
You think you know everything there is about knitting socks and then BAM! you find this super long article showing all you didn’t know about our beloved cozy footwear!
There are two main ways you can knit socks: Toe-Up socks patterns and Cuff-down sock patterns. There’s no such thing as “the perfect sock knitting method”. Both of these have their own set of pros and cons.
Let’s talk about them:
Toe-Up Sock Knitting Patterns
Toe-up socks refer to patterns that ask you to begin knitting the sock starting with the toe!
Pros:
Cons:
Cuff-Down Sock Knitting Patterns
Cuff-down socks are patterns that start off knitting the cuff and ends at the toe.
Pros:
Cons:
Did you know that there are different ways to knit sock heels? Let’s talk about some of the simpler ones for beginners:
German Short Row – This is the easiest sock heel technique and can be used for both toe-up and cuff-down sock patterns. It creates a snug fit around your ankles, perfect for people with narrow feet.
Traditional Heel Flap – Mostly used for toe-up socks, this method is considered to be the “traditional” way of knitting heels as many socks throughout the decades have this type of heel. It has fallen out of favor because of how tricky it can be to knit.
Fish Lips Kiss Heel – Great for both cuff-down and toe-up sock patterns. Despite the silly name, it’s known for giving a seamless heel and toe. Yes, no holes, no picking up extra stitches, no fluff!
Square/Dutch Heel – The square or Dutch heel method is characterized by straight lines at the bottom of the heel and its square-ish shape. This method typically skips the gusset stitches and is great for people with smaller feet.
Round/French Heel – The round/French heel method is great for people with high insteps and works great with sock patterns of any stitch count and gauge.
Afterthought Heel – This peculiar heel knitting method involves knitting the full length of the sock and picking up the stitches in the heel at the end.
Forethought/ Peasant Heel – The forethought/peasant heel method involves using scrap yarn to “map out” the correct placement of your heel. Once you finish your sock, you will remove the scrap yarn and knit your heel in place.
All knitting projects must come to an end and we wanted to help make sure you love how your socks turn out. There are two things in the “end game” of knitting, well, anything. These are weaving in your ends and blocking. Let’s talk about them!
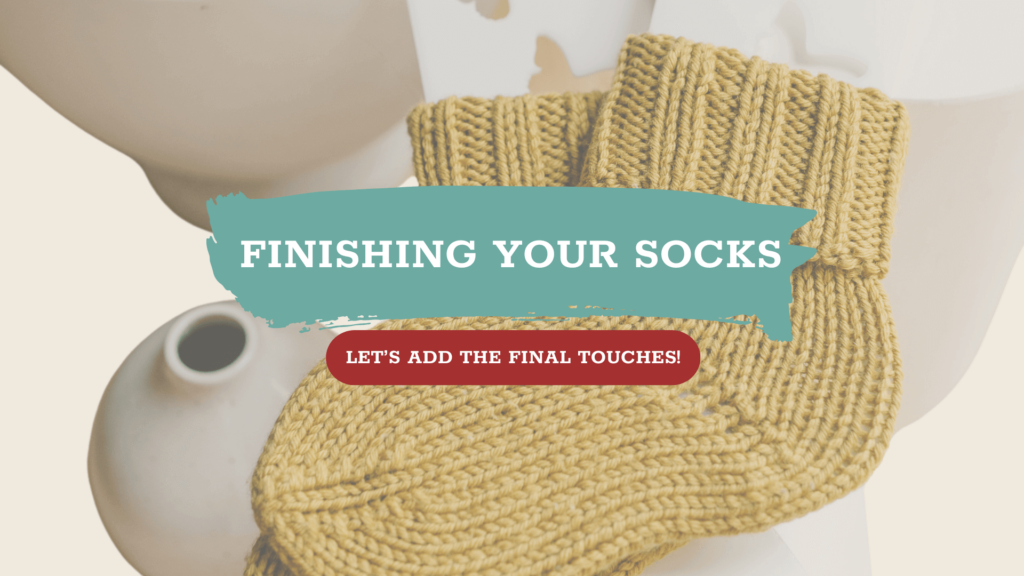
Once you’re done knitting your socks, it’s time to weave in your yarn tails! Weaving in your yarn tails secures your edges and stops your work from unraveling. But you also want to avoid your yarn tail coming loose and getting caught in between your toes every time you wear your socks.
It’s quite easy to weave in your ends. All you need is a darning needle, scissors, and this very beginner-friendly tutorial below!
“You can block socks?” Yes! You can pretty much block any flat knit. This is often done for wearable knits like dresses, sweaters, socks, and shirts.
There is a special way to block socks that give you the most perfectly-shaped pair. and it’s one using sock blockers. Sock Blockers are so helpful in ensuring that your socks retain its shape after every wash.
Here’s the best way to block your knitted socks:
Wet Blocking is when you fully saturate your knits with water, laying/pinning them in the shape you want, and leaving them out to dry. This is an amazing method for knitted clothing like sweaters, cardigans, and socks!
Learn How to Block Your knits!
Well who knew there was so much to learn about socks, huh? I was also really surprised at how much I was able to find when I was doing my research. Heck, I think there might even be other things that I may have missed. That’s how big to sock knitting ice berg is!
This article covered things like yarn, yarn material, the right knitting needles, and even new techniques that will help you as you learn how to knit socks. Cool, right? We even listed down the different ways to knit sock heels — a topic that took me by surprise when I first learned how to knit socks!
It can be easy to feel overwhelmed by the sheer volume of information you’re facing right now. My best advice is to find the easiest pattern, learn the easiest knitting technique, and find the simplest bind off method. This is what I usually do when it comes to new knitting projects!
Socks are fun projects once you get the hang of them. Here are some of our favorite sock knitting patterns for all skill levels:
Don’t limit your knitting skills to knitting needles alone! Here’s another way to knit your next favorite pairs of socks:


