Wrap and Turn Knitting
Create curves in your knits with short rows!
Create curves in your knits with short rows!
Wrap and turn is a common “short row” knitting technique used to shape specific areas such as sweater shoulders, necklines, or sock heels. This technique creates extra fabric knit back and forth in “short” rows, creating curves and angles in your design.
Short rows are one way to add shaping to knitting. These rows are called “short rows” because you turn your work before reaching the end of the row leaving the row only partially knit! When knitting short rows wrap and turn knitting is just one way to create that little wedge of extra fabric. You can also use other techniques like German short rows, Japanese short rows, and yarn over short row knitting methods to add shaping to projects. The big difference between these techniques is how you handle the stitches as you turn mid-row.
Wrap-and-turn knitting is a short-row method that involves wrapping the yarn around a stitch as you turn mid-row. The wrapped stitch helps to prevent holes from forming in the fabric where the short row starts and ends. The wrap is later picked up and knit with the stitch it wrapped to create an almost totally invisible turn.
While it may seem intimidating at first, the short rows wrap-and-turn knitting technique is a relatively easy technique that can be learned by beginners with a little bit of practice.
Ready to give it a try? Grab your needles and a practice swatch to get started!
Wrap and turn knitting always happens in three parts. 1. wrapping the stitch on the knit side. Working a specified number of stitches before 2. wrapping the stitch on the purl side and then 3. picking up both wrapped stitches for an invisible finish.
Some patterns may ask you to work wrap and turn knitting once, and some projects may have you work a series of stacked short rows to build up more fabric. These instructions will show you how to do the individual steps for wrap and turn short rows, make sure to follow your pattern instructions for when to work each step.
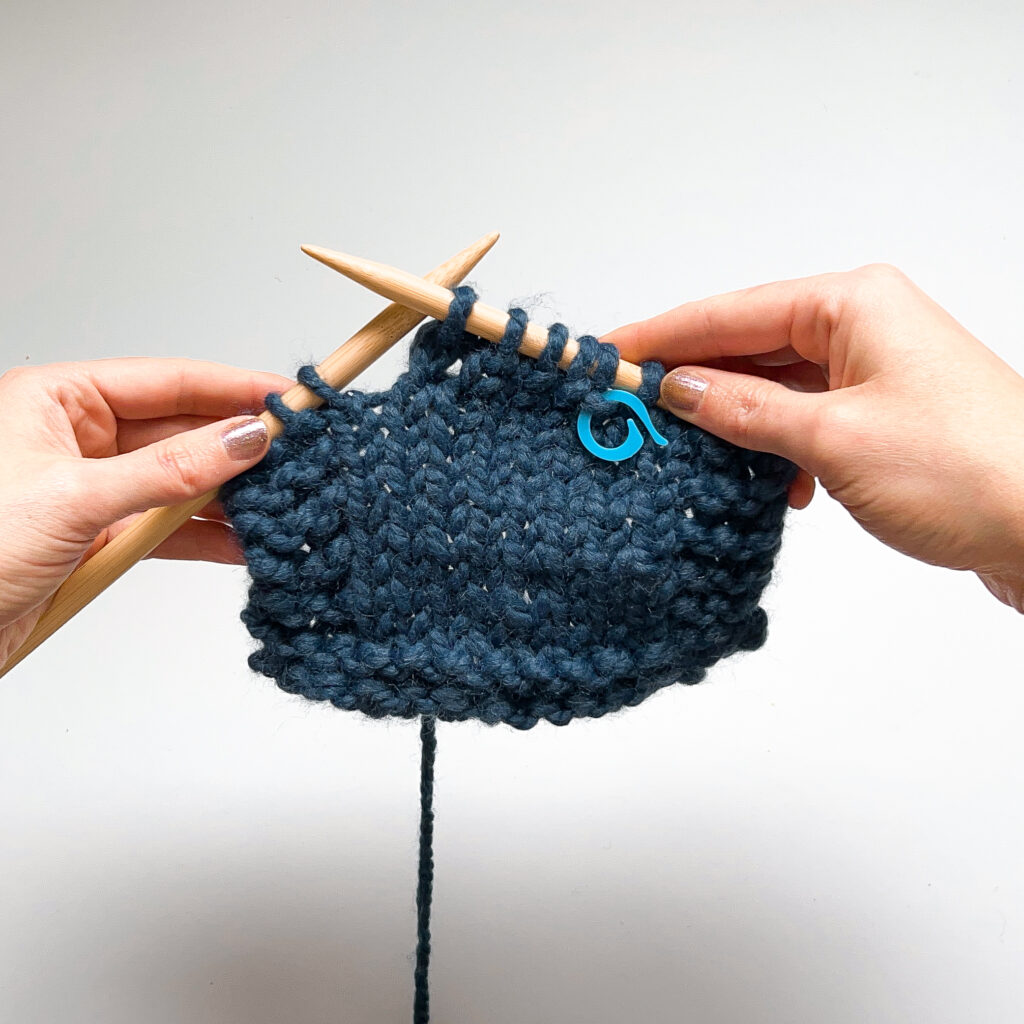
In this tutorial we’ll show you all of the steps for these short rows in a contrast (pink) yarn color to make it easy to see how the fabric is made. To knit short rows in a regular project make sure to use your project yarn.
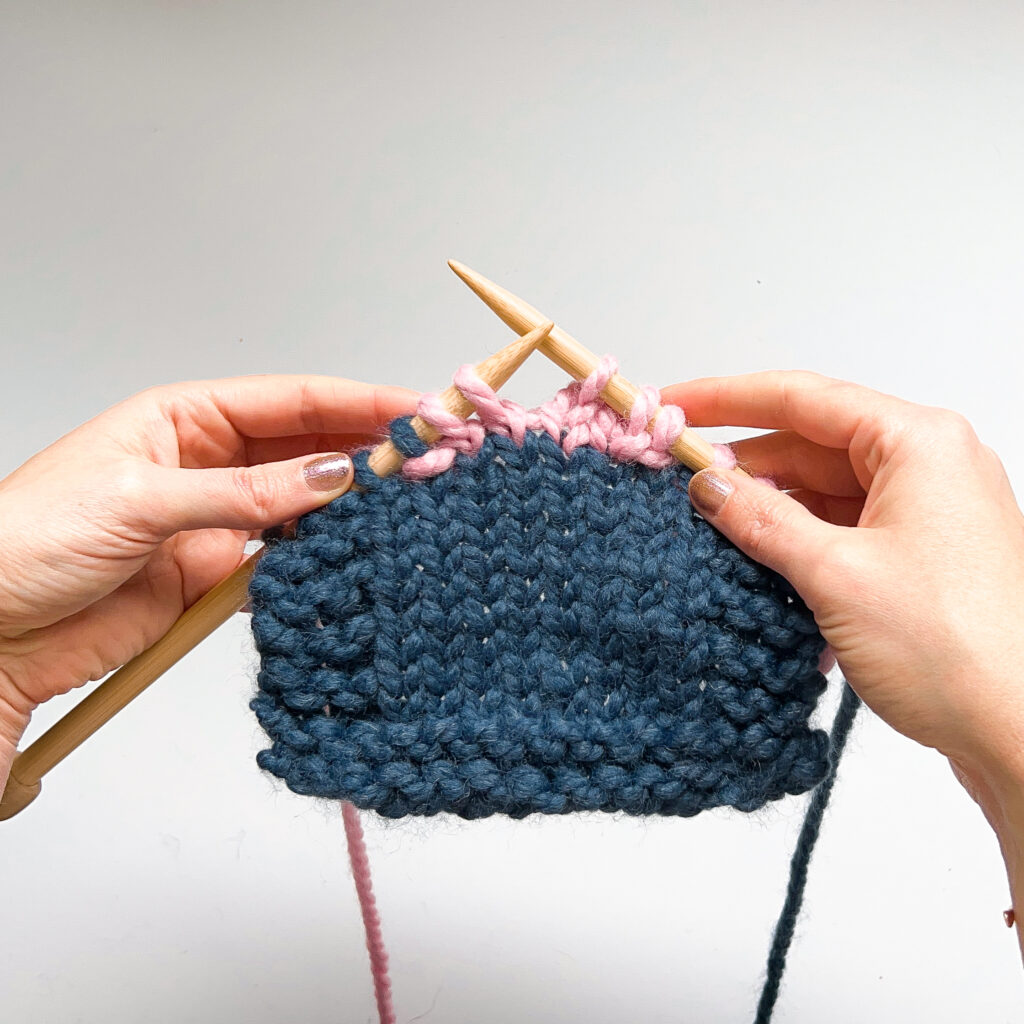
Knit until the stitch you want to wrap.

Step 1:
Insert the right needle purlwise through the stitch you want to wrap.
Step 2:
Slip the stitch from the left to right needle, purlwise.
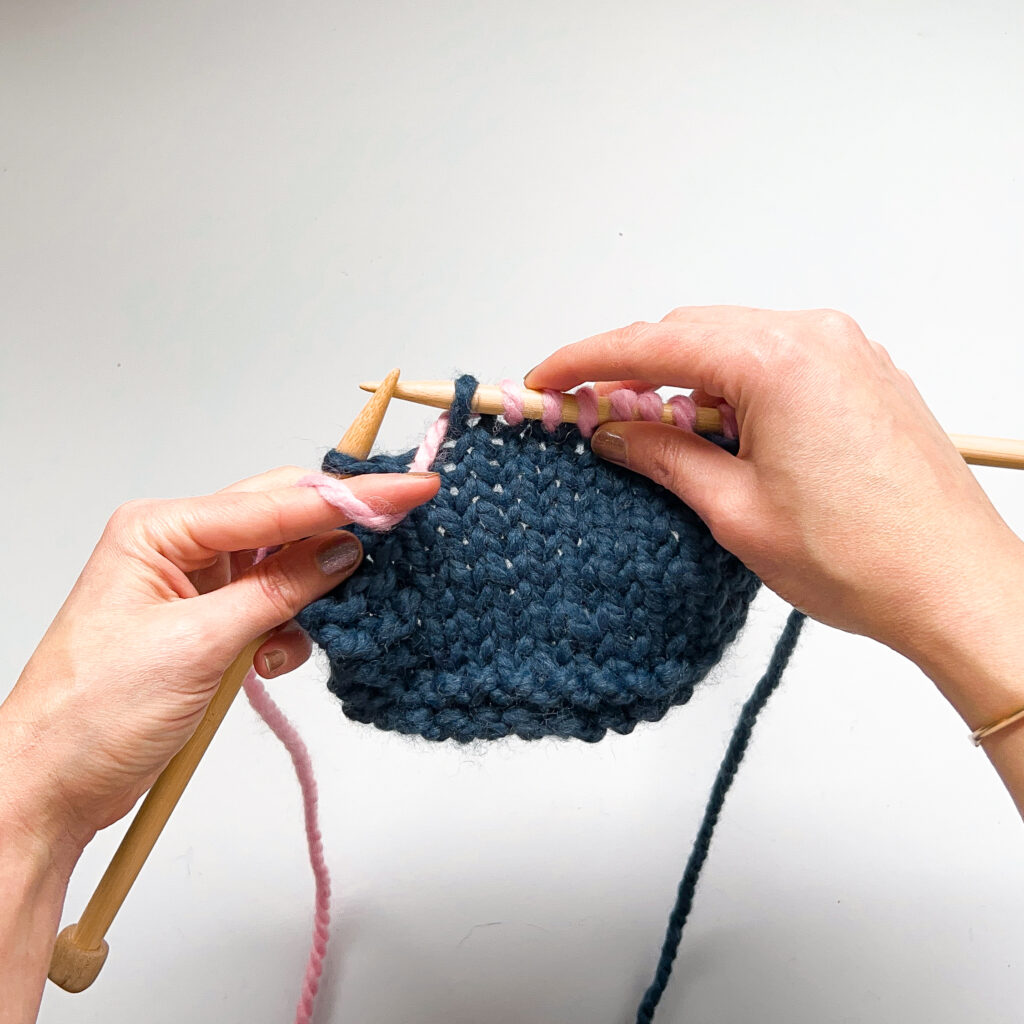
Step 3:
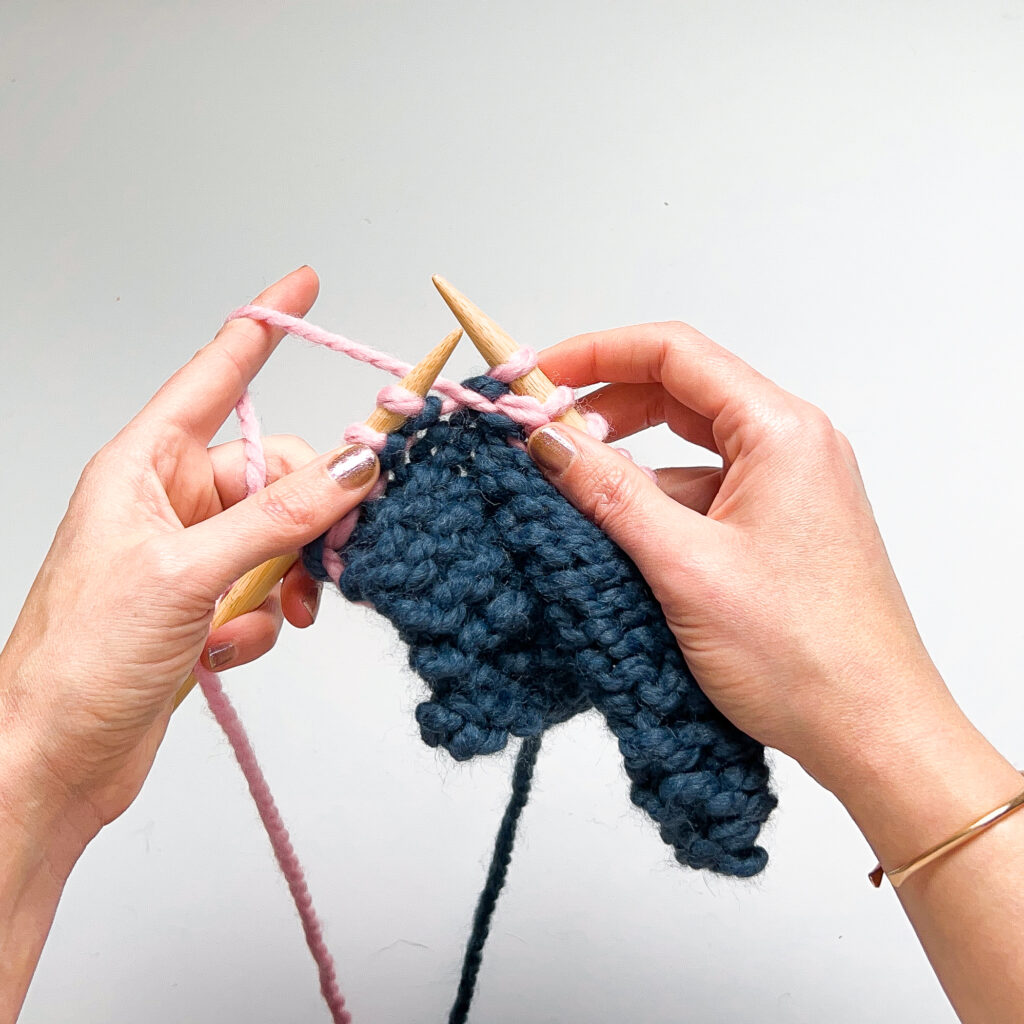
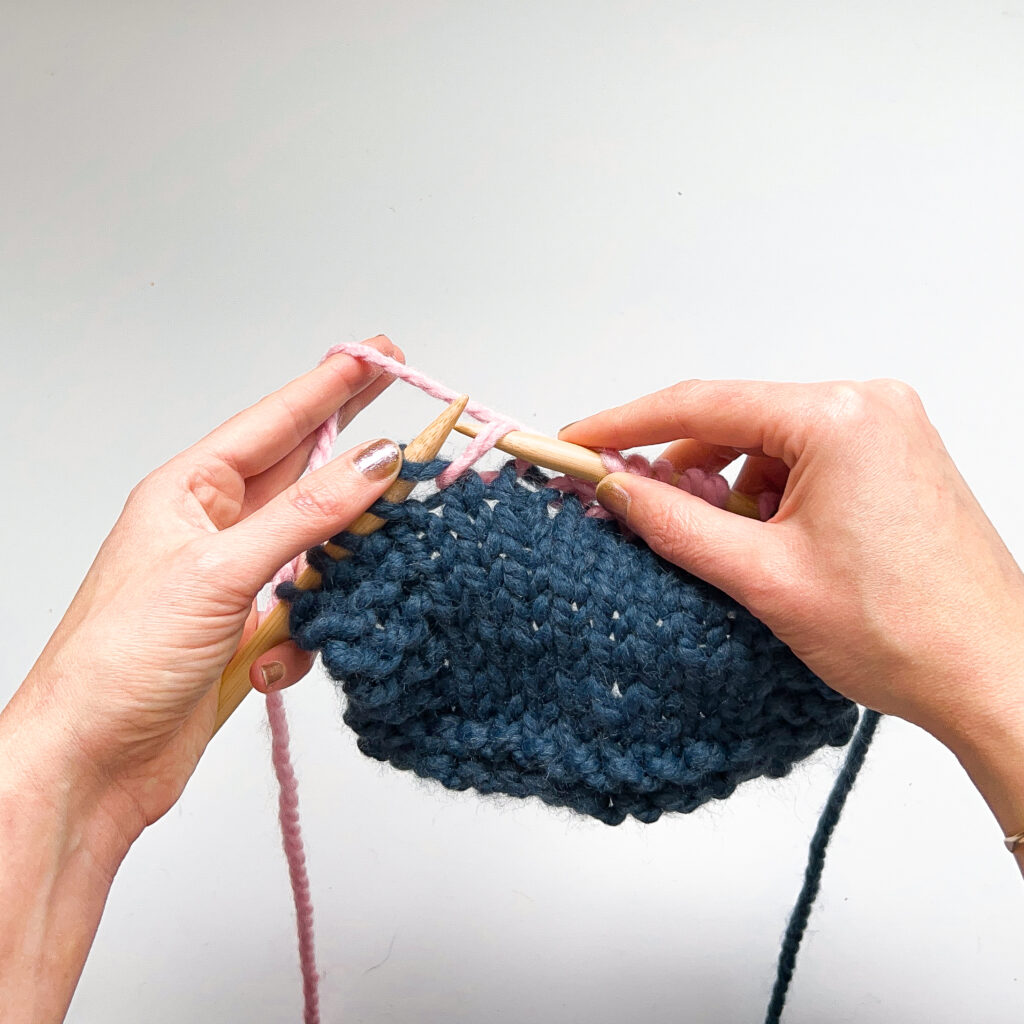
Bring the yarn to the front, between the needles.
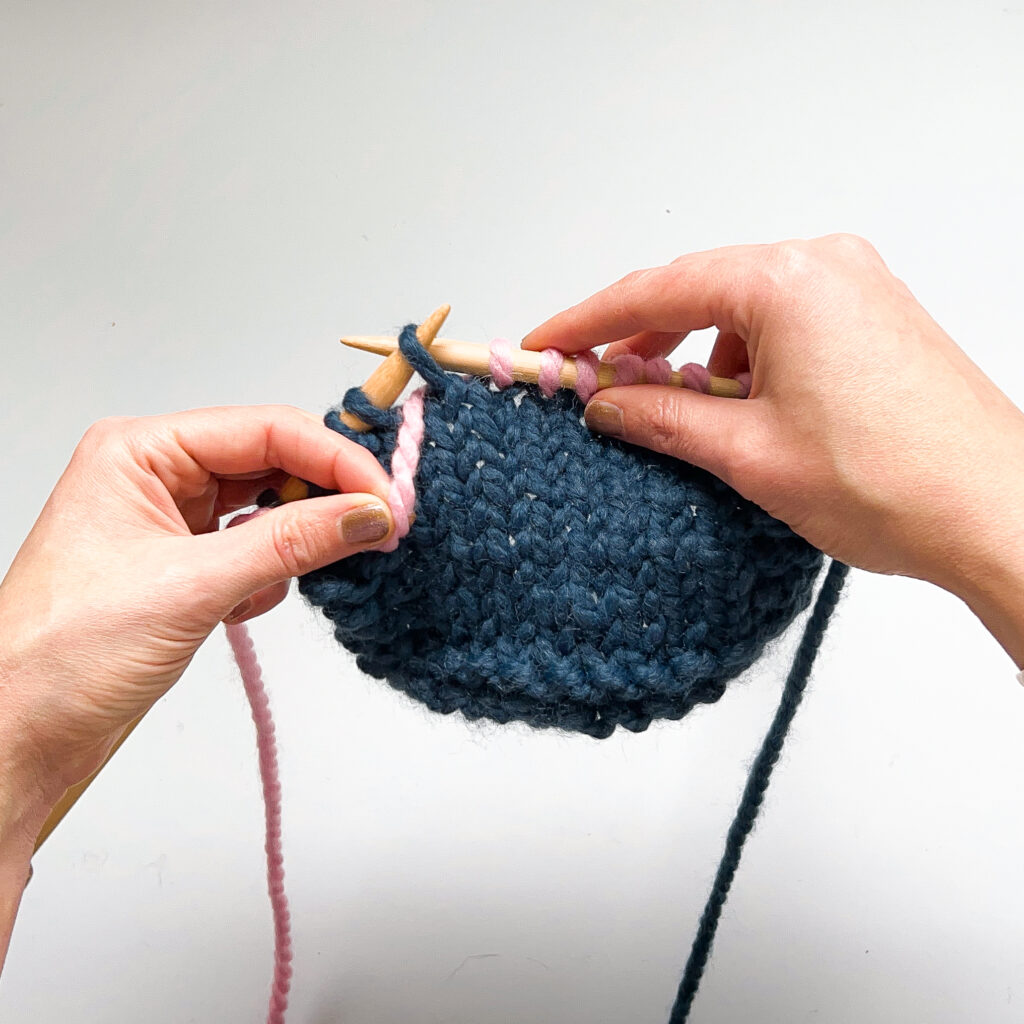
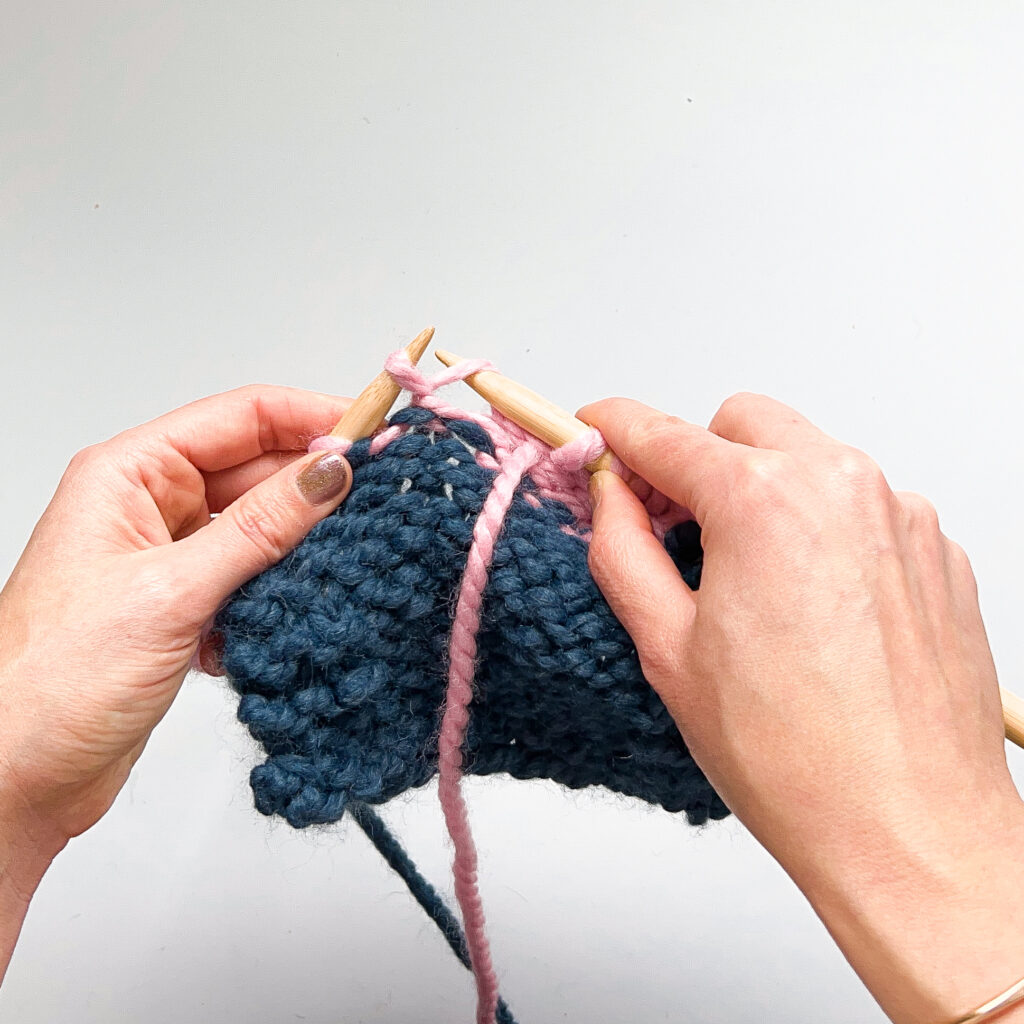
Step 4:
Slip the stitch back to the left needle.
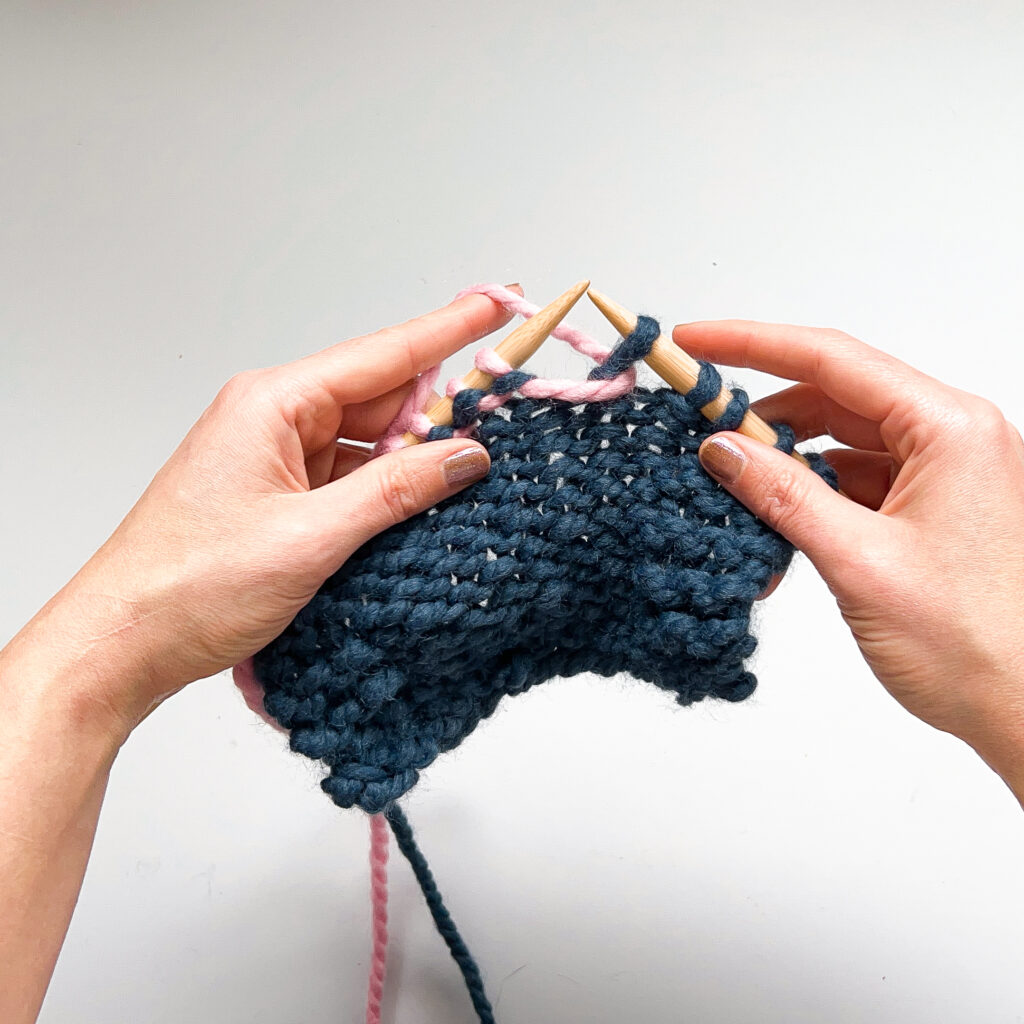
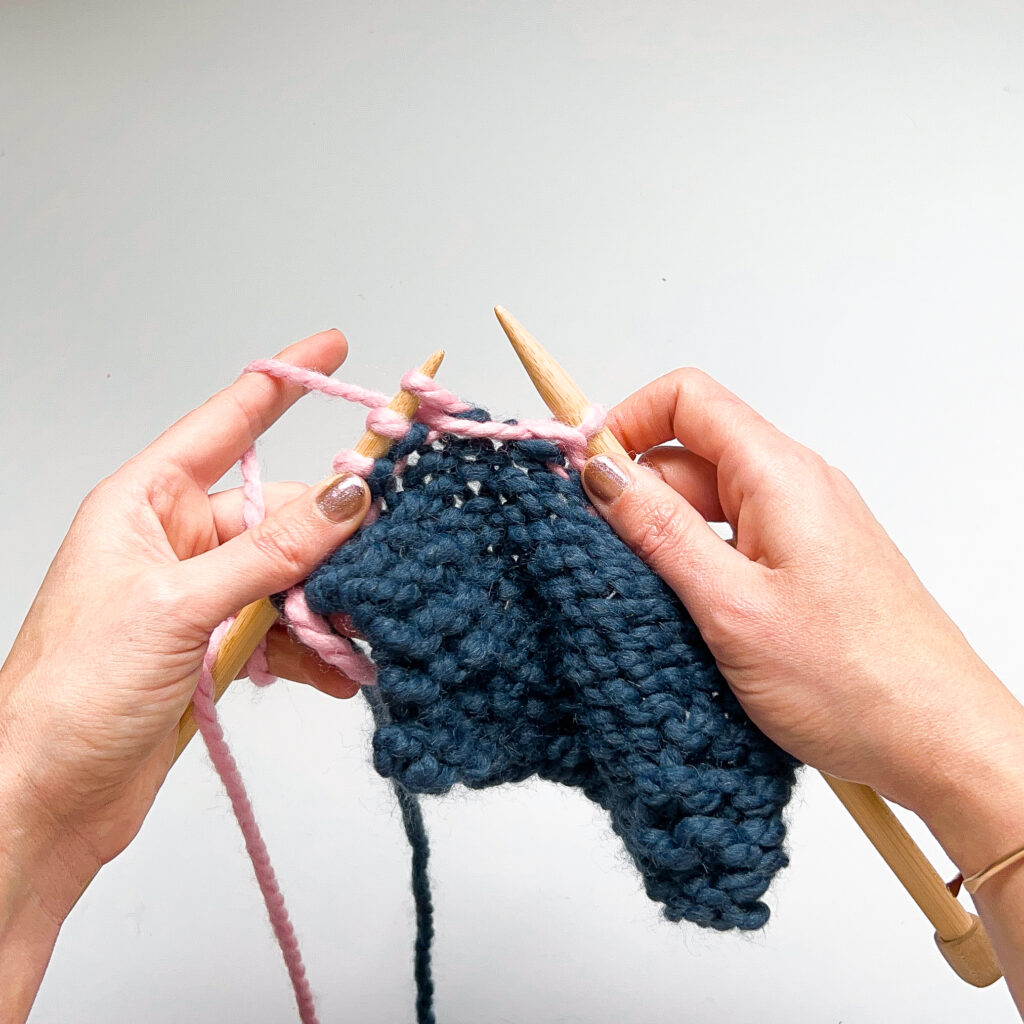
Step 5:
Turn your work.
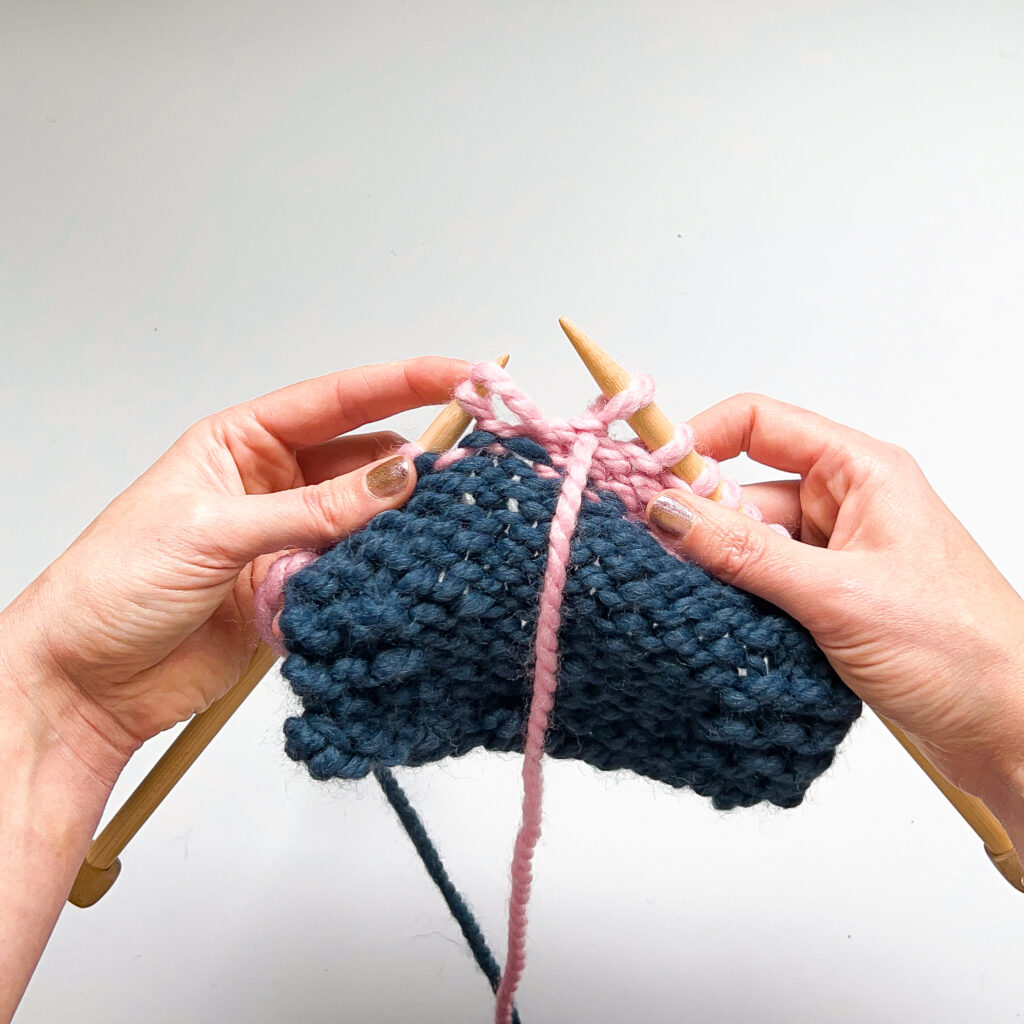
Step 6:
Finish wrapping the stitch by bringing the yarn to the front, between the knitting needles. You’re now ready to purl.
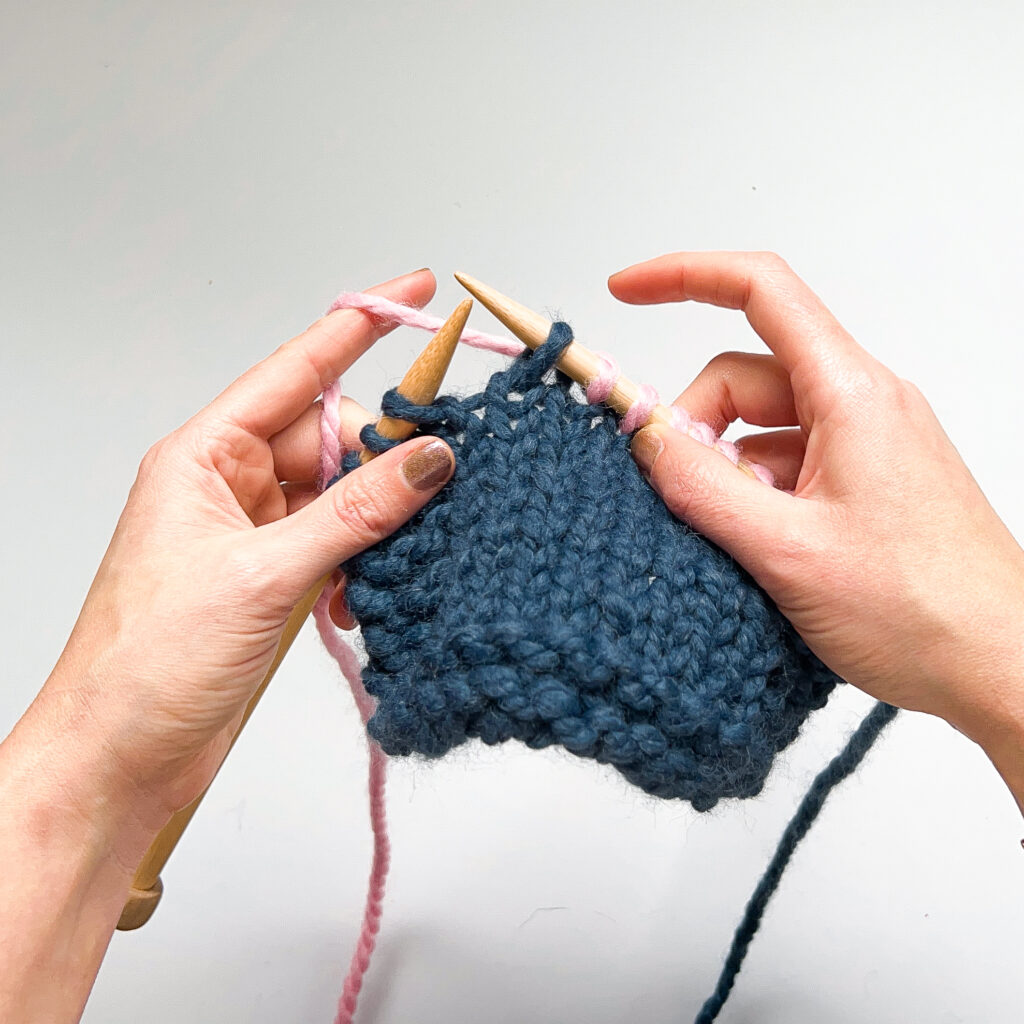
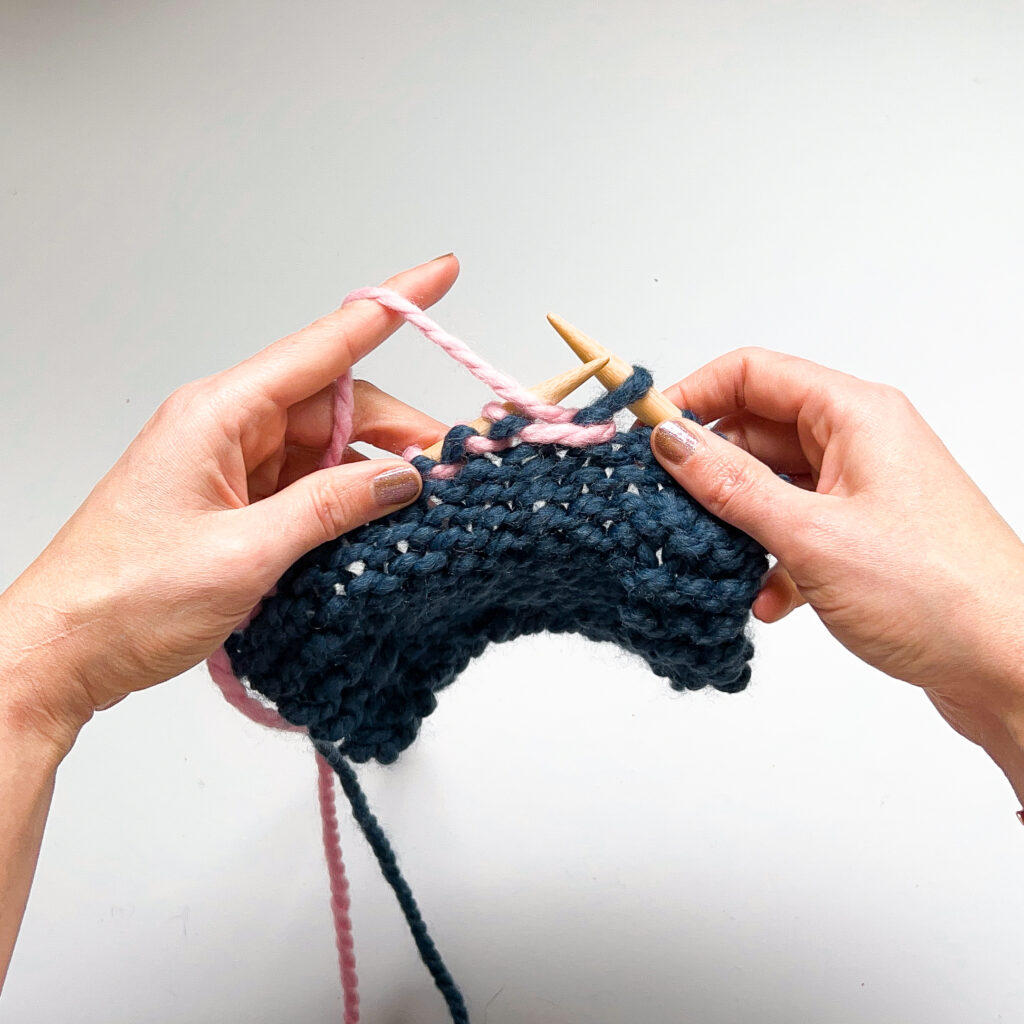
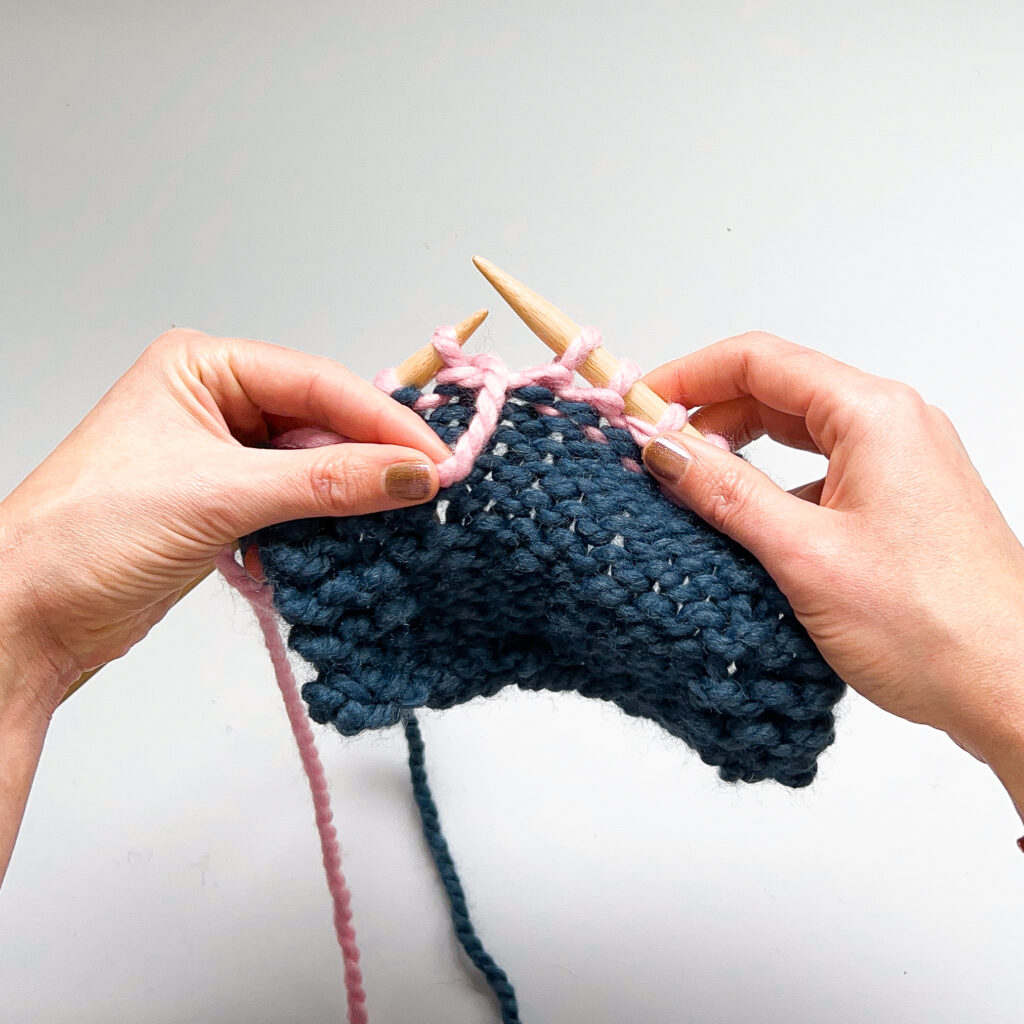
Purl until the stitch you’d like to wrap.
Step 1:
Slip the stitch from the left to right needle, purlwise.
Step 2:
Bring the yarn to the back, between the knitting needles.
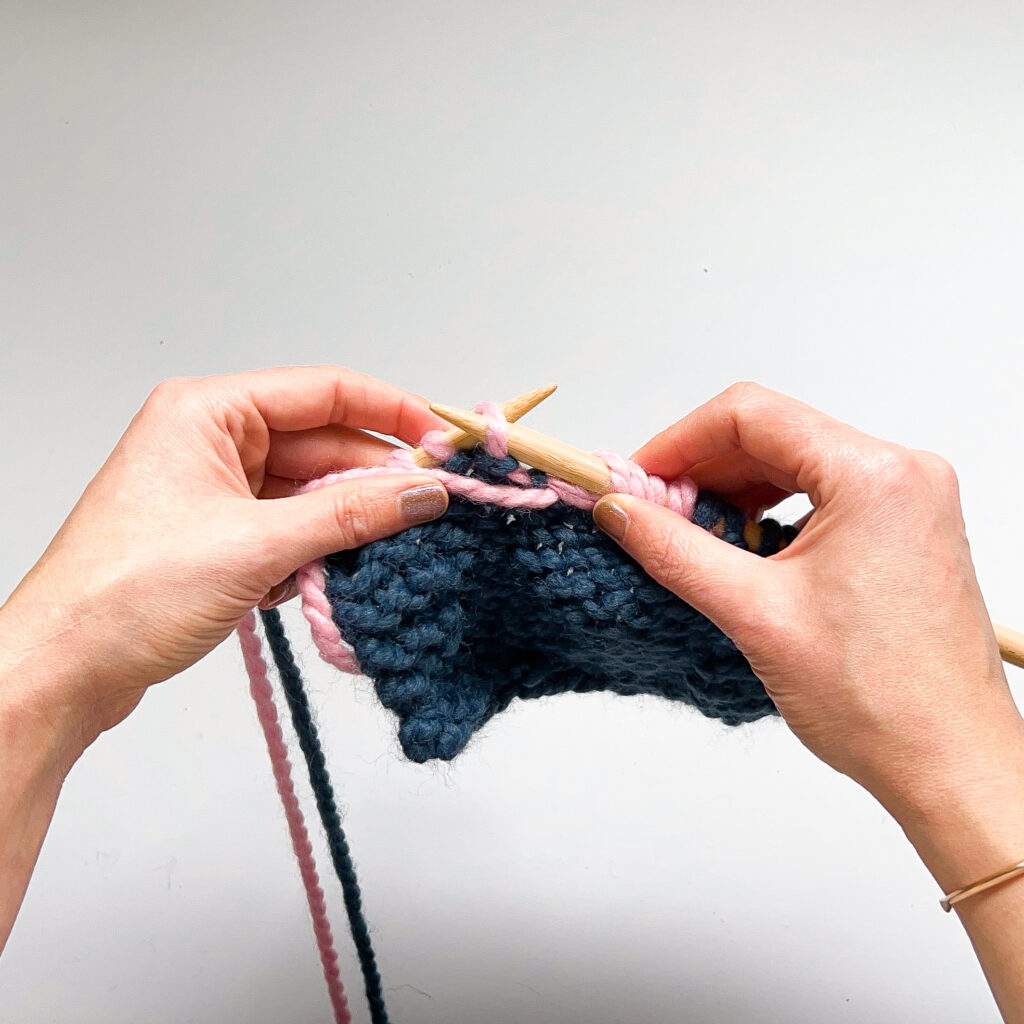
Step 3:
Slip the stitch back to the left needle.
Step 4:
Finish wrapping the stitch by bringing the yarn back between the knitting needles.
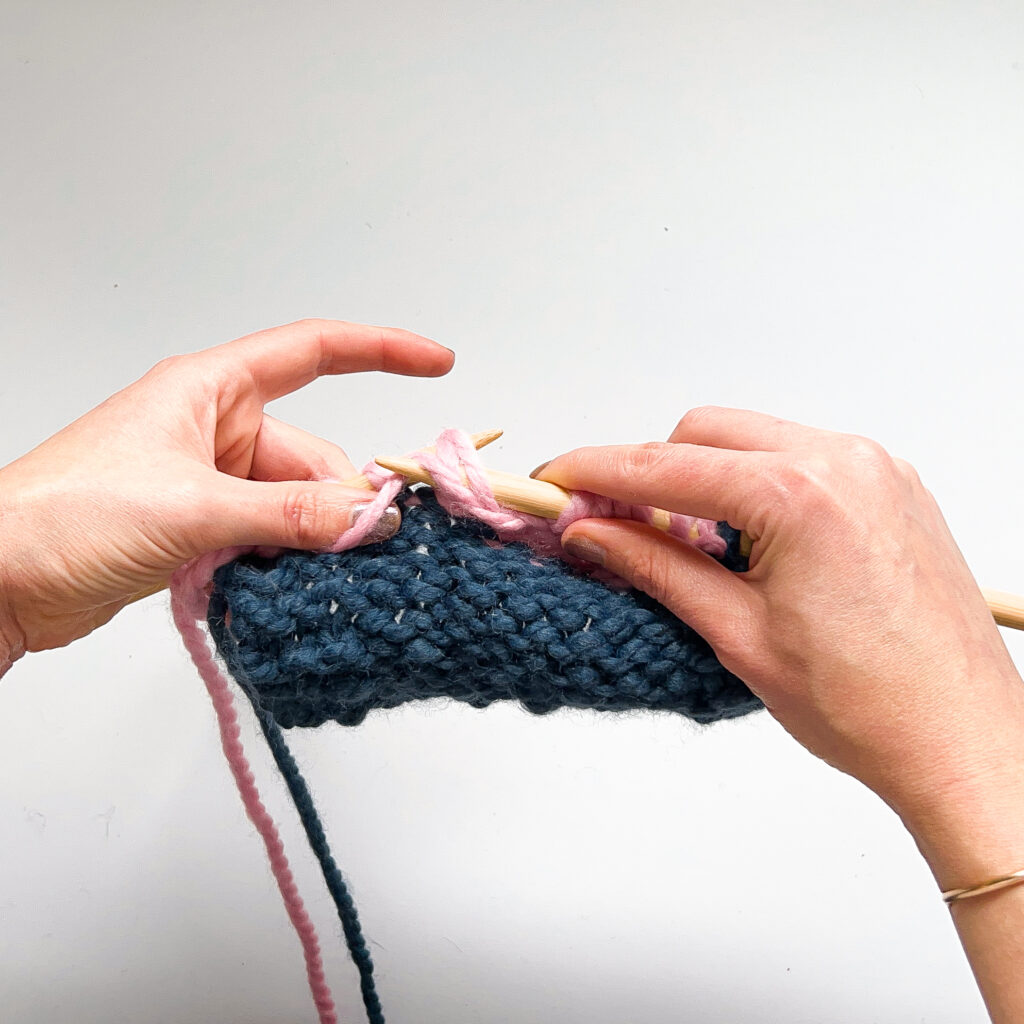
Step 5:
Turn, the yarn at the back of your work ready to knit.
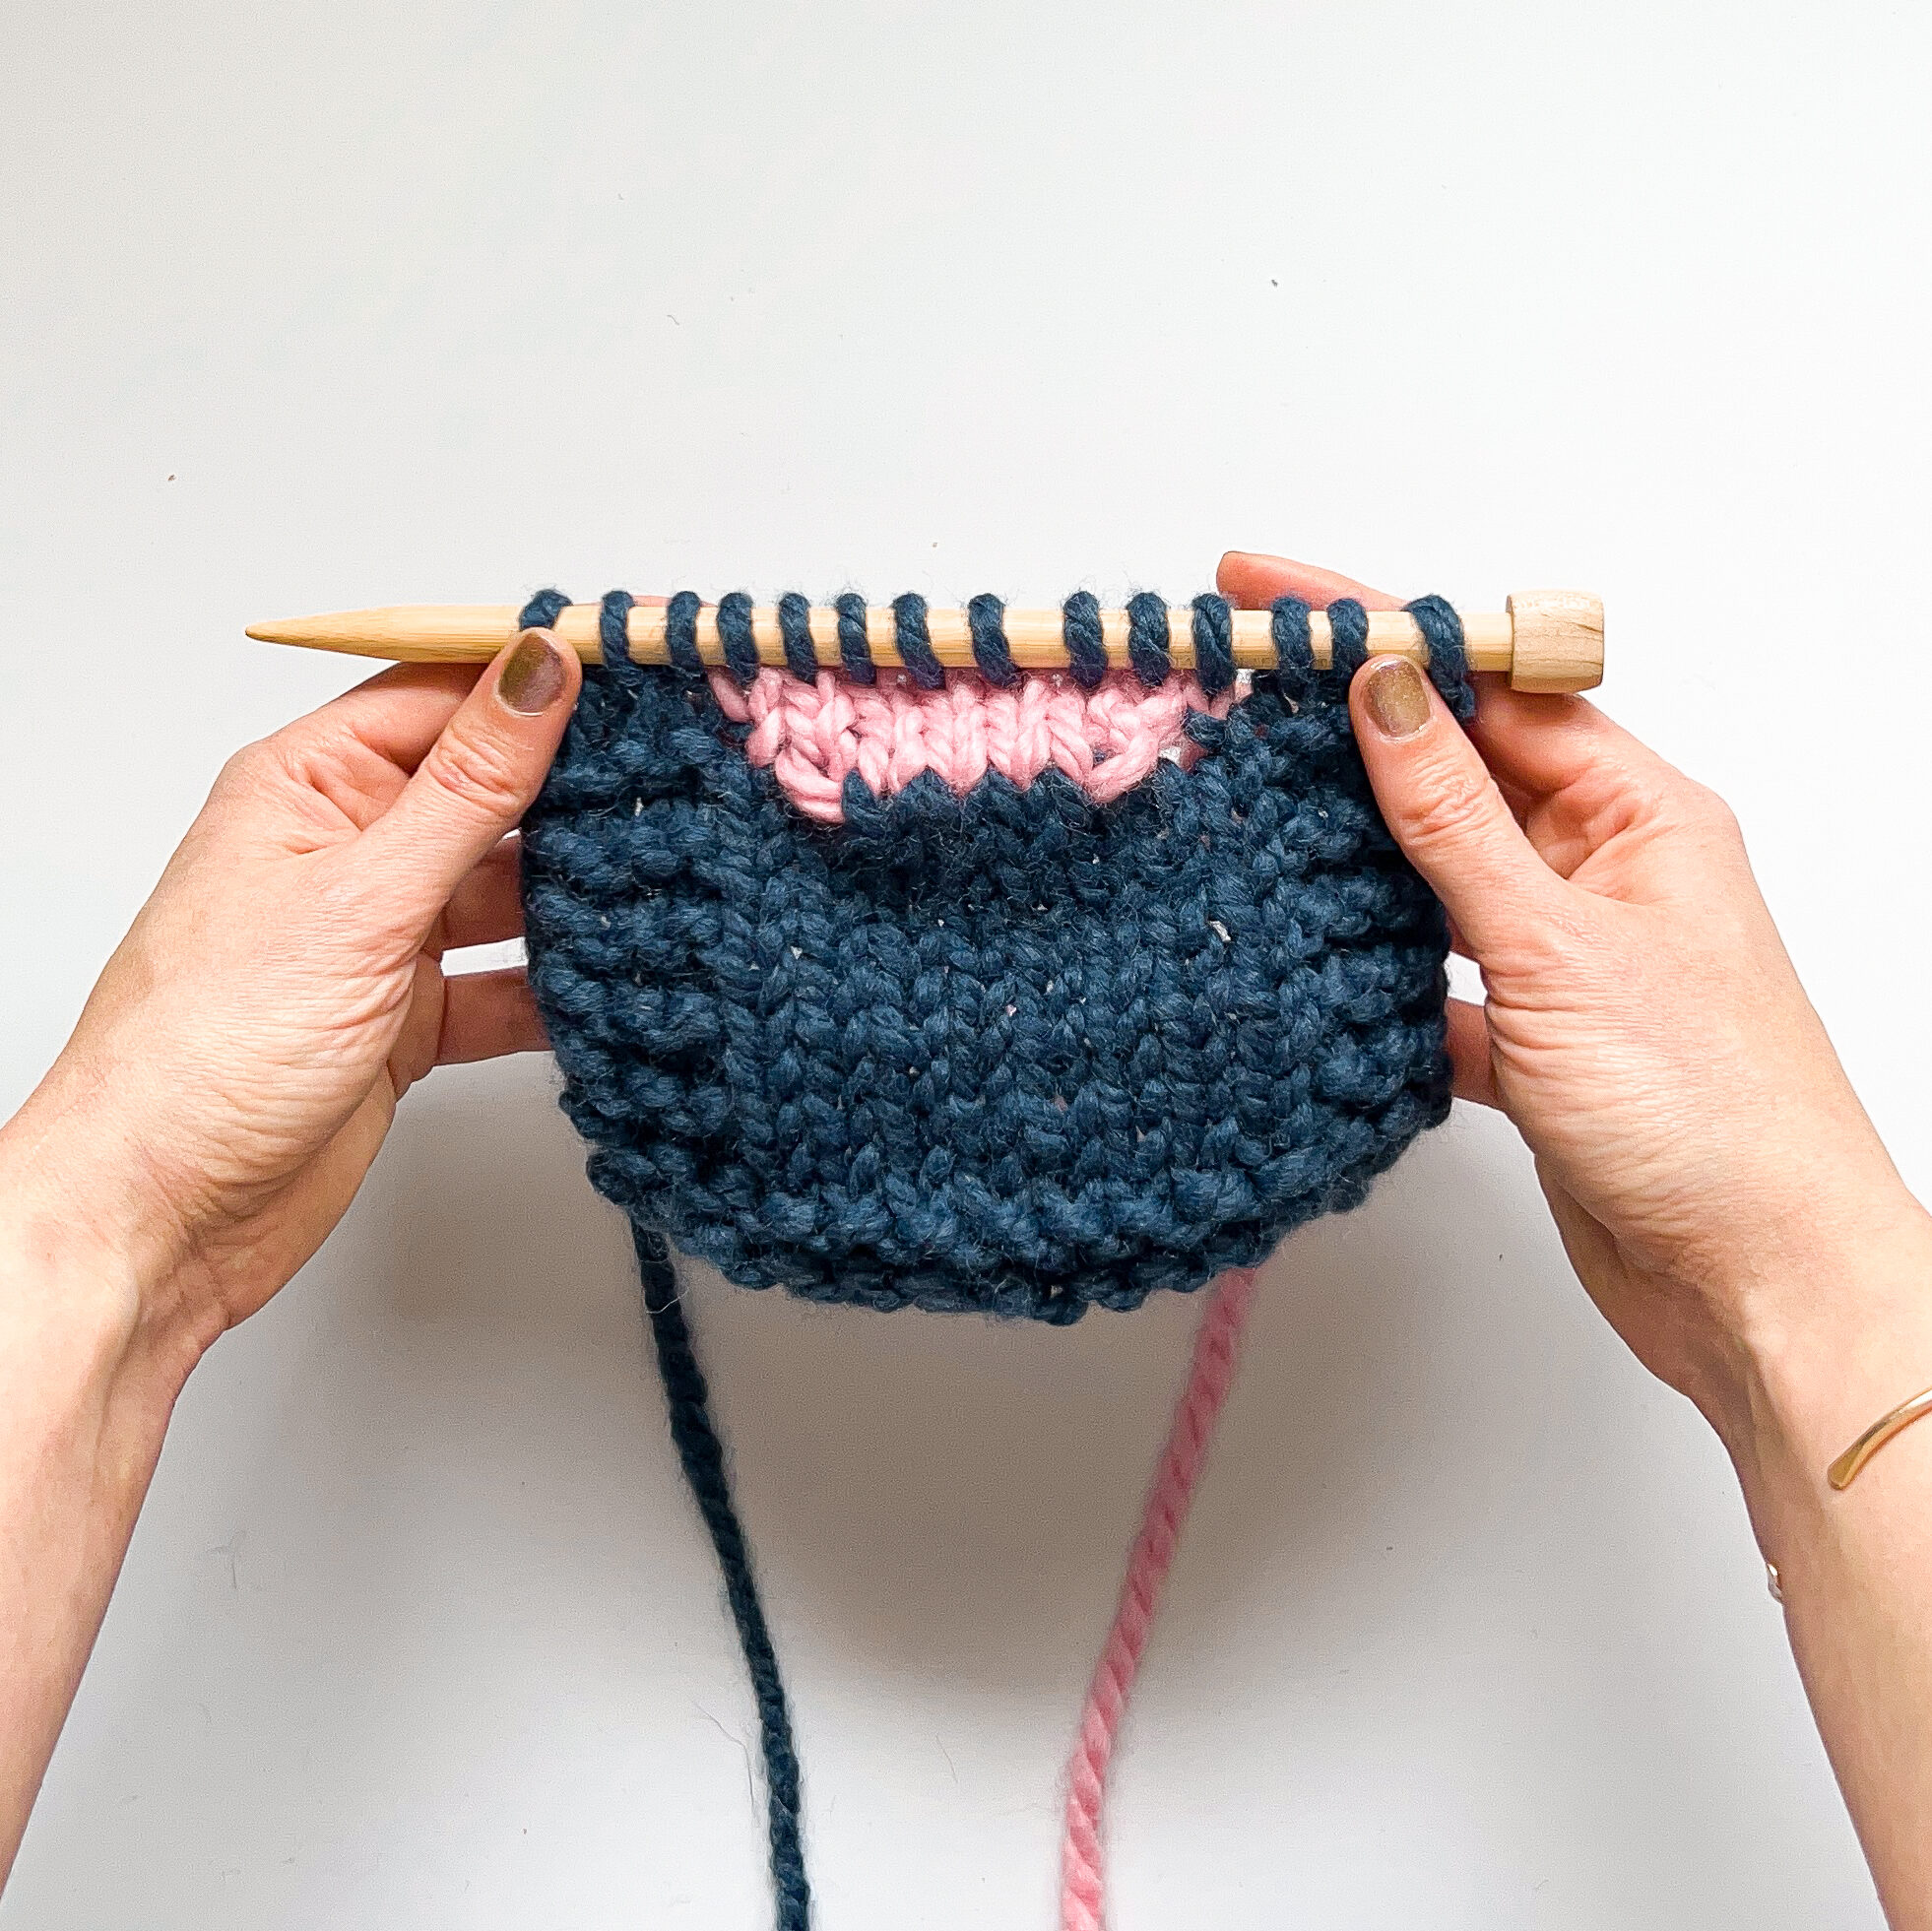
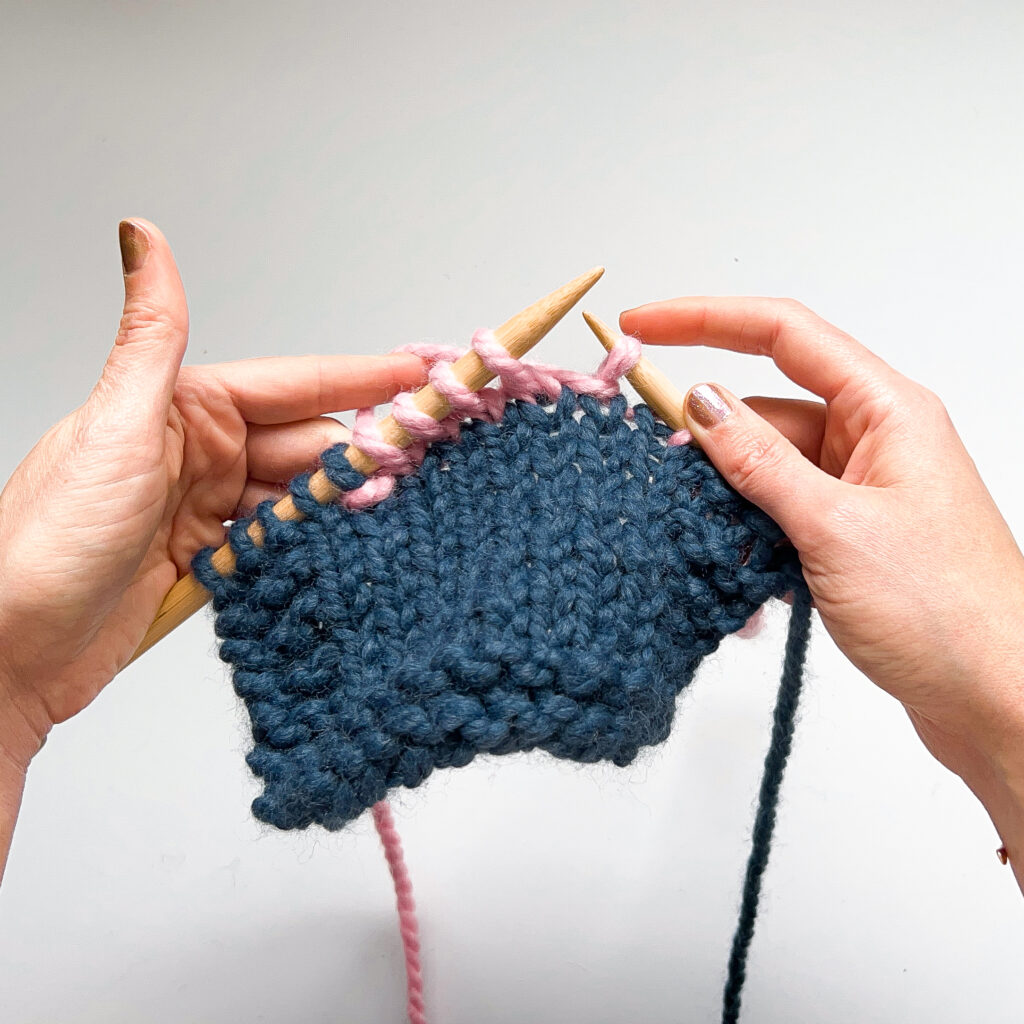
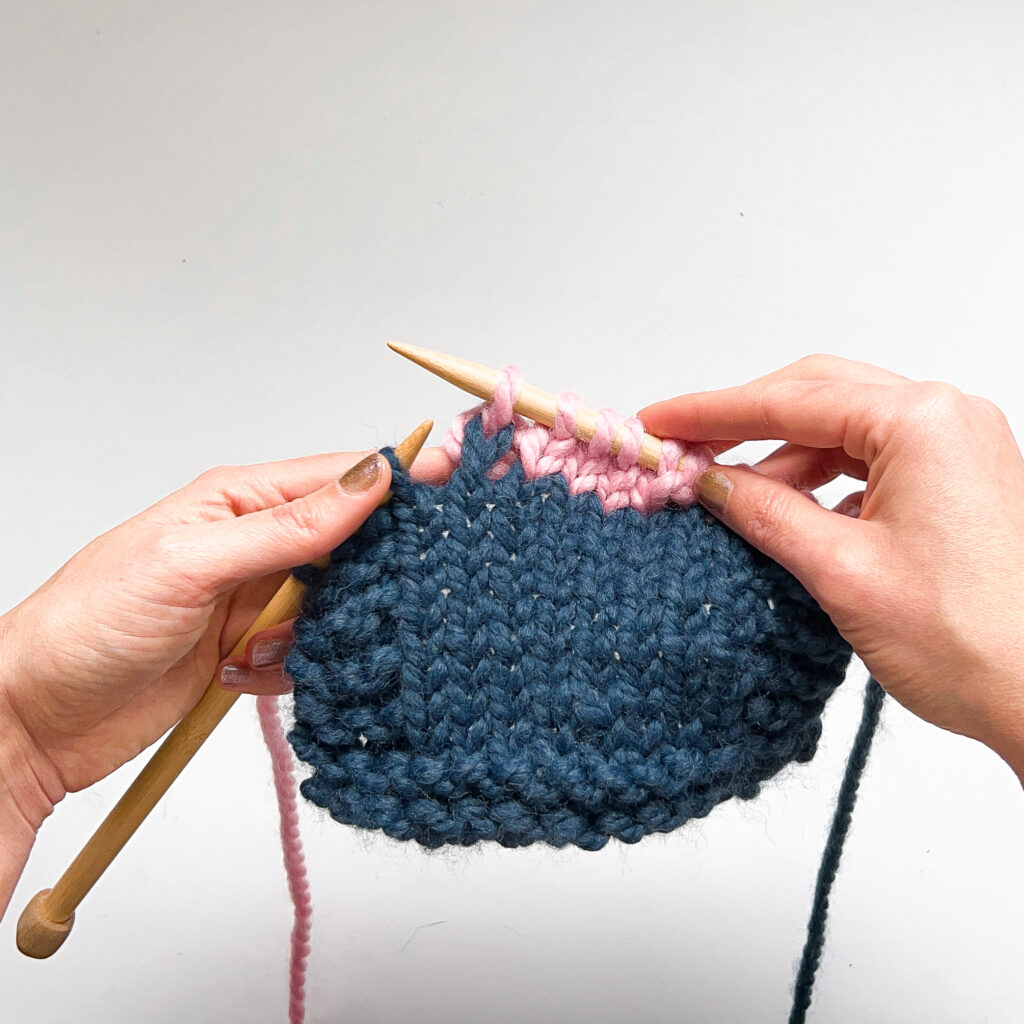
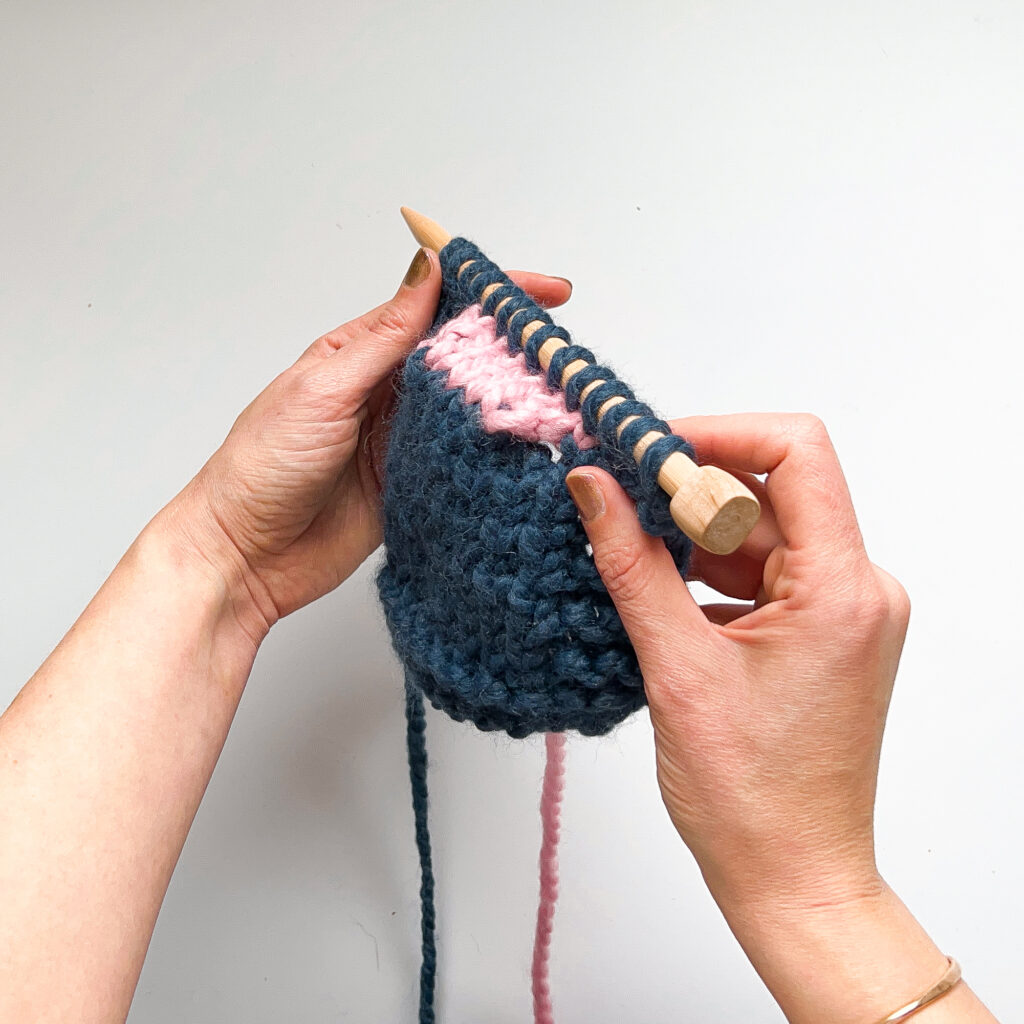
You can see the wedge of fabric beginning to take shape in the center of the swatch.
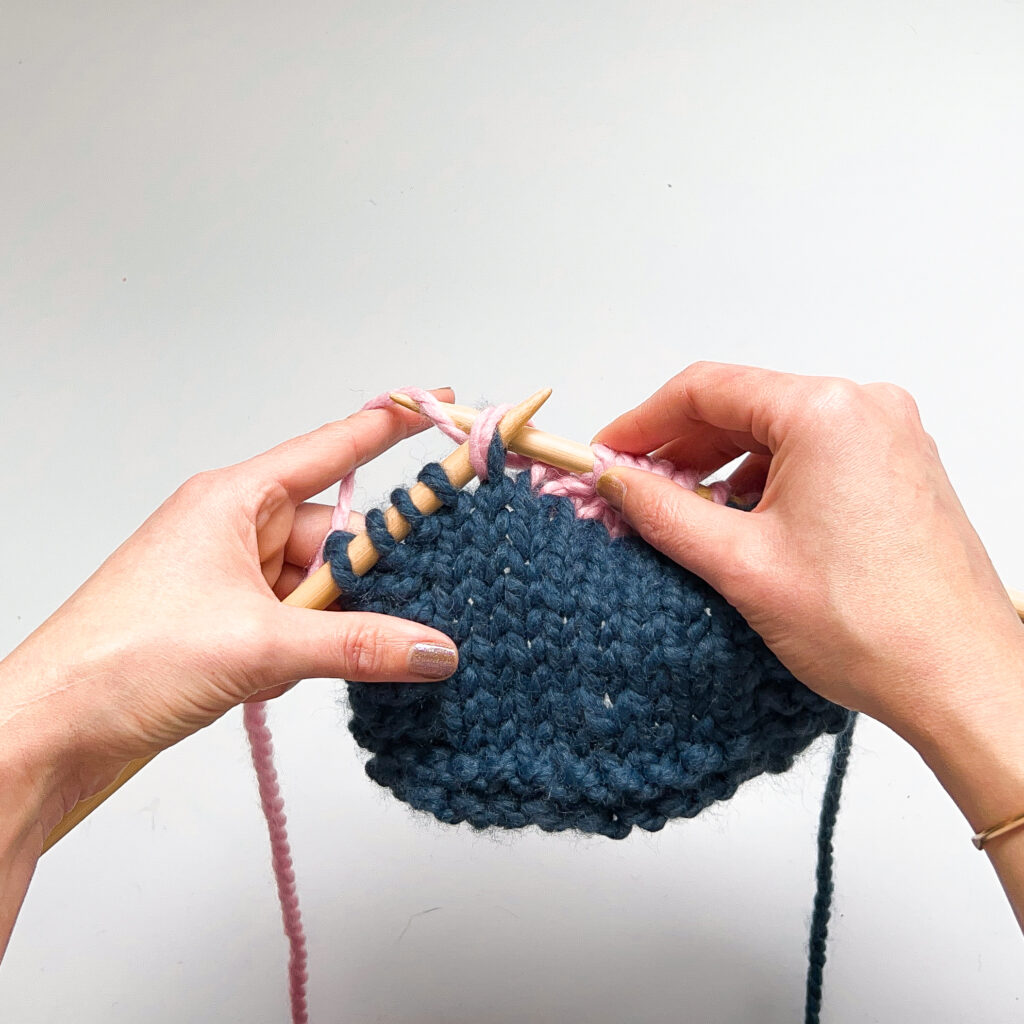
Knit across the row until you come to the wrapped knit stitch.
Step 1:
Lift the wrap up onto the left needle so that it sits next to the slipped knit stitch it wrapped around.
Step 2:
Knit the slipped stitch and its wrap together through the back loop. The wrap has now been picked up and worked together with the stitch!
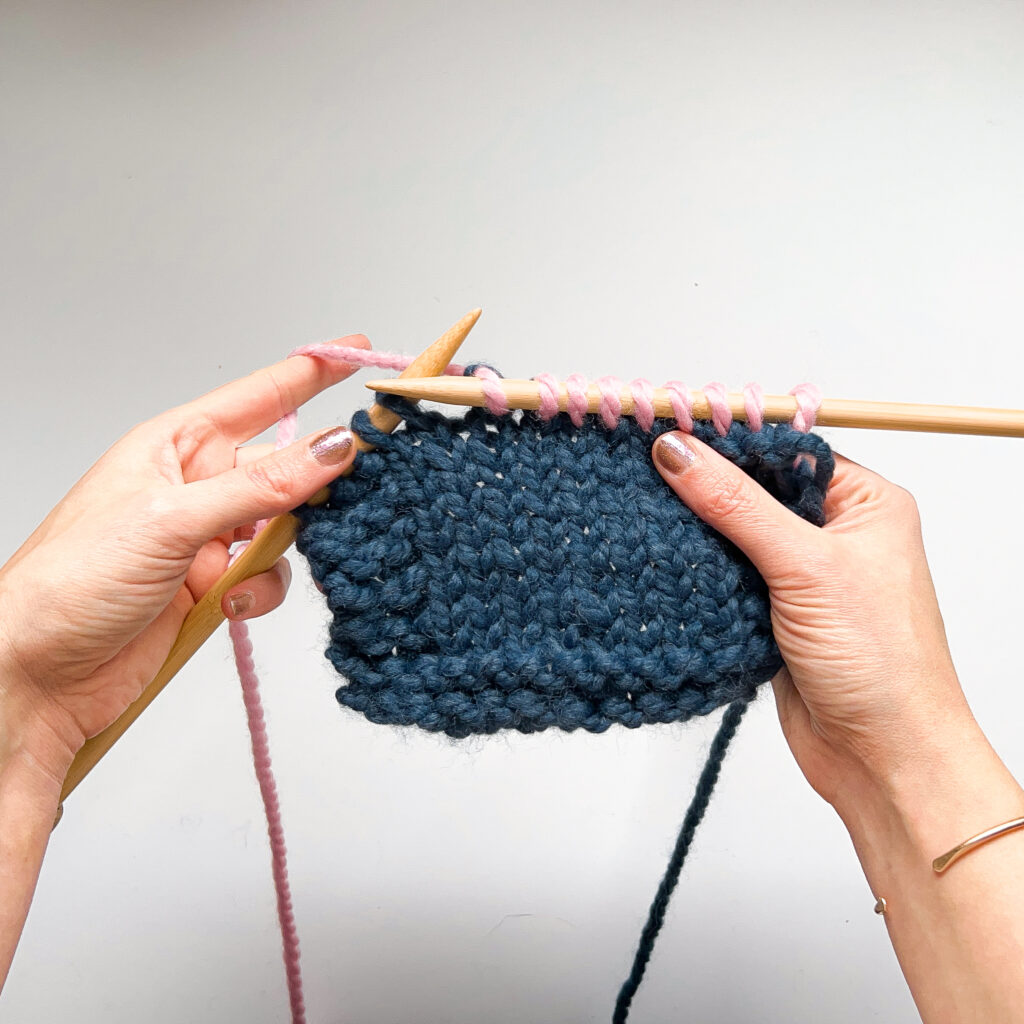
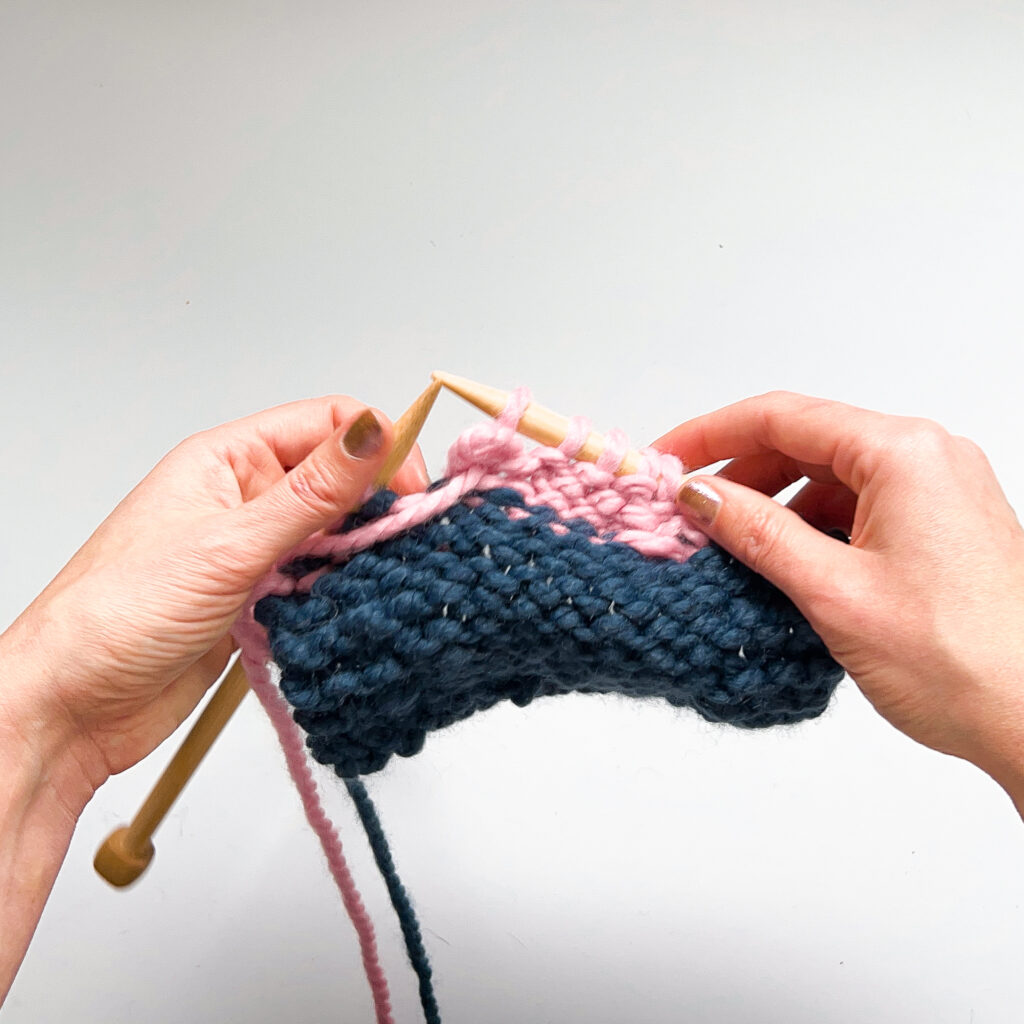
Purl across the row until you come to the wrapped purl stitch.
Step 1:
Lift the wrap up onto the left needle through the back loop so that it sits next to the slipped purl stitch it wrapped around.
Step 2:
Purl the slipped stitch and its wrap together.
Done! The wrap has been lifted and worked with the purl stitch.

Help, I can’t see the wrapped stitch!
Try using a locking stitch marker to make it easy to spot your wrapped stitch. This is particularly helpful on the purl side of the fabric where the wrap might get lost among the purl bumps.
What kind of short row knitting method should I use?
There are several ways to create short rows in knitting. Each one adds fabric in partial rows, however slight variations in how the stitches are worked and turned can make it easier or harder to knit depending on your knitting style or pattern! We recommend trying each technique on a swatch before starting a project. You might be surprised about which technique works best! Try these alternative short rows for knitting: German short rows, Japanese short rows, and yarn over short row techniques.


Following this method is very complicated, as the knitter seems to have the wool in the wrong place, or is left-handed. Either way, she is knitting very oddly.
I followed this and ended up with 10 stitches missing at the end.
I have had to abandon the pattern and do something else as I can’t understand what wrap and turn is.